


HCM700
All products are trademarks of Nostalgia Products Group, LLC.
Worldwide design & utility patented or patents pending.
© 2012 Nostalgia Products Group, LLC.
2013
www.nostalgiaelectrics.com
(rev. 07/24/13)
SERIES
HCM700
Hot Chocolate Maker
Fábrica de Chocolate Caliente
Machine à chocolat chaud
Instructions and Recipes
Instrucciones y recetas
Instructions et recettes


Make every day a party!
Visit www.nostalgiaelectrics.com for more fun products.
CONTENTS
IMPORTANT PRECAUTIONS . . . . . . . . . . . . . . . . . . . . . . . . . . . . . 3
IMPORTANT SAFEGUARDS . . . . . . . . . . . . . . . . . . . . . . . . . . . . . 3
INTRODUCTION . . . . . . . . . . . . . . . . . . . . . . . . . . . . . . . . . . . . 4
PARTS & ASSEMBLY . . . . . . . . . . . . . . . . . . . . . . . . . . . . . . . . . . 5
HOW TO OPERATE . . . . . . . . . . . . . . . . . . . . . . . . . . . . . . . . . . 6
HELPFUL TIPS . . . . . . . . . . . . . . . . . . . . . . . . . . . . . . . . . . . . . 7
CLEANING & MAINTENANCE . . . . . . . . . . . . . . . . . . . . . . . . . . . . 7
RECIPES . . . . . . . . . . . . . . . . . . . . . . . . . . . . . . . . . . . . . . . . . 8
RETURNS & WARRANTY . . . . . . . . . . . . . . . . . . . . . . . . . . . . . . . 10
SAFETY
ENGLISH
Your safety and the safety of others is very important.
We have provided many important safety messages in this manual and
on your appliance. Always read and obey all safety messages.
This is the safety alert symbol.
This symbol alerts you to potential hazards that
can kill or hurt you and others.
All safety messages will follow the safety alert symbol.
All safety messages will tell you what the potential hazard is, tell you how to reduce the
chance of injury, and tell you what can happen if the instructions are not followed.
Appliance Specications:
220-240 Volts,50/ 60 Hz
600 Watts, ETL Approved
2

IMPORTANT PRECAUTIONS
1. NEVER immerse the Base or cord in water.
2. NEVER use near water.
3. NEVER leave unit unattended if used near children.
4. NEVER use a scouring pad on the appliance.
ENGLISH
5. NEVER use an abrasive sponge or harsh cleaning products on or inside of the appliance.
6. NEVER use for anything other than what this item was originally intended.
7. Avoid contact with moving parts.
8. DO NOT operate this appliance with a damaged cord or plug,
or in the event the appliance ever malfunctions.
9. DO NOT place parts in dishwasher.
10. Keep out of reach of children.
11. Unplug appliance from electrical outlet when not in use and before
cleaning. Remove plug by gripping the plug body and pulling out
of the outlet. Never yank or twist cord to unplug the unit.
12. This appliance is NOT A TOY. This appliance can be used by children aged from 8
years and above if they have been given supervision or instruction concerning use
of the appliance in a safe way and if they understand the hazards involved.
13. Cleaning and user maintenance shall not be made by children unless
they are aged from 8 years and above and supervised. Keep the appliance
and its cord out of reach of children aged less than 8 years.
14. This appliance is not intended for use by young children or
cognitively challenged individuals without supervision.
IMPORTANT SAFEGUARDS
When using electrical appliances, basic safety precautions should always be followed,
including:
1. Read all instructions before operating this appliance.
2. NEVER put ngers or utensils into feed or discharge areas.
3. Keep hands and utensils out of container while unit is in operation to
reduce the risk of severe personal injury or damage to the appliance.
4. To protect against electrical shock do not immerse cord,
plug or main unit in water or other liquids.
5. Close supervision is necessary when any appliance is used by or near children.
6. Unplug from outlet when not in use and before removing parts
for cleaning. Allow appliance to cool before cleaning.
7. DO NOT operate any appliance with a damaged cord or plug or if the
appliance has been damaged in any manner. Return the appliance
to the nearest repair shop for examination or repair.
3
8. The manufacturer does not recommend the use of accessory attachments.
Use of attachments may result in re, electrical shock or injuries.
9. DO NOT remove Lid when in use.
10. DO NOT add anything to the container while the appliance is operating.
11. DO NOT let the cord touch hot surfaces.
12. DO NOT place on or near a hot gas or electric burner, or in a heated oven.
13. Extreme caution must be used when moving this appliance with liquids inside.
14. This unit must be on a level surface to operate properly.
15. DO NOT use this appliance for other than its intended use.
16. DO NOT use outdoors. FOR HOUSEHOLD USE ONLY.
17. DO NOT leave unit unattended while in use or when plugged into an outlet.
18. Check inside of the container for foreign objects prior to use.
19. A short power supply cord is provided to reduce the risk resulting
from becoming entangled or tripping over a long cord.
20. Do not attempt to service this appliance yourself, as opening or
removing covers may expose you to dangerous voltage or other
hazards. Refer all servicing to qualied service personnel.
21. Beverages will be HOT. Avoid contact with hot liquids.
22. Always operate the appliance with cover in place.
23. Make sure the container is properly attached to the base before turning on unit.
24. lf the supply cord is damaged, it must be replaced by the manufacturer, its
service agent or similarly qualied persons in order to avoid a hazard.
25. Children shall not play with the appliance.
26. The kettle is only to be used with the stand provided .
27. Ensure that the kettle is switched o before removing it from its stand.
28. The food should not be heated for too long a period.
29. This appliance is intended to be used in household and similar applications as:
sta kitchen areas in shops, oces and other working environments, farm houses, by
clients in hotels, motels and other residential type environments, bed and breakfast type
environments
ENGLISH
SAVE THESE INSTRUCTIONS!
INTRODUCTION
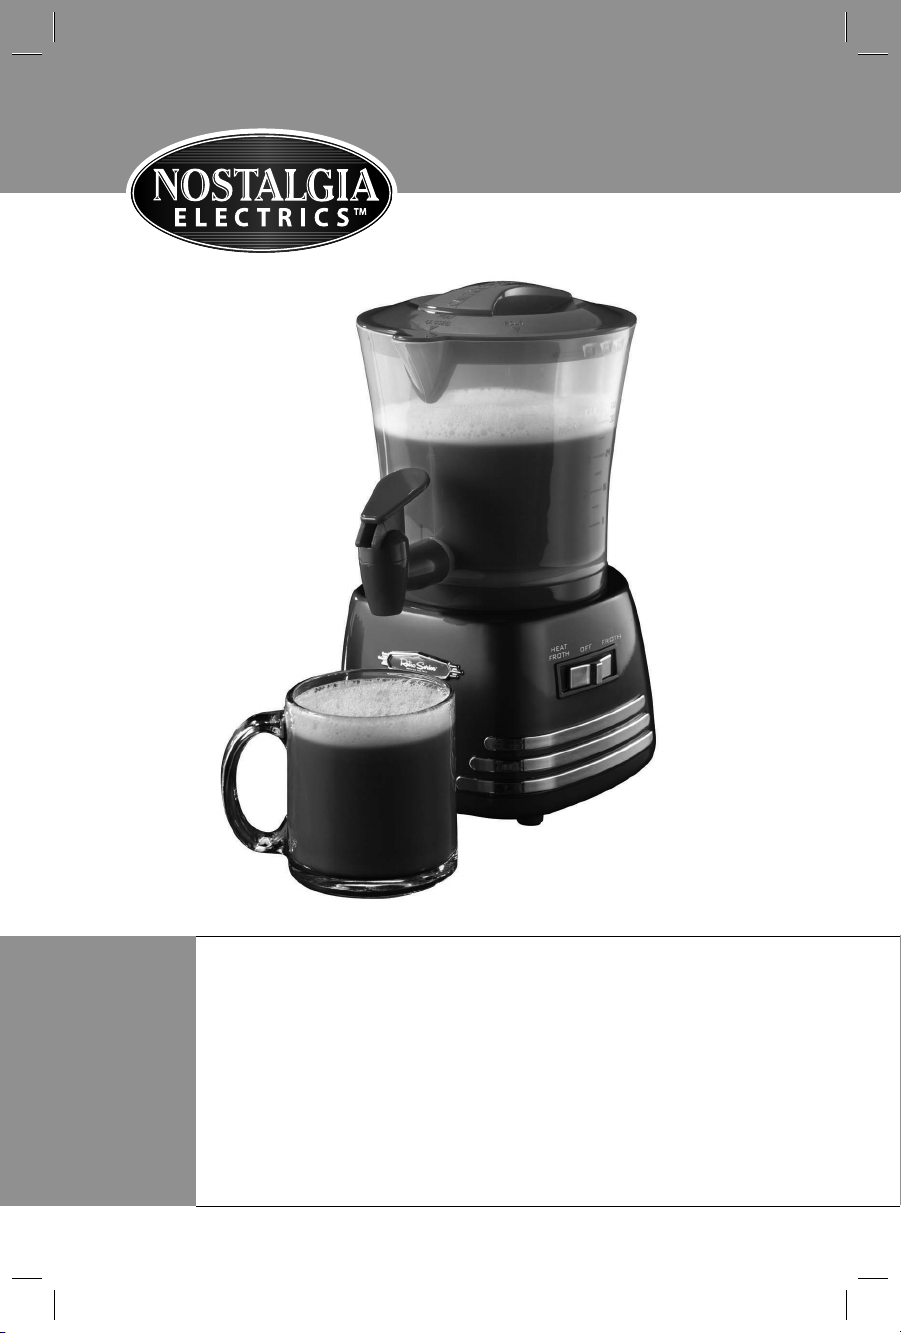
Thank you for purchasing the HOT CHOCOLATE MAKER from Nostalgia Electrics™! Making
perfectly blended cups of hot cocoa at home has never been easier. The HOT CHOCOLATE
MAKER heats and whips beverages into steamy, delicious drinks in no time. And, its sleek,
retro design will complement any kitchen. The HOT CHOCOLATE MAKER makes great:
Gourmet Hot Cocoa
Café Lattes & Tea Lattes
Café Mochas & more!
4
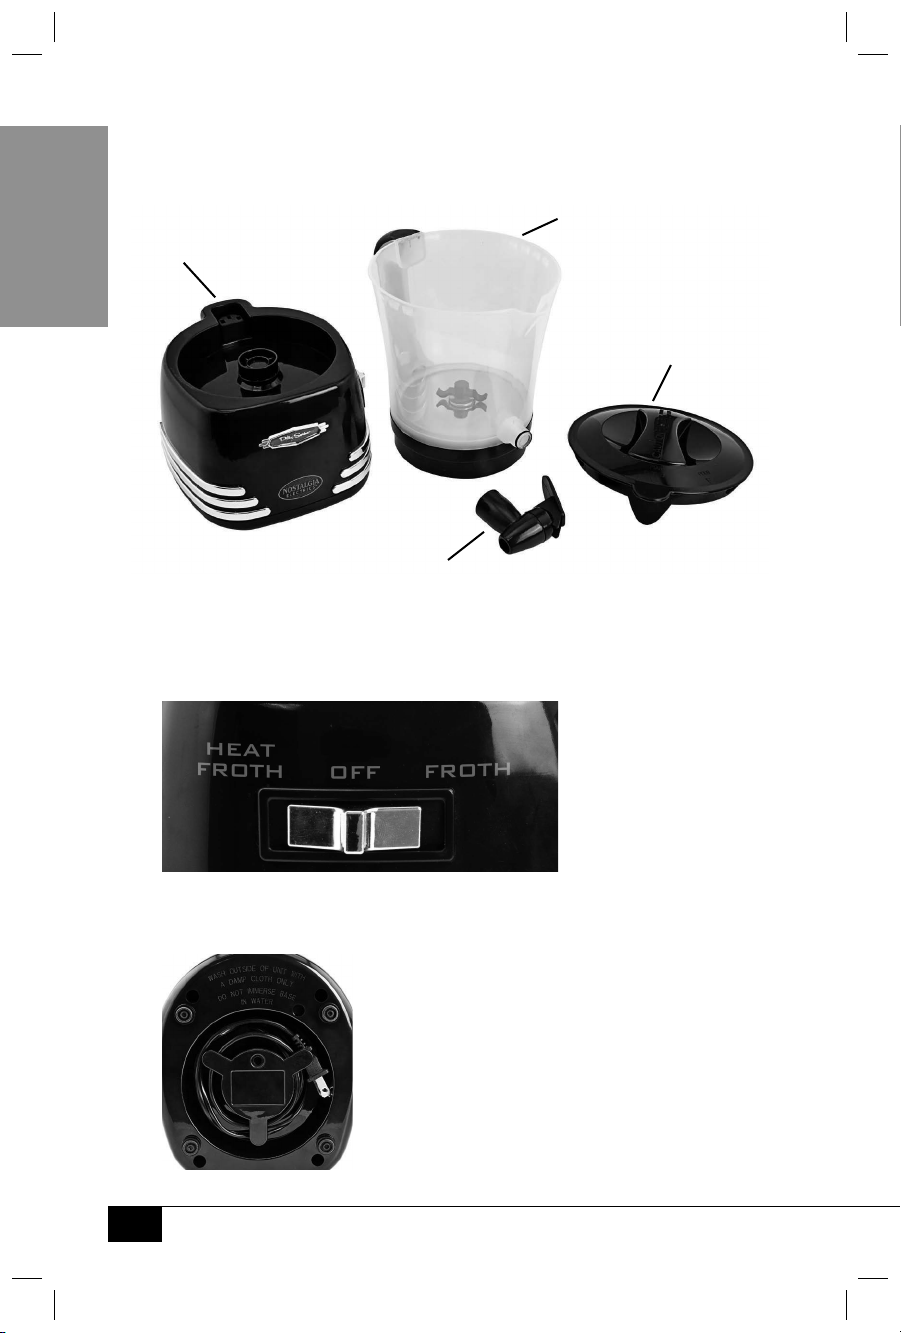
PARTS & ASSEMBLY
Parts
Base
ENGLISH
(Glass on cover page not included)
Switch Positions
Left: Heat/Froth (heat and stir) | Center: O | Right: Froth (stir)
Mixing Container
Lid
Dispensing Valve
Cord Location
Cord can be wrapped and stored inside of the bottom of Base when not in use.
Please see Important Safeguards section for instructions about the cord & plug.
5

HOW TO OPERATE
1. Before rst use, wipe down the HOT CHOCOLATE MAKER exterior with a clean,
non-abrasive cloth or sponge. Thoroughly wash the interior of the Mixing
Container with warm, sudsy water and a non-abrasive cloth or sponge. DO
NOT immerse Mixing Container in water. Wash Dispensing Valve and Lid in
warm, sudsy water and thoroughly dry. DO NOT put the Base in water.
2. Find a stable, waterproof surface near an electrical outlet before
starting. Make sure the cord is away from any water source.
3. DO NOT place the HOT CHOCOLATE MAKER near the edge of a table or countertop.
4. Remove the Lid from the Mixing Container.
5. Pour 32 ounces of water or milk into the Mixing Container.
NOTE: Do not ll the Mixing Container past the "Max" ll line.
6. Add 8 to 14 tablespoons of your favorite instant drink mix, depending on
whether using milk or water. (See SERVING GUIDE table below.)
7. Replace the Lid on the Mixing Container. Make sure the lid covers the
pour spout. DO NOT operate without lid securely in place.
8. Plug the HOT CHOCOLATE MAKER into an outlet.
9. Turn the switch to the "HEAT/FROTH" position. The HOT CHOCOLATE MAKER will begin to
mix and heat.
NOTE: You may move the switch to the "OFF" position to turn the appliance o
at any time. A full 32 ounces takes approximately 6-8 minutes to heat. DO NOT
run on "HEAT/FROTH" for more than 15 minutes. This will cause milk to scald.
10. Once the beverage reaches your ideal temperature, turn the switch to the "FROTH" position.
Place a cup under the Dispensing Valve press down on the valve. The beverage will mix while
it dispenses so that a rich layer of froth is released into your cup along with the hot drink.
11. When the container has less than 1 cup of liquid remaining or is empty, press the "OFF"
switch. Dispense any remaining liquid into a cup by pressing down on the Dispensing
Valve. You may also pour the beverage out of the top of the Mixing Container by
turning the lid clockwise so the "POUR" indicator is aligned with the spout.
The appliance will remain on until you switch it o.
ENGLISH
SERVING GUIDE
CUPS 1 2 3 4
LIQUID
Milk/Water
POWDER MIX
with Milk
POWDER MIX
with Water
NOTE: Pre-packaged instant cocoa, coffee and tea mixes may
vary from the quantities indicated in this guide. Use the quantities
specified on the packaging for exact measurements.
8-oz. 16-oz. 24-oz. 32-oz.
2 Tbsp. 4 Tbsp. 6 Tbsp. 8 Tbsp.
4 Tbsp. 7 Tbsp. 11 Tbsp. 14 Tbsp.
6
HELPFUL TIPS
NEVER leave the unit unattended while operating.
SMOKING
A small amount of smoke and/or odor may occur upon heating
ENGLISH
due to the release of manufacturing oils. This is normal.
NOISE
Some minor expansion/contraction sounds may occur
during heating and cooling. This is normal.
HEATING BEVERAGES
DO NOT run the HOT CHOCOLATE MAKER on the "HEAT/FROTH" setting
for more than 15 minutes. This will cause milk to scald.
CLEANING & MAINTENANCE
1. After using your HOT CHOCOLATE MAKER, disconnect from electrical outlet. Remove
plug by gripping the plug body and pulling out of the outlet. Never yank or twist
cord to unplug the unit. Allow the appliance to cool completely before cleaning.
2. Remove the Mixing Container from the Base. Pour out any unused beverage.
3. Wash the interior of the Mixing Container with a combination of mild detergent and
water. DO NOT submerge the Mixing Container in water. Rinse and dry thoroughly.
4. Unscrew the Dispensing Valve from the Mixing Container by turning
counterclockwise. Open the Dispensing Valve and ush with clean water.
5. Wash the lid in warm, soapy water. Rinse and dry thoroughly.
6. Wipe the exterior of the Base and Mixing container with a soft, damp cloth.
7. NEVER immerse Base in water or put any parts in the dishwasher.
7
RECIPES
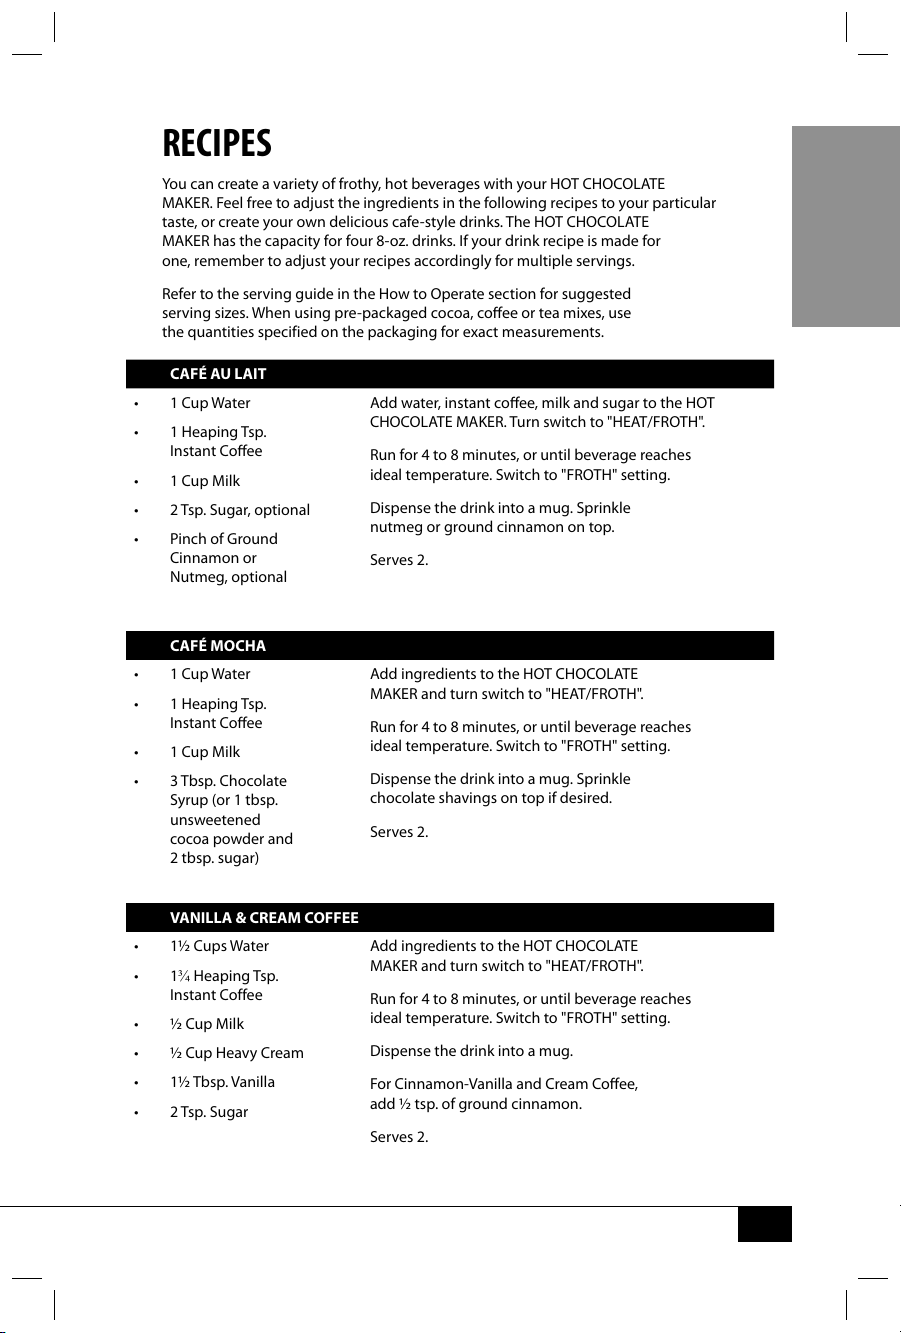
You can create a variety of frothy, hot beverages with your HOT CHOCOLATE
MAKER. Feel free to adjust the ingredients in the following recipes to your particular
taste, or create your own delicious cafe-style drinks. The HOT CHOCOLATE
MAKER has the capacity for four 8-oz. drinks. If your drink recipe is made for
one, remember to adjust your recipes accordingly for multiple servings.
Refer to the serving guide in the How to Operate section for suggested
serving sizes. When using pre-packaged cocoa, coee or tea mixes, use
the quantities specified on the packaging for exact measurements.
CAFÉ AU LAIT
• 1 Cup Water
• 1 Heaping Tsp.
Instant Coee
• 1 Cup Milk
• 2 Tsp. Sugar, optional
• Pinch of Ground
Cinnamon or
Nutmeg, optional
Add water, instant coee, milk and sugar to the HOT
CHOCOLATE MAKER. Turn switch to "HEAT/FROTH".
Run for 4 to 8 minutes, or until beverage reaches
ideal temperature. Switch to "FROTH" setting.
Dispense the drink into a mug. Sprinkle
nutmeg or ground cinnamon on top.
Serves 2.
CAFÉ MOCHA
• 1 Cup Water
• 1 Heaping Tsp.
Instant Coee
• 1 Cup Milk
• 3 Tbsp. Chocolate
Syrup (or 1 tbsp.
unsweetened
cocoa powder and
2 tbsp. sugar)
Add ingredients to the HOT CHOCOLATE
MAKER and turn switch to "HEAT/FROTH".
Run for 4 to 8 minutes, or until beverage reaches
ideal temperature. Switch to "FROTH" setting.
Dispense the drink into a mug. Sprinkle
chocolate shavings on top if desired.
Serves 2.
VANILLA & CREAM COFFEE
• 1½ Cups Water
• 1¾ Heaping Tsp.
Instant Coffee
• ½ Cup Milk
• ½ Cup Heavy Cream
• 1½ Tbsp. Vanilla
• 2 Tsp. Sugar
Add ingredients to the HOT CHOCOLATE
MAKER and turn switch to "HEAT/FROTH".
Run for 4 to 8 minutes, or until beverage reaches
ideal temperature. Switch to "FROTH" setting.
Dispense the drink into a mug.
For Cinnamon-Vanilla and Cream Coee,
add ½ tsp. of ground cinnamon.
Serves 2.
ENGLISH
8
 Loading...