


WT-2

Pixagent
Engineered Workflow
TM
WT-2/WT-2A Setup Guide
Infrastructure Setup for Windows XP
Service Pack 2 or Later
First EditionWritten by Thomas Sapiano
www.pixagent.com
Wireless Setup Guide
System Requirements
Operating System:
Windows XP
Service Pack 2 or later
Software:
Pixagent ITP 2.0
.NET Framework 1.1
Hardware:
IEEE802.11b or IEEE802.11g Card
Wireless Access Point/Router
Nikon D2Hs/D2X
Nikon WT-2/WT-2A
Internet Links
http://www.pixagent.com/itp20/
http://www.pixagent.com/support/
support@pixagent.com
Nikon WT-2/2A Transmitter Setup
Windows XP Service Pack 2 or Later
Guide for Windows XP SP2
This document provides step-by-step instructions on how
to congure your Nikon WT-2/WT-2A wireless transmitter
and computer to communicate with one another. Each
step is provided with a screenshot to make the setup
process as easy as possible.
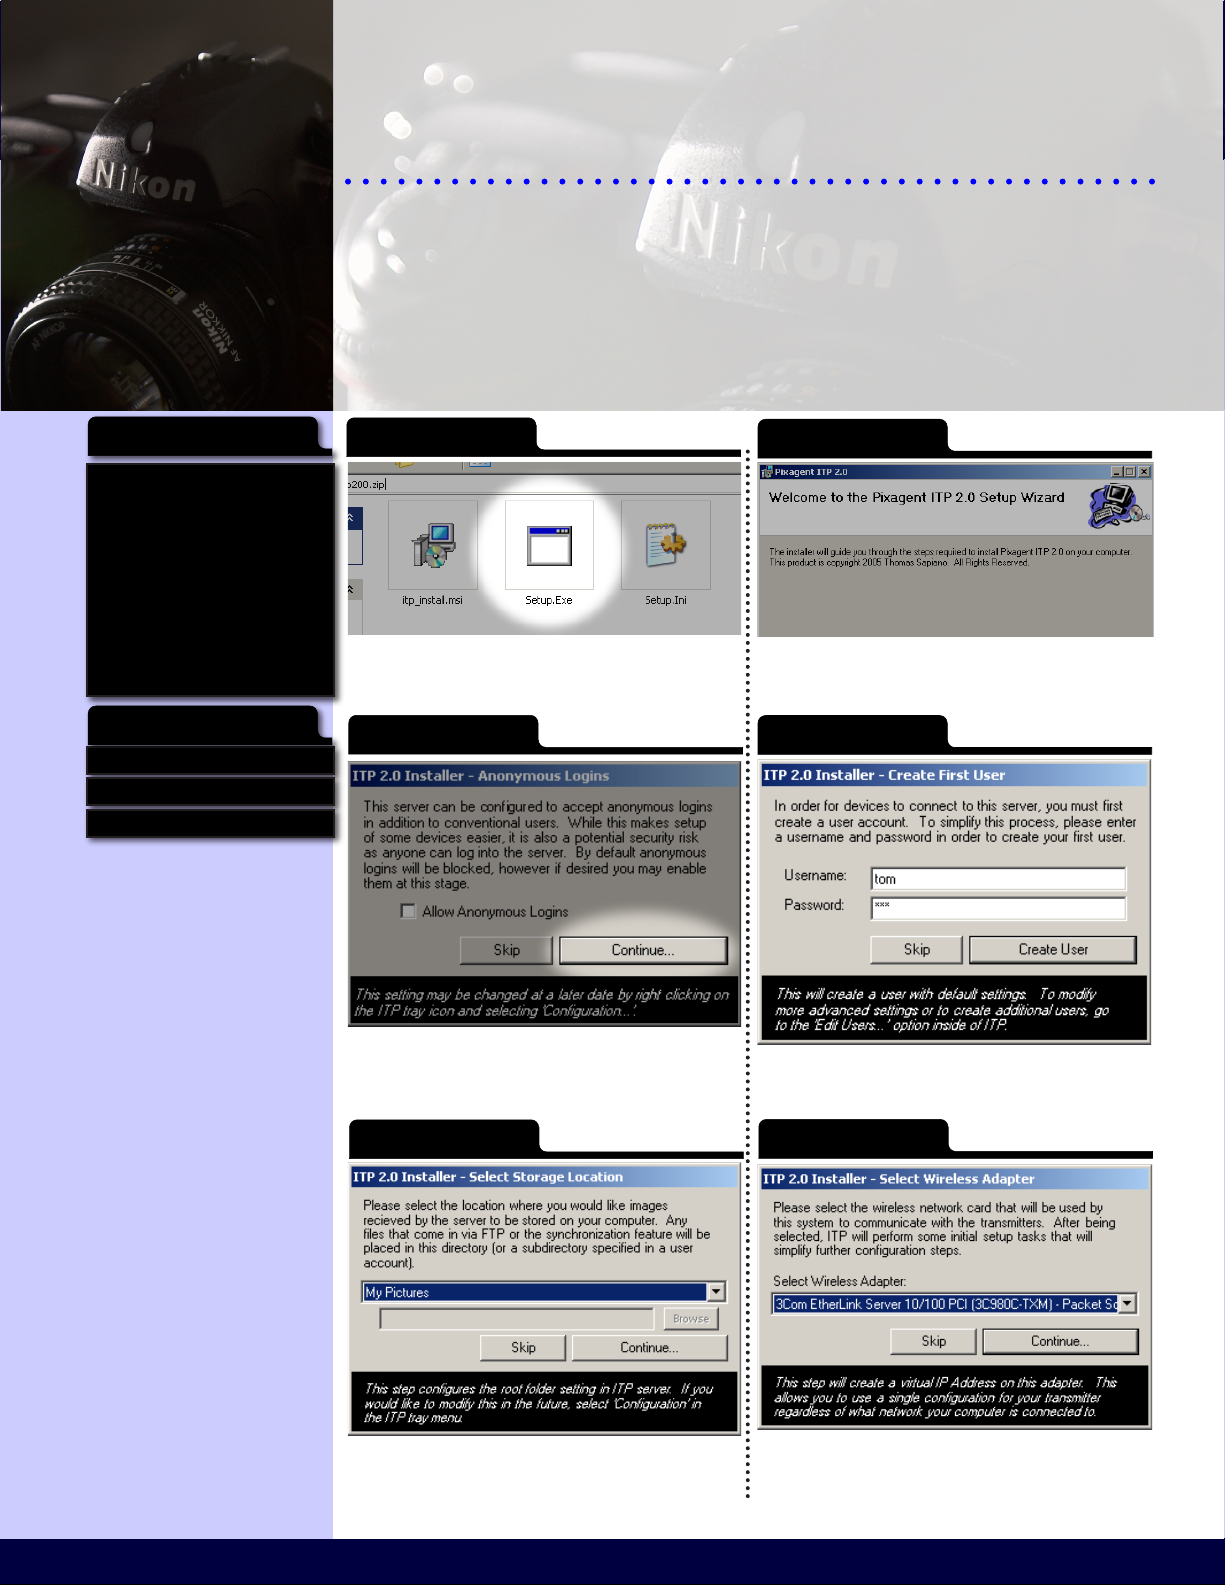
Step 1
After downloading ITP 2.0 from the Pixagent
website, open the compressed le and run ‘Setup.Exe’
to begin the install process.
Step 3
Step 2
Follow the directions in the installation wizard to
place the ITP 2.0 les on your computer.
Step 4
When prompted whether to allow anonymous
logins, leave the checkbox empty and click the
‘Continue...’ button to move on.
Step 5
Select the location where you would like ITP to
place the received image les on your computer.
Click the ‘Continue’ button when you are done.
When the ‘Create First User’ window pops up,
enter a new username and password pair and click
the Create User button.
Step 6
Select the network adapter that the wireless
transmitter will use to communicate with your
computer and click ‘Continue’.
2 3
Wireless Setup Guide
Windows XP Service Pack 2 or Later
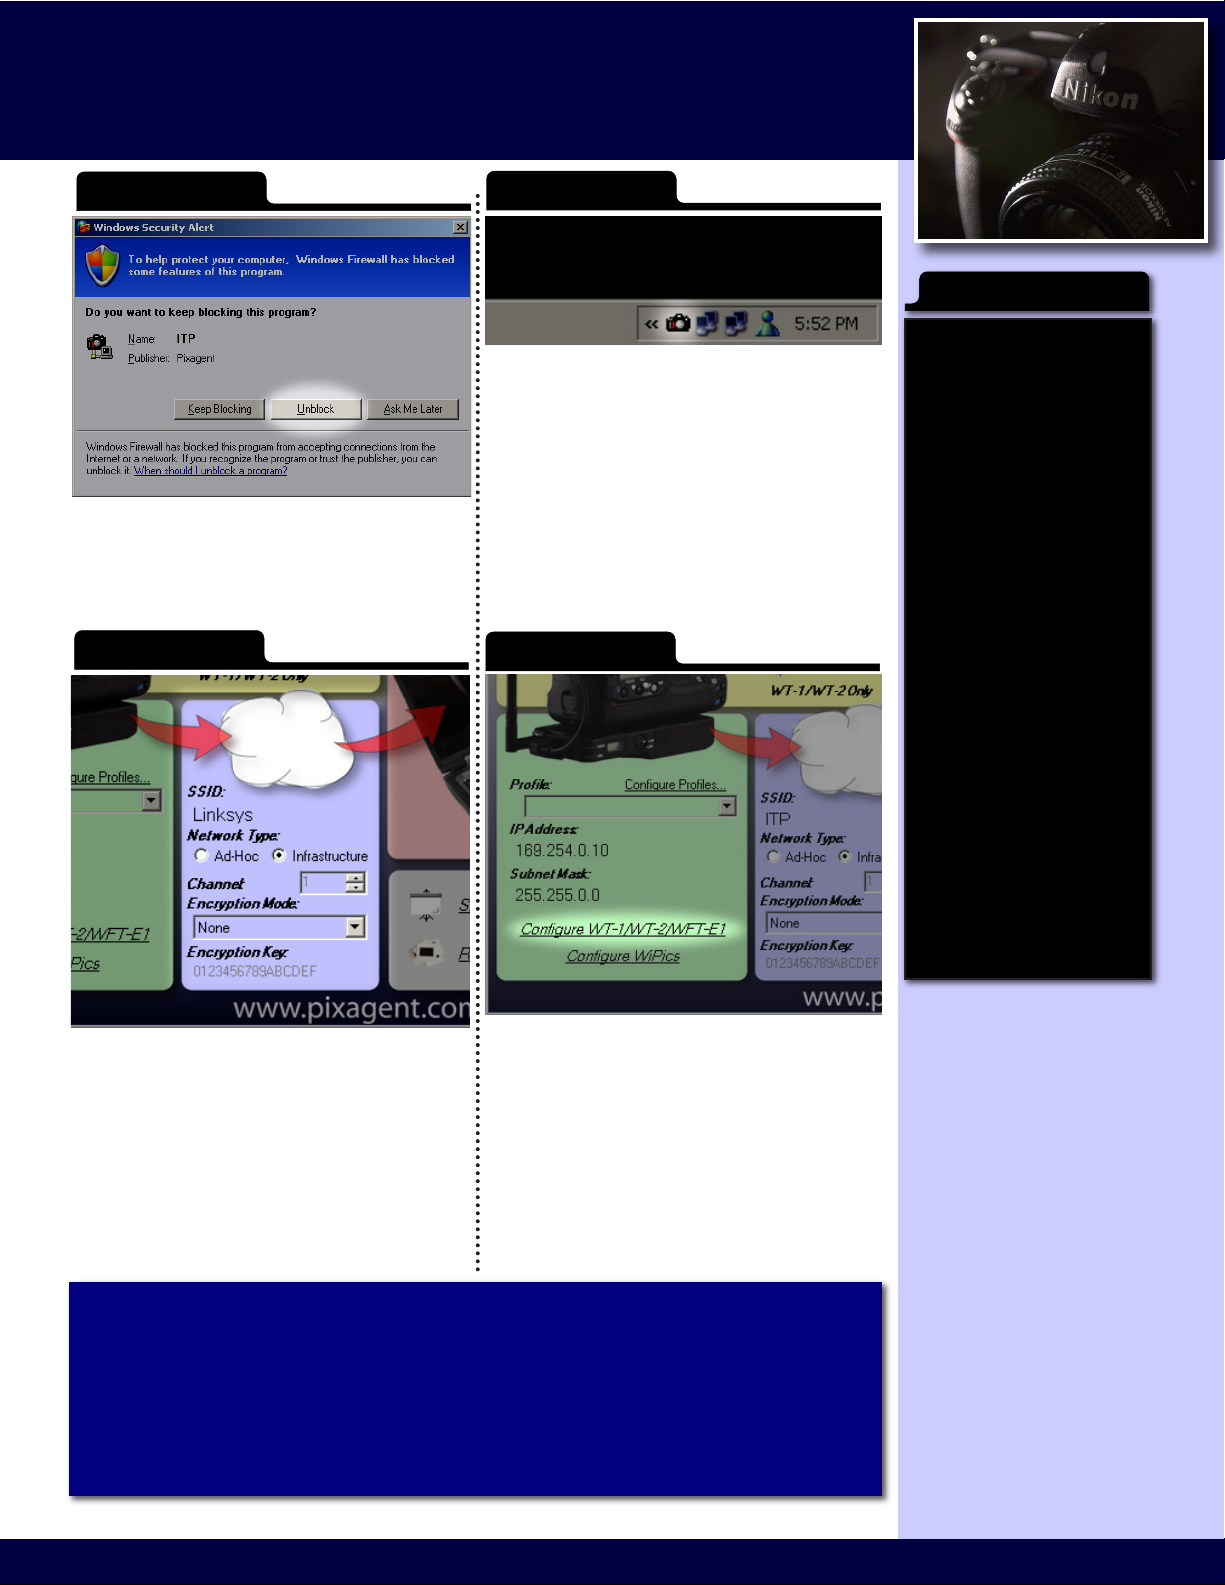
Step 7
If the Windows Firewall is enabled on your computer,
you will be prompted to continue blocking ITP. When
this dialog pops up, select the Unblock button to allow
ITP to receive connections from the camera. This is
necessary for proper operation of your system.
Step 9
Step 9
Step 8
Now that the installation process is complete, ITP
is now set up and opperational on your computer.
Your next task is to congure the camera so that it
knows how to communicate with your computer.
To begin this process, double click on the ITP tray
icon (shown above) in order to launch the Control
Centre interface.
Step 10
Firewalls
Firewalls are designed to protect
computers from outside threats.
One of the mechanisms used to
do this is to block any connection
that does not originate from the
computer/network. For normal
users this typically isn’t a problem
as the tasks they perform are
initiated by the user.
These image transmitters work
in a different manner, however.
When an image is ready to be
transmitted, the camera is the
one that initiates the connection.
As such, in their default configuration,
most rewalls will attempt to
prevent this action from taking
place. When that happens, the
camera will be unable to connect
to your computer.
If you are using rewall software
other than the one supplied
with Windows XP you may need
to perform additional steps. In
order for the camera to function
correctly, the rewall must be
congured to allow incoming
FTP trafc (TCP/IP port 21). The
way that you do this depends
on the rewall being used, so
please read the instructions
that came with it.
Once the Control Centre interface comes up,
enter the wireless settings that you are currently
using in the blue section. Please refer to the
settings used in your access point/router for the
correct values.
Once the specied settings have been selected,
click the Congure WT-1/WT-2/WFT-E1 link to
begin the process of conguring your camera.
Follow the provided directions to load these
settings onto a memory card.
Selecting your wireless network adapter.
During the installation process, you are prompted to select the network
adapter used for your transmitter. Whenever ITP is started, it will automatically
take steps to congure this adapter to operate with your transmitter. As such,
if you switch to using another adapter you should change your selection in the
‘Congure Adapter’ entry in the ITP tray menu to ensure that these features
continue to operate.
 Loading...