


X65
Quick Start
Nighthawk X6S
AC3000 Tri-Band WiFi Range Extender
Model EX8000
Getting Started
To extend the range of your WiFi network, you must connect the extender to your existing
WiFi network.
You can do this in one of two ways:
• Connect with WPS. Wi-Fi Protected Setup (WPS) lets you join a secure WiFi network
without typing the network name and password. For more information, see Connect
With WPS.
Note: WPS does not support WEP network security or a hidden SSID network. If your
router WiFi network uses WEP security or its SSID is hidden, follow the instructions in
Connect With the NETGEAR Installation Assistant.
• Connect with the NETGEAR installation assistant. To use the NETGEAR installation
assistant, you must launch a web browser on your computer or mobile device. For
more information, see the other side of this quick start guide.
Note: If your router’s WiFi security setting is set to WPA2 enterprise, your extender can’t
connect to your router. You must change your router’s WiFi security setting.
Connect With WPS
a. Take your WiFi-enabled computer or mobile device to the location with poor WiFi
router coverage.
b. Connect your WiFi-enabled computer or mobile device to the extended network.
Your extender uses the same WiFi network settings as your router for its 2.4 GHz
and 5 GHz extended networks.
For example, if your extender connects to the router’s 2.4 GHz WiFi band, your
extender uses your router’s 2.4 GHz WiFi settings for both its networks:
• Router 2.4 GHz WiFi network name. MyWiFiExample
• Router 5 GHz WiFi network name. MyWiFiExample-5G
• Extended 2.4 GHz WiFi network name. MyWiFiExample
• Extended 5 GHz WiFi network name. MyWiFiExample
If your extender connects to the router’s 5 GHz WiFi band, your extender uses
your router’s 5 GHz WiFi settings for both its networks:
• Router 2.4 GHz WiFi network name. MyWiFiExample
• Router 5 GHz WiFi network name. MyWiFiExample-5G
• Extended 2.4 GHz WiFi network name. MyWiFiExample-5G
• Extended 5 GHz WiFi network name. MyWiFiExample-5G
Note: Since your router and extended networks share the same WiFi network
name, only one WiFi network name is broadcast.
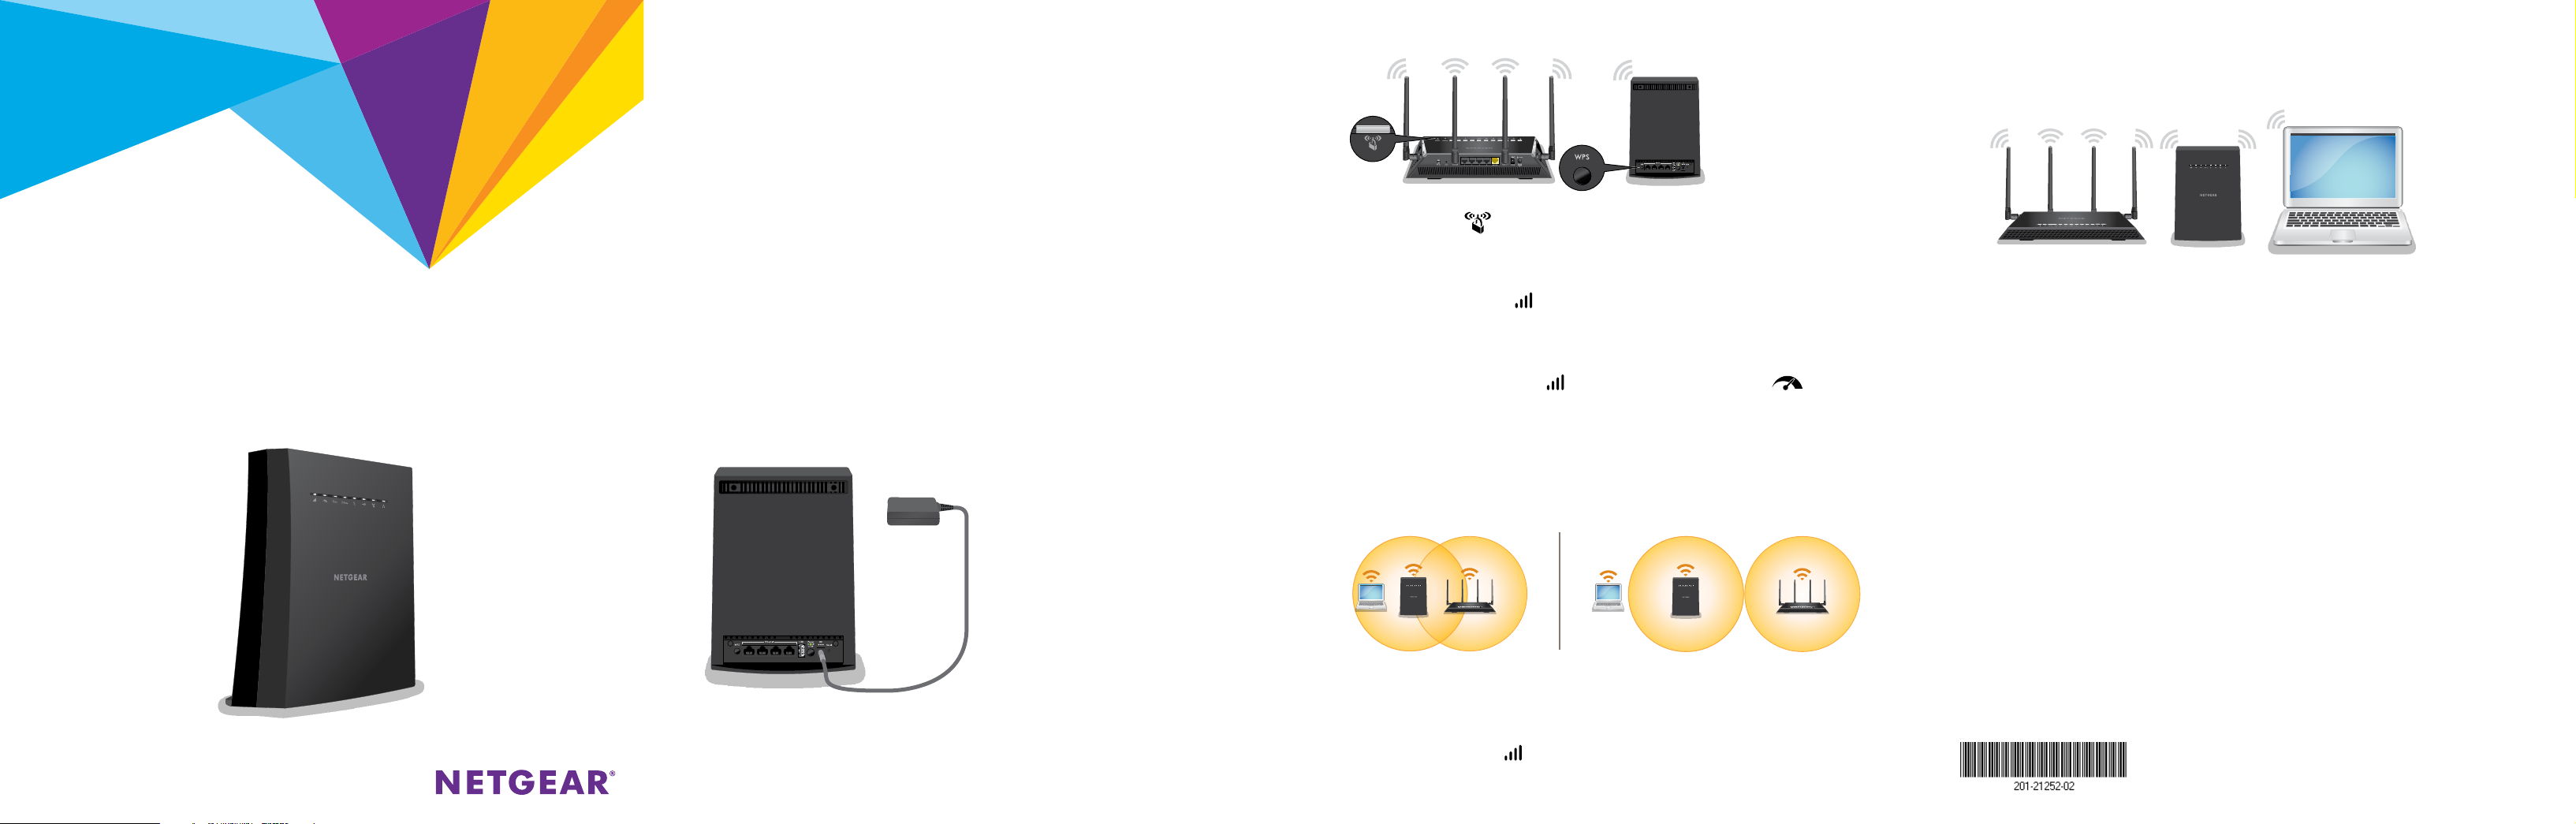
1. Place the extender and supply power.
2. Connect your extender to your router with WPS.
3. Choose a location and check the signal strength.
4. Connect your devices.
a. Place the extender close to your router.
b. Plug the extender into an electrical outlet.
The Power LED lights green.
If the Power LED does not light, press the Power button.
Do
Don’t
a. Move your extender to a new location that is about halfway between your router
and the area with a poor router WiFi signal.
The location that you choose must be within the range of your existing WiFi
router network. See the previous image for an example.
The Link Status LED helps you choose a spot where the extender-to-router
connection is optimal. For more information, see LED Descriptions on the back of
this quick start guide.
a. Press the WPS button on the extender.
The WPS LED
blinks white.
b. Within two minutes, press the WPS button on your router.
When the extender connects to the router, the WPS LED lights solid white.
If the Link Status LED lights white, the connection between your router and
extender is good. If the Link Status LED lights amber or red, move the extender
closer to the router and try again.
c. If your WiFi router supports the 5 GHz band, repeat Steps 2a and 2b and check to
see that the Link Rate LED and Maximum Throughput LED light solid
white to confirm the connection.
Note: If your router supports the 5 GHz band, your extender attempts to
connect to the router’s 5 GHz band the first time you press the WPS button. If
your extender did not connect to the router’s 5 GHz band the first time, repeat
the WPS process.
b. If you get no connection or a poor connection, move the extender closer to your
router and try again until the Link Status LED lights white.
July 2017
NETGEAR, Inc.
350 East Plumeria Drive
San Jose, CA 95134, USA
 Loading...