


CHANGING THE GAME IN HEALTH AND FITNESS™ |
Model T7.16 & T7.18 |
Be Strong.
Nautilus®
Pro Series Treadmills
Owner’s Manual
®NAUTILUS
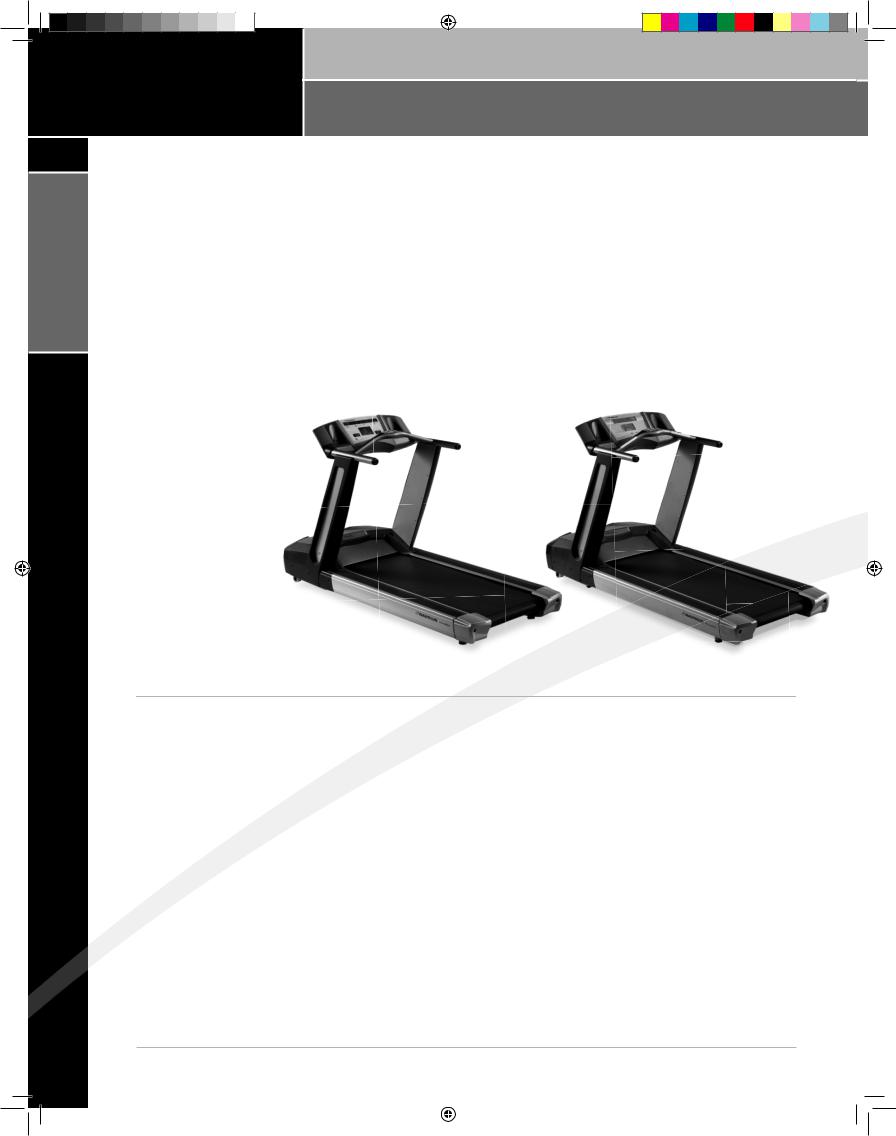
Model T7.16 |
Model T7.18 |
T7_16-18_OM.indd 1 |
|
|
11/12/04 3:28:47 PM |
|
|
||
|
|
|
|
CHANGING THE GAME IN HEALTH AND FITNESS™


 INTRODUCTION
INTRODUCTION
NAUTILUS®
Thank you for purchasing your Nautilus® Pro Series treadmill. For more than 30 years Nautilus® has been producing the world’s fi nest fi tness equipment used in health clubs and homes around the globe. We hope this product meets your every expectation and is a valuable tool on the road to accomplishing all your fi tness goals.
Please carefully read through this manual to familiarize yourself with the operation of your new Nautilus® treadmill. Doing so will help to ensure you get the most use out of your treadmill and enjoy safe and enjoyable workouts in the many miles ahead.
Nautilus®
1886 Prairie Way
Louisville, CO 80027
(800) 864-1270 Fax (800) 898-9410 nautilus.com
Model T7.16 |
Model T7.18 |
TABLE OF CONTENTS:
Safety Requirements > > > > > > > > > > |
1 |
Treadmill Key Functions > > > > > > > >10 |
|
Installation & Operation> > > > > > > > > |
2 |
My Nautilus™ > > > > > > > > > > > > > >12 |
|
Plugging In Your Treadmill > > > > > > |
2 |
Member Set up, Operations |
|
Turning On the Power > > > > > > > > 2 |
& Options > > > > > > > > > > > > > >12 |
||
Options & Updates > > > > > > > > >13 |
|||
Understanding the Display |
|
||
|
|
||
and Controls > > > > > > > > > > > > > |
2 |
Erasing Profi les & History > > > > >13 |
|
Magnetic Safety Stop Cord > > > > > 3 |
Workout Program Overview > > > > > >14 |
||
Getting Started > > > > > > > > > > > > > 4 |
Time & Distance Goal Programs> > >15 |
||
Guidelines For Getting On |
4 |
Time Based Programs > > > > > > > >16 |
|
and Off the Treadmill > > > > > > > > > |
Interval Training Programs> > > > > >17 |
||
Heart Rate Monitoring > > > > > > > > > |
6 |
||
Distance Based Programs > > > > > >18 |
|||
Telemetry Heart Rate> > > > > > > > > |
6 |
||
Heart Rate Control Programs > > > >19 |
|||
Maintaining the Transmitter Belt > > |
7 |
||
Custom Workout Programs > > > > >24 |
|||
Contact Heart Rate |
|
||
|
|
||
(T7.18 Model Only)> > > > > > > > > 7 |
Results Summary> > > > > > > > > > >25 |
||
Heart rate Monitoring > > > > > > > > |
7 |
Exercise & Fitness Guidelines > > > > >26 |
|
Treadmill Display Defi nitions > > > > > > |
8 |
Exercise and Health > > > > > > > > >26 |
|
Your New Home Fitness Program > >27 Steps to Getting Started > > > > > > >28 Components of Fitness> > > > > > > >29 Nutrition > > > > > > > > > > > > > > >31 Monitoring Your Intensity > > > > > >32 Beating The Dropout Odds > > > > >34
Maintenance & Cleaning > > > > > > > > 37 Walking Belt Adjustments> > > > > > >37 Adjusting the Tension > > > > > > > >37 Adjusting the Tracking > > > > > > > >38 Belt Replacement > > > > > > > > > > 38 Moving & Storing the Treadmill > > > > 38 Troubleshooting > > > > > > > > > > > > > 39 Warranty Information > > > > > > > > > > 40 Contacting Nautilus® > > > > > > > > > > 41
T7_16-18_OM.indd 2 |
|
|
11/12/04 3:29:14 PM |
|
|
||
|
|
|
|

SAFETY REQUIREMENTS
When using electrical equipment, always follow these basic precautions:
IMPORTANT SAFETY INSTRUCTIONS
The following defi nitions apply to the words “Danger” and “Warning” found throughout this manual:
qqqqq Used to call attention to immediate hazards DANGER which, if not avoided, will result in immediate,
serious personal injury or loss of life.
qqqqq Used to call attention to potential hazards that WARNING could result in personal injury or loss of life.
READ ALL INSTRUCTIONS BEFORE USING THE MACHINE.
qqqqq
DANGERTo reduce the risk of electrical shock, always unplug the external power supply from the electrical outlet before cleaning, maintaining, or repairing.
qqqqq
WARNINGTo reduce the risk of burns, electric shock, or injury to persons: Read this manual in full before operating the treadmill. Failure to follow these guidelines can produce a
serious or possibly fatal electrical shock hazard or other serious injury. Consult a qualifi ed electrician as required.
1.The controller Stop Key does not turn off the electrical current to the treadmill. The treadmill continues to draw power, even when the controller is off. To avoid electric shock, do not remove treadmill hood or place hands beneath the treadmill while the treadmill is plugged into a power source.
2.Do not start the treadmill when someone else is standing on the belt.
3.Keep speed and incline at the lowest settings when someone is getting on and off the treadmill.
4.Keep the area underneath and around the treadmill clear.
5.qqqqqNever position the treadmill with the back WARNING end (direction of belt travel) facing a wall or
any other objects such as furniture or other pieces of fi tness equipment. Failure to do so can prevent safe exit of the treadmill in an emergency situation such as falling. Allow
a minimum of four feet behind the treadmill and any objects.
6.Before each use of this equipment, check the power receptacle for signs of damage. Do not operate the equipment if the integrity of this item is in question.
7.To avoid potential safety and electrical problems, replace with manufacturers’ specifi ed parts only.
8.This equipment is classifi ed Class I, Type B, ordinary equipment. Not protected against fl uid ingress. Rated for continuous operation. Do not operate this equipment in the presence of fl ammable anesthetic mixtures.
9.Do not let liquid enter the controller. If it does, the controller must be inspected and tested for safety by an approved technician before it can be used again.
10.Increased risk due to leakage current can result if this equipment is not grounded properly.
11.The treadmill must be on an appropriate, dedicated electrical circuit. Nothing else should be connected to the circuit.
12.Do not stand on treadmill hood or front trim cover.
13.Close supervision is necessary whenever the machine is used by or near children, invalids, or disabled persons.
Failure to follow the conditions set forth below shall limit, to the extent allowed by law, Nautilus® Inc. responsibility for the safety, reliability, and performance of this equipment.
•The operator manual must be read in full by each owner and trainer before the product is fi rst used. Each user must be instructed in the proper use of the treadmill and its accessories.
Do not remove the treadmill hood: dangerous voltages are present. Components are serviceable only by qualifi ed service personnel.
•The electrical wiring within the treadmill setting and the electrical installation of the treadmill must comply with the applicable local or provincial requirements.
•The equipment must be used in accordance with the instructions for use.
•For further information or instruction on use, maintenance or specifi cations, please contact your Authorized Nautilus® Retail Outlet.
®NAUTILUS REQUIREMENTS SAFETY
1
T7_16-18_OM.indd 1 |
|
|
11/12/04 3:29:17 PM |
|
|
||
|
|
|
|
INSTALLATION
NAUTILUS®
2
CHANGING THE GAME IN HEALTH AND FITNESS™


 INSTALLATION & OPERATION
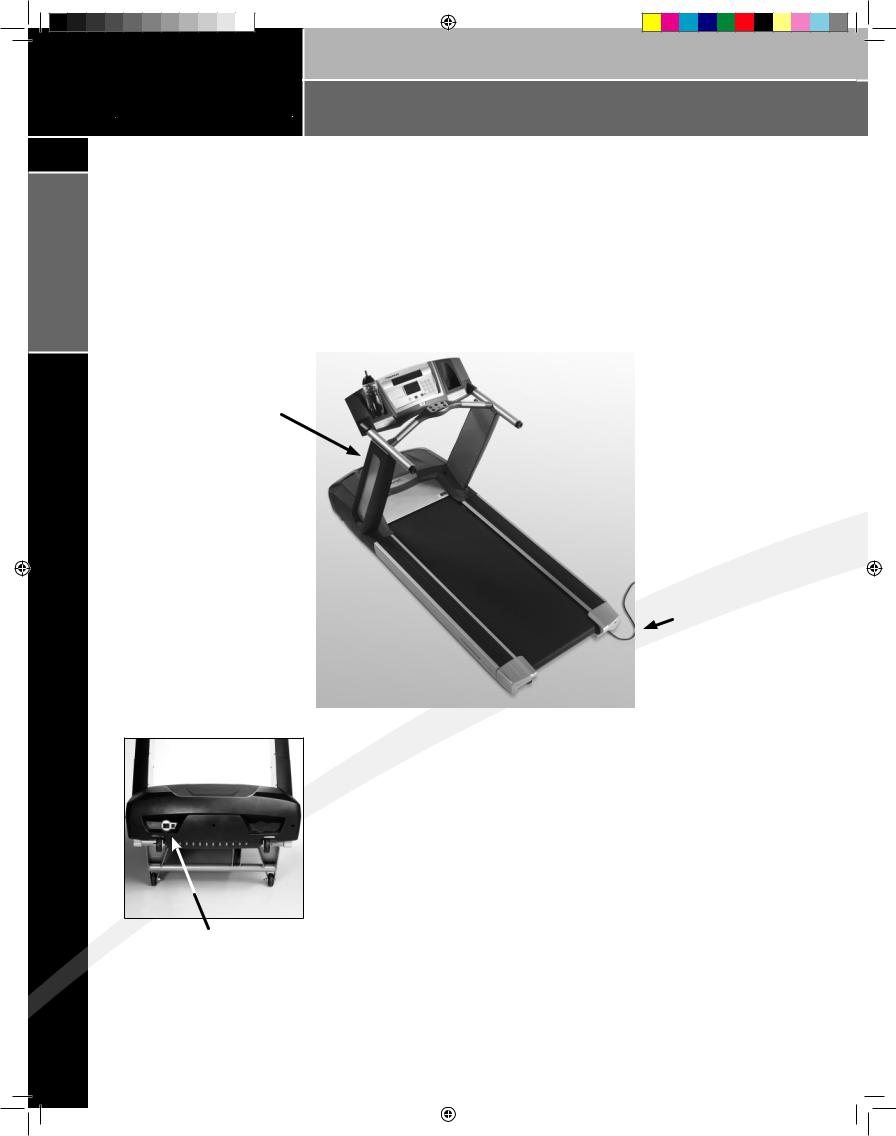
Treadmill Power Plug Receptacles
Attach power cord here if your treadmill will be facing a wall or will be parallel to a wall.
Power Switch
The Pro Series treadmills have two power plug receptacles allowing you plug in the treadmill from the front or the rear of the machine. The rear power cord receptacle, located underneath the right side of the side rail, should be used if the treadmill is going to be placed in the center of the room facing away from the
wall. The front power cord receptacle, located on the front side of the motor pan, can be used if the treadmill is placed facing a wall or parallel to a wall.
Attach power cord here if your treadmill will face away from the wall .
Turning on the Power
After you have determined which end of the treadmill to plug in, the treadmill can be turned on by moving the power switch located at the front of the treadmill, to the ON position. The unit will be in Sleep Mode, all displays will be blank. Pressing any key, except STOP, will cause the displays to light up and the treadmill to enter Standby Mode. Unit will return to Sleep Mode after 30 minutes of inactivity. Be sure to turn treadmill off when not in use. (Pressing STOP while in Standby mode brings unit to Sleep mode, but does not turn off power.)
Understanding the Display and Controls
The treadmill display is a computerized panel used to operate the treadmill and see all workout data and operational status. You should familiarize yourself with the operation of the treadmill and the location of all keys before beginning use.
T7_16-18_OM.indd 2 |
|
|
11/12/04 3:29:27 PM |
|
|
||
|
|
|
|

INSTALLATION & OPERATION |
|
|
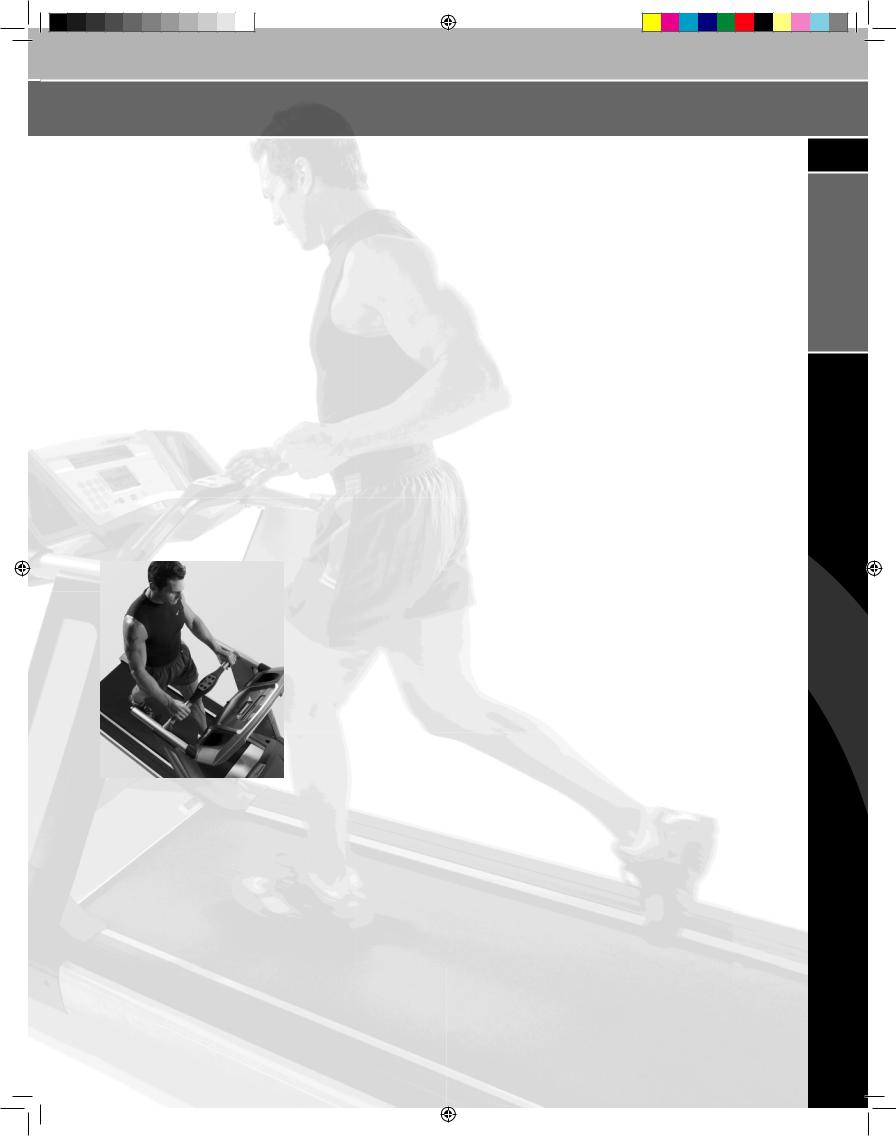
Treadmill Magnetic Safety Stop Cord |
|
|
|
|
|
qqqqq |
|
|
IMPORTANTThe emergency stop |
|
|
cord should always be in use while on your treadmill. |
|
|
The magnetically activated key is located on the |
|
|
bottom of the display as shown. This magnetic key |
|
|
is an emergency shut off and will abruptly stop the |
|
|
walking belt should you fall down while using the |
|
|
Emergency |
||
treadmill. Removing this magnetic key while not in |
Stop |
|
use will prevent children or unwanted users from |
Magnet |
|
|
|
|
operating the treadmill. |
|
|
Safety Cord Deactivation |
|
|
While we recommend using the Safety Stop Cord, |
|
|
more experienced users may fi nd they prefer to use |
|
|
the treadmill without this cord in place. To deactivate |
|
|
the Safety Stop Cord and permit unrestricted access |
|
|
of the treadmill follow the steps below. |
|
|
|
|
|
1.Press and hold the SPEED UP and SPEED DOWN Keys for three seconds while in Standby Mode. The Management menu will be entered and Total Hours will be shown on the upper display.
2.Press the ENTER Key until SAFETY CORD – ON is displayed.
3.Pressing the SPEED UP Key will change display to read SAFETY CORD – OFF.
4.Press the ENTER Key to save the new value and press STOP to exit Management Menu. The Safety Cord feature is now deactivated
qqqqq
IMPORTANTIf at any time the safety key is put back in place THE SAFETY CORD FEATURE REACTIVATES AUTOMATICALLY and must be turned off again using the above steps.
(T7.16)
(T7.18)
Attach magnetic safety cord onto clothing as shown.
OPERATION
®NAUTILUS
3
T7_16-18_OM.indd 3 |
|
|
11/12/04 3:29:43 PM |
|
|
||
|
|
|
|

NAUTILUS® GETTING STARTED
4
CHANGING THE GAME IN HEALTH AND FITNESS™


 GETTING STARTED
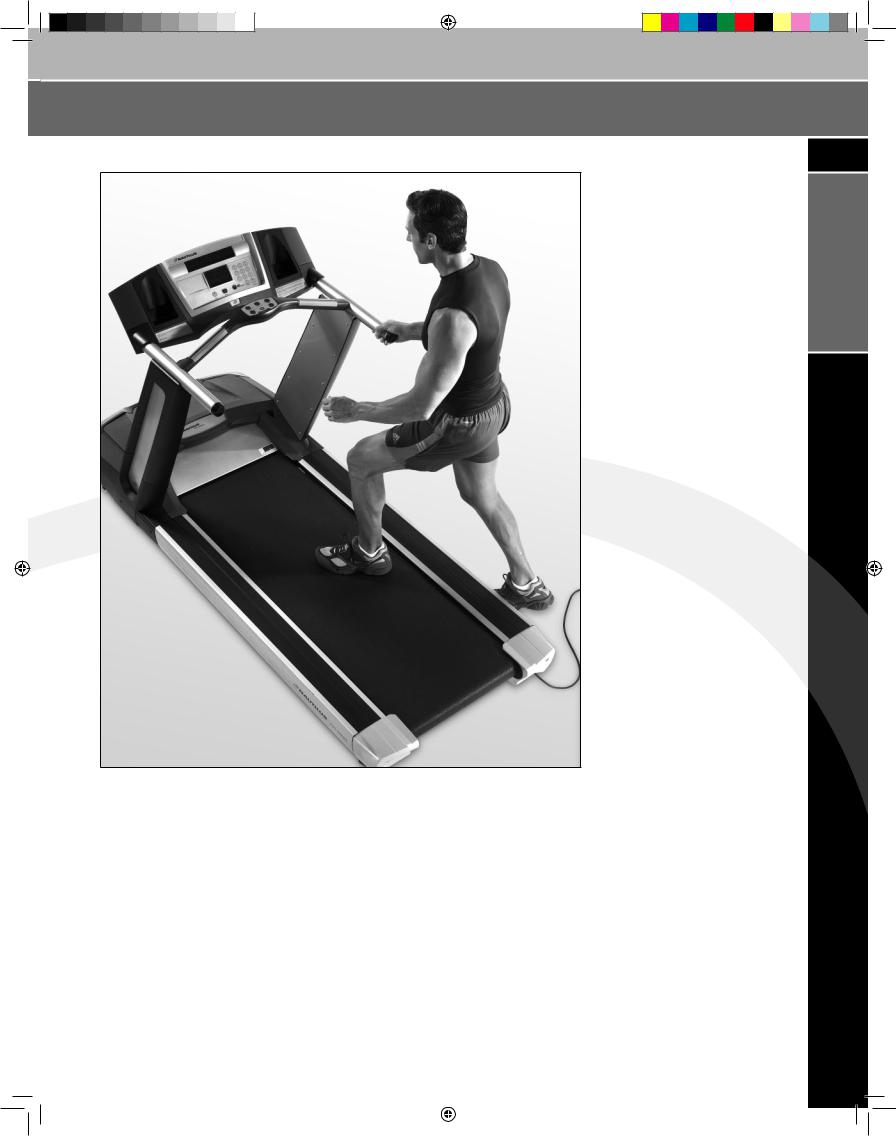
Guidelines For Getting On and Off the Treadmill
Instruct each user in the following guidelines for getting on and off the treadmill.
1.Magnetic safety cord should be in place on the display and should be securely clipped onto an area of clothing approximately waist high.
2.The walking belt should be moving at minimum speed before the user steps onto the treadmill.
3.Stand next to the treadmill and place both hands on the front handrail.
4.Straddle the walking belt or step onto the side of the deck. Step onto the moving belt and begin walking.
5.(Optional) To get the feel of the moving belt place the foot nearest the treadmill on the walking belt and let it move backwards. Lift it and repeat several times until comfortable with the treadmill speed.
6.When walking comfortably on the treadmill, let go of the handrail.
7.While walking on the treadmill:
•Face forward. Avoid looking down at the walking belt.
•Maintain speed by keeping a consistent distance from the handrail.
•Adjust the speed and incline as desired. Hold the handrail as the speed and incline change.
8.Before stepping off the treadmill, place one hand on the handrail, wait for the belt to stop, then step off.
T7_16-18_OM.indd 4 |
|
|
11/12/04 3:29:44 PM |
|
|
||
|
|
|
|
GETTING STARTED
®NAUTILUS STARTED GETTING
5
T7_16-18_OM.indd 5 |
|
|
11/12/04 3:29:51 PM |
|
|
||
|
|
|
|
NAUTILUS® HEART RATE MONITORING
6
|
CHANGING THE GAME IN HEALTH AND FITNESS™ |
|
|
HEART RATE MONITORING |
|
|
Heart rate monitoring helps you monitor your level of exertion by displaying your |
|
|
||
|
heart rate during exercise. There are two methods of monitoring heart rate on |
|
|
the Pro Series treadmills: |
|
|
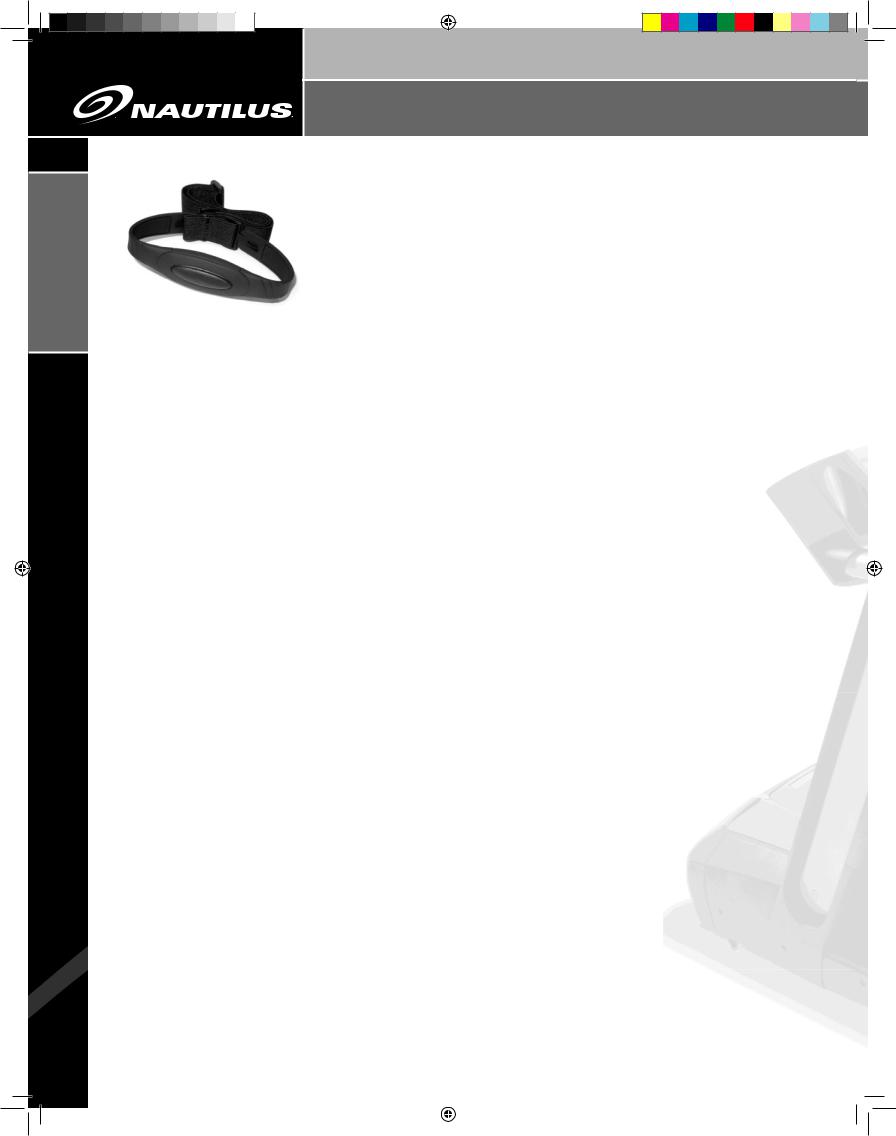
• Telemetry (e.g., Polar®) belt. The wireless heart rate chest belt supplied with |
|
|
your treadmill transmits the heart beat signal to the receiver in the display. |
|
|
The display shows the heart rate in beats per minute and uses the heart rate |
|
|
value in heart rate control mode. (See Programming Instructions for more |
|
The Telemetry (e.g., Polar®) belt. |
||
information) |
||
|
• Contact heart rate (T7.18 Model Only). Sensors on the handgrip detect heart rate and display it on the controller.
qqqqq
WARNING!
Pacemaker users should not use the telemetry transmitter without fi rst consulting with their doctor.
Telemetry Heart Rate
The telemetry heart rate monitoring system consists of the receiver, located in the display, and a transmitter belt worn across your chest. The monitoring function is activated as soon as you strap on the chest belt and step within range of the receiver in the machine. Two electrodes on the underside of the chest belt sense the heart rate signal and send it to the receiver. On the T7.18, the heart symbol on the display pulses to indicate that the display is receiving a valid signal. On the T7.16, the far right decimal point in the Heart Rate Display pulses to indicate that the display is receiving a valid signal. A microprocessor in the controller calculates the heart rate and shows it, in beats per minute, on the display.
Before you put the transmitter belt on, wet the two electrode patches (the grooved rectangles on the reverse side of the belt). Secure the transmitter belt as high under the pectoral muscles (chest) as is comfortable. The transmitter belt should fi t snugly and comfortably, and allow normal breathing.
After the initial heart rate signal is detected, the display will enter a validation phase in which four good heart beat signals lasting four seconds are required before locking on telemetry heart rate signals for the duration of the workout session.
If your heart rate is not being displayed, try the following:
•Move closer to the display.
•Tighten the elastic band on the chest belt.
•Adjust the belt higher or lower on your chest.
•Remoisten the electrodes.
•Test your chest strap with a machine that you know is working, or with a heart rate watch that you know is working.
T7_16-18_OM.indd 6 |
|
|
11/12/04 3:29:56 PM |
|
|
||
|
|
|
|
HEART RATE MONITORING
Maintaining the Transmitter Belt
Clean the chest belt regularly with mild soap and water, then dry thoroughly — residual sweat and moisture keeps the transmitter active and will drain the battery in the transmitter. Do not use abrasives or chemicals such as steel wool or alcohol for cleaning, as they can damage the electrodes permanently. The supplied chest belts use a sealed battery and are non-replaceable. Batteries in a chest belt will last on average for 1500-2000 hours of use. Replacement belts can be purchased from an Authorized Nautilus® Fitness Retailer.
Contact Heart Rate (T7.18 model only)
Through the use of stainless steel sensors built into the handle bar and using sophisticated software, heart rate can be checked at any time during a workout. As with the wireless telemetry chest belt, the heart rate is shown on the display in the same manor.
The contact heart rate system’s ability to detect a heart rate signal is infl uenced by several factors. Movement of the muscles of the upper body produces an electrical signal that will interfere with the detection of the heart rate signal by the sensors. Movement of the hands while they are in contact with the sensors also produces interference. For this reason users
should avoid moving their hands while using the contact heart rate grips. For reasons of safety it is also recommended that users not use the contact heart rate feature while running and instead use the telemetry chest belt method. Calluses and hand lotion act as an insulating layer to reduce the signal strength. Also, the EKG signal generated
by some individuals is not strong enough to be detected by the sensors. These individuals should opt for the telemetry method of heart rate monitoring.
Contact heart rate input signals are acquired only during contact between your hands and the stainless steel sensors on the handrails. To use the contact heart rate feature, place your hands around the handles so that your hands touch both the top and the bottom of the sensors. After the initial contact heart rate signal is detected, the controller will enter a validation phase requiring a good heart beat signal within 10 to 15 seconds, or until the system acquires a valid signal. During the validation phase the display will not recognize telemetry heart rate signals. If, during exercise, the heart rate displayed is erratic, it may be helpful to remove your hands from the handles, wipe them and place them back on the handles.
T7_16-18_OM.indd 7
®NAUTILUS MONITORING RATE HEART
7
11/12/04 3:30:14 PM 

NAUTILUS® DISPLAY DEFINITIONS
8
|
CHANGING THE GAME IN HEALTH AND FITNESS™ |
|
TREADMILL DISPLAY DEFINITIONS |
00:01 |
The following describes the display functions and specifi cations on the Pro |
Series treadmills. |
|
Incline — The treadmill incline is displayed as a percentage of elevation. The |
|
00:02 |
window. In the Time Based workouts, the timer will count down to 0:00 from the |
|
Pro Series treadmill has an incline range of 0 to 15%. |
|
Time — The selected workout time is displayed in the center of the upper display |
00:03 |
preset time you have selected. In Distance based programs, HRC Weight Loss |
and HRC Cardio, the timer will count up. The timer will also count up if QUICK |
|
START is pressed without selecting a workout program. |
|
00:04 |
Speed — The treadmill speed is displayed in miles per hour (or kilometers per |
hour). The Pro Series T7.18 and T7.16 treadmills have a speed operation range of |
|
0.5 mph to 12 mph (0.8 kph to 19.2 kph). For safety reasons you may also limit the |
|
maximum speed in the Management Menu. |
Heart Rate — Current heart rate is displayed in beats per minute.
Percentage of Maximum Heart Rate — An approximation of maximal heart rate is calculated by subtracting the users age from 220. Percentage of maximum heart rate will only be shown in HRC programs or when a program has been selected through the My Nautilus™ Menu, since these are the only times the user’s age is known.
Example: 220 – 40 (age) = 180 — 180 Beats per minute would be the approximate maximum heart rate for a 40-year-old user.
180 x 75%= 135 — 135 Beats per minute would be the heart rate of a 40 year old user exercising at 75% of their max.
(See the Heart Training programs for more information.)
Distance — Provides a cumulative total of the equivalent distance, in miles (or kilometers if your display is set to metric units), you have traveled.
Calories — Provides a current total of the number of calories burned during a workout. Note: this number is only an approximation as a user’s caloric expenditure will vary signifi cantly based on a persons age, gender, weight and metabolism.
Calories/Hour — Provides the rate at which calories are burned per hour at the current speed and incline.
T7_16-18_OM.indd 8 |
|
|
11/12/04 3:30:15 PM |
|
|
||
|
|
|
|
TREADMILL DISPLAY DEFINITIONS
Strides Per Minute — Your strides per minute can be an extremely valuable tool to measure the length of your stride and consistency of your stride rate. In general as your speed increases your stride rate increases as your legs are moving faster. Speed and Strides Per Minute are not however directly connected. There are several philosophies on the optimal stride rate depending on your walking/running speed as well as your leg length. In general, a lower stride rate, equals fewer strides for a given speed resulting
in greater running effi ciency. Also important is to maintain a consistent stride rate for the entire workout. Often as a user gets fatigued, the begin taking shorter, “choppier” strides. Monitoring this number can help to improve your performance at any level.
Pace — Displays the walking/running pace in minutes per mile (or minutes per kilometer). This time displayed is the time it will take you to complete one mile at your current rate. Pace is shown in the Time display for 4 seconds anytime speed is modifi ed using the SPEED UP/DOWN keys. For speeds less than
0.7 mph, Pace is displayed in the format 000 where Pace is expressed in minutes only (no seconds). For speeds greater than or equal to 0.7 mph, Pace is displayed in the format 00:00 where Pace is expressed as minutes and seconds.
Watts — During a workout, this statistic displays the power output at the current speed and incline, displayed in watts (746 watts = 1 hp).
METs — Gives you the relative energy cost of exercise. MET stands for multiples of the resting metabolic rate. While you are sitting quietly, your body consumes oxygen at the rate of about 3.5 milliliters per kilogram of body mass per minute. When you exercise, your body needs more oxygen in order to function. For example, exercising at 10 METs requires ten times the resting rate of oxygen consumption, or about 35 milliliters per kilogram per minute. During a workout, this key shows the current MET level. During the workout summary, the average MET level is displayed.
Workout Profi le — The dot-matrix area of the display shows the actual course profi le of the selected exercise program. The taller the column, the higher the incline and/or speed for that interval. The fl ashing column shows your current interval.
®NAUTILUS DEFINITIONS DISPLAY
9
T7_16-18_OM.indd 9 |
|
|
11/12/04 3:30:16 PM |
|
|
||
|
|
|
|

NAUTILUS® KEY FUNCTIONS
10
CHANGING THE GAME IN HEALTH AND FITNESS™


 TREADMILL KEY FUNCTIONS
Quick Start Key — This key starts the walking belt with a gradual increase to the default start speed of the workout program selected. You can also use this key to Quick-Start a workout session. This allows you to bypass entering in information and simply starts the treadmill belt at a speed of 0.5 mph.
Stop Key — During a workout, pressing the STOP Key once will stop the walking belt and bring the treadmill to the Pause Mode. This allows you to interrupt your workout to answer a phone, get a drink of water, etc. Pressing the START Key twice will resume your workout.
If the STOP Key is pressed twice, all workout data will be erased and treadmill will return to the Standby Mode.
Pressing the STOP Key a third time will turn off all displays and treadmill will return to Sleep Mode.
Numeric Keypad (0-9) — During program setup, this keypad allows you to quickly enter requested information such as time, age, max speed, weight and heart rate. During a the workout, the numbers are used to enter the desired speed as opposed to pressing the SPEED UP and SPEED DOWN Keys. For example to go to 4.5 mph, you simply press the 4 key, 5 key and ENTER to take you directly to the desired speed. (Speed will ramp up/down to selected speed)
Enter Key — Confi rms information selections and stores the information used to calculate workout statistics.
Incline Up & Down Keys — The treadmill incline may be changed at any time during a workout. Pressing the INCLINE UP key increases the incline and pressing the INCLINE DOWN key decreases the incline. The treadmill incline increases or decreases in increments of 0.5%.
T7_16-18_OM.indd 10 |
|
|
11/12/04 3:30:23 PM |
|
|
||
|
|
|
|
TREADMILL KEY FUNCTIONS
Speed Faster & Slower Key — The treadmill belt speed may be changed at any time during a workout. Pressing the SPEED DOWN Key decreases the belt speed and pressing the SPEED UP key increases the belt speed. The belt speed increases or decreases in increments of 0.1 MPH (0.15 KM/H).
qqqqq
IMPORTANTIt is important to know that the speed change up or down is not immediate. Speed will gradually increase or decrease so be sure to allow the treadmill to adjust to a new speed before changing again to avoid overshooting your desired speed.
Scan Key (T7.18) — During the exercise program, the Scan Key is used to select between various displayed information. When a workout is started, the display is in the Scan On Mode and the various exercise statistics will scroll thru every few seconds. Pressing the Scan Key will select between the various displays and locks on a specifi c readout. Pressing and holding the Scan Key for 2 seconds will turn the Scan feature back on.
Scan Keys (T7.16) — During the exercise program, the Scan Keys are used to select between various displayed information. When a workout is started, all 3 scanning displays are in the Scan On Mode and the various exercise statistics will scroll thru every few seconds. Pressing the individual Scan Keys will select between the various displays and will lock on a specifi c readout. The LED next to the Scan Key, when lit indicates the scanning feature is on. My Nautilus™ Key — Pressing the My Nautilus™ Key while in Standby Mode brings you to the My Nautilus™ Member Menu. The My Nautilus™ Key is then used to advance thru the My Nautilus™ Members. Press the ENTER Key to confi rm selection. For detailed information and My Nautilus™ member profi le creation, refer to the My Nautilus™ section of the manual.
My Nautilus™ Key — Pressing the My Nautilus™ Key while in Standby Mode brings you to the My Nautilus™ Member Menu. The My Nautilus™ Key is then used to advance through the My Nautilus™ Members. Press the ENTER Key to confi rm selection. For detailed information and My Nautilus™ member profi le creation, refer to the My Nautilus™ section of the manual.
T7_16-18_OM.indd 11
®NAUTILUS FUNCTIONS KEY
11
11/12/04 3:30:38 PM 
NAUTILUS® MY NAUTILUS™
12
CHANGING THE GAME IN HEALTH AND FITNESS™


 MY NAUTILUS™ SET UP AND OPERATION
My Nautilus™ is a personal workout diary that records and tracks every workout. Tracking all your crucial exercise data is essential to knowing where you are on the road to achieving your fi tness goals. My Nautilus™ will store up
to fi ve individual user’s workout data including total workouts, total hours, total miles, average speed and incline, average heart rate and fastest mile times.
My Nautilus™ Member Set up
To set up a personal My Nautilus™ profi le, complete the following steps.
1.Press the MY NAUTILUS™ key during Standby mode to scroll through the menu of My Nautilus™ members. If a profi le has not been set up, the names will be displayed as USER 1, USER 2, etc.
2.After selecting an open user slot, press and hold the ENTER key for 3 seconds to begin set up. CHANGE NAME and the word NO will appear on the display.
3.Use the SPEED UP/DOWN Keys to select YES and press ENTER to confi rm.
4.ENTER NAME +/- will appear on the display. Enter your name (up to 16 characters) using the SPEED UP/DOWN Keys pressing ENTER to confi rm each letter. After your name is entered, press and hold the ENTER key for 3 seconds to store name. (Hint: You can also enter in numbers allowing you to create multiple menus for the same user. For example you could create
“JOHN 1” and “JOHN 2” for different workout tracking needs.)
5.You will then be asked to input in your weight and age. Enter this information using the SPEED UP/DOWN keys or the numeric keypad and press ENTER to confi rm.
6.Profi le set up is complete. This new name will now appear in the My Nautilus™ member menu.
My Nautilus™Operation
After the My Nautilus™ profi le has been created using the steps above, simply press the MY NAUTILUS™ Key during Standby Mode to select the member name and press ENTER to confi rm.
LAST WORKOUT will be shown on the display. Use the SPEED UP/DOWN Keys to select between LAST WORKOUT, NEW WORKOUT and WORKOUT HISTORY. Press ENTER to confi rm selection.
My Nautilus™ Options
•LAST WORKOUT — If you would like to repeat your last performed exercise workout, Press the ENTER key then the START Key. This will immediately bring you to the beginning of your last completed workout and you will bypass entering program data.
T7_16-18_OM.indd 12 |
|
|
11/12/04 3:30:52 PM |
|
|
||
|
|
|
|
 Loading...