Napoleon T495sb, T495 Owner's Manual
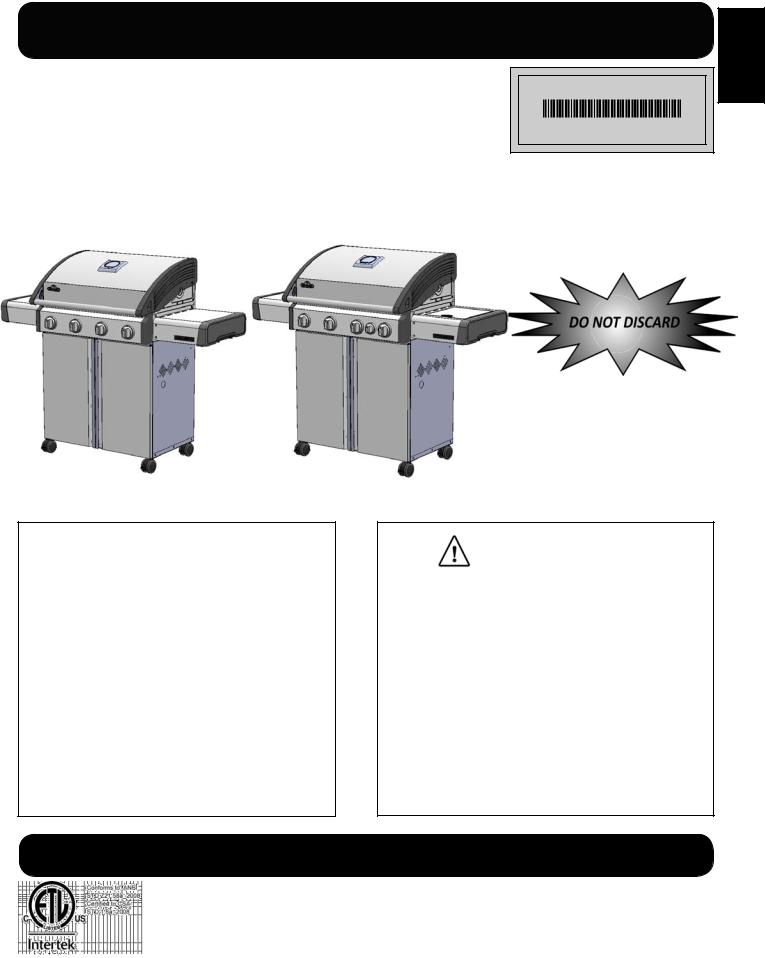
This gas grill must be used only outdoors in a well-ventilated space and must not be used inside a
building, garage, screened-in porch, gazebo or any other enclosed area.
EN
APPLY SERIAL NUMBER LABEL FROM CARTON
Serial No.
XXXXXX000000
MODEL NO.
 DANGER
IF YOU SMELL GAS:
•Shut off gas to the appliance.
•Extinguish any open flame.
•Open lid.
•If odor continues, keep away from the appliance and immediately call your gas supplier or fire department.
495, 495SB
WARNING
Do not try to light this appliance without reading the “LIGHTING” instructions section of this manual.
Do not store or use gasoline or other flammable liquids or vapors in the vicinity of this or any other appliance. An L.P. cylinder not connected for use must not be stored in the vicinity of this or any other appliance. If the information in these instructions is not followed exactly, a fire or explosion may result, causing property damage, personal injury or death.
Notice to Installer: Leave these instructions with the grill owner for future reference.
|
NapoleonApplianceCorp., |
|
214BayviewDr.,Barrie,Ontario,Canada L4N4Y8 Phone:1-866-820-8686 |
3194571 |
Fax:(705)725-2564 email: wecare@napoleonproducts.com web site: www.napoleongrills.com |
Z415-0011 JUN 24/16

3
WARNING!Failure to follow these instructions could result in property damage, personal injury or death. Read and follow all warnings and instructions in this manual prior to operating grill.
EN
Safe Operating Practices
•This gas grill must be assembled exactly according to the instructions in the manual. If the grill was store assembled, you must review the assembly instructions to confirm correct assembly and perform the required leak tests before operating the grill.
•Read the entire instruction manual before operating the gas grill.
•Under no circumstance should this gas grill be modified.
•Follow lighting instructions carefully when operating grill.
•Gas must be turned off at the propane cylinder or at the natural gas supply valve when the gas grill is not in use.
•Keep children and pets away from hot grill, DO NOT allow children to climb inside cabinet.
•Children should be supervised to ensure that they do not play with the appliance.
•This appliance is not intended for use by persons (including children) with reduced physical, sensory or mental capabilities, or lack of experience and knowledge, unless they have been given supervision or instruction concerning use of the appliance by a person responsible for their safety.
•Do not leave the grill unattended while in use.
•Do not move grill when hot or operating.
•This grill is for household use only.
•This gas grill must not be installed in or on recreational vehicles and/or boats.
•This gas grill must only be stored outdoors in a well-ventilated area and must not be used inside a building, garage, screened -in porch or any other enclosed area.
•Maintain proper clearance to combustibles (16” (410mm) to rear of unit 7” (180mm) to sides). Additional clearance 24” (610mm) is recommended near vinyl siding or panes of glass.
•At all times keep the ventilation openings of the cylinder enclosure free and clear from debris.
•Do not operate unit under any combustible construction.
•Do not locate in windy settings. High winds adversely affect the cooking performance of the gas grill.
•When the gas grill is stored indoors, the propane cylinder must be disconnected from the grill and stored outdoors in a well-ventilated area, disconnected cylinders must not be stored in a building, garage or other enclosed area. Natural gas units must be disconnected from the supply when being stored indoors.
•Inspect the gas line hose before each use. If there is evidence of excessive abrasion or wear, it must be replaced before using the gas grill, with a replacement hose assembly specified by the grill manufacturer.
•Never store a spare LP gas cylinder under or near this grill.
•Never fill the cylinder beyond 80 % full.
•Do not attempt to use a cylinder, which is not equipped with a QCC1 type connection.
•Leak test all connections before initial use, even if the grill was purchased fully assembled, annually or whenever any gas component has been replaced.
•Never use natural gas in a unit designed for liquid propane gas.
•Never use lighter fluid in a gas grill.
•Use charcoal briquettes only with a Napoleon charcoal tray designed for this unit.
•Burner controls must be off when turning supply cylinder on.
•Do not light burners with lid closed.
•Do not operate rear burner with main burners operating.
•The lid is to be closed during the preheat period.
•Do not route hose underneath drip pan-proper hose clearance to bottom of unit must be maintained.
•Clean grease tray and sear plates regularly to avoid build-up, which may lead to grease fires.
•Remove warming rack before lighting rear burner. The extreme heat will damage the warming rack.
•Ensure sear plates are positioned properly according to sear plate installation instructions.
•Do not use side shelves to store lighters, matches or any other combustibles.
•Keep gas line away from heated surfaces
•Keep any electrical supply cord away from water or heated surfaces.
•Inspect infrared burner venturi tube for spider webs and other obstructions periodically. Clean the tubes completely if you find any such obstructions.
•The outdoor cooking gas grill and its individual shutoff valve must be disconnected from the gas supply piping system during any pressure testing of that system at test pressures in excess of 0.5psi (3.5kPa).
•The outdoor cooking gas grill must be isolated from the gas supply piping system by closing its individual manual shutoff valve during any pressure testing of the gas supply piping system at test pressures equal to or less than 1/2 psi (3.5 kPa).
www.napoleongrills.com
4
EN
Cylinder Specification/Gas Hook Up
This gas barbecue is certified under Canadian and American National Standards, CSA 1.6-2008 and ANSI Z21.58a -2008 respectively for outdoor gas grills and should be installed to conform with local codes. In absence of local codes, install to the current CAN/CSA-B149.1 Propane Installation Code in Canada or to the National Fuel Gas Code, ANSI Z223.1 in the United States.
When installed, the unit must be electrically grounded in accordance with local codes or, in absence of local codes, with the current CSA C22.1 Canadian electrical code in Canada or the National Electrical Code, ANSI/NFPA 70 in the United States.
If a rotisserie motor is used, it must be electrically grounded in accordance with local codes or, in absence of local codes, with the current CSA C22.1 Canadian electrical code in Canada or the National Electrical Code, ANSI/NFPA 70 in the United States.
California Proposition 65: The burning of gas fuel creates by-products, some of which are on the list as substances known by the State of California to cause cancer or reproductive harm. When cooking with gas, always ensure adequate ventilation to the unit, to minimize exposure to such substances.
Propane Cylinder Specifications
WARNING!If these instructions are not followed exactly, a fire causing death or serious injury may occur.
A dented or rusty cylinder may be hazardous and should be checked by your propane supplier. Never use a cylinder with a damaged valve. Use only a propane supply cylinder constructed and marked in accordance with the specifications for LP-gas cylinders of the National Standard of Canada, CAN/CSA-b339, Cylinders, Spheres and Tubes for Transportation of Dangerous Goods; and Commission, as applicable or the Specifications for LP-Gas Cylinders of the U.S. Department of Transportation (D.O.T.). This appliance has been designed for use with a 20 lb. (9.1 kg) size propane cylinder only (not supplied).
The propane cylinder must be provided with a cylinder connection device compatible with the connection for outdoor cooking appliances. The propane cylinder must be provided with a shut-off valve terminating in a propane cylinder valve type QCC1, and a safety relief device having direct communication with the vapor space of the cylinder. The cylinder supply system must be arranged for vapor withdrawal and the cylinder shall include a collar to protect the cylinder valve. The cylinder shall incorporate a listed OPD (overfill protection device). Do not store a spare LP-gas cylinder under or near this appliance. Never fill the cylinder beyond 80 percent full.
Propane Cylinder Installation
Cylinder Connection: Ensure that the gas regulator hose is kink free. Remove the cap or plug from the cylinder fuel valve. Insert the black QCC1 regulator nipple onto the QCC1 fuel valve. Hand tighten clockwise. Do not use tools. Leak test all joints prior to using the barbecue. A leak test must be performed annually, and each time a cylinder is hooked up, or if a part of the gas system is replaced.
•Check that the cylinder valve is closed by turning the knob clockwise.
•Check that the grill’s burner knobs are in the off position.
•Open cabinet doors.
•Place the cylinder into the tank holder in bottom of shelf.
•Position the cylinder so that the valve faces toward the front of the unit.
•Attach regulator hose.
WARNING!Use only the pressure regulator and hose assembly provided with this barbecue. Replacement pressure regulators and hose assemblies must be specified by the manufacturer. Do not store a spare propane cylinder on the shelf beneath the barbecue. The regulator must be attached so that no part of the hose touches the underside of the grill or drippan. A fire will result if these directions are ignored.
The regulator supplies a pressure of 11 inches. water column to the gas grill and has a QCC1 type fitting. Cylinders to be used with this unit must be supplied with a QCC1 cylinder valve. A QCC1 cylinder has a positive seating connection, which will not allow gas flow until a positive seal has been achieved. It is also equipped with an excess flow device. In order to attain full flow to the grill, the valves must be in the off position when the cylinder valve is turned on.
www.napoleongrills.com
5
Natural Gas Hook-Up
This natural gas grill is supplied with a 10ft supply hose (complete with a quick disconnect) designed for natural
gas and certified for outdoor use. The gas grill is designed to operate at an inlet pressure of 7 inches water EN column. Piping and valves upstream of the quick disconnect are not supplied. The installation must comply
with CAN B149.1 Natural Gas and Propane installation code in Canada, or to the National Fuel Gas Code, ANSI Z223.1 in the United States. The gas supply pipe must be sufficiently sized to supply the BTU/h specified on the rating plate, based on the length of the piping run. The quick disconnect must not be installed in an upward direction and a readily accessible manual shut-off valve must be installed upstream of, and as close to, the quick disconnect as is feasible. The flared end of the hose must be connected to the fitting on the end of the flex tube as illustrated in the Natural Gas Hose Attachment diagram. Tighten using two wrenches. (Do not use thread sealer/pipe dope.) These connections must be made by a licensed gas installer. Leak test all joints prior to using the gas grill.
WARNING!The installation must be performed by a licensed gas fitter, and all connections must be leak tested before operating the grill.
•Do not route hose underneath drip pan.
•Do not route hose between space in bottom shelf and back panel.
•Do not route hose over top of back panel.
•Ensure all hose connections are tightened using two wrenches. Do not use teflon tape or pipe dope on any hose connection.
•Ensure the hose does not contact any high temperature surfaces, or it may melt and leak causing a fire.
•Do not use enclosure to store excess hose, as there is a greater chance of the hose contacting a hot surface, it may melt and leak causing a fire.
•Leak test all the connections using a soap and water solution, as per the leak testing instructions found in the this manual.
Leak Testing Instructions
WARNING! A leak test must be performed annually and each time a cylinder is hooked up or if a part of the gas system is replaced.
WARNING!Never use an open flame to check for gas leaks. Be certain no sparks or open flames are in the area while you check for leaks. Sparks or open flames will result in a fire or explosion, damage to property, serious bodily injury, or death.
Leak testing: This must be done before initial use, annually, and whenever any gas components are replaced or serviced. Do not smoke while performing this test, and remove all sources of ignition. See Leak Testing Diagram for areas to check. Turn all burner controls to the off position. Turn gas supply valve on.
Brush a half-and-half solution of liquid soap and water onto all joints and connections of the regulator, hose, manifolds and valves.
Bubbles will indicate a gas leak. Either tighten the loose joint or have the part replaced with one recommended by the Napoleon Customer Care department and have the grill inspected by a certified gas installer.
If the leak cannot be stopped, immediately shut off the gas supply, disconnect it, and have the grill inspected by a certified gas installer or dealer. Do not use the grill until the leak has been corrected.
www.napoleongrills.com
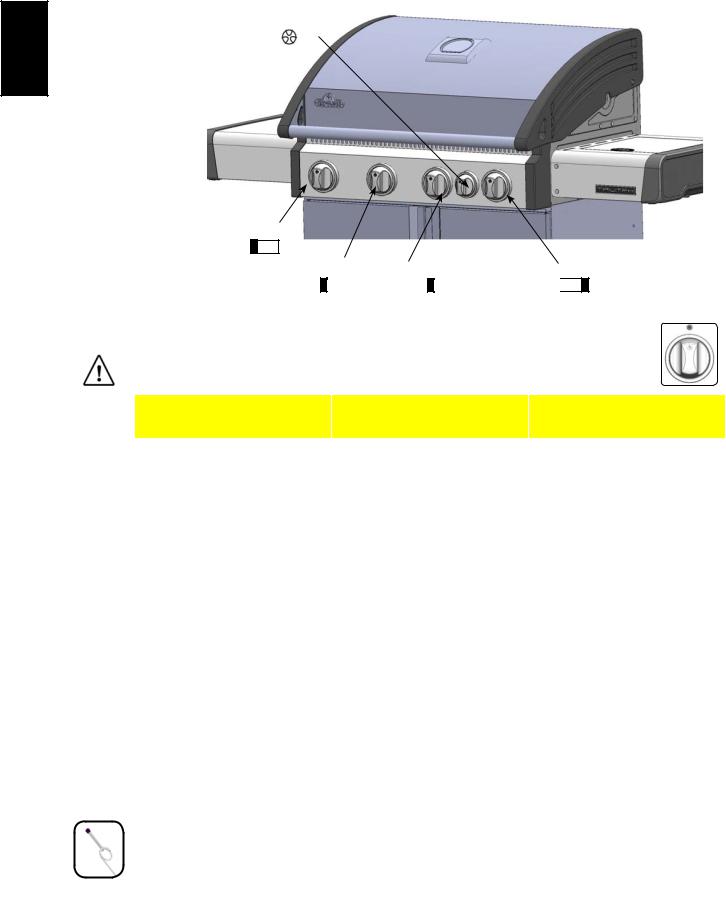
6Lighting Instructions
Side Burner
EN
Left Burner |
|
Left CentreBurner Right Centre Burner |
Right Burner |
|
|
|
|
|
|
|
|
|
|
|
|
|
|
|
|
|
|
|
|
|
|
|
|
WARNING!Open lid. |
|
|
|
|
|
|
|
|
Off Position |
||
|
|
|
|
|
|
|
|
|
|||
WARNING!Ensure all burner controls are in the off position. Turn on the gas supply |
|||||||||||
valve. |
|
|
|
|
|
|
|
|
|
||
|
|
|
|
|
|
|
|
||||
|
|
|
|
|
|
|
|
||||
Main Burner |
|
|
Rear Burner Lighting |
|
Side Burner Lighting |
||||||
Lighting |
|
|
(If equipped) |
|
(If equipped) |
||||||
|
|
|
|
|
|
|
|
||||
1. Open grill lid. |
|
|
1. Open grill lid. |
|
1. Open side burner cover. |
||||||
|
|
|
|
|
|
|
|
||||
2. Push and turn any main burner |
|
|
2. Remove the warming rack. |
2. Push and turn the side burner |
|||||||
knob slowly to the ’hi’ position. This |
|
|
|
|
|
|
|
|
control knob slowly to the |
||
action will ignite the pilot flame |
|
|
|
|
|
|
|
‘hi’ position. This action will ignite |
|||
which will in turn light the selected |
|
|
|
|
|
|
|
|
the side burner. |
||
burner. If the pilot lights, continue to |
|
|
|
|
|
|
|
|
|
||
push down on the control knob until |
|
|
|
|
|
|
|
|
|
||
the burner lights and then release. |
|
|
|
|
|
|
|
|
|
||
3. If the pilot does not ignite, then |
|
|
3. Push and turn the rotisserie |
3. If the burner does not ignite, then |
|||||||
immediately turn the control knob |
|
|
burner control knob slowly to the |
immediately turn the control knob |
|||||||
back to the ‘off position and repeat |
|
|
‘hi’ position. This action will ignite |
back to the ‘off’ position and repeat |
|||||||
step 2 several times. |
|
|
the pilot flame, which will in turn |
|
step 2 several times. |
||||||
. |
|
|
|
|
light the burner. If the pilot lights, |
|
|
||||
|
|
|
|
continue to push down on the burner |
|
|
|||||
|
|
|
|
|
control knob until the burner lights |
|
|
||||
|
|
|
|
|
then release. |
|
|
||||
4. If the pilot and burner will not |
|
|
4. If the burner does not ignite, then |
4. If the burner will not ignite within |
|||||||
ignite within 5 seconds, turn the |
|
|
immediately turn the control knob |
5 seconds, turn the control knob to |
|||||||
control knob to the ‘off’ position and |
|
|
back to the ‘off’ position and repeat |
the ‘off’ position and wait 5 minutes |
|||||||
wait 5 minutes for any excess gas to |
|
|
step 3 several times. |
for any excess gas to dissipate. Either |
|||||||
dissipate. Either repeat steps 2 and 3 |
|
|
|
|
|
|
|
repeat steps 2 and 3 or light with a |
|||
or light with a match. |
|
|
|
|
|
|
|
|
match. |
||
|
|
|
|
|
|
|
|
||||
5. If lighting the unit with a match, |
|
|
5. If the burner will not ignite within |
|
|
||||||
clip the match into the supplied |
|
|
5 seconds, turn the control knob to |
|
|
||||||
lighting rod. Hold the lit match down |
|
|
the ‘off’ position and wait 5 minutes |
|
|
||||||
through the grill and sear plate while |
|
for any excess gas to dissipate. Either |
|
|
|||||||
turning the corresponding burner |
|
|
repeat steps 3 and 4 or light with a |
|
|
||||||
valve to high. |
|
|
match. |
|
|
||||||
|
|
|
|
|
|
|
|
|
|
|
|
www.napoleongrills.com
7
Operating The Grill
Initial Lighting: When lit for the first time, the gas grill emits a slight odor. This is a normal temporary condition caused by the “burn-in” of internal paints and lubricants used in the manufacturing process and does not occur EN again. Simply run the main burners on high for approximately one-half hour.
Main Burner Use: When searing foods, we recommend preheating the grill by operating all main burners in the high position with the lid closed for approximately 10 minutes. Food cooked for short periods of time (fish, vegetables) can be grilled with the lid open. Cooking with the lid closed will ensure higher, more even temperatures that can reduce cooking time and cook meat more evenly. Food that has a cooking time longer
than 30 minutes, such as roasts, can be cooked indirectly (with the burner lit opposite to the food placement). When cooking very lean meats, such as chicken breasts or lean pork, the grids can be oiled before pre-heating to reduce sticking. Cooking meat with a high degree of fat content can create flare-ups. Either trim the fat or reduce temperatures to inhibit this. Should a flare-up occur, move food away from the flames and reduce the heat. Leave the lid open. See Your All Season Grill cookbook by Napoleon for more detailed instructions.
Direct Cooking: Place food to be cooked on the grill directly over the heat. This method is generally used for searing or for foods that do not require prolonged cooking times such as hamburgers, steaks, chicken pieces, or vegetables. The food is first seared to trap-in the juices and flavor, and then the temperature is lowered to finish cooking the food to your preference.
Indirect Cooking: With one or more burners operating, place food to be cooked on the grill over a burner that is not operating. The heat circulates around the food, cooking slowly and evenly. Cooking with this method is much the same as cooking in your oven and is generally used for larger cuts of meats such as roasts, chickens or turkeys, but can also be used for cooking foods that are prone to flare-ups or for smoking foods. Lower temperatures and slower cooking times result in tender foods.
Rear Burner Use (If Equipped): Remove the warming rack prior to use, the extreme heat will damage the warming rack. Cooking grids should also be removed if they interfere with the rotisserie. The rear burner is designed to be used in conjunction with the rotisserie kit (included with most rear burner units) available from your dealer. See the rotisserie kit assembly instructions.
To use the counterbalance - remove the rotisserie motor from the gas grill. Place the spit with meat being cooked across the hangers inside the grill. The meat will naturally hang with the heavy side down. Tighten the counterbalance arm and weight so the arm is facing up. Slide the counterweight in or out to balance the load and tighten in place. Re-install the motor and begin cooking. Place a metal dish underneath the meat to collect drippings for basting and naturally delicious gravy. Basting liquid may be added as required. To seal in juices, first operate rear burner on high until brown, then reduce the heat to thoroughly cook foods. Keep the lid closed for best results. Your roasts and fowl will brown perfectly on the outside and stay moist and tender on the inside. For example, a 3 pound chicken on the rotisserie will be done in approximately 1½ hours on medium to high. See ‘Your all Season Grill’ cookbook by Napoleon for more detailed instructions.
WARNING!Barbecue sauce and salt can be corrosive and will cause rapid deterioration of the gas grill components unless cleaned regularly. When finished cooking disassemble rotisserie components, wash thoroughly with warm soapy water and store indoors.
Flame Side Burner Use (if equipped): The side burner can be used like any stove top burner, for gravies, soups etc. For best performance, the gas grill should be located with the side burner protected from the wind.
WARNING!Never grill food directly on the side burner grate. It is designed for use with pots and pans only.
WARNING!Do not close the side burner lid while it is operating or hot.
WARNING!Do not use side burner to deep fry foods as cooking with oil can create a dangerous situation.
www.napoleongrills.com
8
EN
Maintenance / Cleaning Instructions
We recommend this gas grill be thoroughly inspected and serviced annually by a qualified service person.
At all times keep the gas grill area free from combustible materials, gasoline and other flammable vapors and liquids. Do not obstruct the flow of ventilation and combustion air. Keep the cylinder enclosure ventilation openings (located on the cart sides and at the front and back of the bottom shelf) free and clear from debris.
WARNING!Always wear protective gloves and safety glasses when servicing your grill.
WARNING!To avoid the possibility of burns, maintenance should be done only when the grill is cool. Avoid unprotected contact with hot surfaces. Ensure all burners are turned off. Clean grill in an area where cleaning solutions will not harm decks, lawns, or patios. Do not use oven cleaner to clean any part of this gas grill. Do not use a self-cleaning oven to clean cooking grids or any other parts of the gas grill. Barbecue sauce and salt can be corrosive and will cause rapid deterioration of the gas grill components unless cleaned regularly.
Note: Stainless steel tends to oxidize or stain in the presence of chlorides and sulfides, particularly in coastal areas and other harsh environments, such as the warm, highly humid atmosphere around pools and hot tubs. These stains could be perceived as rust, but can be easily removed or prevented. To provide stain prevention and removal, wash all stainless steel surfaces every 3-4 weeks or as often as required with fresh water and/or stainless steel cleaner.
WARNING!Turn off the gas at the source and disconnect the unit before servicing. To avoid the possibility of burns, maintenance should be done only when the grill is cool. A leak test must be performed annually and whenever any component of the gas train is replaced or gas smell is present.
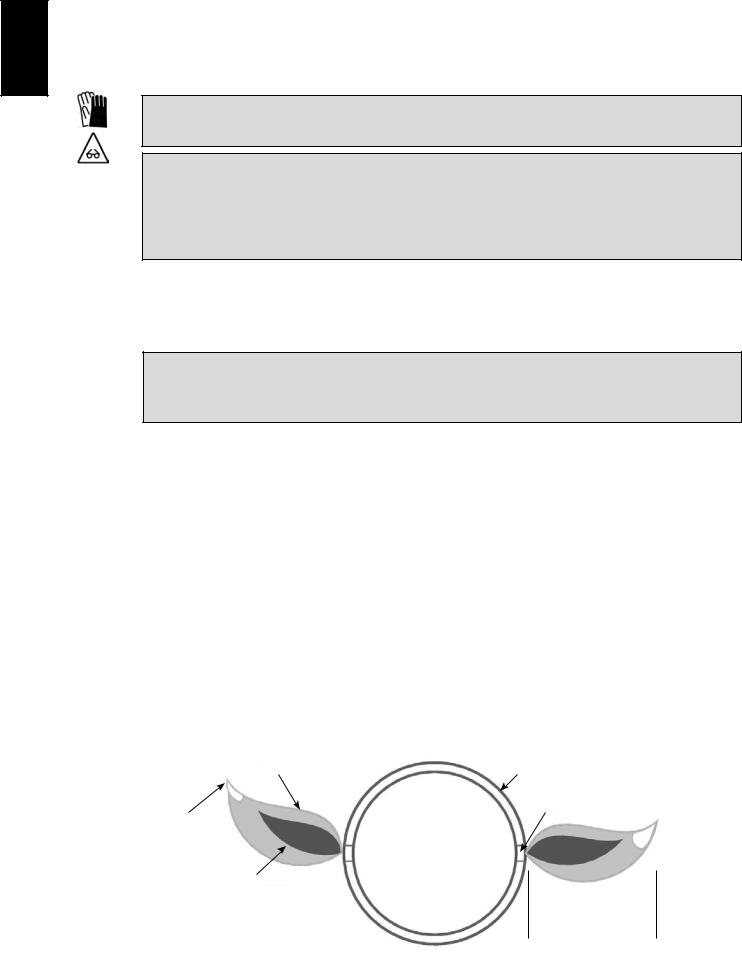
Combustion Air Adjustment: (This must be done by a qualified gas installer.) The air shutter is factory set and should not need adjusting under normal conditions. Under extreme field conditions, adjustments might be required. When the air shutter is adjusted correctly the flames will be dark blue, tipped with light blue and occasionally yellow.
•With too little air flow to the burner, the flames are lazy yellow and can produce soot.
•With too much air flow, the flames lift erratically and can cause difficulties when lighting. Adjusting the air shutter:
1.Remove cooking grids and sear plates and leave lid open.
2.Loosen air-shutter lock screw located at the mouth of the burner and open or close air shutter as required. The normal opening settings are:
Main Tube Burner |
Propane 15/64” (6mm) |
|
Natural 1/8” (3mm) |
*Infra-Red burners have no air adjustment.
3. Light the burners and set to high. Visually inspect burner flames. When the shutters are set correctly, turn burners off, tighten locking screws, and replace removed parts. Ensure that the insect screens are installed.
Light Blue |
Burner |
Burner Port
Yellow Tipping
Dark Blue
Approximately 1/2” (13mm)
www.napoleongrills.com

9 |
|
|
Grids And Warming Rack: The grids and warming rack are best cleaned with a brass wire brush during the |
|
|
|
|
|
pre-heating period. Steel wool can be used for stubborn stains. It is normal that stainless grids (if equipped) will |
|
|
discolor permanently from regular usage due to the high temperature of the cooking surface. |
|
EN |
Cast Iron Cooking Grids: The cast iron cooking grids supplied with your new grill offer superior heat retention |
|
|
and distribution. By regularly seasoning your grids you are adding a protective coating, which will aid in resisting |
|
|
corrosion and increase your grids non-stick capabilities. |
|
|
First Time Use: Wash the cooking grids by hand with mild dish soap and water to remove any residue from |
|
|
|
|
|
the manufacturing process (never wash in a dish washer). Rinse thoroughly with hot water and dry completely |
|
|
with a soft cloth. This is important to avoid moisture from entering the cast iron. |
|
|
Seasoning: Using a soft cloth, spread VEGETABLE SHORTENING over the entire grid surface ensuring all grooves |
|
|
and corners are covered. Do not use salted fats such as butter or margarine. Pre-heat your grill for 15 minutes, |
|
|
then place the seasoned cooking grids in the grill. Turn the burner control knobs to medium with the lid |
|
|
closed. Allow the cooking grids to heat for approximately one-half hour. Turn all the burners to the “OFF” |
|
|
position and turn the gas off at the source. Let the cooking grids stand until cool. This procedure should be |
|
|
repeated several times throughout the season, although it is not required for daily use (follow daily usage |
|
|
procedure below). |
|
|
Daily Usage: Before pre-heating, and cleaning with a brass wire grill brush, coat the entire top surface of the |
|
|
cooking grids with VEGETABLE SHORTENING. Pre-heat the grill and then brush away any unwanted residue |
|
|
with a brass wire brush. |
|
|
Stainless Steel Cooking Grids: (upgrade kit available - see replacement parts list). Stainless steel cooking grids |
|
|
are durable and corrosion resistant. They require less seasoning and maintenance than cast iron cooking grids. |
|
|
It is recommended that you follow the daily usage procedure listed above although you may find pre-heating |
|
|
and cleaning your grids with a wire brush is sufficient for your grilling needs. |
|
|
Control Panel: The control panel text is printed directly on the stainless steel and with proper maintenance |
|
|
will remain dark and legible. To clean the panel, use only warm soapy water or stainless steel cleaner available |
|
|
from your Napoleon dealer. Never apply abrasive cleaners on any stainless surfaces, especially the printed |
|
|
portion of the control panel or the printing will gradually rub off. |
|
|
Cleaning Inside The Gas Grill: Remove the cooking grids. Use a brass wire brush to clean loose debris from |
|
|
the casting sides and underneath the lid. Scrape the sear plates with a putty knife or scraper, and use a wire |
|
|
brush to remove the ash. Remove the sear plates and brush debris from the burners with the brass wire brush. |
|
|
Sweep all debris from inside the gas grill into the drip pan. |
|
|
Drip Pan: Accumulated grease is a fire hazard. Clean the drip pan frequently (every 4 – 5 uses or as often as |
|
|
required) to avoid grease buildup. Grease and excess drippings pass through to the drip pan, located beneath |
|
|
the gas grill and accumulate in the disposable grease tray below the drip pan. To access the disposable grease |
|
|
tray or to clean the drip pan, slide the drip pan free of the grill. Never line the drip pan with aluminum foil, |
|
|
sand or any other material as this could prevent the grease from flowing properly. The pan should be scraped |
|
|
out with a putty knife or scraper. Replace the disposable grease tray every 2 – 4 weeks, depending on gas grill |
|
|
usage. For supplies, see your Napoleon Gas Grill dealer. |
|
|
Cleaning The Outer Grill Surface: Do not use abrasive cleaners or steel wool on any painted, porcelain or stainless |
|
|
steel parts of your Napoleon Grill. Doing so will scratch the finish. Exterior grill surfaces should be cleaned with |
|
|
warm soapy water while the metal is still warm to the touch. To clean stainless surfaces, use a stainless steel or |
|
|
a non-abrasive cleaner. Always wipe in the direction of the grain. Over time, stainless steel parts discolor when |
|
|
heated, usually to a golden or brown hue. This discoloration is normal and does not affect the performance of |
|
|
the grill. Porcelain enamel components must be handled with additional care. The baked-on enamel finish is |
|
|
glass-like, and will chip if struck. Touch-up enamel is available from your Napoleon Grill dealer. |
|
|
|
|
|
WARNING!Hose: Check for abrasions, melting, cuts, and cracks in the hose. If any of these conditions |
|
|
exist, do not use the gas grill. Have the part replaced by your Napoleon Gas Grill dealer or qualified gas |
|
|
installer. |
|
|
|
|
|
Tube Burner: The burners are made from heavy wall 304 stainless steel, but extreme heat and a corrosive |
|
|
environment can cause surface corrosion to occur. This can be removed with a brass wire brush. |
|
|
CAUTION!Beware of Spiders. |
|
|
Spiders and insects are attracted to the smell of propane and natural gas. The burner is equipped with an |
|
|
insect screen on the air shutter, which reduces the likelihood of insects building nests inside the burner but |
|
|
does not entirely eliminate the problem. A nest or web can cause the burner to burn with a soft yellow or |
|
|
orange flame or cause a fire (flashback) at the air shutter beneath the control panel. To clean the inside of the |
|
|
burner, it must be removed from the gas grill: Remove the screw that attaches the burner to the back wall. |
|
|
Slide the burner back and upwards to remove. Cleaning: Use a flexible venturi tube brush to clean the inside |
|
|
www.napoleongrills.com
10
EN
of the burner. Shake any loose debris from the burner through the gas inlet. Check the burner ports and valve orifices for blockages. Burner ports can close over time due to cooking debris and corrosion, use an opened paperclip or the supplied port maintenance bit to clean them. Drill out blocked ports using this drill bit in a small cordless drill. The ports are easier to clean if the burner is removed from the grill, but it can also be done with the burner installed. Do not flex the drill bit when drilling the ports, as this will cause the drill bit to break. This drill is for burner ports only, not for the brass orifices (jets) which regulate the flow into the burner. Take care not to enlarge the holes. Ensure the insect screen is clean, tight, and free of any lint or other debris.
Reinstallation: Reverse the procedure to reinstall the burner. Check that the valve enters the burner when installing.
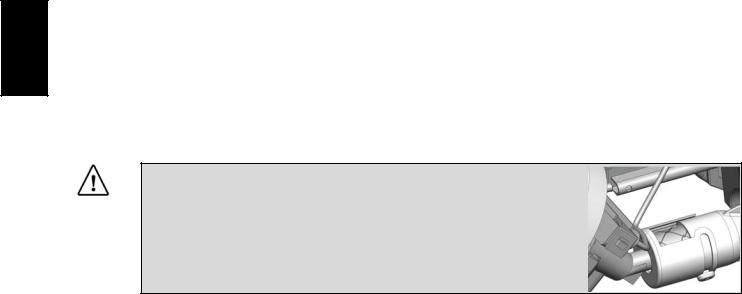
WARNING!When reinstalling the burner after cleaning it is very important that the valve/orifice enters the burner tube before lighting your gas grill. If the valve is not inside the burner tube a fire or explosion could occur.
Aluminum Castings: Clean castings periodically with warm soapy water. Aluminum will not rust, but high temperatures and weathering can cause oxidation to occur on aluminum surfaces. This appears as white spots on the castings. To refinish these areas, clean first and sand lightly with fine sandpaper. Wipe the surface to remove any residue and paint with high temperature barbecue paint. Protect surrounding areas from over-spray. Follow the manufacture’s directions for curing.
www.napoleongrills.com

Troubleshooting
Problem |
Possible Causes |
Solution |
|
|
|
Low heat / Low flame when |
For propane - improper lighting |
Ensure lighting procedure is followed carefully. |
valve turned to high. |
procedure. |
All gas grill valves must be in the off position |
|
|
when the tank valve is turned on. Turn tank |
|
|
on slowly to allow pressure to equalize. See |
|
|
lighting instructions. |
|
For natural gas - undersized supply line. |
Pipe must be sized according to installation |
|
|
code. |
|
For both gases - improper preheating. |
Preheat grill with both main burners on high |
|
|
for 10 to 15 minutes. |
|
|
|
Excessive flare-ups/uneven |
Improper preheating. |
Preheat grill with both main burners on high |
heat. |
|
for 10 to 15 minutes. |
|
Excessive grease and ash build on sear |
Clean sear plates and drip pan regularly. Do not |
|
plates and in drip pan. |
line pan with aluminum foil. Refer to cleaning |
|
|
instructions. |
|
|
|
Burners burn with yellow |
Possible spider web or other debris, or |
Thoroughly clean burner by removing. See |
flame, accompanied by the |
improper air shutter adjustment. |
general maintenance instructions. |
smell of gas. |
|
|
|
|
|
|
|
|
Humming regulator. |
Normal occurrence on hot days. |
This is not a defect. It is caused by internal |
|
|
vibrations in the regulator and does not affect |
|
|
the performance or safety of the gas grill. |
|
|
Humming regulators will not be replaced. |
|
|
|
Burners will not cross light |
Plugged ports at back of burner. |
Clean burner ports. See burner maintenance |
each other. |
|
instructions. |
|
|
|
“Paint” appears to be |
Grease build-up on inside surfaces. |
This is not a defect. The finish on the lid and |
peeling inside lid or hood. |
|
hood is porcelain, and will not peel. The |
|
|
peeling is caused by hardened grease, which |
|
|
dries into paint-like shards, that flake off. |
|
|
Regular cleaning will prevent this. See cleaning |
|
|
instructions. |
|
|
|
11
EN
www.napoleongrills.com

12
EN
KEEP YOUR RECEIPT AS PROOF OF PURCHASE TO VALIDATE YOUR WARRANTY.
Ordering Replacement Parts
Warranty Information
MODEL:
DATE OF PURCHASE:
SERIAL NUMBER:
(Record information here for easy reference)
Before contacting the Customer Care Department, check the NAC Website for more extensive cleaning, maintenance, troubleshooting and parts replacement instructions at www.napoleongrills.com. Contact the factory directly for replacement parts and warranty claims. Our Customer Care Department is available between 9 AM and 5 PM (Eastern Standard Time) at 1-866-820-8686 or fax at 1-705-727-4282. To process a claim, we must be provided with the following information:
1.Model and serial number of the unit.
2.Part number and description.
3.A concise description of the problem (‘broken’ is not sufficient).
4.Proof of purchase (photocopy of the invoice).
In some cases the Customer Care Representative could request to have the parts returned to the factory for inspection before providing replacement parts. These parts must be shipped prepaid to the attention of the Customer Care Department with the following information enclosed:
1.Model and serial number of the unit.
2.A concise description of the problem (‘broken’ is not sufficient).
3.Proof of purchase (photocopy of the invoice).
4.Return Authorization Number - provided by the Customer Care Representative.
Before contacting customer care, please note that the following items are not covered by the warranty:
•Costs for transportation, brokerage or export duties.
•Labor costs for removal and reinstallation.
•Costs for service calls to diagnose problems.
•Discoloration of stainless steel parts.
•Part failure due to lack of cleaning and maintenance, or use of improper cleaners (oven cleaner).
www.napoleongrills.com
|
13 |
|
|
|
|
|
|
EN |
CAUTION!During unpacking and assembly we recommended you wear work gloves and safety glasses |
|
|
for your protection. Although we make every effort to make the assembly process as problem free and |
|
|
safe as possible, it is characteristic of fabricated steel parts that the edges and corners might be sharp and |
|
|
could cause cuts if handled incorrectly. |
|
|
|
|
|
|
|
|
Getting Started
1.Remove all cart panels, hardware, and grill head from carton. Raise lid and remove any components packed inside. Use the parts list to ensure all necessary parts are included.
2.Do not destroy packaging until the grill has been fully assembled and operates to your satisfaction.
3.Assemble the grill where it is to be used, lay down cardboard or a towel to protect parts from being lost or damaged while assembling.
4.Most stainless steel parts are supplied with a protective plastic coating that must be removed prior to using grill.
5.Follow all instructions in the order that they are laid out in this manual.
6.Two people are required to lift the grill head onto the assembled cart.
If you have any questions about assembly or grill operation, or if there are damaged or missing parts please call our Customer Care Department at 1-866-820-8686 between 9 AM and 5 PM (Eastern Standard Time).
TOOLS REQUIRED FOR ASSEMBLY (tools not included)
3/8“ (10mm) |
Flat and Philips |
Pliers |
Hammer |
Wrench, |
screwdrivers |
|
|
ratchet or driver |
|
|
|
www.napoleongrills.com

14
EN
FAX TO: 705 727 4282
ACCESSORIES & PARTS ORDER FORM
PLEASE PRINT CLEARLY
CONTACT NAME:______________________________________________________________________
SHIP TO :_____________________________________________________________________________
_________________________________________________________________________________________
_________________________________________________________________________________________
_________________________________________________________________________________________
TEL :_________________________________ |
FAX :______________________________ |
||
EMAIL: __________________________________________________________________ |
|||
VISA OR MASTERCARD # :_______________________________________ EXPIRY DATE: _____________ |
|||
SIGNATURE:_____________________________________________________________________________ |
|||
|
|
|
|
QUANTITY |
PART NUMBER |
|
DESCRIPTION |
|
|
|
|
|
|
|
|
|
|
|
|
|
|
|
|
|
|
|
|
|
|
|
|
|
|
|
|
TAXES MAY APPLY
SHIPPING EXTRA
www.napoleongrills.com
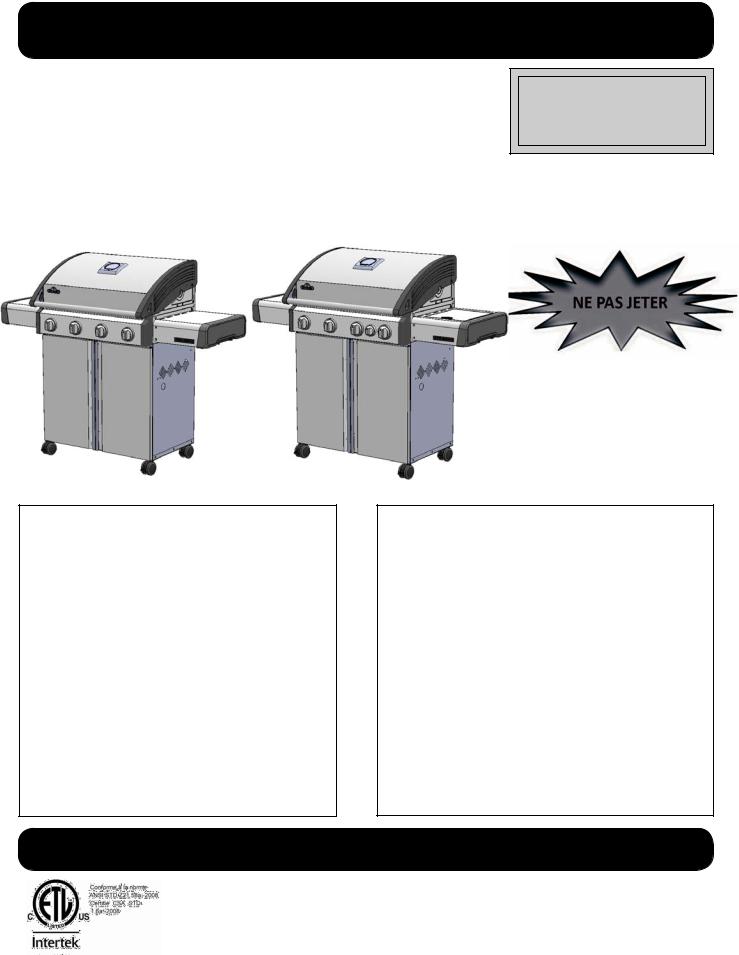
Ce gril doit être utilisé uniquement à l’extérieur, dans un endroit bien aéré et ne doit jamais être utilisé à l’intérieur d’un bâtiment, d’un garage, un gazebo, une véranda avec paramoustique, ou de tout autre endroit fermé.
APPOSEZ LÉTIQUETTE DU NUMERO DE SERIE DU CARTON
|
|
|
|
|
NO de série |
|
|||
XXXXXX000000 |
FR |
|||
NO DE MODÈLE |
||||
|
||||
|
|
|
|
|
 DANGER
SI VOUS DÉTECTEZ UNE ODEUR DE GAZ :
•Fermez l’alimentation en gaz à l’appareil.
•Éteignez toute flamme nue.
•Ouvrez le couvercle.
•Si l’odeur persiste, éloignez-vous de l’appareil et appelez immédiatement votre fournisseur de gaz ou le service des incendies.
495, 495SB
 AVERTISSEMENT
Ne tentez pas d’allumer cet appareil avant d’avoir lu la section “INSTRUCTIONS D’ALLUMAGE” de ce manuel.
Pour votre sécurité n’entreposez pas et n’utilisez pas d’essence ou autres liquides et vapeurs inflammables à proximité de cet ou tout autre appareil. Une bonbonne de propane de propane non branchée ne devrait pas être entreposée à proximité de cet ou de
tout autre appareil. Si ces instructions ne sont pas suivies à la lettre, un feu ou une explosion pourraient s’ensuivre, causant des dommages à la propriété, des blessures corporelles ou des pertes de vie.
Note à l’installateur : Laissez ces instructions au propriétaire du gril pour consultation ultérieure.
|
NapoleonApplianceCorp., |
|
214BayviewDr.,Barrie,Ontario,CanadaL4N4Y8 Phone:1-866-820-8686 |
3194571 |
Fax:(705)725-2564 email: wecare@napoleonproducts.com web site: www.napoleongrills.com |
Z415-0011 DEC 06/12
 Loading...