


 Loading...
FaxFinder®
V.34 Fax Servers
Models: FF120
FF220
FF420
FF820
Administrator User Guide

FaxFinder® Administrator User Guide
S000405E, Version E
Models: FF120, FF220, FF420, and FF820
Copyright © 2008, by Multi-Tech Systems, Inc.
This publication may not be reproduced, in whole or in part, without prior expressed written permission from Multi-Tech Systems, Inc. All rights reserved.
Multi-Tech Systems, Inc. makes no representations or warranties with respect to the contents hereof and specifically disclaims any implied warranties of merchantability or fitness for any particular purpose. Furthermore, Multi-Tech Systems, Inc. reserves the right to revise this publication and to make changes from time to time in the content hereof without obligation of Multi-Tech Systems, Inc. to notify any person or organization of such revisions or changes. Check Multi-Tech’s web site for current versions of our product documentation.
Revisions |
|
|
Level |
Date |
Description |
A05/05/06 Initial release of FF-420/820.
B03/02/07 Initial release. Update of FF420/820 and addition of FF120/220.
C04/04/07 Revise warranty statement and update tech support contact list.
D11/20/07 Removed status LED references, updated tech support contact list, and
added slotted hole mounting drawing.
E 09/15/08 Update Server changes for software & firmware. Added status LED references back in.
Patents
This device covered by the following patents:
6,031,867; 6,012,113; 6,009,082; 5,905,794; 5,864,560; 5,815,567; 5,815,503; 5,812,534; 5,809,068; 5,790,532; 5,764,628; 5,764,627; 5,754,589; D394,250; 5,724,356; 5,673,268; 5,673,257; 5,644,594; 5,628,030; 5,619,508; 5,617,423; 5,600,649; 5,592,586; 5,577,041; 5,574,725; D374,222; 5,559,793; 5,546,448; 5,546,395; 5,535,204; 5,500,859; 5,471,470; 5,463,616; 5,453,986; 5,452,289; 5,450,425; D361,764; D355,658; D355,653; D353,598; D353,144; 5,355,365; 5,309,562; 5,301,274, 6,219,708 Other patents pending.
Trademarks
Multi-Tech Registered Trademarks: FaxFinder, Multi-Tech, and the Multi-Tech logo.
All other products and technologies are the trademarks or registered trademarks of their respective holders.
World Headquarters
Multi-Tech Systems, Inc. 2205 Woodale Drive
Mounds View, Minnesota 55112 Phone: 763-785-3500 or 800-328-9717 Fax: 763-785-9874
Technical Support |
|
|
Country |
By Email |
By Phone |
Europe, Middle East, Africa: |
support@multitech.co.uk |
(44) 118 959 7774 |
U.S., Canada, all others: |
support@multitech.com |
(800) 972-2439 or (763) 717-5863 |
Internet Address: http://www.multitech.com

CONTENTS |
|
CHAPTER 1 – PRODUCT DESCRIPTION & SPECIFICATIONS ............................................................... |
4 |
Product Description ................................................................................................................................... |
4 |
Safety Warnings ........................................................................................................................................ |
6 |
Technical Specifications ............................................................................................................................ |
7 |
CHAPTER 2 – INSTALLATION ................................................................................................................... |
9 |
Mechanical Mounting............................................................................................................................... |
10 |
Quick Hookup .......................................................................................................................................... |
11 |
Installation Overview ............................................................................................................................... |
14 |
CHAPTER 3 – FAXFINDER SERVER SOFTWARE SCREENS............................................................... |
42 |
Home Screen........................................................................................................................................... |
42 |
Login Screen ........................................................................................................................................... |
43 |
Fax Log Screen ....................................................................................................................................... |
44 |
Current Status Screen ............................................................................................................................. |
47 |
Administration Screen ............................................................................................................................. |
50 |
Phone Book Screen................................................................................................................................. |
54 |
Modem Configuration Screen.................................................................................................................. |
56 |
Password Administration Screen ............................................................................................................ |
60 |
Shared Resources Screen ...................................................................................................................... |
61 |
CHAPTER 4 – FAXFINDER CLIENT SOFTWARE CONFIGURATION.................................................... |
62 |
Establishing Client User’s ID in System .................................................................................................. |
62 |
Associating Client with Specific FaxFinder Unit(s).................................................................................. |
63 |
Disassociating the Client from a Specific FaxFinder Unit ....................................................................... |
65 |
Disabling and Re-Enabling a Client’s FaxFinder Service........................................................................ |
66 |
FaxFinder Fax Client Software Menu Command Definitions .................................................................. |
67 |
CHAPTER 5 – FAXFINDER CLIENT SOFTWARE OPERATION............................................................. |
79 |
Sending a Fax ......................................................................................................................................... |
80 |
Scheduling Fax Transmissions ............................................................................................................... |
86 |
Putting Pending Faxes on Hold and Removing the Hold ........................................................................ |
88 |
Canceling a Fax....................................................................................................................................... |
91 |
Setting Fax Retry Number and Interval ................................................................................................... |
92 |
Sending One Fax Containing Multiple Documents ................................................................................. |
93 |
Forwarding a Fax..................................................................................................................................... |
95 |
Receiving a Fax....................................................................................................................................... |
96 |
Using the Multi-Tech Tiff Viewer ............................................................................................................. |
99 |
Setting up Your Address Book Manually............................................................................................... |
105 |
Setting up Your Address Book by Synchronizing with Outlook............................................................. |
108 |
Setting Up Address Books with CSV Files............................................................................................ |
111 |
Cover Pages.......................................................................................................................................... |
125 |
CHAPTER 6 – SERVER OPERATION .................................................................................................... |
147 |
Fax Log Email Messages ...................................................................................................................... |
147 |
Dealing with Failed Fax Reports ........................................................................................................... |
149 |
CHAPTER 7 – DEVICE MANAGER OPERATION .................................................................................. |
150 |
Access to Commands............................................................................................................................ |
152 |
Firmware Updating Process .................................................................................................................. |
175 |
APPENDIX A – TROUBLESHOOTING ................................................................................................... |
183 |
APPENDIX B – REGULATORY INFORMATION .................................................................................... |
188 |
APPENDIX C – WARRANTY, SERVICE, & REPAIR.............................................................................. |
193 |
APPENDIX D – EXAMPLE SYSTEMS .................................................................................................... |
195 |
Multi-Tech Systems, Inc. |
FaxFinder Admin User Guide |
3 |

Chapter 1 – Product Description &
Specifications
Product Description
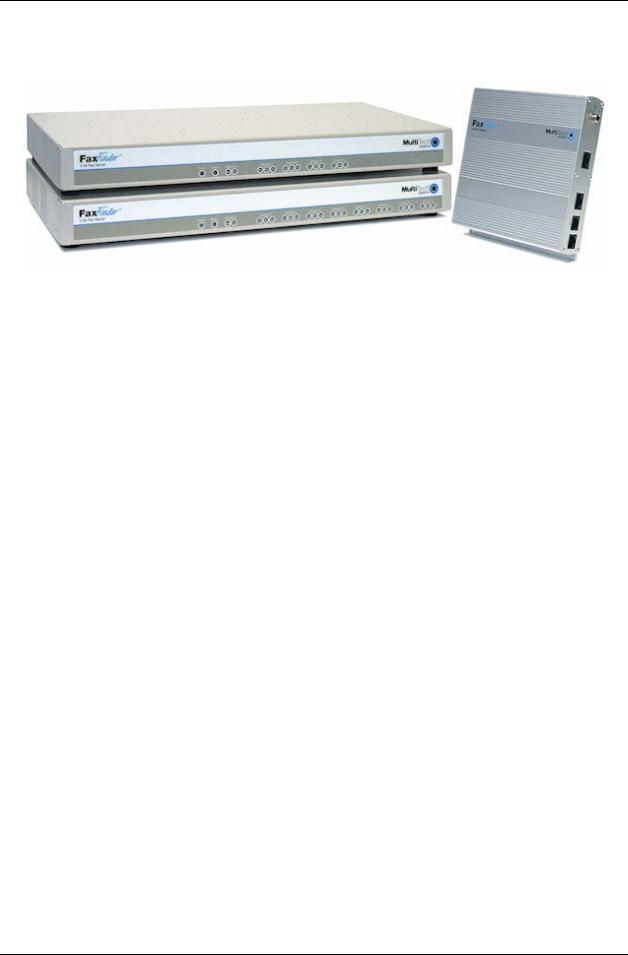
This manual describes four Multi-Tech V.34 fax servers: the FF120 1-Port FaxFinder unit, the FF220 2- Port FaxFinder unit, the FF420 4-Port FaxFinder unit, and the FF820 8-Port FaxFinder unit. All four of these units are complete, economical, easy-to-use network fax servers. With any of these units, you can receive faxes as emails and send faxes from any application that can print. The FF120/220/420/820 FaxFinder operates in two modes: Automated Routing Mode and Manual Routing Mode.1 The mode is set in the Routing field of the Modem Configuration screen of the FaxFinder Server software.
Automated Routing Mode. When connected to a station port on a PBX, the FaxFinder functions as a network fax server with two-way fax service. Multiple PBX extension numbers are dedicated to incoming fax traffic which is routed to the FaxFinder. (Only one station port is needed. Faxes transmitted to any of the PBX’s fax-dedicated extension numbers all go to the station port serving the FF120/220/420/820.) The FaxFinder converts the incoming faxes into graphic files that are sent as email attachments to fax recipients on or beyond the Ethernet network. (Because faxes are delivered in the form of email, the fax recipient could be at any reach-able email address. So, for example, a sales person could receive faxes while traveling by using a regular company fax number and picking up the email messages remotely.) Each fax-dedicated PBX extension number is associated with a particular email address.
Receiving. Fax clients receive faxes in the form of email attachments. From the remote fax sender’s perspective, PBX extension phone numbers are functionally identical to ordinary fax phone lines.
Sending. Fax clients on the network can send faxes directly from their PCs using any application program that can print. The application program must be set so that the FaxFinder itself is its printing destination. In response to the ‘Print’ command, the FaxFinder turns the ‘print file’ image into a fax. The FaxFinder transmits the fax to the public phone system (PSTN) or to another PBX extension.
Manual Routing Mode. When connected directly to a regular POTS line (or to a PBX without ‘convergent’ routing capability), the FF120/220/420/820 functions as an outgoing fax server with incoming fax service going through one or more attendants. Each of the FaxFinder’s modems has a separate fax number and each modem can have a separate attendant that receives the fax messages as emails and then has the duty to direct them to their intended recipients. (Note that one attendant could serve more than one of the FaxFinder’s modems – some or all of the modems.) For example, an FF820 FaxFinder might be used in a company with several departments that regularly receive faxes but in differing volumes. Suppose the sales department and the purchasing department receive many faxes and the shipping and service departments receive much less fax traffic. In that case, three of the FF820’s modems might direct faxes to a single attendant in the sales department, and an additional three modems might direct faxes to the purchasing department; one modem might be directed to an attendant for the shipping department and another to an attendant for the service department.
Outgoing faxes work the same in Manual Routing Mode as in Automated Routing Mode. That is, to send a fax, the user prints to the FaxFinder from an application program. However, all incoming faxes go to a single email recipient, the attendant, who then sends them on, as needed, to the intended recipient.
Being devices of multiple ports, the FF220/420/820 units can send and receive faxes simultaneously.
Mixed Mode. It is also possible to operate a FaxFinder unit in a mixed mode such that some of its modems are connected to PBX extensions while other of its modems are connected to POTS lines.
1 For FF120/220/420/820 compatibility in Automated Routing Mode, the PBX must support ‘convergent routing,’ that is, the routing of multiple extension numbers to a single station port. PBXs lacking this functionality can still be used with the FaxFinder in Manual Routing Mode.
Multi-Tech Systems, Inc. |
FaxFinder Admin User Guide |
4 |
Chapter 1: Product Description and Specifications
The FF420 and FF820 are both housed in chassis of the same size and shape. Similarly, the FF120 and FF220 are both housed in a chassis of the same size and shape, a chassis smaller and differently shaped than that for the FF420/820.
The FaxFinder product consists of the hardware unit, server software pre-installed on the hardware unit, server management software (the Device Manager program), and a suite of client software programs (the main fax-sending client program, a viewer for TIFF files, and a program for creating and modifying fax cover pages).
Prerequisite: Determining PBX Compatibility &
Configuration
To operate the FF120/220/420/820 FaxFinder system in conjunction with a PBX (“Automated Routing Mode”), that PBX must be able to route incoming calls to many PBX extension numbers to a single PBX station port. This multiple-extension-to-single-port capacity allows multiple PBX users to have their own unique directory numbers for receiving faxes.
If you are using the FF120/220/420/820 in conjunction with a PBX, be sure that the PBX has this multiple- extension-to-single-port functionality and that it is activated. PBXs lacking this functionality can still be used with the FaxFinder in Manual Routing Mode.
Multi-Tech Systems, Inc. |
FaxFinder Admin User Guide |
5 |

Chapter 1: Product Description and Specifications
Safety Warnings
Telecom
1.Never install telephone wiring during a lightning storm.
2.This product must be disconnected from power source and telephone network interface when servicing.
3.This product is to be used with UL and cUL listed computers.
4.Never touch uninsulated telephone wires or terminals unless the telephone line has been disconnected at the network interface.
5.Use caution when installing or modifying telephone lines.
6.Avoid using a telephone (other than a cordless type) during an electrical storm. There may be a remote risk of electrical shock from lightning.
7.Do not use a telephone in the vicinity of a gas leak – not even to report a gas leak.
8.To reduce the risk of fire, use only 26 AWG or larger telecommunication line cord.
9.Never install a telephone jack in wet locations unless the jack is specifically designed for wet locations.
Lithium Battery Caution
•A lithium battery located within product provides backup power for the timekeeping capability. The battery has an estimated life expectancy of ten years.
•When the battery starts to weaken, the date and time may be incorrect. If the battery fails, the board must be sent back to Multi-Tech Systems for battery replacement.
Warning! There is danger of explosion if the battery is incorrectly replaced!
Ethernet Ports Caution
Caution: The Ethernet ports and command ports are not designed to be connected to a Public Telecommunication Network.
Multi-Tech Systems, Inc. |
FaxFinder Admin User Guide |
6 |

Chapter 1: Product Description and Specifications
Technical Specifications
The FaxFinder models meet the following specifications:
|
FF120/220 |
FF420/820 |
|
|
|
Connectors |
RJ11 Line Jacks (1 or 2), Console |
RJ11-Line Jacks (4 or 8), RJ45 - |
|
Serial Port for RJ45-to-RS232 |
Ethernet Jack |
|
configuration/debug connection, |
|
|
Ethernet RJ48 connector, and |
|
|
Locking Screw on the Power Jack. |
|
|
|
|
Size |
6.4” W x 6.0” L x 1.2” H |
17.3” W x 1.7” H x 8.4” L |
|
16.3 cm x 15.2 cm x 3.0 cm |
43.9 cm x 4.3 cm x 21.3 cm |
|
|
|
Weight |
20.5 oz. (750 g) |
7.4 lbs. (3.4 kg) |
|
|
|
Power Consumption |
Typical: 4.05 W (0.450A@ 9V) |
Typical 3.75W (0.750A @5v DC) |
|
Maximum: 5.31W (0.590A @9V) |
Maximum 7.7W (1.4A @5.5v DC) |
|
100 -240 VAC, 1.2 – 0.6A, |
|
|
50/60Hz |
|
|
|
|
Operating |
32°-120° F (0°-50° C) |
32°-120° F (0°-50° C) |
Environment |
relative humidity 20 to 90% |
relative humidity 20 to 90% |
|
noncondensing |
noncondensing |
|
|
|
Storage Temp. |
-10° to +85° C |
-10° to +85° C |
|
|
|
EMC Approvals |
FCC Part 15 Class A, Canada |
FCC Part 15 Class A, Canada |
|
Class A, EN 55022:1998 Class A, |
Class A, EN 55022:1998 Class A, |
|
EN55024: 1998 |
EN55024: 1998 |
|
|
|
Safety Approvals |
cUL/UL60950-1, EN60950-1, |
cUL/UL60950-1, EN60950-1, |
|
AS/NZS60950:2000 |
AS/NZS60950:2000 |
Telecom Approvals |
FCC Part 68, CS03 |
FCC Part 68, CS03 |
|
|
|
Data Modem Specs |
ITU-T V.92/V.90/56K (-92 build |
ITU-T V.92/V.90/56K (-92 build |
|
option), V.34/ |
option), V.34/ |
|
33.6K V.32bis/14.4K V.22bis/2400 |
33.6K V.32bis/14.4K V.22bis/2400 |
|
baud |
baud |
|
V.22, V.23, & V.21; Bell 212A & Bell |
V.22, V.23, & V.21; Bell 212A & Bell |
|
103 |
103 |
|
V.44 Error Correction |
V.44 Error Correction |
|
V.42 LAPM, MNP 2-4 Error Correction |
V.42 LAPM, MNP 2-4 Error Correction |
|
V.42bis & MNP Class 5 data |
V.42bis & MNP Class 5 data |
|
compression |
compression |
Fax Modem Specs |
ITU-T V.34 (MT5634SMI) |
ITU-T V.34 (MT5634SMI) |
|
ITU-T V.17, V.29, V.27 & V.21 Ch. 2 |
ITU-T V.17, V.29, V.27 & V.21 Ch. 2 |
|
Telephony/TAM |
Telephony/TAM |
|
V.253 commands |
V.253 commands |
|
2-bit & 4-bit ADPCM, 8-bit linear PCM |
2-bit & 4-bit ADPCM, 8-bit linear PCM |
|
& 4-bit IMA coding |
& 4-bit IMA coding |
|
8kHz sample rate |
8kHz sample rate |
|
Concurrent DTMF, ring, & U.S. Caller |
Concurrent DTMF, ring, & U.S. Caller |
|
ID detection |
ID detection |
Multi-Tech Systems, Inc. |
FaxFinder Admin User Guide |
7 |

Chapter 1: Product Description and Specifications
Related Manuals
Each FF-120/220/420/820 FaxFinder unit comes with 4 manuals that serve different purposes (see table below). In addition, several FaxFinder Reference Guides are available on the Multi-Tech web site and they describe use of a FaxFinder in conjunction with PBXs of various brands and models.
Title |
Format |
Purpose |
|
|
|
Administrator User Guide |
on CD |
Presents comprehensive info about FaxFinder |
(this manual) |
|
unit, server software, & client software. |
|
|
Includes Quick Start Instructions chapter. |
|
|
FaxFinder Administrator should use this |
|
|
chapter to configure the FaxFinder unit, the |
|
|
server software, and software for each client. |
|
|
|
Client User Guide |
on CD |
Comprehensive user info for FaxFinder clients. |
|
|
|
Client Operation Primer |
on CD |
Brief instructions for sending and receiving |
|
|
faxes via the FaxFinder system. Multi-Tech |
|
|
recommends that you give a copy of this |
|
|
document to each client user. |
|
|
|
Cabling Guide |
in print |
FaxFinder Administrator should use this |
|
|
manual to make cabling connections for the |
|
|
FaxFinder unit. |
FaxFinder Reference Guides |
on MTS |
FaxFinder Administrator should use these |
|
web site |
manuals to configure the FaxFinder unit in |
|
|
conjunction with the PBX specified in each |
|
|
guide. |
|
|
|
Multi-Tech manuals and other resources are available on the Multi-Tech Web site at http://www.multitech.com.
Distributing Documents to Client Users
The person acting as FaxFinder Administrator should see to it that client users get copies of the Client Operation Primer (the file name is S000407E.PDF) and the Client User Guide (the file name is S000406E.PDF). You could distribute this information either by printing out and/or photocopying hard copies of these manuals for client users or else by supplying them with the electronic PDF files for these documents either as email attachments or via some memory storage medium (CD, diskette, etc.). Client users will need this information to take advantage of the capabilities of the FaxFinder system.
Multi-Tech Systems, Inc. |
FaxFinder Admin User Guide |
8 |

Chapter 2: Installation
Chapter 2 – Installation
Introduction
This chapter shows you how to set up your Multi-Tech Model FF120/220/420/820 FaxFinder.
The setup process includes both cabling of the FaxFinder unit and configuration of the FaxFinder server software. The FaxFinder server software resides on the FaxFinder unit and does not need to be installed.
PBX Compatibility
Before proceeding with cabling or software installation, you should confirm that the telephony equipment with which you intend to use the FaxFinder is compatible with it. Although the FaxFinder can simply be connected to an ordinary phone subscriber line (a POTS line), it is often connected to a PBX. One of the convenient features of the FaxFinder is its ability to deliver incoming faxes as email messages directly to users on an Ethernet network. This direct service depends on the PBX’s ability to route multiple phone extension numbers to a single station port. If the PBX lacks that ability, incoming faxes must be sent to users through an attendant. If you will be connecting the FaxFinder to a PBX, it is important to understand the PBX’s capabilities in this regard beforehand. The following section explains why the capabilities of your PBX will determine how you set up the FaxFinder unit to work with it.
We Supply
FF120/220 |
|
FF420/820 |
• A FaxFinder (FF120 or FF220) with factory- |
• |
A FaxFinder (FF420 or FF820) with factory- |
installed software |
|
installed software |
• One universal power supply with power |
• One universal power supply with power |
|
cord |
|
cord |
• Common telephone cables (one for each |
• Common telephone cables (one for each |
|
port; RJ-11 at both ends) |
|
port; |
• A product CD that contains: (a) a software |
|
RJ-11 at both ends) |
package for client PCs, (b) a system |
• A product CD that contains: (a) a software |
|
management software package for the |
|
package for client PCs, (b) a system |
administrator’s PC, and (c) additional |
|
management software package for the |
documentation for both administrators and |
|
administrator’s PC, and (c) additional |
client/users |
|
documentation for both administrators and |
• A printed Cabling Guide |
|
client/users |
|
• A set of four self-adhesive plastic feet |
|
|
• Rack-mounting fasteners |
|
|
• A printed Cabling Guide |
|
You Supply
•A nearby AC power outlet and a connection to your Ethernet LAN
•A telephony connection: either - a PBX station port
or - a common subscriber (POTS) phone line jack
•An admin PC (with web browser) to configure the FaxFinder
•Client PCs (Windows 2000/XP/2003/Vista) with email and printing applications. Network clients receive faxes in their email inboxes. They will send faxes by printing to the FaxFinder server from application programs.
Multi-Tech Systems, Inc. |
FaxFinder Admin User Guide |
9 |

Chapter 2: Installation
Mechanical Mounting
The FF120/220 FaxFinder comes with chassis screw holes to facilitate attaching it to a flat surface.
The FF420/820 are table-top units that can also be rack-mounted. Rack-mounting hardware is included.
Multi-Tech Systems, Inc. |
FaxFinder Admin User Guide |
10 |
Chapter 2: Installation
Quick Hookup
FF120/220
FaxFinder FF-120/220 Hookup
|
|
|
|
|
|
|
|
|
|
|
|
|
|
|
Cabling to computer running |
||
Cabling to telco POTS lines |
|
|
terminal software. |
|||||
|
|
|||||||
|
For debugging purposes only. |
|||||||
or PBX station ports. |
|
Connector at FaxFinder: RJ-45. |
||||||
|
|
|
|
|
|
Connector at computer: DB-9. |
||
|
|
|
|
|
|
|||
|
|
|
|
|
|
|
|
|
Power Cable
Receptacle
LINE 1 |
LINE 2 |
LAN 1 |
CONSOLE |
|
|
|
RESET |
|
|
|
|
|
|
|
|
|
|
|
|
|
|
|
|
Cabling to your IP network. |
|
|
|
Reset |
|
|
|
|||||||||||||||||||||||||||||
|
|
Line 2 appears |
|
|||||||||||||||||||||||||||||||||||||||||||||||||
|
|
|
Switch |
|
|
|
||||||||||||||||||||||||||||||||||||||||||||||
|
|
|
|
|
RJ-45 connector. |
|
|
|
||||||||||||||||||||||||||||||||||||||||||||
|
|
on FF220 only. |
|
|
|
|
|
|
|
|
|
|
|
|
|
|
|
|
||||||||||||||||||||||||||||||||||
|
|
|
|
|
|
|
|
|
|
|
|
|
|
|
|
|
|
|||||||||||||||||||||||||||||||||||
|
|
|
|
|
|
|
|
|
|
|
|
|
|
|
|
|
|
|
|
|
|
|
|
|
|
|
|
|
|
|
|
|
|
|
|
|
|
|
|
|
|
|
|
|
|
|
|
|
|
|
|
|
|
|
|
|
|
|
|
|
|
|
|
|
|
|
|
|
|
|
|
|
|
|
|
|
|
|
|
|
|
|
|
|
|
|
|
|
|
|
|
|
|
|
|
|
|
|
|
|
|
|
|
|
|
|
|
|
|
|
|
|
|
|
|
|
|
|
|
|
|
|
|
|
|
|
|
|
|
|
|
|
|
|
|
|
|
|
|
|
|
|
|
|
|
|
|
|
|
|
|
|
|
|
|
|
|
|
FF420/820
FaxFinder Hookup: FF-420/820
Cabling to telco POTS lines or PBX station ports. Ports 5-8 appear on FF820 only.
Cabling to computer running terminal software.
For debugging purposes only. Connector at FaxFinder: RJ-45. Connector at computer: DB-9.
Grounding Screw:
Connect to Earth Ground 
|
|
1 |
|
2 |
|
|
|
3 |
|
|
|
|
4 |
|
5 |
|
|
|
|
6 |
|
|
|
|
7 |
|
|
|
8 |
|
|
|
ETHERNET |
|
COMMAND |
|
|
|
|
|
|
|
|
|
|
|
|
|
|
|
|
|
|
|
|
|
|
|
|
|
|
|
|
|
|||||||||||||||||||||||||||||||||||||||||||||
|
|
|
|
|
|
|
|
|
|
|
|
|
|
|
|
|
|
|
|
|
|
|
|
|
|
|
|
|
|
|
|
|
|
|
|
|
|
|
|
|
|
|
|
|
|
|
|
|
|
|
|
|
|
|
|||||||||||||||||||||||||||||||||||||||||||||||||||||||
|
|
|
|
|
|
|
|
|
|
|
|
|
|
|
|
|
|
|
|
|
|
|
|
|
|
|
|
|
|
|
|
|
|
|
|
|
|
|
|
|
|
|
|
|
|
|
|
|
|
|
|
|
|
|
|
|
|
|
|
|
|
|
|
|
|
|
|
|
|
|
|
|
|
|
|
|
|
|
|
|
|
|
|
|
|
|
|
|
|
|
|
|
|
|
|
|
|
|
|
||||||||||
|
|
|
|
|
|
|
|
|
|
|
|
|
|
|
|
|
|
|
|
|
|
|
|
|
|
|
|
|
|
|
|
|
|
|
|
|
|
|
|
|
|
|
|
|
|
|
|
|
|
|
|
|
|
|
|
|
|
|
|
|
|
|
|
|
|
|
|
|
|
|
|
|
|
|
|
|
|
|
|
|
|
|
|
|
|
|
|
|
|
|
|
|
|
|
|
|
|
|
|
|
|
|
|
|
|
|
|
|
|
|
|
|
|
|
|
|
|
|
|
|
|
|
|
|
|
|
|
|
|
|
|
|
|
|
|
|
|
|
|
|
|
|
|
|
|
|
|
|
|
|
|
|
|
|
|
|
|
|
|
|
|
|
|
|
|
|
|
|
|
|
|
|
|
|
|
|
|
|
|
|
|
|
|
|
|
|
|
|
|
|
|
|
|
|
|
|
|
|
|
|
|
|
|
|
|
|
|
|
|
|
|
|
|
|
|
|
|
|
|
Cabling to telco POTS lines or PBX station ports.
Ports 1-4.
RJ-11 Connectors.
|
|
|
|
|
|
|
|
|
|
|
|
|
|
|
|
|
|
|
|
|
|
|
|
|
|
|
|
|
|
|
|
|
On/Off |
||||||
|
|
|
|
|
|
|
|
|
|
|
|
|
|
|
|
|
|
|
|
|
|
|
|
|
|
|
|
|
|
|
|
|
Switch |
||||||
Cabling to your IP network. |
|||||||||||||||||||||||||||||||||||||||
|
|
|
|
|
|
|
|
|
|
|
|
|
|
||||||||||||||||||||||||||
|
|
|
|
|
|
|
|
|
|
|
|
|
|
|
|
|
|
|
|
||||||||||||||||||||
|
|
|
RJ-45 connector. |
|
|
|
|
|
|
Power Cable |
|||||||||||||||||||||||||||||
|
|||||||||||||||||||||||||||||||||||||||
|
|
|
|
|
|
|
|
|
|
|
|
|
|
|
|
|
|
|
|
|
|
|
|
|
|
Receptacle |
|||||||||||||
|
|
|
|
|
|
|
|
|
|
|
|
|
|
|
|
|
|
|
|
||||||||||||||||||||
|
|
|
|
|
|
|
|
|
|
|
|
|
|
|
|
|
|
|
|
|
|
|
|
|
|
|
|
|
|
|
|
|
|
|
|
|
|
|
|
|
|
|
|
|
|
|
|
|
|
|
|
|
|
|
|
|
|
|
|
|
|
|
|
|
|
|
|
|
|
|
|
|
|
|
|
|
|
|
|
|
|
|
|
|
|
|
|
|
|
|
|
Multi-Tech Systems, Inc. |
|
FaxFinder Admin User Guide |
11 |
||||||||||||||||||||||
Chapter 2: Installation
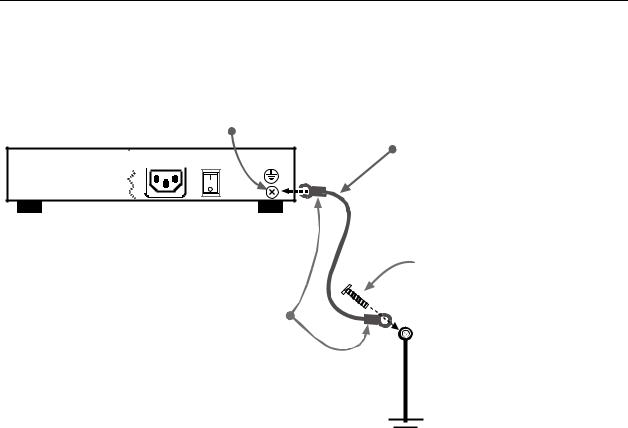
Earth Grounding for FF420/820
Product
Ground
Screw
FF-420/820 


Unit
Ground Wire: Size 18AWG or thicker
Grounding connectors must be secured permanently to
product ground screw and earth ground screw.
 Earth Ground Screw:
Connected to
Permanent Earth Ground
of Building’s
Electrical System
GND
|
|
|
|
|
Multi-Tech Systems, Inc. |
FaxFinder Admin User Guide |
12 |
||
Chapter 2: Installation
FaxFinder Operating Modes
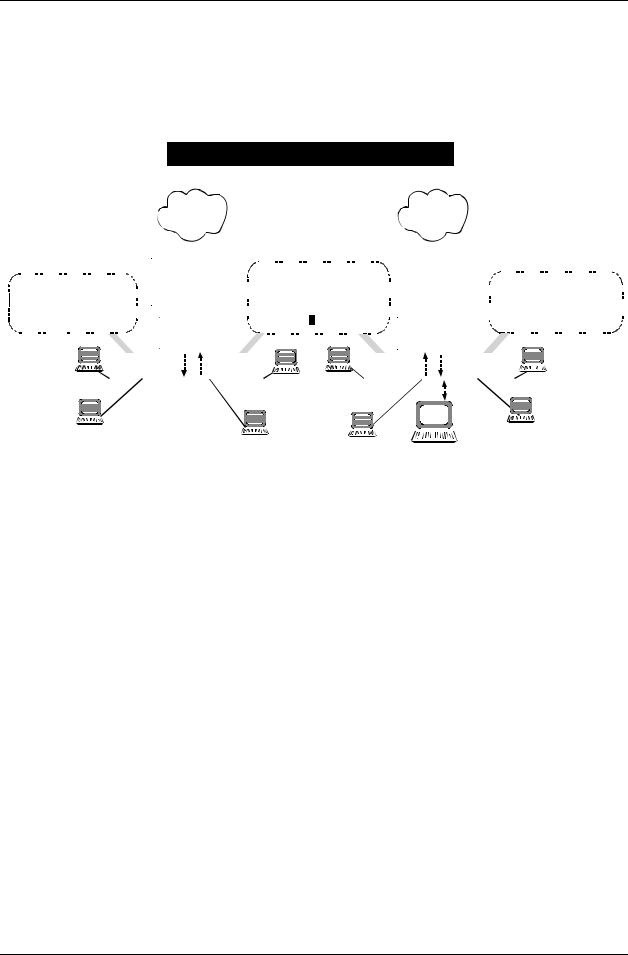
The FaxFinder Fax Server provides two-way fax service to PC client users on an Ethernet network. For outgoing service, users send faxes by using the Print command of any application program and selecting the FaxFinder as the target Printer. For incoming fax service, the FaxFinder converts the incoming faxes into graphic files that are sent as email attachments to fax recipients on the Ethernet network.
FaxFinder Operating Modes
|
|
|
|
|
|
Automated Routing Mode |
|
|
|
|
|
|
|
|
|
|
|
Manual Routing Mode |
|||||||||||||||||||||||||||||||||||||||||||||||||||||||||||||||||||||||||||
|
|
|
|
|
|
|
|
|
|
|
|
|
|
|
|
|
|
|
|
|
|
|
|
|
PSTN |
|
|
|
|
|
|
|
|
|
|
|
|
|
|
|
|
|
|
|
|
|
|
|
|
|
|
|
|
|
|
|
|
|
|
PSTN |
|
|
|
|
|
|
|
|
|
|
|
|
|
|
|
|
|
|
|
|
|||||||||||||
|
|
|
|
|
|
|
|
|
|
|
|
|
|
|
|
|
|
|
|
|
|
|
|
|
|
|
|
|
|
|
|
|
|
|
|
|
|
|
|
|
|
|
|
|
|
|
|
|
|
|
|
|
|
|
|
|
|
|
|
|
|
|
|
|
|
|
|
|
|
|
|
|
|
|
|
|
|
|
|||||||||||||||
|
|
|
|
|
|
|
|
|
|
|
|
|
|
|
|
|
|
|
|
|
|
|
|
|
|
|
|
|
|
|
|
|
|
|
|
|
|
|
|
|
|
|
|
|
|
|
|
|
|
|
|
|
|
|
|
|
|
|
|
|
|
|
|
|
|
|
|
|
|
|
|
|
|
|
|
|
|
|
|||||||||||||||
|
|
|
|
|
|
|
|
|
|
|
|
|
|
|
|
|
|
|
|
|
|
|
|
|
|
|
|
|
|
|
|
|
|
|
|
|
|
|
|
|
|
|
|
|
|
|
|
|
|
|
|
|
|
|
|
|
|
|
|
||||||||||||||||||||||||||||||||||
|
|
|
|
|
|
|
|
|
|
|
|
|
|
|
|
|
|
|
|
|
|
|
|
|
|
|
|
|
|
|
|
|
|
|
|
|
|
|
|
|
|
|
|
|
|
|
|
|
|
|
|
|
|
|
|
|
|
|
|
||||||||||||||||||||||||||||||||||
|
|
|
|
|
|
|
|
|
|
|
|
|
|
|
|
|
|
|
|
|
|
|
|
|
|
|
|
T1 Line |
|
|
|
|
|
|
|
|
|
|
|
|
|
|
|
|
|
|
|
|
|
|
|
|
|
|
|
|
|
|
|
|
|
|
|
|
|
POTS Lines |
|||||||||||||||||||||||||||
|
|
|
|
|
|
|
|
|
|
|
|
|
|
|
|
|
|
|
|
|
|
|
|
|
|
|
|
|
|
|
|
|
|
|
|
|
|
|
|
|
|
|
|
|
|
|
|
|
|
|
|
|
|
|
|
|
|
|
|
|
|
|
|
|
|||||||||||||||||||||||||||||
|
|
|
|
|
|
|
|
|
|
|
|
|
|
|
|
|
|
|
|
|
|
|
|
|
|
|
|
|
|
|
|
|
|
|
|
|
|
|
|
|
|
|
|
|
|
|
|
|
|
|
|
|
|
|
|
|
|
|
|
|
|
|
|
|
|||||||||||||||||||||||||||||
|
|
|
|
|
|
|
|
|
|
|
|
|
|
|
|
|
|
|
|
|
|
|
|
|
|
|
|
|
|
|
|
|
|
|
|
|
|
|
|
|
|
|
|
|
|
|
|
|
|
|
|
|
|
|
|
|
|
|
|
|
|
||||||||||||||||||||||||||||||||
|
|
|
|
|
|
|
|
|
|
|
|
|
|
|
|
|
|
|
|
|
|
|
|
|
|
|
|
|
|
|
|
|
|
|
|
|
|
|
|
|
|
|
|
|
|
|
|
|
|
|
|
|
|
|
|
|
|
|
|
|
|
|
|
|
|
|
|
|
|
|
|
|
|
|
|
|
|
|
|
||||||||||||||
|
|
|
|
|
|
|
|
|
|
|
|
|
|
|
|
|
|
|
|
|
|
|
|
|
PBX |
|
|
Outbound |
|
|
|
|
Faxing: |
|
|
|
|
|
|
|
|
|
|
|
|
|
|
|
|
|
|
|
|
|
|
|
|
|
|
||||||||||||||||||||||||||||||||||
|
|
|
|
|
|
|
|
|
|
|
|
|
|
|
|
|
|
|
|
|
|
|
|
|
|
|
|
|
|
|
|
|
|
|
|
|
|
|
|
|
Inbound Faxing: |
|
|||||||||||||||||||||||||||||||||||||||||||||||||||
Inbound Faxing: |
|
|
|
|
|
|
|
|
|
|
|
|
|
|
|
|
|
||||||||||||||||||||||||||||||||||||||||||||||||||||||||||||||||||||||||||||
|
|
|
Station Ports |
|
|
Users set |
|
FaxFinder |
|
|
|
|
|
|
|
|
|||||||||||||||||||||||||||||||||||||||||||||||||||||||||||||||||||||||||||||
|
|
Email attachments |
|
|
|
|
|
as printing |
|
destination |
|
|
|
|
|
|
|
Email attachments are |
|
||||||||||||||||||||||||||||||||||||||||||||||||||||||||||||||||||||||||||
|
|
|
|
|
|
|
|
|
|
|
|
|
|
|
|
||||||||||||||||||||||||||||||||||||||||||||||||||||||||||||||||||||||||||||||
|
|
|
|
|
|
|
|
|
|
|
|
|
|
|
|
|
|||||||||||||||||||||||||||||||||||||||||||||||||||||||||||||||||||||||||||||
|
|
are sent directly |
|
|
|
|
|
|
|
|
|
|
|
in application |
|
|
|
program. |
|
|
|
|
|
|
|
sent to Attendant(s) and |
|
||||||||||||||||||||||||||||||||||||||||||||||||||||||||||||||||||
|
|
to recipients. |
|
|
|
FaxFinder |
|
|
|
Then ‘print |
- |
to-FaxFinder.’ |
|
|
FaxFinder |
|
|
forwarded to recipients. |
|||||||||||||||||||||||||||||||||||||||||||||||||||||||||||||||||||||||||||
|
|
|
|
|
|
|
|
|
|
|
|
|
|
|
|
|
|
|
|
|
|
|
|
|
|
|
|
|
|
|
|
|
|
|
|
|
|
|
|
|
|
|
|
|
|
|
|
|
|
|
|
|
|
|
|
|
|
|
|
|
|
|
|
|
|
|
|
|
|
|
|
|
|
|
|
|
|
|
|
|
|
||||||||||||
|
|
|
|
|
|
|
|
|
|
|
|
|
|
|
|
|
|
|
|
|
|
|
|
|
|
|
|
|
|
|
|
|
|
|
|
|
|
|
|
|
|
|
|
|
|
|
|
|
|
|
|
|
|
|
|
|
|
|
|
|
|
|
|
|
|
|
|
|
|
|
|
|
|
|
|
|
|
|
|
|
|
||||||||||||
|
|
|
|
|
|
|
|
|
|
|
|
|
|
|
|
|
|
|
|
|
|
|
|
|
|
|
|
|
|
|
|
|
|
|
|
|
|
|
|
|
|
|
|
|
|
|
|
|
|
|
|
|
|
|
|
|
|
|
|
|
|
|
|
|
|
|
|
|
|
|
|
|
|
|
|
|
|
|
|
|
|
||||||||||||
|
|
|
|
|
|
|
|
|
|
|
|
|
|
|
|
|
|
|
|
|
|
|
|
|
|
|
|
|
|
|
|
|
|
|
|
|
|
|
|
|
|
|
|
|
|
|
|
|
|
|
|
|
|
|
|
|
|
|
|
|
|
|
|
|
|
|
|
|
|
|
|
|
|
|
|
|
|
|
|
|
|
|
|
|
|
|
|
||||||
. . . |
|
|
|
|
|
|
|
|
|
|
|
|
|
Inbound |
|
|
|
Outbound |
|
|
|
|
|
|
|
|
|
|
|
|
|
|
|
|
|
|
|
Outbound |
Inbound |
|
|
|
|
|
|
|
|
|
|
|
|
|
|
|
|||||||||||||||||||||||||||||||||||||||
|
|
|
|
|
|
|
|
|
|
|
|
|
|
||||||||||||||||||||||||||||||||||||||||||||||||||||||||||||||||||||||||||||||||
|
|
|
|
|
|
|
|
|
|
|
|
|
|
|
|
|
|
|
|
|
Faxes |
|
|
|
Faxes |
|
|
|
|
|
|
|
|
|
|
|
|
|
|
|
|
|
|
|
|
|
|
|
|
|
|
|
|
|
Faxes |
|
Faxes |
|
|
|
|
|
|
|
|
|
|
|
|
|
|
|
|
|
|
|
|
||||||||||||||||
|
|
|
|
|
|
|
|
|
|
|
|
|
|
|
|
|
|
|
|
|
|
|
|
|
|
|
|
|
|
Ethernet |
|
|
|
|
|
|
|
Ethernet |
|
|
|
|
|
|
|
|
|
|
|
|
|
|
|
|
|
|
|
|
|
|
|
|
|
||||||||||||||||||||||||||||||
|
|
|
|
|
|
|
|
|
|
|
|
|
|
|
|
|
|
|
|
|
|
|
|
|
|
|
|
|
|
|
|
|
|
|
|
|
|
|
|
|
|
|
|
|
|
|
|
|
|
|
|||||||||||||||||||||||||||||||||||||||||||
|
|
|
|
|
|
|
|
|
|
|
|
|
|
|
|
|
|
|
|
|
|
|
|
|
|
|
|
|
|
|
|
LAN |
|
|
|
|
|
|
LAN |
|
|
|
|
|
|
|
|
|
|
|
|
|
|
|
|
|
|
|
|
|
|
|
|
|
|
||||||||||||||||||||||||||||
|
|
|
|
|
|
|
|
|
|
|
|
|
|
|
|
|
|
|
|
|
|
|
|
|
|
|
|
|
|
|
|
|
|
|
|
|
|
|
|
|
|
|
|
|
|
|
|
|
|
|
|
|
|
|
|
|
|
|
|
|
|
|
|
|
|
|
|
|
|
|
|
|
|
|
|
|
|
|
|
|
|
|
|
|
|
|
|
|
|
|
|
|
|
|
|
|
|
|
|
|
|
|
|
|
|
|
|
|
|
|
|
|
|
|
|
|
|
|
|
|
|
|
|
|
|
|
|
|
|
|
|
|
|
|
|
|
|
|
|
|
|
|
|
|
|
|
|
|
|
|
|
|
|
|
|
|
|
|
|
|
|
|
|
|
|
|
|
|
|
|
|
|
|
|
|
|
|
|
|
|
|
|
|
|
|
|
|
|
|
|
|
|
|
|
|
|
|
|
|
|
|
|
|
|
|
|
|
|
|
|
|
|
|
|
|
|
|
|
|
|
|
|
|
|
|
|
|
|
|
|
|
|
|
|
|
|
|
|
|
|
|
|
|
|
|
|
|
|
|
|
|
|
|
|
|
|
|
|
|
|
|
|
|
|
|
|
|
|
|
|
|
|
|
|
|
|
|
|
|
|
|
|
|
|
|
|
|
|
|
|
|
|
|
|
|
|
|
|
|
|
|
|
|
|
|
|
|
|
|
|
|
|
|
|
|
|
|
|
|
|
|
|
|
|
|
|
|
|
|
|
|
|
|
|
|
|
|
|
|
|
|
|
|
|
|
|
|
|
|
|
|
|
|
|
|
|
|
|
|
|
|
|
|
|
|
|
|
|
|
|
|
|
|
|
|
|
|
|
|
|
|
|
|
|
|
|
|
|
|
|
|
|
|
|
|
|
|
|
|
|
|
|
|
|
|
|
|
|
|
|
|
|
|
|
|
|
|
|
|
|
|
|
|
|
|
|
|
|
|
|
|
|
|
|
|
|
|
|
|
|
|
|
|
|
|
|
|
|
|
|
|
|
|
|
|
|
|
|
|
|
|
|
|
|
|
|
|
|
|
Attendant(s)
If the FaxFinder is connected to a PBX station port and that PBX can route multiple phone extension numbers to the FaxFinder, then each user can have his/her own incoming fax number and faxes will go directly to each user’s email address. This is the FaxFinder’s Automated Routing Mode of operation. Because there are several ways of implementing Automated Routing Mode (some generic and some specific to certain PBXs) there are several different “Routing” settings in the FaxFinder software’s “Modem Configuration” screen that will implement the Automated Routing Mode for these different situations.
If the FaxFinder is connected directly to a POTS line or to the station port of a PBX that cannot route multiple extension numbers to a single station port, then all incoming faxes must go to the email address of a single recipient who acts as an attendant and forwards the faxes to the intended recipients.
This is the FaxFinder’s Manual Routing Mode of operation. In the FaxFinder software’s “Modem Configuration” screen, you simply choose the “POTS Line” option to implement the Manual Routing Mode of operation.
In order for each user to receive incoming faxes directly, the FaxFinder must be connected to a PBX that can route multiple extensions to a single port (convergent routing). If your PBX does not support this convergent routing, then incoming faxes must be sent to recipients through an attendant.
Multi-Tech Systems, Inc. |
FaxFinder Admin User Guide |
13 |
Chapter 2: Installation
Installation Overview
Part A: Cabling – Connecting the FaxFinder to Power, Phone Lines, and Ethernet
Summary: Place the FaxFinder in a convenient location, and then connect it to your AC power outlet and Ethernet.
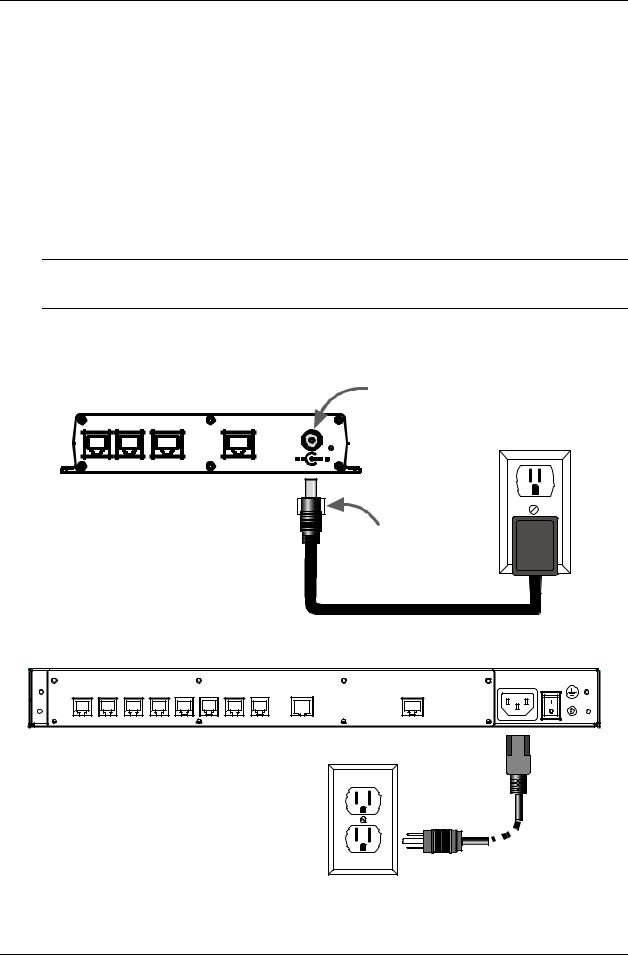
1.Connect FaxFinder to AC Outlet.
A.FF120/220 Power. Plug the DC power transformer into a power outlet or power strip. Secure the other end to the Power Receptacle on your FF120/220 FaxFinder. Secure the power cord to the connector with the lock nut. (Builds of FF120/220 for outside of North America have a 2-piece power connection.)
Note: The FF120 & 220 have a reset switch in lieu of a power toggle switch. Using a straightened paper clip to push the recessed button will perform a hardware reset. This is only necessary if the unit becomes unresponsive.
Caution: Use only the DC power transformer supplied with the FaxFinder. Use of any other transformer voids the warranty and can damage the FaxFinder.
Power Cable
Receptacle
LINE 1 |
LINE 2 |
LAN 1 |
CONSOLE |
|
|
|
RESET |
FF-120/220 |
Lock Nut |
|
B. FF420/820 Power. Connect the power cable between the unit and a power outlet.
1 |
2 |
3 |
4 |
5 |
6 |
7 |
8 |
ETHERNET |
COMMAND |
|
FF-420/820
Multi-Tech Systems, Inc. |
FaxFinder Admin User Guide |
14 |
Chapter 2: Installation
2. Verify Powering.
Status LED
FF-120/220
Power Status CF |
LAN 1 |
Line 1 |
Line 2 |
LNK 100 |
TD RD TR CD |
TD RD TR CD |
Power
LED
Status LED
R
Power Status Ethernet |
Modem 1 |
Modem 2 |
Modem 3 |
Modem 4 |
Modem 5 |
Modem 6 |
Modem 7 |
Modem 8 |
LNK IOO |
TD RD CD |
TD RD CD |
TD RD CD |
TD RD CD |
TD RD CD |
TD RD CD |
TD RD CD |
TD RD CD |
Power LED
FF-420/820
After power is applied, the Power LED comes on immediately but there is a 4-second delay before the Status LED comes on. In normal operation, the Status LED will be flashing.
When you apply power, the FaxFinder performs a diagnostic self-test. The Status indicator flashes when the test is complete and the unit is ready. If this does not happen, check that the power supply is solidly connected and that the AC outlet is live.
3. Connect FaxFinder to Ethernet Network.
Plug one end of your RJ45 Ethernet cable into the FaxFinder’s Ethernet jack and the other end into your network Ethernet hub. This Ethernet cable is not included with your FaxFinder unit.
Ethernet
Receptacle
 LINE 1 LINE 2 LAN 1
FF-120/220 


CONSOLE 


 RESET
RESET
1 |
2 |
3 |
4 |
5 |
6 |
7 |
8 |
ETHERNET |
COMMAND |
FF-420/820 |
Caution: Before connecting to the Ethernet Network, make sure that the network to which you are connecting the FaxFinder is not a 192.168.2.x subnet. Because the FaxFinder’s factory default IP address is 192.168.2.1, connecting it to a network that has a different device at that same IP address would cause data interference.
If it is a 192.168.2.x subnet, connect from the Administrative PC to the FaxFinder using an RJ45 crossover cable until the FaxFinder’s IP address has been configured. Thereafter, connect the FaxFinder into the network with an ordinary RJ45 cable.
Multi-Tech Systems, Inc. |
FaxFinder Admin User Guide |
15 |
Chapter 2: Installation
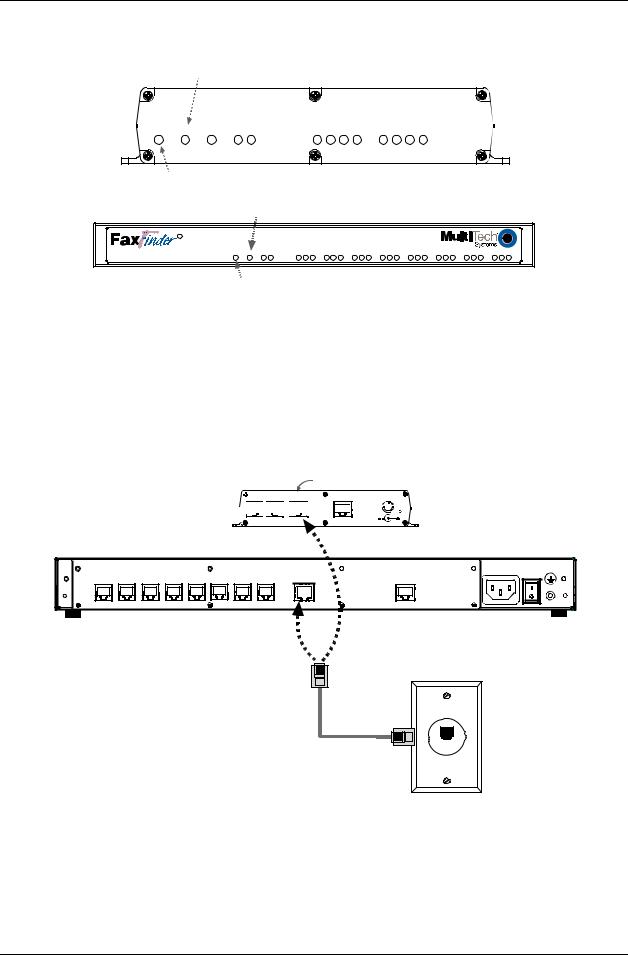
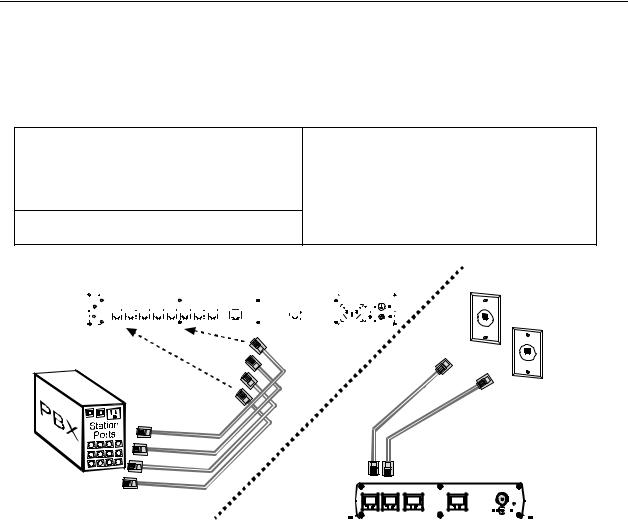
Part B: Connecting to Telephony Service
The FaxFinder can either be connected to a PBX
(for use in Automated Routing Mode) or to POTS lines (for use in Manual Routing Mode).
Connection for |
Connection for |
Automated Routing Mode |
Manual Routing Mode |
Plug one end of the phone cable into the |
Plug one end of the phone cable into the |
FaxFinder’s LINE jack and the other into an |
FaxFinder’s LINE jack and the other end into |
available Station Port on the PBX. |
your standard telephone receptacle. |
An RJ11-to-RJ11 cable is included with your
FaxFinder.
Automated Routing Mode
|
|
|
|
|
|
|
|
|
|
|
|
|
|
|
|
|
|
|
|
|
|
|
|
|
|
|
|
|
1 |
2 |
|
3 |
|
4 |
5 |
6 |
7 |
8 |
ETHERNET |
COMMAND |
|
|
|
|
|
|
|
|
|
||||||
|
|
|
|
|
|
|
|
|
|
|
|
|
|
|
|
|
|
|
|
|
|
|
|
|
|
|
|
|
|
|
|
|
|
|
|
|
|
|
|
|
|
|
|
|
|
|
|
|
|
|
|
|
|
|
|
Manual
Routing
Mode
LINE 1 |
LINE 2 |
LAN 1 |
CONSOLE |
|
|
|
RESET |
|
|
|
|
|
|
|
|
|
|
|
|
|
|
|
|
|
|
|
|
|
|
|
|
|
|
|
|
|
|
|
|
|
|
|
|
|
|
|
|
|
|
|
|
|
|
|
|
|
|
|
|
|
|
|
|
|
|
|
|
|
|
|
|
Multi-Tech Systems, Inc. |
FaxFinder Admin User Guide |
16 |
|||||||||||||
Chapter 2: Installation
Part C: Installing the Software
There are two programs to install for configuring and using the FaxFinder unit. The Device Manager software is for the Administrator and primarily deals with the setup and logging functionality. The second is the Client software that is for general use of the FaxFinder, but it needs to be associated with a FaxFinder unit for proper operation.
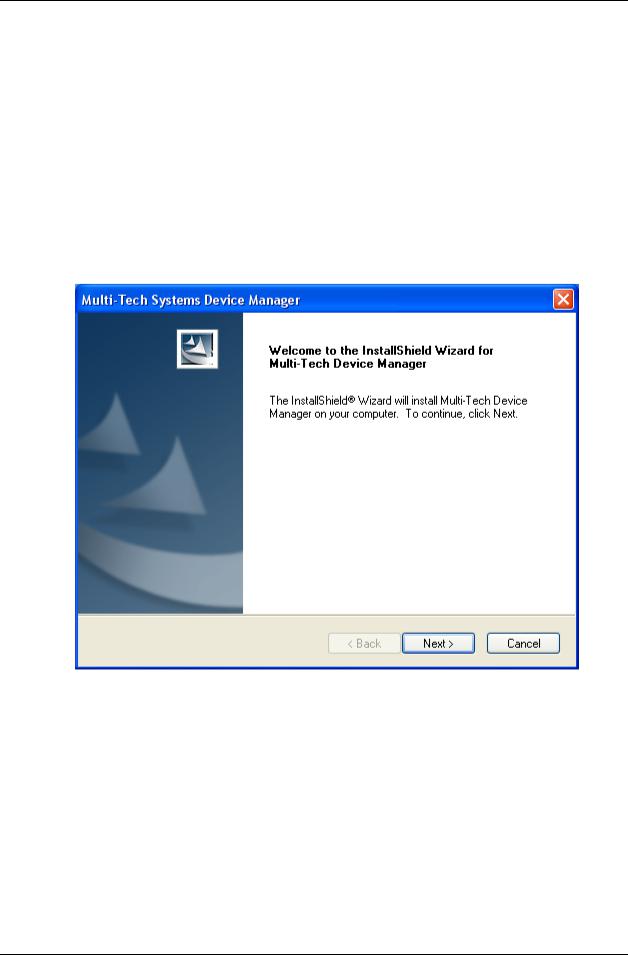
Installing the Device Manager software
A.Insert the FaxFinder Product CD into the CD-ROM drive of the client PC. If the CD does not auto start, use Windows Explorer to navigate to your CD drive and launch the installation program by double-clicking on cd_start.exe file on the CD. From the menu presented, click the Software button.
From the new screen presented, select the Manager Software button to install the Multi-Tech Device Manager software used to configure the FaxFinder unit.
B.The Welcome wizard appears. Click Next.
Multi-Tech Systems, Inc. |
FaxFinder Admin User Guide |
17 |
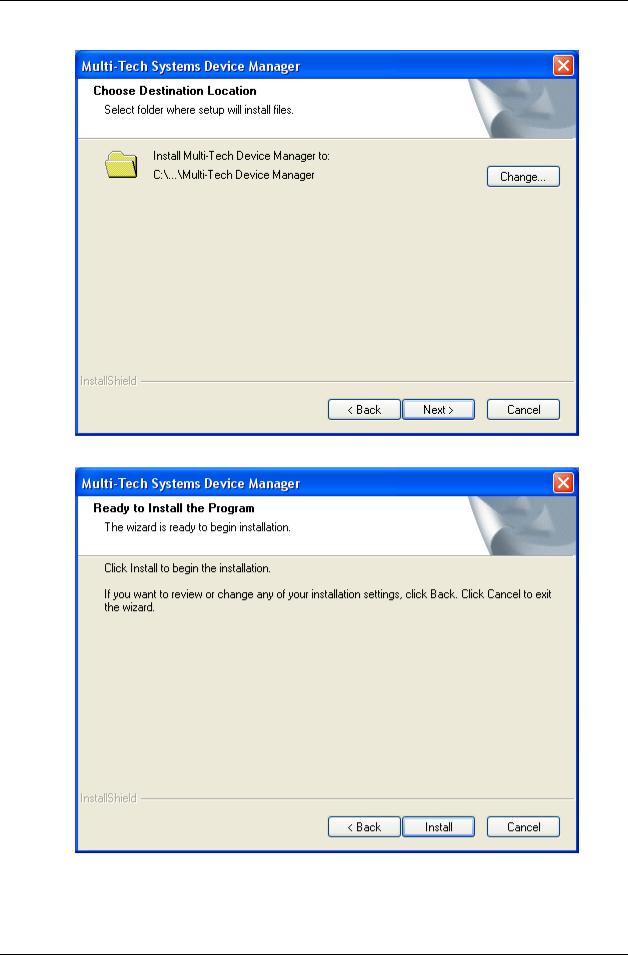
Chapter 2: Installation
C. Select the location where you would like the software to install. Click Next.
D. The software is ready to be installed. Click Install.
Multi-Tech Systems, Inc. |
FaxFinder Admin User Guide |
18 |
Chapter 2: Installation
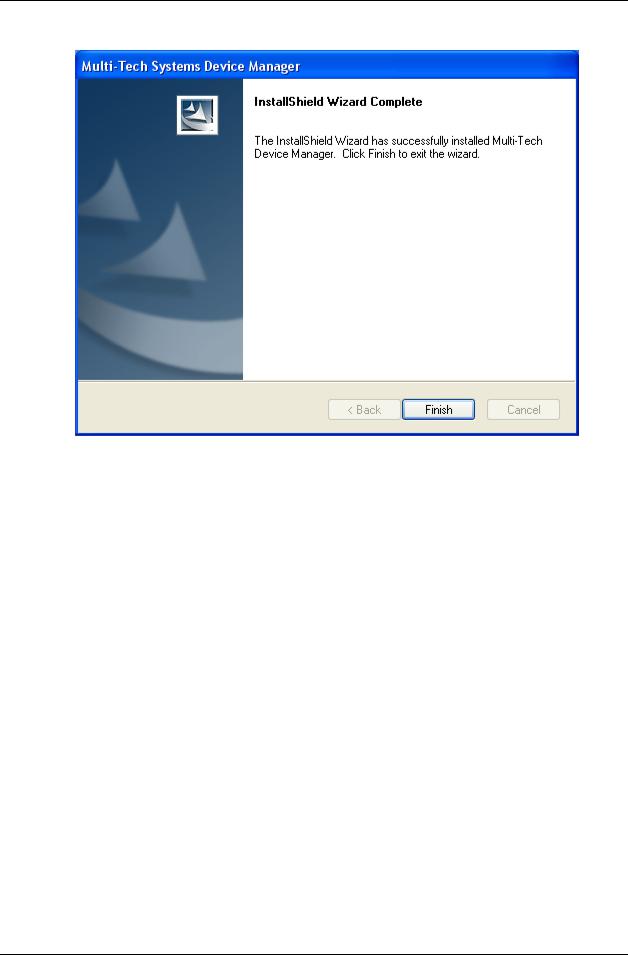
E. When the installation is completed, click Finish.
Installation of the Device Manger software is complete. You may now move ahead and set up your FaxFinder unit using the Device Manager software, or continue with the Client software installation below.
Multi-Tech Systems, Inc. |
FaxFinder Admin User Guide |
19 |
Chapter 2: Installation
Installing the Client software
A.Insert the FaxFinder Product CD into the CD-ROM drive of the client PC. If the CD does not auto start, use Windows Explorer to navigate to your CD drive and launch the installation program by double-clicking on cd_start.exe file on the CD. From the menu presented, click the Software button.
From the new screen presented, select the Client Software button to install the Multi-Tech FaxFinder Client software for using the FaxFinder unit.
Important: If you have any old versions of the FaxFinder client software installed, please uninstall that prior to installing the new version. For your convenience, there is a mass uninstaller available for push uninstalls on the product CD. It is in the Software folder and is called ‘Remove_InstallShield_FFClient.msi’.
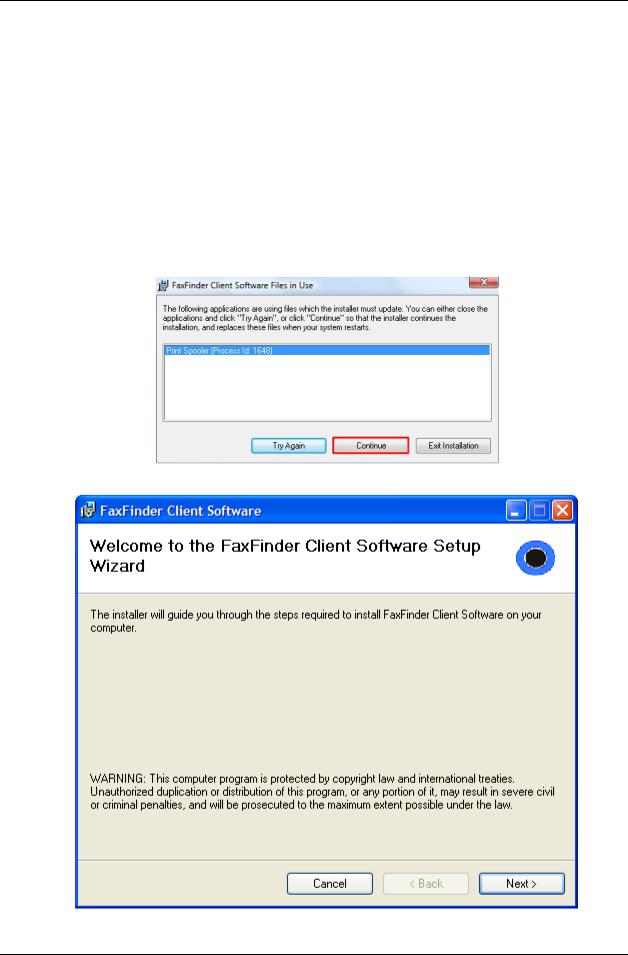
Vista Only: Should you install the client in Windows Vista, you may see a pop-up window informing you of a printer spooling in use. Please select ‘Continue’ to finish the installation. This message has no impact on the installation or functionality of the FaxFinder Client Software.
Continue the installation.
Multi-Tech Systems, Inc. |
FaxFinder Admin User Guide |
20 |
Chapter 2: Installation
B. At the Welcome screen, click Next.
C.At the Select Installation Folder screen, browse to the desired file location for the FaxFinder client software. In most cases, the default file location is recommended.
Clicking on the Disk Cost button will show you the size of the software being installed as well as the available disk space of the target drive.
When the destination location is correct, click Next.
Multi-Tech Systems, Inc. |
FaxFinder Admin User Guide |
21 |
Chapter 2: Installation
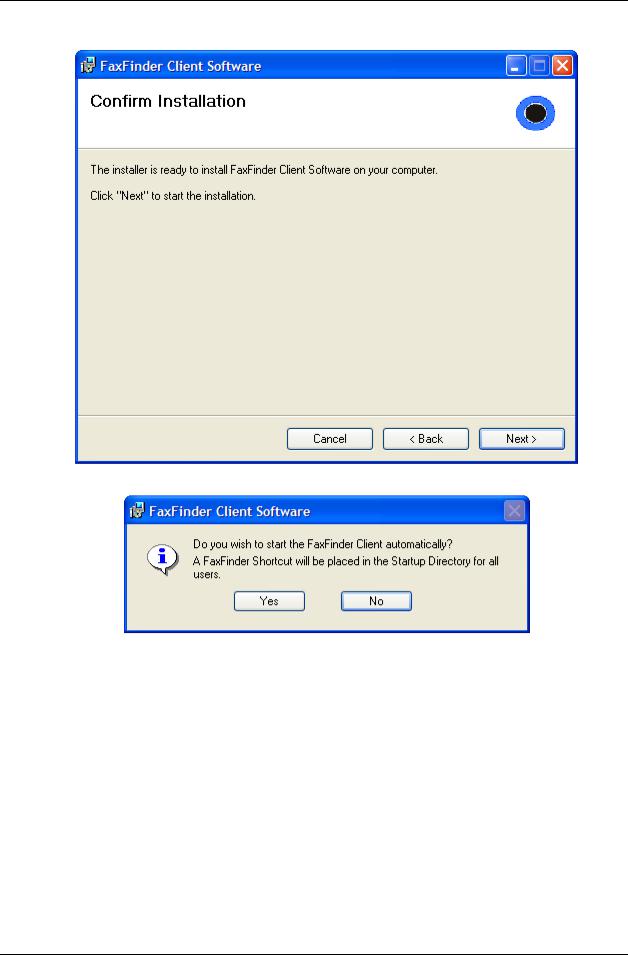
D. At the Confirm Installation screen, click Next to begin the installation..
E. A transient screen will appear while files are being copied.
F.The FaxFinder Client software can place a shortcut in the Startup directory so that the client software will start automatically when the PC is booted.
Multi-Tech Systems, Inc. |
FaxFinder Admin User Guide |
22 |
Chapter 2: Installation
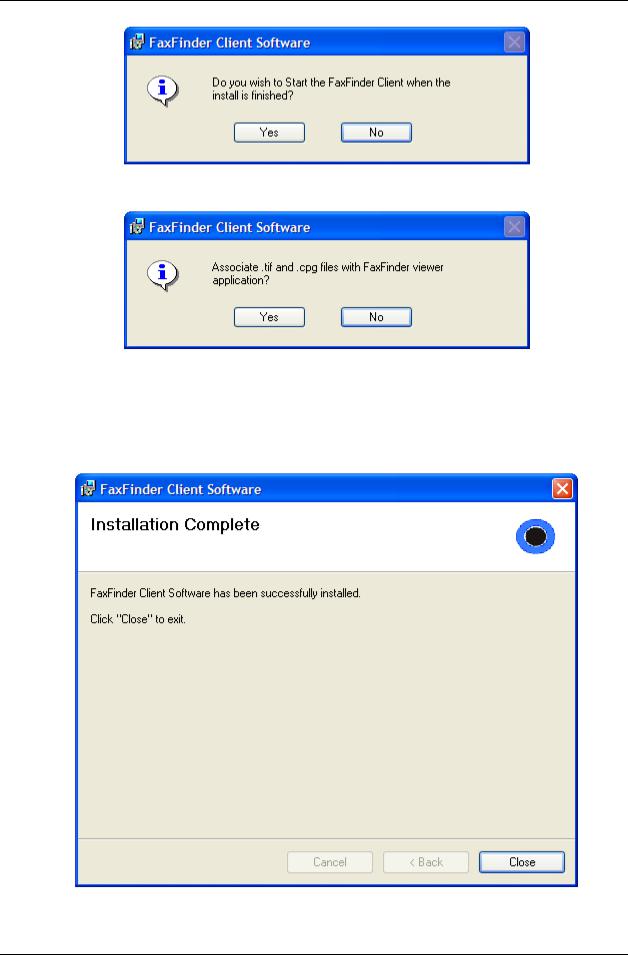
G.You will be asked if you want the Client software to automatically launch when the installation is complete. Select your preference
H.You will be asked whether or not you want to associate .tif and .cpg files with the Multi-Tech Tiff Viewer. Click Yes (unless you prefer to use a different viewer program).
If a Question screen appears asking "Warning - the extension .tif is already registered, Overwrite?”; click Yes if you wish to use the TIFF viewer installed with the FaxFinder Client Software. Click No if you prefer to use a different software package for viewing .tif files.
I.Then the Installation Complete screen will appear.
Click the Close button.
Multi-Tech Systems, Inc. |
FaxFinder Admin User Guide |
23 |

Chapter 2: Installation
Client Install on Terminal Service
The process for installing the FaxFinder Client software in Terminal Services is as follows:
•Run the FaxFinder Client for Terminal Services installer as an administrator on the terminal server.
•Once the installation is complete, a shortcut to the FaxFinder Client is created in the Startup section of the start menu for All Users (C:\Documents and Settings\All Users\Start Menu\Programs\Startup). This causes the FaxFinder Client to start up automatically when any user logs into the terminal server. If this is not desired, the shortcut in the All Users start menu may be deleted and placed in user-specific Startup folders as needed.
•Users running the FaxFinder Client must be granted full permissions to the "Multi-Tech FaxFinder" printer or the client will error on start up.
•The users may be added to the Power Users group, which has full access by default, or can be given permission individually by selecting Properties on the printer and navigating to the Security tab.
Push Installs of the Client Software
The FaxFinder Client installer is now available as an MSI package. This provides the ability to perform remote installation using Microsoft Group Policy, SMS, as well as other third party tools. The installer can be run like any other Windows software installer and it can also be invoked from the command line using the Windows Installer command ‘msiexec’. Previous versions of the FaxFinder Client (1.08.06 and older) must be uninstalled before upgrading.
The installer supports the following options when being used from the command line or remote installation:
•Set a different install directory:
oTARGETDIR=PATH (default is Program Files/Multi-Tech Systems/FaxFinder Client Software)
•Add file associations for Multi-Tech TIFF Viewer and Cover Page Editor:
oADDFILEEXT=1 (default is 0)
•Start the FaxFinder client after installation:
oLAUNCHPRODUCT=1 (default is 0)
•Automatically Start the FaxFinder Client
oLAUNCHPRODUCTONBOOT=1 (default is 0)
•Example command to install in silent mode with options:
omsiexec /i FFClient-x_x_x.msi /q TARGETDIR=”C:\FaxFinder Client” ADDFILEEXT=1 LAUNCHPRODUCT=1 LAUNCHPRODUCTONBOOT=1
•Example command to uninstall in silent mode:
omsiexec /x FFClient-x_x_x.msi /q
An example of how to perform a remote software installation using Microsoft Group Policy is available from Microsoft’s website.
•Search for Knowledge Base article number 816102 at microsoft.com.
Multi-Tech Systems, Inc. |
FaxFinder Admin User Guide |
24 |

Chapter 2: Installation
FaxFinder Client Terminal Services MSI Installer
The FaxFinder Client Terminal Services Installer is also available as an MSI package.
•Run the FaxFinder Client for Terminal Services installer as an administrator on the terminal server.
Once the installation is complete, a shortcut to the FaxFinder Client is created in the Startup section of the start menu for All Users (C:\Documents and Settings\All Users\Start Menu\Programs\Startup). This causes the FaxFinder Client to start up automatically when any user logs into the terminal server. If this is not desired, the shortcut in the All Users start menu may be deleted and placed in user-specific Startup folders as needed.
FaxFinder Client Install Shield Mass Uninstall
An MSI package is available on the web site, and the Installation CD, that can be used to mass un-install the previous version of FaxFinder Client (versions before 1.08.08).
• Example command to uninstall the Install Shield FaxFinder Client in silent mode: o msiexec /i remove_installshield_faxclient.msi /q
Multi-Tech Systems, Inc. |
FaxFinder Admin User Guide |
25 |

Chapter 2: Installation
Part D: Configuring the FaxFinder Server
Summary of Configuration Data
The table below lists the information you will need to fill in on the various FaxFinder Server screen. Gathering this information in advance will expedite the FaxFinder configuration process.
Server Parameters (for Server Admin screen) Values for this FaxFinder
IP Address (of FaxFinder unit)
Subnet Mask
(Domain) Name Server
Secondary Name Server (optional)
Default Gateway
Time Server
SMTP (Mail) Server Address
SMTP Port
SMTP Server User ID
SMTP Password
Routing: Manual Routing Mode= “None”;
Automated Routing Mode = either “DTMF Digits” or a PBXspecific mode code)
User Parameters
(for Server Phonebook, Client Options, & Client Add Fax Server screens)
|
Name |
User ID/ |
Email Address |
PBX Extension |
Password |
|
|
|
Username |
|
|
|
|
|
|
|
|
|
|
|
|
|
|
|
|
|
|
|
|
|
|
|
|
|
|
|
|
|
|
|
|
|
|
|
|
|
|
|
|
|
|
|
|
|
|
|
|
|
|
|
|
|
|
|
|
|
|
|
|
|
|
|
|
|
|
|
|
|
|
|
|
|
|
|
|
|
|
|
|
|
|
|
|
|
|
|
|
Multi-Tech Systems, Inc. |
FaxFinder Admin User Guide |
26 |

Chapter 2: Installation
Manual Routing Mode: Mapping of FF Ports to Phone Numbers
FaxFinder Port |
Phone Number |
|
|
Port 1
Port 2
Port 3
Port 4
Port 5
Port 6
Port 7
Port 8
Automated Routing Mode: PBX Phone Number Ranges
Start of Range |
End of Range |
Multi-Tech Systems, Inc. |
FaxFinder Admin User Guide |
27 |
Chapter 2: Installation
1. Setting Admin PC to Startup IP Address
There are two ways that you can set the startup IP parameters. You can either
•do steps 1A and 1B, then do the steps for your operating system from the table, and then skip to
2A,
-or-
•do the “Alternative Method ...” using the Device Manager software and then go on to step 2A.
A.Connect a pc to your network.
B.Set the pc IP address to 192.168.2.x subnet (using any address except 192.168.2.1).
Windows XP/2003 |
Windows 2000 |
||
a. |
From the Windows desktop, right-click on “My |
a. |
From the Windows desktop, right-click on “My |
|
Network Places,” and select “Properties.” |
|
Network Places,” and select “Properties.” |
b. |
In the Network Connection screen, right-click |
b. |
In the Network and Dialup Connections |
|
on “Local Area Connection.” |
|
screen, right-click on “Local Area Connection” |
c. |
In the Local Area Connection Properties |
|
and select “Properties.” |
|
screen, on the “General” tab, scroll to the |
c. |
In the Local Area Connection Properties |
|
“Internet Protocol (TCP/IP)” entry and select it. |
|
screen, select the “Internet Protocol (TCP/IP)” |
|
Click “Properties.” |
|
entry. Click “Properties.” |
d. |
In the Internet Protocol (TCP/IP) Properties |
d. |
In the Internet Protocol (TCP/IP) Properties |
|
screen, record the existing IP address. Then |
|
screen, record the existing IP address. Then |
|
reset the IP address to 192.168.2.2. |
|
reset the IP address to 192.168.2.2. |
Windows Vista
a. Click on Start and go to Network.
b. In the left-hand ‘Folders’ pane, Right-click on Network and select Properties. c. For the Local Area Connection, click on the View Status link.
d. In the Status window, click on Properties. Click Continue when the permission window pops-up.
e. In the Properties window, click once to highlight “Internet Protocol Version 4 (TCP/IPv4) and then click Properties below.
f. Here you can select the “Use the following IP address:” radio button, and then set the “IP Address” to 192.168.2.2.
g. Click OK, then click Close and Close again.
Alternative Method for Setting Desired IP Parameters on FaxFinder Server
If the FaxFinder Server is on the same subnet as the Administration PC, you can set its IP parameters using the Multi-Tech Device Manager’s Auto-Discovery function (see Chapter 8 concerning installation of the Device Manager software).
In Device Manager, go to Edit | Auto-Discover Devices. The Auto Discovery Monitor dialog box will appear.
Multi-Tech Systems, Inc. |
FaxFinder Admin User Guide |
28 |
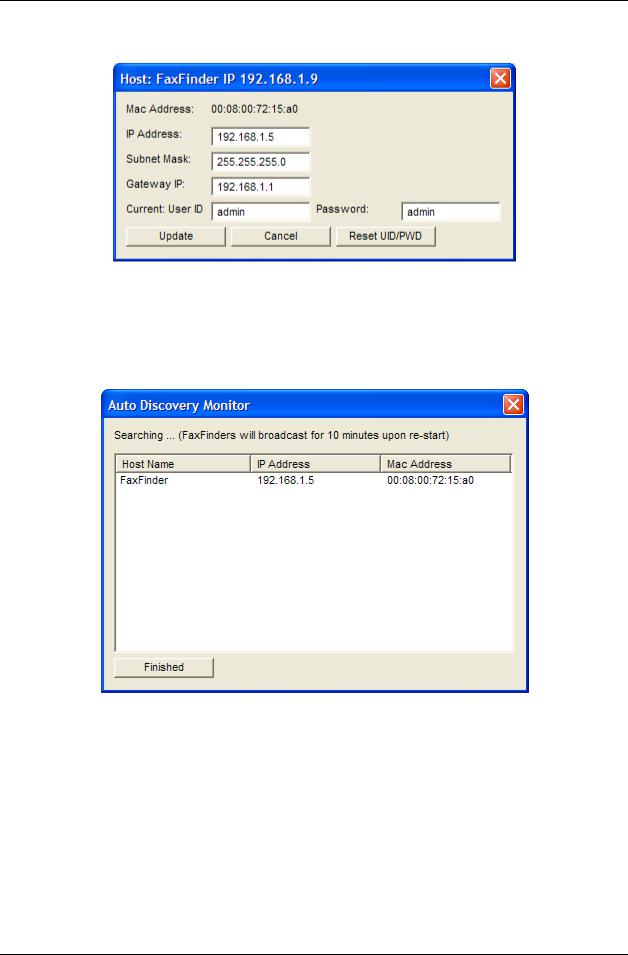
Chapter 2: Installation
Double-click on the FaxFinder in the Auto Discovery Monitor dialog box and change the IP Addresses.
If you know the correct User ID and Password, you can change the IP Address, Subnet Mask or Gateway IP. Select the field you wish to change, enter the User ID and Password then click Update.
If you click the Reset UID/PWD button, the telnet User ID and Password of the FaxFinder Server will be reset to factory defaults (admin/admin).
The Auto Discovery Monitor dialog box will be updated with the IP parameter information from the Server. This can take up to 30 seconds.
The Host Name column will change to Waiting for update, and then back to FaxFinder once the update is completed.
The FaxFinder server may need to be turned off and back on again for the IP address change to take effect. If the IP address is being changed from a previously “discovered” FaxFinder, the old IP version will need to be deleted from the Device Manager by right-clicking on the old IP and selecting Delete.
You may now Add Device or run the Auto-Discovery again.
Continue to step 2A.
Multi-Tech Systems, Inc. |
FaxFinder Admin User Guide |
29 |

Chapter 2: Installation
2. Logging In
A.Bring up a Web browser on your pc. At the browser’s address line, type the IP address of the FaxFinder:
either type http://192.168.2.1 and press Enter,
or type the IP address you set using the Auto Discovery dialog box (the “Alternative Method...” above) and press Enter.
B.The Login screen will appear.
At this point you can be assured that the FaxFinder is connected to the network.
If the Login screen does not appear, see “What if I can’t see the web page for my FaxFinder?” in the
Troubleshooting appendix.
C.At the Login screen, enter admin (all lower case) in the Username field.
D.Enter admin (all lower case) in the Password field.
Multi-Tech Systems, Inc. |
FaxFinder Admin User Guide |
30 |
Loading...