


VIDEO CASSETTE RECORDER
OWNER’S GUIDE
|
VCR |
|
|
|
|
|
|
POWER |
CHANNEL |
VOLUME |
|
||
|
|
|
|
|
TV |
|
|
|
|
|
|
|
POWER |
|
EJECT |
|
|
|
|
|
|
|
|
|
|
|
MUTE |
|
1 |
|
|
2 |
|
|
|
|
|
|
3 |
|
|
|
|
|
CM SKIP |
|
||
|
4 |
|
|
|
||
|
|
|
5 |
|
|
|
|
|
|
|
6 |
|
|
|
|
|
|
|
|
|
|
7 |
|
|
8 |
|
|
QUICK |
|
|
9 |
|
||
|
PROGRAM |
|
|
|
|
|
|
|
|
0 |
|
INPUT |
|
|
|
PLAY |
|
VCR |
|
|
|
REW |
|
|
|
TV |
|
|
|
|
|
|
|
|
|
|
|
|
FF |
|
|
REC |
STOP |
|
|
|
|
|
|
PAUSE |
|
|
X2 |
|
|
|
|
DISPLAY |
|
|
||
|
INDEX |
|
|
|
|
|
AUDIO/VIDEO |
ADJUST |
|
|
|
|
|
|
|
|
MENU |
|
|
|
CANCEL |
|
|
|
|
|
|
VCR/TV |
ENTER |
|
|
|
||
|
|
|
|
|
|
|
|
|
|
SP/EP |
|
|
|
|
ADJUST |
|
|
|
|
|
MODEL HS-U448
This Video Cassette Recorder is based on the VHS format. Only video cassette tapes with the 

 mark may be used with this model.

 Special Features HS-U448

SMART: |
FAST: |
♦ Program Conflict |
♦ Alfa 500 Precision High |
Warning |
Speed Mechanism with |
♦ VHS Hi-Fi audio record/ |
for 500x rewind/fast |
playback |
forward speed |
|
♦ Rental XpressTM – Auto |
|
rewind, eject and power |
|
off for a fast movie |
|
return |
EASY:
♦ViewPoint® Menu Operating System
♦OTR2 Advanced One Touch Recording with delayed start time
♦Auto Clock Set
♦Front A/V input jacks
CAUTION
RISK OF ELECTRIC SHOCK
DO NOT OPEN
CAUTION: TO REDUCE THE RISK OF ELECTRIC SHOCK,
DO NOT REMOVE COVER (OR BACK).
NO USER-SERVICEABLE PARTS INSIDE.
REFER SERVICING TO QUALIFIED SERVICE PERSONNEL.
The lightning flash with arrowhead symbol, within an equilateral triangle, is intended to alert the user to the presence of uninsulated “dangerous voltage” within the product’s enclosure that may be of sufficient magnitude to constitute a risk of electric shock to persons.
The exclamation point within an equilateral triangle is intended to alert the user to the presence of important operating and maintenance (servicing) instructions in the literature accompanying the product.
IMPORTANT:
RECORDING OF COPYRIGHTED TELEVISION PROGRAMS MAY VIOLATE COPYRIGHT LAW.
WARNING:
TO REDUCE THE RISK OF FIRE OR ELECTRIC SHOCK, DO NOT EXPOSE THIS PRODUCT TO RAIN OR MOISTURE.
CAUTION:
TO PREVENT ELECTRIC SHOCK HAZARD, DO NOT USE THIS (POLARIZED) PLUG WITH AN EXTENSION CORD, RECEPTACLE OR OTHER OUTLET UNLESS THE BLADES CAN BE FULLY INSERTED TO PREVENT BLADE EXPOSURE.
NOTE TO CATV SYSTEM INSTALLER:
THIS REMINDER IS PROVIDED TO CALL THE CATV SYSTEM INSTALLER’S ATTENTION TO SECTION 820-40 OF THE NEC WHICH PROVIDES GUIDELINES FOR PROPER GROUNDINGAND, IN PARTICULAR, SPECIFIES THAT THE CABLE GROUND SHALL BE CONNECTED TO THE GROUNDING SYSTEM OF THE BUILDING, AS CLOSE TO THE POINT OF CABLE ENTRY AS PRACTICAL.


 SHORTCUTS
To connect your VCR, go to page 4.
To play a tape, go to page 9.
To record a program, go to page 18.
To learn about Advanced Features, go to page 32.

 TABLE OF CONTENTS
IMPORTANT SAFEGUARDS................. |
2 |
Hooking Up Your VCR ........................... |
4 |
Playback................................................. |
9 |
Setting Up Your VCR ............................. |
12 |
Selecting the On-screen Language .... |
12 |
Memorizing Channels Automatically... |
13 |
Adding and Deleting Channels ........... |
14 |
Setting the Clock ................................ |
15 |
Recording ............................................... |
18 |
Recording a Current Broadcast .......... |
18 |
OTR .................................................... |
19 |
OTR2 ................................................... |
20 |
Using Audio and Video Functions....... |
21 |
Timer Recording ..................................... |
24 |
Conventional VCR Timer Recording... |
24 |
Quick Program.................................... |
26 |
Timer Recording Hints ........................ |
27 |
Editing Features ..................................... |
30 |
Using Two VCRs to Copy ................... |
30 |
Advanced Features ................................ |
32 |
Advanced Playback Controls.............. |
32 |
Searching Techniques ........................ |
34 |
Displaying Time Gauge, Remaining Time, |
|
Current Time ................................. |
38 |
Customize Choices Menu................... |
39 |
Advanced Options .............................. |
42 |
Location of Controls ............................... |
44 |
Important Information ............................. |
47 |
Trouble Checks ...................................... |
48 |
Specifications ......................................... |
50 |
Index ...................................................... |
50 |
Warranty................................................. |
53 |
1

 IMPORTANT SAFEGUARDS
Please read all these instructions carefully regarding your VCR before you begin operating it. Follow all warnings and instructions marked on the VCR. Thank you.
1Read Instructions
All the safety and operating instructions should be read before the product is operated.
2Retain Instructions
The safety and operating instructions should be retained for future reference.
3Heed Warnings
All warnings on the product and in the operating instructions should be adhered to.
4Follow Instructions
All operating and use instructions should be followed.
5Cleaning
Unplug this product from the wall outlet before cleaning. Do not use liquid cleaners or aerosol cleaners. Use a damp cloth for cleaning.
6Attachments
Do not use attachments not recommended by the product manufacturer as they may cause hazards.
7Water and Moisture
Do not use this product near water — for example, near a bath tub, wash bowl, kitchen sink, laundry tub, in a wet basement, or near a swimming pool, and the like.
8Accessories
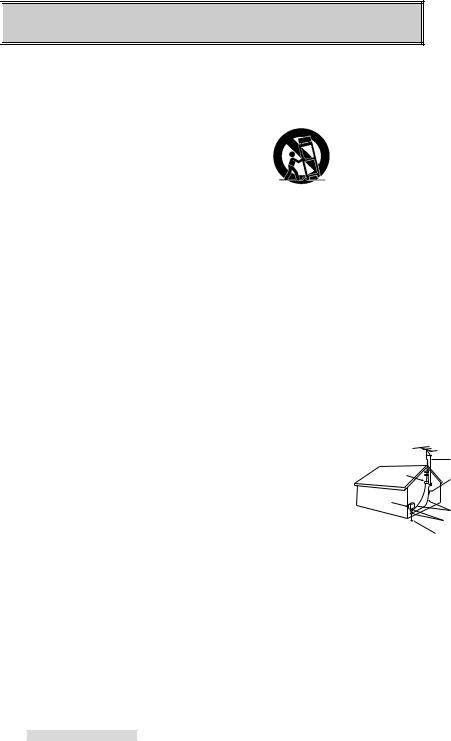
Do not place this product on an unstable cart, stand, tripod, bracket, or table. The product may fall, causing serious injury to a child or adult, and serious damage to the product. Use only with a cart, stand, tripod, bracket, or table recommended by the manufacturer, or sold with the product. Any mounting of the product should follow the manufacturer’s instructions, and should use a mounting accessory recommended by the manufacturer.
9 A product and cart combination should be moved with care. Quick stops, excessive force, and uneven sur-
faces may cause the product and cart combination to overturn.
10Ventilation
Slots and openings in the cabinet are provided for ventilation and to ensure reliable operation of the product and to protect it from overheating, and these openings must not be blocked or covered. The openings should never be blocked by placing the product on a bed, sofa, rug, or other similar surface. This product should not be placed in a built-in installation such as a bookcase or rack unless proper ventilation is provided or the manufacturer’s instructions have been adhered to.
11Power Sources
This product should be operated only from the type of power source indicated on the marking label. If you are not sure of the type of power supply to your home, consult your product dealer or local power company. For products intended to operate from battery power, or other sources, refer to the operating instructions.
12Grounding or Polarization
This product is equipped with a polarized alternating-current line plug (a plug having one blade wider than the other). This plug will fit into the power outlet only one way. This is a safety feature. If you are unable to insert the plug fully into the outlet, try reversing the plug. If the plug should still fail to fit, contact your electrician to replace your obsolete outlet. Do not defeat the safety purpose of the polarized plug.
13 Power-Cord Protection
Power-supply cords should be routed so that they are not likely to be walked on or pinched by items placed upon or against them, paying particular attention to cords at plugs, convenience receptacles, and the point where they exit from the product.
14Outdoor Antenna Grounding
If an outside antenna or cable system is connected to the product, be sure the antenna or cable system is grounded so as to provide some protection against voltage surges and built-up static charges.
Article 810 of the National Electrical Code, ANSI/NFPA 70, provides information with regard to proper grounding of the mast and supporting structure, grounding of the lead-in wire to an antenna discharge unit, size of grounding conductors, location of antenna-discharge unit, connection to grounding electrodes, and requirements for the grounding electrode.
EXAMPLE OF ANTENNA GROUNDING
|
ANTENNA |
|
|
LEAD IN WIRE |
|
GROUND CLAMP |
|
|
|
ANTENNA |
|
|
DISCHARGE UNIT |
|
ELECTRIC |
(NEC SECTION 810-20) |
|
|
||
SERVICE |
GROUNDING |
|
EQUIPMENT |
||
CONDUCTORS |
||
|
||
|
(NEC SECTION 810-21) |
|
|
GROUND CLAMPS |
|
|
POWER SERVICE GROUNDING |
|
|
ELECTRODE SYSTEM |
|
NEC – NATIONAL ELECTRICAL CODE (NEC ART 250, PART H) |
||
15Lightning
For added protection for this product during a lightning storm, or when it is left unattended and unused for long periods of time, unplug it from the wall outlet and disconnect the antenna or cable system. This will prevent damage to the product due to lightning and power-line surges.
16Power Lines
An outside antenna system
2

should not be located in the vicinity of overhead power lines or other electric light or power circuits, or where it can fall into such power lines or circuits. When installing an outside antenna system, extreme care should be taken to keep from touching such power lines or circuits as contact with them might be fatal.
17Overloading
Do not overload wall outlets, extension cords, or integral convenience receptacles as this can result in fire risk or electric shock.
18Object and Liquid Entry
Never push objects of any kind into this product through openings as they may touch dangerous voltage points or short-out parts that could result in a fire or electric shock. Never spill liquid of any kind on the product.
19Servicing
Do not attempt to service this product yourself as opening or removing covers may expose you to dangerous voltage or other hazards. Refer all servicing to qualified service personnel.
20Damage Requiring Service
Unplug this product from the wall outlet and refer servicing to qualified service personnel under the following conditions:
(a)When the power-supply cord or plug is damaged.
(b)If liquid has been spilled, or objects have fallen into the product.
(c)If the product has been exposed to rain or water.
(d)If the product does not operate normally by following the operating instructions. Adjust only those controls that are covered by the operating instructions as an improper adjustment of other controls may result in damage and will often require extensive work by a qualified technician to restore the product to its normal operation.
(e)If the product has been dropped or damaged in any way.
(f)When the product exhibits a distinct change in performance – this indicates a need for service.
21Replacement Parts
When replacement parts are required, be sure the service technician has used replacement parts specified by the manufacturer or have the same characteristics as the original part. Unauthorized substitutions may result in fire, electric shock or other hazards.
22Safety Check
Upon completion of any service or repairs to this product, ask the service technician to perform safety checks to determine that the product is in proper operating condition.
23Heat
The product should be situated away from heat sources such as radiators, heat registers, stoves, or other products (including amplifiers) that produce heat.
CONDENSATION
Leave the VCR on, without a tape in it, for 2 hours if the VCR has been exposed to sudden changes in temperature. Sudden temperature changes cause moisture to form on the metal parts inside the VCR. This moisture can cause the tape to stick and damage the head. Leaving the VCR on for a 2 hour period will dry the inside of the VCR.
PROTECT THE POWER CORD
Do not damage the power cord. Damage to the power cord may cause a fire or shock hazard. When unplugging the power cord, please hold it by the plug and remove it carefully.
DO NOT PLACE HEAVY OBJECTS ON THE RECORDER
Heavy objects placed on the recorder will cause damage.
WHEN NOT IN USE
When you finish operating the recorder, always unload the cassette and turn OFF the VCR POWER.
CARE OF THE VIDEO
CASSETTE TAPES
•Avoid violent vibration or shock.
•Do not place in a location where strong magnetic fields exist (near a motor, transformer or magnet).
•Never place or store in direct sunlight.
•Avoid dusty places.
•Place the cassette in the cassette case and store vertically.
•Never store tape in a high humidity location.
INFORMATION
This equipment has been tested and found to comply with the limits for a Class B digital device, pursuant to Part 15 of the FCC Rules. These limits are designed to provide reasonable protection against harmful interference in a residential installation. This equipment generates, uses, and can radiate radio frequency energy and, if not installed and used in accordance with the instructions, may cause harmful interference to radio communications. However, there is no guarantee that interference will not occur in a particular installation. If this equipment does cause harmful interference to radio or television reception, which can be determined by turning the equipment off and on, try to correct the interference by one or more of these measures:
•Reorient or relocate the receiving antenna
•Increase the separation between the equipment and receiver
•Connect the equipment into an outlet on a different circuit than the receiver is connected
•Consult the dealer or an experienced radio/TV technician for help
Changes or modifications not expressly approved by the party responsible for compliance could void the user’s authority to operate the equipment. If necessary, consult the dealer or an experienced radio/TV technician for additional suggestions. You may find this booklet prepared by the Federal Communications Commission helpful: How to Identify and Resolve Radio-TV Interference Problems. This booklet is available from the US Government Printing Office, Washington, D.C., 20402, Stock No. 004-000-00345-4.
3

 Hooking Up Your VCR
Unpacking Your VCR
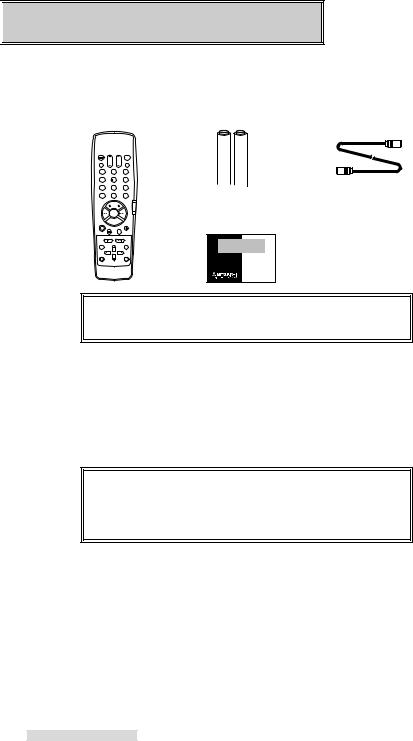
As you unpack your new VCR, please make sure the following items are included:
• Remote control • 2 "AA" size batteries |
• 1 Coaxial cable |
1 2 3
4 5 6
7 8 9
0
• Registration card
PRODUCT
REGISTRATION
Register and
Win in the
$100,000
Give Away II!
See inside...
IMPORTANT
Never place any heavy objects on top of the VCR. Do not place the VCR on top of the television as the surface may not be stable.
Choosing a Hookup
The connections shown in this book are general. Individual televisions and stereo systems can vary from those shown here. The first diagrams show connections for common equipment. Then, if you are connecting equipment such as a Home Theater receiver, you will also use those diagrams after you have connected the common equipment.
IMPORTANT
To maximize your system for its best performance, your dealer can help you customize these hookups and sell you any additional connection accessories that may be necessary to match your particular equipment and antennas.
1Make a list of each piece of equipment that you want to hook up.
2If you are connecting several pieces of equipment, you may be using more than one of these diagrams. Using your list, find EACH of the diagrams you will need to connect all of your equipment. For example, to hook up this VCR, a TV, a cable box, and a Home Theater receiver, you will use Cable System with Cable Box, and Connecting a Home Theater receiver.
3If your TV has audio and video inputs, use the diagrams on page 7 in addition to the connections on page 5 or 6.
4

Hooking Up Your VCR
IMPORTANT
You must use one of the connections shown on page 5 and 6 in order to record television or cable programs.
Antenna or Cable |
VCR Rear Panel |
System without |
From Antenna or |
Cable wall outlet |
|
|
ANTENNA |
Cable Box |
IN |
OR |
|
|
OUT |
Connecting Antenna or Cable |
supplied |
|
|
|
|
|
|
Optional 300 Ohm to 75 Ohm |
|||
1 Connect antenna or cable from wall |
coaxial cable |
||||
Matching Transformer |
|||||
|
|
||||
outlet to ANTENNA IN of the VCR. |
Optional |
|
|||
|
OR |
|
|||
|
|
|
|||
2 Connect VCR ANTENNA OUT to |
UHF/VHF |
|
|
||
|
x |
x |
|||
the TV’s Antenna jacks (varies by |
Splitter |
|
|
|
|
TV). |
|
|
x |
x |
|
UHF |
|
|
|
||
3 If your TV has audio video inputs, |
OR |
VHF/UHF |
Optional UHF/VHF Combiner |
||
continue with the connections on |
VHF |
|
|
|
|
page 7. If not, plug in power cords |
|
|
|
|
|
of VCR and TV. |
TV Rear Panel |
|
|
||
|
|
|
|||
Cable System with |
Cable Box Rear Panel |
From Cable |
||
Cable Box |
||||
OUT |
IN |
wall outlet |
||
Connecting Cable and Cable Box, |
|
|
|
|
if all channels are scrambled |
coaxial cable provided |
|||
1 Connect cable from wall outlet to CABLE |
|
by cable company |
||
|
|
|
||
IN on the cable box. |
|
|
|
|
2 Connect OUT (or OUT TO TV) on the |
|
ANTENNA |
|
|
cable box to ANTENNA IN on the VCR. |
|
|
|
|
|
|
IN |
|
|
3 Connect ANTENNA OUT on the VCR to |
|
OUT |
|
|
|
|
|
||
the TV’s antenna jacks (varies by TV). |
VCR Rear Panel |
|
|
|
4 If your TV has audio video inputs, |
|
|
||
|
|
|
||
continue with the connections on page 7. |
|
|
|
|
If not, plug in power cords of VCR, TV, |
supplied coaxial cable |
|||
and cable box. |
||||
|
|
|
||
If your cable company scrambles all of its |
UHF |
|
|
|
|
|
|
||
channels, you cannot record one channel |
OR |
VHF/UHF |
|
|
|
|
|||
while watching another. |
|
|
||
VHF |
|
|
||
If your cable company only requires the use |
TV Rear Panel |
|
|
|
of a cable box for some channels, connect |
|
|
||
|
|
|
||
the cable box as shown on the next page. |
|
|
|
|
|
IMPORTANT |
|
|
|
Your TV Owner’s Guide may have additional suggestions for antenna/cable hookups.
If your TV has more than one antenna jack, ask your Mitsubishi dealer for advice on additional accessories.
5
Hooking Up Your VCR
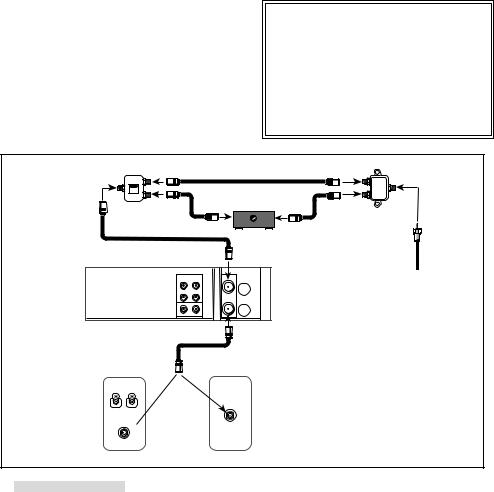
Connecting Cable and Cable Box, if only some channels are scrambled
1You will need a cable splitter, five lengths of coaxial cable, and a cable A/B switch.
2Connect cable from wall outlet to IN terminal on the cable splitter.
3Connect the coaxial cable to OUT terminal on the cable splitter and A-IN on the A/B switch.
4Connect the second coaxial cable to the other OUT terminal on the splitter and IN (or CABLE) on the cable box.
5Connect the third coaxial cable to the OUT or TV on the cable box and B-IN on the A/B switch.
6Connect the fourth coaxial cable to OUT terminal on the A/B switch and ANTENNA IN on the VCR.
7Connect the fifth coaxial cable to the ANTENNA OUT on the VCR to the TV’s ANTENNA jacks (varied by TV).
8If your TV has audio and video inputs, continue with the connections on the next page. If not, plug in power cords of VCR, TV, and cable box.
This connection will allow you to watch one nonscrambled channel while you record another non-scrambled channel.
With this connection, you should set the A/B switch to A to record a non-scrambled channel. You may watch the same channel or any other non-scrambled channel at the same time.
To record a scrambled channel, set the switch to B, select your cable output channel (usually 3 or 4) on the VCR and select the channel you wish to record on the cable box. At this time your TV will not be able to show any other channel.
IMPORTANT
With this connection, you cannot:
•record a scrambled channel and watch a non-scrambled channel at the same time.
•record a non-scrambled channel and watch a scrambled channel at the same time.
•record one scrambled channel and watch a different scrambled channel.
A/B Switch |
Splitter |
|
A |
OUT |
|
IN |
B |
OUT |
|
OUT |
IN |
|
|
|
|
|
From Cable |
|
|
Cable box |
|
|
|||||
|
|
|
|
|
wall outlet |
|
|
VCR Rear Panel
ANTENNA |
IN |
OUT |
supplied coaxial cable
UHF
VHF/UHF
OR
VHF 
TV Rear Panel
6
Hooking Up Your VCR
Connections to TV with Audio Video Inputs
Because you purchased a Hi-Fi VCR, you will want to take advantage of its superior sound capability and connect it to a stereo TV system with audio and video inputs. This connection also helps maintain the best picture quality.
1Connect the red and white audio cable to AUDIO OUT R (right) and AUDIO OUT L (left) on the VCR. Connect the other end to the TV’s AUDIO INPUT RIGHT and AUDIO INPUT LEFT. Match the colors of the connectors to the cables.
2Connect the yellow video cable to VIDEO OUT on VCR. Connect the other end to VIDEO INPUT on the TV.
3Set the RF Converter to OFF. See page 40 for instructions on this setting, which can be done at a later time.
IMPORTANT
You may need to purchase an audio/ video cable for this hookup.
Your TV Owner’s Guide may have additional suggestions for audio/video hookups.
To connect your VCR to a mono (nonstereo) TV, connect only the white AUDIO OUT L of the VCR and the white AUDIO INPUT of the TV. Since the TV is not stereo, you cannot take advantage of your VCR’s Hi-Fi stereo sound.
If you have an older TV without audio video inputs, simply connect only the antenna or cable as shown on page 5 or 6.
VCR Rear Panel |
|
|
|
|
|
|
AUDIO |
|
|
|
|
|
OUT |
|
|
|
|
|
R |
|
|
|
|
R |
|
|
|
|
|
Red |
L |
|
|
|
|
L |
|
|
|
|
|
White |
VIDEO |
|
|
|
|
|
|
|
|
|
|
Yellow |
OUT |
|
|
|
|
|
|
|
|
|
|
|
|
|
|
L |
RR |
TV Rear Panel |
Yellow White |
Red |
|||
|
|
INPUT-1 |
|
|
|
|
|
INPUT-2 |
|
|
|
|
|
OUTPUT |
|
|
|
|
|
MONITOR/TUNER |
|
|
|
|
|
S-VIDEO |
VIDEO |
L (MONO) |
R |
|
|
AUDIO |
|
||
7
Hooking Up Your VCR
Connections to Home Theater Receiver
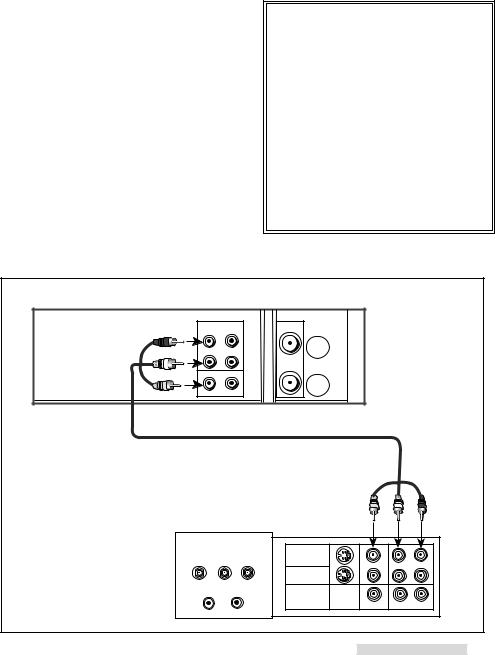
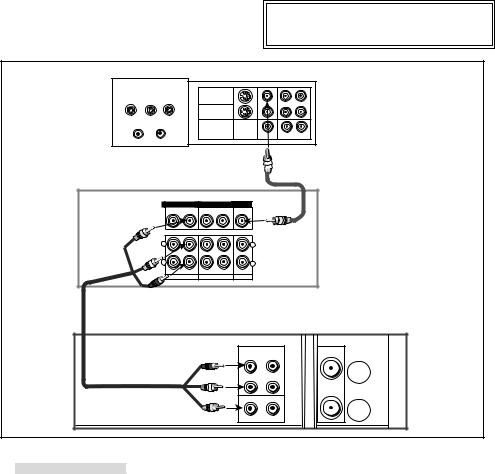
You may wish to connect your VCR to a Home Theater Receiver so that you can take advantage of the Surround Sound audio recordings that are common with many movies. Home Theater Receivers often will control both the sound that is heard from the speakers and the picture shown on your TV. Below is the basic connection between your VCR and Home Theater Receiver. If you use this connection, you will not use Connections to TV with Audio Video Inputs.
1Connect the red and white audio cables to AUDIO OUT R and AUDIO OUT L on the VCR. Connect the other end to the VCR 1 AUDIO INPUT R and AUDIO INPUT L on the Home Theater Receiver.
2Connect a yellow video cable to VIDEO OUT on the VCR. Connect the other end to the VCR 1 VIDEO INPUT on the Home Theater Receiver.
3Connect a yellow video cable to the MONITOR OUT of the Home Theater Receiver. Connect the other end to the VIDEO INPUT on the back of the TV.
4See your Home Theater Receiver Owner’s Guide for information concerning audio connection between TV and Home Theater Receiver, or additional hookups and operations.
IMPORTANT
You may need to purchase two sets of audio/video cables for this hookup.
TV Rear Panel
INPUT 1 |
|
|
|
S-VIDEO |
VIDEO |
L (MONO) |
R |
AUDIO |
|
 Yellow
Home Theater Receiver Rear Panel
VIDEO |
VCR 1 |
VCR2 |
|
MONITOR |
OUT |
IN |
OUT |
IN |
OUT |
Yellow |
|
|
|
Yellow |
AUDIO |
|
|
||
L |
|
|
|
L |
White |
|
|
|
|
R |
|
|
|
R |
L |
|
|
|
|
OUT |
IN |
OUT |
IN |
IN |
VCR 1 |
VCR 2 |
|
TV |
|
R |
|
|
|
|
Red |
|
|
|
|
VCR Rear Panel
|
AUDIO |
|
OUT |
|
R |
R |
|
Red |
L |
L |
|
White |
VIDEO |
Yellow |
OUT |
8

 Playback
Setting Up Your VCR
The first thing you need to do is set up your VCR so that you can see the picture coming from the VCR. It’s important to take a few minutes to set up your VCR correctly before you try to use it.
Based on the type of TV that you have, choose one of the following:
TV with Audio/Video Inputs
1Turn on your TV and switch it to the correct external input. For most Mitsubishi TVs, this means pressing the TV’s INPUT button until you see the words Ext-1 or Input-1 on the screen. If you do not have a Mitsubishi TV, please refer to your TV Owner’s Guide for this procedure.
2Turn the VCR on by pressing POWER.
3You are now watching the VCR’s picture. To go back to viewing the picture from the TV, press the TV’s INPUT button to go back to the previous ANTENNA input position.
4Later, you should turn the RF converter OFF by following instructions on page 40.
If your system includes a home theater receiver or an A/V receiver, refer to your home theater receiver’s owner’s guide.
TV without Audio/Video Inputs
If your TV does not have separate audio/video inputs, then your VCR will need to convert the VCR’s picture to channel 3 or 4. This is called the video channel. The factory has already selected channel 3; however, if it is a broadcast channel in your area, then you will need to change this to channel 4. To make this change:
set up
1To choose channel 4: with the VCR power OFF, press CHANNEL ªand REC SPEED on the front panel at the same time. CH4 will display on the front panel and the VCR will send signals on channel 4.
If needed, to return to channel 3: with the VCR turned OFF, press CHANNEL º and REC SPEED on the front panel at
the same time. CH3 will display.
2 Turn the VCR on by pressing POWER. operating
3Check to see if the VCR light on the front panel display is lit. If it is not, press VCR/TV on the remote control until the VCR light appears on the front panel. This light must be on when you watch a video tape or use the VCR menus. The VCR light will turn on automatically when you play a tape or use the VCR menus when the RF converter is set to ON. See page 40.
4Turn on the TV and change the TV to the video channel (3 or 4). You are now watching the VCR’s picture.
To watch a channel that is different than the channel your VCR is recording, the VCR light must be off. The VCR/TV button turns this light on and off.
1 2 3
4 5 6
7 8 9
0
VCR/TV
POWER REC SPEED
SP/EP CHANNEL
9
Playback
Operating Your Remote Control
Installing the Batteries
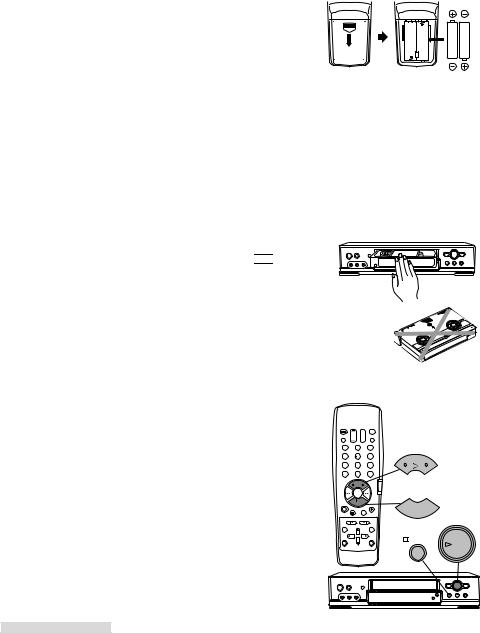
1To remove the back cover, press the ridged area gently, then push the cover in the direction of the arrow and lift.
2Load the batteries, making sure the polarities (+) and (–) are correct. This is marked inside the battery compartment.
Next, you need to tell the remote control to operate the VCR, not the TV.
Operating the VCR with the Remote Control
The HS-U448 has two VCR remote control operational settings: VCR-A and VCR-B. The HS-U448 is pre-set to VCR-A setting. See page 43 for information about VCR operational setting.
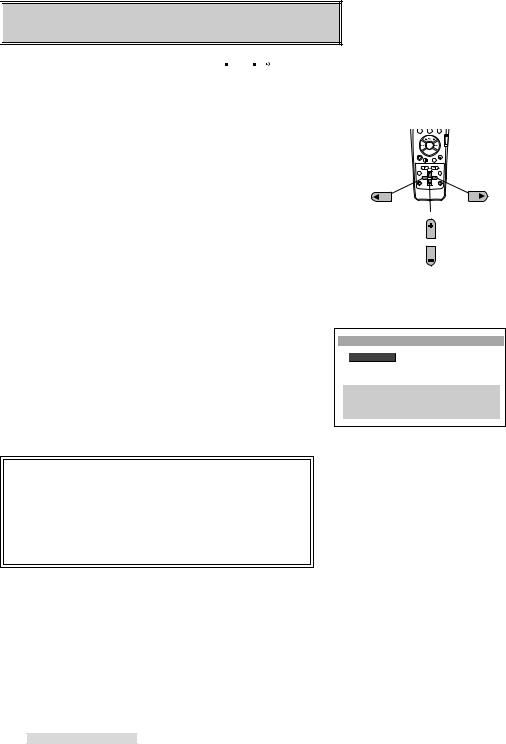
1Set the VCR/TV slide switch on the remote control to VCR position. This “tells” the remote that you want to control the VCR.
Loading a Tape
Tapes can be loaded into your VCR as long as the VCR is plugged in. Even when the VCR POWER is off, loading a tape will automatically turn the VCR on. Use only tapes that have a 

 label.
1Hold the tape so that the long narrow edge with the contents label faces you. The other edge is hinged and should face the VCR. The plastic window that shows the videotape should face up.
2Gently insert the tape evenly into the cassette slot until the VCR automatically takes it in.
If the VCR will not automatically take the tape in, press EJECT and try again.
Your VCR will eject the tape if it is loaded improperly. If the VCR ejects the tape; remove the tape, check to see that the contents label is facing you, that the geared tape reels are facing down, wait a few seconds, and try again.
Playing a Tape
1Press PLAY on the front panel or the remote control.
The VCR will automatically play the tape at the correct speed. When the VCR reaches the end of the tape, it will automatically rewind to the beginning of the tape and stop.
You can stop playing by pressing STOP.
CORRECT
INCORRECT
1 2 3
4 5 6
PLAY
7 8 9
0
STOP
STOP
PLAY
10
Playback
Using Basic Playback Controls
Rewinding a tape
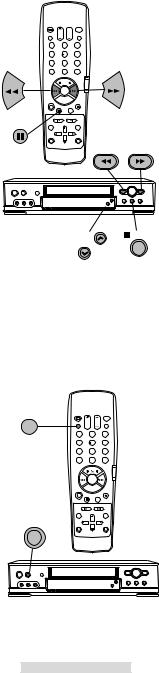
While the tape is stopped, press REW on the remote control or on the front panel.
Fast forwarding a tape
While the tape is stopped, press FF on the remote control or on the front panel.
Speed Search with picture
While the tape is playing press FF for forward speed search with picture or press REW for reverse speed search. See page 34 for additional information on searching techniques.
Pausing a tape
While the tape is playing, press PAUSE on the remote control or on the front panel to freeze the picture on the screen.
Press PAUSE a second time to return to normal play.
If you leave the VCR in pause for more than 5 minutes, the VCR will automatically stop to prevent damage to the tape.
Controlling the Vibration During Still Frame
If the picture vibrates during still frame, press the CHANNEL ªor º on the front panel until the picture is steady.
Unloading a Tape
1Press EJECT on the front panel or on the remote control. If the VCR POWER is off, the VCR will turn on, eject the tape, then turn off.
2Remove the tape.
Using repaired tapes
We recommend that you take any broken or torn tapes to a professional for repair. If you repair a torn tape with improper materials, you could damage your VCR when you play the tape.
1 |
2 |
3 |
4 |
5 |
6 |
7 |
8 |
9 |
|
0 |
|
REW |
FF |
|
PAUSE |
|
|
|
REW |
FF |
PAUSE
CHANNEL
EJECT
1 2 3
4 5 6
7 8 9
0
 EJECT
EJECT
11

 Setting Up Your VCR
Your VCR comes with Mitsubishi’s exclusive


 onscreen operating system. This system has been developed to simplify the operation of your VCR with clear, easy-to-understand language and design.
Before your VCR can receive television channels or you can program your VCR to record, you need to memorize all of the channels you can receive into your VCR and set the clock.
Fortunately, your VCR makes this an easy process with our menu system.
When using the on-screen menus, use the ADJUST buttons to move the highlight bar up or down and to change the setting of selected features. Press the ENTER button to enter a selection or adjustment. Press the CANCEL button to cancel or clear a setting.
Selecting the On-screen Language
You can set your VCR to display on-screen messages, menus, and functions in English or Spanish. You will do this the first time you use the menus or set any audio and video functions.
1Make sure you are viewing the picture coming from your VCR. Press MENU on the remote control. If this is the first time the menus have been used, you will see the menu for selecting the on-screen language.
2Press ADJUST buttons on the remote control to highlight the desired language.
3Press ENTER on the remote control. The menu will change to the VCR Main Menu.
4Press MENU to exit the menus.
IMPORTANT
The Select Language menu is unique. While all other menus can be accessed at almost any time, the Select Language menu will not automatically appear again after it is first set. To see the Select Language menu, press the POWER button for about 8 seconds, then follow the procedure above. The Select Language menu will also appear after an extended power failure.
4 |
5 |
6 |
7 |
8 |
9 |
|
0 |
|
Press to |
Press to |
Cancel |
Enter |
CANCEL |
ENTER |
|
ADJUST |
|
Press to |
|
Select |
|
ADJUST |
Select Language
ƒEnglish ƒEspañol
MENU to go back
ADJUST to select¥ ENTER to enter
ADJUST to select
12
Setting Up Your VCR
Memorizing Channels Automatically
Using this process, your VCR will automatically memorize all of the television stations available to you. You can later get rid of unwanted or unused stations.
If your local cable company scrambles some or all stations, and/or requires you to use a cable box, then your ability to memorize channels would normally be limited. The cable box receives all of your channels, then sends only one to your TV and your VCR, usually on channel 3 or 4.
If your cable box or cable system seems incompatible with your new VCR, call your cable company. They may be able to provide solutions to your problems.
1Set the VCR’s input to tuner. To do this, press INPUT on the remote control until a channel number appears on the screen.
2Press MENU on the remote control. VCR Main Menu comes up. If First Time Set-Up is not highlighted, use the ADJUST buttons on the remote to highlight it.
3Press ENTER. First Time Set-Up menu will appear. Press the ADJUST buttons to select Memorize channels. Press ENTER.
IMPORTANT
If you are playing back a tape or receiving a video signal from an external input, Not available will flash and an error message will appear. To correct this, stop the tape or turn off the menus and switch the VCR’s input to tuner.
4You will see the menu for sources connected to the VCR. Using the list below as a reference, press the ADJUST buttons to select the kind of antenna you connected.
•Cable if you are using any cable combination, including a cable box with an A/B switch
•Indoor/outdoor ant. if you use rabbit ears type or roof
mounted type antennas
After you have selected, press ENTER.
5An on-screen message will show you that the VCR is memorizing the stations you can receive. You can cancel the memorization at any time by pressing CANCEL. After the VCR has memorized all the channels, the screen will return to the VCR’s picture.
IMPORTANT
Automatic channel memorizing may include vacant channels if there are stray signals or noise on those channels. If this occurs, you can manually delete the channels using the procedure in the section Adding and Deleting Channels.
A special note to cable box subscribers
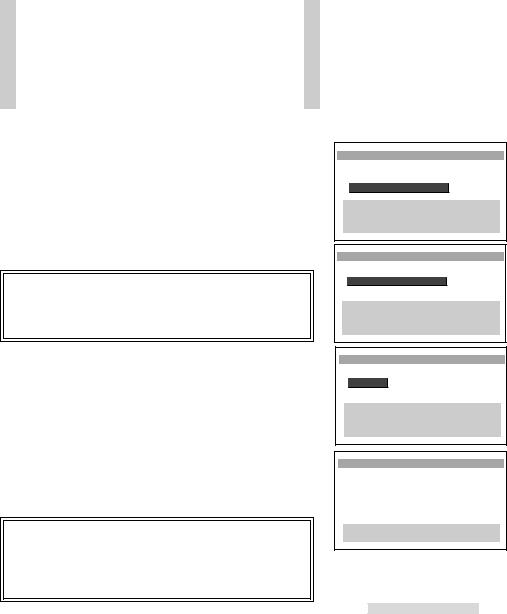
ªVCR Main Menu Your choices are:
¬Program to recordCustomize choices ƒFirst Time Set-Up
MENU to go back
ADJUST to select¥ ENTER to enter
ADJUST to select
ƒFirst Time Set-Up Your choices are:Set the clockMemorize channels «Add/delete channels
MENU to go back
ADJUST to select¥ ENTER to enter
ADJUST to select
Memorize channels
What type of sources are connected to the VCR? ’Cable ”Indoor/outdoor ant.
MENU to go back
ADJUST to select¥ ENTER to enter
ADJUST to select
Memorize channels
Now memorizing all the stations you can receive
Channel 3 Stand by this may take a few minutes
To cancel memorization, press CANCEL
13
Setting Up Your VCR
Adding and Deleting Channels
If necessary, you can manually add or delete channels after you have completed the automatic channel memorizing.
1Make sure that video mute is ON. See page 39.
2Set the VCR’s input to tuner. To do this, press INPUT on the remote control until a channel number appears on the screen.
3Press MENU on the remote control. VCR Main Menu appears.
4Press the ADJUST buttons on the remote control to select First Time Set-Up. Press ENTER.
5You will see the First Time Set-Up menu. Press the ADJUST buttons to select Add/delete channels. Press ENTER.
IMPORTANT
If you are playing back a tape or receiving a video signal from an external input, then Not available will flash onscreen. To correct this, stop the tape or turn off the menus and switch the VCR’s input to tuner.
6You will see the screen for adding or deleting channels. Use the ADJUST buttons to select the channel that you want to add or delete. Press ENTER to add the channel; press CANCEL to delete it.
7When you are finished adding or deleting channels, press MENU three times to exit the menus.
IMPORTANT
If you use automatic memorizing again, you will lose all of the manual changes you made. All of the channels you deleted will be added; all of the channels you added will be deleted.
Selecting a Channel
Now that you have memorized channels, and added or deleted some, you will want to be able to select channels. If you have not yet memorized channels, see page 13, Memorizing Channels
Automatically. |
|
Antenna/Cable selections |
Your VCR can receive |
indoor/outdoor antenna |
VHF/UHF channels 2–69 |
cable antenna |
cable channels 1–125 |
If you try to select a channel number that the VCR cannot receive, the VCR will not change channels.
selecting channels sequentially
Press CHANNEL on the remote control or on the VCR front panel. This will cycle through the channels in sequential numerical order.
selecting channels directly
Use the number buttons on the remote control. For example, to choose channel 23, press 2-3.
To select a single digit channel, such as channel 5; press 5. You can also press 5, then press ENTER.
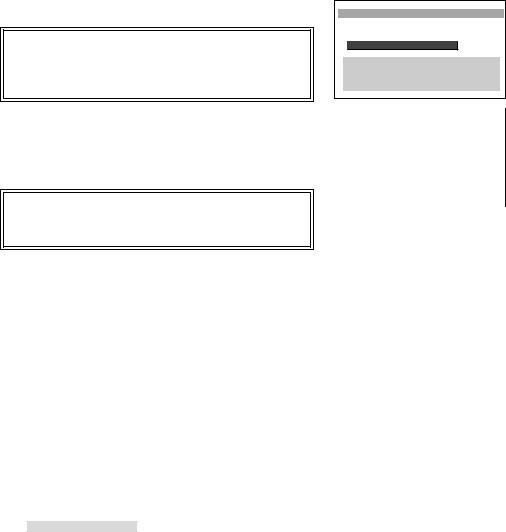
ƒFirst Time Set-Up Your choices are:Set the clockMemorize channels «Add/delete channels
MENU to go back
ADJUST to select¥ ENTER to enter
ADJUST to select
|
|
|
|
|
|
|
|
«Add/delete channels |
|
|
|||
|
|
|
|
|
|
|
|
|
Channel |
39 |
|
|
|
|
|
Not in memory |
|
|
||
|
|
|
|
|
||
|
|
MENU to go back |
|
|
|
|
|
|
ADJUST to select |
|
|
|
|
|
|
¥ ENTER |
to add |
|
|
|
|
|
† ADJUST to select |
|
|
|
|
|
CANCEL to delete |
|
|
|||
|
|
|
|
|
||
14
Setting Up Your VCR
Setting the Clock
You have to set the clock using either Setting the Auto Clock or Setting the Clock Manually before you can program your VCR to record.
Setting the Auto Clock
Your VCR can set the clock automatically by picking up a time signal which some TV and cable channels transmit with their broadcasts. Most PBS stations send this signal; however, this function works only if a channel in your area is broadcasting a time signal. If you don’t receive this signal, set the clock manually.
1Press MENU on the remote control. VCR Main Menu will appear.
2Press the ADJUST buttons to select First Time Set-Up. Press ENTER. The First Time Set-Up menu will appear. Use the ADJUST buttons to select Set the clock. Press ENTER.
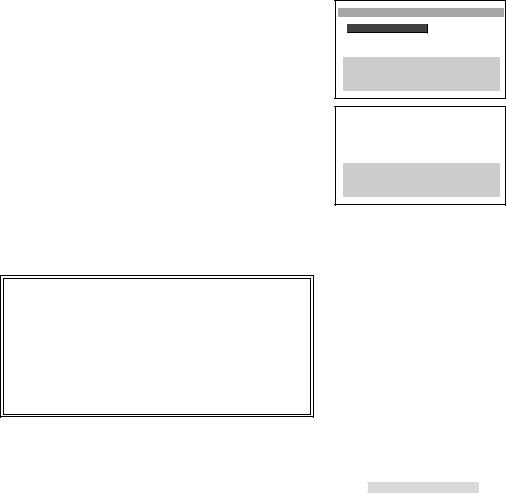
3You will see the Set the clock menu. Auto Clock set will be highlighted. Press the ADJUST buttons to select ON.
4Turn the VCR off to activate the auto clock setting function.
The VCR will search for a channel that carries a time signal, then set your time zone and daylight saving time. If there are only a few channels in your area that carry time signals, it may take about 30 minutes to complete. If you turn the VCR on before the correct time displays, the auto clock setting will be cancelled. See if the clock has been set on the front panel display on the VCR.
If the VCR displays the wrong time, the time zone setting may not be correct. To adjust this, follow the steps in If the VCR displays the wrong time. (See the next page.)
IMPORTANT
The auto clock function will activate whenever you turn off the VCR and at 3:00 am, when the VCR power is off. If you use a cable box, make sure that you leave the cable box on and tuned to the local PBS station to activate the auto clock function.
After a power failure, the VCR will automatically set the clock again. (If you have set the Auto Clock set setting of the Set the clock menu to OFF, the auto clock function will not work.)
ƒFirst Time Set-Up Your choices are:Set the clockMemorize channels «Add/delete channels
MENU to go back
ADJUST to select¥ ENTER to enter
ADJUST to select
Set the clock |
|
|
|
|
|
|
|
|
|
|
|
|
|
|
|
|
|
|
|
|
|
ƒAuto Clock set |
|
ON |
|
OFF |
|
|
|
|
|
|
|
|
|
|
|
|
|
|
|
MENU to go back
ADJUST to select¥ ENTER to enter
ADJUST to select
15
 Loading...