Miele H 176 MB, H 177 MB, H 187 MB, H 186 MB User Manual
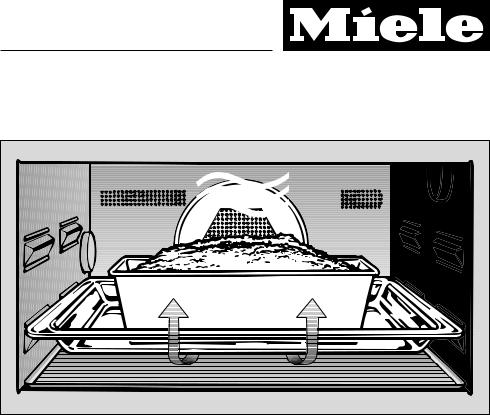
Operating Instructions
Microwave
Combination Oven
H 176 MB, H 177 MB
H 186 MB, H 187 MB
It is essential to read these operating instructions before installing or using the machine, to avoid the risk of accident, or damage to the machine.
GiZWO
M.-Nr. 05 237 671
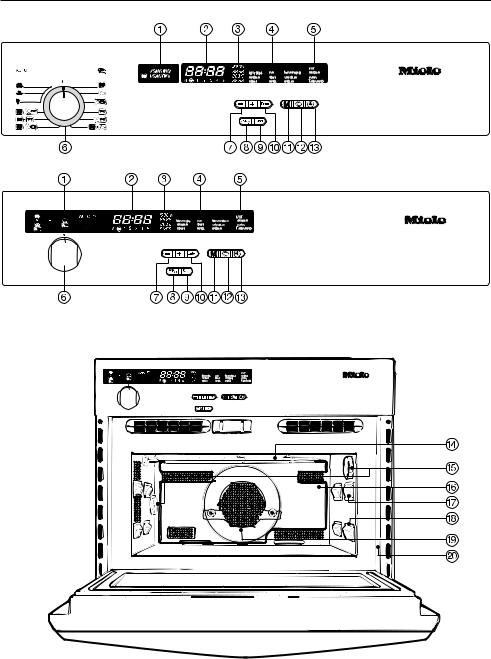
Description of the appliance
2
Description of the appliance
aDisplay field (according to model)
–for operating modes
–MANUAL / AUTOMATIC
bData entry display
cSelected settings display
dDisplay for: - Food groups - Automatic-Programmes -
eStatus display for the clock
fFunction selector
g"– /+" Touch controls with indicator light for selecting a microwave setting or temperature, time, food group, weight
hTouch control for interrupting, cancelling a cooking process
iTouch control with indicator light for starting a cooking process
jEnter touch control with indicator light for confirming selected setting
kTouch control for memory function M
lTouch control for the short step system c
mTouch control for entering times
nGrill element
oOven interior lighting
pRemovable glass rear panel
qSecond shelf support
rFirst shelf support
sAir vent for the fan
tData plate
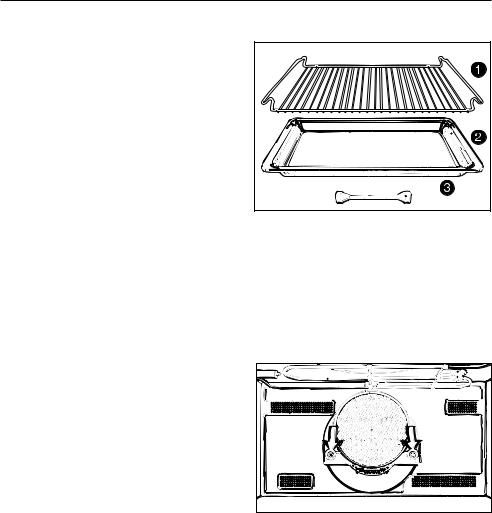
Accessories |
A Rack, B Glass tray, C Boiling rod
Grease filter
Remember to insert the grease filter when roasting on the rack using the Fan Heat (hot air), Auto Roast and Fan Grill systems - both solo and in combination with the microwave.
The grease filter will trap any excess droplets of fat keeping the oven interior and the area behind the rear wall cleaner.
3

Contents
Description of the appliance. . . . . . . . . . . . . . . . . . . . . . . . . . . . . . . . . . . . . . . . . 2 Accessories . . . . . . . . . . . . . . . . . . . . . . . . . . . . . . . . . . . . . . . . . . . . . . . . . . . . . . . 3
Description of the functions . . . . . . . . . . . . . . . . . . . . . . . . . . . . . . . . . . . . . . . . . 7 Functions . . . . . . . . . . . . . . . . . . . . . . . . . . . . . . . . . . . . . . . . . . . . . . . . . . . . . . . . . 7 Safety features . . . . . . . . . . . . . . . . . . . . . . . . . . . . . . . . . . . . . . . . . . . . . . . . . . . . . 8 Energy saving functions . . . . . . . . . . . . . . . . . . . . . . . . . . . . . . . . . . . . . . . . . . . . . 8
Warning and Safety instructions . . . . . . . . . . . . . . . . . . . . . . . . . . . . . . . . . . . . . 9
Caring for the environment . . . . . . . . . . . . . . . . . . . . . . . . . . . . . . . . . . . . . . . . . 15
Before using for the first time. . . . . . . . . . . . . . . . . . . . . . . . . . . . . . . . . . . . . . . 16
Operating modes . . . . . . . . . . . . . . . . . . . . . . . . . . . . . . . . . . . . . . . . . . . . . . . . . 17 Microwave h . . . . . . . . . . . . . . . . . . . . . . . . . . . . . . . . . . . . . . . . . . . . . . . . . . . . 17 Traditional oven functions . . . . . . . . . . . . . . . . . . . . . . . . . . . . . . . . . . . . . . . . . . . 18 Fan Heat D . . . . . . . . . . . . . . . . . . . . . . . . . . . . . . . . . . . . . . . . . . . . . . . . . . . 18 Auto Roast E. . . . . . . . . . . . . . . . . . . . . . . . . . . . . . . . . . . . . . . . . . . . . . . . . 18 Grill n. . . . . . . . . . . . . . . . . . . . . . . . . . . . . . . . . . . . . . . . . . . . . . . . . . . . . . . . 18 Fan Grill N . . . . . . . . . . . . . . . . . . . . . . . . . . . . . . . . . . . . . . . . . . . . . . . . . . . 18 Combination programmes . . . . . . . . . . . . . . . . . . . . . . . . . . . . . . . . . . . . . . . . . . . 19 Automatic programmes . . . . . . . . . . . . . . . . . . . . . . . . . . . . . . . . . . . . . . . . . . . . . 19
Suitable containers for microwave ovens . . . . . . . . . . . . . . . . . . . . . . . . . . . . . 20 Material and shape . . . . . . . . . . . . . . . . . . . . . . . . . . . . . . . . . . . . . . . . . . . . . . . . 20
Operation - Controls . . . . . . . . . . . . . . . . . . . . . . . . . . . . . . . . . . . . . . . . . . . . . . 25 Function selector . . . . . . . . . . . . . . . . . . . . . . . . . . . . . . . . . . . . . . . . . . . . . . . . . . 25 Touch controls . . . . . . . . . . . . . . . . . . . . . . . . . . . . . . . . . . . . . . . . . . . . . . . . . . . . 25
Time of day . . . . . . . . . . . . . . . . . . . . . . . . . . . . . . . . . . . . . . . . . . . . . . . . . . . . . . 27 Setting time of day (24 hour clock) . . . . . . . . . . . . . . . . . . . . . . . . . . . . . . . . . . . . 27 Turning off the time of day display. . . . . . . . . . . . . . . . . . . . . . . . . . . . . . . . . . . . . 27 Showing time of day display again . . . . . . . . . . . . . . . . . . . . . . . . . . . . . . . . . . . . 27
Notes on use . . . . . . . . . . . . . . . . . . . . . . . . . . . . . . . . . . . . . . . . . . . . . . . . . . . . 28 Selecting a function . . . . . . . . . . . . . . . . . . . . . . . . . . . . . . . . . . . . . . . . . . . . . . . . 28 Selecting a microwave power level / temperature. . . . . . . . . . . . . . . . . . . . . . . . . 28 Entering the time . . . . . . . . . . . . . . . . . . . . . . . . . . . . . . . . . . . . . . . . . . . . . . . . . . 29
Operating modes . . . . . . . . . . . . . . . . . . . . . . . . . . . . . . . . . . . . . . . . . . . . . . . . . 30
Combination programmes . . . . . . . . . . . . . . . . . . . . . . . . . . . . . . . . . . . . . . . . . 31
Automatic programmes. . . . . . . . . . . . . . . . . . . . . . . . . . . . . . . . . . . . . . . . . . . . 33
Altering entered data . . . . . . . . . . . . . . . . . . . . . . . . . . . . . . . . . . . . . . . . . . . . . . 36 Before starting a process. . . . . . . . . . . . . . . . . . . . . . . . . . . . . . . . . . . . . . . . . . . . 36 After starting a process . . . . . . . . . . . . . . . . . . . . . . . . . . . . . . . . . . . . . . . . . . . . . 36
4

Contents
Memory function . . . . . . . . . . . . . . . . . . . . . . . . . . . . . . . . . . . . . . . . . . . . . . . . . 38
Short step system . . . . . . . . . . . . . . . . . . . . . . . . . . . . . . . . . . . . . . . . . . . . . . . . 39
Automatic delay start. . . . . . . . . . . . . . . . . . . . . . . . . . . . . . . . . . . . . . . . . . . . . . 41
Opening the door . . . . . . . . . . . . . . . . . . . . . . . . . . . . . . . . . . . . . . . . . . . . . . . . . 42
When the time has elapsed. . . . . . . . . . . . . . . . . . . . . . . . . . . . . . . . . . . . . . . . . 43 Audible tone. . . . . . . . . . . . . . . . . . . . . . . . . . . . . . . . . . . . . . . . . . . . . . . . . . . . . . 43 Starting another process . . . . . . . . . . . . . . . . . . . . . . . . . . . . . . . . . . . . . . . . . . . . 43 When a process has finished. . . . . . . . . . . . . . . . . . . . . . . . . . . . . . . . . . . . . . . . . 43
Minute Minder. . . . . . . . . . . . . . . . . . . . . . . . . . . . . . . . . . . . . . . . . . . . . . . . . . . . 44 Altering a minute minder entry. . . . . . . . . . . . . . . . . . . . . . . . . . . . . . . . . . . . . . . . 44 When the minute minder time has elapsed . . . . . . . . . . . . . . . . . . . . . . . . . . . . . . 44
Energy saving functions . . . . . . . . . . . . . . . . . . . . . . . . . . . . . . . . . . . . . . . . . . . 45 "Night time dimming" . . . . . . . . . . . . . . . . . . . . . . . . . . . . . . . . . . . . . . . . . . . . . . . 45 Switching off the oven interior lighting . . . . . . . . . . . . . . . . . . . . . . . . . . . . . . . . . . 46
Programming lock . . . . . . . . . . . . . . . . . . . . . . . . . . . . . . . . . . . . . . . . . . . . . . . . 47
Defrosting . . . . . . . . . . . . . . . . . . . . . . . . . . . . . . . . . . . . . . . . . . . . . . . . . . . . . . . 48
Chart for defrosting food. . . . . . . . . . . . . . . . . . . . . . . . . . . . . . . . . . . . . . . . . . 49
Reheating . . . . . . . . . . . . . . . . . . . . . . . . . . . . . . . . . . . . . . . . . . . . . . . . . . . . . . . 50
Chart for reheating food . . . . . . . . . . . . . . . . . . . . . . . . . . . . . . . . . . . . . . . . . . 52
Cooking. . . . . . . . . . . . . . . . . . . . . . . . . . . . . . . . . . . . . . . . . . . . . . . . . . . . . . . . . 53 Microwave h. . . . . . . . . . . . . . . . . . . . . . . . . . . . . . . . . . . . . . . . . . . . . . . . . . . . . 53 Fan Heat D . . . . . . . . . . . . . . . . . . . . . . . . . . . . . . . . . . . . . . . . . . . . . . . . . . . . . . 54 Combination programmes . . . . . . . . . . . . . . . . . . . . . . . . . . . . . . . . . . . . . . . . . . . 54 Chart for cooking food . . . . . . . . . . . . . . . . . . . . . . . . . . . . . . . . . . . . . . . . . . . 55 Chart for cooking and crisping/browning food. . . . . . . . . . . . . . . . . . . . . . . . . 56
Defrosting and Re-heating / Cooking. . . . . . . . . . . . . . . . . . . . . . . . . . . . . . . . . 57 Chart for defrosting and reheating or cooking of deep frozen ready made meals . . . . . . . . . . . . . . . . . . . . . . . . . . . . . . . . . . . . . . . . . . . . . . . . . . . . . . . . 58 Defrosting and reheating, or cooking and crisping or browning of deep frozen ready made meals . . . . . . . . . . . . . . . . . . . . . . . . . . . . . . . . . . . . . . . . . . . . . . 59
Grilling . . . . . . . . . . . . . . . . . . . . . . . . . . . . . . . . . . . . . . . . . . . . . . . . . . . . . . . . . 60 Preparation of meat or fish. . . . . . . . . . . . . . . . . . . . . . . . . . . . . . . . . . . . . . . . . . . 60 Test to see if cooked . . . . . . . . . . . . . . . . . . . . . . . . . . . . . . . . . . . . . . . . . . . . . . . 60 Chart for grilling . . . . . . . . . . . . . . . . . . . . . . . . . . . . . . . . . . . . . . . . . . . . . . . . 61
5

Contents
Roasting . . . . . . . . . . . . . . . . . . . . . . . . . . . . . . . . . . . . . . . . . . . . . . . . . . . . . . . . 62 Auto Roast E. . . . . . . . . . . . . . . . . . . . . . . . . . . . . . . . . . . . . . . . . . . . . . . . . 62 Microwave + Auto Roast h+ E. . . . . . . . . . . . . . . . . . . . . . . . . . . . . . . . . . 63 After the roasting process is finished . . . . . . . . . . . . . . . . . . . . . . . . . . . . . . . . . . 63 Useful hints . . . . . . . . . . . . . . . . . . . . . . . . . . . . . . . . . . . . . . . . . . . . . . . . . . . . . . 63 Roasting in a covered pot. . . . . . . . . . . . . . . . . . . . . . . . . . . . . . . . . . . . . . . . . 63 Roasting deep frozen meat . . . . . . . . . . . . . . . . . . . . . . . . . . . . . . . . . . . . . . . 63 Chart for roasting . . . . . . . . . . . . . . . . . . . . . . . . . . . . . . . . . . . . . . . . . . . . . . . 64
Baking . . . . . . . . . . . . . . . . . . . . . . . . . . . . . . . . . . . . . . . . . . . . . . . . . . . . . . . . . . 65 Fan Heat D . . . . . . . . . . . . . . . . . . . . . . . . . . . . . . . . . . . . . . . . . . . . . . . . . . . 65 Microwave + Fan Heat h+ D. . . . . . . . . . . . . . . . . . . . . . . . . . . . . . . . . . . . 65 Chart for baking . . . . . . . . . . . . . . . . . . . . . . . . . . . . . . . . . . . . . . . . . . . . . . . . 67
Cleaning and care . . . . . . . . . . . . . . . . . . . . . . . . . . . . . . . . . . . . . . . . . . . . . . . . 68 Appliance front and control panel . . . . . . . . . . . . . . . . . . . . . . . . . . . . . . . . . . . . . 68 Oven interior . . . . . . . . . . . . . . . . . . . . . . . . . . . . . . . . . . . . . . . . . . . . . . . . . . . . . 70 Glass back panel . . . . . . . . . . . . . . . . . . . . . . . . . . . . . . . . . . . . . . . . . . . . . . . 70 Oven interior roof . . . . . . . . . . . . . . . . . . . . . . . . . . . . . . . . . . . . . . . . . . . . . . . 71 Door interior . . . . . . . . . . . . . . . . . . . . . . . . . . . . . . . . . . . . . . . . . . . . . . . . . . . . . . 71 Accessories . . . . . . . . . . . . . . . . . . . . . . . . . . . . . . . . . . . . . . . . . . . . . . . . . . . . . . 71 Grease filter . . . . . . . . . . . . . . . . . . . . . . . . . . . . . . . . . . . . . . . . . . . . . . . . . . . 71 Rack . . . . . . . . . . . . . . . . . . . . . . . . . . . . . . . . . . . . . . . . . . . . . . . . . . . . . . . . . 71 Glass tray . . . . . . . . . . . . . . . . . . . . . . . . . . . . . . . . . . . . . . . . . . . . . . . . . . . . . 71
Problem solving guide. . . . . . . . . . . . . . . . . . . . . . . . . . . . . . . . . . . . . . . . . . . . . 72
After sales service . . . . . . . . . . . . . . . . . . . . . . . . . . . . . . . . . . . . . . . . . . . . . . . . 76 Customer contact . . . . . . . . . . . . . . . . . . . . . . . . . . . . . . . . . . . . . . . . . . . . . . . . . 76
Electrical connection IRL, U.K., ZA . . . . . . . . . . . . . . . . . . . . . . . . . . . . . . . . . . 77
Electrical connection AUS, NZ . . . . . . . . . . . . . . . . . . . . . . . . . . . . . . . . . . . . . . 79
Installation . . . . . . . . . . . . . . . . . . . . . . . . . . . . . . . . . . . . . . . . . . . . . . . . . . . . . . 80 Possibilities for installation and combination . . . . . . . . . . . . . . . . . . . . . . . . . . . . . 80 Installation measurements . . . . . . . . . . . . . . . . . . . . . . . . . . . . . . . . . . . . . . . . . . . 80
6

Description of the functions
Functions
User responsive
The appliance is designed to be "user responsive". When the user presses a function control the relevant display and indicator light will automatically light up.
* See "Operating modes" for further details.
"Solo" functions *
Each of the following functions can be used by itself "Solo":
– Microwave h
For defrosting, reheating and cooking food in a short time.
– Fan Heat (hot air) D
For baking, cooking food using hot air circulation.
– Auto Roast E
For automatic browning and continued cooking.
– Grill n
For browning and grilling flat food. Grill with the door shut.
– Fan Grill N
For grilling thick cuts, e.g. rolled meat, poultry.
Grill with the door shut.
Combination programmes *
For combining the microwave with a traditional oven function.
Automatic programmes *
For cooking Q, reheating P, and defrosting Nselected food groups using the microwave.
Memory function
For storing up to 5 stages of a cooking process in memory, e.g. for initial and continued cooking.
Short step system
For storing in memory the microwave power setting and the time for cooking processes you use frequently.
Automatic delay start
For delaying the start of a process by up to 23 hours and 59 minutes.
Minute minder
For monitoring other kitchen activities, e.g. boiling an egg on a hob.
Time of day display
When the appliance is switched off the time of day is shown in the digital display.
You can also turn off this display.
7

Description of the functions
Safety features |
Energy saving functions |
Door lock
Once a cooking process using the microwave has begun, the door will remain locked until the end of the programme.
You can cancel the door lock by pressing the Stop/C touch control. The programme will then be interrupted.
Programming lock
The programming lock prevents functions being entered unintentionally.
Safety cut-out
A process using a traditional oven function can be started without programming in a time. To prevent over-use and the consequent danger of fire, the appliance switches off automatically after a certain length of time. This can be between 1 hour and 10 hours depending on the function and temperature chosen.
If the microwave is switched off in between using two microwave cooking processes, there will be a delay of about 30 seconds before the new setting is accepted. Therefore wait a short while before starting the second process.
Door contact switch
If the door is opened during a programme using a traditional oven function (with or without microwave), a contact switch for the door switches the fan and heating element off automatically. The programme will continue to run again as soon as the door is shut. If ‘Stop/C’ was pressed before opening the door, then ‘Start’ must be pressed for the programme to continue.
Making use of residual heat
With the Fan Heat (hot air) and Auto Roast systems the heating shuts off automatically with the door closed when the current ambient temperature is sufficient to finish cooking the food. Whenever heat is lost, e.g. if the door is opened, the heating will switch on again automatically.
"Night time dimming" option
You can programme the appliance so that the brightness of the display is dimmed between the hours of 10 pm and 6 am. (22.00 to 6.00 hours).
Optional oven interior lighting
You can turn off the oven interior lighting if you do not want it to remain on during the entire cooking process. It will then only light up for approx. 10 seconds after you have pressed the Enter touch control.
8

Warning and Safety instructions
This appliance complies with all relevant legal safety requirements. Improper use of the appliance can, however, present a risk of both personal injury and material damage.
Before installation and before using the appliance for the first time, read the operating instructions carefully. They contain important notes on installation, safety, operation and care of the appliance. This way you will avoid the risk of accidents and damage to the appliance.
Keep these instructions in a safe place and pass them on to any future user.
Correct usage
The appliance is intended for domestic use only: to cook food, and
in particular to defrost, reheat, cook, bake, roast and to grill. Any other usage is at the owner’s risk and could be dangerous. The manufacturer cannot be held responsible for damage caused by improper use of the appliance.
Do not let children access the appliance or its controls. Supervise its use by the elderly or infirm.
If allowing older children to use the appliance without supervision please ensure that they are aware of how a microwave oven works and understand the dangers of improper use.
Technical safety
If the connection cable is damaged the new cable must be fitted by a
Miele approved service technician.
Do not use the microwave function of the appliance if
-the door is warped.
-the door hinges are loose.
-holes or cracks are visible in the casing, the door, the door seal or the oven interior walls. Operating the appliance with this type of damage will result in microwave leakage, and present a hazard to the user.
Never open the casing of the appliance. Tampering with electrical
connections or components and mechanical parts is highly dangerous to the user and can cause operational faults or electric shock.
Before connecting the appliance to the mains supply make sure that
the rating on the data plate corresponds to the voltage and frequency of the household supply. It is essential that these data correspond as otherwise damage will occur to the machine. If in doubt consult a suitably qualified electrician.
Do not connect the appliance to the mains electricity supply by an
extension lead. Extension leads do not guarantee the required safety of the appliance, (for example danger of overheating).
9

Warning and Safety instructions
The electrical safety of this appliance can only be guaranteed when
continuity is complete between the appliance and an effective earthing system, which complies with local and national regulations. It is most important that this basic safety requirement is tested by a qualified electrician. The manufacturer cannot be held responsible for the consequences of an inadequate earthing system, such as an electric shock.
This appliance must only be operated as a built-in appliance. This is
necessary to ensure that all electrical components are shielded.
Installation work and repairs may only be carried out by a suitably qualified and competent service technician approved by Miele in accordance
with local and national safety regulations. Repairs and other work by unqualified persons could be dangerous. The manufacturer cannot be held responsible for unauthorised work.
This equipment is not designed for maritime use or for use in mobile
installations such as caravans, aircraft etc. However it may be suitable for such usage subject to a risk assessment of the installation being carried out by a suitably qualified engineer.
The appliance is only completely isolated from the electricity supply
when:
–it is switched off at the wall socket, and the plug removed (where applicable). Do not pull on the cable, only on the plug.
–or the mains fuse is withdrawn
–or the screw-out fuse is removed (in countries where this is applicable)
Ensure that current is not supplied to the appliance while maintenance or repair work is being carried out.
Use
General notes
Always ensure that food is sufficiently cooked or reheated. Many
factors will affect the overall cooking time, including the size and amount of food, its initial temperature, changes to recipe and the shape and size of cooking container. Some foods may contain micro organisms which are only destroyed by thorough cooking, therefore when cooking or reheating foods, e.g. poultry, it is particularly important that food is fully cooked through (at over 70°C, for a minimum of 10 minutes). If in doubt select a longer cooking or reheating time.
It is important that the heat is allowed to spread evenly throughout
the food being cooked.
This can be achieved by stirring and/or turning the food, and by observing a sufficiently long standing time, which should be added to the time needed for cooking, reheating or defrosting.
10

Warning and Safety instructions
Always remember that cooking times in a microwave oven are usu-
ally considerably shorter than with traditional methods of food preparation. Excessively long cooking times can lead to food drying out and eventually burning, or could even cause it to catch fire.
There is also a danger of fire if breadcrumbs, flowers, herbs, grains etc., are dried in the microwave oven. Always ensure that this type of procedure is supervised.
Exercise caution when cooking or reheating food with a high sugar
content, e.g. Christmas pudding. If heated for too long the sugar may caramelise or ignite.
Do not use full power if you warm empty dishes or dry herbs. The
lack or minimum amount of food could cause damage to the appliance.
Do not leave the oven unattended when cooking with oils and fats as these can be a fire hazard if allowed to
overheat.
If smoke occurs in the oven, to avoid fuelling any flame do not
open the oven door. Turn the function selector to "0", or switch off at the mains and remove the plug from the socket. Do not open the oven door until the smoke has dispersed.
Never heat undiluted alcohol in the microwave oven as this can easily
ignite.
Do not heat up unopened tins of food in the oven as pressure will build up in the tin and it can explode. This could result in injury or damage.
Food left in the oven to take advantage of residual heat should always
be covered to avoid it drying out, and to avoid a possible build-up of condensation which could adversely affect the oven interior.
Try to avoid the interior walls being splashed with food or liquids con-
taining salt. If it does happen wipe these away thoroughly, to avoid corrosion on the stainless steel surface.
Wear oven gloves when removing the glass tray from the oven. If the glass tray has a heavy load, pull it only
slightly towards you, and then hold firmly at the sides as you take it out.
The glass dish and the rack take a maximum load of 8 kg. Do not ex-
ceed this or the accessories may be damaged.
Do not lean or sit on the open oven door. This could damage the appli-
ance. Take care in the region of the hinges. An oven door can support a maximum load of 8 kg.
When it is hot do not place the glass tray on a cold surface, such
as a tile or granite worktop. It could break. Place it on a pot rest or a wire rack.
11
Warning and Safety instructions
Under no circumstances use a steam cleaner to clean this appli-
ance. The steam could attack the electrical components and cause a short circuit, or permanent damage to the surface and to components, for which the manufacturer of the oven cannot accept any responsibility.
Do not use the oven to heat up the room. Due to the high temperatures
radiated, objects left near the oven could catch fire.
When using kitchen appliances connected to sockets near the
oven ensure that the cable cannot get trapped in a hot oven door, which could melt the cable insulation and be dangerous.
In countries which may be subject to infestation by cockroaches or
other vermin, pay particular attention to keeping the appliance and its surroundings in a clean condition at all times.
Any damage which might be caused by cockroaches or other vermin will not be covered by the appliance guarantee.
Microwave function
Before serving remember to allow sufficient standing time and then
always check the temperature of the actual food itself after taking it out of the oven. Do not be misled by the temperature of the container which does not necessarily give a correct indication of the temperature of the food or liquid in it. This is paricularly important when preparing food for babies, children, and the elderly or infirm.
Never cook or reheat food or liquids in sealed containers or bottles. With baby bottles the screw top and teat must be removed. Otherwise
pressure builds up which can cause the bottle or container to explode posing a severe risk of injury.
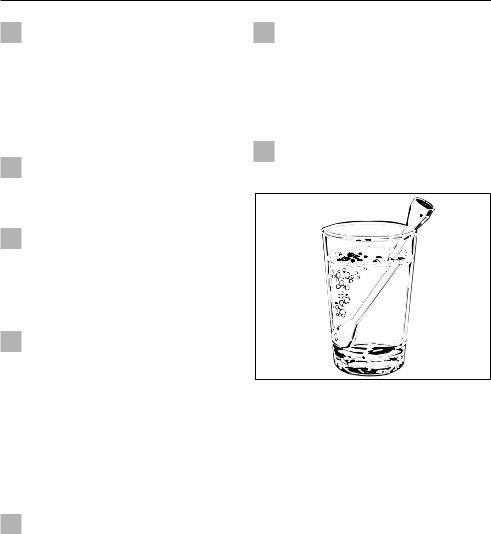
When heating liquids, the boiling rod provided should be placed into
the container.
When heating liquids, milk, sauces etc., in the oven without the boiling rod, the boiling point of the liquid may be reached without the production of typical bubbles. The liquid does not boil evenly throughout. This so-called ‘boiling delay’ can cause a sudden build up of bubbles, when the container is removed from the oven or shaken. This can lead to the liquid boiling over suddenly and explosively. There is a danger of burning. The formation of bubbles can be so strong that the pressure forces the oven door open. The user could be injured and the appliance damaged.
The boiling rod ensures that the liquid boils evenly and that bubbles form at an early stage during the operation.
12

Warning and Safety instructions
Do not use any containers or cutlery made from or containing metal,
aluminium foil, lead crystal glassware, temperature-sensitive plastics, wooden utensils or cutlery, metal clips or wire ties. Such items could be damaged, or cause a fire hazard.
The rack supplied with the appliance is designed to be compatible with microwaves, and can therefore be used with or without the microwave function.
The rack gets hot when operating either the microwave function or
the browning element, or both. There is a danger of burning.
Eggs can only be cooked in their shells in the microwave oven in a
specially designed egg-boiling device. Similarly, hard-boiled eggs should not be reheated in the microwave oven as this may lead to the eggs bursting, even once they have been removed from the oven.
Eggs can be cooked without their shells in the microwave oven only if
the yolk membrane has been punctured several times first. The pressure would otherwise cause the egg yolk to explode.
Do not reheat food in the oven in heat-retaining bags intended for
normal ovens.
These heat-retaining bags usually contain a thin layer of aluminium foil which reflects microwaves. This reflected energy can, in turn, cause the outer paper covering to become so hot that it ignites.
Food with a thick skin or peel, such as tomatoes, sausages, jacket po-
tatoes, aubergines, should be pierced or cut in several places to allow steam to escape and prevent the food from bursting.
Ovenproof earthenware can retain a considerable amount of moisture.
Earthenware and porcelain containers with hollow handles and lid knobs must only be used in this oven if they have vent holes, which allow the moisture to escape. Without vent holes there can be a pressure build-up, causing the container to crack or shatter, with the danger of injury.
Traditional oven functions:
Fan Heat, Auto Roast, Grill, Fan Grill
Caution - Danger of burning When the oven is being used as a traditional oven it can get very hot.
Great care should be taken to ensure that small children do not
touch the oven when it is being used. External parts of the oven such as door glass, handle vents and the facia panel can become quite hot.
Wearing heat-resistant oven gloves is recommended when placing
food in the oven, turning or removing it. When the Grill or Fan Grill function has been chosen, either solo or in a combination programme the grill element becomes very hot and there is a danger of burning.
13

Warning and Safety instructions
Wait until the grill element has cooled down before lowering it for
cleaning.
Do not use force to pull it down as this can cause the element to
break.
Bottling
Bottling should only be undertaken by an experienced cook who has received proper training in this method of preserving fruit and vegetables in an oven or microwave oven, and understands the implications of the chemical reactions involved.
The manufacturer cannot be held liable for damage caused by non-com- pliance with these Warning and safety instructions.
14

Caring for the environment
Disposal of the packing material
The transport and protective packing has been selected from materials which are environmentally friendly for disposal and can normally be recycled.
Ensure that any plastic wrappings, bags etc. are disposed of safely and kept out of the reach of babies and young children. Danger of suffocation!
Rather than just throwing these materials away, please ensure they are offered for recycling.
Disposal of your old appliance
Old appliances may contain materials which can be reclaimed or recycled. Please contact your dealer, your local waste collection centre or scrap merchant about potential recycling schemes.
Before discarding an old appliance switch off and disconnect it from
the power supply. This should be done by a competent person. Cut off the cable directly behind the appliance to prevent misuse.Cut off and render any plug useless.
Ensure that the appliance presents no danger to children while being stored for disposal.
15

Before using for the first time
^Wipe out the oven interior with hot water and a little washing up liquid. Dry using a soft cloth.
Do not shut the oven door until the interior is completely dry, to avoid odours and the possibility of corrosion developing.
^ Wash the accessories.
With new appliances there is usually a smell during the first use. It is dispelled more quickly by using a high temperature as follows:
Run the oven on the Fan Heat Dsetting for at least an hour.
^Select Fan Heat Dwith the function selector.
^Enter the highest possible temperature with the "+" touch control.
^Confirm by pressing Enter.
^Enter a time (at least 1 hour) with the "+" touch control.
^ Press the Start touch control.
Ensure the room is well ventilated during this process.
16
Operating modes
Microwave h
Microwave cooking offers the benefits of speed, convenience and nutritional advantages when food does not require browning or crisping.
Functional description
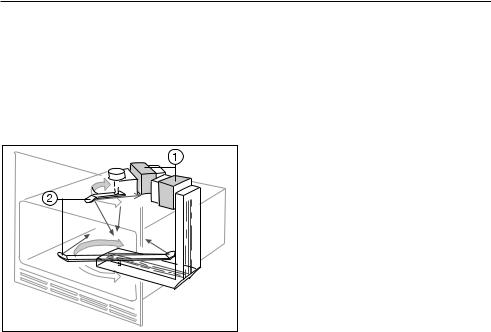
This oven is equipped with two magnetrons a, which convert electrical energy into microwaves.
There are two stirrer fans b, one above the oven ceiling and the other under the oven floor. The fans distribute the microwaves evenly throughout the oven interior, rebounding them off the walls so that they reach and enter the food from all sides.
An advantage of this system is that food can be cooked on two levels simultaneously, (e.g. on the oven floor and the second runner level).
In order for microwaves to reach the food, they must be able to penetrate the cooking utensil being used.
Microwaves can penetrate porcelain, glass, cardboard and plastics but not metal. Do not, therefore, use utensils made of metal, or which contain metal, for example in the form of gold or silver trim. The metal reflects the microwaves and this could lead to the creation of sparks. The microwaves cannot be absorbed.
All food contains moisture molecules which, when subjected to microwave energy, start to oscillate 2.5 thousand million times a second. The friction caused by this vibration creates heat, which first starts developing around the outside of the food and then slowly penetrates towards the centre. The moisture, fat and sugar content of food will affect the speed at which it is cooked.
As heat is produced directly in the food,
–food can generally be cooked without adding much liquid or cooking oil
–cooking, reheating and defrosting in a microwave oven is quicker than using traditional oven methods
–nutrients, such as vitamins and minerals, are generally retained
–colour, texture and taste of food are not impaired
–the surface temperature stays cool enough to avoid browning.
17

Operating modes
Traditional oven functions
Fan Heat D
Auto Roast E
Grill n
Fan Grill N
These cook and brown the food.
Fan Heat D
The fan circulates heat constantly around the oven, giving a very even temperature throughout.
It sucks in the air, heats it over a ring element and blows it back through the carefully spaced openings in the back panel.
As the heat is quickly transferred to the food, it is not usually necessary to preheat the oven, except when roasting sirloin or fillet or for foods such as puff pastry and yeast mixtures which require instant heat.
With Fan Heat food can be baked or roasted on the floor and the second level at the same time.
Auto Roast E
After the selected temperature is entered, the oven heats initially to a preset high temperature which seals the meat to keep it succulent and tasty.
The oven temperature is then automatically returned to the temperature setting selected.
When roasting, you are strongly recommended to cover the food. Not only does this help retain all the juices, but will also make cleaning the oven easier afterwards.
Grill n
As the grill element needs to radiate a high heat in order to cook the food, it will take several minutes after being switched on for the element to glow red hot and so produce sufficient infra-red heat for grilling. Pre-heat the grill with the oven door closed for approx. 5 minutes before starting to cook.
Fan Grill N
The hot air from the grill is distributed by the fan in the rear of the oven evenly over all the food being grilled. This enables a lower temperature to be selected than for normal oven grilling.
18

Operating modes
Combination programmes
h+ D Microwave + Fan Heat
h+ E Microwave + Auto Roast
h+ n Microwave + Grill
h+ N Microwave + Fan Grill
The combination programmes enable the grill, fan and Auto roast settings to be used in conjunction the the microwave facility.
In general when using the combination programmes, you should not set the microwave power level higher than 150 W for baking, and not higher than 450 W for cooking, roasting and grilling.
Automatic programmes
QCooking
PReheating
NDefrosting
The microwave’s automatic programmes can be used to cook, reheat or defrost food.
They are dependent on weight, i.e. after selecting the appropriate food group, you then enter the weight of the food and the microwave power setting and time will be calculated automatically.
19
Suitable containers for microwave ovens
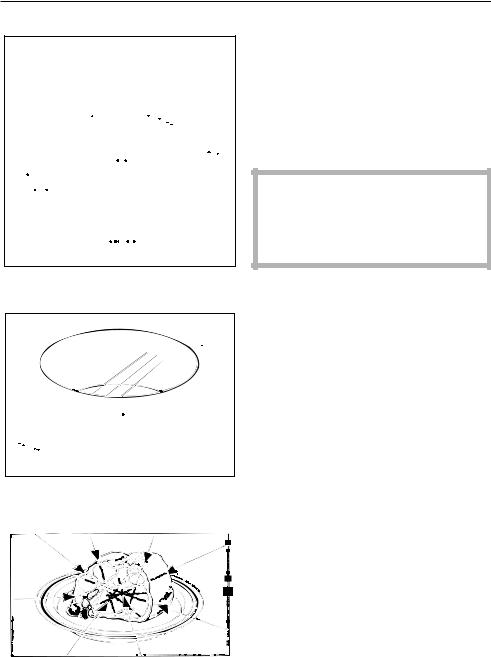
Microwaves |
– are reflected by metal,
–pass through glass, chinaware, plastic and card,
– and are absorbed by food.
Material and shape
The material and shape of containers used affect cooking results and times. Heat distribution is more even in round and oval shaped dishes than in rectangular containers, providing better results.
Metal
Metal containers, aluminium foil and metal cutlery, or china with metallic decoration such as gold rims or cobalt blue must not be used in microwave mode.
The metal reflects the microwaves, hindering the cooking process.
Exceptions:
If recommended by the producer, precooked meals packed in aluminium foil containers can be defrosted and reheated in the microwave oven. Important: remove the lid first. However, as food is only heated from the top, it is better to remove the food from the aluminium foil container and transfer it to a dish suitable for a microwave oven. The heat distribution will be more even. If sparks and arcing occur when using a metal container, stop and transfer the food to a microwave safe container.
For even defrosting and to avoid overcooking unevenly shaped cuts of meat, poultry or fish, small pieces of aluminium foil may be used to mask wingtips or other thin parts for the last few minutes of the process.
20

Suitable containers for microwave ovens
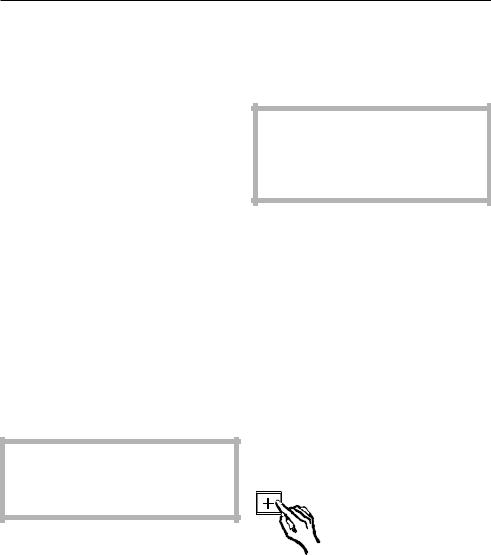
Make sure that the aluminium foil is at least 2 cm from the oven walls at all times. It must not touch the walls.
Metal meat skewers or clamps should only be used if they are very small in comparison to the size of the cut of meat.
The rack supplied with the appliance is suitable for use in a microwave oven. Do not place the rack on the oven floor.
The rack can get hot.
Glassware
Heat-resistant glass or ceramic glass are ideal for use in the microwave oven.
Crystal glass contains lead which could cause the glass to crack. Glass dishes with a milled rim are subject to the same risk. Both are unsuitable.
Earthenware
Although some ovenproof earthenware can be used in a microwave oven it may contain a considerable amount of moisture, causing it to become hot during use. It is normally advisable to avoid using it in a microwave oven.
Earthenware containers with hollow handles and lid knobs must only be used in this oven if they have vent holes, which allow the moisture to escape. Without vent holes there can be a pressure build-up, causing the container to crack or shatter, with the danger of injury.
Decorated earthenware is only suitable if the decoration is beneath an all-over glaze.
Earthenware can get very hot, and may crack.
Porcelain (chinaware)
Porcelain is suitable, however containers with hollow handles and lid knobs must only be used in this oven if they have vent holes, which allow the moisture to escape. Without vent holes there can be a pressure build-up, causing the container to crack or shatter, with the danger of injury.
Do not use porcelain with gold or silver edging or items with hollow knobs or handles as insufficient ventilation may cause pressure.
Glazes and colours
Some glazes and colours contain metal.
This makes them unsuitable for use in a microwave oven.
Plastics
Plastic containers must only be used for Microwave mode alone and not in conventional oven mode.
Plastics must be heat-resistant to a minimum of 180 °C. Otherwise the plastic may melt and fuse with the food.
21
Suitable containers for microwave ovens
Special plastic utensils, designed for use in microwave ovens are available from good retail outlets. Melamine ware is not suitable as it absorbs energy and heats up. When purchasing plasticware, make sure that it is suitable for use in a microwave oven.
Disposable containers, such as trays made from polystyrene, can only be used for very short timed warming and reheating of food.
Plastic boiling bags can be used for cooking and reheating. To reduce the risk of the bag bursting, they should be pierced first so that steam can escape and prevent a build-up of pressure.
Roasting bags and -tubes
Roasting tubes should be about 40 cm longer and roasting bags about 20 cm longer than the food being roasted, and carefully tied with string. Turn the ends over and secure them. Holes should be made according to the manufacturer’s instructions.
Do not use metal clips or wire ties, even if bound by paper. There is a danger that they will ignite when heated.
Wood
Wooden dishes are not suitable.
Moisture contained in the wood evaporates when exposed to microwave energy, causing the wood to dry and crack.
Disposable containers
Only those plastic disposable containers which are specified by the manufacturer as suitable for use in a microwave oven may be used.
Do not leave the oven unattended when reheating or cooking food in disposable containers made of plastic paper or other inflammable material.
Disposable containers are not always recyclable or degradable.
Testing dishes for their suitability
If in doubt as to whether glass, earthenware or porcelain plates or dishes are suitable for use in a microwave oven, a simple test can be performed:
^Place the item you wish to test in the centre of the oven, fill a suitable glass with water and also place this in the oven.
^Shut the door.
^Select Microwave hwith the function selector.
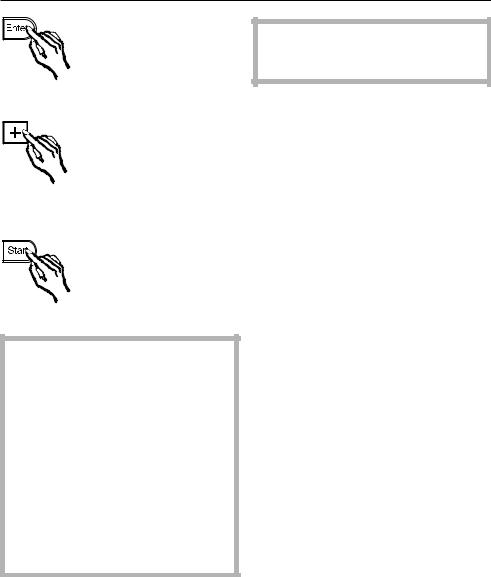
^Select the highest microwave power setting (1200 W) with the "+" control.
22
Suitable containers for microwave ovens
^Confirm by pressing "Enter".
^Enter a time of 30 seconds with the "+" control.
^Press the Start control.
If a crackling noise is heard accompanied by sparks during the test, switch off the appliance immediately. Turn the function selector to the "0" position.
Any crockery which causes this reaction, is unsuitable for use in the microwave oven.
The water in the glass should be warm, but the dish cool. If the dish is very hot and the water is cold, it would be unwise to use the dish.
If any doubt exists about the suitability of containers, please contact the supplier.
This test cannot be used to check whether items with hollow knobs or handles are suitable for use in a microwave oven.
A cover
–prevents too much steam escaping, especially when cooking food which needs longer to cook, such as potatoes,
–shortens and evens out the cooking process,
–prevents food from drying out,
–prevents any loss of aroma.
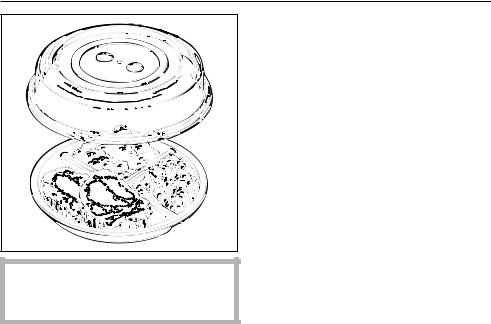
Always use lids or covers made of mi- crowave-safe glass or plastic, or use a clingfilm recommended for use in a microwave oven, (pierce as instructed by the manufacturer). Unsuitable clingfilm can melt into the food.
23
Suitable containers for microwave ovens
Sealed glass containers, such as jars of food, must be opened before they are placed in the oven.
Do not use a cover if
–cooking meals which are to be given a crisp finish,
–cooking breaded or battered foods
–using a combination programme.
24
Operation - Controls
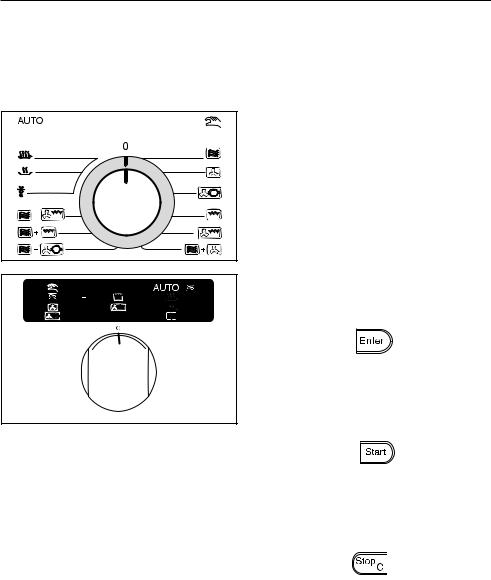
The function selector and the touch controls are used to operate the appliance.
Function selector
The function selector can be turned clockwise and anti-clockwise.
"Solo" programmes:
h Microwave
D Fan Heat
E Auto Roast
n Grill
N Fan Grill
Combination programmes:
h+ D Microwave + Fan Heat
h+ E Microwave + Auto Roast
h+ n Microwave + Grill
h+ N Microwave + Fan Grill
Automatic programmes:
QCooking
PReheating
NDefrosting
If the function selector is turned away from "0", the cool air fan will run at a very low level and the oven interior lighting will be switched on.
Exception: If a delayed start time has been programmed, the cool air fan and oven lighting will remain switched off until the programmed start time. The oven lighting can be switched on for approx. 10 secs. by pressing the "Enter" touch control.
Touch controls
– to confirm an entry or alteration.
The setting is accepted by the system and appears in the display.
– to start a process.
The Start touch control can only be used when the appliance door is shut.
–to interrupt a process which has already started,
–to delete a setting which has been selected,
–to cancel the door locking function (a microwave feature).
25
Operation - Controls
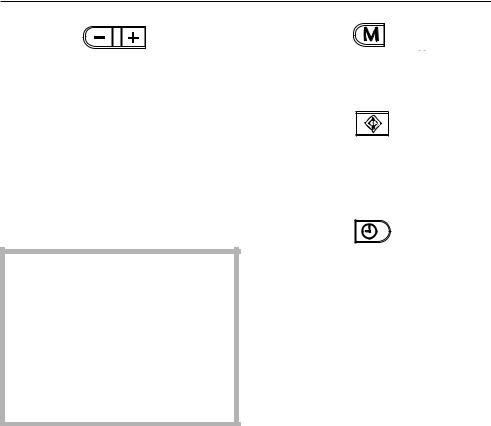
–to select a microwave power setting,
–to enter or alter the temperature or time step by step (press the control for a brief moment several times) or quickly (press and hold the touch control),
–to select a food group and to enter a weight (Automatic programme),
–to activate or cancel the programme lock ("–" touch control).
–to store various stages of a microwave cooking process in memory.
–to store frequently used microwave processes in memory,
–to call up the stored processes.
Those touch controls which have indicator lights can only be confirmed if the relevant indicator lights are illuminated. If the indicator light does not light up then the touch control is locked.
Exception: The programme lock is activated by pressing the "–" touch control when the indicator light is not illuminated.
–to activate the minute minder,
–to enter, correct and turn off the time of day,
–to enable a delayed start.
26
 Loading...