


1
MP600 Mobile Phone
User’s Manual
Read the manual carefully before you use
the mobile phone.
User’s Menu
Thank you for using MP600 mobile phone, in order
to keep your phone in the best state,please read
this user’s menu carefully.After reading it,please
keep it well for using.
This User’s Manual is published by Meridian Telecom.
Meridian Telecom reserves the right to change or
correct the possible wrong print, unconformity data,
process and equipment improvement in this manual
without prior notice, but will edit new user’s menu.
Copyright MERIDIAN TELECOM company reserves all
the right
Before using the mobile phone, please read “Safety
and Precautions”and “maintenance”these two
Mobile
2
chapters carefully.
Note:some services /functions described in this
manual is not supported by all networks. Please
contact the network operator whether you could
use some of services/functions.
One﹑Safety and Precautions
1.1 Introduction………………………………….…….……….7
1.2 Safety
………………………………………....…..………….8
1.3 Safety warning and Attention
……..……………..9
Two﹑Your Phone
2.1 Keypad Introduction ………………….………...18
2.2 Screen
……………………………………………..……..21
2.3 LCD Back Light
……………………………….……..22
2.4 TECHNIQUE PARAMETER
…………………….……22
3
Three﹑Getting Started
3.1 Insert SIM Card(insert/take out SIM Card)and
Battery ……………………………………………………………..23
3.2 connect to the network
………………..………..30
3.3 Charging Battery
……………………….…………….31
3.4 Switched on/off
……………………………..……….35
3.5 Using hands free accessory
……………………...36
Four﹑ Basic Operation
4.1 Making a Call………………………………..………..36
4.2 volume
……………………………………………..…….39
4.3 Answering a Call
……………………………..……..39
4.4 Options during a call
…………………………..….40
Five、Main Menu
5.1 Phonebook………………………………..………………43
5.1.1 Quick Search
…………………………….………..45
5.1.2 Search Entry Page
…………………..………… 45
5.1.3 Adding New Record
…………….………..…….46

4
5.1.4 Copy All ……………………………………..……..49
5.1.5 Delete
………………………………………………..49
5.1.6 Caller Group
………………………………….…….49
5.1.7 Extra Number
………………….………………….49
5.1.8 Settings
…………………………..………………..50
5.2 Messages
……………………………….……………..51
5.2.1 SMS
…………………………………………….…………51
5.2.2 MMS
…………………………………………….…………58
5.2.3 E-MAIL
……………………………………………………64
5.2.4 Voice mail server
……………………………..…….66
5.2.5 Broadcast Massage
………………………………67
5.3
Call History……………………………………………..….68
5.3.1 Missed calls
…………………………………..……….68
5.3.2 Dialed calls
………………………………….………..69
5.3.3 Received calls
………………………………………..69
5.3.4 Delete call Log
……………………………………….69
5.3.5 Call Time
……………………………..……………….70
5.3.6 Call Cost
…………………………….………………….70
5.3.7 SMS counter
………………………………………….71
5
5.3.8 GPRS counter…………………………….…………72
5.4 Setting
……………………………………………….……72
5.4.1 Phone setup
……………………………….……….72
5.4.2 Call Setup
……………………………………………77
5.4.3 Network Settings
………………………………..83
5.4.4 Security Settings
…………………………………84
5.4.5 Restore Factory Settings
…………………..…87
5.5 Multimedia…
…………………………………….……….87
5.5.1 Camera…
……………………………………….………87
5.5.2 ImageViewer
…………………………………………90
5.5.3 Video Recorder
………………………………………91
5.5.4 Video player
……………………………………..……91
5.5.5 Audio player
………………………………….………93
5.5.6 Sound Recorder
……………………….……………95
5.5.7 Melody Compose
…………………………..…….96
5.6 File manager
……………………………………….……99
5.6.1 Open
………………………………………………………99
5.6.2 Create Folder
…………………………..………….101
5.6.3 Format
………………………………………..……….101
6
5.7 Entertainment and Games ………………….102
5.7.1 Games
……………………………………..……….102
5.7.2 Game setting
…………………………………...102
5.8 User Profiles
………………………………………..103
5.8.1 Conference Model
………………………….105
5.8.2 Outdoor Model
…………………….…….…….105
5.8.3 Indoor Model
…………………………….………105
5.8.4 Earphone Model
………………………….……105
5.9 Tools
………………………………….………….…….106
5.9.1 Calendar
…………………………….……..………106
5.9.2 To Do List
………………………………..……….106
5.9.3 Alarm
Clock……………………………...……….107
5.9.4 World Clock
………………………………..….…108
5.10 Services
…………………………………………...108
5.10.1 WAP
………………………………………….……108
5.10.2 Account Document
……………..………..111
5.11 Extras
…………………………………………..…112
5.11.1 Calculator
…………………………………….….112
5.11.2
Unit Exchange ………………………………..…113
7
5.11.3 Currency Exchange …………….………………..113
5.11.4 Health Management
………………………...114
5.12 Shortcut function
………….………………….….114
Six﹑Appendix
Appendix 2: Trouble shooting
Appendix 3: Accessories explanations .
One
﹑ Safety and precautions
1.1 Introduction
Please read this user manual carefully before
using this mobile phone, In order to keep your
phone in its best state.
Meridian Telecom introduces MP600 super slim
mobile phone .It’s the perfect combination of
humanized design and excellent craft with
streamline and comfortable handset.
Besides the
basic call function, MP600 provides you with a collection
of practical functions including color screen, sweet ring

8
tone, cartoon incoming call animation, File manager
(T-Flash card support) camera, recorder, MP3. It also
supports MMS and increment service, which facilitate
your work and entertainment.
The manual has been validated and reviewed for
it’s accurateness. The explanation and description
in the manual of MP600 are correct when it is
published but the manual may be changed without
prior notice. Meridian Telecom reserves the right
to change or improve the manual.
1.2 Security
If your mobile phone is lost or stolen,
please report to telecom departments or
proxy agencies (When you contact with
telecom departments and proxy agencies,
they need to know the
IMEI code of your
mobile phone, it is printed on the label on
the back of the phone which can be seen

9
when the battery is removed. Please copy
and keep the code at a safe place for further
use when necessary.) to ban the use of your
lost SIM card and phone, which will protect
you from economic lose resulted from
unauthorized use.
To protect your mobile phone from
illegal use, please take the following
security measures:
Set PIN code of the SIM card
Set call restriction
1.3 Safety warnings and Attentions
Safety Warning
Road Safety
When driving, please never use a handheld
mobile phone, use the hands free calling
device to ensure safety. Remember, in some
countries it disobey laws and regulations

10
using mobile phone while driving.
Switch off in Aircraft
Mobile phone causes disturbance. Switch off
the phone in the flight, as it is illegal and
dangerous to use phone in flight.
Switch off the phone in the vicinity of gas
stations,refuelling depot, chemical plants,
and other locations containing explosive
objects.Observe relevant laws and
regulations.
Observe exceptive regulations
Observe relevant exceptive regulations, do
not use your phone where forbid use or
using phone may cause interfere or
dangerous.(like in hospital)

11
Interference
Any mobile phone may disturbed by wireless
electronic wave and effects communication..
Professional Service
Only professional staff could install and
maintain the mobile phone. Never attempt to
disassemble the phone by yourself. which
may cause great danger and violate warranty
regulations.
Accessory and Battery
Only the batteries and chargers authorized
by original factory to be used in your mobile
phone.
Proper Use
Use the mobile phone in normal way
Emergency Call
Be sure the mobile phone is power on and on
service. dial the emergency call number(like

12
112 or other ) and press the calling key. Tell
you location and explain what happened
briefly. Do not stop the calling without
permission.
Cautions for battery use
Only the batteries produced by original
factory have to be charged in your mobile
phone. Others batteries and chargers may
cause injury for wrong charging
.
Switch off before you take off the
battery.
Please be careful when you are using
battery. Don’t try to use metal(like coin, clip
and so on)to touch the anode(+) and
cathode(-)of battery, It may destroy the
battery and the metal. When you take off
the battery form the mobile phone and put
into your handbag, please be sure that

13
there is no metal touches the anode and
cathode of the battery at same time.
Do not throw the battery into fire, or it
will catch fire and explode.
Do not disassemble and modify your
battery
Conserve the battery in cool and dry
place. Never leave it exposed under direct
sunlight or in hot environment(Above 55
)
If the liquid of battery drops on your
skin or clothes, wash it with soap and clean
water immediately. When the liquid gets in
your eyes, which may result in blindness,
immediately wash the eye with clean water
and get it treated in hospital (do not rub
your eyes).
Do not use Li-ion battery in low
temperature
Do not use liquid or organic solution to

14
clean battery and immerse it in the water.
Please charge the battery full if you
don’t use and conserve it.
Please send used li-ion batteries to
specified locations or return them to our
company. Do not dispose of the batteries
into dustbins
NOTICE ITEMS
The phone needs your careful nursing for its
excellent design and workmanship.
Following suggestions may help you through
the warranty time carefully and keep it in
working condition for many years.
Keep the phone and the accessories far
away from children.
Ensure to keep the phone away from
rain, moisture and liquid, keep it dry. Once
soak or erosion happens, take the battery

15
off and insert it again when it dried.
Do not place and conserve your phone
in dusty place, which may damage its active
accessories.
Do not place your phone in hot area,
which may shorten its service life, damage
its battery and some of its plastic
accessories.
Do not place your phone in cold area,
which assemble moisture and damage
electronic circuit when the temperature
goes up to normal.
Do not throw, shake or vibrate your
phone, which may damage the inner
electronic circuit and precise in structure.
Do not use corrosive chemical agent,
detergent strong detergent to clean the
handset. Please use soft towel to moisten a
few suds to clean it.
16
If the phone and any of its accessories
don’t work please send it to service
department. Our staff will help you and fix
it.
「Reducing the effect of Hertz Ian waves, using
the phone carefully.
」
Phone Decription
MP600 Mobile Phone
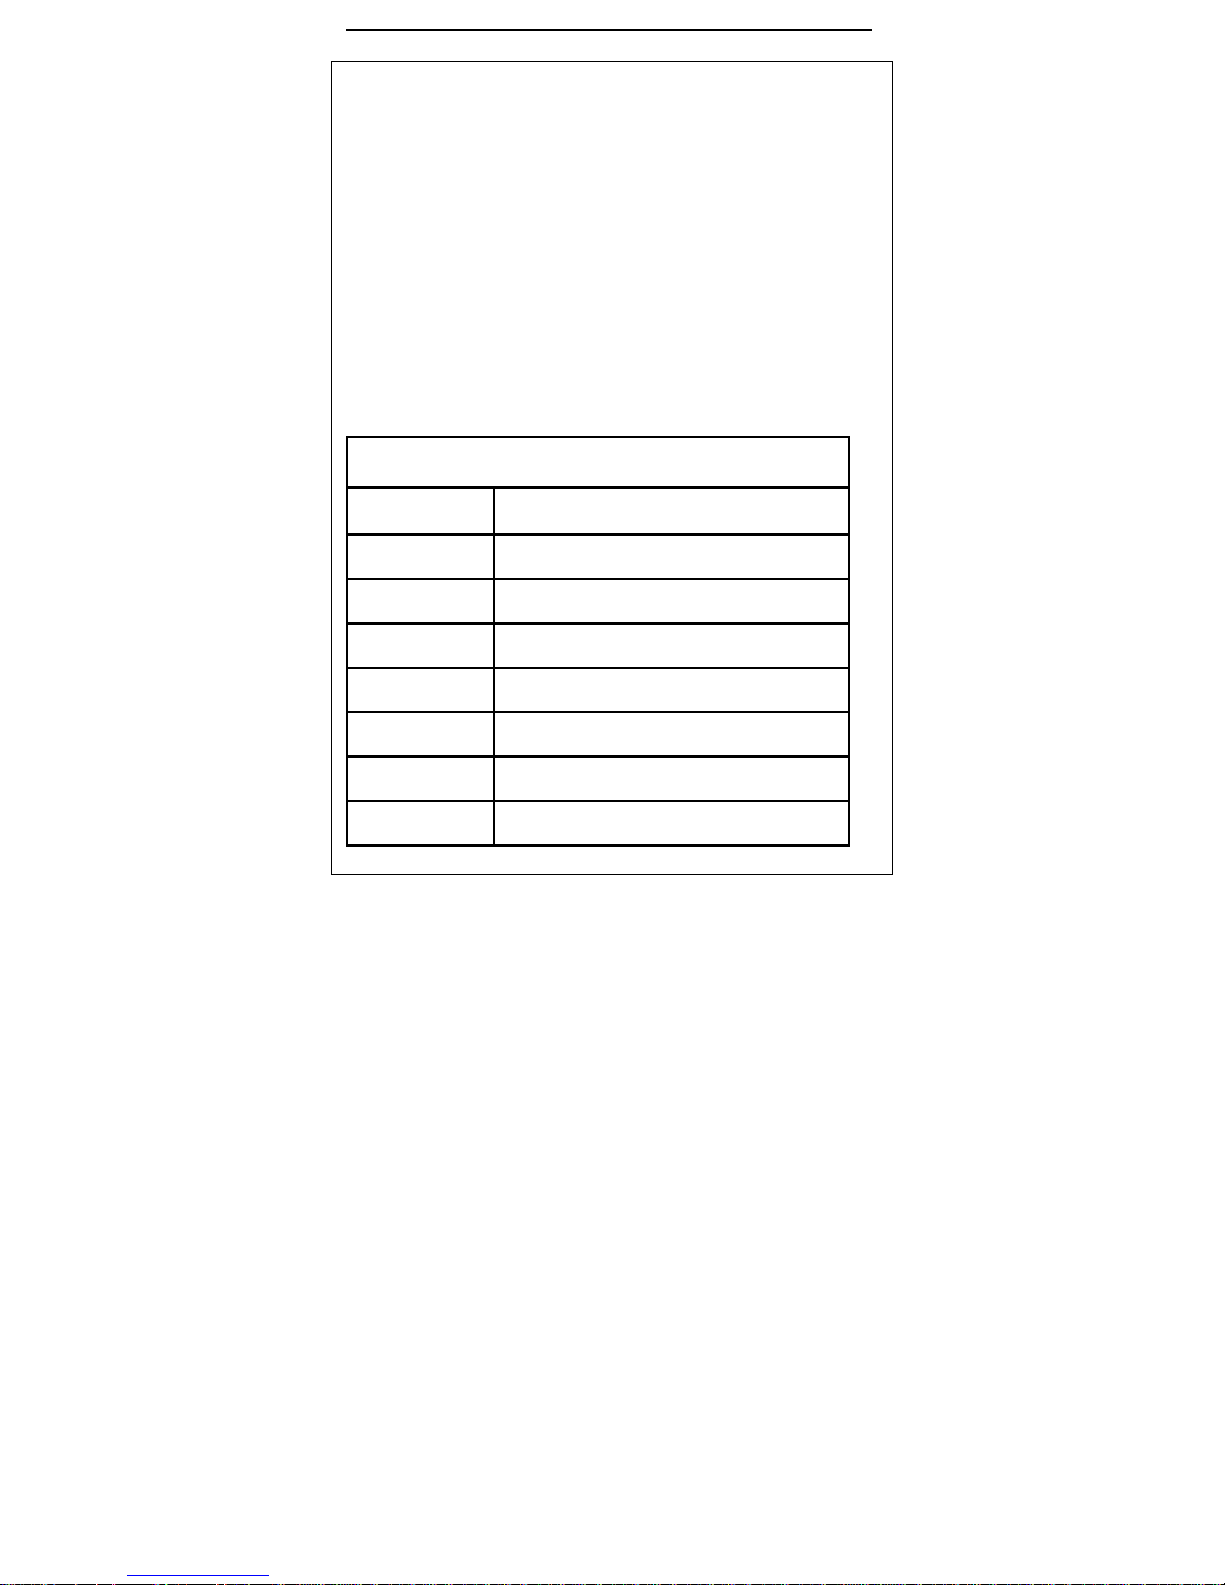
Phone Description
Frequency GSM900/DCS1800/1900
GPRS Class 10
Vocoder HR , FR , EFR
WAP WAP 2.0
Language English
Ring Tone 64 chord music ringtone
Camera Pixel 1.3M pixel ,1280*1024
17
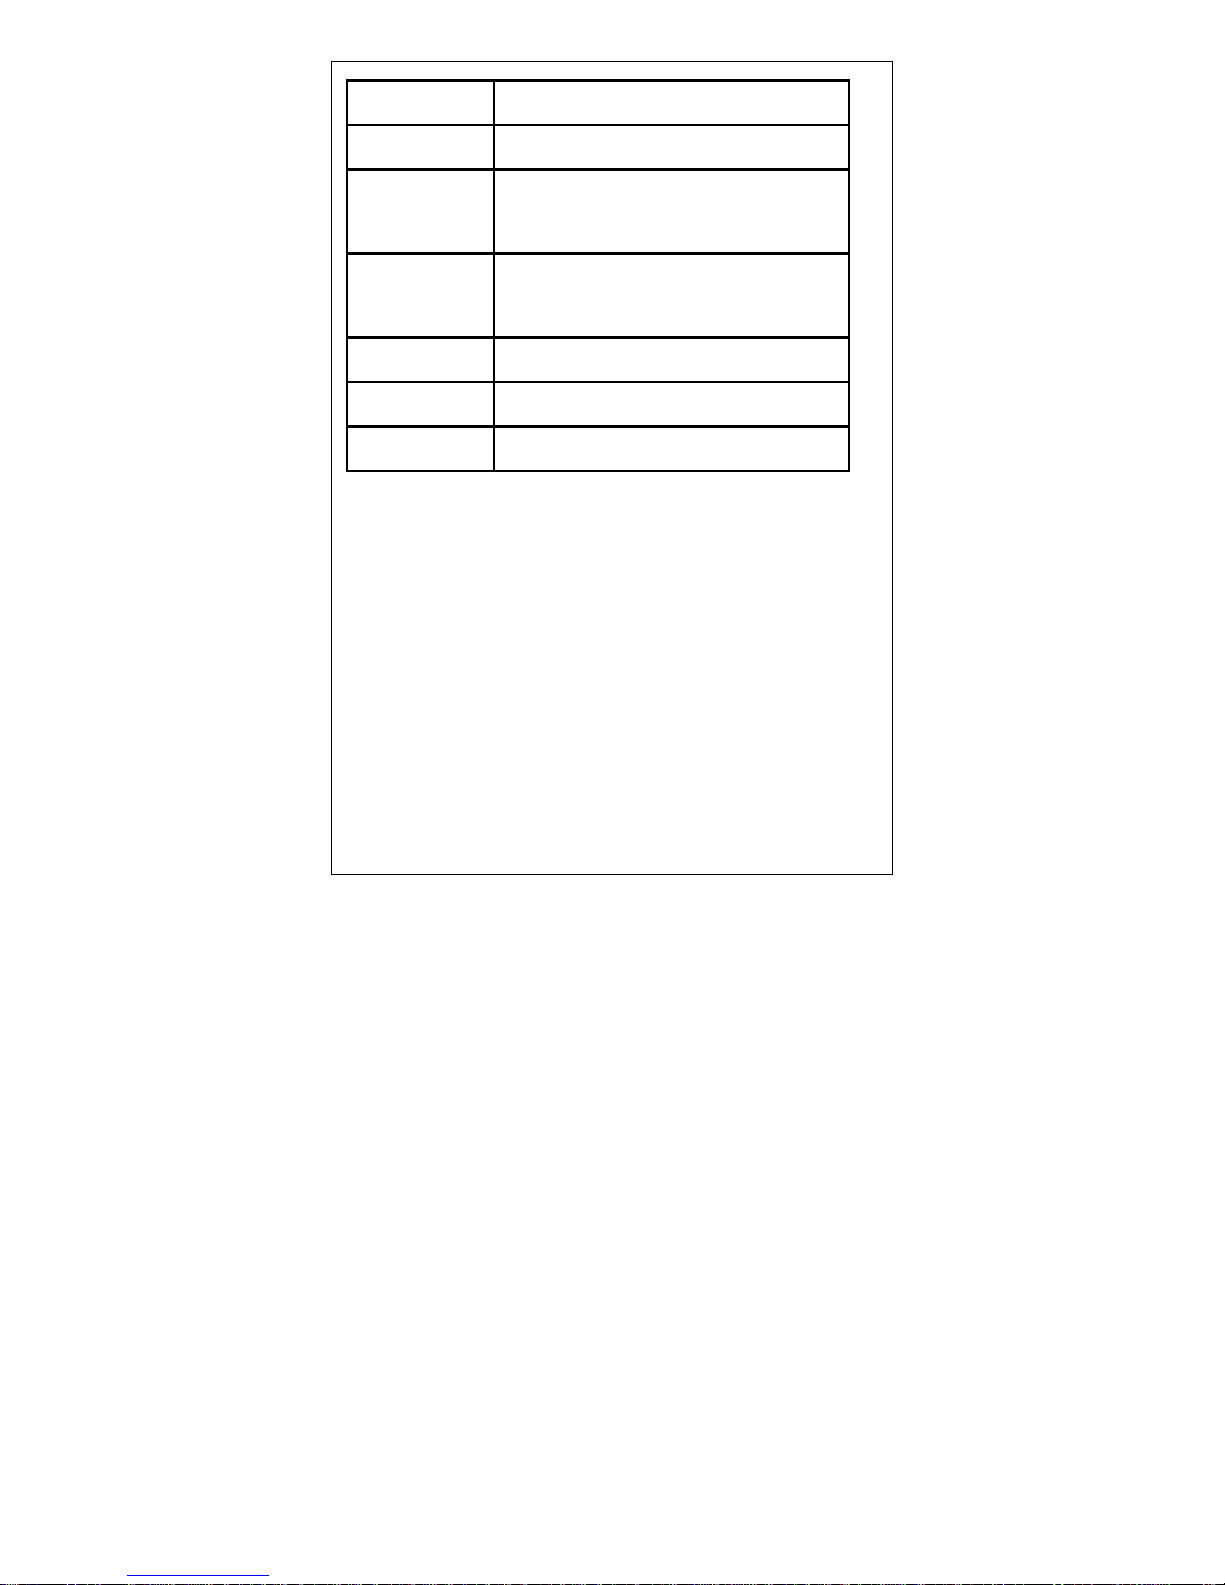
Dimension 106×45.2×12.5mm
Weight 65 g
Standby Time
70-
100hours(depend on network
status)
Talk Time
120 ~ 150 mimutes(depend on
network status)
Screen 128 x 160 pixels,65K TFT
Battery 630mAh Li-ion
Colour Black
18
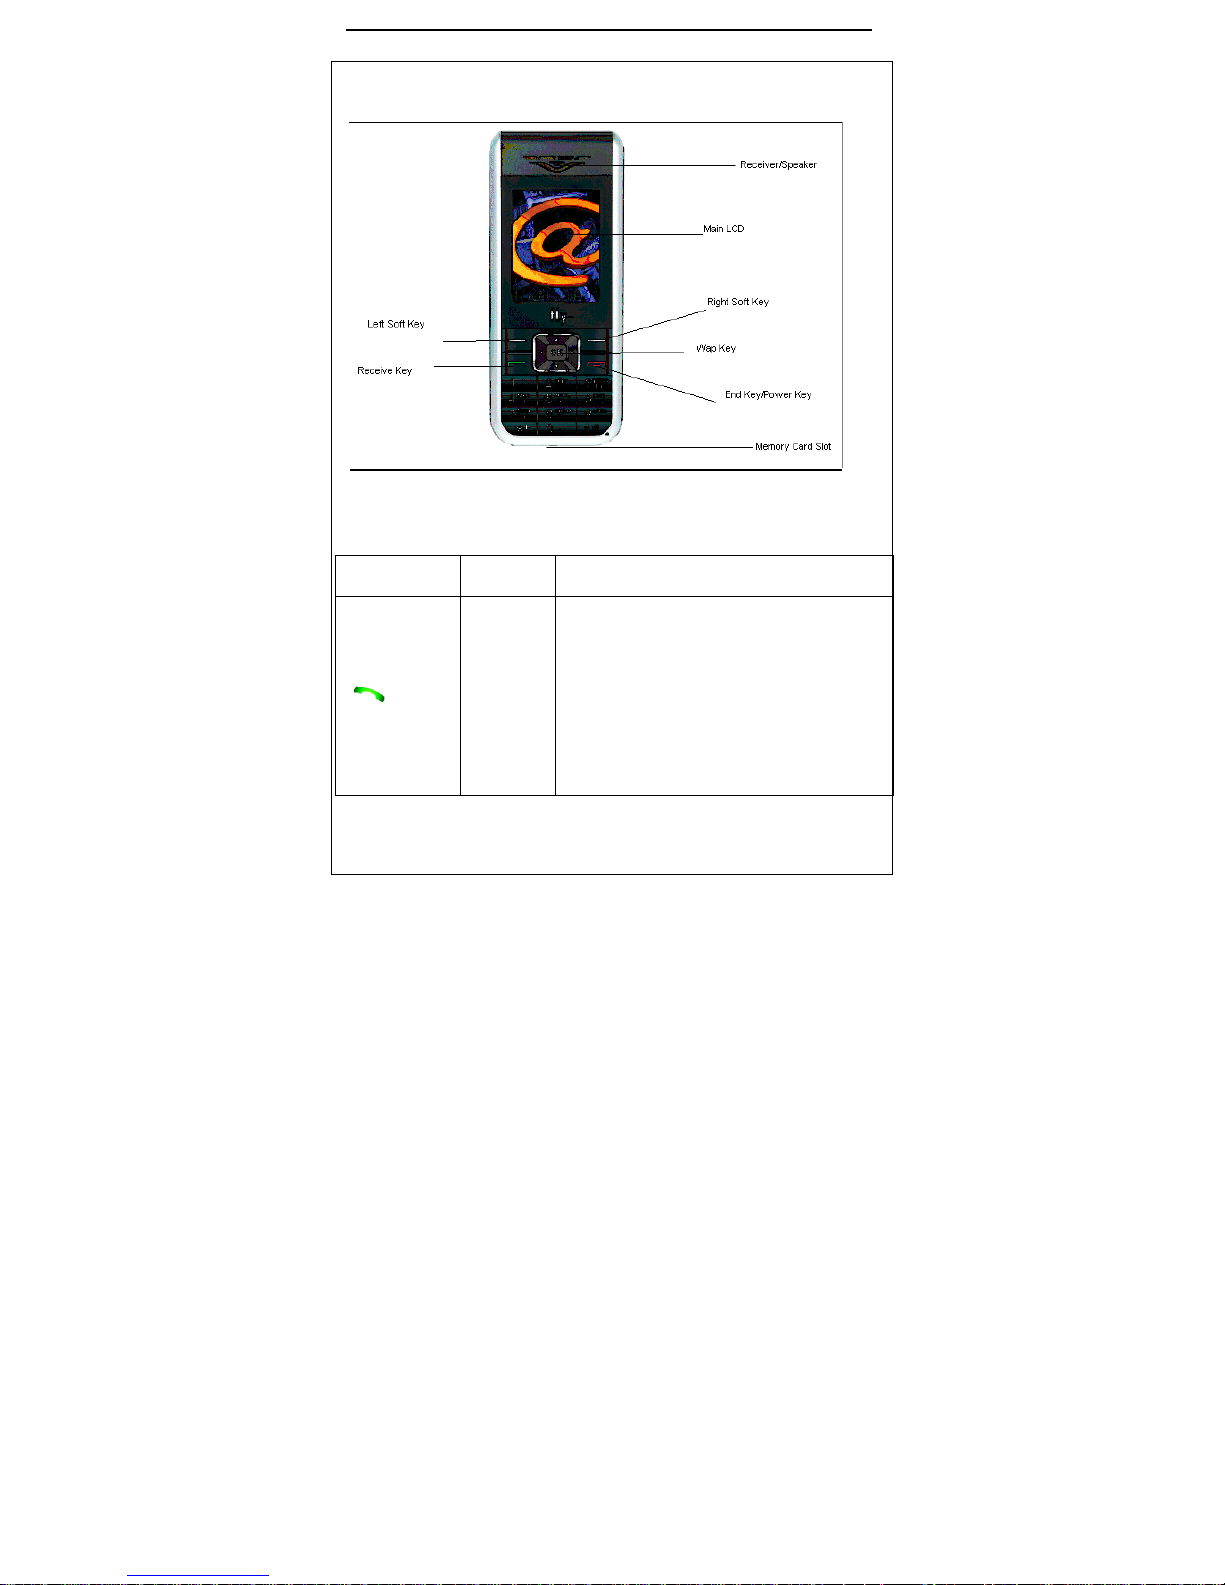
Two 、Your Phone
2.1 Keypad Introduction
keypad Name Explanation
Calling
Key
Making a call or answering a
call
order out call log in
stand-by mode
Call log
19
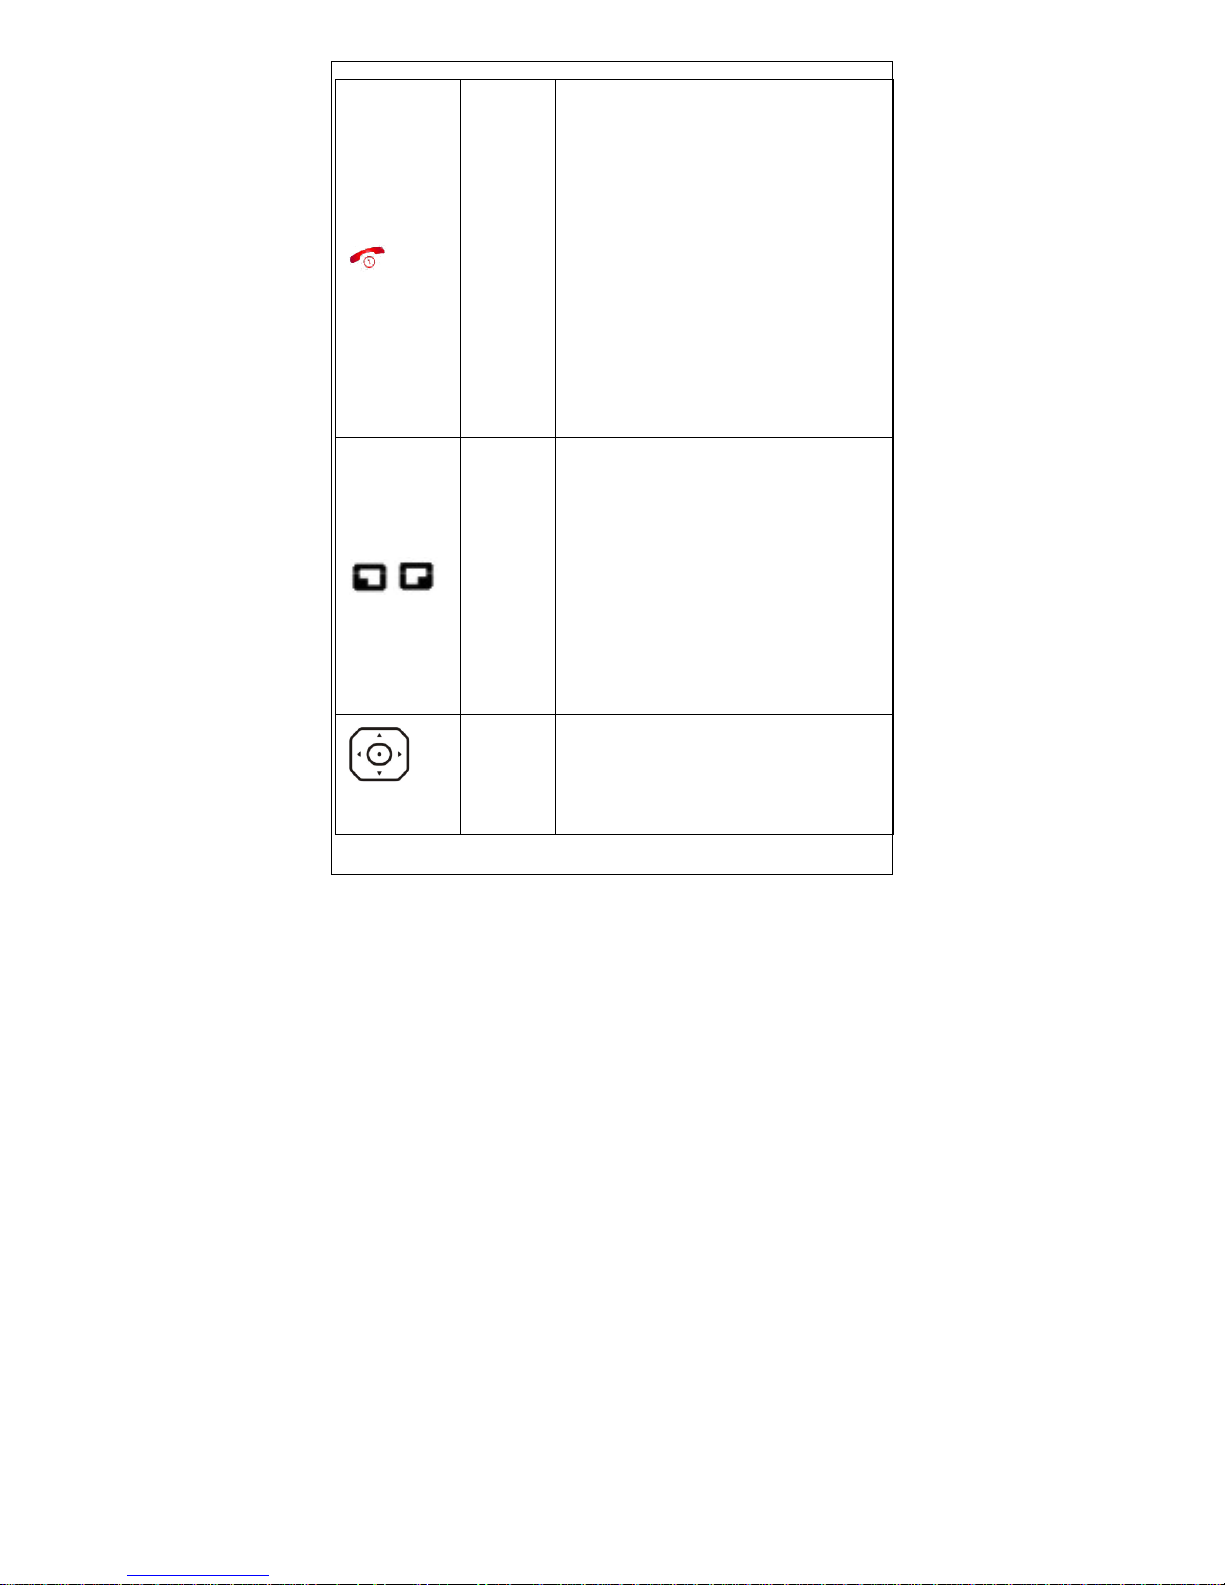
Ending
Key
End communication
Pressing and holding the key for
about 2 seconds can switch on/off
the phone.
To quit the menu and return to
standby state
Press this key to stop
alarm.
Soft
Key
Separate to left key and right key.
During menu operation, functions
of the left and right soft key are
displayed at the bottom line of the
screen and they are closely related
to the current state of the phone.
Directi
on key
Used in the scroll menu or
phonebook .

20
Numeric
keys
Are used for dialing,
inputting password,
English letters,
symbols etc.
Pressing and holding "#"
key for more than two
seconds under standby
state can enable mute
function Pressing
“#”key to switch input
method in editing
method
Pressing any key to stop
alarm when it start ringing.
21
2.2 Screen
MP600 mobile phone’s screen includes three
parts:
The top line displays all kinds of icons.
Showing the Antenna and signal reception
strength and Battery indicator status.
The middle line display message,
structure and any other concent. Including
number, words and active icons
The bottom line displays the soft key.
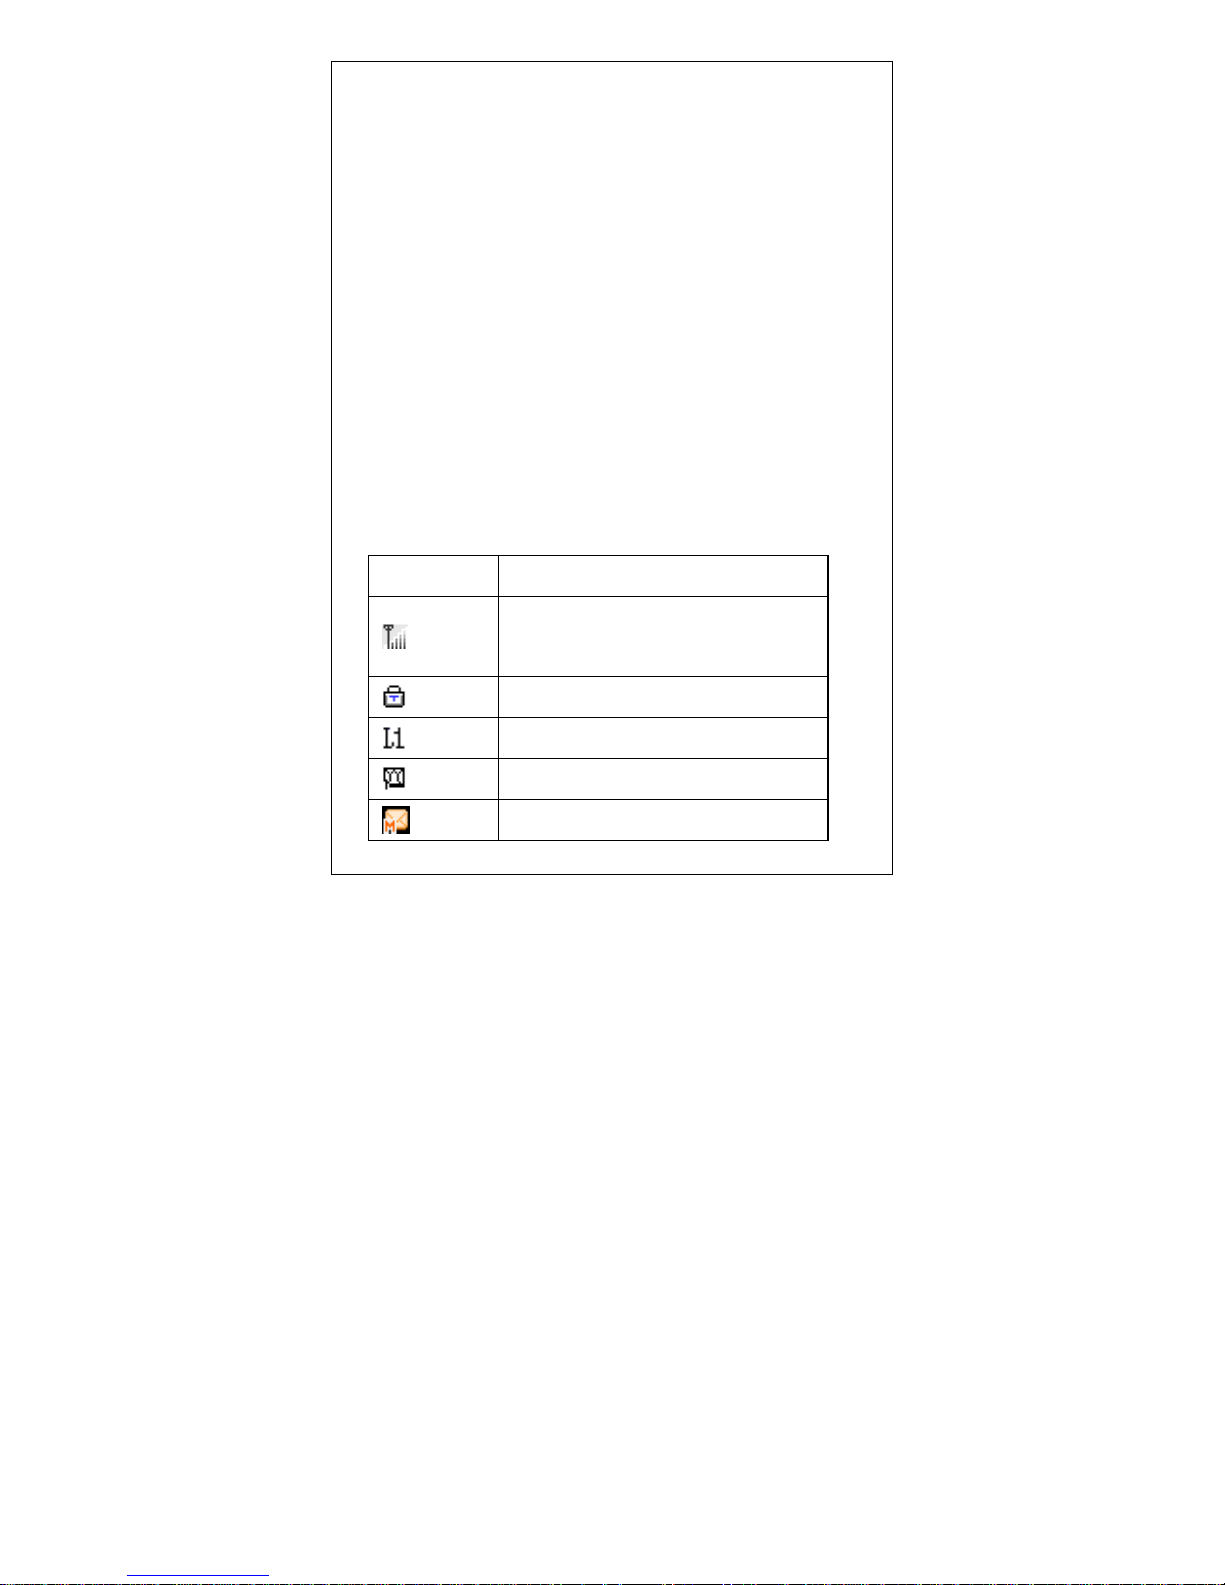
Top line icons
Icons content
Antenna and signal reception
strength
Auto Keypad Lock
Line One
Voice Mail Service
SMS prompt
22
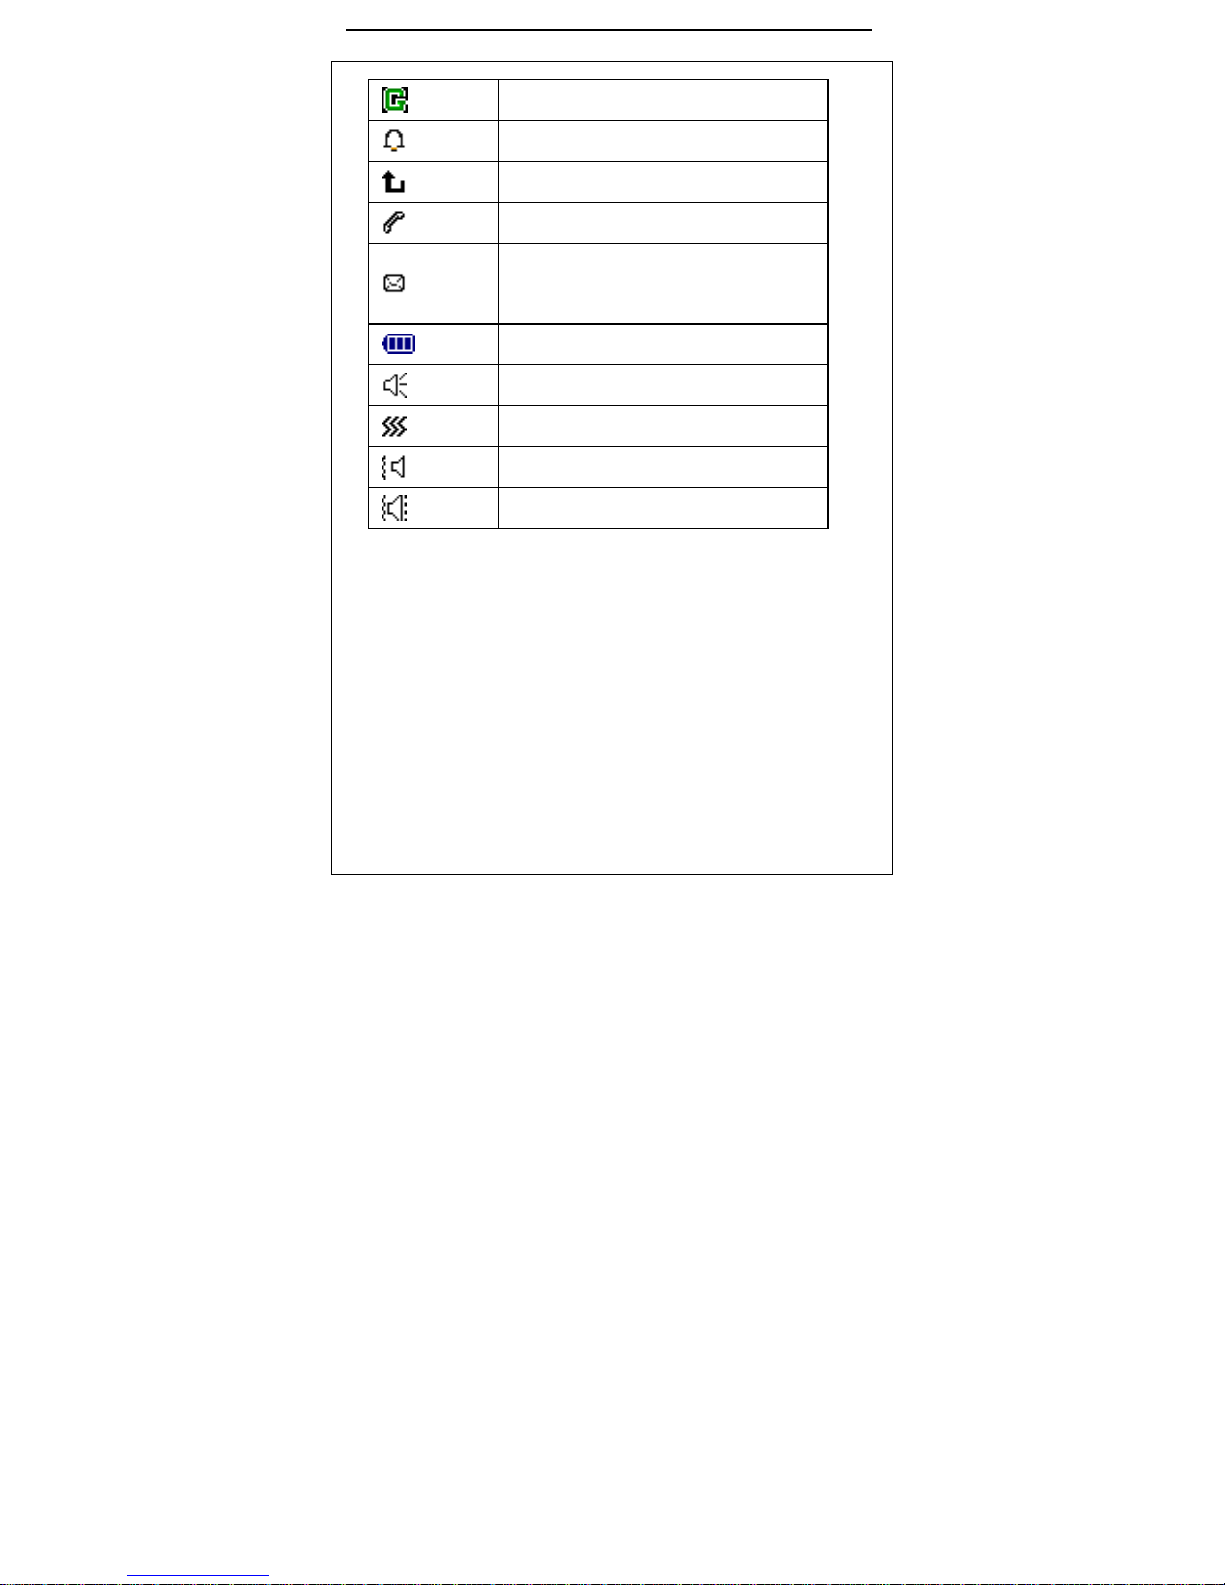
connected to GPRS network
Alarm clock enabled
Transmit unconditional
Missed call(s)
Recived new SMS massage or
the SMS masseage is full
Battery indicator
Alarm
Vibration only
Vibration then ring
Vibration and ring
2.3 LCD Back Light
2.4 Technique parameter
Handset
Item :MP600
Size ( width x height x thickness )
:
45.2mm×105.8mm× 12.5mm

23
Weight :65 g ( Including standard battery )
Li-battery
Standby time: About 150—180 hours. (Connected
with network )
Talk time: About 120—180mins (connected with
network )
Please refer to practicality if want to know the
related parameter of battery and charger.
Three 、Getting Started
3.1 Installing SIM card (Insert /remove SIM card)
and battery.
With the SIM card, which stores many parameters
required for communication, you can use the
various functions of the phone and store personal
information, including PIN (Personal Identification
Number), PIN2, PUK (PIN1 decoded).PUK2 (PIN2
decoded) and IMSI(International mobile user
24
Identification)serial number and network
massage phonebook, message and other
additional system services.
Note: The phone user should note that this phone
only support 1.8V and 3V SIM card, do not support
5V SIM card.
Switch off your phone before installing the SIM
card.
Please be careful while inserting the
card .scrubbing or bending will damage the SIM
card.
Please keep the phone and the accessories well
and keep it away from children.
Installing Step
Pressing the ending key for a while to
switch off the phone,then remove the
battery.

25
With the metal contacts of the SIM card
downward and the unfilled corner against the
one within the groove, put the card into the
groove gently and push it down until it
doesn't move.
Inserting the battery again and
fastening groove of the phone. Be sure the
battery is locked before you switch on.
Using code
The phone and the SIM card have many code s,
which may protect your SIM card and phone from
illegal use. When this function is put in use, press
“ok” when you enter the correct number when you
enter the wrong number press “delete” to delete
the wrong number, then enter the correct number.
Insert 1 code each time you power on your phone
to unlock the SIM card before you dial or receive
calls. You may cancel the SIM card protection

26
(referring to chapter 4.7.6 “security settings”),
and in this case, the SIM card will be unable to
prevent illegal use.
Handset Code
Handset Code is also called Handset Lock, which
can protect your phone from illegal use. Usually it
is supplied by the factory with the handset
Preferred handset code is 0000.If your handset
has set code enter correct handset code when you
switch on.
PIN
PIN Code (It is Personal Identification Number,
you could input 4-8 digits), which can protect your
phone from illegal use. You can get PIN1 code
while obtaining the SIM card from your network
supplier. If the PIN code has been set you should
input PIN code everytime when you switch on. If

27
you input a wrong PIN1 for three consecutive
times, the SIM card will be locked. Following are
the methods to decode:
·Input correct PUK code as screen displayed,
decoding the SIM card.
·Then input new PIN code and press “ok”.
·Input new PIN code again when the screen hints
input new PIN code again, then press “ok”.
·If the PUK code is correct, the SIM card will be
decoded and the PIN code will be settle again.
<Warning>: If you input a wrong PIN1 for
three consecutive times, the SIM card will be
locked. Only PUK code could decode which
kept by network supplier.
PUK CODE
PUK Code (It is PIN code’s decode, 8 digits), using
to decode PIN code. You can get PUK code while
obtaining the SIM card from your network supplier.

28
If don’t please connect your network supplier. If
you input a wrong PIN1 for ten consecutive times,
the SIM card will be invalidated. Contact the
network supplier to change a new card.
PIN2 CODE
PIN2 Code (4-8 digits), which can be get with SIM
card from your network supplier. It is used to set
“call cost” and “fixed dial” and other functions.
Please confirm with your network supplier to make
sure the phone has these functions. If you input a
wrong PIN2 for three consecutive times, the PIN2
card will be locked. Only entering the correct
PUNK2 code could decode the PIN2 card.
Following are the methods to decode:
·Enter into correct PUK code as screen
displayed to decode the SIM card.
·Entering into new PIN code, then press the
“ok” key.

29
·Enter into new PIN2 code again when the
screen hints input new PIN code again,then
press “ok”
PUK2 Code
PUK2 Code (to decode PIN2 card, 8 digits), used to
decode PIN2 code. You can get PUK code while
obtaining the SIM card from your network
operator. If don’t please contact your network
supplier.
If you input a wrong PIN2 for ten
consecutive times, the PIN2 will be locked.
Contact the network operator to change a
new card.
Forbidden Code
When you use call barring function, you will use
forbidden code, which can be obtained from
network supplier when you apply for this network
function.

30
3.2 Connecting to the network
After SIM card and handset being decoded, the
phone will search network automatically. You can
dial number, receiving call or operate following
functions when the phone is in standby state.
Press left soft key to access function
menu
Press right soft key to enter into
phonebook
Press calling key to enter into calling log
Press up guiding key to enter into
multimedia
Press down guiding key to enter into
User Profiles.
Press left guiding key to enter into
messaging
Press right guiding key to enter into
Audio Player

31
Press left soft key and press # key to
lock or decode phone.
Note: when the screen displays “you can dial
emergency call”,at that time you could only dial
emergency call.
3.3 Charging Battery
The accessory lithium battery of the handset,
which is half-charged in its original state, can be
immediately used after unpacking. A new battery
performs best after full charge/discharge cycles
for the first three times.
Battery
Your phone could monitor and show relevant
information about your battery.
You could see a charge indicator icon
displays on the upper right corner of the
screen to show the remaining electricity

32
capacity.
The handset will give off warning tone
and displays prompting message " Battery
low" on the screen when the battery is
running out, in such circumstance, if you
choose any reminding sound or warning
sound in user profiles, the phone will give
off warning remind sound.
During the cause of charging, the
screen will display charging icon and stop
flicking to indicate that the battery is fully
charged.
Note: the phone’s talk time and standby time are
based on ideal working environments. In practice,
the battery work time varies with different
network conditions, work environments and
modes.
Using USB cable to charging and net and using the

33
network camera function.
To insert one end of the USB cable into the
USB interface on PC (personal computer)
and connect the other end to the
"charging/data transmission interface" on
the left side of the phone. During the cause
of charging the battery indicator icon is
changing till to full.
Connecting the mobile with computer by USB
cable after open . You can chat with your friends
by selecting “network camera”. If you are using
the WidowsXP system , you can use the function
directly. If you are using Windows2000 or
Windows2003 system ,you need to install driver to
use this function .
34
Using travel charger to charging
You can charge the battery through handset when
you use travel charger. Insert the battery into the
handset when you are charging the battery
Connect the travel charger’s adapter to
plug on the left side of the phone.
Insert the travel charger’s plug into an
appropriate main power plug
During the cause of charging, the
battery indicator icon is in changing state till
to full
When the battery is full, the battery
indicator icon stops and you can see the
indicator light at the same time.
Note: If the battery’s voltage is too low to operate
the phone, there will be no display for a long when
you charge the battery.

35
Warning: Please make sure that the local standard
voltage and frequency is matching your travel
charger.
3.4 Swith on and off
Press and hold the ending key for a
while to switch on the phone. The screen will
display boot-strap picture.
If you set handset code. please enter the
code and press “ok” key. The preferred
handset code set by factory is 0000.
If you set PIN code, please enter the code
and press ”ok” key. Usually, the new
register’s SIM card and PIN card are supplied
by network operator.
Come into standby state
Press and hold ending key to switch off
the phone

36
3.5 Using hand free accessory
When you insert the hand free accessory into
the plug on the left side of the phone, it turns
into headset mode automatically. The hand
free accessory will take the place of phone
receiver and mike.
Four﹑ Basic Operation
4.1 Making a call
In standby state, dialing area number and phone
number, then press calling key to make a call.
press ending call to end calling
International call
Press * consecutively two times until
“+”appears. Enter country code, area code
and phone number and press calling key to
start a call
Dial Extension number

37
After you enter into phone exchange number,
press * consecutively three times until
appears “p” or press * consecutively four
times until appear ”w”, then enter into
extension number and press calling key to
start a call.
Correct wrong
The right soft key is used to delete the last
digit of the number. Pressing and holding it
for a while will clear all the entry.
Using the number saved in the
phonebook to make a call
Method One
Press right soft key to access
phonebook in standby state, find the
number you want to dial. Searching method:
press the first character of the record.
Pressing consecutively to find the character

38
you want according to its order, then press
up and down guiding key to the number you
want to dial.
Press calling key, the phone will dial
automatically the number you want.
Method Two:
Press left soft key for a while will access
to phonebook menu in standby state.
Choosing “searching by name” key, find
the number you want to dial, then press
calling key.
Redial
Pressing calling key in standby state,
the dialed number will display on the
screen.
When the dialed numbers displayed on
the screen, press up and down guiding key

39
to choose phone number
Press calling number to make a call.
Speed dial
Editing speed dial number in
“settings->phone setup->speed dial->Set
Number and to make sure the speed dial
function is open.
Press 2-9 digit key in speed dial list
for a while in standby state, then the
speed dial call will be made. the 1 digit
key is the voice service number.
4.2 Volume
Press up and down guiding key to change
volume during a call.
4.3 Answering a call
Press calling key or the left soft key to
answer a call.

40
Press ending key to end the call.
Press ending key or the right soft key to
object a call
4.4 Options during a call
You can use many optional functions during a
call.
Call Waiting
If the network support call waiting and you
opened this function, you will hear call
waiting sound when a new call coming
during the call .Following are the way to
answering a call during a call
Press calling key or left soft key to
answer a call, when you answer another call,
the first call will be kept. The detail
information please see ”keep/switch”
Press ending key or right soft key to
object a call and to keep the temporary call

41
Press left soft key to choose “ending” to
end the temporary call and to answer
another call.
Keep/Switch
When one call is kept and another call was
answering, use following way to change:
Press left key to change, which could
change the one call in keeping state and
another call is in answering state, you could
talk with anther one.
Press left key to choose ”ending single
line” to end the temporary call or keep
another call. Press ending key, you can end
the temporary call.
Press left soft key to choose “end all” to
end all call.
Call Keeping
If the network supports call keeping function,

42
you can make another call while answering a call.
Method one:
Dial phone number directly or press
left soft key access phone book and find the
number your desired in it, or press left key
to choose new call, then dial the phone
number and press calling key to make
another call.
The first call will be kept automatically.
Method Two:
Press left soft key to choose ”mute’ to
keep the temporary call.
Then dial another call.
When the phone call is put through. one call
is in calling state, another is in holding state.
you can switch between two states at any
time. The detail information pleases check”
keep/switch
Mute/Resume

43
This optional key could close or open the
phone microphone any other connected
microphone. ”mute” function could keep
your voice from being heard.
During a call, press the left soft key to access
to “option->mute/resume” to open or close mute
function.
Other options During a Call
You could access to phonebook、SMS、record
and other optional function. The detail information
please checking main menu.
Five、Main Menu
Read the following manual carefully in order
to master the functions well.
5.1 Phonebook
The phone provides two kinds of storage media:
SIM card and phone.MP600 phone could store 300

44
phone number and the SIM card could store 250
phone number at the very best. The storage
capacity of SIM card depends on the type of SIM
card.The phone number stored in phone or SIM
card could be used as the united phonebook to
search the number. Every name stored in the
phone could store three number in corresponding.
Any record, you could press “option”key to
operate as following :
IP number: When the IP number is
set(“IP number” in call setup),when you dial
the phone number, the phone will add IP
number in the front of your number and
making IP calling. On the contrary, you are
making a ordinary call.
Massage: Edit content and sending it to
receiver.
Postmortem: view the phone log.
Edit: edit the phone log

45
Delete: delete the phone log form the
phonebook
Copy : Copy the phone record to SIM
card or the SIM card record to phone
Move: If the record was saved in the
phone, this function could help move the
record to SIM card and you could also move
SIM card record to the phone
5.1.1 Quick Search
This function could help you find the linkman
quickly. You could enter into the first letter. The
screen will display all the linkman record
according to the first letter or the first stroke.
Press up and down guiding key to browse the
record and press calling key to make a call.
5.1.2 Search Entry
This function will help browse the phonebook
according to name described, also using this
function, you can search the phone number that

46
you desire to dial in phonebook. In the standby
state, press “main menu ”soft key,
choosing ”phonebook” then press up and down
guiding key to search. you can operate link
following:
Enter the name that you want to search
in ”enter name”
Press “option”key, choose ”search” then
press “ok” key, all relevant record will come
out form the phonebook. Pressing up and
down guiding key to browse the record and
press calling key to make a call
5.1.3 Adding New Record
You can use this function to add a new record in
phone log. The new record could be added to SIM
card or phone. The detail operation like following:
Choose “add new record” in phonebook,
then choose ”to SIM card ”or” to phone”
key.

47
Press “ok” key when you choose adding
new record “to SIM card”. Editing your
name and press “finished” key ,then press
up and down guiding key to access to
“phonebook” and choose ”save” to save
new record
Choose “to phone”, then press “ok” key.
Enter your name first, then
press ”editing” and “back” to finish
inputting your name.MP600 phone
supplies ,Smart ABC, Smart abc,
MultitapABC, Multitap abc, Numeric and
Insert symbols. The detail operation,
please check ”appendix1:word input
explanation. press “option” key, choosing
“finished”, press ”ok” key to finish this
operation.
Then press up and down guiding key to
the information: phone number, home

48
telephone number, company name (the
detail operation, please check ”insert
name” ) e-mail address, company
telephone number and fax number.
Then press left and right guiding key
set image, ringtone and close group.
When you input wrong entry, press
“delete” to delete the last character. If you
want to delete all, press “delete” for a
while.
At last, press “finished” to finish the
whole adding operation.
Note: When you are editing your e-mail address.
only letter, digit and symbol could be input. press
the digit key quickly for once will input first letter
on key. If you press the digit key twice
consecutively, the second letter on the digit will be
input again. until you input all letters and digit
symbols. You can press 1 consecutively to input @

49
symbol.
5.1.4 Copy All
This function could help you to copy phonebook
from phone and SIM card mutually.
Note: When you copy the phonebook, If the
capacity of phone phonebook is different from SIM
card phonebook, can copy up to the minor
capacity.
5.1.5 Delete
This function will help you delete all record on
phonebook both in phone and SIM card, you will
informed before you delete all information one-off.
5.1.6 Caller Group
Using this function, you could set five group, group
name, ring type, incoming call tone, incoming call
picture and group member.
5.1.7 Extra Number
Using this function, you could set Own number,
service number and emergency call number.

50
You could input two group numbers
and names in phone, and you could also
re-edit or delete these information. using in
line 1 and line 2 separately. Finishing edit,
press “ok” key to save the edit
You can input service number on the
support of SIM card.
You can input five group emergency call
numbers. When the keypad was locked,you
can also make emergency call, just press
digit to choose any emergency call number
which set by yourself, then press calling key
to make a call
5.1.8 Setting
Memory status: display the dispended
space and overall space of phonebook of
phone and SIM card.
Preferred Storage: Setting new number
saving place, choosing “to SIM card” or “to

51
phone”
Fields: When you add new phone
number to phone, choose the relevant
contents you want to add. including: home
telephone, company name, e-mail address,
company telephone, fax number and
picture link, ringtone link and incoming call
group. Press ”delete” or “choosing” key to
choose the content that you want to add
and press ”finish” to finish the setting.
Note: when you switch on the phone, it will
connect to network, if the screen display ”in
dealing” while you browse the phonebook
immediately, that means the phonebook is in
initialization, please browse the phonebook later.
5.2 Messages
5.2.1 SMS
Using this function, you can receive and send
massage through SMS service and manage the
52
massage.
5.2.2.1 Inbox
When you received an new short message, a
flashing icon
will appear on the the screen. If
the memory of short message is full, you can’t
receive any more new massages, please delete all
needless short massage
Choosing inbox”, the screen will display
all the short massage in inbox. if it is
marked
,that means it is a unread new
massage.
Press “ok” key to browse the current
massage.
Read message and press “option” key,
you can choose following functions:
·Reply: send the replied massage to the
sender’s telephone number
·Delete: delete the current short massage.
·Edit: edit the intrinsic massage.

53
·Forward: forward or edit the intrinsic
massage, then send it to others whom you
want to send to.
·Delete all: delete all the short massages in
inbox.
·Use number: pick-up all telephone numbers
in current massage, then save it in SIM card or
phone.
1. Save Objects: Store picture, motion
picture and ringtone in the short
message.
Note: preferred motion picture and preferred
rhythm can not be saved
5.2.2.2 Outbox
Choose “outbox”, the screen will display
all short massages in outbox
Press “ok” key to browse the current
massage.

54
Read massage and press ”option” key,
you can choose following functions:
·Send: send the current short massage.
·Edit: edit the current short massage. when
you finish it, send to others whom you want
to send to.
·Delete: delete the current short massage.
·Delete all: delete all short massages in
inbox
·Use number: pick-up the receiver’s
telephone number.
The detail operation. please check ”Write
Massage”
5.2.2.3 Write Massage
When you are writing a message, you can press # to
switch input method. You can insert letters, digit
symbols, you can also insert normal phrases,
pictures and ringtone.
First input the content, then press * to

55
insert special symbols.
You can choose following optional functions
when you press ”option”
·Finish: finish editing short massage.
·Templates: the short massages pre stored in
the phone when the phone left the factory.
·Insert: inset picture, motion picture,
ringtone, and rhythm.
·Format Text: you can change the size and
letter form and set the paragraph and put the
letter in order during editing.
·Input method: you can use this function to
switch input method.
After choosing “finish” in step one. you
can choose following optional functions.
·Send: sending short massage.
◆ ·Save and send: Save the message
in outbox and send the message to the
corresponding receiver at the same

56
time.
Save: Save the message in outbox.
Send to many: Send the message to
several receivers.
·Send By group: Send the message to
each member of the corresponding
group.
Choosing ”send” or ”send and save” in
step two, input the receiver’s telephone
number or pick-up the telephone number
from phonebook. then press “ok” key to
finish this operation.
5.2.2.4 Templates
10 normal used short massages was saved in the
phone, the user could edit and delete these short
massages. After deleting the short massage is blank.
5.2.2.5 Message Setting

57
Using this function, you can set SMS massage.
Profile settings: you can save and
amend the SMS center number or get this
number from network operator.
Common Settings: Enable or disable
message delivery report and reply path.
when you open “massage report” you can
state report from massage center to make
sure whether the massage has been sent or
not. Please contact with the network
operator to make whether it support this
function or not.
Memory status: Check the total capacity of
saved massages in SIM card and the phone.
The actual capacity is depend on the
capacity of the phone and SIM card.
Preferred Storage:default storage
position of the short massage, choosing SIM
card or phone

58
Sending massage setting: set priority
order for sending massage.
Note: choosing storage position only effect the
storage postion of the short massage in outbox.
5.2.2 MMS
Your phone can also send and receive MMS. Using
MMS, you can send massage containing picture,
sound and letter.
When you send MMS massage, the receiver should
have phone with this function to read your
massage.
5.2.2.1 Writing Massage
a . Choose” write massage” to input massage.
To: setting receiver’s telephone
number and e-mail address.
Cc: setting the carbon copyer’s
telephone number and e-mail address.
Confidential Copy:setting the
deferential receiver’s telephone number and

59
e-mail address
Subject: Enter the subject of the
message
Edit: editing the massage content, you
can insert letter, picture and annex in it
b. After inputting massage content, press left key
access to next option.
Send: sending the massage.
Save and send: saving the massage in
outbox and send it
Saved to draft: saving the massage in
draft for sending.
Send option: to set the send option for
the massage.
Back: quit to edit the massage, the
phone will warn you whether to save the
massage or not.
5.2.2.2 Inbox
You can use this function to read the short

60
massage .choosing one message, then press left
soft key to access to following optional operations:
View: view the short massage
Massage detail: view the receiver’s
name, the content, date and the capacity.
Reply: reply the massage
Reply All: replay all the people in
“sender” ”receiver” and “carbon copier”
Forward: forward the selected short
massage to other people
Delete: delete the selected short
massage
Delete All: delete all short massages in
inbox
Use number: pick-up the phone
number from the short massage
5.2.2.3 Outbox
Use this function to keep your short massage in
the archives and save it. You could do following

61
operations to the messages:
View: view the short massage;
Massage Detail: view the receiver’s
name, content, date and the size;
Send to other/Resend: send the
selected short massage to other people. If
the message did not send successfully, the
screen will display ”resend” to resend the
massage;
Delete: delete the selected short
massage;
Delete All: delete all massages in
outbox;
Use Number: pick-up the phone
number from the short massage.
5.2.2.4 Draft
This function will list our MMS massage which
saved in draft, you could do the following
operations to the massage.

62
View: view the short massage;
Massage Detail: view the receiver’s
name, content, date and the size;
Forward: forward the selected short
massage;
Edit: edit the selected short massage;
Delete: delete the selected short
massage;
Delete All: delete all short massages in
the draft box
Use number: pick-up the phone
number from the short massage
Note: If the massage receiver is not set in the
draft box, you could not find “Send” in main
menu.
5.2.2.5 Template
In this option, you can find five normal used
messages, using these preferred templates when
you are editing new short massage. Choosing one

63
template and press “option” key to access to
following options:
View: view the models;
Properties: view the receiver’s name,
the content and the size
Write message: take the template as
new message, you can edit it.
5.2.2.6 Message setting
Using this option, you can do following settings to
the collection of the message which you sent and
received.
Send Setting: set the validity period,
delivery report, read report, priority,
alternative time and sending time of the
massage,
Retrieve Setting: set the main network,
roam network of the massage and send read
report and permit sending report.
Filter: set anonymity sender, the max

64
capacity of receiving and advertising
massage;
Server Profiles: Select the needed
network when you use the short message.
You can also edit the .
Memory Status: view the memory
status.
5.2.3 E-mail
You can send E-mail including work , sound and
picture. If you want to using this function , you
need to apply for the E-mail service , and set the
E-mail account and server .
Send and receive : Display the quantity
of sending and receiving E-mail.
Write Email: Edit the content of sending
E-mail. Including receiver , copy to , subject ,
adding file , PRI and content . Press “finish”
soft key to send and save . You can save to

65
draft or not save to leave
Inbox: display the received E-mail.
Sent: display the send-out E-mail . Select
any of E-mail you can send , save , edit ,
move to draft or delete .
Unsent: Press “finish”softkey to select
to save the editing E-mail.
Draft: Press “finish”softkey to select to
save the E-mail to draft.
Delete the mailbox: Delete all the
E-mail.
E-mail Setting: Can set three kinds of
accounts and servers.
Open: Activate the setting of E-mail
Edit: Edit the transmission setting, Out
server setting, inner server setting and
signature file.

66
5.2.4 Vioce Mail Server
This function is using for setting the number of
voice mail server and receiving the record. When
you receive Voice mail, the server operator will
send it to your mobile.
You can input two groups of number of voice mail.
The server operator will offer you the number.
In “Messages” menu, press upper or down key to
select “voice mail server”, press “OK” into this
function.
Edit : input or edit the number of voice
mail server .
Connecting to voice mail : You can
listen to the message in the voice mail by
using this function .
Note: In the numeric simulation keypad , press
“1” , you can dial the number in voice mail server .

67
5.2.5 Broadcast Massage
This network service permitting you to receive all
kinds of word messages. like weather report and
transportation message. In the contemporary. not
many network has started this service, you could
consult the network operator about the relevant
information,
Receive Mode: Choose whether to open or
close cell broadcast.
Read Broadcast Massage: Read the received
cell broadcast. Press up and down guiding key to
view the massage.
Language: choose the language to
display the cell broadcast massage(support
or un support language is up to network
operator)
Channel Setting: select broadcast
channel. You can select broadcast message.

68
5.3 Call History
You can learn about recent call status via this
menu.
5.3.1 Missed calls
Your phone can store the latest calls missed, calls
received, and calls dialed, 20 entries for each, and
you can view these records through menu.
Enter the submenu Calls Missed to view
the missed call list by pressing
Select
Press Options to practice the following
operations on the piece of record selected.
View: View the detailed information of the
record including number and call times .
Delete: Delete this piece of record
·
Save: Save the number in the SIM card or
the handset

69
·Call: Dial the phone number
·
Edit: Edit the current number and save it in
the phone book
5.3.2 Dialed Calls
In the detailed information interface, press
Options to practice the operations of view, delete,
save, dial and edit on the piece of record selected.
5.3.3 Received Calls
In the detailed information interface, press
Options to practice the operations of view, delete,
save, dial and edit on the piece of record selected.
5.3.4 Delete call Log
Enter submenu Delete All Delete all the call
records in the same contents

70
5.3.5 Call time
Summarize the last call duration, dialed calls
duration, received calls duration since the counter
is reset last time. You can also reset the last call
duration, dialed calls duration, and received calls
duration.
Last call duration: summarize the last call
duration .
Dialed calls duration: summarize the dialed
calls duration.
Received calls duration: summarize the
received calls duration .
Reset: reset the last call duration, dialed
calls duration , received calls duration .
5.3.6 Call cost
Summarize the last call cost , total cost ,reset cost ,
Max. cost and price per unit .
Last Call Cost: View the last call charge.

71
Total cost : View all calls charge and revise
the cost maximum .
Reset Cost: Clear call charge record.
Max Cost: View the maximum call
charge.PIN2 code is nessary in revising.
Price Per Unit: View and set call charge unit.
PIN2 code is nessary in revising.
Note: It is related with SIM card , and many SIM
cards do not support it . Please contact with your
network provider to obtain the PIN2 code .
5.3.7 SMS counter:
Summarize the number of sent and received short
messages since last reset.
Sent: record the number of being sent SMS
Received: record the number of being
received

72
Note: It do no matter with SIM card . As the
number of sent and received will not change when
revert the SIM card .
5.3.8 GPRS Counter
Summarize GPRS volume of last sending, last
receiving, all sending and all receiving since last
reset and reset GPRS volume record. The using
unit is Byte.
5.4 Settings
Press “main options” soft key. Select “setting” by
pressing left/right key or upper/ down key. Press
“confirm” to access to this function.
5.4.1 Phone setup
Time and date
Set home city: Can select 57 cities, and the

73
implied city is new delhi.
Time setting: Setting time, date and light
economy by pressing numeric key. When
the light economy is on , the display time will
be ahead on hour .
Set Format: Set time format as 12-hour
format or 24-hour format. Date display
format can also be YYYY/MM/DD
,
YYYY-MM-DD , “MMM DD , YYYY” ,
DD-MMM-YYYY,DD/MM/YYYY,MM/DD/YYYY .
DD represent dat , MM means month , and
YYYY means year . And screen display will
also change .
Auto Power ON/OFF
Enable or disable timer on and off function. The
phone provides 2 time points for switch-on and
switch-off. You can set the status and time for

74
each time point.
Language
Select a display language of handset menu.
Preferred Input method
Select a default input.
Display Characteristic
Wallpaper: Select the phone’s standby
image in eight pictures.
Screen saver: You can set whether to enable
screen saver and the time before screen
saver is activated, and select screen saver
image.
Show Date and Time: Choose whether to enable
or disable displaying time and date on standby
interface.

75
Show Owner Number: Choose whether to
enable or disable displaying owner number on
standby interface.
The precondition of showing the handset
number is users have edit the name or
number of the phone . And two groups of
phone number separately correspond
with line 1 and Line 2.
Greeting Text
Select to set standby greetings ON/Off, or
select
Editing Greetings submenu to edit
the greetings.
Speed dial
You can customize 8 shortcut keys
corresponding to 8 phone numbers in the
phonebook. By doing so, you can make a call

76
quickly by pressing and holding from numeric
key 2 to 9 under standby state.
Dedicated Key:
Assign function to Up Key, Down Key, Left Key
and Right Key.
Auto update of date and time:
Set whether to enable auto time update
function. After this function is enabled, after
the phone is switched on or arrives at a new
area, the network will update the time of the
phone with the system time (This function
requires network support.)
Flight Mode:
You can access the menu with the connectivity
of network.

77
5.4.2 Call Setup
Caller ID:
System Pre-set: Whether send
caller’s number while calling up to the
system default setting.
This function need be supported
by operator’s network. It cannot dial
while hiding the number. Please test the
call by yourself when activate this
function.
Call Waiting
Open: Handset will contact with network
when the dial –waiting is active. Pause for a
while , the network will give response and give
message to confirm your operation . If you
activate the call-waiting , when you have call ,
network will give you warning . At the same

78
time , there will be another call number display
on the screen .
Closed : If you cancel the dial-waiting
function , the network will not give warning
when you have call .
Inquire : Using for inquire about the recent
estate to network .
Call diverts
This network service allows divert our call to
another handset. After entering call settings,
select call diverts, press “confirm” soft key to
enter.
All calls:Divert all incoming calls.
Unreachable: Divert the call to pre-set
number when the phone can’t be got through.
No Answer : Divert the call to pre-set
number when there is no answer.
When Busy: Divert the call when the

79
phone is busy.
Note : In these four kinds of diverting operation :
Open: Open after input the divert number .
Close: Cancel this divert function .
Inquire: Inquire one divert function to network .
The handset will contact with network , it will give
response and inform the result in a while.
Divert All Data in-coming: Divert all
incoming data calling.
Cancel All: Cancel all the call diverting
settings
Call Barring:
This function allows you to restrict the call by using
call restrict service.
You need the network restrict code from operator
when setting this function. If the code is not
correct, it will give error message . After you

80
select , if you continue to select open or close , the
handset will request prohibit code .And then the
handset will contact with network , after a while ,
the network will give response and inform the
operation result .
Block out-going call:
·All the call: If this restrict service is open, you
can not make any call .
·International call : If this restrict service is
open , you can not make
any international call.
·International call exclude nation call : If this
restrict service is open , you can only call
the number in the country you are . Or call
the homeland number.
Block in-coming call
·All calls: If this restrict service is open , you
can not receive any call .
·While roaming : If this restrict is open , when

81
you are out of service area , you can not
receive the call.
Note : In these two kinds of restrict operators :
Open : Open it after inputing the resrict code .
Close: Cancel the restrict function .
Inquire: Inquire one restrict function to
network . The handset will contact with network ,
it will give response and inform the result in a
while.
Cancel Blocking
Cancel the call restrict . The network restrict
code from network operator is necessary.
Revise the code of dial prohibit
It is used for revising the code of dial prohibit. You
need to input the original one to revise.
Call time reminder
Call Time Reminder: Choose whether to
prompt you call duration during a call (prompted

82
by a "tick" tone). Prompt period can also be set.
Call Time Display:
Choose whether to display current call duration
during a call.
Auto redial:
Choose whether to automatically redial when
the called party is busy or no answer is received.
Closed group
Display the group list by pressing “confirm” left
soft key . Select “ add” to input the group name ,
select “finish” by pressing left soft key , and input
the directory number ,then press “confirm” to finish
the group adding operation . You can edit , add,
open , close and cancel by pressing “options”. The
inner group is divided by operator . Group members
can call each together to restrict the call cost.
Note : This function need be supported by

83
operator’s network.
Blacklist
In the blacklist, users can set five numbers at
best . When the blacklist is open , you can not
receive the call in blacklist .
Note:If you want to add the dest phone in the
blacklist , you should add 0 before code . If you
want to put the handset in the blacklist , input the
number directly .
5.4.3 Network Settings
Please contact with operator if you want obtain the
sevices as followings :
Network selection:
Set whether to use automatic or manual network
selection.
Preferred networks:
Select operator with priority , the default display

84
is the network of using SIM card . Press “ options” to
operate :
Add from list: Display all the PLMN lists .
Add : Add the priority of network using .
Change the priority network : Set the
priority grade of network
Delete : Delete the priority network .
Connect GPRS:
select GPRS connecting mode, constant or
temporary.
5.4.4 Security Settings
This function provides some setting choices about
security .
SIM Card Lock
You can set security settings in this menu to
prevent your mobile phone from being used
illegally.

85
PIN Code
PIN Code can prevent your mobile phone from
being used illegally.
If the current PIN Code is closed, please select
Open to activate this protection function. Next
time when you power on your mobile phone, PIN
Code will be requested. If the current PIN code is
in ON mode, select Close to cancel PIN code
protection function. Select Change PIN Code to set
a new PIN Code follow the procedure, input old
PIN Code, new PIN Code and again new PIN code.
If input wrong PIN Code three times sequentially,
SIM card will be locked. In this case, you need PUK
Code to unlock SIM card. PIN code, PUK code will
be given to you along with SIM card. If you don’t
have, please contact your network service
provider.
Handset Lock
The handset lock can prevent your mobile

86
phone from being used illegally.
Select
handset lock can activate handset
code-protected function, next time when you
power on your mobile phone, handset code will be
requested. Press again to switch off the function of
handset code-protected.
Note: Default handset lock code from 4 –8
numbers .
Key Pad Lock:
set the waiting time for locking the key pad.
After setting, key pad will be locked automatically
Fixed Dial:
If this function is set (PIN2 code is required),
you can only dial the numbers stored in the fixed
dialing list, and normal phonebook will no longer
be effective.
Barred Dial

87
Bar user dialing. Network support is required.
Change password
Set new passwords, which include PIN1, PIN2
and phone password.
5.4.5 Restore Factory Settings
Factory default setting of the phone will be
restored after this function is selected.
Phone lock password is required, which is "1122"
by default.
5.5 Multimedia
5.5.1 Camera
This phone has built-in 1.3 Mp CMOS camera,
which supports photographing and video shooting
function. Browse function is provided for you to
take the scenery you like at any time and at any
place. Photos are saved in the phone's own file
system and photo is in JPG format. You can send

88
the photo taken via the MMS option provided by
the phone.
“Options” soft key provides functions as follows:
Album: Save the pictures shot . Check,
browse, forward, rename , delete ,delete all ,
sort and save your picture files .
Camera Settings: Set relevant parameters for
the camera.
White Balance: Can be set one of Auto ,
Daylight , Cloud, Fluorescent , Tungsten,
incandescence . Press 2 to set rapidly .
·Shutter Sound : Can set three kinds of shutter
sound .
·EV : Select the EV parameters , press left/right
key to set rapidly .
·Scene Mode : Select on or off , press 6 to set

89
rapidly .
·Banding : Users can choose 50Hz or 60Hz.
Image setting : Set the Image Size and
Image Quality , press 7 to set Image Quality
rapidly , and set 8 to set the Image Size
rapidly .
Effect Setting : Provide Normal, Grayscale ,
sepia , Sepia Green , Spia Blue , Color Invert ,
Gray Invert , Blackboard , Whiteboard , Copper
Carving , Blue Carving ,
Embossment ,Contrast , Sketch , Custom FX1,
Custom FX2 , Custom FX3 to select . Press 1 to
set rapidly .
Add frame : When the image is 128*160 ,
the frame can be selected. Provide many kinds
of frame to make the image more interesting .
Cont Shot : Set the quantity of cont shot .
The handset will shot the pictures and save it
in image viewer . Press 5 to set rapidly .

90
Delay timer : Provide delay timer of 5
sec.10 sec.15 sec . Press 4 to set rapidly .
Storage: You can choose to save the
picture in the phone or memory card.
Restore Default : Restore default .
Note : Press Upper/down key to change the
focus . The most numeral focus can be 4X.
5.5.2 ImageViewer
View: Browse the photos saved here.
Forward: Set the photo as wallpaper, screen
saver, caller image or send it in form of MMS.
Rename: Rename the photo.
Delete: Delete the photo.
Delete all files: Delete all photos saved here.
Sort: Sort all photos saved here.
Storage: Set the storage location for the

91
photo.
5.5.3 Video Recorder
To Player: Save the video file and play ,
forward, rename , delete , delete all the file ,
sort and storage .
CamCoder Settings: Set some relevant
parameters for video shooting.
Video setting: set the video quality ,
Specially good effect settings : set
specially good effect .
Storage: Set the storage location for the
video file.
Restore Default: Restore video setting to
default.
5.5.4 Video player
Save the video file and play , forward, rename ,
delete , delete all the file , sort and storage .

92
Play: Play appointed kinescope or cinema ,
and adjust the volume by pressing figure key 2 or
8 , and adjust the play speed by upper key and
down key . Process the files by left and right key.
Switch the full screen and half screen by pressing
“*”key .
Forward: Forward the file to message or
E-mail.
Rename: Rename the video or cinema
files .
Delete: delete assigned video or cinema
files
Delete all the files: delete all the video or
cinema files
Sort : Sort the video or cinema files as
requested ( name , style , time , size )
Storage: chose to save to handset or
memory card .

93
5.5.5 Audio player
You can enjoy music by this function , but the
music file should be in the directory of My Music .If
you want to browse lyric , please put the lyric in
the same directory .
Press upper key into Audio player or enter by
menu . The Audio player provide play, stop , back
off,advance , corresponding with
upper/down/lef/right key . It support the music
file with format : MP3,WAV, AMR, MIDI, IMY .
Enter list by pressing “list”soft key , “options”soft
key provide functions as below :
Play : Play the appointed music . Press 2 or
8 to adjust the volume .
Particular : List all the music name , track ,
tone, and time according to different music .
Add rings : You can using songs you like as
the in-call ring .

94
Refresh Play list : Update song list.
Settings
·Location choice: Play from handset or
memory card .
·Automatic-create list : Provide open or close
estate ; When you select closed estate , you
can operate the MP3 file according to your
requests . System will provide not only the
playing list change but also adding, moving
and moving all by pressing “select” soft key .
When you select open estate , all the file will
be list in the playing list by carrying out the
update of playing list.
·Appearance: Provides three kinds of playing
appearance for your choice .
·Repeat : You can set one kind of three
manners : close , single song and all the
songs .
·stochastic : You can open or close the

95
stochastic play .
· Backgroud: If you select the open estate,
the music still can play after exit the playing
connector. If you select the close estate ,
the music will stop after exit the playing .
The play device only put the files which are in the
“my music”directory in the playing list . Please
save your download music into My Music directory .
The system do not support MP3 with nonstandard
format .
5.5.6 Sound record
This handset support WAV and AMR format , can
record for long time , and users can choose the
format from setting function to record . Also it can
record talk and save in handset or memory card .
Slecte original record in handset to record , play ,
append ( only for AMR format ) , rename , delete ,
delete all , settings and forward .

96
5.5.7 Melody Compose
Use this function to edit the ring tone you like by
yourself (vibration can also be edited), and set it
as caller ring tone or send it in form of MMS.
Note : This handset can save many rings
according to the magnitude.
Use this function to edit the ring tone you like
by yourself. Select different instruments to
play the ring tone edited by yourself. Also,
you can save the ring tone.
Select the edited music , and press “select”
soft key to operate as follows :
·Play: Play the selected ring tone edited by
yourself.
·Edit: Edit the selected ring tone edited by
yourself .
· Add: Edit a new ring tone.

97
Note : one edited ring ton can have 150 note
at best
· Rename: Rename the selected ring tone .
· Delete: Delete the selected ring tone .
· Delete all the files: Delete all the selected
ring tone.
· Forward: forward to scene model , message ,
E-mail to message.
On the ring editor , press “select” soft
key to operate as
follows :
· Play: Play the selected ring tone edited by
yourself.
·Play speed: Setting the play speed of the
ring edited by yourself .
·Select Instrument: Select different
instruments to play the ring tone edited by
yourself.

98
· Save: Save the ring tone in the audio .
ring edit rule:
0
: Means input a pause .
1
:Means input Do.
2 Means input Re
3
:Means input Mi
4
:Means input Fa
5
:Means input So
6
:Means input La
7
:Means input Si
8
:Key "8" is the vibrating key
*: Means change the playing rhythmic speed
of current note .
#
:Means change the playing way of current
note .
Upper key : Means change the tone of current
note . It has three kinds : high , middle , low .

99
Down key : Means change the tone of current
note . It has three kinds : high , middle , low .
5.6 File Manager
BMV01 provides volume of 760K to users , and
support TFlash card ( volume is seleted ) . You can
manage the files saved in the handset and TFlash
card conveniently. Enter main table, select “file
manager” and start file manager function, offer
operation as follows by pressing “option”.
5.6.1 Open
Using this function to the EMS memory, system
folder , data file set up and user file will be list .
( The handset is first open or the directory is not
be changed , the root directory only has system
file ) .
Enter specified file options, please refer to
the computer file operation.

100
· Open: Open a specified data folder.
· Create Folder: Create a new data folder.
· Rename: Modify the name of data folder.
·Delete : Delete appointed file .
·Sort: Sort files according to the selected way.
Enter specified file options, please refer to
the computer file operation.
· Browse ( play) : Browse or play the
appointed file .
Forward : sound file can be forwarded to
scene mode or message ; picture file can
be forwarded to desktop , to screen
protect , to phone test and message .
· Details: list date and magnitude of
appointed file .
· Rename: Rename appointed file.
· Copy: copy appointed file to appointed
 Loading...