

Mazda MX-5 Miata Sport 2007 Accessories Manual
2007 ACCESSORIES & BODY, CAB
Entertainment - MX-5 Miata
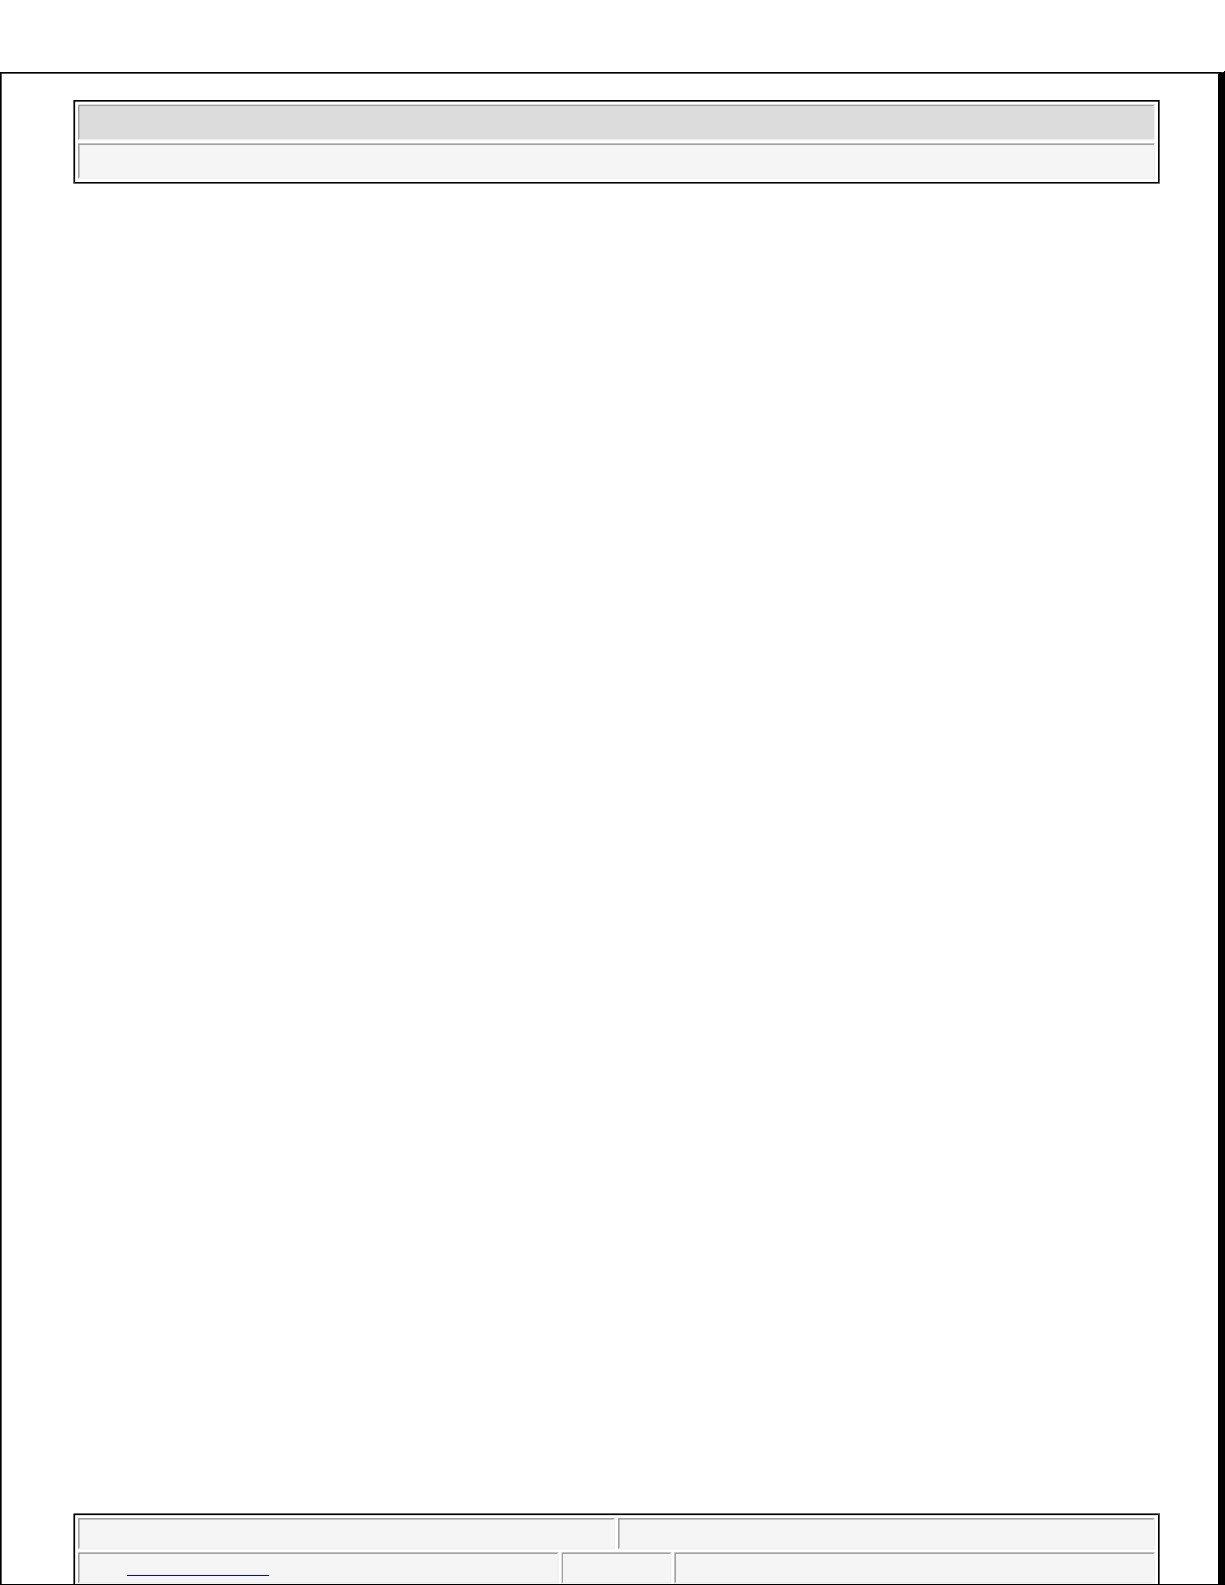
ENTERTAINMENT LOCATION INDEX
2007 Mazda MX-5 Miata Sport
2007 ACCESSORIES & BODY, CAB Entertainment - MX-5 Miata
2007 Mazda MX-5 Miata Sport
2007 ACCESSORIES & BODY, CAB Entertainment - MX-5 Miata
Microsoft
Thursday, July 09, 2009 3:34:33 PM Page 1 © 2005 Mitchell Repair Information Company, LLC.
Microsoft
Thursday, July 09, 2009 3:34:38 PM Page 1 © 2005 Mitchell Repair Information Company, LLC.
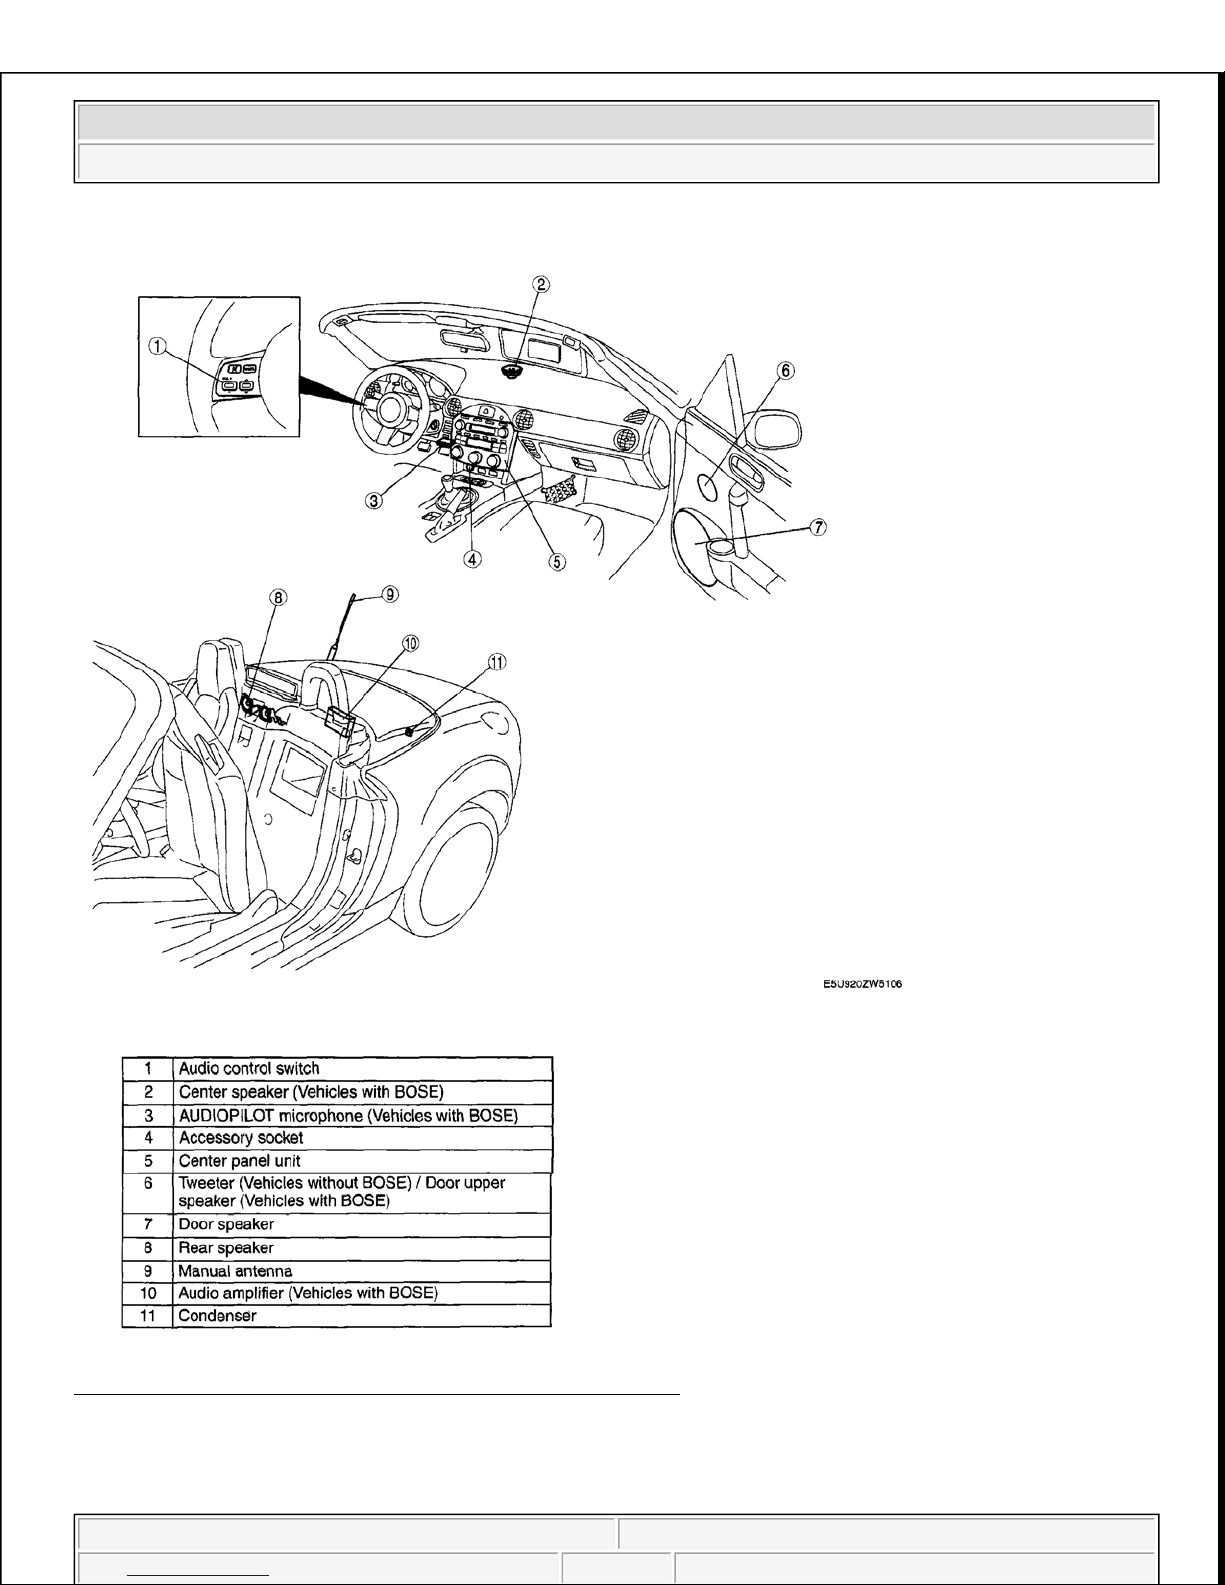
Fig. 1: Identifying Location Of Entertainment Components
Courtesy of MAZDA MOTORS CORP.
CENTER PANEL UNIT REMOVAL/INSTALLATION
2007 Mazda MX-5 Miata Sport
2007 ACCESSORIES & BODY, CAB Entertainment - MX-5 Miata
Microsoft
Thursday, July 09, 2009 3:34:33 PM Page 2 © 2005 Mitchell Repair Information Company, LLC.
1. Remove the battery cover.
2. Disconnect the negative battery cable. See BATTERY REMOVAL/INSTALLATION [LF] .
3. Remove the lower panel. See LOWER PANEL REMOVAL/INSTALLATION
.
4. Remove the knee bolster. See KNEE BOLSTER REMOVAL/INSTALLATION .
5. Remove the side wall. See SIDE WALL REMOVAL/INSTALLATION
.
6. Check if the vehicle has the installation bolt or not at the position shown in the figure from the underside
of the driver seat
If the installation bolt is equipped, remove it.
Fig. 2: Identifying Installation Bolt (With Torque Specifications)
Courtesy of MAZDA MOTORS CORP.
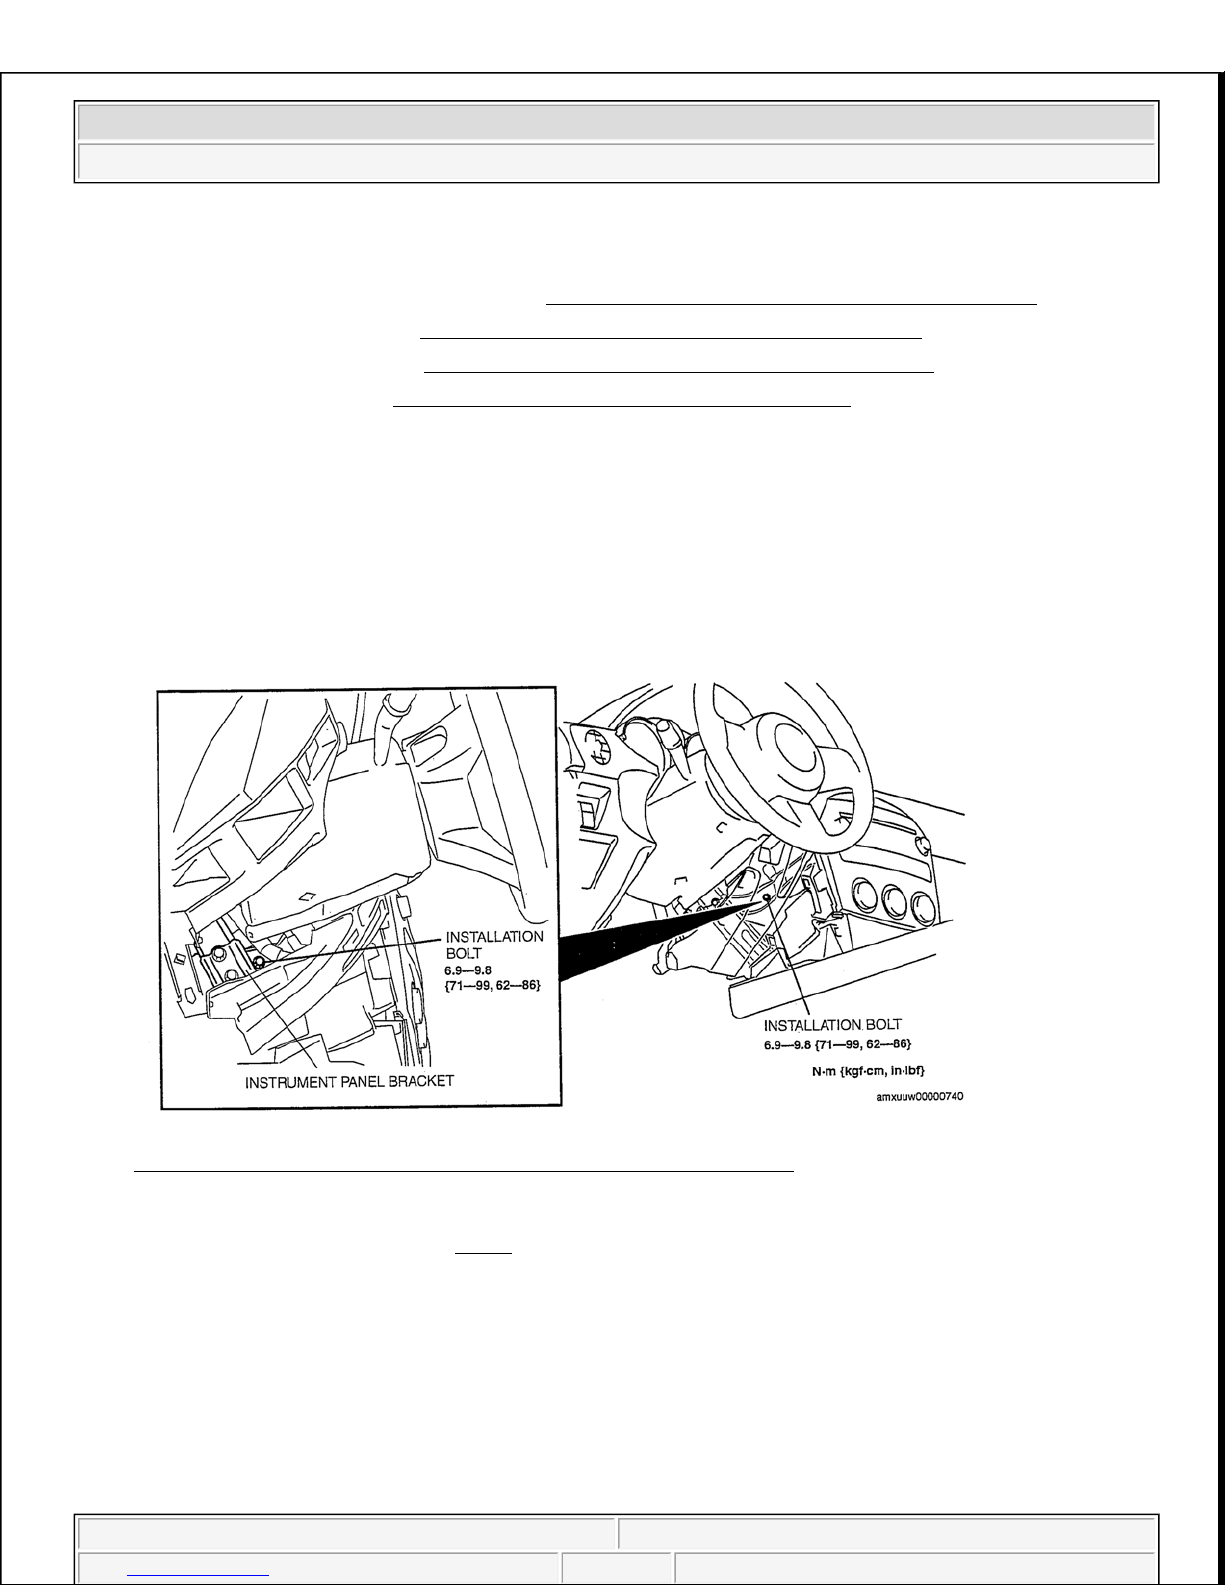
7. Remove in the order indicated in Fig. 3.
CAUTION: The center panel unit may be damaged if it is pulled out with the
installation bolt installed. Verify that the installation bolt is removed
before pulling out the center panel unit.
2007 Mazda MX-5 Miata Sport
2007 ACCESSORIES & BODY, CAB Entertainment - MX-5 Miata
Microsoft
Thursday, July 09, 2009 3:34:33 PM Page 3 © 2005 Mitchell Repair Information Company, LLC.
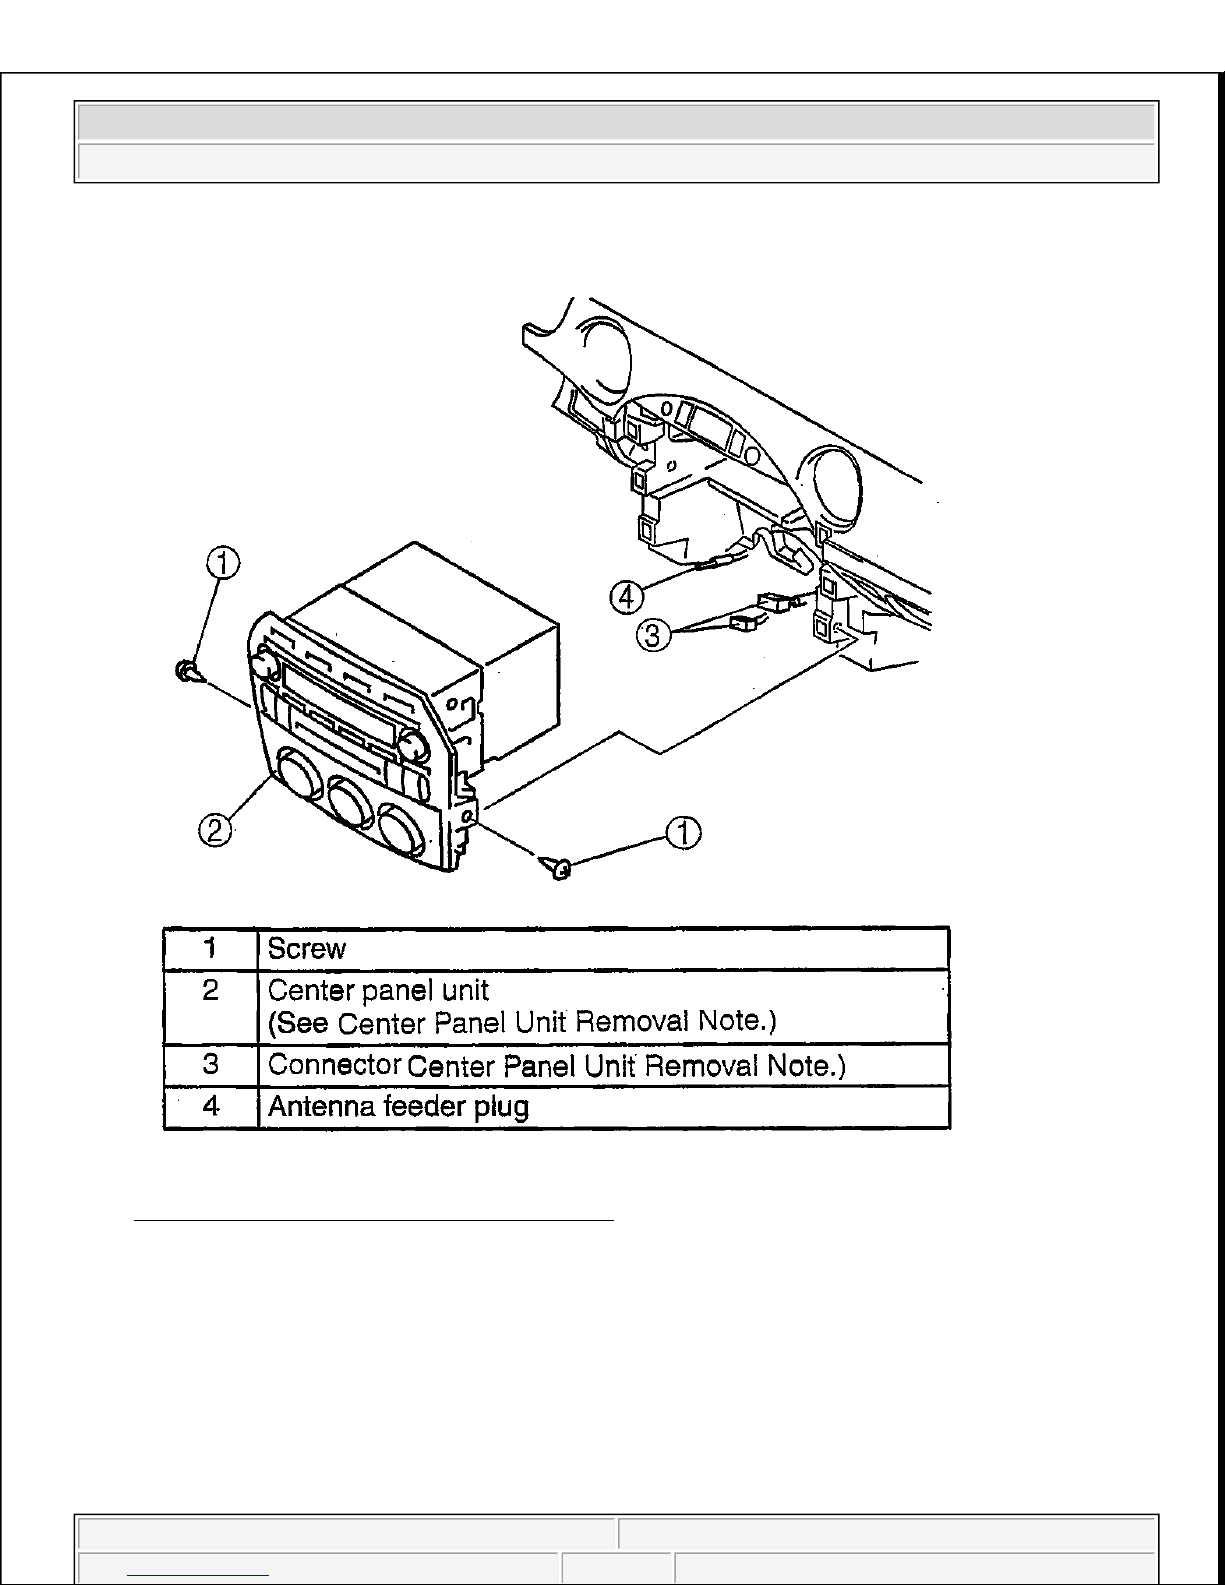
Fig. 3: Identifying Center Panel Unit Assembly
Courtesy of MAZDA MOTORS CORP.
8. Install in the reverse order of removal.
CENTER PANEL UNIT REMOVAL NOTE
CAUTION:
When installing the center panel unit, make sure that the wiring
harness and antenna feeder are not caught between the unit and
dashboard. If the wiring harness or the antenna feeder is caught
between the unit and dashboard, it may cause malfunctions.
2007 Mazda MX-5 Miata Sport
2007 ACCESSORIES & BODY, CAB Entertainment - MX-5 Miata
Microsoft
Thursday, July 09, 2009 3:34:33 PM Page 4 © 2005 Mitchell Repair Information Company, LLC.
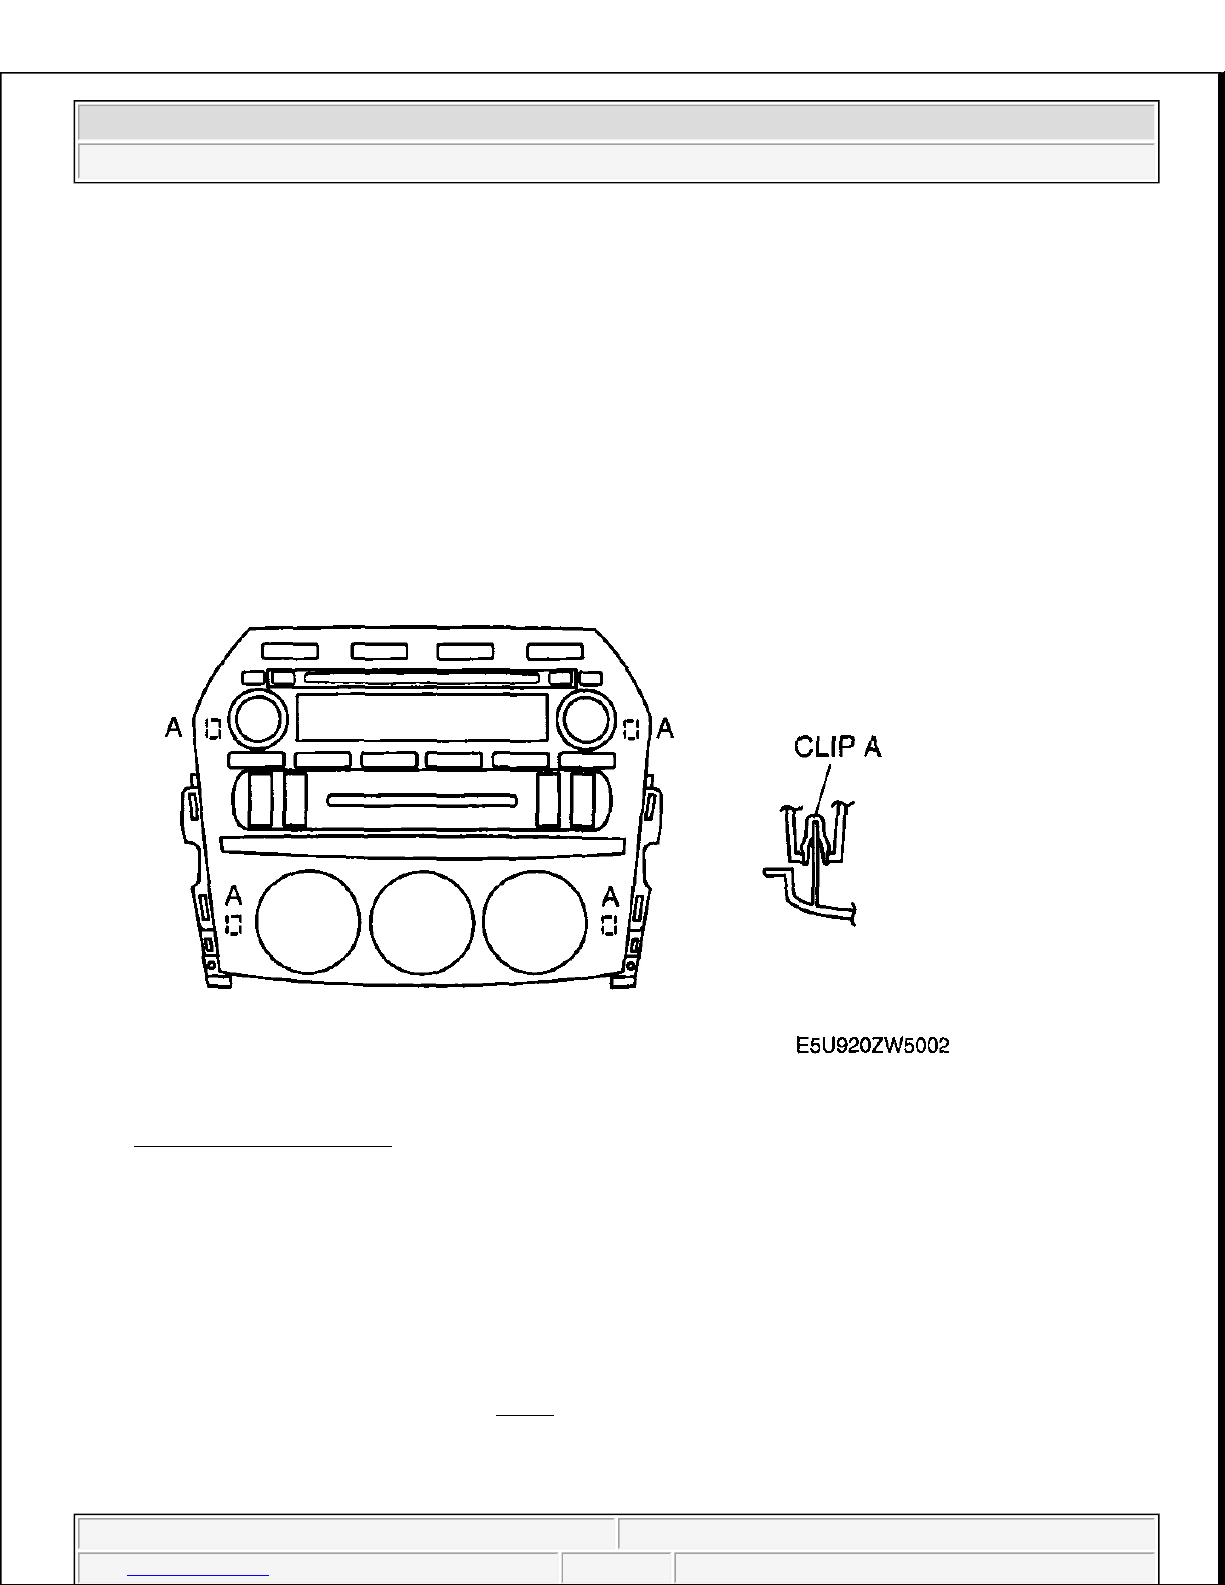
1. Pull the center panel unit outward, detach clip A from the dashboard, and then remove the center panel
unit.
2. When removing the center panel unit, disconnect the audio unit connector (24-pin) first to aid in
disconnecting other connectors and the antenna plug.
Fig. 4: Identifying Clip A
Courtesy of MAZDA MOTORS CORP.
CENTER PANEL UNIT DISASSEMBLY/ASSEMBLY
1. Disassemble in the order indicated in Fig. 5 .
CAUTION:
Verify that bolt has been removed when pulling the center panel
unit outward. If the center panel unit is pulled with bolt installed,
stress will be applied to the connectors inside the panel which
may cause a malfunction.
CAUTION:
Before disassembling the center panel unit, spread a cloth on the
floor to put the disassembled parts on. This protects the surface of
the panel from scratches or dirt.
2007 Mazda MX-5 Miata Sport
2007 ACCESSORIES & BODY, CAB Entertainment - MX-5 Miata
Microsoft
Thursday, July 09, 2009 3:34:33 PM Page 5 © 2005 Mitchell Repair Information Company, LLC.
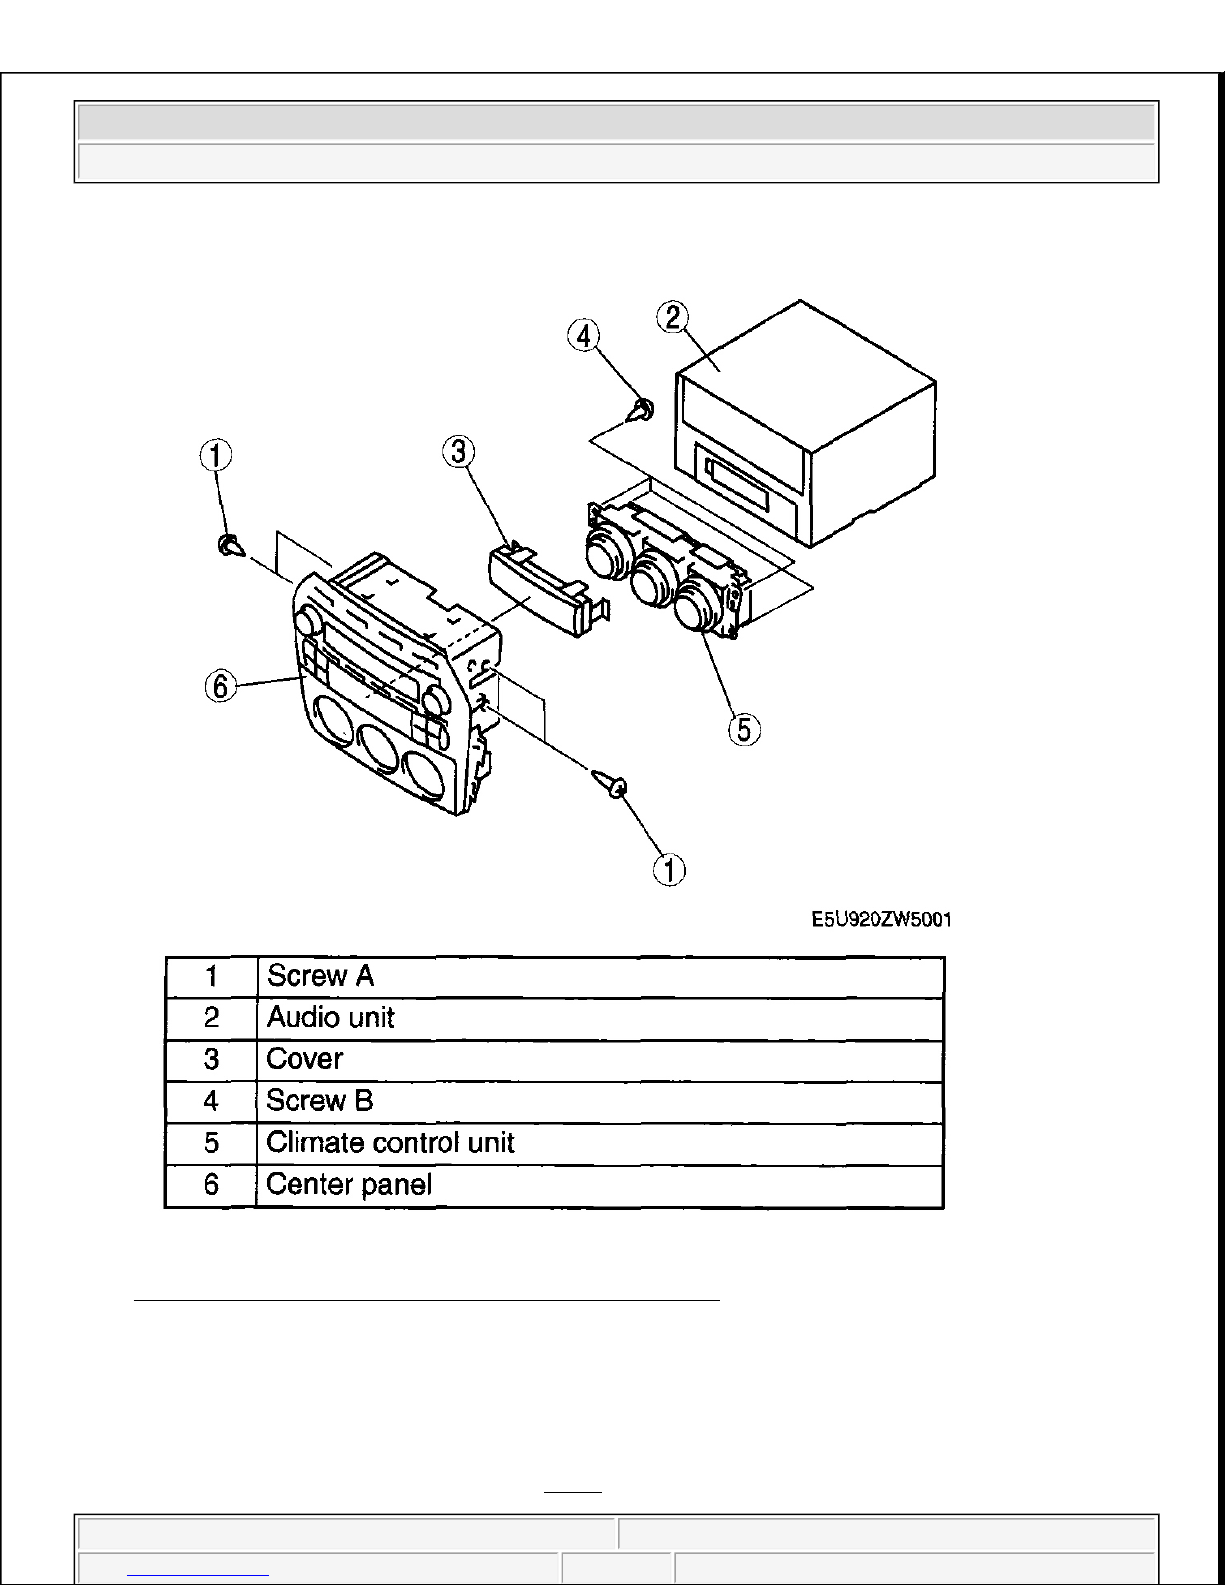
Fig. 5: Exploded View Of Center Panel Unit Components
Courtesy of MAZDA MOTORS CORP.
2. Assemble in the reverse order of disassembly.
SCREW A ASSEMBLE NOTE
1. Ti
g
hten screws A at the position shown in Fig. 6 .
2007 Mazda MX-5 Miata Sport
2007 ACCESSORIES & BODY, CAB Entertainment - MX-5 Miata
Microsoft
Thursday, July 09, 2009 3:34:33 PM Page 6 © 2005 Mitchell Repair Information Company, LLC.
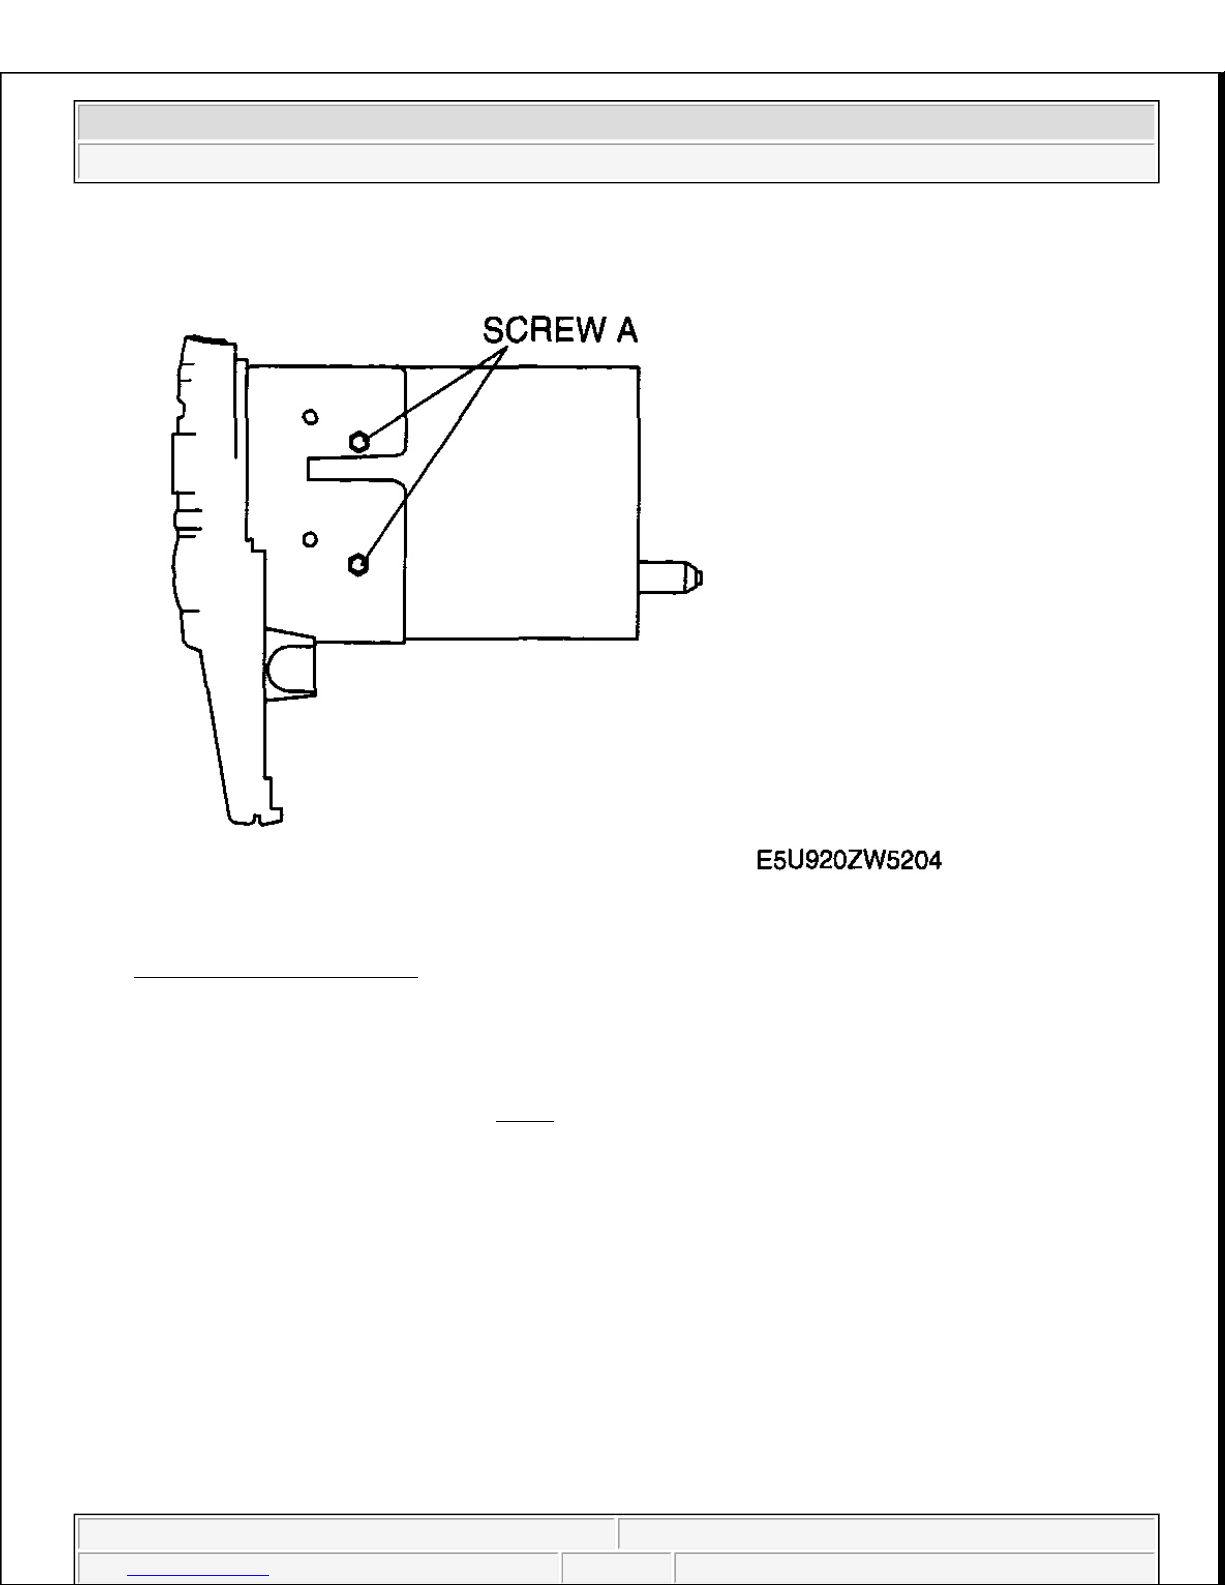
Fig. 6: Tightening Screws A
Courtesy of MAZDA MOTORS CORP.
AUDIO UNIT DISASSEMBLY/ASSEMBLY
1. Disassemble in the order indicated in Fig. 7 .
2007 Mazda MX-5 Miata Sport
2007 ACCESSORIES & BODY, CAB Entertainment - MX-5 Miata
Microsoft
Thursday, July 09, 2009 3:34:33 PM Page 7 © 2005 Mitchell Repair Information Company, LLC.
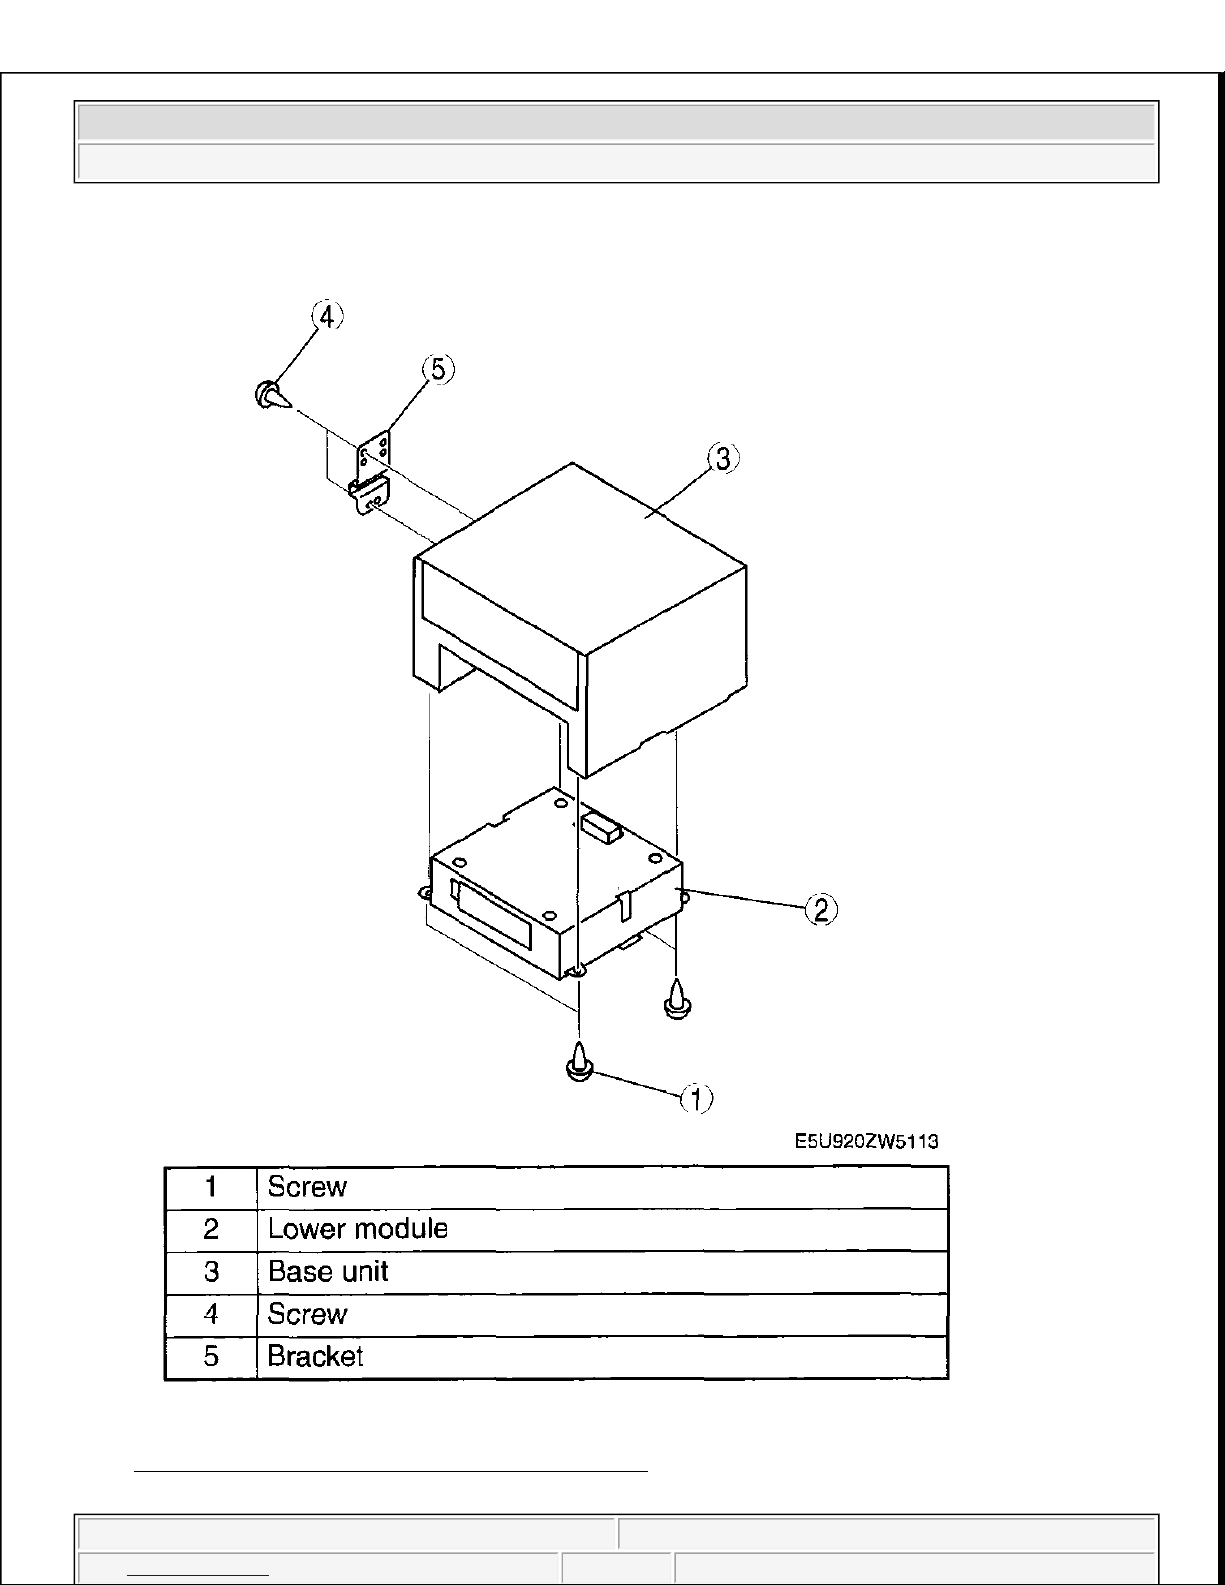
Fig. 7: Exploded View Of Audio Unit Components
Courtesy of MAZDA MOTORS CORP.
2007 Mazda MX-5 Miata Sport
2007 ACCESSORIES & BODY, CAB Entertainment - MX-5 Miata
Microsoft
Thursday, July 09, 2009 3:34:33 PM Page 8 © 2005 Mitchell Repair Information Company, LLC.
2. Assemble in the reverse order of disassembly.
AUDIO AMPLIFIER REMOVAL/INSTALLATION
EXCEPT POWER RETRACTABLE HARDTOP
1. Remove the battery cover.
2. Disconnect the negative battery cable. (See BATTERY REMOVAL/INSTALLATION [LF]
.)
3. Remove the following parts:
1. Console (See CONSOLE REMOVAL/INSTALLATION
.)
2. Quarter trim (See QUARTER TRIM REMOVAL/INSTALLATION
.)
3. Scuff plate (See SCUFF PLATE REMOVAL/INSTALLATION
.)
4. Tire house trim (See TIRE HOUSE TRIM REMOVAL/INSTALLATION .)
5. Aeroboard (See AEROBOARD REMOVAL/INSTALLATION .)
6. Front seat back bar garnish (See SEAT BACK BAR GARNISH
REMOVAL/INSTALLATION .)
7. Back trim (See BACK TRIM REMOVAL/INSTALLATION .)
8. Seat belt set plate (See SEAT BELT REMOVAL/INSTALLATION .)
9. Seat back crossmember assembly (See SEAT BACK CROSSMEMBER ASSEMBLY
REMOVAL/INSTALLATION .)
10. Rear side trim (See REAR SIDE TRIM REMOVAL/INSTALLATION .)
11. Rear package trim (See REAR PACKAGE TRIM REMOVAL/INSTALLATION .)
4. Remove in the order indicated in the table.
2007 Mazda MX-5 Miata Sport
2007 ACCESSORIES & BODY, CAB Entertainment - MX-5 Miata
Microsoft
Thursday, July 09, 2009 3:34:33 PM Page 9 © 2005 Mitchell Repair Information Company, LLC.
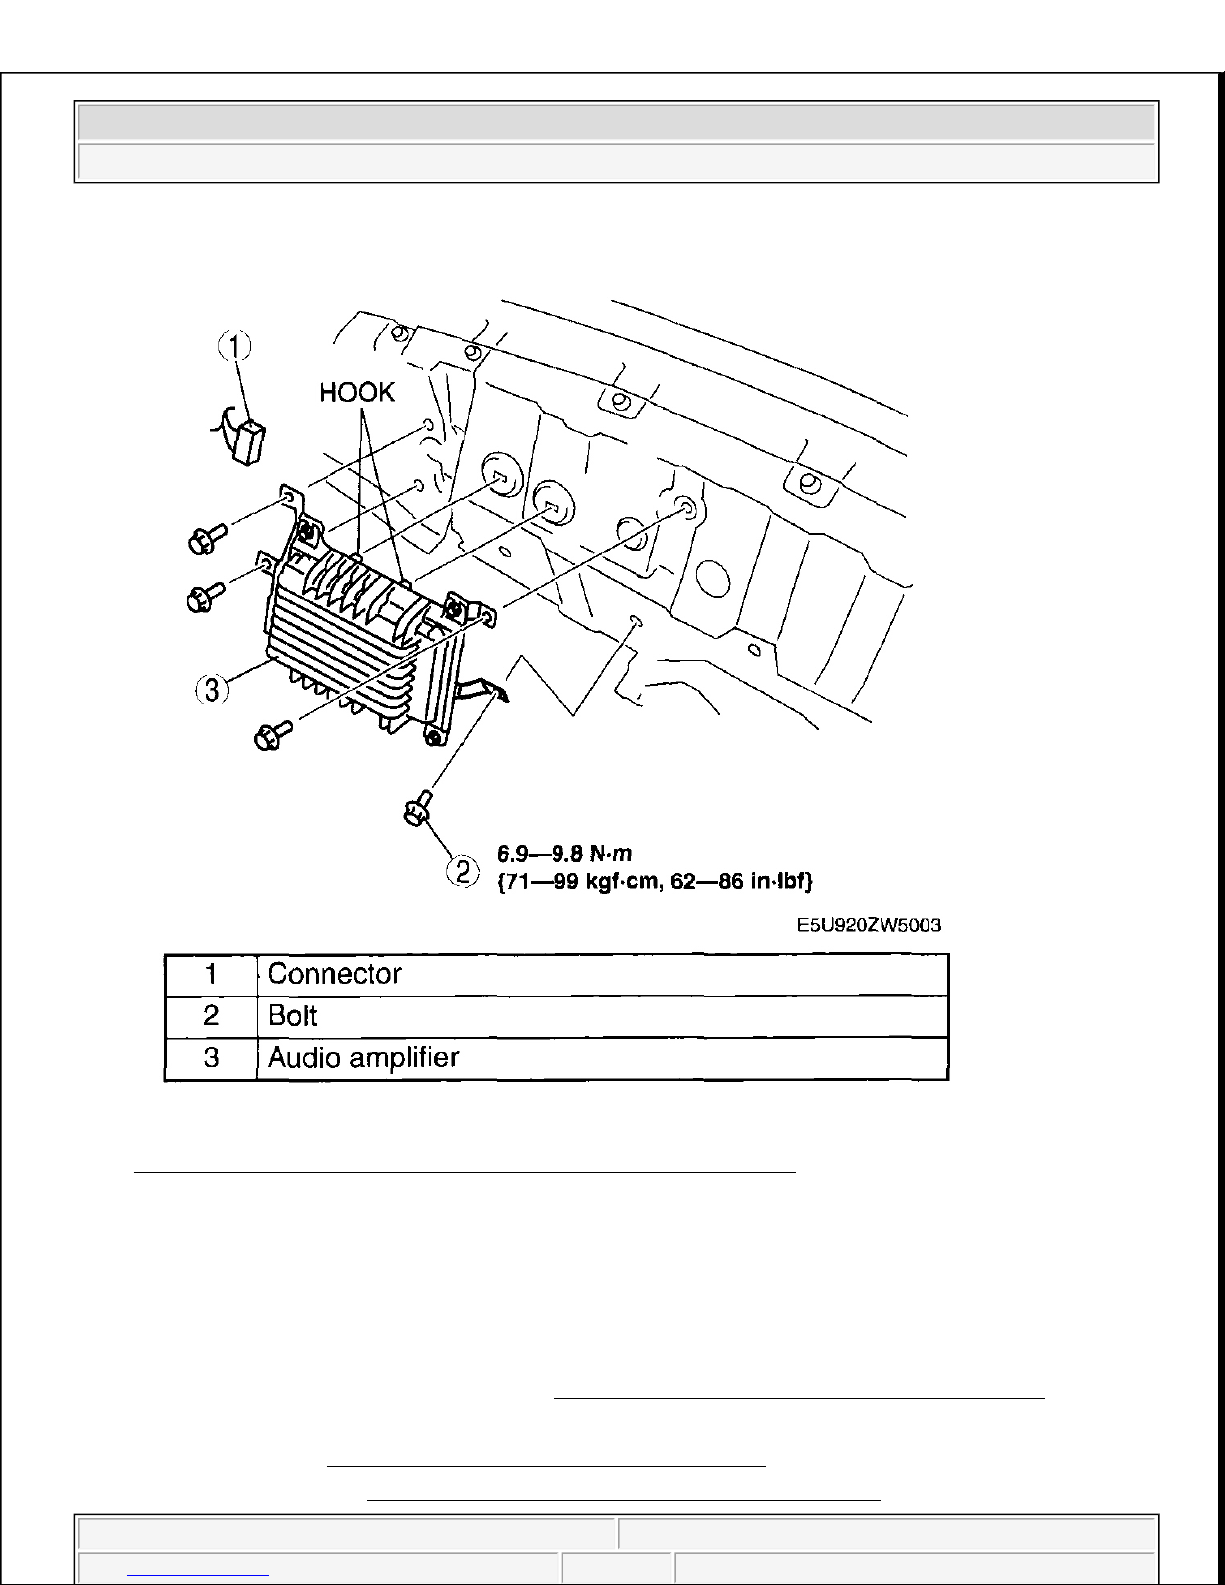
Fig. 8: Identifying Audio Amplifier (With Torque Specifications)
Courtesy of MAZDA MOTORS CORP.
5. Install in the reverse order of removal.
POWER RETRACTABLE HARDTOP
1. Remove the battery cover.
2. Disconnect the negative battery cable. (See BATTERY REMOVAL/INSTALLATION [LF] .)
3. Remove the following parts:
1. Console (See CONSOLE REMOVAL/INSTALLATION
.)
2. Quarter trim (See QUARTER TRIM REMOVAL/INSTALLATION
.)
2007 Mazda MX-5 Miata Sport
2007 ACCESSORIES & BODY, CAB Entertainment - MX-5 Miata
Microsoft
Thursday, July 09, 2009 3:34:33 PM Page 10 © 2005 Mitchell Repair Information Company, LLC.
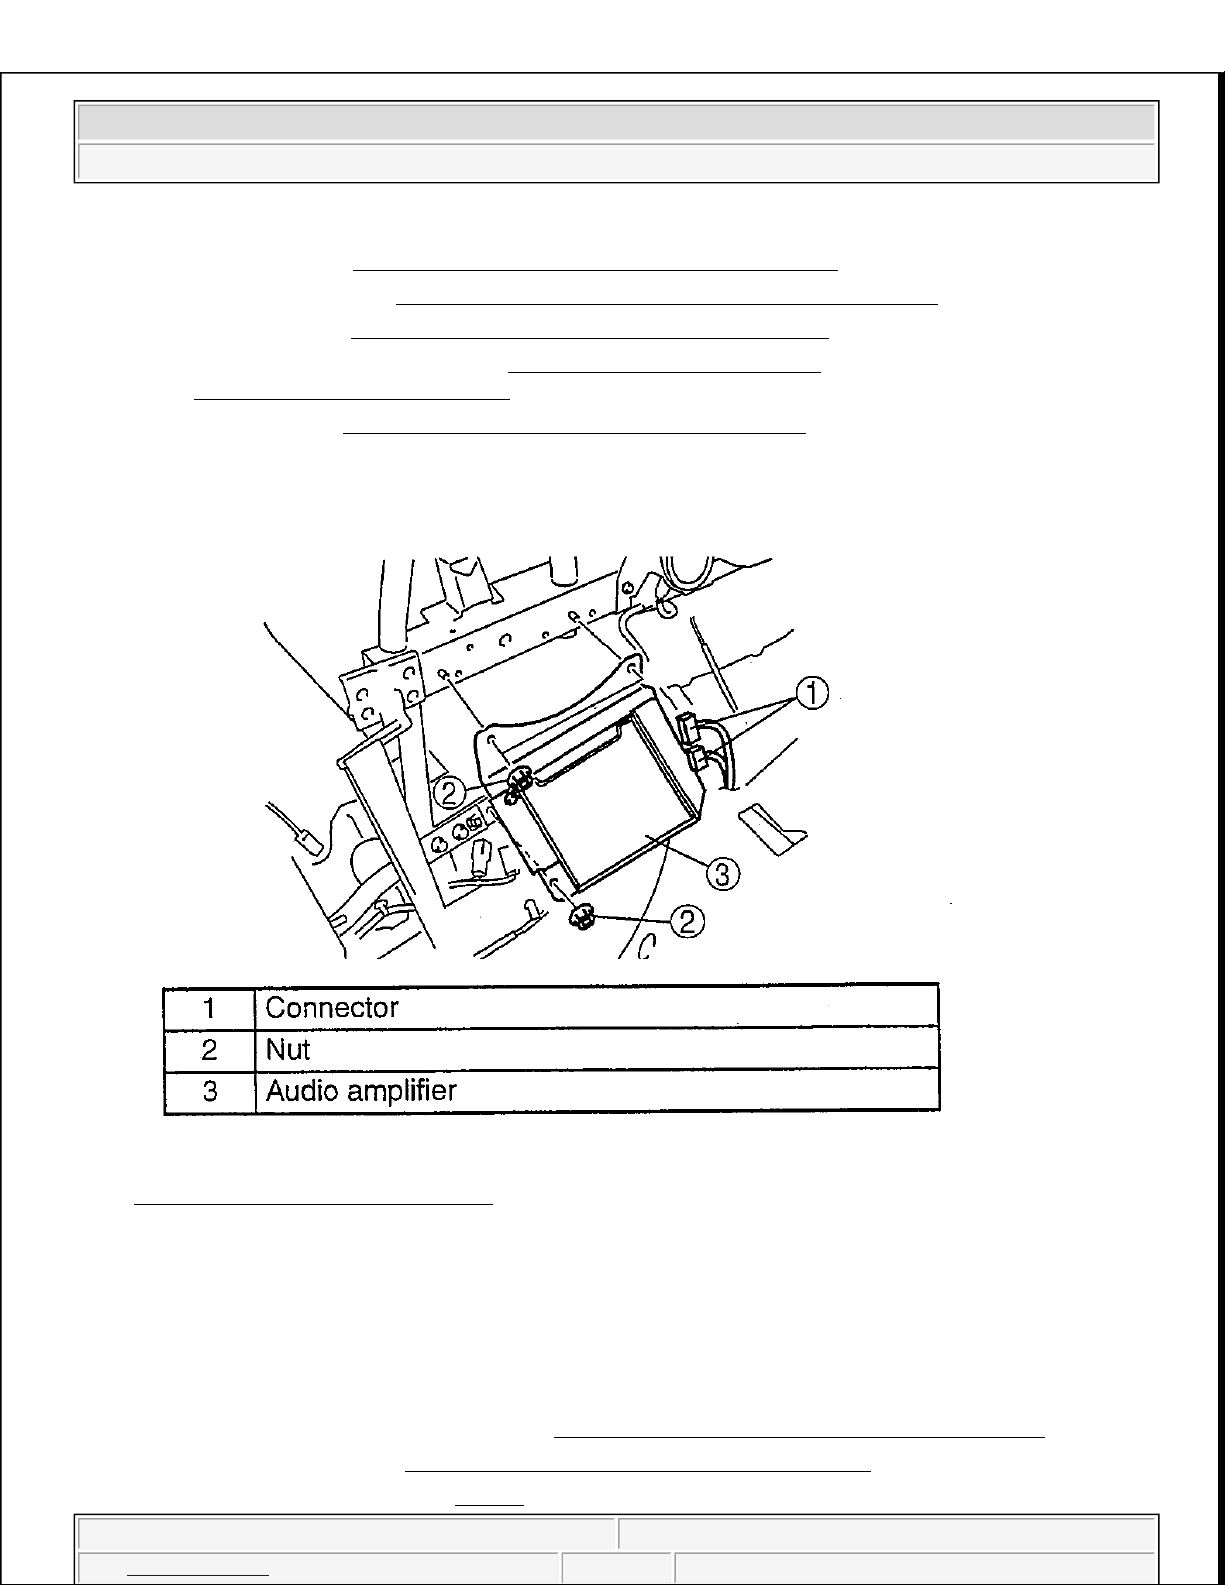
3. Scuff plate (See SCUFF PLATE REMOVAL/INSTALLATION .)
4. Tire house trim (See TIRE HOUSE TRIM REMOVAL/INSTALLATION .)
5. Aeroboard (See AEROBOARD REMOVAL/INSTALLATION
.)
6. Front seat back bar garnish (See SEAT BACK BAR GARNISH
REMOVAL/INSTALLATION .)
7. Back trim (See BACK TRIM REMOVAL/INSTALLATION .)
4. Remove in the order indicated in the table.
Fig. 9: Identifying Audio Amplifier
Courtesy of MAZDA MOTORS CORP.
5. Install in the reverse order of removal.
DOOR SPEAKER REMOVAL/INSTALLATION
1. Remove the battery cover.
2. Disconnect the negative battery cable. (See BATTERY REMOVAL/INSTALLATION [LF] .)
3. Remove the door trim. (See DOOR TRIM REMOVAL/INSTALLATION
.)
4. Remove in the order indicated in Fig. 10
.
2007 Mazda MX-5 Miata Sport
2007 ACCESSORIES & BODY, CAB Entertainment - MX-5 Miata
Microsoft
Thursday, July 09, 2009 3:34:33 PM Page 11 © 2005 Mitchell Repair Information Company, LLC.
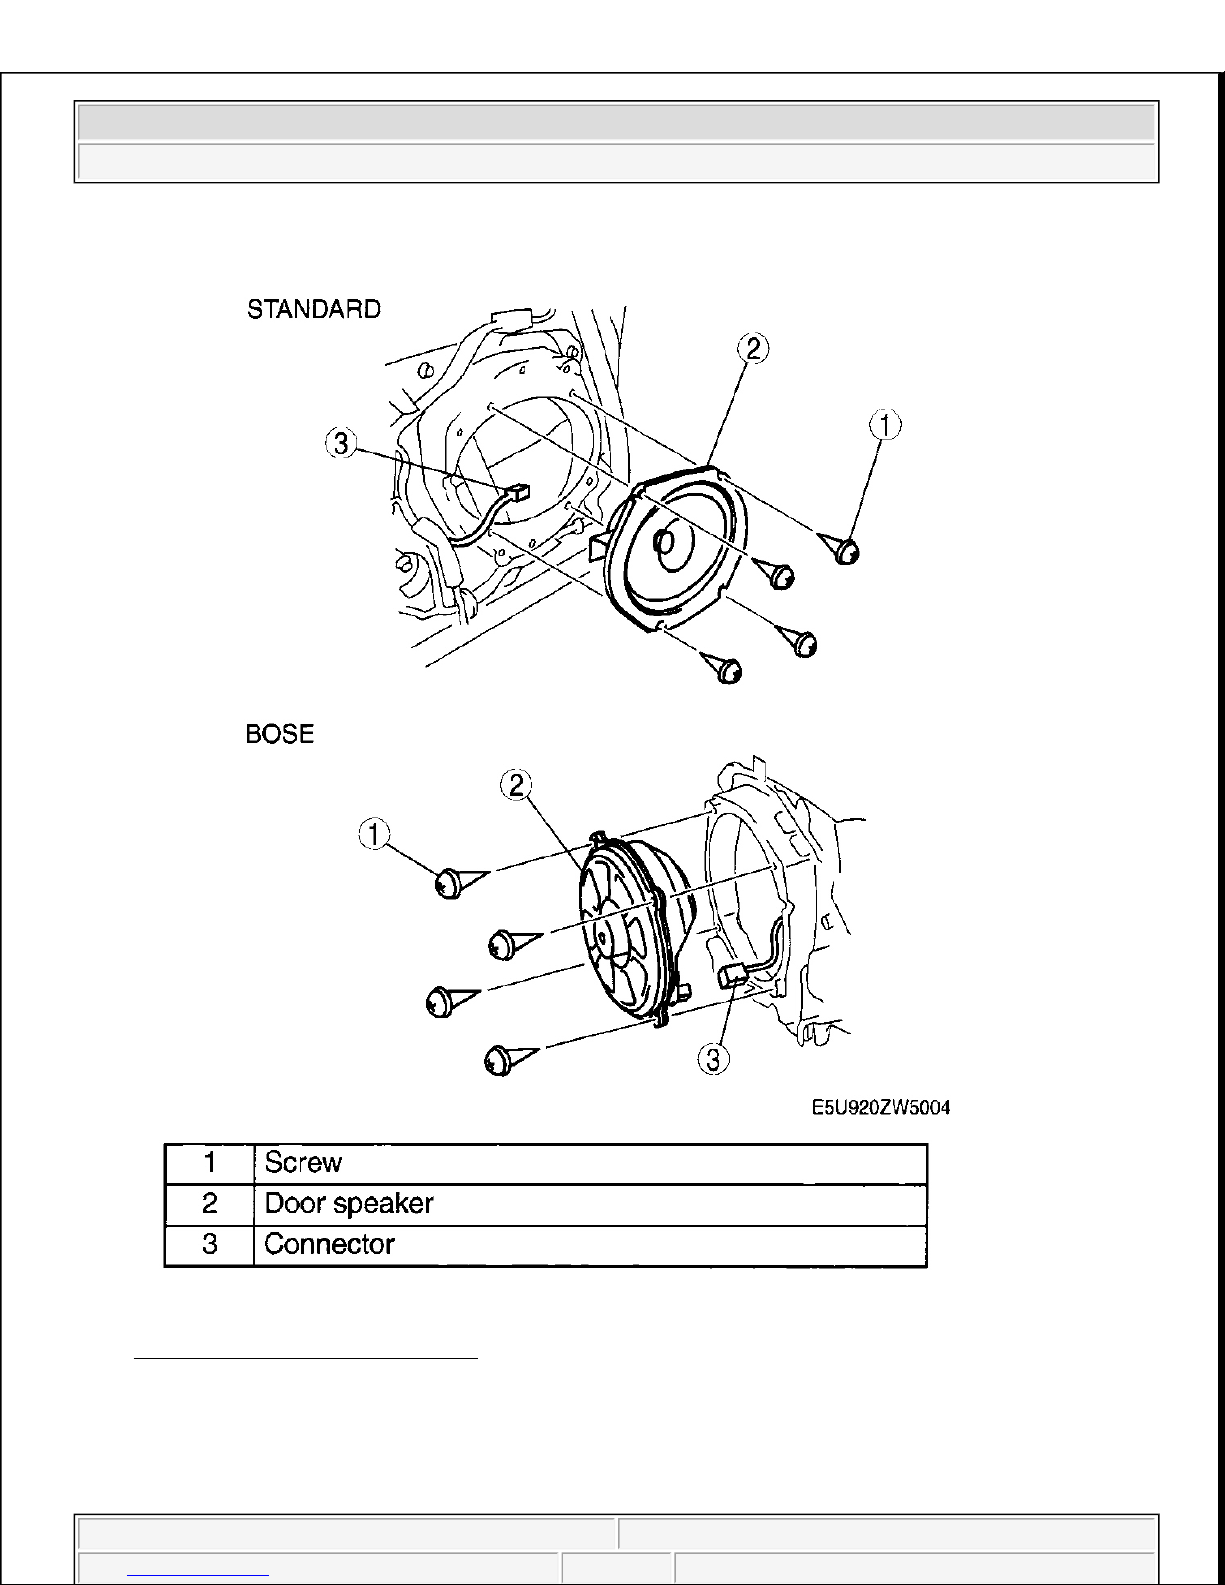
Fig. 10: Identifying Door Speaker
Courtesy of MAZDA MOTORS CORP.
5. Install in the reverse order of removal.
DOOR SPEAKER INSTALLATION NOTE
2007 Mazda MX-5 Miata Sport
2007 ACCESSORIES & BODY, CAB Entertainment - MX-5 Miata
Microsoft
Thursday, July 09, 2009 3:34:33 PM Page 12 © 2005 Mitchell Repair Information Company, LLC.
 Loading...