

Distributed by / Distribuido por:
Lidl US LLC., Arlington, VA 22202
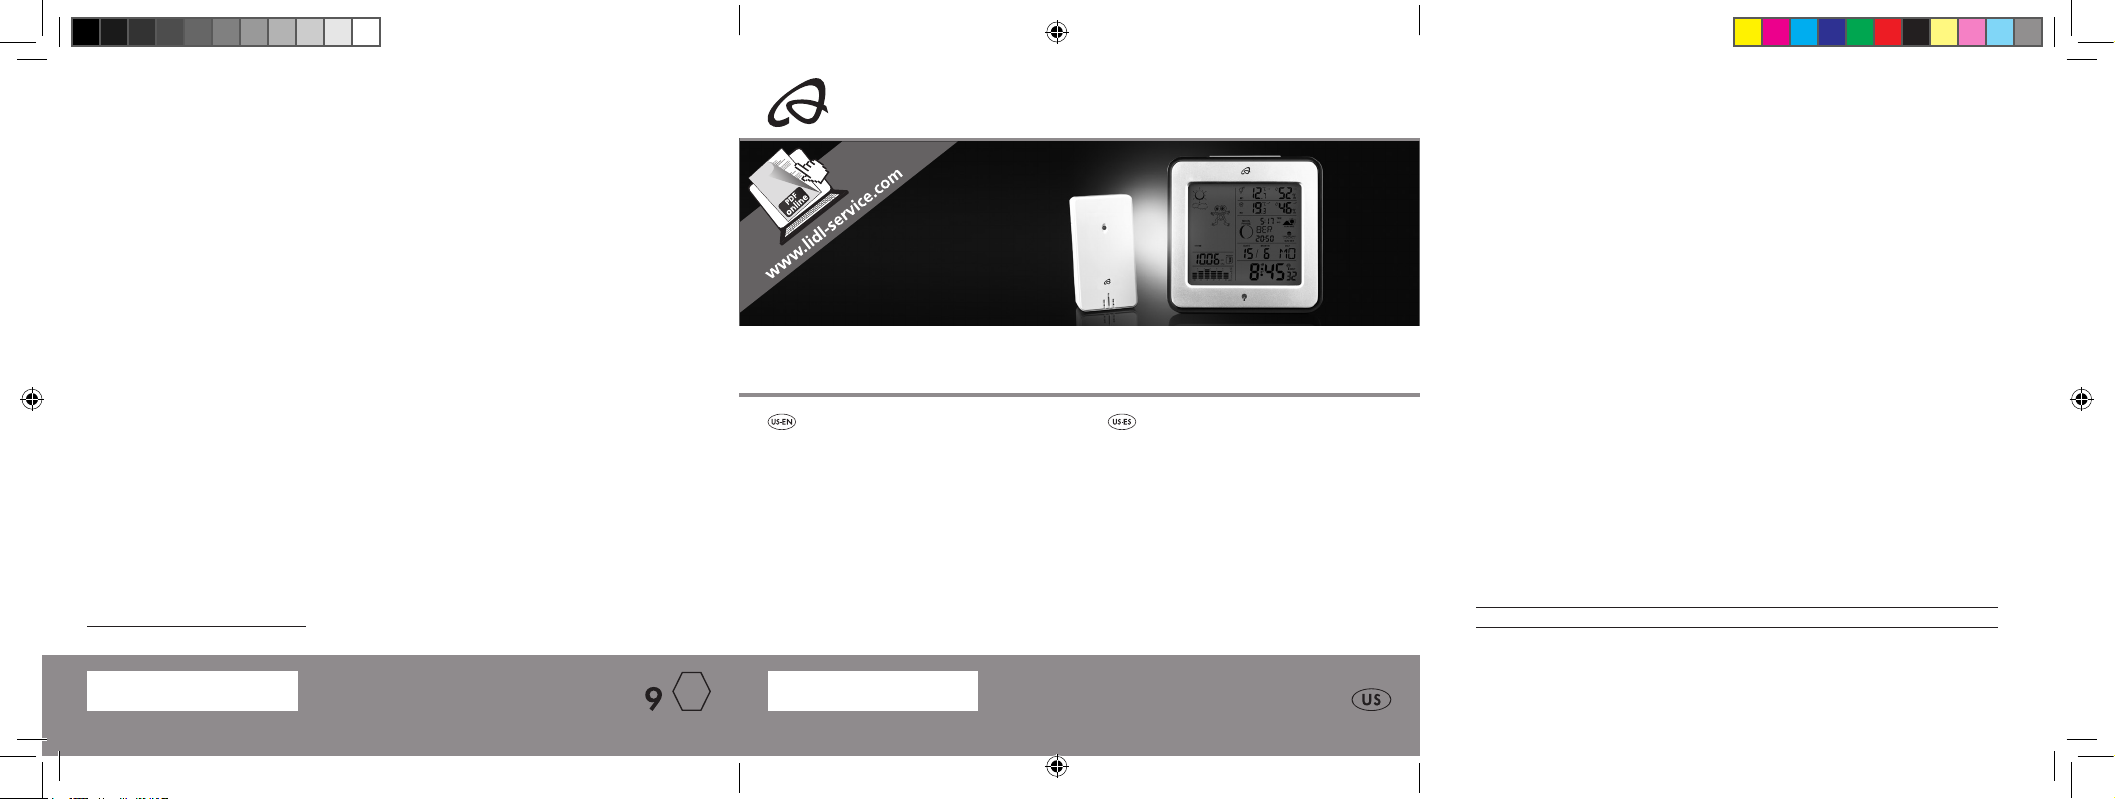
DIGITAL WEATHER STATION /
ESTACIÓN METEOROLÓGICA DIGITAL PORTÁTIL
Model No. / Modelo Núm.: Z31915-US
(Z31915-US-RX & Z31915-US-TX)
Version / Versión: 02 / 2017
Made in / Hecho en: China
Last Information Update · Estado
de las informaciones: 02 / 2017
Ident.-No.: Z31915-US022017-9
DIGITAL WEATHER STATION
Operation and Safety Notes
ESTACIÓN METEOROLÓGICA
DIGITAL PORTÁTIL
Instrucciones de utilización y de seguridad
US-EN Operation and Safety Notes Page 5
US-ES Instrucciones de utilización y de seguridad Página 46
IAN 282650 IAN 282650
282650_aur_Funk-Wetterstation_Cover_US.indd 3-5 14.02.17 08:26
0.4 in / 10 mm
0.3 in / 8 mm
282650_aur_Funk-Wetterstation_Cover_US.indd 6-8 14.02.17 08:26

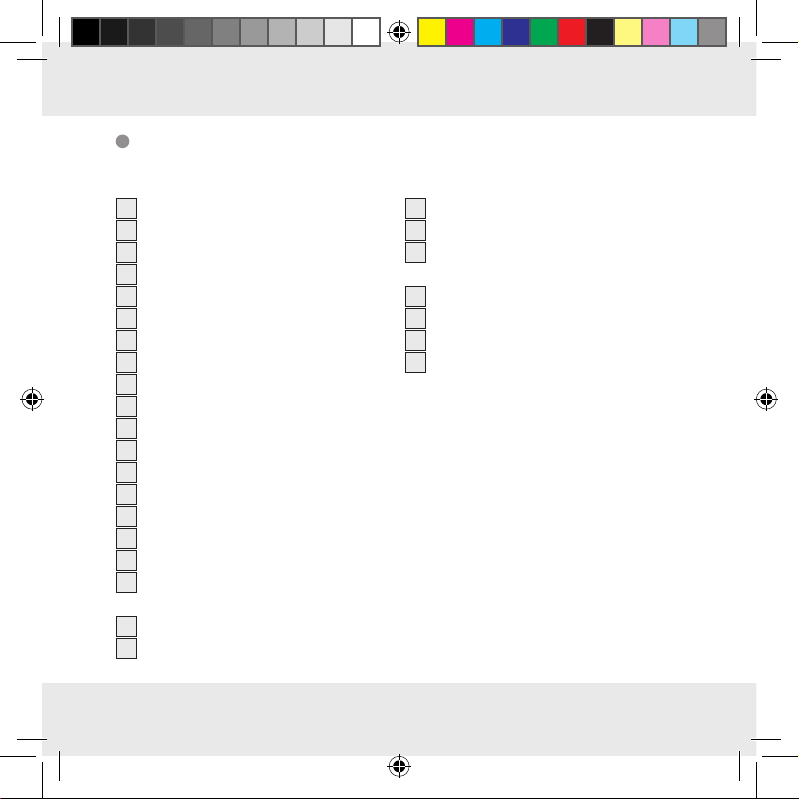
Description of signal words ......................................................................................................................................Page 6
Customer service ...........................................................................................................................................................Page 6
Introduction .....................................................................................................................................................................Page 7
Intended use ...................................................................................................................................................................Page 7
Parts description .............................................................................................................................................................Page 8
Technical data ................................................................................................................................................................Page 13
Included items ................................................................................................................................................................Page 14
Important safety notes ...............................................................................................................................................Page 14
General safety information ............................................................................................................................................Page 14
Safety instructions for batteries / rechargeable batteries ...........................................................................Page 16
Before use.........................................................................................................................................................................Page 18
Setting up the devices ....................................................................................................................................................Page 18
Preparing to use the outdoor sensor .............................................................................................................................Page 19
Preparing the weather station for use ...........................................................................................................................Page 20
Operation .........................................................................................................................................................................Page 22
Receiving the WWVB radio time signal .......................................................................................................................Page 22
Setting the 12 / 24 Hour mode / °C / °F / hPa / inHg / Time zone / time / date / language manually ...................Page 23
Setting the alarm time ....................................................................................................................................................Page 25
Turning the alarm on / off ..............................................................................................................................................Page 26
Dismissing the alarm ......................................................................................................................................................Page 26
SNOOZE function .........................................................................................................................................................Page 27
Preparing to use the weather forecasting function.......................................................................................................Page 27
Selecting the location.....................................................................................................................................................Page 29
Selecting the location manually ....................................................................................................................................Page 30
Lunar phases ..................................................................................................................................................................Page 34
Reading the barometric pressure for the last 12 hours ...............................................................................................Page 34
Adjusting the air pressure indication .............................................................................................................................Page 35
Setting the channel.........................................................................................................................................................Page 36
Displaying temperature and temperature trend ...........................................................................................................Page 37
Displaying the humidity and humidity trend .................................................................................................................Page 37
Displaying the maximum / minimum temperature / humidity .......................................................................................Page 38
Temperature and frost alarm .........................................................................................................................................Page 39
Activating / deactivating the the temperature and frost alarm ....................................................................................Page 39
Background lighting .......................................................................................................................................................Page 40
Battery state display.......................................................................................................................................................Page 40
Changing the batteries ..................................................................................................................................................Page 40
Troubleshooting .............................................................................................................................................................Page 41
Cleaning and care .........................................................................................................................................................Page 42
Disposal .............................................................................................................................................................................Page 43
Warranty ..........................................................................................................................................................................Page 44
5 US-EN
282650_aur_Funk-Wetterstation_Content_US.indd 5 14.02.17 14:19
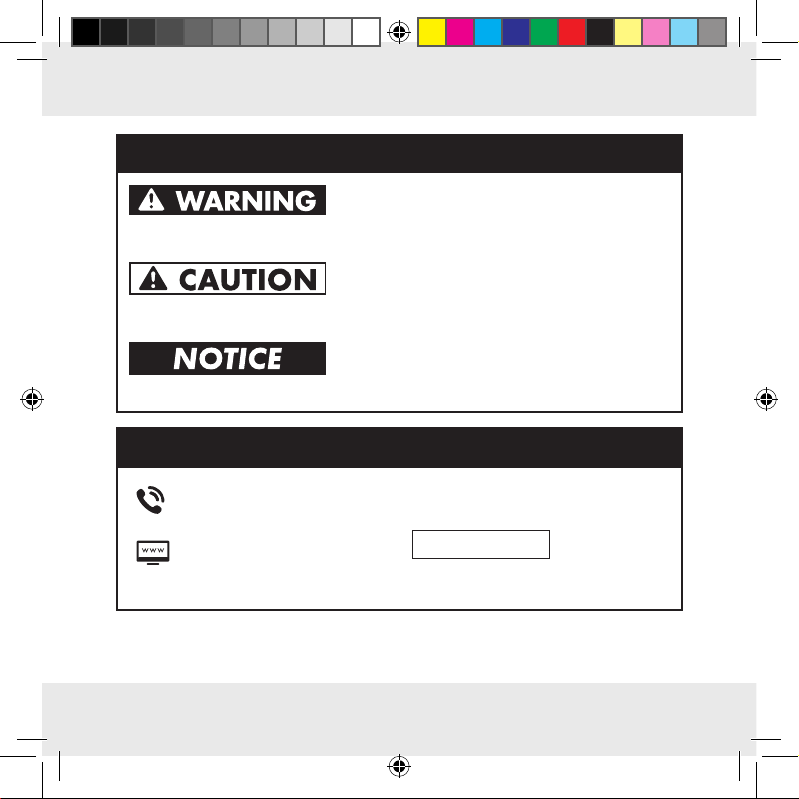
DESCRIPTION OF SIGNAL WORDS
WARNING indicates a hazardous situation
that, if not avoided, could result in death or
serious injury.
CAUTION indicates a hazardous situation
that, if not avoided, could result in minor or
moderate injury.
NOTICE indicates information considered im-
portant, but not hazard related (e.g. messages
related to property damage).
CUSTOMER SERVICE
Call customer service at
1 (844) 543-5872
Visit the Website Customer
Service Platform at
www.lidl.com / contact-us
6 US-EN
282650_aur_Funk-Wetterstation_Content_US.indd 6 14.02.17 14:19
Visit a LIDL store for further assistance.
IAN 282650
Please have
your IAN
number ready.

Digital weather station
Introduction
Congratulations on your purchase. You have chosen a high quality product. The instructions for use are a part of the product. They contain important information on
safety, use and disposal. Please familiarize yourself with the safety information and
instructions for use before using the product. Only use the product as described and
for the intended use. Include all documentation when passing this product on to
others.
Intended use
The weather station displays the indoor and outdoor temperatures in Celsius (°C) or
Fahrenheit (°F) and their maximum and minimum values. It also displays the indoor
and outdoor humidity (%RH) as well as their maximum and minimum values. The
weather station additionally displays the weather forecast, the time in 12 / 24-hour
clock mode and the date. The weather station displays the sunrise and sunset times
for that day, along with the lunar phase. The weather station also has two different
alarm functions. The product is only suitable for use in private households and is not
intended for commercial use.
7 US-EN
282650_aur_Funk-Wetterstation_Content_US.indd 7 14.02.17 14:19
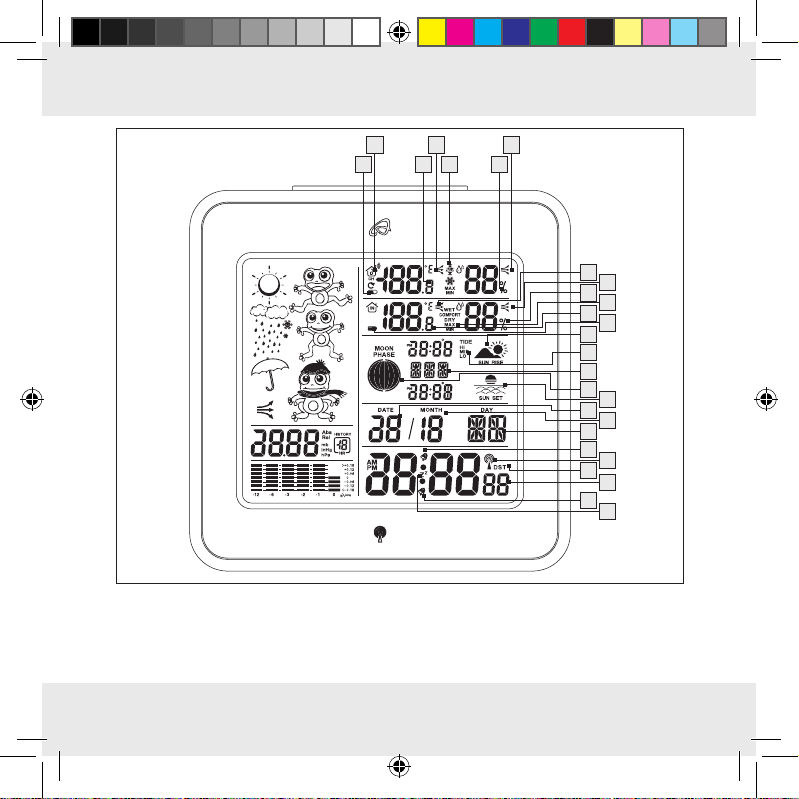
Parts description
Weather station:
1
Date display
2
Month display
3
Alarm 1
4
SNOOZE display
5
Radio tower symbol
6
DST display (daylight saving time)
7
Time display
8
Alarm 2
9
Weekday display
10
Sunrise time
11
Tidal range display
12
Location
13
Lunar phase
14
Sunset time
15
Temperature trend (indoor)
16
Humidity trend (indoor)
17
Humidity (indoor)
18
Comfort indicator (maximum /
minimum)
19
Indoor temperature (°C / °F)
20
Battery level display
8 US-EN
21
Humidity trend (outdoor)
22
Humidity (outdoor)
23
Temperature and frost alarm
(maximum / minimum)
24
Temperature trend (outdoor)
25
Outdoor temperature (°C / °F)
26
Battery level display (outdoor sensor)
27
Selected channel
282650_aur_Funk-Wetterstation_Content_US.indd 8 14.02.17 14:19
27 24 21
26 25 23 22
15
16
17
18
19
20
10
11
12
13
14
1
2
9
3
5
6
7
8
4
9 US-EN
282650_aur_Funk-Wetterstation_Content_US.indd 9 14.02.17 14:19
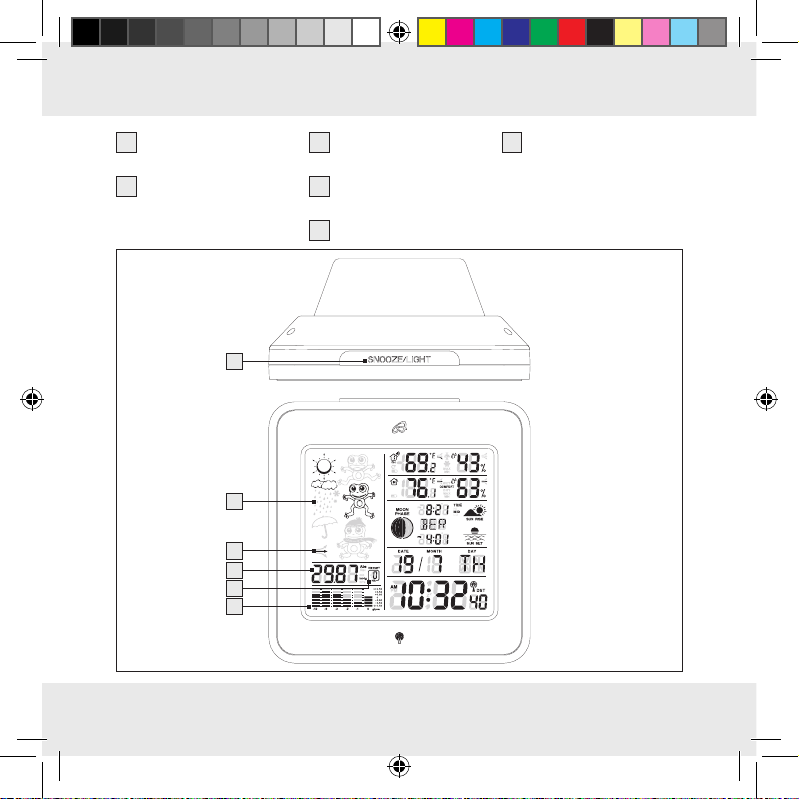
28
Barometric pressure
bar graph
29
Barometric pressure
display of the last
hour
10 US-EN
30
A bsolute / relative
barometric pressure
31
Barometric pressure
33
SNOOZE / LIGHT
button
trend
32
Weather forecast
33
32
31
30
29
28
282650_aur_Funk-Wetterstation_Content_US.indd 10 14.02.17 14:19
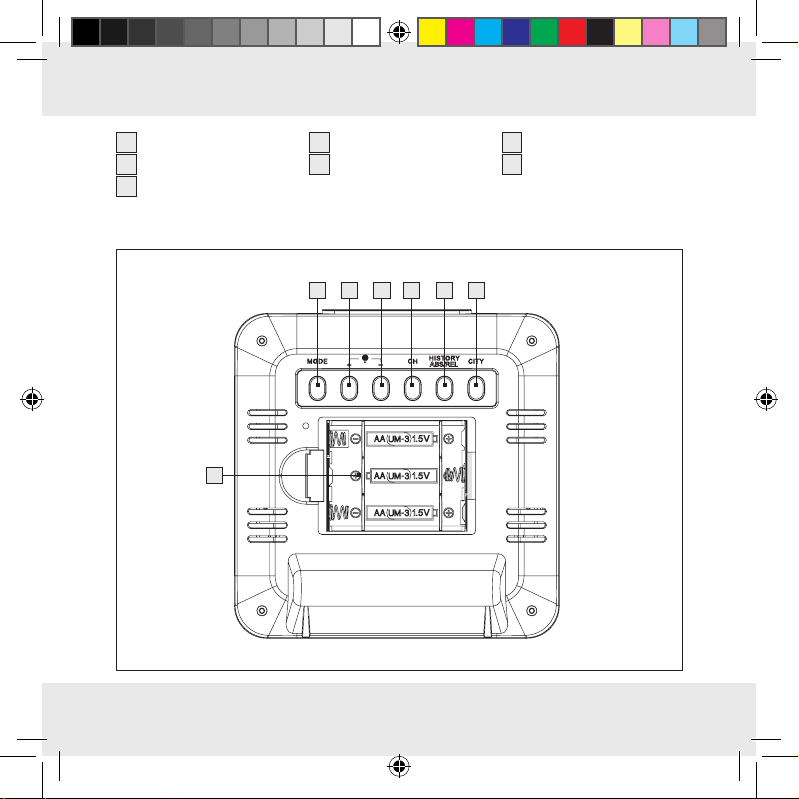
34
MODE button
35
+ button
36
– button
37
Channel button (CH)
38
HISTORY ABS /
39
CITY button
40
Battery compartment
REL button
34 35 36 37 38 39
40
11 US-EN
282650_aur_Funk-Wetterstation_Content_US.indd 11 14.02.17 14:19
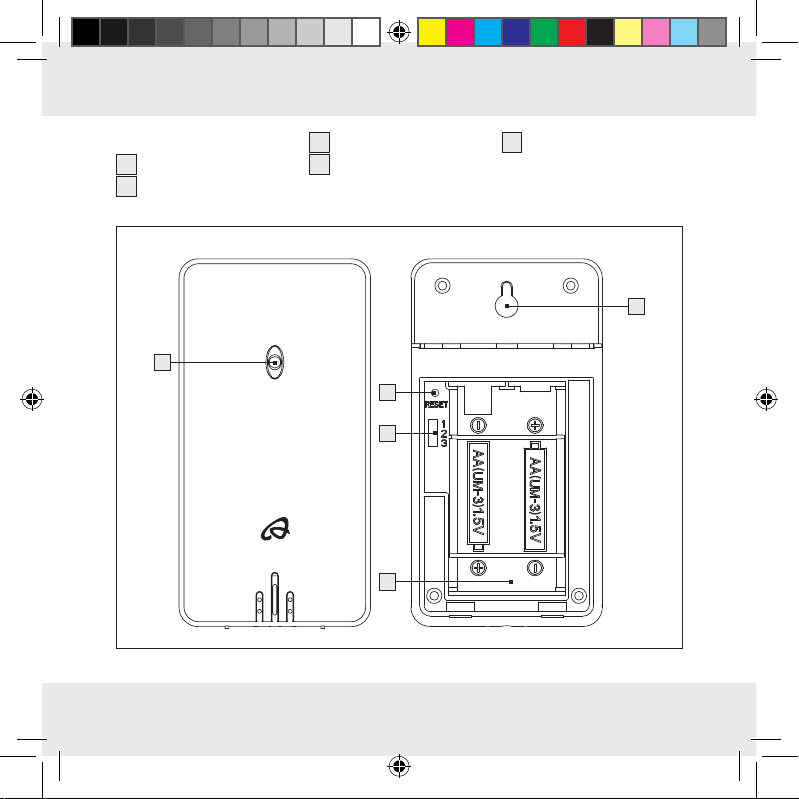
Outdoor sensor:
41
Control LED
42
Mount
41
12 US-EN
43
RESET button
44
Channel selector
switch
43
44
45
45
Battery compartment
42
282650_aur_Funk-Wetterstation_Content_US.indd 12 14.02.17 14:19
Technical data
Weather station:
Temperature measurement range: +32 to +122 °F (0 to +50 °C)
Temperature resolution: 33.8 °F (0.1 °C)
Humidity measurement range: 20 %–95 %
Humidity resolution: 1 %
Radio signal: WWVB
Batteries: 3 x AA , 1.5 V
Air pressure range: 25–31 inHg
Outdoor sensor:
Temperature measurement range: –4 to +149 °F (–20 to +65 °C)
Humidity measurement range: 20 %–95 %
Humidity resolution: 1 %
HF transmission signal: 433 MHz
HF transmission range: max. 1181 in (30 meter) (in open area)
Batteries: 2 x AA , 1.5 V
Degree of protection: IPX4 (splash-proof)
(direct current)
(direct current)
13 US-EN
282650_aur_Funk-Wetterstation_Content_US.indd 13 14.02.17 14:19
Included items
1 Weather station
1 Outdoor sensor
3 Batteries AA, 1.5 V (pre-installed)
2 Batteries AA, 1.5 V (pre-installed)
1 Instructions for use
IMPORTANT
SAFETY NOTES
READ ALL INSTRUCTIONS. KEEP FOR FUTURE REFERENCE. INCLUDE ALL
DOCUMENTATION WHEN PASSING THIS PRODUCT ON TO OTHERS.
General safety information
Failure to observe the following warnings can
result in death or serious injuries.
14 US-EN
282650_aur_Funk-Wetterstation_Content_US.indd 14 14.02.17 14:19
Children frequently underestimate the dangers. Always keep this
product out of the reach of children.
This product may be used by children 8 years and older and individuals with
physical, sensory or cognitive impairments or lacking experience and knowledge
when instructed on safe product use and understand the associated risks. Do
not allow children to play with the product. Never allow children to clean or
perform user maintenance unsupervised.
Changes or modifications to this product not expressly approved by the party res
ponsible for compliance could void the user‘s authority to operate the product.
Note: This product has been tested and found to comply with the limits for a
Class B digital device, pursuant to part 15 of the FCC Rules. These limits are
designed to provide reasonable protection against harmful interference in a
residential installation. This product generates, uses and can radiate radio frequency energy and, if not installed and used in accordance with the instructions,
may cause harmful interference to radio communications.
However, there is no guarantee that interference will not occur in a particular
installation. If this product causes harmful interference to radio or television reception, which can be determined by turning the product off and on, the user is
encouraged to try and correct the interference by one or more of the following
measures:
• Reorient or relocate the receiving antenna.
• Increase the separation between the product and receiver.
15 US-EN
282650_aur_Funk-Wetterstation_Content_US.indd 15 14.02.17 14:19
• Connect the product into an outlet on a circuit different from that to which
the receiver is connected.
• Consult the dealer or an experienced radio / TV technician for help.
• Model: Z31915-US-RX / FCCID: 2AJ9O-Z31915R
• Model: Z31915-US-TX / FCCID: 2AJ9O-Z31915T
• The RF Exposure Compliance distance is 20mm
Failure to observe the following warnings can
result in injuries or property damage.
Do not use the product if it is damaged.
Safety instructions for batteries /
rechargeable batteries
Failure to observe the following warnings can
result in death or serious injuries.
DANGER TO LIFE! Keep batteries / rechargeable batteries out of reach of
children. If accidentally swallowed seek immediate medical attention.
DANGER OF EXPLOSION! Never recharge disposable batteries.
Do not short-circuit batteries / rechargeable batteries and / or open
them. Overheating, fire or bursting can be the result.
Never throw batteries / rechargeable batteries into fire or water.
Do not exert mechanical loads to batteries / rechargeable batteries.
16 US-EN
282650_aur_Funk-Wetterstation_Content_US.indd 16 14.02.17 14:19
Risk of battery leakage
Failure to observe the following warnings can
result in injuries or property damage.
Avoid extreme environmental conditions and temperatures, which could affect
batteries / rechargeable batteries, e.g. radiators / direct sunlight.
Avoid contact with the skin, eyes and mucous membranes. In the event of con-
tact with battery acid, thoroughly flush the affected area with plenty of clean
water and seek immediate medical attention.
WEAR PROTECTIVE GLOVES! Leaked or damaged batteries /
rechargeable batteries can cause burns on contact with the skin.
Wear suitable protective gloves at all times if such an event occurs.
In the event of a battery leak, immediately remove it from the product to prevent
damage.
Only use the same type of batteries / rechargeable batteries. Do not mix used
and new batteries / rechargeable batteries.
Remove the batteries / rechargeable batteries if the product will not be used for
a longer period.
Risk of damage of the product
Only use the specified type of battery / rechargeable battery!
Please note the polarity when inserting batteries! This is shown inside the battery
compartment!
17 US-EN
282650_aur_Funk-Wetterstation_Content_US.indd 17 14.02.17 14:19
Clean the contacts on the battery and in the battery compartment before in-
serting!
Remove drained batteries / rechargeable batteries from the product immediately.
SAVE THESE INSTRUCTIONS
Before use
Setting up the devices
First install the batteries in the outdoor sensor.
Failure to observe the following warnings can result
in injuries or property damage.
When choosing where to position the weather station, make sure that it is not
exposed to direct sunlight, vibrations, dust, heat, cold or moisture. Do not place
the devices close to sources of heat, e.g. radiators. Otherwise they may be
damaged.
Do not place the devices on valuable or sensitive surfaces unless these are
appropriately protected. Otherwise they may be damaged.
Please ensure that neighboring devices are not operated at the same frequency
of 433 MHz. These types of devices may interfere with the radio connection.
18 US-EN
282650_aur_Funk-Wetterstation_Content_US.indd 18 14.02.17 14:19
Do not place the devices next to or on metal plates. Otherwise the quality of
radio wave transmission may be reduced.
Do not install the devices in buildings made of reinforced concrete, e.g. airports,
high-rise buildings, factories or cellars. Otherwise the transmission of the radio
waves between the devices may be severely impaired.
Preparing to use the outdoor sensor
Remove the battery cover from the back of the outdoor sensor.
Remove the battery insulation strip. The outdoor sensor is now ready for use
and the control LED
Close the battery cover.
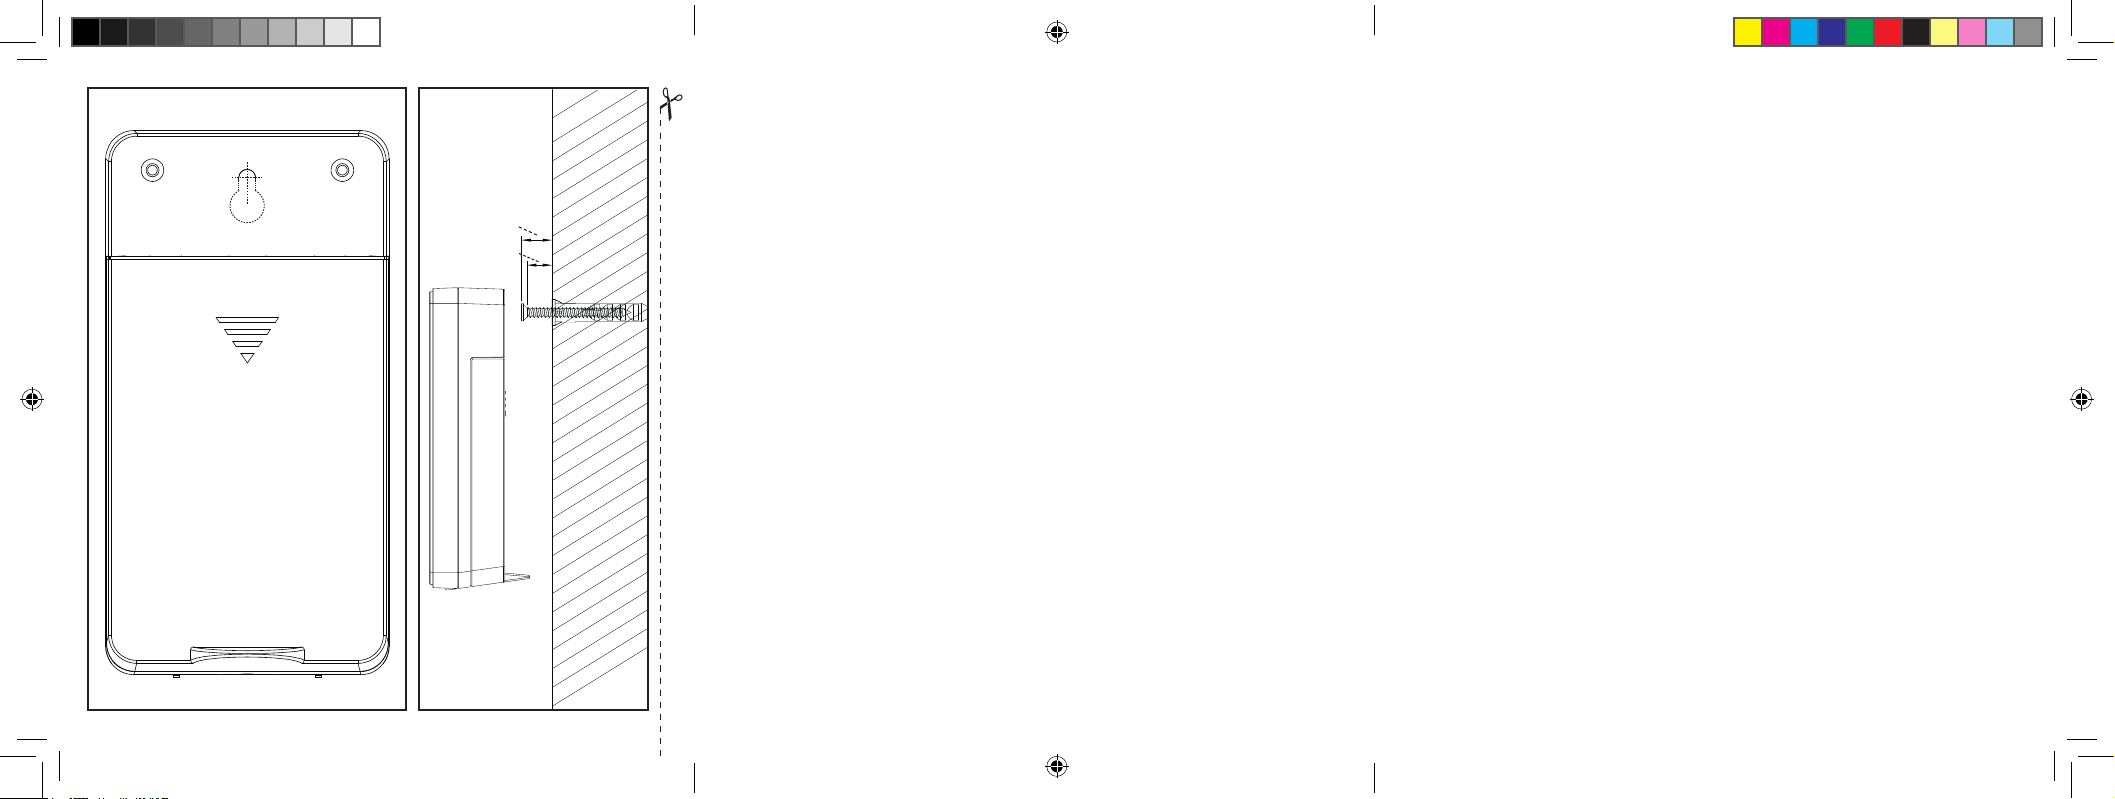
Installing the Outdoor Sensor:
Note: You will need an electric drill for this step.
Find an appropriate place for the outdoor sensor.
Note: Be sure to install the outdoor sensor within 1181 in (30 m) of the weather
station. Check that there are no obstacles between the outdoor sensor and the
weather station. These may interfere with data transmission.
For wall mounting:
Hang the outdoor sensor with the mount 42 on one screw.
41
will light up briefly.
19 US-EN
282650_aur_Funk-Wetterstation_Content_US.indd 19 14.02.17 14:19
Use the included drill template (shown on the fold-out page) intended for mark-
ing drill holes.
Preparing the weather station for use
Removing the battery insulation strip:
Open the battery compartment 40 on the back of the weather station.
Remove the battery insulation strip.
Then close the battery compartment.
As soon as the battery insulation strip has been removed the weather station will
start receiving radio signal.
Note: Do not move the weather station while it is receiving the signal. This may
disrupt reception.
Connecting the weather station with the outdoor sensor and the
WWVB radio signal:
After removing the battery insulation strip the weather station will attempt to establish
a connection with the outdoor sensor. This process can take a few minutes. The
symbol will keep flashing for a few minutes. After successfully connecting with the
outdoor sensor, the selected channel symbol
the channel of the outdoor sensor (if necessary you can change the channel of the
20 US-EN
27
will appear in the LC display with
282650_aur_Funk-Wetterstation_Content_US.indd 20 14.02.17 14:19
outdoor sensor as shown under “Setting the channel”). If the connection with the outdoor sensor is not established automatically, this can be done manually as follows:
1. Press the channel button (CH)
37
. The icon of the selected channel 27 will flash
in the LC display.
2. Then press the sensor RESET button
43
.
As soon as the weather station has established a connection with the outdoor sensor
it automatically begins to receive the WWVB radio signal. This process takes several
minutes and is indicated in the LC display by a flashing radio tower symbol
5
.
When the WWVB radio signal is being successfully received, the radio tower symbol
is shown permanently in the display. If the product cannot synchronize with the atomic
clock during setup, you can also set the clock manually (“Setting the 12 / 24 Hour
mode / °C / °F / hPa / inHg / Time zone / time / date / language manually”).
Radio signal (WWVB):
The WWVB signal (time signal transmitter) consists of time pulses emitted by one of
the most accurate clocks in the world close to Fort Collins, Colorado.
Reception of the radio signal generally takes 3–10 minutes.
Reception can be considerably impaired by obstacles (e.g. concrete walls) or sources
of interference (e.g. other electrical devices). In the event of reception problems,
change the position of the weather station (e.g. to somewhere near a window).
21 US-EN
282650_aur_Funk-Wetterstation_Content_US.indd 21 14.02.17 14:19
Operation
Receiving the WWVB radio time signal
After connecting with the outdoor sensor or 3 minutes after the battery insulation
strip is removed, the weather station automatically begins to search for the WWVB
radio signal. The LC display will show a flashing radio tower symbol
process.
Note: In buildings made of reinforced concrete the reception of the radio signal
may be severely impaired (see “Setting up the devices”).
In order to correct any deviations from the exact time, the clock is automatically
synchronized with the WWVB radio signal every day at 1:00, 2:00 and 3:00.
The weather station’s reception of the WWVB radio signal can also be initiated
manually.
Press the + and – button 35, 36 at the same time. The weather station attempts
to receive the WWVB radio signal. This process takes several minutes and is indicated in the LC display by a flashing radio tower symbol.
If the connection with the WWVB radio signal cannot be established, the search is
stopped.
Note: If the clock of the weather station cannot receive the WWVB radio signal due
to errors, the distance to the transmitter or similar reasons, the time may also be set
22 US-EN
5
during this
282650_aur_Funk-Wetterstation_Content_US.indd 22 14.02.17 14:19
manually. If reception of the WWVB signal is successful, the manual settings are
overwritten.
Setting the 12 / 24 Hour Mode / °C / °F / hPa / inHg /
Time zone / time / date / language manually
The reception of WWVB radio signal where the weather station has been positioned
may deteriorate or be interrupted. If this happens you can set the device manually.
Follow these steps:
1. Press and hold down the MODE button
will flash “12 Hr” or “24 Hr”. Press the + or – button
sired hour format.
Note: In 12 hour mode, the AM symbol indicates morning 7. In 12 hour mo
the PM symbol in the time display stands for afternoon.
2. Confirm your setting by pressing the MODE button. The temperature unit “°C “
or “°F” flashes in the display. Press the + or – button to choose the desired
temperature unit.
3. Confirm your setting by pressing the MODE button. The barometric pressure
unit flashes in the display. Press the + or – button to set the desired unit (hPa /
inHg).
4. Confirm your setting by pressing the MODE button. The time zone indicator
flashes in the display. Press the + or – button to set the desired value (-8 to -5).
34
for about 3 seconds. The display
35, 36
to choose the de-
de
23 US-EN
282650_aur_Funk-Wetterstation_Content_US.indd 23 14.02.17 14:19
Note: If you’re in a country where the WWVB signal can be received but the
time is different from your current local time, you can use the time zone setting
to have the product display your current local time. For example, if you’re in a
country where the local time is an hour ahead of Pacific Standard Time (PST),
set the time zone to -8. The product is now still controlled by WWVB but shows
the time as one hour ahead of PST.
5. Confirm your setting by pressing the MODE button. The DSP indicator flashes
in the display. Press the + or - button to set the desired value (ON / OFF).
6. Confirm your setting by pressing the MODE button. The hour value of the time
display flashes. Press the + or – button to set the desired value.
Note: The time and date will be set automatically if the weather station receives
the WWVB signal. You should manually adjust the time and date if you have
no reception of WWVB.
Tip: Hold the + or – button. This will speed up the process of setting the values.
You can also use this fast setting option for subsequent settings. If you do not
press any button for 20 seconds, the LCD automatically reverts to the standard
display.
7. Confirm your setting by pressing the MODE button. The minute indicator of the
time display will flash. Press the + or – button to set the desired value.
8. Confirm your setting by pressing the MODE button. The year indicator in the
time display will flash. Press the + or – button to set the desired value.
9. Confirm your setting by pressing the MODE button. The month indicator in the
date display
24 US-EN
1
will flash. Press the + or – button to set the desired value.
282650_aur_Funk-Wetterstation_Content_US.indd 24 14.02.17 14:19
10. Confirm your setting by pressing the MODE button. The day indicator in the
date display will flash. Press the + or – button to set the desired value.
11. Confirm your setting by pressing the MODE button. At the place of the day of
the week display
9
, the language indicator of this display flashes. Press the +
or – button to choose the desired language.
Note: Choose between German (GE), English (EN), Italian (IT), French (FR)
and Spanish (SP) (The default language is English).
12. Confirm your setting by pressing the MODE button.
Setting the alarm time
1. Press the MODE button 34 briefly to set the alarm. The current alarm time will
appear in the LC display.
2. Press and hold down the MODE button for about 2 seconds. The hours display
flashes.
3. Press the + or – button
4. Confirm your setting by pressing the MODE button. The minutes display flashes.
Repeat step 3 to set the minutes.
5. Confirm your setting by pressing the MODE button.
Tip: Hold the + or – button. This will speed up the process of setting the values.
You can also use this fast setting option for subsequent settings. If you do not press
any button for 20 seconds, the LCD automatically reverts to the standard display.
Note: You can set two different alarms.
35, 36
to set the desired value.
25 US-EN
282650_aur_Funk-Wetterstation_Content_US.indd 25 14.02.17 14:19
6. Press the MODE button twice briefly if the weather station is in time display 7
mode. Press the MODE button once briefly if the weather station is in ALARM
1 mode. This will take you to ALARM 2 mode.
7. Repeat steps 2–5 to set the value for ALARM 2.
Turning the alarm on / off
1. Briefly press the MODE button 34 briefly once or twice for ALARM 1 or
ALARM 2 mode.
2. P
ress the + button 35. The ALARM 1 symbol 3 or ALARM 2 symbol 8 appea
in the LC display. The alarm has been turned on.
3. Press the button + again. The ALARM 1 or ALARM 2 symbol in the LC display
goes out. The alarm has been turned off.
Dismissing the alarm
Press any button except the SNOOZE- / LIGHT button 33 to stop the alarm.
You do not need to turn the alarm back on. It will automatically go off again at
the set time.
Note: The alarm signal sounds for 2 minutes.
26 US-EN
rs
282650_aur_Funk-Wetterstation_Content_US.indd 26 14.02.17 14:19
SNOOZE function
Press the SNOOZE- / LIGHT button 33 when the alarm sounds to SNOOZE the
alarm. The alarm signal sounds again after 5 minutes.
Preparing to use the weather forecasting function
Note: Please take the weather forecast from your local weather forecasting service
into account as well as the forecast from your weather station. If there are discrepancies between the information from your product and from the local weather forecasting service, please take the advice of the latter as authoritative.
The weather forecast is calculated from evaluation of fluctuations in the barometric
pressure and may deviate from the actual weather conditions.
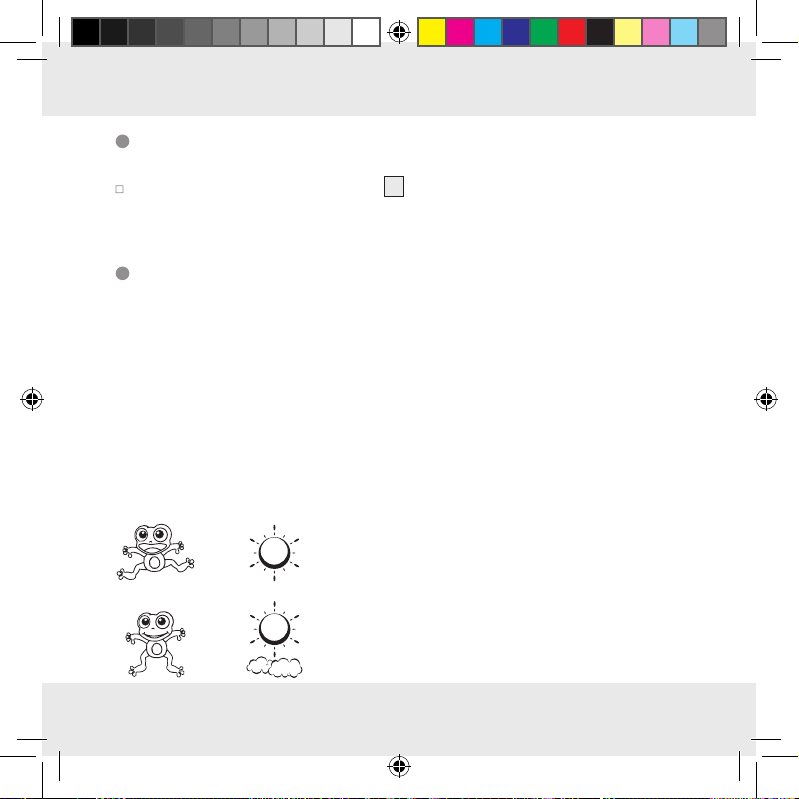
The weather station displays the following weather symbols:
282650_aur_Funk-Wetterstation_Content_US.indd 27 14.02.17 14:19
+
+
= sunny
= slightly cloudy
27 US-EN
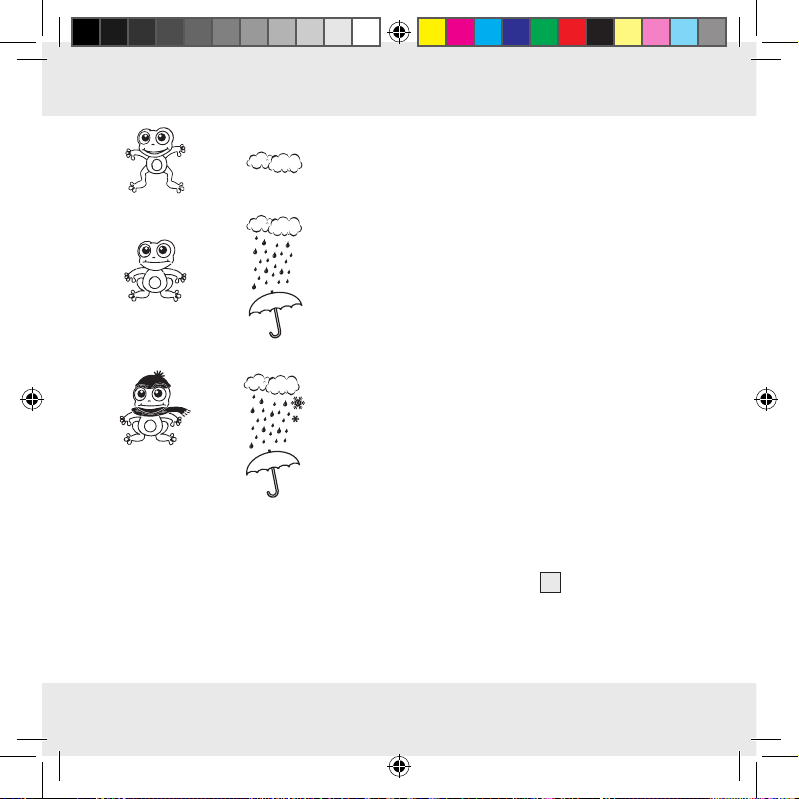
+ = cloudy
+ = rainy
+
= rain + snow
The weather symbols indicate the weather fluctuation over the next eight hours and
not the current weather.
The weather station can display the barometric pressure trend
28 US-EN
282650_aur_Funk-Wetterstation_Content_US.indd 28 14.02.17 14:19
31
.
You may see the following displays:
The barometric pressure will rise.
The barometric pressure will remain constant.
The barometric pressure will fall.
Selecting the location
Press the CITY button 39. The location display 12 blinks and the longitude and
latitude are displayed.
Press the + or – button 35, 36 to select your location.
Press the CITY button to confirm your entry. If the abbreviation for your location
does not appear in the display, you may enter a user-defined location (see
“Selecting the location manually”).
After a brief moment, the weather station displays the sunrise and sunset times, the
lunar phases as well as the tidal range - low (TIDE LO), medium (TIDE MID) and
high (TIDE TH).
29 US-EN
282650_aur_Funk-Wetterstation_Content_US.indd 29 14.02.17 14:19

Selecting the location manually
Press the CITY button 39 down for 2 seconds and keep it pressed. Press the
+ or – button
Press the CITY button to confirm your entry. Enter the 2nd and 3rd letters in the
same fashion.
GMT appears in the LC display and the time zone indicator blinks.
Press the + or – button to set the difference from your time zone to GMT.
Press the CITY button to confirm your entry. Set the longitude and latitude of
your location in the same fashion.
After a brief moment, the weather station displays the sunrise and sunset times,
the lunar phases as well as the tidal range - low (TIDE LO), medium (TIDE MID)
and high (TIDE TH).
Note: To determine your latitude and longitude, we recommend to search on the
internet.
30 US-EN
35, 36
to select the beginning letters of your location.
282650_aur_Funk-Wetterstation_Content_US.indd 30 14.02.17 14:19

You can choose from the following countries and cities:
Germany
(DE)
Berlin BER
Bremen BRE
Köln KOE
Dortmund DOR
Dresden DRE
Düsseldorf DUS
Erfurt ERF
Frankfurt FRA
Freiburg FRE
Hamburg HAM
Hannover HAN
Hof HOF
Kaiserslautern KAI
Kassel KAS
Kiel KIE
Leipzig LEI
Magdeburg MAG
München MUN
Nürnberg NUR
Osnabrück OSN
Passau PAS
Regensburg REG
Rostock ROS
Australia
(AU)
Austria
(AT)
Belgium
(BE)
Saarbrücken SAA
Stuttgart STU
Ulm ULM
Würzburg WUR
Canberra CBR
Melbourne MEL
Sydney SYD
Bregenz BRE
Graz GRZ
Innsbruck INN
Linz LNZ
Salzburg SLZ
Vienna WIE
Villach VIL
Wels WEL
Antwerp ANT
Bruges BRG
Brussels BRU
Libramont LIB
Liege LIE
Bosnia &
Herzegovina (BA)
Croatia
(HR)
Czech
(CZ)
Denmark
(DK)
Finland
(FI)
France
(FR)
Sarajevo SAR
Split SPL
Zagreb ZAG
Brno BRN
Prague PRG
Aalborg ALB
Copenhagen KOB
Odense ODE
Helsinki HEL
Ajaccio AJA
Biarritz BIA
Bordeaux BOR
Brest BRE
Cherbourg-
Octeville
Clermont-Fer-
rand
Dijon DIJ
Lille LIL
CHE
CMF
31 US-EN
282650_aur_Funk-Wetterstation_Content_US.indd 31 14.02.17 14:19

Lyon LYO
Marseille MRS
Metz MET
Nantes NAN
Nice NIC
Orleans ORL
Paris PAR
Perpignan PER
Rouen ROU
Strasbourg STR
Toulouse TOU
Greece
Athens AHN
(GR)
Hungary
Budapest BUD
(HU)
Ireland
Dublin DUB
(IE)
Italy (IT) Ancona ANC
Bari BAR
Bolzano BOZ
Cagliari CAG
Florence FIR
Foggia FOG
Genoa GEN
Lecce LEC
Messina MES
32 US-EN
Liechtenstein (LI)
Luxemburg (LU)
Monaco
(MC)
Netherlands
(NL)
Milan MIL
Naples NAP
Palermo PAL
Parma PAR
Perugia PER
Rome ROM
San Remo SRE
Triest TRI
Turin TOR
Venice VEN
Verona VER
Vaduz VDZ
Luxembourg LUX
Monte Carlo MCM
Amsterdam AMS
Arnhem ARN
Eindhoven EIN
Groningen GRO
Rotterdam ROT
The Hague DHA
New
Zealand
(NZ)
Norway
(NO)
Poland
(PL)
Portugal
(PT)
Russian
Federation (RU)
Serbia
(RS)
Slovakia
(SK)
Slovenia
(SI)
Spain
(ES)
Wellington WLG
Bergen BGN
Lillehammer LIL
Oslo OSL
Cracow KRA
Gdansk GDA
Poznan POZ
Warsaw WAR
Faro FAR
Lisbon LIS
Porto POR
St. Petersburg PET
Belgrade BEO
Bratislava BRV
Kosice KOS
Ljubliana LUB
Alicante ALI
282650_aur_Funk-Wetterstation_Content_US.indd 32 14.02.17 14:19

Sweden
(SE)
Switzerland
(CH)
Andorra AND
Badajoz BAD
Barcelona BAR
Bilbao BIL
Cordoba COR
Eivissa Ibiza IBZ
La Coruña LCO
Las Palmas LPA
Leon LEO
Madrid MAD
Malaga MAL
Palma de Mal-
lorca
Salamanca SAL
Sevilla SEV
Valencia VAL
Zaragoza ZAR
Gothenburg GOT
Karlstad KAR
Stockholm STO
Basel BAS
Berne BRN
Chur CHU
PAL
United
Kingdom
(GB)
United
States
(US)
Geneva GEN
Lucerne LUC
Lugano LUG
Sion SIO
St. Gallen SGL
Zurich ZUR
Aberdeen ABD
Belfast BEL
Birmingham BIR
Cardiff CAR
Glasgow GLW
London LON
Manchester MAN
Newcastle
upon Tyne
Plymouth PLY
Los Angeles LAX
New York NYC
Washington WAS
NEC
33 US-EN
282650_aur_Funk-Wetterstation_Content_US.indd 33 14.02.17 14:19

Lunar phases
The weather station has a display which automatically displays the current lunar
13
phase
.
New moon Waxing half-
Full moon Waning full
moon
moon
Half-moon Waxing full
Half-moon Waning half-
moon
moon
Reading the barometric pressure for the last 12 hours
Press the HISTORY ABS / REL button 38 repeatedly to read the barometric
pressure values for the last 12 hours.
0HR = present barometric pressure
–1HR = barometric pressure an hour earlier
–2HR = barometric pressure two hours earlier, etc.
34 US-EN
282650_aur_Funk-Wetterstation_Content_US.indd 34 14.02.17 14:19

Adjusting the air pressure indication
The forecast of this weather station is basing on an analysis of the change of the
air pressure.
The barometric pressure
As the air pressure generally decreases with the elevation above sea level, the public
weather service always announces the so-called relative air pressure. This relative air
pressure is adjusted to the topography of the country in order to get comparable
values.
You can adjust the air-pressure of your weather station to the proportion of its place.
In this case you will need to customize the weather station’s current air pressure.
Ask your local weather forecast service for the barometric pressure at sea level or
get the current value from the Internet.
To adjust the weather station:
Press and hold the HISTORY ABS / REL button 38 for 3 seconds. Then press the
+ or – button
Chose “Rel” and press the HISTORY ABS / REL button to confirm. The air pres-
sure indication blinks. Now you can choose the correct value by pressing the +
or – button.
Confirm your choice by pressing the HISTORY ABS / REL button. Your weather
station now shows the relative air pressure.
30
is factory provided adjusted to the absolute air pressure.
35, 36
to toggle between the absolute or relative air pressure.
35 US-EN
282650_aur_Funk-Wetterstation_Content_US.indd 35 14.02.17 14:19

If you want your weather station to announce the absolute air pressure:
Press and hold the HISTORY ABS / REL button for 3 seconds. Then press the
+ or – button to change to the absolute air pressure. Confirm by pressing the
HISTORY ABS / REL button.
Setting the channel
The weather station automatically receives the outdoor sensor signal once you have
completed all the settings.
Note: In the event of interference from nearby equipment transmitting radio signals,
b
oth the humidity (outdoor) 22 and outdoor temperature 25 symbols will flash. Plea
select a different channel for the outdoor sensor by pressing the CH button
the weather station or the channel selector switch
44
on the outdoor sensor. The
relevant data is shown in the LC display.
- 1: Outdoor sensor channel 1
- 2: Outdoor sensor channel 2
- 3: Outdoor sensor channel 3
-
: automatic channel change
36 US-EN
se
37
on
282650_aur_Funk-Wetterstation_Content_US.indd 36 14.02.17 14:19

Displaying temperature and temperature trend
The current indoor temperature 19 and the temperature trend (indoors) 15 are
shown in the LC display.
After successfully connecting with the outdoor sensor, the weather station can display the outdoor temperature
25
and the temperature trend (outdoor) 24. You may
see the following displays:
The temperature is rising.
The temperature is remaining constant.
The temperature is falling.
Displaying the humidity and humidity trend
The current humidity trend (indoors) 16 and the current humidity (indoors) 17 are
shown in the LC display.
The COMFORT indicator
18
displays the humidity in three categories.
37 US-EN
282650_aur_Funk-Wetterstation_Content_US.indd 37 14.02.17 14:19

The categories are:
DRY = Humidity < 40 %
COMFORT = Humidity 40–70 %, indoor temperature –4 to +149 °F
(20 °C–28 °C)
WET = Humidity > 70 %
After successfully connecting with the outdoor sensor, the weather station shows
the humidity trend (outdoors)
21
and the humidity (outdoors) 22 in the LC display.
Displaying the maximum / minimum
temperature / humidity
The minimum / maximum temperature / humidity is measured for the first time after
the batteries have been inserted and stored in the weather station.
The maximum and minimum values for temperature, hygrometer and barometric
pressure are automatically saved.
If the weather station is in time display 7, press the + button 35 to display the
maximum values.
Press the + button twice to display the minimum values.
Hold the + button down for 3 seconds to erase the stored maximum and mini-
mum values.
38 US-EN
282650_aur_Funk-Wetterstation_Content_US.indd 38 14.02.17 14:19

Temperature and frost alarm
The temperature alarm is a short beep, which sounds as soon as the outdoor temperature exceeds or falls below the preset temperature range. Follow the below
procedures to set the desired temperature range.
Press the – button 36 to access the temperature alarm mode.
Hold the – button down for 3 seconds. The maximum temperature display
blinks. Press the + or – button to set the values.
Press the MODE button 34 to confirm your setting. The minimum temperature
display blinks. Press the + or – button to set the values.
Press the MODE button to confirm your setting.
Activating / deactivating the the temperature
and frost alarm
If more than one outdoor sensor is activated, press the channel button 37 to
select one.
Press the – button 36 repeatedly to activate the temperature and frost alarms.
If the frost alarm alarm is activated, the corresponding symbol
the outdoor temperature. The alarm signal sounds at 30.2 ° F to 37.4 ° F
(–1 °C to + 3 °C).
282650_aur_Funk-Wetterstation_Content_US.indd 39 14.02.17 14:19
23
appears next to
39 US-EN

If the temperature alarm is activated, the corresponding symbol appears next to the
outdoor temperature. The alarm signal sounds at the set values.
If the temperature and frost alarm are activated, both symbols appear in the display.
Background lighting
Press the SNOOZE / LIGHT button 33. The backlight illuminates for 5 seconds.
Battery state display
The battery state display 20, 26 appears in the weather station’s LC display if the
batteries are weak. Make sure you replace the batteries soon (see “Changing the
batteries”).
Changing the batteries
Weather station:
Replace the batteries if the LC display becomes illegible or if the battery display
is shown.
40 US-EN
20
282650_aur_Funk-Wetterstation_Content_US.indd 40 14.02.17 14:19

Remove the battery cover on the back of the weather station.
Remove the used batteries.
Insert 3 new batteries type AA, 1.5 V.
Note: Make sure that the polarity is correct when you insert the battery. The
correct polarity is shown inside the battery compartment
40
.
Close the battery compartment.
Outdoor sensor:
Replace the batteries if battery display
26
is shown.
Remove the battery cover from the back of the outdoor sensor.
Remove the used batteries.
Insert 2 new batteries type AA, 1.5 V.
Note: Make sure you insert the batteries with the correct polarity. The correct
polarity is shown inside the battery compartment
45
.
Close the battery compartment.
Troubleshooting
Note: This product has delicate electronic components. This means that if it is
placed near an object that transmits radio signals, it could cause interference.
41 US-EN
282650_aur_Funk-Wetterstation_Content_US.indd 41 14.02.17 14:19

If the display indicates a problem, move such objects away from the weather
station or outdoor sensor or remove the batteries from the weather station or
outdoor sensor for a short while and then replace them.
Obstacles such as concrete walls can also interfere with reception. In this case,
change the location (e. g. near a window). Please remember the external sensor
should always be set up within max. 1181 in (30 meters) (open space) of the base
station. The specified range is the free-field range and means that no obstacle should
be between the remote sensor and the base station. A “visual contact” between
remote sensor and base station often improves the transmission.
Cold (outdoor temperatures below 32 °F (0 °C)) can reduce the battery power of
the outdoor sensor and thereby negatively affect radio transmission. Another factor
that may cause harmful interference is dead or weak batteries in the outdoor sensor.
Replace them with new ones.
Cleaning and care
Never use liquids or detergents, as these will damage the product.
Clean only the outside of the product with a soft, dry cloth.
Never spray the outdoor sensor, e.g. with a garden hose. The outdoor sensor
is only protected against rain.
42 US-EN
282650_aur_Funk-Wetterstation_Content_US.indd 42 14.02.17 14:19

Disposal
Dispose of the packaging through your local recycling facilities and in
compliance with all federal, state and local regulations.
Please note the package markings regarding waste separation, indicated
b
by abbreviations (a) and numbers (b), meaning: 1–7: plastics / 20–22:
a
paper and cardboard / 80–98: composite materials.
Contact your local waste management authority for additional
information on how to dispose of the used product.
To help protect the environment, please dispose of the product properly when it
has reached the end of its useful life, do not throw in the garbage. Information on
collection sites and their opening hours is available from your local authority.
Improper disposal of batteries can damage the environment!
Never throw batteries in the garbage. They may contain toxic heavy metals and
must be handled as special waste. The chemical symbols of heavy metals are: Cd =
cadmium, Hg = mercury, Pb = lead. Used batteries should therefore be disposed of
through a local collection point.
43 US-EN
282650_aur_Funk-Wetterstation_Content_US.indd 43 14.02.17 14:19

Warranty
What does this warranty cover?
The warranty covers:
· Damage, breakage or inoperability due to defect.
· Damage not accounted for by normal wear and tear or following the safety and
maintenance instructions provided in the user manual.
What is not covered by the warranty?
The warranty does not cover damage caused by:
· Normal wear and tear of the product, including fragile parts (such as switches,
glass, etc.);
· Improper use or transport;
· Disregarding safety and maintenance instructions;
· Accidents or acts of nature (e.g. lightning, fire, water, etc.).
· Tampering with the product (such as removing cover, unscrewing screws etc.)
What is the period of coverage and warranty resolution?
The warranty is for 3 years from the date of purchase. At our discretion, product will
either be refunded or replaced.
44 US-EN
282650_aur_Funk-Wetterstation_Content_US.indd 44 14.02.17 14:19

What will we not do?
We will not:
· Start a new warranty period upon product exchange;
· We will not repair product.
How to process the warranty?
We recommend first either:
· Call customer service at 1 (844) 543-5872
· Visit the Website Customer Service Platform at www.lidl.com / contact-us
· Visit a LIDL store for further assistance
To ensure the quickest warranty return process, please have the following available:
· The original sales receipt that includes the date purchased;
· The product and manual in the original package;
· A statement of the problem.
What must you do to keep the warranty in effect?
· Retain the original receipt;
· Follow all product instructions;
· Do not repair or modify the product.
How does state law relate to this warranty?
Any State Laws that contradict or modify the warranty listed here to the consumer’s
benefit will be followed.
45 US-EN
282650_aur_Funk-Wetterstation_Content_US.indd 45 14.02.17 14:19

Descripción de las palabras de advertencia ...................................................................................................Página 47
Servicio al cliente ........................................................................................................................................................Página 47
Introducción ..................................................................................................................................................................Página 48
Uso previsto .................................................................................................................................................................Página 48
Descripción de las partes ...........................................................................................................................................Página 49
Información técnica ....................................................................................................................................................Página 54
Artículos incluidos .......................................................................................................................................................Página 55
Importantes instrucciones de seguridad ..........................................................................................................Página 55
Información general de seguridad ............................................................................................................................Página 55
Instrucciones de seguridad para baterías / baterías recargables .........................................................Página 57
Antes de usar ...............................................................................................................................................................Página 60
Configurar los dispositivos .........................................................................................................................................Página 60
Preparar el sensor exterior para su uso ....................................................................................................................Página 61
Preparar la estación meteorológica para su uso ......................................................................................................Página 62
Operación ......................................................................................................................................................................Página 64
Recepción de la señal de radio de la WWVB para la hora ...................................................................................Página 64
Configurar de forma manual el modo de 12 / 24 horas / °C / °F / hPa / inHg / zona horaria /
hora / fecha / idioma ..................................................................................................................................................Página 65
Configurar la hora de alarma ....................................................................................................................................Página 68
Activar / desactivar la función de alarma .................................................................................................................Página 69
Apagar la señal de alarma ........................................................................................................................................Página 69
Función SNOOZE.......................................................................................................................................................Página 69
Preparar para usar la función de pronóstico del tiempo .........................................................................................Página 70
Seleccionar la ubicación ............................................................................................................................................Página 72
Seleccionar la ubicación manualmente.....................................................................................................................Página 72
Fases lunares ...............................................................................................................................................................Página 77
Lectura de la presión barométrica de las últimas 12 horas .....................................................................................Página 77
Ajustar la indicación de presión del aire...................................................................................................................Página 78
Configurar el canal .....................................................................................................................................................Página 79
Indicación de temperatura y tendencia de temperatura ..........................................................................................Página 80
Indicación de humedad y tendencia de humedad ...................................................................................................Página 80
Indicación de la temperatura / humedad máxima / mínima ....................................................................................Página 81
Alarma de temperatura y alarma de helada ............................................................................................................Página 82
Activar / desactivar la alarma de temperatura y la alarma de helada ...................................................................Página 83
Retroiluminación ..........................................................................................................................................................Página 83
Indicación del nivel de batería ..................................................................................................................................Página 84
Cambiar las baterías ..................................................................................................................................................Página 84
Resolución de problemas ........................................................................................................................................Página 85
Limpieza y mantenimiento .....................................................................................................................................Página 86
Eliminación ....................................................................................................................................................................Página 86
Garantía .........................................................................................................................................................................Página 88
46 US-ES
282650_aur_Funk-Wetterstation_Content_US.indd 46 14.02.17 14:19

DESCRIPCIÓN DE LAS PALABRAS
DE ADVERTENCIA
ADVERTENCIA indica una situación peligrosa,
que puede provocar la muerte o lesiones gr
si no se evita.
aves
PRECAUCIÓN
PRECAUCIÓN indica una situación peligrosa,
que puede provocar lesiones leves o moderada
si no se evita.
AVISO indica información que se considera im-
portante, pero que no implica un peligro (p. ej.
mensajes relacionados con daños materiales).
s
SERVICIO AL CLIENTE
Llame al Servicio de atención al
cliente al 1 (844) 543-5872
Visite el Portal de atención
al cliente en
www.lidl.com / contact-us
282650_aur_Funk-Wetterstation_Content_US.indd 47 14.02.17 14:19
Visite una de nuestras tiendas LIDL
en caso de cualquier inquietud.
IAN 282650
Por favor tenga
su número IAN
a la mano.
47 US-ES

Estación meteorológica digital portátil
Introducción
Felicitaciones por la compra de su nuevo producto. Usted se decidió por un producto
de alta calidad. Las instrucciones de uso forman parte del producto. Contienen información importante respecto a la seguridad, el uso y la eliminación. Antes de usar
el producto, familiarícese con toda la información de seguridad y las instrucciones
de uso. Utilice el producto únicamente como se describe y para las aplicaciones
indicadas. Si traspasa el producto a alguien más, por favor asegúrese de incluir
toda la documentación con él.
Uso previsto
La estación meteorológica muestra las temperaturas interior y exterior en Celsius (°C)
o Fahrenheit (°F) y sus valores máximos y mínimos. También muestra la humedad
(%HR) interior y exterior, así como sus valores máximos y mínimos. Otros valores
que muestra la estación meteorológica son el pronóstico del tiempo, y la hora en
reloj con modos de 12 / 24 horas y la fecha. La estación meteorológica muestra
las horas de salida y puesta del sol para ese día, así como también la fase lunar.
Además, la estación meteorológica tiene dos funciones de alarma. El producto está
diseñado solo para uso en un entorno residencial privado y no para uso comercial.
48 US-ES
282650_aur_Funk-Wetterstation_Content_US.indd 48 14.02.17 14:19

Descripción de las partes
Estación meteorológica:
1
Indicación de fecha
2
Indicación de mes
3
Alarma 1
4
Indicación de SNOOZE
5
Símbolo de torre de radio
6
Indicación de horario de verano
7
Indicación de hora
8
Alarma 2
9
Indicación de día de la semana
10
Salida del sol / hora de salida del sol
11
Indicación de amplitud de marea
12
Ubicación
13
Fase lunar
14
P
uesta del sol / hora de puesta del sol
15
Tendencia de temperatura (interior)
16
Tendencia de humedad (interior)
17
Humedad (interior)
18
Indicador de confort (máximo /
mínimo)
19
Temperatura interior (°C / °F)
20
Indicador de nivel de batería
21
Tendencia de humedad (exterior)
22
Humedad (exterior)
23
Temperatura y alarma de helada
(máxima / mínima)
24
Tendencia de temperatura (exterior)
25
Temperatura exterior (°C / °F)
26
Indicador de nivel de batería
(sensor exterior)
27
Canal seleccionado
49 US-ES
282650_aur_Funk-Wetterstation_Content_US.indd 49 14.02.17 14:19

50 US-ES
27 24 21
26 25 23 22
15
16
17
18
19
20
10
11
12
13
14
1
2
9
3
5
6
7
8
4
282650_aur_Funk-Wetterstation_Content_US.indd 50 14.02.17 14:19

28
Indicación de presión
barométrica en bar
29
Indicación de presión
barométrica en la
última hora
33
32
31
30
29
28
30
Presión barométrica
absoluta / relativa
31
Tendencia de presión
barométrica
32
Pronóstico del tiempo
33
Botón de
SNOOZE / LUZ
51 US-ES
282650_aur_Funk-Wetterstation_Content_US.indd 51 14.02.17 14:19

34
Botón de MODE
35
Botón +
36
Botón –
52 US-ES
37
Botón de canal (CH)
38
Botón HISTORY
ABS / REL
34 35 36 37 38 39
40
39
Botón CITY
40
Compartimiento de
baterías
282650_aur_Funk-Wetterstation_Content_US.indd 52 14.02.17 14:19

Sensor exterior:
41
LED de control
42
Montaje
41
43
Botón RESET
44
Interruptor de selec-
ción de canal
43
44
45
45
Compartimiento de
las baterías
42
53 US-ES
282650_aur_Funk-Wetterstation_Content_US.indd 53 14.02.17 14:19

Información técnica
Estación meteorológica:
Rango de medición de temperatura: +32 a +122 °F (0 a +50 °C)
Resolución de temperatura: 33.8 °F (0.1 °C)
Rango de medición de humedad: 20 %–95 %
Resolución de humedad: 1 %
Señal de radio: WWVB
Baterías: 3 x AA , 1.5 V
Rango de presión de aire: 25–31 inHg
Sensor exterior:
Rango de medición de temperatura: –4 a +149 °F (–20 a +65 °C)
Rango de medición de humedad: 20 %–95 %
Resolución de humedad: 1 %
Señal de transmisión de HF: 433 MHz
Rango de transmisión HF: máx. 1181 in (30 metros) (en campo abierto)
Baterías: 2 x AA , 1.5 V
Grado de protección: IPX4 (a prueba de salpicaduras)
54 US-ES
(corriente directa)
(corriente directa)
282650_aur_Funk-Wetterstation_Content_US.indd 54 14.02.17 14:19

Artículos incluidos
1 estación meteorológica
1 sensor exterior
3 baterías AA, 1.5 V (preinstaladas)
2 baterías AA, 1.5 V (preinstaladas)
1 instrucciones de uso
IMPORTANTES
INSTRUCCIONES DE
SEGURIDAD
LEA TODAS LAS INSTRUCCIONES. GUARDAR PARA FUTURAS REFERENCIAS.
INCLUYA TODA LA DOCUMENTACIÓN AL PASAR ESTE PRODUCTO A
TERCEROS.
Información general de seguridad
El incumplimiento de las siguientes advertencias
puede provocar lesiones graves o la muerte.
55 US-ES
282650_aur_Funk-Wetterstation_Content_US.indd 55 14.02.17 14:19

Los niños suelen subestimar los peligros. Los niños deben permanecer
siempre alejados del producto.
Este producto puede ser usado por niños a partir de los 8 años y por personas
con capacidades físicas, sensoriales o mentales reducidas o con falta de experiencia y conocimiento si han sido supervisadas o instruidas respecto al uso
del producto de una manera segura y entienden los riesgos involucrados. Los
niños no deben jugar con el producto. La limpieza y el mantenimiento de uso
no deberán ser realizados por niños sin supervisión.
Los cambios o las modificaciones a este producto que no sean expresamente
aprobados por la parte responsable del cumplimiento podrían anular la autorización al usuario para operar el producto.
Nota: Este producto ha sido probado y cumple con los límites para un dispo-
sitivo digital clase B, de acuerdo con el apartado 15 de las normas de la FCC.
Estos límites están diseñados para proveer protección razonable contra interferencias perjudiciales en una instalación residencial. Este producto genera, usa
y puede emitir energía de radiofrecuencia y en caso de no ser instalado y utilizado de acuerdo a las instrucciones puede causar interferencias perjudiciales
a las radiocomunicaciones.
Sin embargo, no existe ninguna garantía de que no se produzcan interferencias
en una instalación en particular. Si este producto causa una interferencia dañina a la recepción de radio o televisión, la cual puede ser determinada encendiendo y apagando el producto, se alienta al usuario a intentar corregir las
interferencias siguiendo las siguientes medidas:
56 US-ES
282650_aur_Funk-Wetterstation_Content_US.indd 56 14.02.17 14:19

• Oriente o localice de nuevo la antena receptora.
• Aumente la separación entre el producto y el receptor.
• Conecte el producto a la toma de corriente en un circuito distinto de aquel
al que esté conectado el receptor.
• Solicite ayuda a su proveedor o a algún técnico experto de radio / TV.
• Modelo: Z31915-US-RX / FCCID: 2AJ9O-Z31915R
• Modelo: Z31915-US-TX / FCCID: 2AJ9O-Z31915T
El incumplimiento de las siguientes advertencias
puede provocar lesiones y daños materiales.
No use el producto si éste está dañado.
Instrucciones de seguridad para
baterías / baterías recargables
El no tomar en cuenta las siguientes advertencias puede resultar
en heridas serias o muerte.
¡RIESGO DE MUERTE! Mantenga las baterías / baterías recargables fuera
del alcance de los niños. En caso de ser tragadas, busque inmediatamente
atención médica.
57 US-ES
282650_aur_Funk-Wetterstation_Content_US.indd 57 14.02.17 14:19

¡PELIGRO DE EXPLOSIÓN! Nunca recargue baterías no
recargables. No cause corto circuito o abra las baterías / baterías
recargables. Se puede provocar sobrecalentamiento, incendio o
quemaduras.
Nunca arroje las baterías / baterías recargables al fuego o al agua.
No someta las baterías / baterías recargables a cargas mecánicas.
Riesgo de chorreo de batería
El no tomar en cuenta las siguientes advertencias puede resultar en
heridas o daños a propiedad.
Evite condiciones ambientales y temperaturas extremas que puedan afectar a
las baterías / baterías recargables, p.ej. radiadores / luz solar directa.
Evite el contacto con la piel, ojos y membranas mucosas. En caso de contacto
con el ácido de la batería, enjuague intensivamente el área afectada con abun-
dante agua limpia y busque inmediatamente atención médica.
¡UTILICE GUANTES PROTECTORES! Las baterías / baterías
recargables chorreadas o dañadas pueden causar quemaduras al
contacto con la piel. Lleve puestos guantes protectores en todo mo-
mento en caso de que esto ocurra.
En caso de que la batería chorree, remuévala inmediatamente del producto
para evitar daños.
Utilice sólo el mismo tipo de baterías / baterías recargables. No mezcle baterías /
baterías recargables nuevas con usadas.
58 US-ES
282650_aur_Funk-Wetterstation_Content_US.indd 58 14.02.17 14:19

Remueva las baterías / baterías recargables del producto si éste no será usado
por un largo periodo.
Riesgo de daño del producto
¡Utilice sólo el tipo específico de baterías / baterías recargables!
¡Asegúrese de usar la polaridad correcta al insertar las baterías! ¡Esta se muestra
dentro del compartimientos para la batería!
¡Limpie los contactos de la batería y dentro del compartimiento para baterías
antes de insertarlas!
Remueva inmediatamente del producto baterías / baterías recargables gastadas.
GUARDE ESTAS INSTRUCCIONES
59 US-ES
282650_aur_Funk-Wetterstation_Content_US.indd 59 14.02.17 14:19

Antes de usar
Configurar los dispositivos
Primero coloque las baterías en el sensor exterior.
El incumplimiento de las siguientes advertencias
puede provocar lesiones o daños materiales.
Cuando elija dónde colocar la estación meteorológica, asegúrese de que no
esté expuesta a la luz directa del sol, vibraciones, polvo, calor, frío o humedad.
No coloque los dispositivos cerca de fuentes de calor, p. ej. radiadores. De lo
contrario, se pueden dañar.
No coloque los dispositivos en superficies de valor o sensibles, a menos de
que estén protegidas adecuadamente. De lo contrario, se pueden dañar.
Asegúrese de que los dispositivos circundantes no operen a la misma frecuen-
cia de 433 MHz. Dichos dispositivos pueden interferir en la conexión de radio.
No coloque los dispositivos cerca o sobre placas de metal. De lo contrario,
puede disminuir la calidad de la transmisión de ondas de radio.
No instale los dispositivos en habitaciones hechas de concreto reforzado, p. ej.
aeropuertos, edificios altos, fábricas o sótanos. De lo contrario, se puede ver
afectada gravemente la transmisión de ondas de radio entre los dispositivos.
60 US-ES
282650_aur_Funk-Wetterstation_Content_US.indd 60 14.02.17 14:19

Preparar el sensor exterior para su uso
Retire la cubierta del compartimiento de las baterías de la parte trasera del
sensor exterior.
Retire la tira de seguridad de las baterías. El sensor exterior está listo para
operar y el LED de control
Cierre la cubierta del compartimiento de las baterías.
Instalar el sensor exterior:
Nota: necesitará un taladro eléctrico para este paso.
Busque un lugar adecuado para el sensor exterior.
Nota: asegúrese de instalar el sensor exterior dentro de un radio de 1181 in
(30 m) de la estación meteorológica. Verifique que no haya obstáculos entre el
sensor exterior y la estación meteorológica. De lo contrario, puede haber inter-
ferencia en la transmisión de datos.
Para montar en pared:
Cuelgue el sensor exterior con el montaje 42 sobre un tornillo.
Use la plantilla de perforación incluida (se muestra en la página plegada) que
está diseñada para marcar los orificios para taladrar.
41
se enciende brevemente.
61 US-ES
282650_aur_Funk-Wetterstation_Content_US.indd 61 14.02.17 14:19

Preparar la estación meteorológica para su uso
Retirar la tira de seguridad de las baterías:
Abra el compartimiento de las baterías 40 en la parte trasera de la estación
meteorológica.
Jale la tira de seguridad de las baterías.
Luego cierre el compartimiento de las baterías.
Tan pronto como haya retirado la tira de seguridad de las baterías, la estación
meteorológica comenzará a recibir la señal de radio.
Nota: no mueva la estación meteorológica mientras está recibiendo la señal. Esto
puede afectar la recepción.
Conectar la estación meteorológica con el sensor exterior y la señal
de radio de la WWVB:
Después de retirar la tira de seguridad de las baterías, la estación meteorológica
intentará establecer una conexión con el sensor exterior. Este proceso puede tardar
algunos minutos. El símbolo
conexión con el sensor exterior fue exitosa, el símbolo del canal seleccionado
aparecerá en la pantalla LC con el canal del sensor exterior (de ser necesario, se
puede cambiar el canal del sensor exterior, como se muestra en la sección “Configurar el canal”). Si la conexión con el sensor exterior no se establece de forma automática, se puede hacer manualmente como a continuación:
62 US-ES
estará parpadeando durante algunos minutos. Si la
27
282650_aur_Funk-Wetterstation_Content_US.indd 62 14.02.17 14:19

1. Presione el botón de canal (CH) 37. El ícono del canal seleccionado 27 parpadeará en la pantalla LC.
2. Luego presione el botón RESET
43
del sensor.
Tan pronto como la estación meteorológica haya establecido una conexión con el
sensor exterior, automáticamente comenzará a recibir la señal de radio de la WWVB.
Este proceso dura varios minutos y se indica en la pantalla LC mediante el símbolo
de torre de radio
5
parpadeando.
Cuando la señal de radio de la WWVB se esta recibiendo con éxito, el símbolo
de torre de radio se muestra de forma permanente en la pantalla. Si al momento de
poner en operación el dispositivo, no es posible sincronizarlo con el reloj atómico,
usted puede ajustar el reloj de forma manual (“Configurar manualmente el modo
de 12 / 24 horas / °C / °F / hPa / inHg / zona horaria / hora / fecha / idioma”).
Señal de radio (WWVB):
La señal de la WWVB (transmisor de señal de tiempo) consiste en pulsos de tiempo
emitidos por uno de los relojes más precisos del mundo en Fort Collins, Colorado.
La recepción de la señal de radio tarda por lo general 3–10 minutos.
La recepción puede verse afectada considerablemente por obstáculos (p. ej. muros
de concreto) o fuentes de interferencia (p. ej. otros dispositivos eléctricos). En caso
de que haya problemas de recepción, cambie la posición de la estación meteorológica (p. ej. a un lugar cerca de una ventana).
63 US-ES
282650_aur_Funk-Wetterstation_Content_US.indd 63 14.02.17 14:19

Operación
Recepción de la señal de radio de la WWVB
para la hora
Después de que se estableció la conexión con el sensor exterior o 3 minutos después
de retirar la tira de seguridad de las baterías, la estación meteorológica comenzará
automáticamente a buscar la señal de radio de la WWVB. La búsqueda se muestra
en la pantalla LC mediante el símbolo de torre de radio
Nota: en habitaciones hechas de concreto reforzado, la recepción de la señal de
radio puede verse afectada gravemente (véase “Configurar los dispositivos”).
Para poder corregir cualquier desviación de la hora exacta, el reloj se sincroniza
automáticamente con la señal de radio de la WWVB todos los días a la 1:00,
2:00 y 3:00.
La recepción de la señal de radio de la WWVB también se puede iniciar de forma
manual en la estación meteorológica.
Presione el botón + y – 35, 36 al mismo tiempo. La estación meteorológica in-
tentará recibir la señal de radio de la WWVB. Este proceso dura varios minutos
y se indica en la pantalla LC mediante el símbolo de torre de radio parpadeando.
Si no se puede establecer la conexión con la señal de radio de la WWVB, se detiene la búsqueda.
64 US-ES
5
parpadeando.
282650_aur_Funk-Wetterstation_Content_US.indd 64 14.02.17 14:19

Nota: si el reloj de la estación meteorológica no puede recibir la señal de radio
de la WWVB debido a errores, o la distancia al transmisor es demasiado grande u
otros motivos similares, es posible establecer de forma manual la hora. Si la recepción de la señal de la WWVB es exitosa, se sobreescribe la configuración manual.
Configurar de forma manual el modo de
12 / 24 horas / °C / °F / hPa / inHg / zona
horaria / hora / fecha / idioma
Es posible que la recepción de la señal de la WWVB de radio se degrade o interrumpa en donde se colocó la estación meteorológica. En caso de que esto suceda,
el dispositivo se puede configurar de forma manual.
Siga los siguientes pasos:
1. Mantenga presionado el botón MODE
o “24 Hr” parpadeará en la pantalla. Presione el botón + o –
el formato deseado de hora.
Nota: el símbolo AM en la indicación de la hora
mediodía en el modo de 12 horas. El símbolo de PM en la indicación de hora
significa después de mediodía en el modo de 12 horas.
2. Confirme su configuración presionando el el botón MODE. La unidad de temperatura “°C “ o “°F” parpadea en la pantalla. Presione el botón + o – para
elegir la unidad de temperatura deseada.
34
durante unos 3 segundos. “12 Hr”
35, 36
y escoja
7
significa antes de
65 US-ES
282650_aur_Funk-Wetterstation_Content_US.indd 65 14.02.17 14:19

3. Confirme su configuración presionando el botón MODE. La unidad de presión
barométrica parpadeará en la pantalla. Presione el botón + o – para establecer
la unidad deseada (hPa / inHg).
4. Confirme su configuración presionando el botón MODE. El indicador de zona
horaria parpadeará en la pantalla. Presione el botón + o – para configurar el
valor deseado (-8 a -5).
Nota: si estuviera uno en un país donde la señal de la WWVB se puede recibir
pero la hora es distinta a la de su hora local actual, puede usar la configuración
de la zona horaria para que el producto muestre su hora local actual. Si estuviera en un país en el que, por ejemplo, la hora local está una hora adelantada
al Tiempo estándar del Pacífico (PST), establezca la zona horaria en -8. El producto estara controlado ahora por la WWVB pero muestra hora como una
hora adelante del PST.
5. Confirme su configuración presionando el botón MODE. El indicador DSP parpadeará en la pantalla. Presione el botón + o - para configurar el valor deseado
(ON / OFF).
6. Confirme su configuración presionando el botón MODE. El valor de la hora
de la indicación de hora parpadeará. Presione el botón + o – para configurar
el valor deseado.
Nota: la configuración de hora y fecha se realizará automáticamente si la estación meteorológica recibe la señal de la WWVB. Usted debe ajustar la hora
y la fecha de forma manual si no tiene recepción de la WWVB.
Consejo: mantenga presionado el botón + o –. Esto acelerará el proceso de
ajuste de los valores. También puede puede usar esta opción de ajuste rápido
66 US-ES
282650_aur_Funk-Wetterstation_Content_US.indd 66 14.02.17 14:19

para otras configuraciones. Si no presiona ningún botón durante 20 segundos,
la pantalla LCD se regresará automáticamente a la indicación estándar.
7. Confirme su configuración presionando el botón MODE. El indicador de minutos
de la indicación de hora parpadeará. Presione el botón + o – para configurar
el valor deseado.
8. Confirme su configuración presionando el botón MODE. El indicador de año
parpadeará en la indicación de hora. Presione el botón + o – para configurar
el valor deseado.
9. Confirme su configuración presionando el botón MODE. El indicador de mes
parpadeará en la indicación de fecha
1
. Presione el botón + o – para confi-
gurar el valor deseado.
10. Confirme su configuración presionando el botón MODE. El indicador de día
parpadeará en la indicación de la fecha. Presione el botón + o – para configurar el valor deseado.
11.
Confirme su configuración presionando el botón MODE. En lugar de la indic
del día de la semana
9
, parpadeará el indicador de idioma. Presione el botón
ación
+ o – para elegir un idioma deseado.
Nota: puede escoger entre alemán (GE), inglés (EN), italiano (IT), francés
(FR) y español (SP) (inglés está establecido como idioma estándar).
12. Confirme su configuración presionando el botón MODE.
67 US-ES
282650_aur_Funk-Wetterstation_Content_US.indd 67 14.02.17 14:19

Configurar la hora de alarma
1. Presione el botón MODE 34 brevemente para entrar en el modo de alarma.
Aparecerá la hora actual de alarma en la pantalla LC.
2. Mantenga presionado el botón MODE durante unos 2 segundos. Parpadeará
la indicación de hora.
3. Presione el botón + o –
4. Confirme su configuración presionando el botón MODE. Parpadeará la indicación de minutos. Repita el paso 3 para configurar los minutos.
5. Confirme su configuración presionando el botón MODE.
Consejo: mantenga presionado el botón + o –. Esto acelerará el proceso de
ajuste de los valores. También puede puede usar esta opción de ajuste rápido
para otras configuraciones. Si no presiona ningún botón durante 20 segundos,
la pantalla LCD se regresará automáticamente a la indicación estándar.
Nota: puede establecer dos alarmas distintas de forma separada.
6. Presione el botón MODE brevemente dos veces si la estación meteorológica está
en el modo de indicación de hora
una vez si la estación meteorológica está en modo de ALARM 1. Esto lo llevará
al modo de ALARM 2.
7. Repita los pasos 2–5 para configurar el valor para ALARM 2.
68 US-ES
35, 36
para configurar el valor deseado.
7
. Presione el botón MODE brevemente
282650_aur_Funk-Wetterstation_Content_US.indd 68 14.02.17 14:19

Activar / desactivar la función de alarma
1. Presione brevemente el botón MODE 34 una o dos veces para llegar los
modos ALARM 1 o ALARM 2.
2. Presione el botón +
en la pantalla LC. Se activó la alarma.
3. Presione el botón + nuevamente. El símbolo de ALARM 1 o ALARM 2 se quitará
de la pantalla LC. Se desactivó la alarma.
35
. El símbolo de ALARM 1 3 o ALARM 2 8 aparecerá
Apagar la señal de alarma
Presione cualquier botón excepto el botón SNOOZE- / LIGHT 33 para detener
la señal de alarma. No es necesario reactivar la alarma. Se cambia automáticamente a la hora de alarma que ya se estableció.
Nota: la señal de alarma sonará durante 2 minutos.
Función SNOOZE
Presione el botón SNOOZE- / LIGHT 33 cuando suene la señal de alarma para
entrar en modo SNOOZE. La señal de alarma nuevamente después de 5 minutos.
69 US-ES
282650_aur_Funk-Wetterstation_Content_US.indd 69 14.02.17 14:19

Preparar para usar la función de
pronóstico del tiempo
Nota: tome en cuenta el pronóstico del tiempo del servicio local de pronóstico del
tiempo, así como el pronóstico de su estación meteorológica. Si existen discrepancias entre la información de su producto y el servicio local de pronóstico del tiempo,
siga las indicaciones de éste último.
El pronóstico del tiempo se calcula a partir de la evaluación de fluctuaciones en la
presión barométrica y puede desviarse de las condiciones climatológicas reales.
La estación meteorológica muestra los siguientes símbolos climatológicos:
70 US-ES
282650_aur_Funk-Wetterstation_Content_US.indd 70 14.02.17 14:19
+
+
= soleado
= parcialmente nublado
+ = nublado

+ = lluvioso
+
= lluvia y nieve
Los símbolos climatológicos indican la fluctuación del clima durante las siguientes
ocho horas y no el clima actual.
La estación meteorológica puede mostrar la tendencia de presión barométrica
31
.
Puede ver las siguientes indicaciones:
La presión barométrica aumentará.
La presión barométrica permanecerá constante.
La presión barométrica bajará.
71 US-ES
282650_aur_Funk-Wetterstation_Content_US.indd 71 14.02.17 14:19

Seleccionar la ubicación
Presione el botón CITY 39. La indicación de ubicación 12 parpadeará y se
mostrará la longitud y la latitud.
Presione el botón + o – 35, 36 para seleccionar su ubicación.
Presione el botón CITY para confirmar los valores. Si la abreviatura de su ubi-
cación no aparece en la pantalla, puede ingresar una ubicación personalizada (véase “Seleccionar la ubicación manualmente”).
Después de un momento breve, la estación meteorológica mostrará las horas de
salida y puesta del sol, las fases lunares, así como la amplitud de marea - baja
(TIDE LO), media (TIDE MID) y alta (TIDE TH).
Seleccionar la ubicación manualmente
Mantenga presionado el botón CITY 39 durante 2 segundos. Presione el botón
35, 36
+ o –
Presione el botón CITY para confirmar los valores. Escriba la 2a y 3a inicial
de la misma forma.
GMT aparecerá en la pantalla LC y parpadeará el indicador de zona horaria.
Presione el botón + o – para configurar la diferencia de su zona horaria res-
pecto a GMT.
72 US-ES
para seleccionar las iniciales de su ubicación.
282650_aur_Funk-Wetterstation_Content_US.indd 72 14.02.17 14:19

Presione el botón CITY para confirmar los valores. Establezca la longitud y la
latitud de su ubicación de la misma forma.
Después de un momento breve, la estación meteorológica mostrará las horas de
salida y puesta del sol, las fases lunares, así como la amplitud de marea - baja
(TIDE LO), media (TIDE MID) y alta (TIDE TH).
Nota: para determinar su latitud y longitud, le recomendamos que haga una
búsqueda por internet.
73 US-ES
282650_aur_Funk-Wetterstation_Content_US.indd 73 14.02.17 14:19

Puede seleccionar entre
los siguientes países y
ciudades:
74 US-ES
Alemania
(DE)
Berlín BER
Bremen BRE
Colonia KOE
Dortmund DOR
Dresde DRE
Düsseldorf DUS
Erfurt ERF
Fráncfort FRA
Friburgo FRE
Hamburgo HAM
Hannover HAN
Hof HOF
Kaiserslautern KAI
Kassel KAS
Kiel KIE
Leipzig LEI
Magdeburgo MAG
Múnich MUN
Núremberg NUR
Osnabrück OSN
Passau PAS
Ratisbona REG
Rostock ROS
Saarbrücken SAA
Stuttgart STU
Australia
(AU)
Austria
(AT)
Bélgica
(BE)
Bosnia y
Herzegovina (BA)
Croacia
(HR)
Ulm ULM
Würzburg WUR
Canberra CBR
Melbourne MEL
Sydney SYD
Bregenz BRE
Graz GRZ
Innsbruck INN
Linz LNZ
Salzburgo SLZ
Viena WIE
Villach VIL
Wels WEL
Amberes ANT
Brujas BRG
Bruselas BRU
Libramont LIB
Lieja LIE
Sarajevo SAR
Split SPL
Zagreb ZAG
282650_aur_Funk-Wetterstation_Content_US.indd 74 14.02.17 14:19

República
Checa
(CZ)
Dinamarca
(DK)
Finlandia
(FI)
Francia
(FR)
Brno BRN
Praga PRG
Aalborg ALB
Copenhague KOB
Odense ODE
Helsinki HEL
Ajaccio AJA
Biarritz BIA
Burdeos BOR
Brest BRE
Cherburgo-
Octeville
Clermont-Fer-
rand
Dijon DIJ
Lille LIL
Lyon LYO
Marsella MRS
Metz MET
Nantes NAN
Niza NIC
Orleans ORL
CHE
CMF
París PAR
Perpignan PER
Rouen ROU
Estrasburgo STR
Toulouse TOU
Grecia
(GR)
Hungría
(HU)
Irlanda
(IE)
Italia (IT) Ancona ANC
Atenas AHN
Budapest BUD
Dublín DUB
Bari BAR
Bolzano BOZ
Cagliari CAG
Florencia FIR
Foggia FOG
Génova GEN
Lecce LEC
Messina MES
Milán MIL
Nápoles NAP
Palermo PAL
Parma PAR
Perugia PER
Roma ROM
Liechtenstein (LI)
Luxemburgo (LU)
Mónaco
(MC)
Holanda
(NL)
Nueva Zelanda
(NZ)
Noruega
(NO)
Polonia
(PL)
San Remo SRE
Trieste TRI
Turín TOR
Venecia VEN
Verona VER
Vaduz VDZ
Luxemburgo LUX
Monte Carlo MCM
Ámsterdam AMS
Arnhem ARN
Eindhoven EIN
Groningen GRO
Rotterdam ROT
La Haya DHA
Wellington WLG
Bergen BGN
Lillehammer LIL
Oslo OSL
Cracovia KRA
75 US-ES
282650_aur_Funk-Wetterstation_Content_US.indd 75 14.02.17 14:19

Portugal
(PT)
Federació
Rusa (RU)
Serbia
(RS)
Eslovaquia
(SK)
Eslovenia
(SI)
España
(ES)
76 US-ES
Gdansk GDA
Poznan POZ
Varsovia WAR
Faro FAR
Lisboa LIS
Porto POR
San Peters-
burgo
Belgrado BEO
Bratislava BRV
Kosice KOS
Ljubliana LUB
Alicante ALI
Andorra AND
Badajoz BAD
Barcelona BAR
Bilbao BIL
Córdoba COR
Eivissa Ibiza IBZ
La Coruña LCO
Las Palmas LPA
PET
Suecia
(SE)
Suiza
(CH)
Reino
Unido
(GB)
León LEO
Madrid MAD
Málaga MAL
Palma de Mal-
lorca
Salamanca SAL
Sevilla SEV
Valencia VAL
Zaragoza ZAR
Gotemburgo GOT
Karlstad KAR
Estocolmo STO
Basel BAS
Berna BRN
Chur CHU
Ginebra GEN
Lucerna LUC
Lugano LUG
Sion SIO
San Gallen SGL
Zúrich ZUR
Aberdeen ABD
Belfast BEL
PAL
Estados
Unidos
(US)
Birmingham BIR
Cardiff CAR
Glasgow GLW
Londres LON
Manchester MAN
Newcastle
upon Tyne
Plymouth PLY
Los Ángeles LAX
Nueva York NYC
Washington WAS
NEC
282650_aur_Funk-Wetterstation_Content_US.indd 76 14.02.17 14:19

Fases lunares
La estación meteorológica indica automáticamente la fase lunar 13 actual.
Luna nueva Luna creciente Cuarto
Luna llena Luna mengu-
ante gibosa
creciente
Cuarto menguante
Luna creciente
gibosa
Luna menguante
Lectura de la presión barométrica de las
últimas 12 horas
Presione el botón HISTORY ABS / REL 38 de forma repetida para leer
los valores de la presión barométrica de las últimas 12 horas.
0HR = presión barométrica actual
–1HR = presión barométrica una hora antes
–2HR = presión barométrica dos horas antes, etc.
77 US-ES
282650_aur_Funk-Wetterstation_Content_US.indd 77 14.02.17 14:19

Ajustar la indicación de presión del aire
El pronóstico de esta estación meteorológica se basa en el análisis del cambio de
la presión de aire.
La presión barométrica
soluta del aire. Conforme la presión del aire va disminuyendo con la altura sobre el
nivel del mar, el servicio meteorológico nacional siempre anuncia lo que se conoce
como presión del aire relativa. Esta presión del aire relativa se ajusta a la topografía del país para obtener valores comparables.
Usted puede ajustar la presión de aire de su estación meteorológica a la proporción
de su ubicación. Para hacerlo, tiene que ajustar en su estación meteorológica únicamente la presión del aire actual. Pregunte al servicio local de pronóstico del
tiempo la presión barométrica a nivel del mar o vea el valor actual en Internet.
Usted puede ajustar la estación meteorológica como sigue:
Mantenga presionado el botón HISTORY ABS / REL 38 durante 3 segundos.
Después de eso, presione el botón + o –
del aire absoluta y relativa.
Elija “Rel” y presione el botón HISTORY ABS / REL para confirmar. La indicación
de presión del aire parpadeará. Ahora puede elegir el valor correcto presionando el botón + o –.
Confirme su elección presionando el botón HISTORY ABS / REL. Su estación
meteorológica mostrará la presión del aire relativa.
78 US-ES
30
viene ajustada de fábrica en relación a la presión ab-
35, 36
, para cambiar entre presión
282650_aur_Funk-Wetterstation_Content_US.indd 78 14.02.17 14:19

Si desea que su estación meteorológica indique la presión del aire absoluta,
proceda como sigue:
Mantenga presionado el botón HISTORY ABS / REL durante 3 segundos.
Luego presione el botón + o –, para cambiar a presión del aire absoluta.
Confirme presionando el botón HISTORY ABS / REL.
Configurar el canal
La estación meteorológica recibe la señal del sensor exterior automáticamente después de haber hecho todas las configuraciones.
Nota: en caso de interferencia de un equipo cercano que transmita señales de
radio, el símbolo de humedad (exterior)
durante este tiempo. Seleccione un canal distinto para el sensor exterior presionando
el botón CH
37
en la estación meteorológica o el interruptor selector de canal 44
en el sensor exterior. Los datos correspondientes se muestras en la pantalla LC.
- 1: sensor exterior, canal 1
- 2: sensor exterior, canal 2
- 3: sensor exterior, canal 3
-
: cambio automático de canal
22
y temperatura exterior 25 parpadearán
79 US-ES
282650_aur_Funk-Wetterstation_Content_US.indd 79 14.02.17 14:19

Indicación de temperatura y tendencia
de temperatura
La temperatura interior 19 actual y la tendencia de temperatura (interior) 15 se
muestran en la pantalla LC.
Después de conectarse exitosamente con el sensor exterior, la estación meteorológica
puede mostrar la temperatura exterior
24
. Puede ver las siguientes indicaciones:
25
y la tendencia de temperatura (exterior)
La temperatura está aumentando.
La temperatura permanece constante.
La temperatura está bajando.
Indicación de humedad y tendencia de humedad
La tendencia de humedad actual (interior) 16 y la humedad actual (interior) 17 se
muestran en la pantalla LC.
El indicador COMFORT
80 US-ES
18
indica la humedad en tres categorías.
282650_aur_Funk-Wetterstation_Content_US.indd 80 14.02.17 14:19

Las siguientes categorías están disponibles:
DRY = Humedad < 40 %
COMFORT = Humedad 40–70 %, temperatura interior –4 a +149 °F
(20 °C–28 °C)
WET = Humedad > 70 %
Después de conectarse exitosamente con el sensor exterior, la estación meteoro
muestra la tendencia de humedad (exterior)
21
y la humedad (exterior) 22 en la
lógica
pantalla LC.
Indicación de la temperatura / humedad
máxima / mínima
La temperatura / humedad máxima / mínima se mide por primera vez después de
insertar las baterías en la estación meteorológica.
Los valores máximos y mínimos de temperatura, higrómetro y presión barométrica
se guardan automáticamente.
Si la estación meteorológica está en indicación de hora 7, presione el botón
35
+
para mostrar los valores máximos.
Presione el botón + dos veces para mostrar los valores mínimos.
81 US-ES
282650_aur_Funk-Wetterstation_Content_US.indd 81 14.02.17 14:19

Mantenga presionado el botón + durante 3 segundos para borrar los valores
máximos y mínimos almacenados.
Alarma de temperatura y alarma de helada
La alarma de temperatura es un pitido breve, que suena en cuanto la temperatura
exterior supera o está por debajo del rango de temperatura establecido. Siga los
siguientes procedimientos para configurar el rango de temperatura deseado.
Presione el – botón 36 para ir al modo de alarma de temperatura.
Mantenga presionado el botón – durante 3 segundos. La indicación de tempe-
ratura máxima parpadeará. Presione el botón + o – para configurar los valores.
Presione el botón MODE 34 para confirmar su configuración. La indicación
de temperatura mínima parpadeará. Presione el botón + o – para configurar
los valores.
Presione el botón MODE para confirmar su configuración.
82 US-ES
282650_aur_Funk-Wetterstation_Content_US.indd 82 14.02.17 14:19

Activar / desactivar la alarma de temperatura
y la alarma de helada
Si está activado más de un sensor exterior, presione el botón de canal 37 para
seleccionar uno.
Presione el botón – 36 de forma repetida para activar la alarma de tempera-
tura y la alarma de heladas.
Si la alarma de helada está activada, aparecerá el símbolo correspondiente
junto a la temperatura exterior. La señal de alarma suena a 30.2 ° F a 37.4 ° F
(–1 °C a + 3 °C).
Si la alarma de temperatura está activada, aparecerá el símbolo correspondiente
junto a la temperatura exterior. La señal de alarma suena en los valores establecidos.
Si la alarma de temperatura y la alarma de helada están activadas, aparecerán
ambos símbolos en la pantalla.
23
Retroiluminación
Presione el botón SNOOZE / LIGHT 33. La iluminación trasera se encenderá
durante 5 segundos.
83 US-ES
282650_aur_Funk-Wetterstation_Content_US.indd 83 14.02.17 14:19

Indicación del nivel de batería
La indicación del nivel de batería 20, 26 aparece en la pantalla LC de la estación
meteorológica’s pantalla LC si las baterías están casi agotadas. Asegúrese de reemplazar las baterías en cuanto sea posible (véase “Cambiar las baterías”).
Cambiar las baterías
Estación meteorológica:
Reemplace las baterías si la pantalla LC es ilegible o si se muestra la indicación de
20
batería
Retire la cubierta del compartimiento de las baterías en la parte trasera de la
Retire las baterías usadas.
Inserte 3 baterías nuevas tipo AA, 1.5 V.
Nota: asegúrese de que la polaridad es correcta al insertar las baterías. La
Cierre el compartimiento de las baterías.
Sensor exterior:
Reemplace las baterías si se muestra la indicación de batería
84 US-ES
.
estación meteorológica.
polaridad correcta se muestra dentro del compartimiento de baterías
26
.
40
.
282650_aur_Funk-Wetterstation_Content_US.indd 84 14.02.17 14:19

Retire la cubierta del compartimiento de las baterías de la parte trasera del
sensor exterior.
Retire las baterías usadas.
Inserte 2 baterías nuevas tipo AA, 1.5 V.
Nota: asegúrese de insertar las baterías con la polaridad correcta. La polari-
dad correcta se muestra dentro del compartimiento de baterías
45
.
Cierre el compartimiento de las baterías.
Resolución de problemas
Nota: este producto dispone de componentes electrónicos delicados. Esto significa
que podrían producirse interferencias si se coloca cerca de un objeto que transmite
señales de radiofrecuencia.
Si la pantalla indica un problema, aleje los objetos de la estación meteoroló-
gica o el sensor exterior o retire las baterías de la estación meteorológica o el
sensor exterior durante un periodo breve de tiempo y vuelva a colocarlas.
Los obstáculos como las paredes de concreto también pueden hacer que se vea afectada la recepción. En este caso, cambie la ubicación (p. ej. cerca de una ventana).
Tenga en cuenta que el sensor exterior siempre debe estar dentro de un radio de
máx. 1181 in (30 metros) (campo abierto) desde la estación base. El rango especificado es el rango de campo abierto y significa que no debe haber obstáculos
85 US-ES
282650_aur_Funk-Wetterstation_Content_US.indd 85 14.02.17 14:19

entre el sensor remoto y la estación base. Un “contacto visual” entre el sensor
remoto y la estación base suele mejorar la transmisión.
El frío (temperatura exterior debajo de 32 °F (0 °C)) puede reducir la potencia de
la batería del sensor exterior y, por tanto, afectar negativamente la transmisión de
radio. Otro factor que puede provocar una interferencia son las baterías agotadas
o a punto de agotarse en el sensor exterior. Reemplácelas con unas nuevas.
Limpieza y mantenimiento
Por ningún motivo utilice líquidos o detergentes, pues éstos pueden dañar el
producto.
Limpie solo la parte externa del producto con un trapo suave y seco.
Por ningún motivo rocíe el sensor exterior, p. ej. con una manguera de jardín.
El sensor exterior solo está protegido de la lluvia que cae desde arriba.
Eliminación
Deshágase del empaque mediante las instalaciones de reciclaje locales
y de acuerdo con las regulaciones federales, estatales y locales.
86 US-ES
282650_aur_Funk-Wetterstation_Content_US.indd 86 14.02.17 14:19

Siga las instrucciones en el empaque en relación a la separación de ba-
b
sura, que se indican mediante abreviaturas (a) y números (b), significado:
a
1–7: plásticos / 20–22: papel y cartón / 80–98: materiales compuestos.
Contacte a las autoridades locales de eliminación de residuos
para obtener información adicional sobre cómo deshacerse del
producto usado.
Para ayudar a proteger el medio ambiente, elimine el producto adecuadamente
al final de su vida útil, no lo tire en la basura. Puede obtener información de sus
autoridades locales sobre los sitios de recolección y horarios de atención.
¡La eliminación inadecuada de las baterías puede causar
daños ambientales!
Las baterías no deben ser eliminadas con los desechos del hogar. Éstas pueden
contener metales pesados tóxicos y requieren ser tratadas como desechos especiales. Los símbolos químicos de los metales pesados son: Cd = Cadmio, HG =
Mercurio, Pb = Plomo. Por esta razón es importante eliminar las baterías usadas
en un punto de recolección local.
87 US-ES
282650_aur_Funk-Wetterstation_Content_US.indd 87 14.02.17 14:19

Garantía
¿Lo que cubre la presente garantía?
La garantía incluye:
· Daños, quebraduras o incapacidad para funcionar debido a defectos.
· Daños que no se expliquen por el desgaste propio del uso o al seguir las instruc-
ciones de seguridad y mantención incluidas en el manual para el usuario.
¿Lo que no cubre esta garantía?
La garantía no cubre daños causados por:
· El desgaste propio del uso del producto, incluidas las partes frágiles (como inte-
rruptores, piezas de vidrio, etc.).
· Uso o transporte no indicado del producto.
· Desatención a las instrucciones de seguridad y mantención.
· Accidentes o causas de fuerza mayor (e.g. relámpagos, incendio, inundación, etc.).
· Falsificación o alteración del producto (retirar la cubierta, tornillos, etc.).
¿Período de cobertura y resolución de la garantía?
La garantía es válida por 3 número de años a partir de la fecha de compra. La
empresa, según lo estime conveniente, devolverá el dinero o repondrá el producto.
La empresa no:
· Dará inicio a un nuevo período de garantía al hacerse el cambio del producto.
· Realizará reparación del producto.
88 US-ES
282650_aur_Funk-Wetterstation_Content_US.indd 88 14.02.17 14:19

¿Cómo se tramita la garantía?
Recomendamos que primero:
· Llame al Servicio de atención al cliente al 1 (844) 543-5872.
· Visite el Portal de atención al cliente en www.lidl.com / contact-us
· Visite una de nuestras tiendas LIDL en caso de cualquier inquietud.
A fin de acelerar el trámite de la garantía, tenga a bien contar con lo siguiente:
· Recibo de venta original que incluya la fecha de compra.
· Producto y manual en su empaque original.
· Descripción del problema.
¿Qué debe hacer usted para mantener la garantía vigente?
· Guardar el recibo original.
· Seguir todas las instrucciones para el uso del producto.
· No realizar ninguna reparación ni alteración al producto.
¿De qué manera influyen las leyes estatales con esta garantía?
Se acatará cualquier ley estatal que contradiga o modifique la presente garantía
en beneficio del cliente.
89 US-ES
282650_aur_Funk-Wetterstation_Content_US.indd 89 14.02.17 14:19
 Loading...