


LCU-15
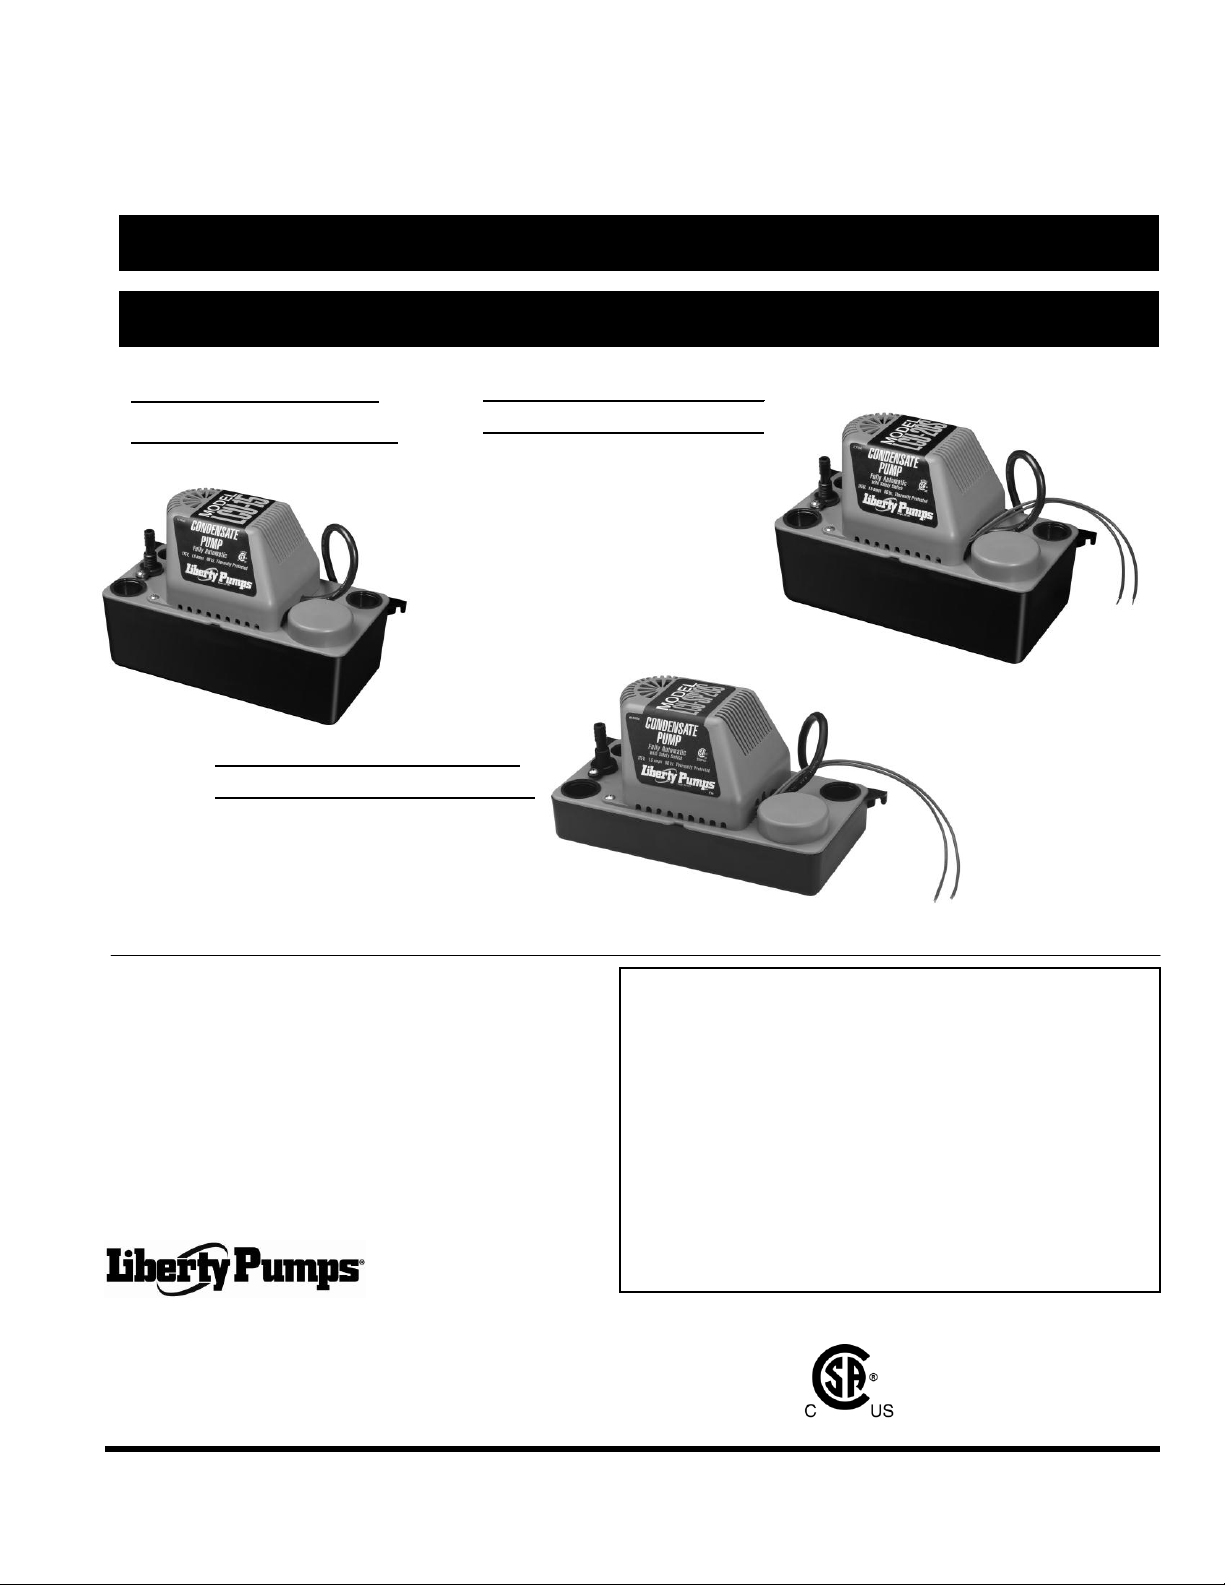
Model LCU-SP20S (115V)
Model LCU-SP220S (230V)
(Both Shallow Pan Design with Safety Switch)
Installation Manual
7196000F
LCU-Series Condensate Pumps
Model LCU-20S (115V)
Model LCU220S (230V)
(Both with Safety Switch)
Contents
1.) General Information
2.) Installation
3.) Troubleshooting
4.) Maintenance
Model LCU-15 (115V)
Model LCU-15S (115V)
(Safety switch)
IMPORTANT:
Prior to installation, record Model, Serial Number, and
Code Number from pump nameplate for future reference.
MODEL ________________________
SERIAL ______________________
CODE ______________________
INSTALLATION
DATE _______________________
7000 Apple Tree Avenue
Bergen, NY 14416
Phone: (800) 543-2550
Fax: (585) 494-1839
www.libertypumps.com
*Models ending with a “T” suffix include 20’ of clear discharge tubing.
©Copyright 2013 Liberty Pumps Inc. All rights reserved

1. General Information – All Models
2. Installation of the Pump
Before Installation, read the following instructions carefully. Each Liberty pump is individually factory tested to
assure proper performance. By closely following these instructions, potential operating problems should be
eliminated, providing years of trouble-free service.
Risk of electric shock. Always disconnect the pump from the power source before handling or making
adjustments.
The electrical connections and wiring for a pump installation should only be made by qualified personnel.
This pump is supplied with a grounding conductor and grounding-type attachment plug. To reduce the risk of
electric shock, be certain that it is connected only to a properly grounded, grounding-type 15 Amp receptacle.
Always wear rubber boots when water is on the floor and you must unplug the pump.
DO NOT bypass grounding wires or remove ground prong from attachment plugs.
DO NOT use an extension cord.
Always use a replacement power cord assembly of the same length and type as originally installed on the
Liberty product. Using a cord of improper gauge or length may lead to exceeding the electrical rating of the
cord and could result in death, injury, fire or other significant failure.
This pump requires a separate, properly fused and grounded branch circuit. Make sure the power source is
properly sized for the voltage and amperage requirements of the pump, as noted on the nameplate.
The electrical outlet shall be within the length limitations of the pump power cord, and at least 4 feet above floor
level to minimize possible hazards from flood conditions.
The installation must be in accordance with the National Electric Code, Uniform Plumbing Code, International
Plumbing Code, as well as all applicable local codes and ordinances.
DO NOT use this product for flammable or corrosive liquid.
DO NOT use this product in applications where human contact with the pumped fluid is common (such as
swimming pools, fountains, etc.)
NEVER dispose of materials such as paint thinner or other chemicals down drains, as they can chemically
attack and damage pump components, potentially causing product malfunction or failure.
DO NOT use pumps in water over 150F (65C).
DO NOT expose pumps or discharge to freezing temperatures.
DO NOT use pumps in mud, sand, cement, oil or chemicals.
DO NOT modify the pump in any way.
DO NOT lift or carry pump by power cord.
DO NOT remove any tags from pump or cords.
If pump is installed during construction before power is available, it must be protected from the environment to
prevent water from entering through the cord plug end, etc.
A. Select a location that is level and below the condensate pan drain. The unit may be mounted on a wall by
using the mounting tabs on the tank, which are 10-9/16” apart. A condensate neutralizer may be required
by some codes to keep condensate pH in an acceptable range for discharge into drains.
B. Connect the drain pan to one of the 3 intake holes. Use vinyl tubing, PVC, or any other suitable material.
Be sure the tubing or pipe extends into the inlet of the tank by at least 1". The discharge connection to the
check valve may be made with 3/8” vinyl tubing secured by a hose clamp (not included), or the barb may
be removed by sawing so that threaded fittings may be attached. The thread is ¼” NPT. Connect the pipe
or the discharge hose to the discharge of the pump. HAND-TIGHTEN ONLY. Over-tightening may cause
©Copyright 2013 Liberty Pumps Inc. All rights reserved
2

the pump housing to crack. Once the discharge tubing has been extended to the required height it should
MODEL MAX. RECOMMENDED LIFT MAX. LIFT
LCU-15, -15S 12’ 15’
LCU-20S 17’ 20’
LCU220S 17’ 20’
LCU-SP20, -SP220S 17’ 20’
3. Troubleshooting
be slanted downward, if possible, to assist in drainage. NOTE: For best results, do not extend
discharge tubing beyond 12' vertically for the LCU-15 and 17' for the LCU-20S, LCU220S,
LCU-SP20S, or LCU-SP220S (Refer to performance chart).
C. The safety switch leads (all Models except LCU-15) should be connected to a class 2 low voltage circuit
(not to exceed 30 volts). Using this feature may prevent damage from condensation overflowing if the
discharge becomes blocked or if the pump fails. The leads may be connected in series with the low voltage
thermostat circuit so as to shut down the heating/air-conditioning system if the water level in the pump tank
rises beyond normal, or they may be connected to an external alarm.
D. To provide maximum mounting positions the tank cover may be removed and rotated 180° so that the
check valve will be on the opposite side of the unit. To remove the lid from the tank, insert a screwdriver in
the slot and pry the tank outward, while lifting the lid. After removing and rotating, be sure the lid snaps
back into place firmly.
E. When all mounting and water connections are secure, connect the unit to an electrical supply.
F. To ensure proper installation, test the unit by adding water to the tank until the pump activates. Be sure the
water discharges properly. Finally, check the connections for leakage and proper discharge pipe routing.
Always disconnect the pump from its power source before handling. This guide is designed to
help identify reasons for potential operating problems. It is not a service guide. Dismantling the pump voids the
warranty. Servicing the pump other than simple cleaning of pump inlet or impeller should be referred to the factory
or its authorized service centers. NOTE: The manufacturer assumes no responsibility for damage or injury due to
disassembly in the field.
PUMP DOES NOT RUN OR HUM
1. Line circuit breaker may be off, tripped or loose. Have a certified electrician check fuse or breaker.
2. Water level in tank may be too low to activate switch. Add more water to tank.
3. Plug on power cord may not be making contact in receptacle. Check security and connection.
4. Float may be obstructed. Make sure float is free and not interfering with the inlet pipe or any other obstruction.
5. Pump is installed on a non-level surface.
6. Consult factory.
PUMP RUNS OR HUMS BUT DOES NOT DELIVER WATER
1. Check valve may be installed incorrectly or is defective. Check to make sure it’s installed properly.
2. Examine discharge tubing for any kinks or blockages. Also, be certain that intake tubing or pipe is not
obstructed.
3. Discharge line may be blocked or frozen. Check to see if line passes through cold areas or is blocked.
4. Vertical lift is beyond pumps capability. See chart below for your pump’s maximum lift capability.
5. Inlet of pump is plugged or the impeller is jammed. Remove the pump screen and clean inlet and impeller.
NOTE: At the pump’s maximum lift there will be no flow.
©Copyright 2013 Liberty Pumps Inc. All rights reserved
3

PUMP RUNS AND REMOVES WATER BUT DOES NOT SHUT OFF
3 Year Limited Warranty
4. Maintenance
1. Float is stuck in the “on” position. Check to make sure the float is free to move up and down without
obstruction.
2. Pump is installed on a non-level surface. Level the pump.
3. Switch is defective. Consult factory.
PUMP RUNS BUT DELIVERS VERY LITTLE WATER
1. Vertical lift is approaching the pump’s maximum lift capability. Refer to the above maximum lift chart.
2. Pump’s inlet is partially blocked. Check to make sure the inlet is clear of debris.
3. Discharge line is partially blocked. Check line for blockage.
4. Check valve is not opening all the way. Check for defective or blocked check valve.
CIRCUIT BREAKER TRIPS OR FUSE BLOWS WHEN PUMP STARTS
1. Fuse or breaker size is too small. A 15-amp breaker should be used.
2. Other major appliances are on the same circuit. Pump should be on its own circuit.
3. Pump is connected to an extension cord or wiring is inadequate. Have a certified electrician check for proper
wiring.
4. Defective motor or switch. Consult factory.
All Liberty pumps are designed and manufactured to ensure long, trouble-free service. However, if the pump is
used in a dirty environment or is pumping something other than clear condensate water, the tank should be
removed and cleaned periodically with soap and water.
Pump models have sealed permanently lubricated bearings and require no additional lubrication. Pour enough
water into the tank to activate the pump periodically when not normally in use.
If unit is mounted in an unheated area that is exposed to temperatures below freezing, the unit and lines must be
drained to prevent damage to the pump.
NOTE: Liberty Pumps, Inc. assumes no responsibility for damage or injury due to disassembly in the field. Disassembly, other
than at Liberty Pumps or its authorized service centers, automatically voids warranty.
Liberty Pumps, Inc. warrants that pumps of its manufacture are free from all factory defects in material and workmanship for a
period of 3 years from the date of purchase. The date of purchase shall be determined by a dated sales receipt noting the
model and serial number of the pump. The dated sales receipt must accompany the returned pump if the date of return is more
than 3 years from the "CODE" (date of manufacture) number noted on the pump nameplate.
The manufacturer's obligation under this Warranty shall be limited to the repair or replacement of any parts found by the
manufacturer to be defective, provided the part or assembly is returned freight prepaid to the manufacturer or its authorized
service center, and provided that none of the following warranty-voiding characteristics are evident.
The manufacturer shall not be liable under this Warranty if the product has not been properly installed; if it has been
disassembled, modified, abused or tampered with; if the electrical cord has been cut, damaged or spliced; if the pump
discharge has been reduced in size; if the pump has been used in water temperatures above the advertised rating, or water
containing sand, lime, cement, gravel or other abrasives; if the product has been used to pump chemicals or hydrocarbons; if a
non-submersible motor has been subjected to excessive moisture; or if the label bearing the serial, model and code number has
been removed. Liberty Pumps, Inc. shall not be liable for any loss, damage or expenses resulting from installation or use of its
products, or for consequential damages, including costs of removal, reinstallation or transportation.
There is no other express warranty. All implied warranties, including those of merchantability and fitness for a particular
purpose, are limited to three years from the date of purchase.
This Warranty contains the exclusive remedy of the purchaser, and, where permitted, liability for consequential or incidental
damages under any and all warranties are excluded.
©Copyright 2013 Liberty Pumps Inc. All rights reserved
4
 Loading...