


LT2223 pwC Flat Panel Monitor User's Guide
?

Product numbers
?
First Edition(December 2012)
© Copyright Lenovo 2012.
All rights reserved.
LENOVO products, data, computer software, and services have been developed exclusively at private expense and are sold to governmental entities as commercial items as defined by 48 C.F.R. 2.101 with limited and restricted rights to use, reproduction and disclosure.
LIMITED AND RESTRICTED RIGHTS NOTICE: If products, data, computer software, or services are delivered pursuant a General Services Administration "GSA" contract, use, reproduction, or disclosure is subject to restrictions set forth in Contract No. GS-35F-05925.
© Copyright Lenovo 2012. |
i |

Safety information
General Safety guidelines
For tips to help you use your computer safety, go to:
http://www.lenovo.com/safety
Before installing this product, read the Safety Information.


 í
í 


 í
í 


 í
í
© Copyright Lenovo 2012. |
iii |
Chapter 1.Getting started
This User’s Guide contains detailed information on the ThinkVision®


 Flat Panel Monitor. For a quick over view, please see the Setup Poster that was shipped with your monitor.
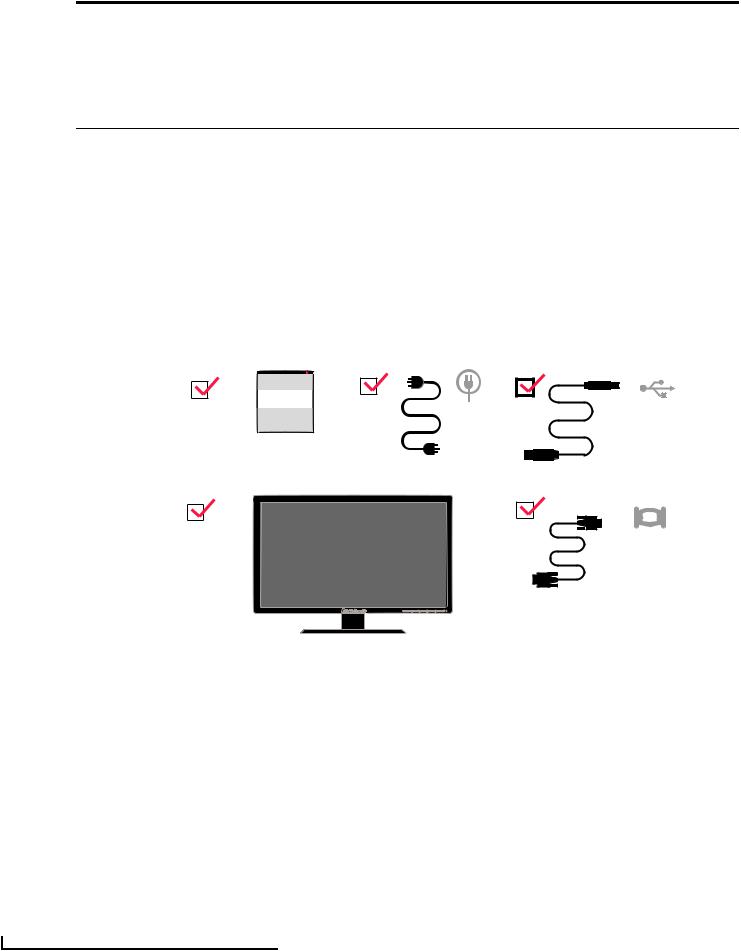
Shipping contents
The product package should include the following items:
·Information flyer
·ThinkVision 


 Flat?Panel Monitor
·Power Cord
·Analog Signal Cable
·USB Cable
Note: To attach a VESA mount, please see “Detaching the monitor stand” on page 2-10.
© CopyrightLenovo2012. |
1-1 |
© |
|
Product overview
This section will provide information on adjusting monitor positions, setting user controls, and using the cable lock slot.
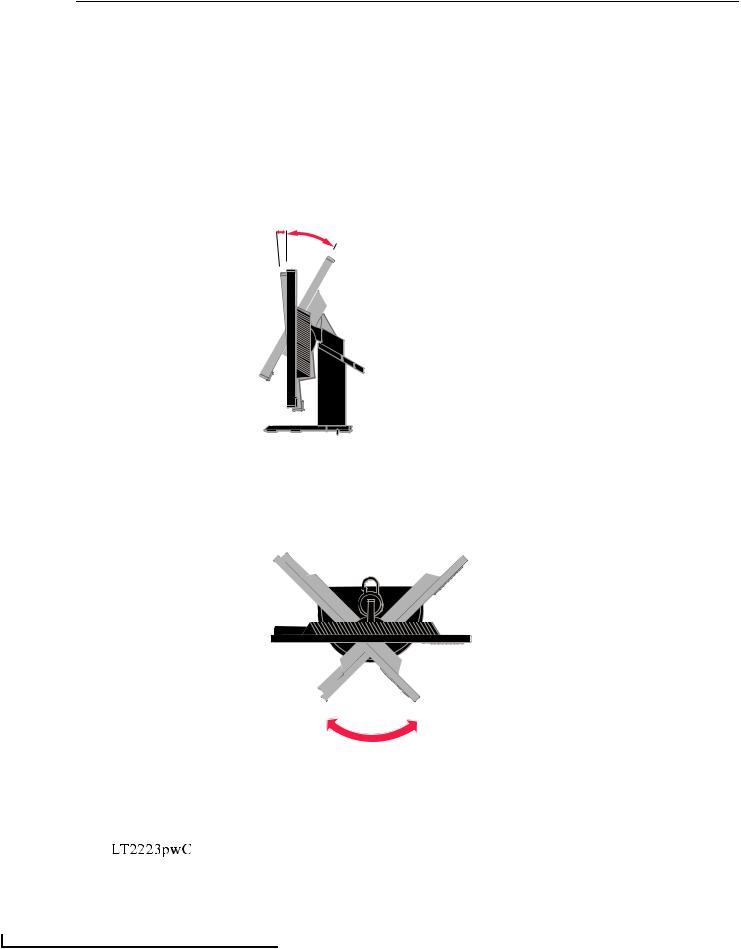
Types of adjustments
Tilt
Please see the illustration below for an example of the tilt range.
5°
0°
30°
Swivel
With the built-in pedestal, you can tilt and swivel the monitor for the most comfortable viewing angle.
-45o |
45o |
1-2 |
Flat Panel Monitor User’s Guide |
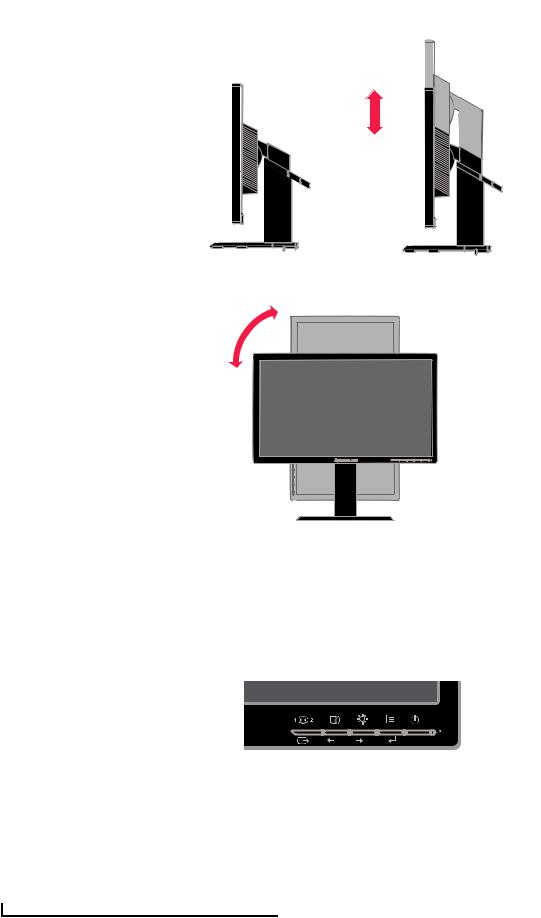
Height Adjustment
Hold the monitor pull up on both sides, adjust the reasonable height of the monitor.
110mm
Monitor Pivot
90 °
-Adjust height to the top position before rotation the monitor.
-Rotate clockwise until the monitor stops at 90°.
User controls
Your monitor has controls on the front which are used to adjust the display.
For information on how to use these controls, please see “Adjusting your monitor image” on page 2-3.
Chapter 1. Getting started |
1-3 |
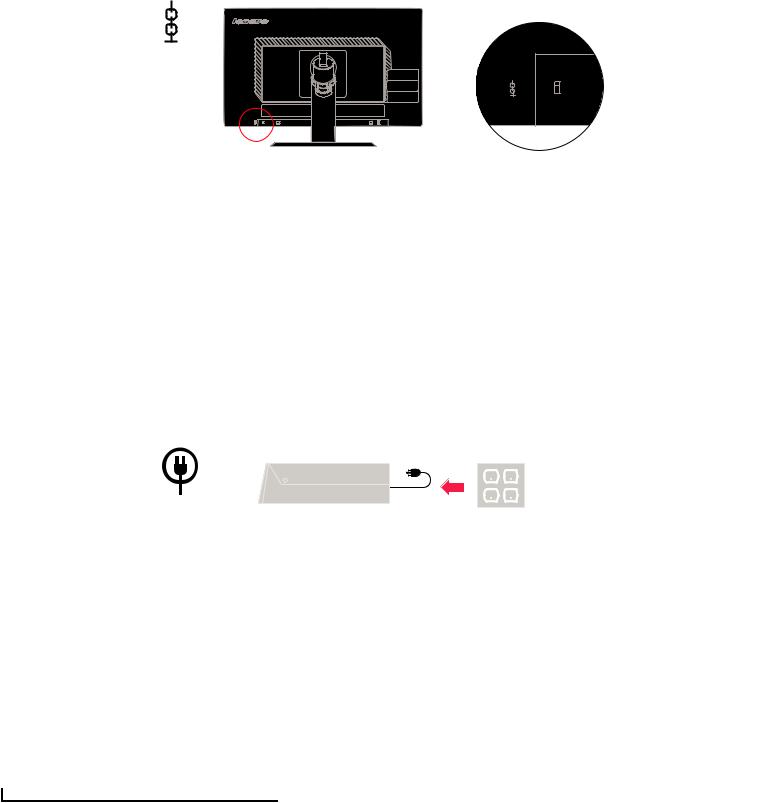
Cable lock slot
Your monitor is equipped with a cable lock slot located on the rear of your monitor (in the lower left corner). Please follow the instructions that came with the cable lock to attach it.
Setting up your monitor
This section provides information to help you set up your monitor.
Connecting and turning on your monitor
Note:Be sure to read the Safety Information located in the information flyer before carrying out this procedure.
Power off your computer and all attached devices, and unplug the computer power cord.
1-4 


 Flat Panel Monitor User’s Guide
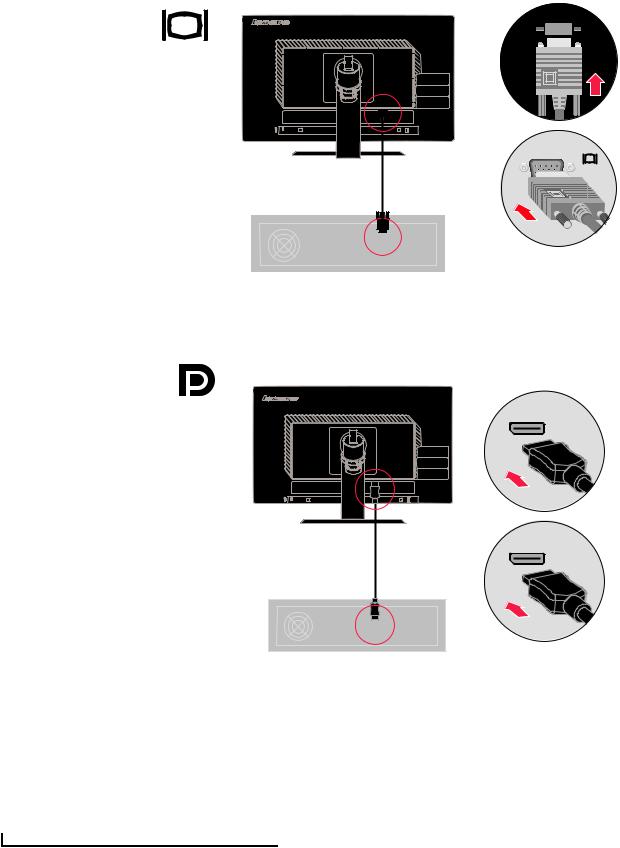
Connect the analog signal cable to the D-SUB connector of the monitor and the other end on the back of the computer.
Connect one end of the DP cable to the DP connector on the back of the computer, and the other end to the DP connector on the monitor.
Chapter 1. Getting started |
1- 5 |
Plug the monitor power cord and the computer cord into grounded electrical outlets.
Note: A certified power supply cord has to be used with this equipment. The relevant national installation and/or equipment regulations shall be considered. A certified
power supply cord not lighter than ordinary polyvinyl chloride flexible cord
( - . 2
according to IEC 60227 designation H05VV F 3G 0 75mm or H05VVH2-F2 3G 0.75mm2) shall be used. Alternative a flexible cord be of synthetic rubber according to IEC 60245 (designation H05RR-F 3G 0.75mm2)shall be used.
Rotate the head of the monitor into portrait .view
Chapter 1.Getting started |
1 7- |
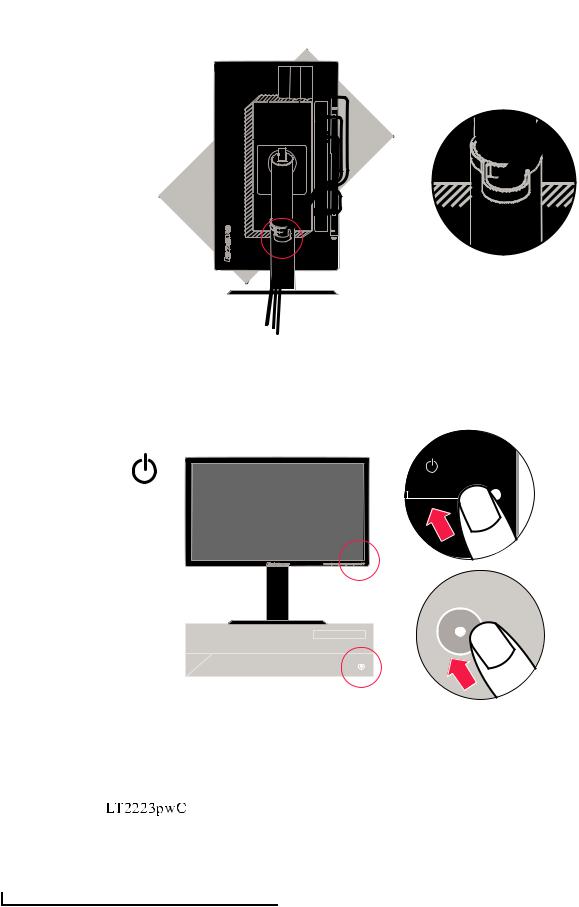
Open the Main Clip and place |
the cables through the Main Clip. |
Power on the monitor and the computer.
1-8 |
Flat Panel Monitor Users Guide |
Install the monitor driver, download the driver of the corresponding monitor model from the Lenovo Website: http://support.lenovo.com/LT2223pwC, and then click on the driver and install it following the on-screen instructions.
Registering your option
Thank you for purchasing this Lenovo® product. Please take a few moments to register your product and provide us with information that will help Lenovo to better serve you in the future. Your feedback is valuable to us in developing products and services that are important to you, as well as in developing better ways to communicate with you. Register your option on the followingWeb site:
http://www.lenovo.com/register
Lenovo will send you information and updates on your registered product unless you indicate on the Web site questionnaire that you do not want to receive further information.
Chapter 1.Getting started |
1 9- |
 Loading...