

Laplink LAPLINK FOR WINDOWS 3.1 User Manual

Installation and
User’s Guide
16-bit, for Windows 3.1

ii
Copyright Notice
No partof this publication may be reproduced, transmitted, transcribed, stored in a retrieval system, or translated into any human or
computer language, in any form or by any means, without the express
written permission of Traveling Software,Inc.,18702 North Creek Parkway, Bothell, Washington, 98011, U.S.A.
T rademarks
Traveling Software, the Traveling Software logo, LapLink, SpeedSync
and SmartXchange are trademarks or registered trademarks of
Traveling Software, Inc.
AirShare is a registered trademark of National Semiconductor Corporation.
Other brand and product names are trademarks or registered trademarks of
their respective holders.
Patents
SpeedSync®U.S. Patent Number 5,446,888
LapLink
®
for Windows
®
© 1995-96 by Traveling Software,Inc. All rightsreserved
18702North Creek Parkway
Bothell, WA 98011 U.S.A.
LapLink
®
for Windows®Installation and User’s Guide
© 1996Traveling Software, Inc.
Printed in U.S.A.
MN-LW600A-XX-US

Contents
Chapter 1 Introducing LapLink for Windows
WhatisLapLinkforWindows?...2
WhatyoucandoinLapLinkforWindows...4
RequirementsforusingLapLinkforWindows...6
SettingupLapLinkforWindows...8
AnsweringtheSetupquestions...10
Post installation: Customizing and uninstalling ...12
Chapter 2 Making connections and opening services
Connectingovermodems...16
Creatingdialingprefixesandsuffixes...18
Connectingoveranetwork...20
Connectingoveracable...22
AttachingtheLapLinkcable...24
Connectingoverwireless...26
RemoteInstalltoacomputerwithoutLapLink...28
RemoteInstalloveraserialcable...30
Chapter 3 Using the Services: Remote Control, File
Transfer, and Chat
Copyingandmovingfilesanddirectories—Overview...34
Opening and managing File T ransfer windows...36
NavigatingthroughFileTransferwindows...38
Selectingitems...40
Copyingormovingusingdraganddrop...42
Copyingormovingusingcommands...44
SynchronizingdirectorieswithSmartXchange...46
Replacingonedirectorywithanother:CloneDirectory...48
Speeding file transfers with SpeedSync ...50
Controlling a host computer ...52
Viewingthehost...54
Customizingkeyboardcontrol...56
HostingaRemoteControlsession...58
UsingDOSRemoteControl...60
PreparingahostforDOSRemoteControl...62
Chattingwitharemoteuser...64
CopyingtexttoandfromaChatwindow...66
iii

iv
Chapter 4 Securing your computer and using the
Address Book
SecurityandtheAddressBook—Overview...70
Usingthesecuritysystem...72
Settinguppasswordprotection...74
Settingupcallbackprotection...76
UsingtheAddressBook...78
Chapter 5 Working with ports and troubleshooting
Enabling and disabling ports ...82
Configuringcableandwirelessports...84
Configuringaserialportforamodem—Thebasics...86
Advanced modem configuration ...89
Creatingorcustomizingamodem’ssettings...91
Troubleshootingmodemconnections...95
Troubleshootingcableconnections...100
Troubleshootingnetworkconnections...102
TroubleshootingAirSharewirelessconnections...105
TroubleshootingRemoteInstall...107
Troubleshootingscreendisplays...109
UsingXircomadapters...110
Index . . . 111

Introducing LapLink
1
for Windows
Contents
WhatisLapLinkforWindows?................... 2
WhatyoucandoinLapLinkforWindows ............. 4
RequirementsforusingLapLinkforWindows ........... 6
SettingupLapLinkforWindows.................. 8
AnsweringtheSetupquestions .................10
Post installation: Customizing and uninstalling . . . . . . . . . . 12

2 Chapter 1
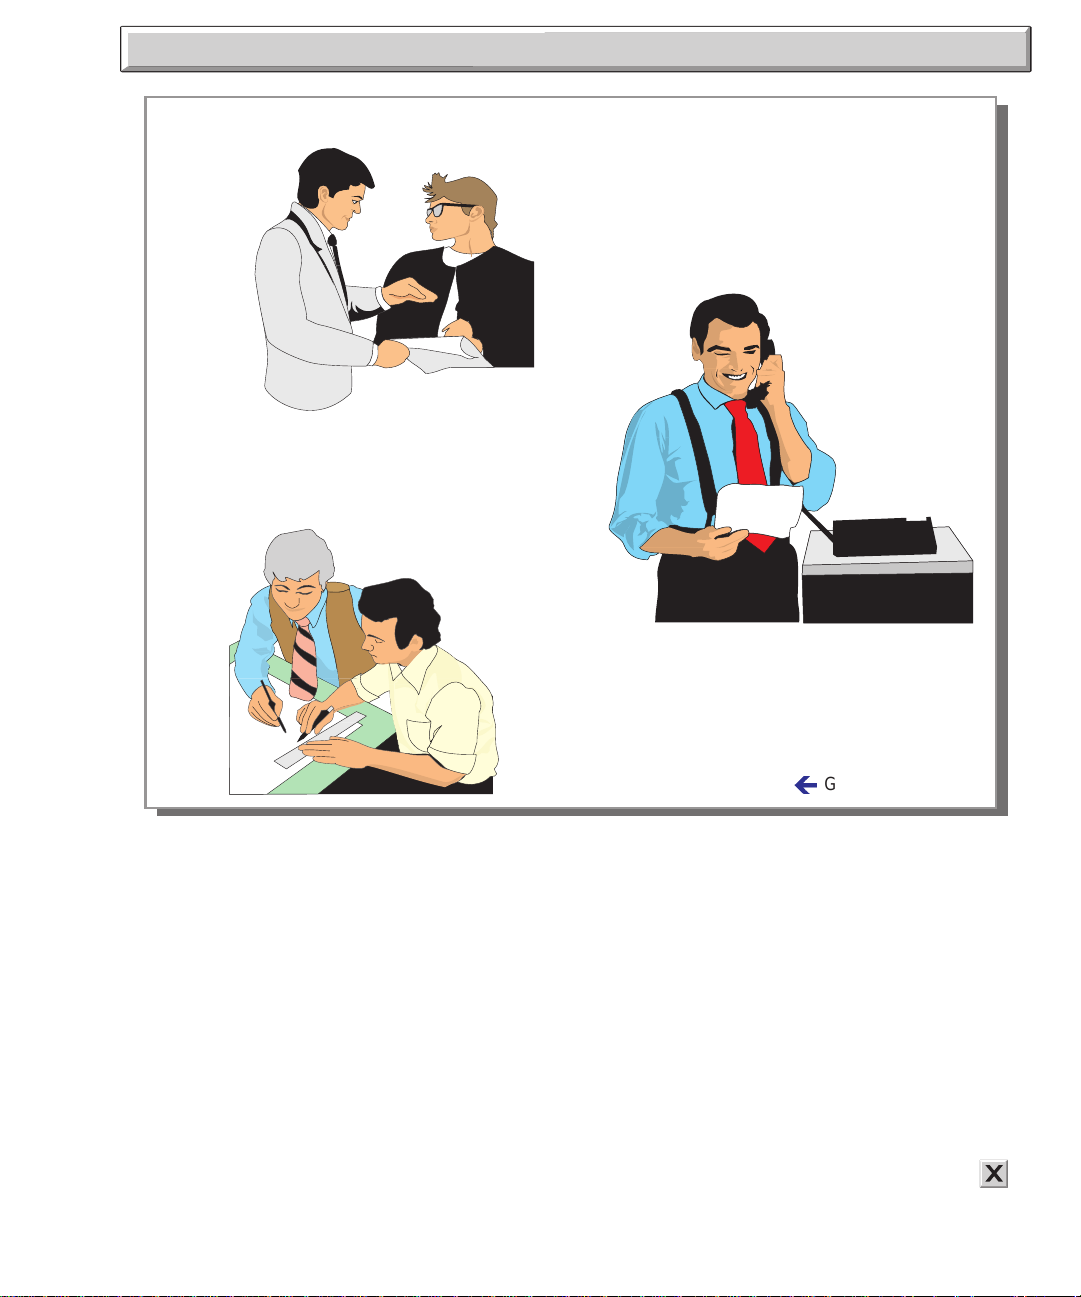
What is LapLink for Windows?
apLinkforWindowsisanintegratedpackageofservicesforcommunicatingwithonecomputer,
L
or several computers at the same time. Whether you’re using a modem, network, wireless
device, or cables, you can connect with other computers that are also using LapLink. You can
transferfilesbetweenPCs, when you’rein the officeor when you’re on theroad. Youcan use files
and programs on your office PC while you’re on the road. You can even “chat”with someoneat
your office PC while you transfer or work on office files from a remotelocation.
Go to illustration
In this manual, “Wireless” refersto AirShare
Radio Modules. The
use of these modules is
restricted in some countries. Wireless connections can also be made
with other devices.To
connect with a cellular
modem, use Connect
over Modem. To connect with a wireless
LAN adapter, use Connect over Network.
è
LapLink for Windows is Traveling Software’snew integrated software
packagefor communicating with other computers.
Connect as you want
Using a modem, network,wireless device,or cable,you can connect
with other computers using the same device. In one session,you can
connectwith several PCs, using a variety of these devices,limited
mainly by the number of devices you can put on your PC.
Different situations call for specific devices.Cablesare better for short
distances. Wireless devices work well when “docking”your laptop to
your desktop PC. Networks make it easier to connect with many different PCs in your company. Modems work wellat any time whenyou
can use a phone line to connect—when you’re at home, on the road,
or you’re communicating with someone in another company.
Using LapLink’s services
LapLink’s services—File Transfer, Remote Control,and Chat—offer
three ways to communicate with other PCs, no matter what device
you use. You can selectone or more services as you connect, and add
other services as you need them. In one session, you can use different
services simultaneously or at different times,on one or more PCs.
◆ With File Transfer, you can moveor copyfiles between PCs. Trans-
ferring files becomes easier to manage, since you can synchronize
directories on the two PCs.
Traveling Software’s new SpeedSync™ technology makes updating
filesfasterbecausefiles are compared, and only changes—not entire files—are transferred. A comprehensive security system protects
your valuabledata at all times.

Introducing LapLink for Windows 3
Welcometo LapLinkfor Windows
This Remote Control win-
dow displays the screen
of one of the remote
computers.
YoucanuseRemoteCon-
trol as a window within
the LapLink workplace (as
shown here) or as a full-
screen display.
◆ With Remote Control, you control another PC as though you were
sitting at that PC, using its keyboard, mouse and programs while
looking at its screen. Whether your PC is controlling or being controlled, you have the same setupand startup procedures.
◆ With Chat, you can “talk” with someone at the other PC, exchang-
ing messages in a written conversation. When you have only one
phone line, you can use your modem to connect to the remote PC
for File Transfer or Remote Control, using Chat to talk to the person
at the other end. Chat is especiallyhelpfulfor collaborative writing
and exchanging ideas while working on the same PC from a distance.
This computer has simultaneous connections to
two computers. File
Transfer and Remote
Control services are in
use.
Go to topic summary
ç

4 Chapter 1
What you can do in LapLink for Windows
apLink for Windows gives you three services for working with other PCs. Use File Transfer to
L
transfer filesbetween computers.UseRemoteControl toworkonanothercomputer.UseChat
to talk with someone using another computer. In one session, you can change from one service
to another, making LapLink for Windows idealfor troubleshooting PCs at remote locations or for
working on your office computer while you’re on the road. Features like SpeedSync and the
Address Book save you time and simplify your work.
Go to illustration
è
Choosing the right service for the job you need to do is simple when
you’reusing LapLink for Windows.You have three services to choose
from: File Transfer , Remote Control and Chat. Being familiar with their
distinctions makes choosing the right serviceeasier.
LapLinkfor Windowsis versatile,designedspecifically so you can use
services when you want, as you want. Use one serviceat a time, or all
services at once. Use one service when connecting to the firstremote
PC; use a different servicewhen connecting to anotherPC.
T ransferring files between PCs?
Whetheryou’rehundredsof miles away or in the same room, use the
File T ransfer service to transfer files between PCs. You can even transfer
filesbetweentwo other PCs,using your PC as an intermediary.
Streamline file transfersby taking advantage of LapLink’s wide variety
of SyncTools. Using SmartXchange, you can synchronize files and directories on two PCs.
Working on a remote PC?
Using the Remote Control service,you can operate a remote PC, driving it from your PC’ skeyboard and mouse. Y oucan use the remote
PC’s applications and network connections.
Since all the work you do is actually performed on the remote PC, Remote
Control is especially helpful to laptop owners who can’t use their office
PC’sprograms on their laptop. Remote Control is also helpful when
you’re providing technical support from a distance or telecommuting.
Sending and receiving messages?
Use the Chat service to hold a two-way conversation with someone at
another PC. You can simply “talk,” or combine this service with Remote Control or File T ransfer to exchange messages and files, and run
programs. Combining Chat with Remote Control makes customer support and training easier.
Introducing LapLink for Windows 5
Choosing services for different tasks
Transferring files from one computer to another is easy with LapLink for Windows. You
can copy, move, delete, and even synchronize
your files and directories.
Chatting with a remote user is like talking
over the telephone, except you can use one
phone line to transfer files and remote control,
whileyouchat.
Controlling another computer helps you
work on your own PC or someone else’s computerfroma distance.Combine withChatto
collaborate or instruct.
Saving time and protecting your PC
◆ Connecting to another PC becomes easier with the AddressBook.
Just select the name of a PC you’ve added to your Address Book,
and you automatically connect.
◆ You can set up your security system to protect your files by naming
thosewho you allow to connectwith your PC. You can also set
which servicesthese people can use on your PC.
◆ One of the greatest timesaversin LapLink for Windows is Speed-
Sync,especially if you’re using slower devices like modems. SpeedSync updates changes to files, rather than copying entire files.
Overalltimesfor transferring files can be drastically cut.
Go to topic summary
ç

6 Chapter 1
Requirements for using LapLink for Windows
efore you begin setting up LapLink for Windows, make sure you have the hardware and
B
softwareyouneedtousetheprogram.DependingonhowyouwillconnecttootherPCs—over
modem, Novell network, wireless or cable—you will need specific components. If LapLink for
Windows is already installed on your computer, skip to Chapter 2 “Making connections and
opening services.”
Go to illustration
In this manual, “Wireless” refersto AirShare
Radio Modules. The
use of these modules is
restricted in some countries. Wireless connections can also be made
with other devices.To
connect with a cellular
modem, use Connect
over Modem. To connect with a wireless
LAN adapter, use Connect over Network.
è
General Requirements for each PC
◆ MS-DOS or PC-DOS3.3 or later (5.0 or later recommended)
◆ Microsoft Windows 3.1 or Microsoft Windows for Workgroups
(386 enhanced mode required)
◆ Intel or compatible 386 or better
◆ 4MB RAM (8MB recommended)
◆ 6MB hard diskspace for complete installation
◆ VGA monitor (or betterrecommended)
Requirements for modem communication
◆ Hayes-compatible 2400 bps (9600 bps or higher recommended)
◆ One RS-232 serial port on eachPC (external modems)
Requirements for network communication
◆ Novell NetWare shell version 3.26 or higher, or
◆ NovellPersonalNetWare 1.0 or higher, or
◆ Microsoft Windows for Workgroups 3.xwith IPX
Requirements for wireless communication
◆ AirShare modules
◆ One RS-232 serial port on eachPC
Requirements for cable communication
◆ LapLink cable
◆ One RS-232 serial port or parallel (printer) port on each PC
Requirements for Remote Control DOS host (optional)
◆ 60K DOS conventional RAM free for minimum (modem only)
installation

Introducing LapLink for Windows 7
Choosing your connection type
Connectbywireless
Connect by network
Connect by cable
Connect by modem
Tips for checking requirements
To determine the freememory availablein Windows, choose About
✓
ProgramManagerfrom the Windows Help menu.
To determine the mode you’re running in Windows, choose About
✓
ProgramManagerfrom the Windows Help menu. Youshould be
running Windows in 386 Enhanced Mode.
Go to topic summary
ç
Set up your version of Windows for network communications if
✓
you’regoing to connect using the network. If LapLink “locks up”
after you start Microsoft Windows for Workgroups, ask your network administrator to update yourworkstation’sdrivers as LapLink
requires the mostcurrentdrivers.

8 Chapter 1
Setting up LapLink for Windows
efore you can connect to other computers, you need to install the LapLink for Windows
B
software. To install the software, choose Run from the File menu. Insert the Setup disk and
type A:\SETUP. You will be asked to make some choices as the Setup program runs. After you’re
doneinstalling,startLapLinkforWindowsbydouble-clickingtheprogram’s iconfoundinLapLink’s
program group. To quit, choose Exit from the File menu.
Go to illustration
è
Installing the software
Beforeyou install, make sure you can answer these questions:
◆ What communication type or device—modem, cable,network, or
wireless—will you use most often to connect to other computers?
◆ What port—LPT1,COM2—will you be using for this main device?
◆ If you’re using a modem, what is the manufacturer’s name and
model?
To install the software:
1 Start Windows. The Program Manager window appears.
Insertthe Setup diskin the appropriate floppy disk drive.
2 Choose Run fromthe File menu.The Run dialogbox appears.
3 Type A:SETUP.
4 Choose OK.
5 Follow the instructions on your screen. If you have questions about
any of the instructions, chooseHelp. Or, refer to “Answering the
Setup questions,” page 10.
6 Quitand restart Windowsbefore startingLapLinkfor Windows.
Registering your copy
Online Registration quickly registers your copy of LapLink for Windows. All you need is a modemso you can dialTraveling Software’s registration line.

Introducing LapLink for Windows 9
Setting up and starting LapLink for Windows
Type A:\SETUP .
To begininstalling,
choose Run from the
File menu.
The Setup program createsa
program group for LapLink
for Windows.
T o start LapLink for Windows,
double-click the LapLinkfor
Windows icon.
To register your copy of LapLink for Windows:
1 Double-click the Online Registration icon in the LapLink for Win-
dows program group.
2 Follow the instructions on your screen. If you have questions,
chooseHelp.
Choose OK.
Go to topic summary
ç
If you didn’t choose
modem during Setup,
set up your modem
and port when you use
Online Registration.
Starting the program
The Setup program creates a new program group for LapLink for Windows. The icons in this program group include the main program icon,
LapLink for Windows, which you use to launch the program.
To start LapLink for Windows:
1 Openthe LapLink for Windows program group.
2 Double-click the LapLink for Windows icon.
You are now in LapLink for Windows, and can connect to other
computers that are also running LapLink for Windows.
To quit LapLink for Windows:
■ Choose Exit from the File menu.

10 Chapter 1
Setting up LapLink for Windows
Answering the Setup questions
hen you install LapLink for Windows, the Setup program changes your directory structure
W
and system files, customizing LapLink for your needs. These changes are based on your
answersto some basic questions:where you wantLapLinkinstalled,whatname you want to give
yourcomputer, and whatconnectiontypeyouprimarilyuse.Setuprecords thesecustomsettings
in your system files.
Go to illustration
è
Where do you want LapLink installed?
When you install LapLink for Windows, the Setup program will install
the main LapLink program files in C:\LLW, or the directory you specify. Other program files are put in the C:\WINDOWS directoryand TSI
subdirectories.
Three main initialization files are modified by Setup, and used by
Laplink for Windows: WIN.INI, SYSTEM.INI, and LLW.INI. The
LapLink initialization file, LL W.INI, records information like port configuration. For example, when you tell LapLink that you’re going to
use a modem on your COM2 port, this information is recorded in
LLW.INI.
What is your computer name?
The name you give your computerwill be seen by others when you
connectto other PCs or when others try to connect to your PC. This
name is stored in your LLW.INI file.
What is your primary connection type?
You can select one of the options given: modem, network, cable, or
wireless (AirShare). If you have more than one connection type,you
can need to add these after you’ve installedLapLinkfor Windows.
Thesesettingsare stored in LLW.INI.
After you choose the connection type, tell Setup which port it is using.
If you chose modem, you will also need to specify the manufacturer’s
name, model and speed (baud, or bps).
A port is “unavailable” if Windows is using this port for your
✓
mouse, if another application is using the port, or if the port is
physically unavailable on your PC.
Introducing LapLink for Windows 11
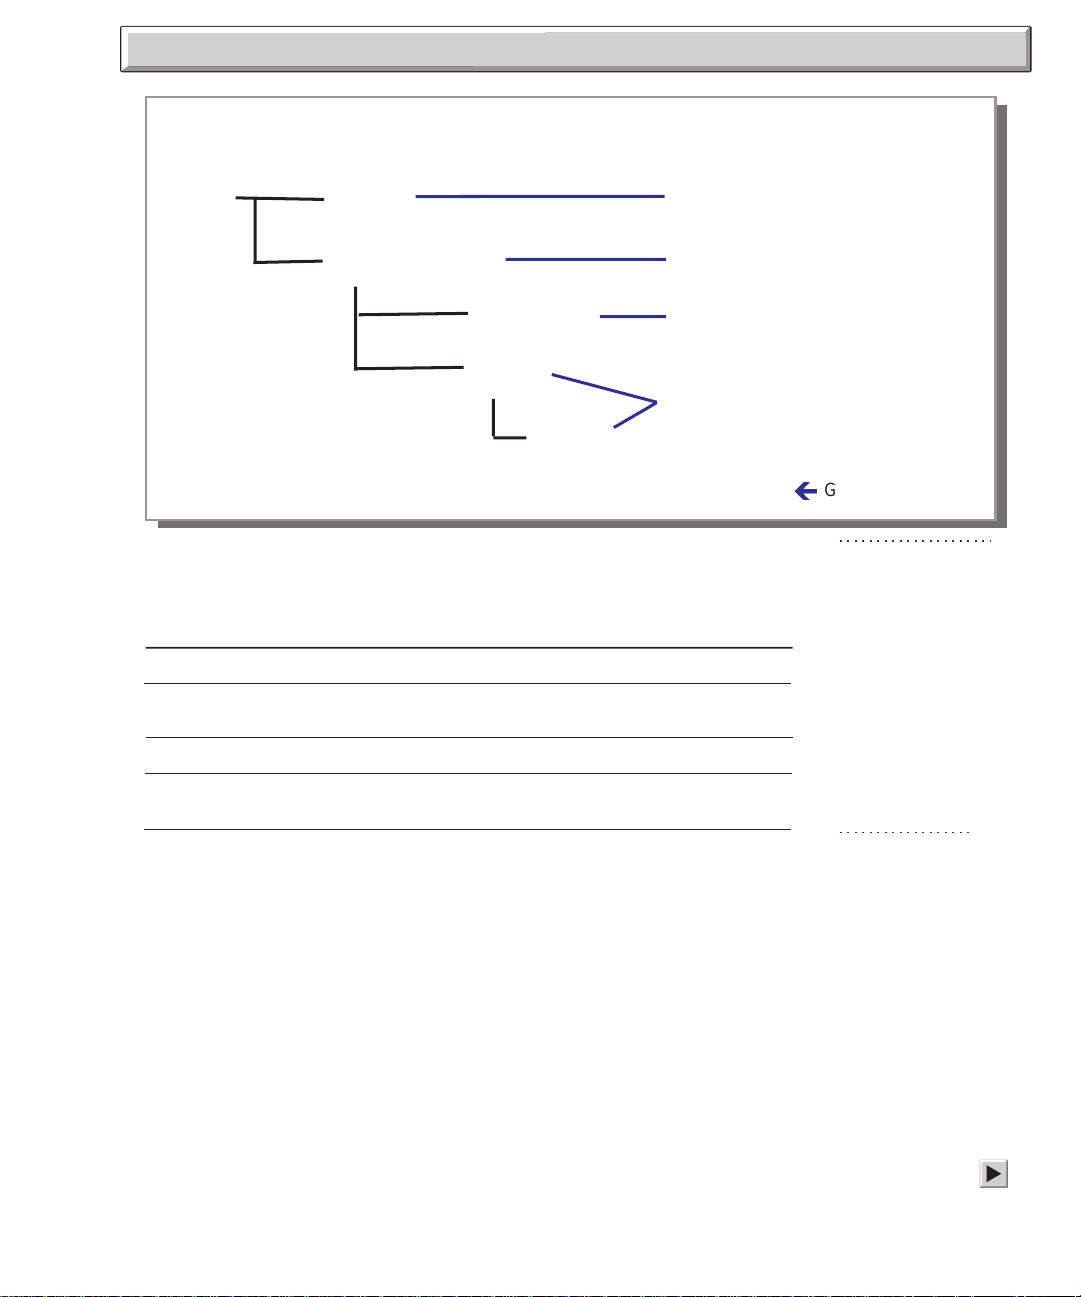
Directory structure created by Setup
Program files are in this directory,
C:
LLW
or the directory you specifyasthe
location duringSetup.
WINDOWS
SYSTEM
TSI
LLW
Changesaremadeto WIN.INI
and SYSTEM.INI.
A limited number of files are
placedin the System directory.
Initialization and log files for
LapLink for Windows and other
TravelingSoftware products are
placedin thesedirectories.
Use this tableas a quick reference to the communication types, or devices, used on various ports:
Communication Type Port Considerations
Serial cable (blue) COM Port often used for modem, mouse
Parallel cable (yellow) LPT Faster than serial; port often used for
printer
Modem COM Port often used for cable, mouse
Network IPX Must use Novell network or
compatible
Wireless COM Up to 30 feet between computers
Go to topic summary
ç
In this manual, “Wireless”referstoAirShare
Radio Modules. The
use of these modules is
restrictedinsomecountries.Wireless connections can also be made
with other devices. To
connect with a cellular
modem, use Connect
over Modem. To connect with a wireless
LAN adapter, use Connect over Network.

12 Chapter 1
Post installation: Customizing and uninstalling
fteryou installLapLinkfor Windows,youmay want tofinetune your LapLink system. Youcan
A
add more connection types or devices, if you use more than one. You may want to change
your computer name. If you need to remove LapLink for Windows from your computer,
double-click the Uninstall icon to remove the program filesand changes made to system files.
Go to illustration
If you need to give
more detailedinformation, chooseConfigure.
You must do this if
you’re settingup a modem.
è
Setting up additional connection types
LapLink for Windows initially uses the settings you supplied during
Setup for your primary connection type. With LapLink, you can use
any combinationof four typesof devices: cables, modems, network,
and wireless.If you need to add moredevices, or change the information you gaveduring Setup, you can change your port setup at any
time directlyin LapLink for Windows.
To add or change devices:
1 Choose Port Setup from the Options menu in LapLinkfor Win-
dows.The Port Setup dialog box appears.
2 In the Port Settings box, select the port’s name.
In the Type box, select the type from the pulldown list.
◆
◆ To make the port active, select Enable Port.
3 ClickCloseto save the settings.These settingsare recorded in
LLW.INI, the initialization file for LapLink for Windows.
Changing your computer’sname
The name you gave yourcomputerduringSetup will be seen by others
when you connect to otherPCs or when others connect to your PC.
To change your computer name:
1 Choose ComputerName from the Options menu. The Computer
Name dialog box appears.
2 Type the new name.
3 ClickOK.

Introducing LapLink for Windows 13
Setting up ports and uninstalling LapLink for Windows
T o change your port settings,
choose Port Setup from the
Options menu.
Selectthe port your primary
device is connectedto.
Select to make the port active.
To remove LapLink for Windows,
double-click the Uninstall icon.
Choose Close to
savethesesettings.
Uninstalling LapLink for Windows
If you need to removeLapLinkfor Windowsfrom your computer, the
Uninstall program simplifies this process for you. Not only does it
removeprogramfiles for LapLink for Windows,it alsoremoves
references to LapLink for Windows in your system files. Use Uninstall
insteadof deleting files using the Windows File Manager or DOS.
To remove LapLink for Windows from your PC:
■ Double-click the Uninstall icon, located in your LapLink for Win-
dows program group.
Follow the instructions on the screen.
Go to topic summary
ç

14 Chapter 1

Making connections
2
and opening services
Contents
Connectingovermodems .....................16
Creating dialing prefixes and suffixes . . . . . . . . . . . . . . 18
Connectingoveranetwork ....................20
Connectingoveracable ......................22
AttachingtheLapLinkcable ...................24
Connectingoverwireless......................26
Remote Install to a computer without LapLink . . . . . . . . . . 28
RemoteInstalloveraserialcable ................30

16 Chapter 2
Connecting over modems
o open a modem connection with another computer running LapLink, click the Modem
T
button on the LinkBar or choose Connect over Modem from the Connect menu. Type a
number to dial or select one of your Address Book entries as it appears in the dialog; then select
one or more of the services you want to open. To allow other users to connect to your computer by
modem, you must grant them permissionwith the LapLink security system.
Go to illustration
If you attempt to connect by modem without having enabled a
modem port, you are
asked if you want to go
directly to the Port
Setup dialog. In that dialog you can enable the
port to which the modem is attached.
When you dial a modem using an Address
Book entry, you provide not only the
number to dial but preset requests for services
and security information requiredby the
computeryou are dialing. If you do not use
an Address Book entry,
you will be prompted
to provide any security
information required
by the remote computer.
è
To connect to another computer by modem:
1 Clickthe Modem button on the LinkBar or choose Connect over
Modem from the Connectmenu.
2 In the Connection list, leave the highlight over Manual Dial unless
you have created an Address Book entry for the computeryou are
calling. In the Phone Number box,type the number to dial.
If you have an Address Book entry for the computer, select it. The
settings in the entry now appear in the dialog box. Unless you want
to change settings, choose Dial to begin dialing.
3 Ifyouwanttoaddaprefixorasuffixtothetelephonenumber,se-
lect Prefix or Suffixand choose fromentriesin the corresponding
drop-down box.
If you want to create a suffix or prefixentry, choose Prefixes or Suffixes.For more information, see page 18.
4 Select Redial if no answer to dial thenumber again if the attempt
fails.
The number of attemptsand the delay between them are deter-
mined by settings for the modemport. You can changethosesettings after choosing Port Setup in this dialog. For more
information, see page 90.
5 UnderServices, select the windows you want to appear when the
connection is made.
6 Under Security ,select Send Log-In Name and Password to use an
Address Book entry that includes security information you want to
send to the other computer.
7 Choose Dial to begin dialing.
Allowing incoming connections
When you start LapLink the first time, you can open connections to
other computers, but other computers cannot open connections to your

Making connections and openingservices 17
Connecting over modems
To connect to another computer by modem, clickthe Modem buttonor choose
Connect over Modem from the connect
menu.
Once you have created entries for modem connections in the Address Book,
the entriesappear in this box. Highlight
an entry to select it.
To typea telephonenumber, leave the
highlight over Manual Dial, and type the
numberin the Phone Number box.
Before dialing, be sure that you have selectedthe services you intendto use and
set the other options as you want them.
computer except by cable or wireless. To give other computers access
by modem or network, change the default security settings.
The proceduredescribednext disablesthe security system entirely,
!
giving other LapLink users complete access to the files on your computer—and to any network resources availableto it. To set up password protection and prevent unauthorized access, see page 74.
To change the default security settings and allow unrestricted access to your computer:
1 Choose Security from the Options menu or click the corresponding
button on the LinkBar.
2 Under Allow Connections From, select Anybody (Public System).
3 Thenselectany or all of the services you wantto makeavailable:
File Transfer, Remote Control, or Chat.
4 Choose OK.
Your computer is now accessible to any computer running LapLink
for Windows.
Go to topic summary
ç

18 Chapter 2
Connecting over modems
Creating dialing prefixes and suffixes
refixes and suffixes are useful for such purposes as reaching an outside line, inserting pauses
P
in the dialing process, and charging calls to credit cards. After choosing Dialing Prefixes or
Dialing Suffixes from the Options menu, you can create your own prefixes or suffixes. They will
then be available when you connect over modems.
Go to illustration
è
A prefix is sent beforea telephone number. Prefixes are usedmost often
to make an outside line available from an office or a hotel. If your telephone is equipped with call waiting, you can use a prefix to disablethe
feature for the duration of your modem connection. (With call waiting
enabled, your modem connection will be broken whenever someone
triesto callyou.)
Asuffixissentaftera telephone number. Suffixesare usedmost often
to charge callsto credit cards.
With LapLink, you can create your own prefixes and suffixes. You can
choose among them when you dial using Connect over Modem.
You can also create prefixes and suffixes after choosing Connect
✓
over Modem: choose Prefixes or Suffixes in the Connect over Modem dialog.
To create a prefix or suffix:
1 From the Options menu, choose Dialing Prefixes or Dialing Suffixes.
If you have set up password protection for your securitysystem,
you are now asked to type the password.
2 Choose Add.
3 In the Description box,type a brief description of the prefix or suf-
fix you are creating. When you attempt to dial, you will see this description rather than the suffix or prefix.
4 In the Dialing String box, type the prefix or suffix.When you are
through, choose OK.
5 You now see the description you just created. If you want to create
anotherentry, choose Add and repeat the previous two steps. Otherwise, choose Close to exit.
Tips for creating prefixes and suffixes
At a point where you want the dialing to pause, type one or more
✓
commas,depending on the length of the pause. (Each commapro-

Making connections and openingservices 19
Creating a dialing prefix or suffix
T ocreate a prefix, choose Dialing
Prefixes fromthe Optionsmenu.
T ocreate a suffix, choose Dialing
Suffixes instead.
Then choose Add.
Type a description of the suffix
or prefix.Thisdescription will appear in the Connect over Modem dialog.
Type the characters you want to
useasyourprefixorsuffix.
Go to topic summary
ç
ducesa pause of two seconds.) Insert a pause, for example, before a
creditcard number.
If your officetelephone systemrequiresthat you dial9 for an out-
✓
side line, you might create a prefix named “Outside line” and enter
thesetwo characters: 9,
To disablecall waiting,type *70 or whatever code is required by
✓
your telephone system. (Consult your telephone directory if in
doubt.)
Managing your list of prefixes or suffixes
To change entries in your list of prefixes or suffixes:
1 From the Options menu, choose Dialing Prefixes or Dialing Suffixes.
2 Select an entry and choose any of the following:
◆ Edit to revisethe entry.
◆ Copy to duplicate the entry,which you can then revise for a
new entry.
◆ Deleteto remove the entry.

20 Chapter 2
Connecting over a network
o connect to another network computer running LapLink, click the Network button on the
T
LinkBaror choose Connect overNetworkfrom the Connectmenu.Selectone of the available
network connections; then choose the services you want to open: File Transfer, Remote Control,
and Chat. To allow other users to connect to your computer over a network, you must grant them
permissionwith the LapLink security system.
Go to illustration
If you attempt to connect over a network
without havingenabled the network
port, you are asked if
you want to go directly
to the Port Setup dialog. In that dialog, you
can enable the port to
which the network is attached.
è
To connect to another computer over a Novell network:
1 Click the Network button on the LinkBar or choose Connect over
Network from the Connect menu.
2 In the Connection list,selectthe name of the computerto connect
to. The list shows the names of all the computers that are on the
network running LapLink.
3 UnderServices, select the services you wantto appearwhen the
connection is made.
4 Under Security ,select Send Log-In Name and Password if you have
createdan Address Book entry for thecomputer. Selectingthis option ensures that the password and other information in the entry
is passed automatically to the remote computer.
5 Choose OK to open the connection.
Allowing incoming connections
When you start LapLink the first time, you can open connections to
other computers, but other computers cannot open connections to
your computer except by cable or wireless. To give other computers access over a network, you mustchange the default securitysettings.
The proceduredescribednext disablesthe security system entirely,
!
giving other LapLink users complete access to the files on your computer—and to any network resources availableto it. To set up password protection and prevent unauthorized access, see page 74.
To change the default security settings and allow unrestricted access to your computer:
1 Choose Security from the Options menu.
2 Under Allow Connections From, select Anybody (Public System).
3 Thenselectany or all of the services you wantto makeavailable:
File Transfer, Remote Control, or Chat.

Making connections and openingservices 21
Connecting over a network
To connectto anothercomputer over
a network, clickthe Networkbutton
or choose Connect over Network
from the Connect menu.
The names of other network computers runningLapLink appear in this
box. Highlight an entry to select it.
Before choosing OK, select the services
you intendto use.
If you have created an Address Book entry for the selected computer, select this
option to ensure that the password and
other information in the entry is passed
automatically to the remote computer .
Go to topic summary
ç
4 Choose OK.
Your computer is now accessible to any computer running LapLink.
Using the Address Book to automate network connections
You can simplify the process of making connections over a network by
addingentriesto the AddressBook for the computersyou connect to
regularly.
In each entry you can record the log-inname and passwordrequired
by the remotecomputer. You can alsorequestthe kinds of servicesyou
want to use when you connect.
When you connectto a network computerusing the Connect over Network command, the security information you have entered in the AddressBook is passed along automatically.Your requests for services
appear as defaults in the Connect over Network dialog.
For detailed information about the Address Book, see page 78.

22 Chapter 2
Connecting over a cable
hen you run LapLink for Windows on computers connected by a LapLink cable, two File
W
Transferwindows are openedautomaticallyoneachcomputer.Youcanuse eithercomputer
to exchange files. You can also open a Remote Control window on either computer and Chat
windows on both.
Go to illustration
If you attempt to connect over a cable without having enableda
serial or parallelport,
you are asked if you
want to go directly to
the Port Setup dialog.
In that dialog, you can
enable the port to
which the cable is attached.
è
On installation, LapLink for Windows is set up so that you can open a
connection with another computer over a LapLink cable simply by
running LapLink for Windows on both computers. (For instructions
on attaching a parallelor serial cable, see the next section.)
When LapLink starts, the computers are connected automatically, and
two File T ransfer windows appear on both. The left window shows directories and files on the local computer (the one you are sitting in
front of). The right window shows directories and files on the remote
computer.You can transfer files from either computer. You can also
open Remote Control and Chat windows on eithercomputer.
To open a Remote Control or Chat window once you have established a cable connection:
■ Click the Remote Control or Chat button on the LinkBar or choose
Open Remote Control or Open Chat from the Window menu.
Changing Autoconnect
The way in which LapLink reacts to a cable connection is determined
by the Autoconnect option. You can use this option to instruct
LapLinknot to make automatic cable connections. Or you can change
the service windows that appear automatically.
To disable Autoconnect:
1 Choose Connect Options from the Options menu.
2 UnderAutoconnect, clearEnable Cable and Wireless Autoconnect.
3 Choose OK.
When you want to connectby cable in the future, you must open the
connection manually.
To change the service windows that appear automatically:
1 Choose Connect Options from the Options menu.
2 Under Autoconnect, select or clear any of these options: File Trans-
fer, Remote Control, or Chat.
3 Choose OK.

Making connections and openingservices 23
Changingthe Autoconnect feature
By default,LapLink
openstwo File Transfer windowsautomatically as soon as two
computers running
LapLink are connected by cable.
If you prefer to make
a cable connection
manually, choose Connect Options from the
Options menu. Then
clearthisoption.
Or leave the option selectedandchange
theseoptions if you
want different service
windowsto appearon
connection.
Go to topic summary
ç
Opening connections manually
If you disable Autoconnect, you must open cable connections manually.
To open a cable connection manually:
1 Click the Cable button on the LinkBar or choose Connect over Ca-
ble from the Connect menu.
2 In the Connection list, make sure that the name of the computer you
want to connect to is selected.
3 UnderServices, select the windows you want to appear when the
connection is made.
4 Under Security, select Send Log-In Name and Password if the other
computerhas password protection and you have an Address Book
entry for thatcomputer.
5 Choose OK to open the connection.
By default, LapLink imposes no security protection on cable connec-
✓
tions. If you want the same security protection for cable connections as for modem and network connections, choose Security from
the Options menu. Under Cablesand Wireless, select EnforceSecurity for Connections.

24 Chapter 2
Connecting over a cable
Attaching the LapLink cable
ora cable connection choose eitherLapLinkcableandattachitto the appropriateportofeach
F
computer. For a serial connection, choose the blue cable (labeled SERIAL) and attach one
connector at each end to a serial port on both computers. For a parallel connection choose the
yellowcable (labeled PARALLEL) and attach each connector to a parallelport on bothcomputers.
Go to illustration
è
LapLinkallowstwo kinds of cable connections:serialand parallel.
Choosing between them may be as simple as looking at the backs of
the two computers. If either of them lacks a parallel port, for example,
you must use a serial connection. Or if one has a mouse attached to its
only serial port, you may want to retain the use of the mouseand use a
parallel connection instead.
If you have a choice, choose parallel because it is considerably faster.
On theother hand, if you want to use Remote Install,chooseserial.
You can’t use RemoteInstall over a parallel cable.
Choosing betweenparalleland serial does not affect the way you
✓
use LapLink. Whether you are using File Tr ansfer or one of the
otherservices,the proceduresare the same for parallel and serial.
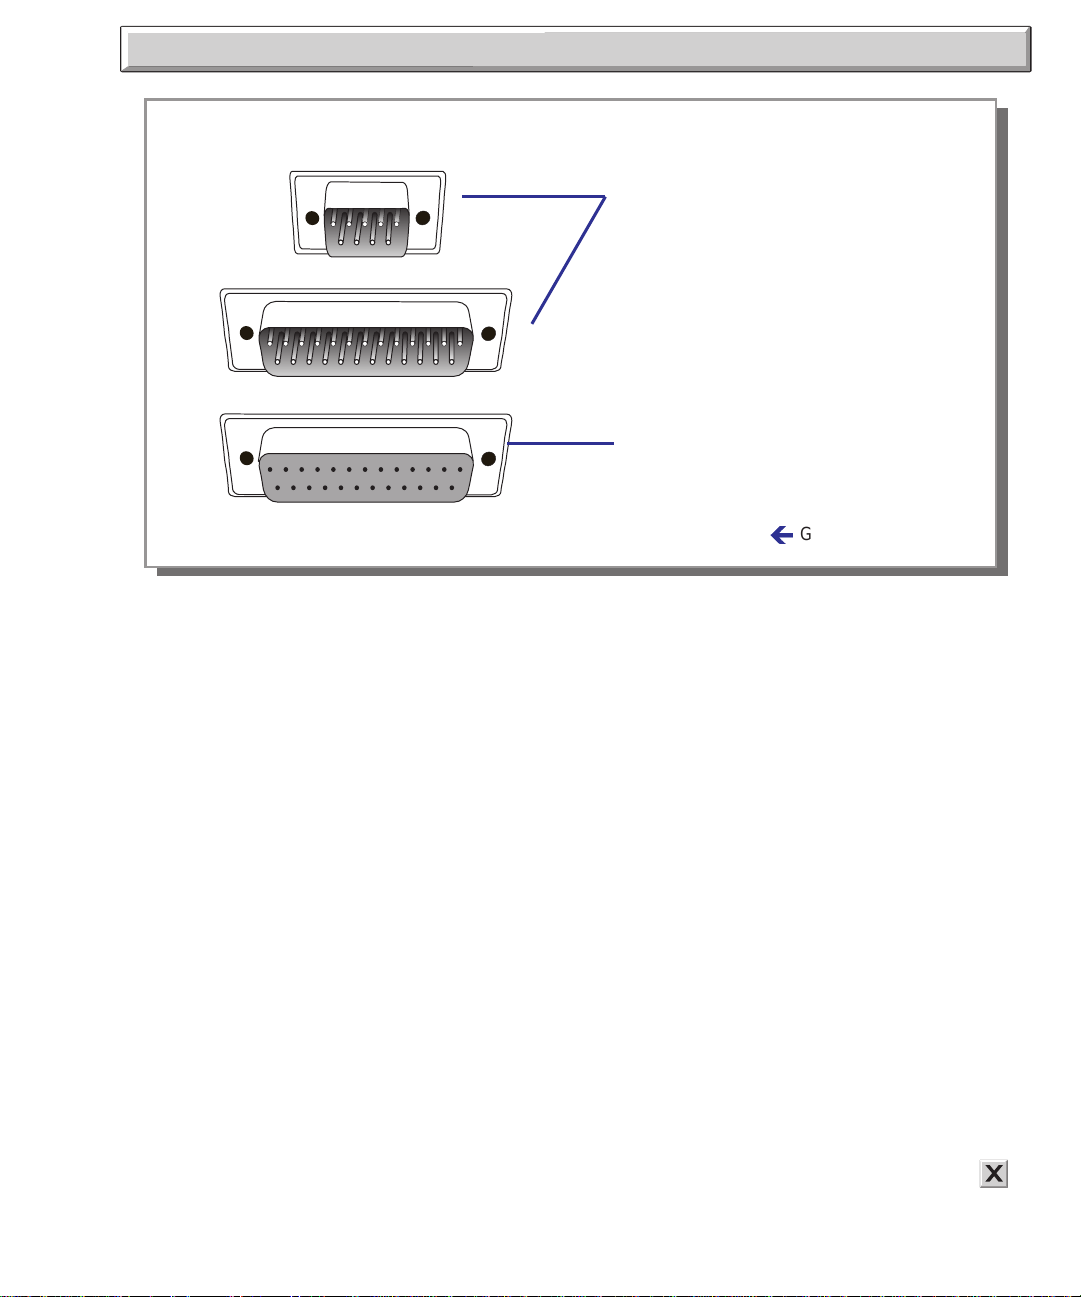
Identifying parallel and serial ports
A parallel port almost always has 25 holes. It is sometimes labeled,
LPT1,LPT2, LPT3, or PRINTER.
Serial ports come in two sizes: a DB9 serial port has just 9 pins; the
larger DB25 port, 25 pins. If you have a serial port with holes instead
of pins, you must purchase a gender changer before you can attach the
LapLinkcable.A serialport is sometimes labeled COM1, COM2,
COM3, COM4, or SERIAL.
If in doubt about the ports on your computer, proceed carefully. At-
!
taching the LapLink cable to a monitor port, in particular, may
damage the computer. (A monitor port is sometimeslabeledRGB
and typically has 9 holes.) Consult the documentation for your system, or contact your dealeror manufacturer.
Attaching the cable
To connect two computers by the LapLink cable.
1 Choose the serial or parallel cable according to your preferenceand
the availability of ports.
Making connections and openingservices 25
Identifying serial and parallel ports
You may find one or both of these types
of serial ports on your computers. Both
typesusually havepinsinstead of holes.
The smallertype(DB9)has9 pins. The
larger type (DB25) has 25 pins. A serial
port may be labeled COM1, COM2,
COM3, COM4, or SERIAL.
A parallel port typically has holes instead
of pins. There are 25 holes in all. A parallel
port is sometimes labeled PRINTER, LPT1,
LPT2, or LPT3.
Go to topic summary
ç
2 Connect each end of thecable to the appropriateport of each com-
puter.
The serial cable has two typesof connectors at one end or both ends,
but only one of them is to be used at any time. If the serial port on one
of your computers has 25 pins, attach the larger connectorto that
port. Otherwise,attachonly the smaller, 9-pin connector.
Use only a LapLink cable to connect your computers. LapLink does
✓
not work overmost other serial cablesor any printercables.(For
more information, call Customer Service at the number listed near
the end of this guide.)
LapLink III cables can be used with LapLink for Windows, though
✓
they will not providethe fastest transmission rate when you are
transmitting over a parallel connection. LapLink Pro and LapLink V
cablesare completely compatible with LapLink for Windows.

26 Chapter 2
Connecting over wireless
f your wireless device was ready to use when you installed LapLink, you should be ready to
I
connectby wirelessto another computer running LapLink. Once thewirelessdevices are within
range of each other,two File Transfer windows are openedon both computers.Youcan then use
either computer to exchange files. You can also open a Remote Control window on either
computer and Chat windows on both.
Go to illustration
In this guide, “wireless”
refers to AirShare Radio
Modules. The use of
these modules is restricted in some countries. To connect over a
cellular modem, use
Connect over Modem.
T oconnect over a wireless LAN adapter,use
Connect over Network.
If you attempt to connect over wirelessdevices withouthaving
enableda wirelessport,
the Port Setup dialog
appears.You can then
enable the port to
which the wireless device is attached.
è
On installation, LapLink for Windows is set up so that you can open a
connection with another computer over wireless devices simply by running LapLink for Windows on both computers and placing the computerswithinrange of each other.
When LapLink starts, the computers are connected automatically, and
two File T ransfer windows appear on both. The left window shows directories and files on the local computer (the one you are sitting in
front of); the rightwindow shows directoriesand files on the remote
computer.You can transfer files from either computer. You can also
open Remote Control and Chat windows on eithercomputer.
To open a Remote Control or Chat window once you have established a wireless connection:
■ Click the Remote Control or Chat button on the LinkBar or choose
Open Remote Control or Open Chat from the Window menu.
Changing Autoconnect
The way in which LapLink reacts to a wireless connection is determinedby the Autoconnect option.You can use this option to instruct
LapLinknot to make automatic wirelessconnections. Or you can
changethe service windows that appear automatically.
To disable Autoconnect:
1 Choose Connect Options from the Options menu.
2 UnderAutoconnect, clearEnable Cable and Wireless Autoconnect.
3 Choose OK.
When you want to connectover wirelessdevicesin the future,you
must open theconnection manually.
To change the service windows that appear automatically:
1 Choose Connect Options from the Options menu.
2 Under Autoconnect, select or clear any of these options: File Trans-
fer, Remote Control, or Chat.
 Loading...