


 Loading...
1-,¿-1
- 6iÀ°Ê£°ä
(
Instructions pertaining to a risk of fire, electric shock, or injury to persons
IMPORTANT SAFETY INSTRUCTIONS
WARNING — When using electrical products, basic precautions should be followed, including the following:
Location. Using the unit in the following locations can result in a malfunction.
•In direct sunlight
•Locations of extreme temperature or humidity
•Excessively dusty or dirty locations
•Locations of excessive vibration
Power supply. Please connect the designated AC adapter to an AC outlet of the correct voltage. Do not connect it to an AC outlet of voltage other than that for which your unit is intended.
Interference with other electrical devices. This product contains a microcomputer. Radios and televisions placed nearby may experience reception interference. Operate this unit at a suitable distance from radios and televisions.
Handling. To avoid breakage, do not apply excessive force to the switches or controls.
Care. If the exterior becomes dirty, wipe it with a clean, dry cloth. Do not use liquid cleaners such as benzene or thinner, or cleaning compounds or flammable polishes.
Keep this manual. After reading this manual, please keep it for later reference.
Keeping foreign matter out of your equipment.
•Never set any container with liquid in it near this equipment. if liquid gets into the equipment, it could cause a breakdown, fire, or electrical shock.
•Be careful not to let metal objects get into the equipment. If something does slip into the equipment, unplug the AC adapter from the wall outlet. Then contact your nearest Korg dealer or the store where the equipment was purchased.
KEEP THESE INSTRUCTIONS CLEAN ONLY WITH A DRY CLOTH
THE FCC REGULATION WARNING (FOR THE U.S.A. AND CANADA ONLY)
This equipment has been tested and found to comply with the limits for a Class B digital device, pursuant to Part 15 of the FCC Rules. These limits are designed to provide reasonable protection against harmful interference in a residential installation. This equipment generates, uses, and can radiate radio frequency energy and, if not installed and used in accordance with the instructions, may cause harmful interference to radio communications. However, there is no guarantee that interference will not occur in a particular installation. If this equipment does cause harmful interference to radio or television reception, which can be determined by turning the equipment off and on, the user is encouraged to try to correct the interference by one or more of the following measures:
•Reorient or relocate the receiving antenna.
•Increase the separation between the equipment and receiver.
•Connect the equipment into an outlet on a circuit different from that to which the receiver is connected.
•Consult the dealer or an experienced radio/TV technician for help.
Unauthorized changes or modification to this system can void theuser's authority to operate this equipment.
CE MARK FOR EUROPEAN HARMONIZED STANDARDS
CE mark which is attached to our company’s products of AC mains operated apparatus until December 31, 1996 means it conforms to EMC Directive (89/336/ EEC) and CE mark Directive (93/68/EEC).
And, CE mark which is attached after January 1, 1997 means it conforms to EMC Directive (89/336/EEC), CE mark Directive (93/68/EEC) and Low Voltage Directive (73/23/EEC).
Also, CE mark which is attached to our company’s products of Battery operated apparatus means it conforms to EMC Directive (89/336/EEC) and CE mark Directive (93/68/EEC).

DATA HANDLING
Data in memory may sometimes be lost due to incorrect user action. Be sure to save important data to floppy disk. KORG will not be responsible for damages caused by data loss.
LCD DISPLAY
Some pages of the manuals show LCD screens along with an explanation of functions and operations. All sound names, parameter names, and values are merely examples and may not always match the actual display you are working on.
TRADEMARKS
Macintosh is a registered trademark of Apple Computer, Inc. MS-DOS and Windows are registered trademarks of Microsoft Corporation. All trademarks or registered trademarks are the property of their respective holders.
DISCLAIMER
The information contained in this manual have been carefully revised and checked through. Due to our constant efforts to improve our products, the specifications might differ to those in the manual. KORG is not responsible for any eventual differences found between the specifications
and the contents of the instruction manual - the specifications being subject to change without prior notice
LIABILITY
KORG products are manufactured under strict specifications and voltages required by each country. These products are warranted by the KORG distributor only in each country. Any KORG product not sold with a warranty card or carrying a serial number disqualifies the product sold from the manufacturer's/distributor's warranty and liability. This requirement is for your own protection and safety.
SERVICE AND USER’S ASSISTANCE
For service, please contact your nearest Authorized KORG Service Center. For more information on KORG products, and to find software and accessories for your keyboard, please contact your local Authorized KORG distributor.
PA50 ON THE WEB
For up-to-date information, please, point your web browser to http://www.korgpa.com.
Copyright © 2003 KORG Italy Spa. Printed in China.
THE BALANCE SLIDER
When turning the instrument on, please be assured the BALANCE slider is set to the center. This sets both Sequencer 1 (SEQ1) and Sequencer 2 (SEQ2) to their maximum level. This will avoid you start a Song without hearing anything.

3
HOW TO…
Keyboard |
|
Song Play mode |
|
…select a Sound Program |
26 |
…play a Song (Standard MIDI File) |
27 |
…select a Performance |
25 |
…see the Lyrics |
74 |
…play a Sound Program across the |
|
…see the Song tracks |
73 |
whole keyboard, as with a piano |
24 |
…start both Sequencers at the same time |
18, 79 |
…split the keyboard in two |
24 |
Backing Sequence mode |
|
…add sounds to the right hand |
24 |
|
|
…mute/unmute sounds |
24 |
…record a new Backing Sequence (Song) |
82 |
Style Play mode |
|
Song mode |
|
…select a Style |
26 |
…record a new Song |
91 |
…start/stop the Style |
29 |
…edit a Standard MIDI File |
88 |
…select a Fill or a Break |
29 |
In general |
|
…select a Style Variation |
30 |
|
|
…see the Style tracks |
41 |
…turn the speakers off |
125 |
…create a new Style |
52 |
…change the Damper polarity |
126 |
|
|
…select the Arabic Scale |
34 |

4
TABLE OF CONTENTS
Introduction
Welcome! . . . . . . . . . . . . . . . . . . . . . . . . . . . . . . . . . 8
Live Performing . . . . . . . . . . . . . . . . . . . . . . . . . . . . . . . . . . . . 8 Useful links . . . . . . . . . . . . . . . . . . . . . . . . . . . . . . . . . . . . . . . . 8 About this manual . . . . . . . . . . . . . . . . . . . . . . . . . . . . . . . . . . 8 Making a backup copy of system files . . . . . . . . . . . . . . . . . . 8 Loading the operating system . . . . . . . . . . . . . . . . . . . . . . . . . 9 Reloading the Factory Data . . . . . . . . . . . . . . . . . . . . . . . . . . . 9
Start up . . . . . . . . . . . . . . . . . . . . . . . . . . . . . . . . . . 10
Connecting the AC power adapter . . . . . . . . . . . . . . . . . . . . 10 Turning the instrument on and off . . . . . . . . . . . . . . . . . . . 10 Controlling the Volume . . . . . . . . . . . . . . . . . . . . . . . . . . . . 10 The BALANCE slider . . . . . . . . . . . . . . . . . . . . . . . . . . . . . . . 10 Headphones . . . . . . . . . . . . . . . . . . . . . . . . . . . . . . . . . . . . . . 10 Audio Outputs . . . . . . . . . . . . . . . . . . . . . . . . . . . . . . . . . . . . 10 Audio Inputs . . . . . . . . . . . . . . . . . . . . . . . . . . . . . . . . . . . . . . 10 MIDI connections . . . . . . . . . . . . . . . . . . . . . . . . . . . . . . . . . 10 Damper Pedal . . . . . . . . . . . . . . . . . . . . . . . . . . . . . . . . . . . . . 11 Demo . . . . . . . . . . . . . . . . . . . . . . . . . . . . . . . . . . . . . . . . . . . . 11 The music stand . . . . . . . . . . . . . . . . . . . . . . . . . . . . . . . . . . . 11
Front panel . . . . . . . . . . . . . . . . . . . . . . . . . . . . . . . 12
Display and User Interface . . . . . . . . . . . . . . . . . . . 19
Display controls . . . . . . . . . . . . . . . . . . . . . . . . . . . . . . . . . . . 19 Interface structure . . . . . . . . . . . . . . . . . . . . . . . . . . . . . . . . . 20 Message windows . . . . . . . . . . . . . . . . . . . . . . . . . . . . . . . . . . 21 Symbols and Icons . . . . . . . . . . . . . . . . . . . . . . . . . . . . . . . . . 21 Grayed-out non-available parameters . . . . . . . . . . . . . . . . . 21
Rear panel . . . . . . . . . . . . . . . . . . . . . . . . . . . . . . . . 22
Basic Guide
Basic operations . . . . . . . . . . . . . . . . . . . . . . . . . . . 24
Playing on the keyboard . . . . . . . . . . . . . . . . . . . . . . . . . . . . 24 Selecting, muting/unmuting and soloing a track . . . . . . . . 24 Selecting a Performance . . . . . . . . . . . . . . . . . . . . . . . . . . . . . 25 Selecting a Program . . . . . . . . . . . . . . . . . . . . . . . . . . . . . . . . 26 Selecting a Style . . . . . . . . . . . . . . . . . . . . . . . . . . . . . . . . . . . 26 Selecting a Single Touch Setting (STS) . . . . . . . . . . . . . . . . . 27 Changing all keyboard tracks at once . . . . . . . . . . . . . . . . . . 27 Playing a Song from Floppy disk . . . . . . . . . . . . . . . . . . . . . 27 Shortcut to see the original bank for a Style,
Performance or Program . . . . . . . . . . . . . . . . . . . . . . . . . . 27
Tutorial . . . . . . . . . . . . . . . . . . . . . . . . . . . . . . . . . . 28
1 - Playing in realtime . . . . . . . . . . . . . . . . . . . . . . . . . . . . . . 28 2 - Playing a Style . . . . . . . . . . . . . . . . . . . . . . . . . . . . . . . . . . 29 3 - Playing a Song . . . . . . . . . . . . . . . . . . . . . . . . . . . . . . . . . . 30 4 - Recording a Song . . . . . . . . . . . . . . . . . . . . . . . . . . . . . . . 31 5 - Editing a Song . . . . . . . . . . . . . . . . . . . . . . . . . . . . . . . . . . 32 6 - The Arabic Scale . . . . . . . . . . . . . . . . . . . . . . . . . . . . . . . . 34
MIDI . . . . . . . . . . . . . . . . . . . . . . . . . . . . . . . . . . . . . 35
What is MIDI? . . . . . . . . . . . . . . . . . . . . . . . . . . . . . . . . . . . . 35 Midifiles . . . . . . . . . . . . . . . . . . . . . . . . . . . . . . . . . . . . . . . . . 35 The General MIDI standard . . . . . . . . . . . . . . . . . . . . . . . . . 35 The Global channel . . . . . . . . . . . . . . . . . . . . . . . . . . . . . . . . 35
The Chord 1 and Chord 2 channels . . . . . . . . . . . . . . . . . . .36 The Control channel . . . . . . . . . . . . . . . . . . . . . . . . . . . . . . . .36 MIDI Setup . . . . . . . . . . . . . . . . . . . . . . . . . . . . . . . . . . . . . . .36 Connecting Pa50 to a Master keyboard . . . . . . . . . . . . . . . .36 Connecting the Pa50 to a MIDI accordion . . . . . . . . . . . . .37 Connecting the Pa50 to an external sequencer . . . . . . . . . .37 Playing another instrument with the Pa50 . . . . . . . . . . . . . .38
Reference Guide
Style Play operating mode . . . . . . . . . . . . . . . . . . . 40
What’s a Style? . . . . . . . . . . . . . . . . . . . . . . . . . . . . . . . . . . . . .40 Styles and Performances . . . . . . . . . . . . . . . . . . . . . . . . . . . . .40 Changing and resetting the Tempo . . . . . . . . . . . . . . . . . . . .40 The DIRECT FD bank . . . . . . . . . . . . . . . . . . . . . . . . . . . . . .40 Main page . . . . . . . . . . . . . . . . . . . . . . . . . . . . . . . . . . . . . . . .41 Style tracks page . . . . . . . . . . . . . . . . . . . . . . . . . . . . . . . . . . .41 How to select Programs . . . . . . . . . . . . . . . . . . . . . . . . . . . . .41 The Write window . . . . . . . . . . . . . . . . . . . . . . . . . . . . . . . . .42 Menu . . . . . . . . . . . . . . . . . . . . . . . . . . . . . . . . . . . . . . . . . . . .42 Edit page structure . . . . . . . . . . . . . . . . . . . . . . . . . . . . . . . . .42 Page 1 - Mixer: Volume . . . . . . . . . . . . . . . . . . . . . . . . . . . . .43 Page 2 - Mixer: Pan . . . . . . . . . . . . . . . . . . . . . . . . . . . . . . . . .43 Page 3 - Mixer: FX Send . . . . . . . . . . . . . . . . . . . . . . . . . . . . .43 Page 4 - Tuning: Detune . . . . . . . . . . . . . . . . . . . . . . . . . . . .44 Page 5 - Tuning: Scale . . . . . . . . . . . . . . . . . . . . . . . . . . . . . .44 Page 6 - Tuning: PitchBend Sensitivity . . . . . . . . . . . . . . . . .44 Page 7 - FX: A/B Select . . . . . . . . . . . . . . . . . . . . . . . . . . . . . .44 Page 8 - FX: C/D Select . . . . . . . . . . . . . . . . . . . . . . . . . . . . . .44 Page 9 - FX: A editing . . . . . . . . . . . . . . . . . . . . . . . . . . . . . . .45 Page 10 - FX: B editing . . . . . . . . . . . . . . . . . . . . . . . . . . . . . .45 Page 11 - FX: C editing . . . . . . . . . . . . . . . . . . . . . . . . . . . . . .45 Page 12 - FX: D editing . . . . . . . . . . . . . . . . . . . . . . . . . . . . . .45 Page 13 - Track: Easy edit . . . . . . . . . . . . . . . . . . . . . . . . . . . .45 Page 14 - Track: Mode . . . . . . . . . . . . . . . . . . . . . . . . . . . . . .46 Page 15 - Track: Internal/External . . . . . . . . . . . . . . . . . . . .46 Page 16 - R.T. controls: Damper . . . . . . . . . . . . . . . . . . . . . .47 Page 17 - R.T. controls: Joystick . . . . . . . . . . . . . . . . . . . . . .47 Page 18 - R.T. controls: Dynamic range . . . . . . . . . . . . . . . .47 Page 19 - R.T. controls: Ensemble . . . . . . . . . . . . . . . . . . . . .47 Page 20 - Style controls: Drum/Fill . . . . . . . . . . . . . . . . . . . .48 Page 21 - Style controls: Wrap Around / Keyboard
Range . . . . . . . . . . . . . . . . . . . . . . . . . . . . . . . . . . . . . . . . . .49 Page 22 - Pads . . . . . . . . . . . . . . . . . . . . . . . . . . . . . . . . . . . . .49 Page 23 - Preferences: Lock . . . . . . . . . . . . . . . . . . . . . . . . . .49 Page 24 - Preferences: controls . . . . . . . . . . . . . . . . . . . . . . .50
Style Record mode . . . . . . . . . . . . . . . . . . . . . . . . . 52
The Style’s structure . . . . . . . . . . . . . . . . . . . . . . . . . . . . . . . .52 Style Import/Export . . . . . . . . . . . . . . . . . . . . . . . . . . . . . . . .53 Entering the Record mode . . . . . . . . . . . . . . . . . . . . . . . . . . .53 Listening to the Style while in Record/Edit mode . . . . . . . .53 Exit and Save/Abort Style . . . . . . . . . . . . . . . . . . . . . . . . . . . .53 The Write window . . . . . . . . . . . . . . . . . . . . . . . . . . . . . . . . .54 List of recorded events . . . . . . . . . . . . . . . . . . . . . . . . . . . . . .54 Fast Delete using the control panel buttons . . . . . . . . . . . . .54 Main page . . . . . . . . . . . . . . . . . . . . . . . . . . . . . . . . . . . . . . . .55 Style Tracks page . . . . . . . . . . . . . . . . . . . . . . . . . . . . . . . . . . .56

Step Record page . . . . . . . . . . . . . . . . . . . . . . . . . . . . . . . . . . 57 Style Record procedure . . . . . . . . . . . . . . . . . . . . . . . . . . . . . 58 Menu . . . . . . . . . . . . . . . . . . . . . . . . . . . . . . . . . . . . . . . . . . . . 61 Edit page structure . . . . . . . . . . . . . . . . . . . . . . . . . . . . . . . . . 61 Page 1 - Edit: Quantize . . . . . . . . . . . . . . . . . . . . . . . . . . . . . 62 Page 2 - Edit: Transpose . . . . . . . . . . . . . . . . . . . . . . . . . . . . 62 Page 3 - Edit: Velocity . . . . . . . . . . . . . . . . . . . . . . . . . . . . . . 63 Page 4 - Event Edit . . . . . . . . . . . . . . . . . . . . . . . . . . . . . . . . . 63 Page 5 - Event Filter . . . . . . . . . . . . . . . . . . . . . . . . . . . . . . . . 64 Event Edit procedure . . . . . . . . . . . . . . . . . . . . . . . . . . . . . . . 64 Page 6 - Edit: Delete . . . . . . . . . . . . . . . . . . . . . . . . . . . . . . . . 66 Page 7 - Edit: Delete All . . . . . . . . . . . . . . . . . . . . . . . . . . . . . 66 Page 8 - Edit: Copy . . . . . . . . . . . . . . . . . . . . . . . . . . . . . . . . . 67 Page 9 - Style Element Controls: Programs . . . . . . . . . . . . . 67 Page 10 - Style Element Controls: Expression . . . . . . . . . . . 68 Page 11 - Style Element Controls: Keyboard Range . . . . . . 68 Page 12 - Style Element Controls: Chord Variation
Table . . . . . . . . . . . . . . . . . . . . . . . . . . . . . . . . . . . . . . . . . . 68 Page 13 - Style Controls: Mode/Tension . . . . . . . . . . . . . . . 68
Song Play operating mode . . . . . . . . . . . . . . . . . . 70
The Songs and the Standard MIDI File format . . . . . . . . . . 70 Transport controls . . . . . . . . . . . . . . . . . . . . . . . . . . . . . . . . . 70 MIDI Clock . . . . . . . . . . . . . . . . . . . . . . . . . . . . . . . . . . . . . . . 70 Switching between sequencers during editing . . . . . . . . . . . 70 Selecting a Song composing its progressive number . . . . . 70 Realtime and sequencer tracks . . . . . . . . . . . . . . . . . . . . . . . 70 Master Volume, Sequencer Volume, BALANCE . . . . . . . . 71 Effects in Song Play mode . . . . . . . . . . . . . . . . . . . . . . . . . . . 71 Groove Quantize window . . . . . . . . . . . . . . . . . . . . . . . . . . . 71 The Write window . . . . . . . . . . . . . . . . . . . . . . . . . . . . . . . . . 72 Main page . . . . . . . . . . . . . . . . . . . . . . . . . . . . . . . . . . . . . . . . 72 Tracks 1-8 page . . . . . . . . . . . . . . . . . . . . . . . . . . . . . . . . . . . . 73 Tracks 9-16 page . . . . . . . . . . . . . . . . . . . . . . . . . . . . . . . . . . . 73 Song Select page . . . . . . . . . . . . . . . . . . . . . . . . . . . . . . . . . . . 73 The Lyrics page . . . . . . . . . . . . . . . . . . . . . . . . . . . . . . . . . . . . 74 Playing a Jukebox file . . . . . . . . . . . . . . . . . . . . . . . . . . . . . . . 74 Menu . . . . . . . . . . . . . . . . . . . . . . . . . . . . . . . . . . . . . . . . . . . . 75 Edit page structure . . . . . . . . . . . . . . . . . . . . . . . . . . . . . . . . . 75 Page 1 - Mixer: Volume . . . . . . . . . . . . . . . . . . . . . . . . . . . . . 75 Page 2 - Mixer: Pan . . . . . . . . . . . . . . . . . . . . . . . . . . . . . . . . 76 Page 3 - Mixer: FX send A/B . . . . . . . . . . . . . . . . . . . . . . . . . 76 Page 3 - Mixer: FX send C/D . . . . . . . . . . . . . . . . . . . . . . . . . 76 Page 4 - FX: A/B Select . . . . . . . . . . . . . . . . . . . . . . . . . . . . . . 77 Page 4 - FX: C/D Select . . . . . . . . . . . . . . . . . . . . . . . . . . . . . 77 Page 5 - FX: A editing . . . . . . . . . . . . . . . . . . . . . . . . . . . . . . 77 Page 6 - FX: B editing . . . . . . . . . . . . . . . . . . . . . . . . . . . . . . . 77 Page 5 - FX: C editing . . . . . . . . . . . . . . . . . . . . . . . . . . . . . . 77 Page 6 - FX: D editing . . . . . . . . . . . . . . . . . . . . . . . . . . . . . . 78 Page 7 - Track: Mode . . . . . . . . . . . . . . . . . . . . . . . . . . . . . . . 78 Page 8 - Track: Internal/External . . . . . . . . . . . . . . . . . . . . . 78 Page 9 - Jukebox . . . . . . . . . . . . . . . . . . . . . . . . . . . . . . . . . . . 79 Page 10 - Preferences . . . . . . . . . . . . . . . . . . . . . . . . . . . . . . . 79 Saving a list of Songs . . . . . . . . . . . . . . . . . . . . . . . . . . . . . . . 80
Backing Sequence operating mode . . . . . . . . . . . . 82
Transport controls . . . . . . . . . . . . . . . . . . . . . . . . . . . . . . . . . 82 The Backing Sequence, Song and Song Play modes . . . . . . 82 How to playback a Song . . . . . . . . . . . . . . . . . . . . . . . . . . . . 82 Realtime Recording mode . . . . . . . . . . . . . . . . . . . . . . . . . . . 82 Chord/Acc Step recording . . . . . . . . . . . . . . . . . . . . . . . . . . . 83 Main Page (Backing Sequence Play) . . . . . . . . . . . . . . . . . . . 83
5
Load Song page . . . . . . . . . . . . . . . . . . . . . . . . . . . . . . . . . . . .84 Save Song page . . . . . . . . . . . . . . . . . . . . . . . . . . . . . . . . . . . .84 Realtime Recording page . . . . . . . . . . . . . . . . . . . . . . . . . . . .85 Chord/Acc Step Recording page . . . . . . . . . . . . . . . . . . . . . .85 How to delete a whole Song . . . . . . . . . . . . . . . . . . . . . . . . . .87
Song operating mode . . . . . . . . . . . . . . . . . . . . . . 88
Transport controls . . . . . . . . . . . . . . . . . . . . . . . . . . . . . . . . .88 Master Volume and Sequencer Volume . . . . . . . . . . . . . . . .88 The Songs and the Standard MIDI File format . . . . . . . . . .88 Fast track deletion . . . . . . . . . . . . . . . . . . . . . . . . . . . . . . . . . .88 How to delete a whole Song . . . . . . . . . . . . . . . . . . . . . . . . . .88 Main page . . . . . . . . . . . . . . . . . . . . . . . . . . . . . . . . . . . . . . . .88 Tracks 1-8 page . . . . . . . . . . . . . . . . . . . . . . . . . . . . . . . . . . . .89 Tracks 9-16 page . . . . . . . . . . . . . . . . . . . . . . . . . . . . . . . . . . .89 Song Select page . . . . . . . . . . . . . . . . . . . . . . . . . . . . . . . . . . .89 Save Song page . . . . . . . . . . . . . . . . . . . . . . . . . . . . . . . . . . . .90 Realtime Record procedure . . . . . . . . . . . . . . . . . . . . . . . . . .91 Step Record procedure . . . . . . . . . . . . . . . . . . . . . . . . . . . . . .91 Song Record page . . . . . . . . . . . . . . . . . . . . . . . . . . . . . . . . . .93 Step Record page . . . . . . . . . . . . . . . . . . . . . . . . . . . . . . . . . . .94 Menu . . . . . . . . . . . . . . . . . . . . . . . . . . . . . . . . . . . . . . . . . . . .95 Edit page structure . . . . . . . . . . . . . . . . . . . . . . . . . . . . . . . . .95 Page 1 - Mixer: Volume . . . . . . . . . . . . . . . . . . . . . . . . . . . . .95 Page 2 - Mixer: Pan . . . . . . . . . . . . . . . . . . . . . . . . . . . . . . . . .95 Page 3 - Mixer: FX Block . . . . . . . . . . . . . . . . . . . . . . . . . . . .96 Page 4 - Mixer: FX Send A/B (or C/D) . . . . . . . . . . . . . . . . .96 Page 5 - Tuning: Detune . . . . . . . . . . . . . . . . . . . . . . . . . . . .96 Page 6 - Tuning: Scale . . . . . . . . . . . . . . . . . . . . . . . . . . . . . .97 Page 7 - Tuning: PitchBend/Scale . . . . . . . . . . . . . . . . . . . . .97 Page 8 - FX: A/B Select . . . . . . . . . . . . . . . . . . . . . . . . . . . . . .97 Page 9 - FX: C/D Select . . . . . . . . . . . . . . . . . . . . . . . . . . . . . .97 Page 10 - FX: A editing . . . . . . . . . . . . . . . . . . . . . . . . . . . . . .98 Page 11 - FX: B editing . . . . . . . . . . . . . . . . . . . . . . . . . . . . . .98 Page 12 - FX: C editing . . . . . . . . . . . . . . . . . . . . . . . . . . . . . .98 Page 13 - FX: D editing . . . . . . . . . . . . . . . . . . . . . . . . . . . . . .98 Page 14 - Track: Easy edit . . . . . . . . . . . . . . . . . . . . . . . . . . . .98 Page 15 - Track: Mode . . . . . . . . . . . . . . . . . . . . . . . . . . . . . .99 Page 16 - Track: Internal/External . . . . . . . . . . . . . . . . . . . .99 Page 17 - Edit: Quantize . . . . . . . . . . . . . . . . . . . . . . . . . . . .100 Page 18 - Edit: Transpose . . . . . . . . . . . . . . . . . . . . . . . . . . .100 Page 19 - Edit: Velocity . . . . . . . . . . . . . . . . . . . . . . . . . . . .100 Page 20 - Edit: Delete . . . . . . . . . . . . . . . . . . . . . . . . . . . . . .101 Page 21 - Edit: Cut Measures . . . . . . . . . . . . . . . . . . . . . . . .101 Page 22 - Edit: Insert Measures . . . . . . . . . . . . . . . . . . . . . .101 Page 23 - Edit: Copy . . . . . . . . . . . . . . . . . . . . . . . . . . . . . . .102 Page 24 - Event Edit . . . . . . . . . . . . . . . . . . . . . . . . . . . . . . .102 Page 25 - Event Filter . . . . . . . . . . . . . . . . . . . . . . . . . . . . . .103 Event Edit procedure . . . . . . . . . . . . . . . . . . . . . . . . . . . . . .104
Program operating mode . . . . . . . . . . . . . . . . . . . 105
Main page . . . . . . . . . . . . . . . . . . . . . . . . . . . . . . . . . . . . . . .105 Sound Programs and Drum Programs . . . . . . . . . . . . . . . .105 Menu . . . . . . . . . . . . . . . . . . . . . . . . . . . . . . . . . . . . . . . . . . .105 Edit page structure . . . . . . . . . . . . . . . . . . . . . . . . . . . . . . . .105 The Compare function . . . . . . . . . . . . . . . . . . . . . . . . . . . . .106 How to select oscillators . . . . . . . . . . . . . . . . . . . . . . . . . . . .106 Erase Program/Oscillator . . . . . . . . . . . . . . . . . . . . . . . . . . .106 The ‘Write’ window . . . . . . . . . . . . . . . . . . . . . . . . . . . . . . .106 Page 1 - Basic . . . . . . . . . . . . . . . . . . . . . . . . . . . . . . . . . . . . .106 Page 2 - Sample (Sound Programs) . . . . . . . . . . . . . . . . . .107 Page 2 - DK Samples (Drum Programs) . . . . . . . . . . . . . . .108

6
Page 3 - Pitch . . . . . . . . . . . . . . . . . . . . . . . . . . . . . . . . . . . . 109 Page 4 - Pitch LFO1 . . . . . . . . . . . . . . . . . . . . . . . . . . . . . . . 110 Page 5 - Pitch LFO2 . . . . . . . . . . . . . . . . . . . . . . . . . . . . . . . 110 Page 6 - Pitch EG . . . . . . . . . . . . . . . . . . . . . . . . . . . . . . . . . 110 Page 7 - Filter . . . . . . . . . . . . . . . . . . . . . . . . . . . . . . . . . . . . 112 Page 8 - Filter Modulation . . . . . . . . . . . . . . . . . . . . . . . . . 113 Page 9 - Filter LFO1 . . . . . . . . . . . . . . . . . . . . . . . . . . . . . . . 114 Page 10 - Filter LFO2 . . . . . . . . . . . . . . . . . . . . . . . . . . . . . . 115 Page 11 - Filter EG . . . . . . . . . . . . . . . . . . . . . . . . . . . . . . . . 115 Page 12 - Amp . . . . . . . . . . . . . . . . . . . . . . . . . . . . . . . . . . . 117 Page 13 - Amp Modulation . . . . . . . . . . . . . . . . . . . . . . . . . 117 Page 14 - Amp LFO1 . . . . . . . . . . . . . . . . . . . . . . . . . . . . . . 118 Page 15 - Amp LFO2 . . . . . . . . . . . . . . . . . . . . . . . . . . . . . . 118 Page 16 - Amp EG . . . . . . . . . . . . . . . . . . . . . . . . . . . . . . . . 118 Page 17 - LFO1 . . . . . . . . . . . . . . . . . . . . . . . . . . . . . . . . . . . 120 Page 18 - LFO2 . . . . . . . . . . . . . . . . . . . . . . . . . . . . . . . . . . . 121 Page 19 - Effects . . . . . . . . . . . . . . . . . . . . . . . . . . . . . . . . . . 121 Page 20 - FX1 editing . . . . . . . . . . . . . . . . . . . . . . . . . . . . . . 122 Page 21 - FX2 editing . . . . . . . . . . . . . . . . . . . . . . . . . . . . . . 122 AMS (Alternate Modulation Source) list . . . . . . . . . . . . . . 123
Global edit environment . . . . . . . . . . . . . . . . . . . 125
The Write window . . . . . . . . . . . . . . . . . . . . . . . . . . . . . . . . 125 Menu . . . . . . . . . . . . . . . . . . . . . . . . . . . . . . . . . . . . . . . . . . . 125 Page 1 - General controls . . . . . . . . . . . . . . . . . . . . . . . . . . . 125 Page 2 - Master Transpose . . . . . . . . . . . . . . . . . . . . . . . . . . 126 Page 3 - Assignable Pedal/Footswitch, Assignable
Slider . . . . . . . . . . . . . . . . . . . . . . . . . . . . . . . . . . . . . . . . . 126 Page 4 - MIDI Setup . . . . . . . . . . . . . . . . . . . . . . . . . . . . . . . 126 Page 5 - MIDI Controls . . . . . . . . . . . . . . . . . . . . . . . . . . . . 127 Page 6 - MIDI IN Channels . . . . . . . . . . . . . . . . . . . . . . . . . 127 Page 7 - MIDI IN Controls (1) . . . . . . . . . . . . . . . . . . . . . . 128 Page 8 - MIDI IN Controls (2) . . . . . . . . . . . . . . . . . . . . . . 128 Page 9 - MIDI IN Filters . . . . . . . . . . . . . . . . . . . . . . . . . . . 129 Page 10 - MIDI OUT Channels . . . . . . . . . . . . . . . . . . . . . 129 Page 11 - MIDI OUT Filters . . . . . . . . . . . . . . . . . . . . . . . . 129
Disk edit environment . . . . . . . . . . . . . . . . . . . . . 130
The WRITE/DISK IN USE LED . . . . . . . . . . . . . . . . . . . . . 130 Floppy disk handling . . . . . . . . . . . . . . . . . . . . . . . . . . . . . . 130 Loading data created with the Pa80 . . . . . . . . . . . . . . . . . . 131 Loading older i-Series data . . . . . . . . . . . . . . . . . . . . . . . . . 131 Disk structure . . . . . . . . . . . . . . . . . . . . . . . . . . . . . . . . . . . . 132 File types . . . . . . . . . . . . . . . . . . . . . . . . . . . . . . . . . . . . . . . . 132 File and folder size display . . . . . . . . . . . . . . . . . . . . . . . . . . 132 Page structure . . . . . . . . . . . . . . . . . . . . . . . . . . . . . . . . . . . . 133 Navigation tools . . . . . . . . . . . . . . . . . . . . . . . . . . . . . . . . . . 133
Menu . . . . . . . . . . . . . . . . . . . . . . . . . . . . . . . . . . . . . . . . . . . 133
Page 1 - Load . . . . . . . . . . . . . . . . . . . . . . . . . . . . . . . . . . . . 133 Page 2 - Save . . . . . . . . . . . . . . . . . . . . . . . . . . . . . . . . . . . . . 135 Page 3 - Copy . . . . . . . . . . . . . . . . . . . . . . . . . . . . . . . . . . . . 139
Page 4 - Erase . . . . . . . . . . . . . . . . . . . . . . . . . . . . . . . . . . . . .140
Page 5 - Format . . . . . . . . . . . . . . . . . . . . . . . . . . . . . . . . . . .140
Page 6 - New Dir . . . . . . . . . . . . . . . . . . . . . . . . . . . . . . . . . .140
Page 7 - Rename . . . . . . . . . . . . . . . . . . . . . . . . . . . . . . . . . .141
Page 8 - Utilities 1 . . . . . . . . . . . . . . . . . . . . . . . . . . . . . . . . .141
Page 9 - Utilities 2 . . . . . . . . . . . . . . . . . . . . . . . . . . . . . . . . .142
Appendix
Factory Data . . . . . . . . . . . . . . . . . . . . . . . . . . . . . 144
Styles . . . . . . . . . . . . . . . . . . . . . . . . . . . . . . . . . . . . . . . . . . .144 Style Elements . . . . . . . . . . . . . . . . . . . . . . . . . . . . . . . . . . . .146 Single Touch Settings (STS) . . . . . . . . . . . . . . . . . . . . . . . . .146 Programs (bank order) . . . . . . . . . . . . . . . . . . . . . . . . . . . . .147 Programs (Program Change order) . . . . . . . . . . . . . . . . . .154 Drum Kits . . . . . . . . . . . . . . . . . . . . . . . . . . . . . . . . . . . . . . .160 Drum Kit instruments . . . . . . . . . . . . . . . . . . . . . . . . . . . . .161 Performances . . . . . . . . . . . . . . . . . . . . . . . . . . . . . . . . . . . . .173 MIDI Setup . . . . . . . . . . . . . . . . . . . . . . . . . . . . . . . . . . . . . .174
Effects . . . . . . . . . . . . . . . . . . . . . . . . . . . . . . . . . . 175
Diagrams . . . . . . . . . . . . . . . . . . . . . . . . . . . . . . . . . . . . . . . .175 Dynamic Modulation sources . . . . . . . . . . . . . . . . . . . . . . .175 Filter/Dynamic . . . . . . . . . . . . . . . . . . . . . . . . . . . . . . . . . . .175 Pitch/Phase Mod. . . . . . . . . . . . . . . . . . . . . . . . . . . . . . . . . .185 Mod./P.Shift . . . . . . . . . . . . . . . . . . . . . . . . . . . . . . . . . . . . .195 ER/Delay . . . . . . . . . . . . . . . . . . . . . . . . . . . . . . . . . . . . . . . .202 Reverb . . . . . . . . . . . . . . . . . . . . . . . . . . . . . . . . . . . . . . . . . .208 Mono – Mono Chain . . . . . . . . . . . . . . . . . . . . . . . . . . . . . .210
Assignable parameters . . . . . . . . . . . . . . . . . . . . . |
225 |
List of functions assignable to the Footswitch . . . . . . . . . |
.225 |
List of functions assignable to the Pedal or |
|
Assignable Slider . . . . . . . . . . . . . . . . . . . . . . . . . . . . . . . . |
226 |
List of sounds assignable to the Pads . . . . . . . . . . . . . . . . . |
226 |
List of functions assignable to the Pads . . . . . . . . . . . . . . . |
227 |
Scales . . . . . . . . . . . . . . . . . . . . . . . . . . . . . . . . . . . . . . . . . . . |
227 |
MIDI Controllers . . . . . . . . . . . . . . . . . . . . . . . . . . 228
MIDI Implementation Chart . . . . . . . . . . . . . . . . . . . . . . . .229
Parameters . . . . . . . . . . . . . . . . . . . . . . . . . . . . . . 230 Recognized chords . . . . . . . . . . . . . . . . . . . . . . . . 233
Error messages & Troubleshooting . . . . . . . . . . . 235
Error messages . . . . . . . . . . . . . . . . . . . . . . . . . . . . . . . . . . .235 Troubleshooting . . . . . . . . . . . . . . . . . . . . . . . . . . . . . . . . . .238
Technical specifications . . . . . . . . . . . . . . . . . . . . 239 Alphabetical Index . . . . . . . . . . . . . . . . . . . . . . . . 240

INTRODUCTION

8 Welcome!
Live Performing
1. WELCOME!
Welcome to the world of KORG Pa50 Professional Arranger! Pa50 is one of the most powerful arranger available today, both for professional and home entertainment use.
Here are some of the features of your new instrument:
•Powerful HI (Hyper Integrated) KORG sound generation system, as seen in our best professional synthesizers.
•OPOS (Objective Portable Operating System) multitasking operating system, to let you load data while playing your instrument.
•Operating System updates, to load new features from disk. Don’t let your instrument get old!
•Solid State Disk (SSD), for any system update–a smart way to replace the usual ROM memory.
•Direct Style access from floppy disk.
•General MIDI Level 2 Sounds-compatible.
•More than 660 Sound Programs.
•4 multieffect processor, each with 89 effect types.
•160 Performances and 1,216 Single Touch Settings (STS), for fast setting of keyboard sounds and effects.
•304 Styles.
•XDS Double Sequencer with Crossfader.
•Style Record and Edit
•Full-featured sequencer (Song Record and Edit)
•Integrated speakers, for the most true sound reproduction.
•Wide Custom Display.
LIVE PERFORMING
Pa50 has been carefully designed to be used live. The “realtime” word has its full meaning in this instrument. Performances allow the instant selection of all the tracks on the keyboard and a suitable Style; STSs allow an instant selection of the keyboard tracks; and Styles are the realtime backing companions for your realtime playing.
USEFUL LINKS
Your preferred KORG dealer not only carries this keyboard, but also a whole bunch of hardware and software accessories. You should ask him for more Programs, Styles, and other useful music materials.
Each KORG distributor can supply you with useful information. Just give him a call for additional services. In the English-speaking world, here are the relevant addresses:
USA |
KORG USA, 316 South Service Road, Melville, |
|
New York, 11747, USA |
|
Tel:1-516-333-9100, Fax:1-516-333-9108 |
Canada |
Jam Industries, 620 McCaffrey, St-Laurent, |
|
QC, Canada, H4T 1N1 |
|
Tel. (514) 738-3000, Fax (514) 737-5069 |
UK |
KORG UK Ltd, 9 Newmarket Court, Kingston, |
|
Milton Keynes, Buckinghamshire, MK10, 0AU |
Telephone: 01908 857100
UK Technical Support Tel: 01908 857122, Fax: 01908 857199
E-mail: info@korg.co.uk
Many KORG distributors also have their own web page on the internet, where you can find infos and software. Useful web pages in English are the following:
www.korg.com www.korg.co.uk www.jam-industries.com
A place to find operating system updates and various system files (for example, a full backup of the factory data) is at the following link:
www.korgpa.com
Other useful information can be found worldwide by accessing to other KORG web sites, like the following:
www.korg.co.jp www.korgfr.net www.korg.de www.korg.it
ABOUT THIS MANUAL
This manual is divided in three sections:
•A Basic Guide, containing an overview of the instrument, as well as a series of practical guides (named “Tutorials”).
•A Reference Guide, with each page and parameter described in detail.
•An Appendix, with a list of data and useful information for the advanced user.
Within the manual, you will find the following abbreviations: 

 The parameter can be saved onto a Perfor-
mance by pressing the WRITE button.
The parameter can be saved onto the current Style Performance by pressing the WRITE button.
The parameter can be saved onto a Single Touch Setting by pressing the WRITE button. The parameter can be saved onto the Global, by going to the Global environment (see “Global edit environment” on page 125) and pressing the WRITE button.
MAKING A BACKUP COPY OF SYSTEM FILES
Before starting playing with your new Pa50, we suggest you make a back-up copy of all system data, including Programs, Performances and Styles, in case the internal data is changed.
To backup the Operating System, please see “Save OS” on page 141.
To backup the Factory Data (Styles, Programs…), see “Backup Data” on page 141.
LOADING THE OPERATING SYSTEM
Your Pa50 can be constantly updated as new versions of the operating system are released by KORG. You can download the operating system from www.korgpa.com. Please, read the Readme file included with the operating system itself.
You can see which version of the operating systems is installed in your Pa50 by keeping the SHIFT button pressed, and pressing the ENTER and EXIT buttons together. The operating system version number will appear in the display. Press EXIT to close the message window.
To load a new system, follow these instructions:
1.Copy the three operating system’s files in an empty, MSDOS® formatted, HD-type floppy disk. These are the needed files:
•OSPa50.LZX
•BPa50.SYS
•NBPa50.SYS
Welcome! 9
Loading the operating system
2.Turn the instrument off, and insert the operating system disk into the disk drive.
3.Turn the instrument on. A message appears in the display, asking if you want to load the operating system.
4.Press ENTER to load, or EXIT to cancel the loading procedure. If you press ENTER, wait until the loading is finished.
When the operating system is finished loading, a message appears, asking you to remove the floppy disk and press any button.
5.Remove the floppy disk, and press any button.
RELOADING THE FACTORY DATA
Should the internal memory content get damaged, you can reload the original Factory Data from the backup disks. See “Restore Data” on page 142.
10 Start up
Connecting the AC power adapter
2. START UP
CONNECTING THE AC POWER ADAPTER
Connect the supplied AC power adapter to the dedicated socket on the rear of the instrument. Then, plug it into a wall socket.
Warning: Use only the supplied adapter, or an adapter suggested by Korg. Other adapters may look similar, but they may damage your instrument!
•Move it fully right to set Sequencer 1 to zero and Sequencer 2 to the maximum level.
•Move it to the center to set both Sequencer at the same level.
Note: When turning the instrument on, move this slider to the center, to avoid starting a Song at the minimum level.
HEADPHONES
Connect a pair of headphones to the PHONES output, on the rear of the insturment. You can use headphones with an impedance of 16-200Ω (50Ω suggested). Use a headphone distributor to connect more than one pair of headphones.
TURNING THE INSTRUMENT ON AND OFF
•Press the POWER switch on the rear panel to turn the instrument on. The display will light up, showing a welcome message.
•Press again the POWER switch on the rear panel to turn the instrument off.
Warning: When turning the instrument off, all data contained in RAM (a volatile memory, used for Song editing) will be lost. On the contrary, data contained in the SSD disk (a non-volatile memory, used for Factory and User data) will be preserved (see “Memory Mode” on page 51).
CONTROLLING THE VOLUME
•Use the MASTER VOLUME slider to control the
overall volume of the instrument. This slider controls the volume of the sound going to the internal speakers, the L/MONO & RIGHT OUTPUTS, and
the HEADPHONES connector.
Note: Start at a moderate level, then raise the MASTER VOLUME up. Don’t keep the volume at an uncomfortable level for too long.
•Use the ACC/SEQ VOLUME slider to control the Style tracks (drums, percussion, bass…) volume. This slider also controls both Sequencers tracks, excluding the Realtime (Keyboard) tracks.
•By default, you can use the ASSIGN.SLIDER to control the keyboard tracks volume. This slider is user-assign- able, but is set to the Keyboard Expression parameter by default.
THE BALANCE SLIDER
The BALANCE slider sets the relative volume of the two onboard sequencers (Sequencer1 and Sequencer 2).
•Move it fully left to set Sequencer 1 to the maximum level and Sequencer 2 to zero.
AUDIO OUTPUTS
You can send the sound to an external amplification system, instead of the internal speakers. This is useful when recording, or when playing live.
Stereo. Connect two mono cables to the L/MONO & RIGHT OUTPUTS. Connect the other end of the cables to a stereo channel of your mixer, two mono channels, two powered monitors, or the TAPE/AUX input of your audio system. Don’t use the PHONO inputs of your audio system!
Mono. Connect a mono cable to the L/MONO OUTPUT. Connect the other end of the cable to a mono channel of your mixer, a powered monitor, or a channel of your TAPE/AUX input of a hi-fi system (you will hear that channel only, unless you can set the amplifier to Mono mode).
AUDIO INPUTS
Connect any other electronic musical instrument, a mixer’s output (non-powered), or a CD/tape player, to the INPUTS on the back of the instrument. These inputs expect a linelevel signal. To connect a microphone, you need a dedicated microphone preamplifier or a mixer.
Use the connected device’s volume control to adjust the input level. Be careful not to make it distort (or “clip”). Here is how to set the volume of the connected device:
•if the sound heard on Pa50’s outputs is too low, you should increase the output level of the connected device.
•if it sounds fine, it’s ok.
•if it distorts, you should lower the level a little, until the sounds is fine again.
MIDI CONNECTIONS
You can play the internal sounds of your Pa50 with an external controller, i.e. a master keyboard, a MIDI guitar, a wind controller, a MIDI accordion, or a digital piano.
1.Connect a standard MIDI cable from the MIDI OUT of your controller to the MIDI IN connector on the Pa50.
2.Select a transmission MIDI channel on your controller. Some controllers, like the MIDI accordions, usually transmit on more than one channel (see more information in the MIDI chapter).

3.On the Pa50, select the MIDI Setup that best fit your
controllers type (see “Page 4 - MIDI Setup” on page 126).
DAMPER PEDAL
Connect a Damper (Sustain) pedal to the DAMPER connector on the back panel. Use a KORG PS1, PS2 or DS1H footswitch pedal, or a compatible one. To switch the Damper polarity, see “Damper Pol. (Damper Polarity)” on page 126
DEMO
Listen to the built-in Demo Songs to appreciate the power of the Pa50. There are 16 Demo Songs to choose from.
Start up 11
Damper Pedal
1.Press the STYLE PLAY and SONG PLAY buttons together. Their LEDs start blinking.
At this point, if you don’t press any other button, all the Demo Songs will be played back.
2.Choose a page using the PAGE buttons. There are two different pages in the Demo mode.
3.Select a Demo Song by pressing the corresponding VOLUME/VALUE button around the display. The Demo will automatically start.
4.Stop the Demo by pressing START/STOP.
5.Exit the Demo mode by pressing one of the MODE buttons.
THE MUSIC STAND
A music stand comes standard with your Pa50. Fit it into the two dedicated holes in the back panel.

12Front panel
3.FRONT PANEL
|
|
|
|
|
|
Q |
|
|
|
|
|
|
|
|
P |
|
|
1 |
2 |
3 |
4 |
5 |
6 |
|
|
|
|
|
|
|
|
|
|
||
|
|
|
|
|
|
S |
|
|
|
|
7 8 |
9 0 A B C |
T |
|
U |
||
|
|
|
|
|||||
D |
|
|
|
|
|
|
|
g |
|
|
|
|
|
|
|
|
|
|
|
|
|
|
|
|
h |
|
E |
|
F |
|
G |
H |
I |
J |
K |
|
|
|
||||||
W
R
\ ]
S X
[ |
U |
V |
Y |
Z |
` a |
b |
|
|
|
|
c |
|
|
g |
|
|
|
|
|
|
|
|
|
|
|
h |
|
|
|
|
K |
L M N |
O |
d |
e |
f |

1 MASTER VOLUME
This slider controls the overall volume of the instrument, both of the internal speakers, the L/MONO and RIGHT outputs, and the HEADPHONES output.
Warning: At the maximum level, with rich-sounding Songs, Styles or Programs, the internal speakers could distort during signal peaks. Should this happen, lower the Master Volume a little.
2 ACC/SEQ VOLUME
This slider controls the accompaniment tracks volume (Style Play mode) or the Song tracks volume, excluding the Realtime tracks (Song and Song Play modes). This is a relative control, whose effective maximum value is determined by the MASTER VOLUME slider position.
3 ASSIGN.SLIDER
This is a freely programmable slider (see “Sld (Slider)” on page 126). By default, it acts as the Keyboard Expression control, to let you balance the relative volume of the Realtime (Keyboard) tracks.
4 MODE section
Each of these buttons recalls one of the operating modes of the instrument. Each mode excludes the others.
STYLE PLAY
Style Play mode, where you can play Styles (automatic accompaniments) and/or play up to four Realtime tracks on the keyboard.
In the main page, Realtime (Keyboard) tracks are shown on the right half of the display. You can reach the main page by pressing EXIT from any of the Style Play edit pages. If you are in a different operating mode, press STYLE PLAY to recall the Style Play mode. If the TRACK SELECT LED is on, press TRACK SELECT to turn it off and see the Realtime tracks.
This operating mode is automatically selected when turning the instrument on.
SONG PLAY
Song Play mode, where you can playback 16track Songs in Standard Midi File (SMF) format directly from disk. You can play “.MID” and “.KAR” files directly from the floppy disk. Since the Pa50 is equipped with two sequencers, you can even play two Songs at the same time, and mix them with the BALANCE slider. In addition to the Song tracks, you can play one to four Realtime (Keyboard) tracks, along with the Song(s). In the main page, Realtime (Keyboard) tracks are shown on the right half of the display. You can reach the main page by pressing EXIT from any of the Song Play edit pages. If you are in a different operating mode, press SONG PLAY to recall the Song Play mode. If the TRACK SELECT LED is on or flashing, press TRK SELECT one or two times to turn it off and see the Realtime tracks.
|
|
Front panel 13 |
B.SEQ |
Backing Sequence mode, where you can record |
|
|
|
a new Song based on the Realtime and Style |
|
|
tracks, and save it as a new Standard MIDI File. |
SONG |
Song mode, where you can play, record, or edit |
|
|
|
a Song. |
PROGRAM |
Program mode, to play single Sound Programs |
|
|
|
on the keyboard, or edit them. |
|
|
|
DEMO |
|
Press the STYLE PLAY and SONG PLAY but- |
|
|
tons together to select the Demo mode. This |
|
|
mode lets you listen to some Demo Songs, to |
|
|
let you hear the sonic power of the Pa50. |
5 GLOBAL
This button recalls the Global edit environment, where you can execute various global settings. This edit environment overlaps any operating mode, that still remains active in the background. Press EXIT to go back to the underlying operating mode.
6 DISK
This button recalls the Disk edit environment, where you can execute various operations on files and disks (Load, Save, Format, etc…). This edit environment overlaps any operating mode, that still remains active in the background. Press EXIT to go back to the underlying operating mode.
7 MEMORY (TIE)
This button turns the Lower and Chord Memory functions on or off. Go to the “Page 24 - Preferences: controls” edit page (Style Play mode, see page 50) to decide if this button should be a Chord Memory only, or a Lower/Chord Memory button. When it works as a Lower/Chord Memory:
ON |
The sound on the left of the split point, and the |
|
chord for the automatic accompaniment, are |
|
kept in memory even when you raise your |
|
hand from the keyboard. |
OFF |
The sound and chords are released as soon as |
|
you raise your hand from the keyboard. |
 This button doubles as a TIE function for the Song mode (see chapter 13).
8 BASS INVERSION (REST)
This button turns the Bass Inversion function on or off.
ON |
The lowest note of a chord played in inverted |
|
form will always be detected as the root note of |
|
the chord. Thus, you can specify to the |
|
arranger composite chords such as Am7/G or |
|
“F/C”. |
OFF |
The lowest note is scanned together with the |
|
other chord notes, and is not always consid- |
|
ered as the root note. |
 This button doubles as a REST function for the Song mode (see chapter 13).
9 MANUAL BASS
This button turns the Manual Bass function on or off.
Note: When you press the MANUAL BASS button, the Bass track volume is automatically set to the maximum value. The volume is automatically set back to the original value when the MANUAL BASS button is deactivated.
14 Front panel
ON |
The automatic accompaniment stops playing |
|
(apart for the Drum and Percussion tracks), |
|
and you can manually play the Bass track on |
|
the Lower part of the keyboard. You can start |
|
the automatic accompaniment again by press- |
|
ing one of the CHORD SCANNING buttons. |
OFF |
The bass track is automatically played by the |
|
Style. |
0 SPLIT POINT (<)
Keep this button pressed to open the Split Point window. While this window is open, you can set the split point, simply by playing the split point note on the keyboard. Then, release the SPLIT POINT button.
To memorize the selected split point note, press the GLOBAL button, then press WRITE to save the Global in memory (see “The Write window” on page 125).
 This button doubles as a PREVIOUS EVENT function for the Backing Sequence and Song modes (see chapters 12 and 13).
A G.QUANTIZE (>)
Press this button to open the Groove Quantize window, where you can select a realtime groove quantization to be applied to the Song (only Sequencer 1). See “Groove Quantize window” on page 71.
 This button doubles as a NEXT EVENT function for the Backing Sequence and Song modes (see chapters 12 and 13).
B TEMPO |
(= LOCK) |
This button turns the Tempo Lock function on or off. |
|
ON |
When you select a different Style or Perfor- |
|
mance, the tempo doesn’t change. You can still |
|
change it using the DIAL or the TEMPO but- |
|
tons. |
OFF |
When you select a different Style or Perfor- |
|
mance, the memorized tempo value is auto- |
|
matically selected. |
C SINGLE TOUCH
This button turns the Single Touch function on or off.
ON |
When a different Style (or the same again) is |
|
selected, a Single Touch Setting (STS1) is auto- |
|
matically selected, meaning that the Realtime |
|
tracks and effects will change, together with |
|
the Style tracks and effects. |
OFF |
When you select a different Style (or the same |
|
again), the Style tracks and effects are changed, |
|
while the Realtime tracks are not changed. |
D STYLE section (NUMERIC KEYPAD)
Use these buttons to open the Style Select window and select a Style. See “Selecting a Style” on page 26.
The leftmost button lets you select the upper or lower row of Style banks. Press it repeatedly to select one of the rows. (After both LEDs have turned on, press the button again to turn them off).
UPPER LED ON
Upper-row Styles selected. LOWER LED ON
Lower-row Styles selected.
A word about Style banks and names. Styles from “8/16 BEAT” to “WORLD 3”, and from “LATIN1” to “TRADITIONAL” are standard Styles, the user can’t normally overwrite with a Load operation (unless you remove the protection; see “Factory Style Protect” on page 142).
“DIRECT FD” Styles are Styles directly accessed from floppy disk (no need to load from disk). See “The DIRECT FD bank” on page 40.
Styles from “USER1” to “USER3” are location where you can load new Styles from disk.
Each button (Style bank) contains 2 pages, each with up to 8 Styles. Browse through the Styles using the PAGE buttons.
Shortcut to see the original bank for a Style. You can see the original bank where a Style is contained. Just keep the SHIFT button pressed, and press the lefmost button of the STYLE section. A message window will appear, showing the name of the original bank. Release the SHIFT button to exit the window.
Shortcut to see all pages of the selected bank. To cycle all pages for a selected bank, repeatedly press the bank’s button.
 These buttons double as a numeric keypad on certain pages (see “Selecting a Song composing its progressive number” on page 70).
E FADE IN/OUT
When the Style is in stop, press this button to start it with a volume fade-in (the volume goes from zero to the maximum).
When the Style is in play, press this button to stop it with a volume fade-out (the volume gradually decreases).
You don’t need to press START/STOP to start or stop the Style.
F VARIATION 1-4 (NOTE LENGTH) buttons
Each of these buttons select one of the four variations of the current Style. Each variation can vary in patterns and sounds.
 These buttons double as a NOTE LENGTH function for the Song mode (see chapter 13).
G FILL 1-2 (NOTE LENGTH) buttons
These two buttons trigger a fill-in. Press them twice (LED blinking) to let them play in loop, and select any other Style element (Fill, Intro, Variation…) to exit the loop.
 They also double as a NOTE LENGTH function for the Song mode (see chapter 13).
H COUNT IN / BREAK
While the Style is not running, press this button, then press START/STOP. This combination triggers a one-bar initial count, then the Style starts playing.
While the Style is already in play, this button triggers a break (an empty measure beginning with a kick + crash shot). Press it twice to let it play in loop, and select any other Style element (Fill, Intro, Variation…) to exit the loop.
I ENDING 1-2 (DOT, TRIPLET) buttons
While the Style is running, these two buttons trigger an Ending, and stop the Style. Press one of them, and the Style will stop running with an Ending. If pressed while the Style is stopped, they act as an additional couple of Intros.

Press them twice (LED blinking) to let them play in loop, and select any other Style element (Fill, Intro, Variation…) to exit the loop.
 ENDING1 also doubles as a DOT function, and ENDING2 doubles as a TRIPLET function, to be used in Song mode (see chapter 13).
Note: Ending 1 plays a short sequence with different chords, while Ending 2 plays on the last recognized chord.
J INTRO 1-2 buttons
These two buttons set the arranger in Intro mode. After pressing one of these buttons, start the Style, and it will begin with the selected intro. The INTRO LED automatically goes off at the end of the intro.
Press them twice (LED blinking) to let them play in loop, and select any other Style element (Fill, Intro, Variation…) to exit the loop.
Note: Intro 1 plays a short sequence with different chords, while Intro 2 plays on the last recognized chord.
K START/STOP
Starts or stops the Style running.
 You can reset all ‘frozen’ notes and controllers on the Pa50 and any instrument connected to its MIDI OUT, by using the “Panic” key combination. Just press SHIFT + START/STOP to stop all notes and reset all controllers.
L SYNCHRO START / STOP (DELETE)
This button turns the Synchro Start and Synchro Stop functions on or off. Press it repeatedly to turn the functions on or off. The LEDs cycle in this order: START START+STOP OFF.
START LED ON
When this LED is lit, just play a chord in the chord recognition area (usually under the split point, see “CHORD SCANNING section” on page 17) to automatically start the Style running. If you like, you can turn one of the INTROs on before starting the Style.
START+STOP LEDs ON
|
When both LEDs are lit, raising your hand |
|
from the keyboard momentarily stops the Style |
|
running. If you play a chord again, the Style |
|
starts again. |
OFF |
All Synchro functions are turned off. |
 This button doubles as a DELETE function for the Backing Sequence and Song modes (see chapters 12 and 13).
It is also used to delete the selected character, during text editing.
M TAP TEMPO/RESET (INSERT)
This is a double-function button, acting in a different way depending on the Style status (stop/play).
Front panel 15
Tap Tempo: When the Style is not playing, you can “beat” the tempo on this button. At the end, the accompaniment starts playing, using the “tapped in” tempo.
Reset: When you press this button while the Style is in play, the Style pattern goes back to the previous strong beat.
 This button doubles as a INSERT function for the Backing Sequence and Song modes (see chapters 12 and 13).
It is also used to insert a character at the cursor position, during text editing.
N WRITE/DISK IN USE
In Style Play mode, this button opens the Write window, that lets you save all the tracks onto a Performance, the Realtime (Keyboard) tracks in a Single Touch Setting (STS), or the accompaniment tracks onto a Style Performance. (See “The Write window” on page 42).
In the Global edit environment, press it to save Global parameters in memory. (See “The Write window” on page 125).
 This button’s LED doubles as a DISK IN USE indicator, flashing when the floppy disk drive is in use.
O ENSEMBLE
This button turns the Ensemble function on or off. When on, the right-hand melody is harmonized with the left-hand chords.
Note: The Ensemble function works only when the keyboard is in SPLIT mode, and the LOWER Chord Scanning mode selected.
P RECORD
This button sets the instrument in Record mode (depending on the current operating mode).
Q MENU
This button opens the Menu page for the current operating mode or edit environment. After opening a menu, you can jump to one of the edit pages by pressing the corresponding VOLUME/VALUE buttons; or browse them using the PAGE buttons. Otherwise, go back to the main page of the current operating mode, or close the edit environment, by pressing the EXIT button.
See the relevant chapter devoted to each operating mode or edit environment, to see their “maps” in detail.
R PAGE -/+
After pressing MENU to open a menu, use these buttons to browse the edit pages of an operating mode or editing environment. Press EXIT to go back from an edit page to the main page of the current operating mode, or to close the Global or Disk edit environment.
In addition, you can use these buttons to select a different page in a Style Select or Program Select window.
16 Front panel
S VOLUME/VALUE (MUTE) A-H buttons
Within this user’s manual, each button pair is marked with an alphabetic letter (A-H). See “Display and User Interface” on page 19 for more details.
|
BossaNova |
|STS1 |
|
|
A |
Drum/Perc |
Piano01 |
E |
|
B |
Bass01 |
Guitar01 |
F |
|
C |
Acc.1-5 |
StrngEns2 |
G |
|
|
VoxPad1 |
|||
D |
|
H |
||
|
|
|
||
A corresponding track name is printed over each button pair. These names show the corresponding track the button pair affects in the main page of the Style Play mode.
•The left half is for the main page, where you can see the Realtime tracks, and the Style tracks grouped together:
•The right half is for the Style tracks page, where you can see each of the accompaniment tracks:
See “Symbols and Icons” on page 21.
Use these buttons to execute various operations on the commands and functions appearing in the display.
SELECTING
|
Use each button pair to select the correspond- |
|
ing item in the display (i.e. a track, a parameter |
|
or a command). Use either the left or right |
|
button in a pair. |
VOLUME |
While you are in the main pages of any operat- |
|
ing mode, select a track and use these buttons |
|
to change the track’s volume. Use the left but- |
|
ton to decrease it, or the right button to |
|
increase it. |
MUTE |
Press both buttons in a pair to mute the corre- |
|
sponding track. Press both buttons again to |
|
unmute the track. |
SOLO |
|
While in the Style Play, Song Play and |
|
Song modes, you can solo one of the tracks. |
|
|
Just keep the SHIFT button pressed, and press |
|
|
both VOLUME/VALUE buttons corresponding |
|
|
to the track you wish to solo. |
|
|
To exit the solo mode, keep the SHIFT button |
|
|
pressed again, and press both VOLUME/ |
|
|
VALUE buttons corresponding to the soloed |
|
|
track. |
|
VALUE |
Use each button pair to change the corre- |
|
|
sponding parameter’s value. The left button |
|
|
decreases the value, the right button increases |
|
|
it. |
|
T TRACK SELECT
Depending on the operating mode, this button switches between the various tracks view.
STYLE PLAY MODE
Switches between the Realtime tracks and the Style tracks.
SONG PLAY MODE
|
Switches between the main page (showing the |
|
Realtime/Keyboard tracks), Song tracks 1-8, |
|
and Song tracks 9-16. |
SONG MODE |
|
|
Switches between the main page, Song tracks |
|
1-8 and Song tracks 9-16. |
The TRACK SELECT LED shows the current page view: |
|
Off |
Main page (Realtime tracks, or Song controls) |
On |
2nd page (Style tracks, or Song tracks 1-8) |
Flashing |
3rd page (Song tracks 9-16) |
U SINGLE TOUCH SETTING (F1-F4 FUNCTION KEYS) buttons
While in the main page of the Style Play or Backing Sequence mode, these buttons select a Single Touch Setting each. Each of the Styles includes a maximum of four Single Touch Settings (STS), to automatically configure the Realtime tracks and effects at the touch of a finger. When the SINGLE TOUCH LED is lit, an STS is automatically selected when selecting a Style.
 In Edit mode, these buttons double as function keys, to select the corresponding items in the display.
V SHIFT
With this button held down, pressing certain other buttons accesses to a second function.
W TEMPO/VALUE section
The DIAL and the DOWN/- and UP/+ buttons can be used to control the Tempo, assign a different value to the selected parameter in the display or scroll a list of files in the Song Select and Disk pages. The VALUE LED shows the status of this section.
DIAL
When used while pressing the SHIFT button, this control always acts as a Tempo control.

DOWN/- and UP/+
DOWN/- decreases the value or tempo; UP/+ increases the value or tempo.
 Keep the SHIFT button pressed down, and press either the DOWN/- or
UP/+ button to reset the Tempo to the value memorized onto the selected Style.
X VALUE LED
This LED shows the status of the DIAL and DOWN/- and UP/+ buttons.
ON |
The DIAL and DOWN/- and UP/+ buttons act |
|
as Value controls, to change the value of the |
|
selected parameter in the display. |
OFF |
The DIAL and DOWN/- and UP/+ buttons |
|
control the Tempo. |
Y EXIT/NO
Use this button to perform various actions, leaving from the current status:
•exit a dialog box
•answer “No” to any question that appears in the display
•exit the Menu window
•go back to the main page of the current operating mode
•exit the Global or Disk edit environment, and go back to the main page of the current operating mode
•exit from a Style, Performance or Program Select window
Z ENTER/YES
Use this button to perform various actions, agreeing the current selected status:
•answer “Yes” to any question that appears in the display
•confirm a command
[ DISPLAY HOLD
This button turns the Display Hold function on or off.
ON |
When you open a temporary windows (like the |
|
Program Select window), it remains in the dis- |
|
play until you press EXIT/NO or an operating |
|
mode button. |
OFF |
Any temporary window closes after a certain |
|
time, or after selecting an item in the window. |
\ CHORD SCANNING section
In Style Play and Backing Sequence mode, use these buttons to define the way chords are recognized by the arranger.
LOWER |
Chords are detected below the split point. The |
|
number of notes you should play to form a |
|
chord is defined by the Chord Scanning Mode |
|
parameter (see “Chord Recognition Mode” on |
|
page 50). |
UPPER |
Chords are detected above the split point. You |
|
must always play three or more notes to let the |
|
arranger recognize a chord. |
FULL (both LEDs on)
Chords are detected on the full keyboard range. You must always play three or more notes to let the arranger recognize a chord.
|
Front panel 17 |
OFF |
No chords detected. After pressing START/ |
|
STOP, only the Drum and Percussion accom- |
|
paniment tracks can play. |
] KEYBOARD MODE section
These buttons define how the four Keyboard (or Realtime) tracks are positioned on the keyboard.
SPLIT The Lower track plays below the split point, while the Upper 1, Upper 2 and Upper 3 tracks play above it. By default, selecting this keyboard mode automatically selects the Lower chord scanning mode (see “Chord Recognition Mode” on page 50).
FULL UPPER
The Upper 1, Upper 2 and/or Upper 3 tracks play on the whole keyboard range. The Lower track does not play. By default, selecting this keyboard mode automatically selects the Full chord scanning mode (see “Chord Recognition Mode” on page 50).
` STYLE CHANGE
This button turns the Style Change function on or off.
ON |
When you select a Performance, the Style |
|
could change, according to which Style num- |
|
ber is memorized onto the Performance. |
OFF |
When you select a Performance, the Style and |
|
Style track settings remain unchanged. Only |
|
Realtime (Keyboard) tracks settings are |
|
changed. |
a PERFORM.
Press this button to use the PROGRAM/PERFORMANCE section to select a Performance.
b PROGRAM
Press this button to use the PROGRAM/PERFORMANCE section to select a Program, and assign it to the selected track.
c PROGRAM/PERFORMANCE section
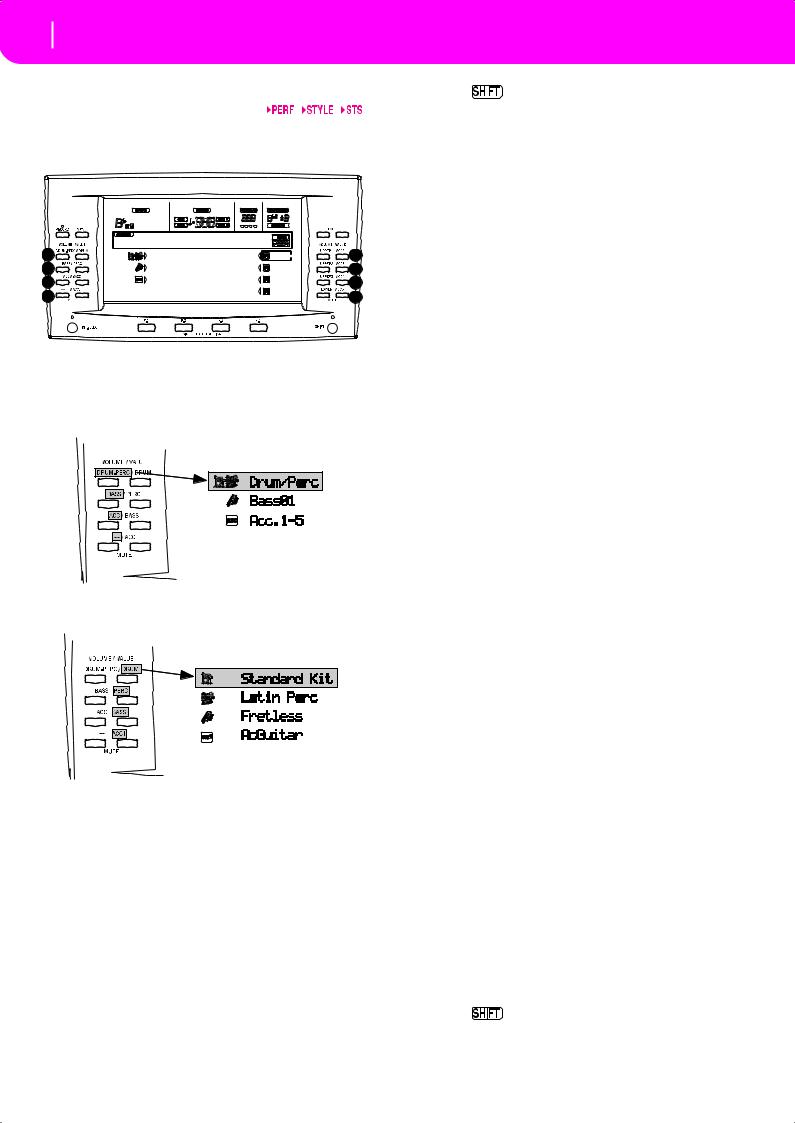
Use these buttons to open the Program Select or Performance Select window, and select a Program or a Performance. See “Selecting a Program” on page 26, or “Selecting a Performance” on page 25. For a list of available Programs, see “Programs (Program Change order)” on page 154.
The leftmost button selects the upper or lower row of Program or Performance banks. Press it repeatedly to select one of the rows. (After both LEDs have consecutively turned on, press the button again to turn them off).
UPPER LED ON
Upper row of Programs or Performances selected.
LOWER LED ON
Lower row of Programs or Performances selected.
On the front panel, Program banks are identified by the instrument names, while Performance banks are identified by numbers (1-10; 0=bank 10).
A note about Program banks and names. Programs from “PIANO” to “SFX” are standard Programs, the user can’t directly modify.

18 Front panel
Programs “USER1” and “USER2” are locations where you can load new Programs from disk.
“USER DK” is where you can load new drum kits.
Each Program bank contains various pages, each with up to 8 Programs. You can browse them using the PAGE buttons.
Shortcut to see the original bank for a Performance or Program. You can see the original bank where a Performance or Program is contained. Just keep the SHIFT button pressed, and press the lefmost button of the PROGRAM/PERFORMANCE section. A message window will appear, showing the name of the original bank. Release the SHIFT button to exit the window.
Shortcut to see all pages of the selected bank. To cycle all pages for a selected bank, repeatedly press the bank’s button.
d PADS (1-4, STOP)
These programmable pads can be used to trigger a sound effect. Use the STOP button to stop a cyclic sound. (See “List of sounds assignable to the Pads” on page 226).
Each Pad corresponds to a dedicated Pad track.
e TRANSPOSE
These buttons transpose the whole instrument in semitone steps (Master Transpose). The transposition value is shown (as a note name) on the top right of the display.
Press both buttons together, to reset the Master Transpose to zero.
Note: The Master Transpose has no effect on tracks set to Drum mode (and, even if set in a different status, on the Drum and
Percussion tracks). See “Page 14 - Track: Mode” on page 46, and |
|
“Page 7 - Track: Mode” on page 78. |
|
|
Lowers the Master Transpose a semitone. |
|
Raises the Master Transpose a semitone. |
f OCTAVE
These buttons transpose the selected track in steps of a whole octave (12 semitones; max ±2 octaves). The transposition value is shown (in octaves) on the top right area of the display.
Press both buttons together, to reset the Octave Transpose to zero.
Note: The Octave Transpose has no effect on tracks set to Drum mode (and, even if set in a different status, on the Drum and Percussion tracks).
–Lowers the selected track an octave.
+Raises the selected track an octave.
g BALANCE slider
In Song Play mode, this slider balances the volume of the two on-board sequencers. When fully on the left, only the Sequencer 1 can be heard. When fully on the right, only the Sequencer 2 can be heard. When in the middle, both sequencers play at full volume.
h SEQUENCER TRANSPORT CONTROLS - SEQ1 and SEQ2
The instrument is equipped with two sequencers (Sequencer 1 and Sequencer 2), each with its own set of transport controls.
<< and >>
PAUSE
PLAY/STOP
Display and User Interface 19
Display controls
4. DISPLAY AND USER INTERFACE
The display shows the current status of the Pa50 and its performance and editing parameters. You can select each parameter by using the VOLUME/VALUE (A-H) buttons on the side of the display, or each page command appearing along
the last line using the F1-F4 buttons. You can vary many of the parameter’s values by pressing the left (-) or right (+) button of any VOLUME/VALUE pair.
|
Status icons area |
|
|
|
|
BossaNova |
|STS1 |
|
|
A |
Drum/Perc |
Piano01 |
E |
|
B |
Bass01 |
Guitar01 |
F |
|
C |
Acc.1-5 |
StrngEns2 |
G |
|
|
VoxPad1 |
|||
D |
|
H |
||
|
|
|
||
|
Style (accompaniment/backing) tracks |
|
Realtime (Keyboard) tracks |
|
DISPLAY CONTROLS
VOLUME/VALUE (A-H) buttons and display parameters. These buttons are used to select the corresponding parameter or command in the display, to change the parameter’s value, or to change the volume of the corresponding track.
While you are in the main page, these buttons can select a track, change the track’s volume, or mute/unmute a track. See “VOLUME/VALUE (MUTE) A-H buttons” on page 16 for more information.
F1-F4 buttons. When in an Edit page, these buttons may be used when there are four parameters in a row, as in the following example:
Mixer:FX Send
- - - - - - C:100 D:050 |
A:127 B:020 C:100 D:050 |
- - - - - - C:100 D:050 |
C:100 D:050 |
First, select the line using a VOLUME/VALUE (A-H) button. Then, select a column using the F1-F4 function key.
In the Disk edit environment, the F1-F4 buttons can be used also to select one of the page commands appearing in the last line of the display.
Disk:Load
NEWNAME.SET |
LIVE.SET
ETHNICA.SET |
FD LOAD OPEN CLOSE
See “SINGLE TOUCH SETTING (F1-F4 FUNCTION KEYS) buttons” on page 16 for more information.
PAGE. The PAGE buttons select the previous or following edit page. When selecting a Style or a Program, they select a different page of Styles or Programs. See “PAGE -/+” on page 15 for more information.
MENU. The MENU button opens the current operating mode or edit environment’s Menu. When in a Menu, you can use the VOLUME/VALUE buttons to select an edit section to jump to.
TRACK SELECT. Each of the operating modes have a different number of tracks:
Style Play |
4 |
Realtime tracks, 8 Style tracks, 4 Pads. |
Song Play |
4 |
Realtime tracks, 2 x 16 Song Tracks, 4 Pads. |
20 Display and User Interface
Interface structure
Backing Sequence
|
4 Realtime tracks, 8 Style tracks, 4 Pads. |
Song |
16 Song tracks. |
You can only see up to 8 tracks in the display. So, use the TRACK SELECT button to switch to the other (hidden) tracks. For example, when in Style Play, you can use this button to switch from the Realtime tracks and the Style tracks.
When opening an edit environment or a selecting page, the current operating mode is still working in the background.
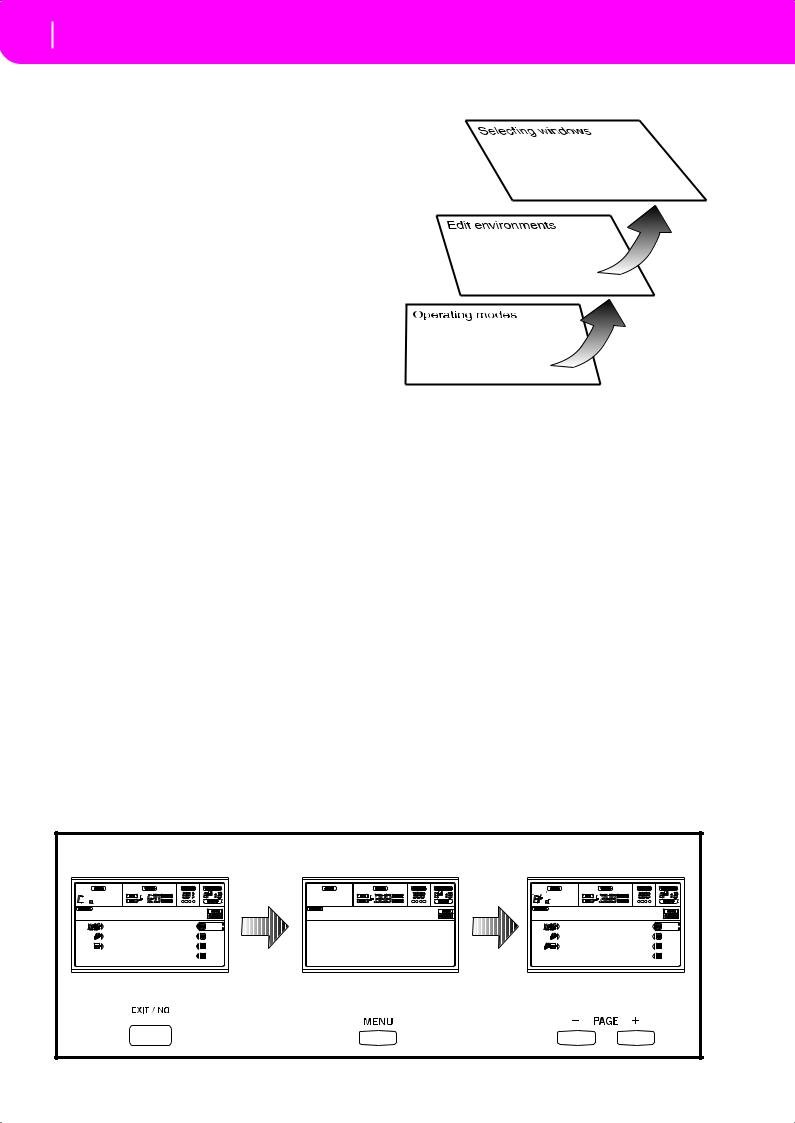
INTERFACE STRUCTURE
Thanks to its multitasking operating system, the Pa50 user interface is structured in “overlapping”, active layers. From the lower level:
•operating modes (Style Play, Backing Sequence, Song
Play, Song, Program)
•edit environments (Global, Disk)
•selecting windows (Style Select, Song Select, Program Select, Performance Select).
Operating modes. (See diagram at the bottom of this page). At the lowest level, an operating mode is always active. The current operating mode is indicated by the lit LED on the STYLE PLAY, B.SEQ, SONG PLAY, SONG or PROGRAM button in the MODE section. The relevant icon lights up in the display.
An operating mode is divided into a main page (the page where you usually play a Style, a Song or a Program), a menu, and a series of edit pages.
Press MENU to access the Menu. Use the MENU and PAGE buttons to browse across the various edit pages. Press EXIT to go back to the main page.
Operating modes |
|
|
|
|
||
BossaNova |
|STS1 |
Style Play Menu |
Mixer:Volume |
|||
Drum/Perc |
Piano01 |
Mixer |
RT Ctrls |
|||||| 127 |
||||| 090 |
|
Bass01 |
Guitar01 |
Tuning |
Sty Ctrls |
||||| 100 |
||| | 092 |
|
Acc.1-5 |
StrngEns2 |
Effects |
Input/Pad |
|||||| 127 |
|| || 086 |
|
|
VoxPad1 |
Track Edit |
Preferences |
|
|||||| 112 |
|
Main page |
|
|
Menu |
|
Edit pages |
|
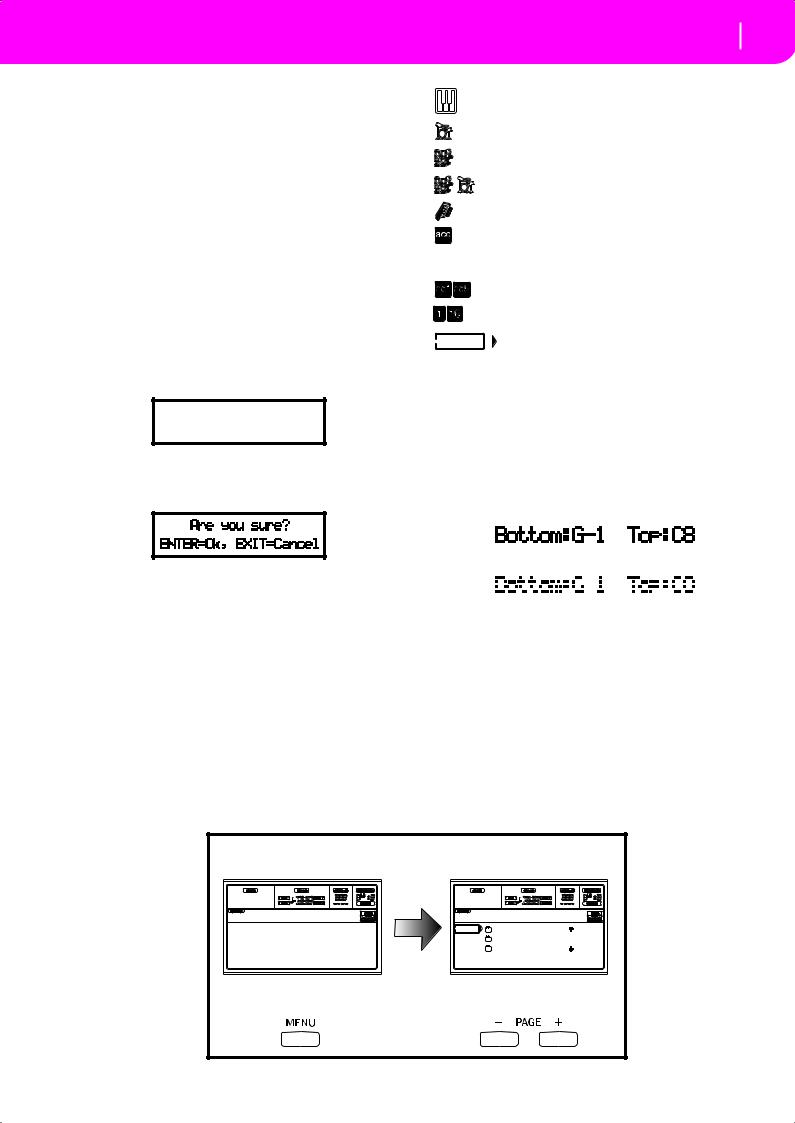
Edit environment. (See diagram at the bottom of this page). When you press GLOBAL or DISK, an edit environment overlaps the current operating mode. Press EXIT to go back to the current operating mode.
An edit environment is made up of a menu and a series of edit pages. Use the MENU and PAGE buttons to browse across the various edit pages.
Selecting windows. When you press one of the STYLE or PROGRAM/PERFORMANCE buttons, you open a selecting window. This window closes after selecting one of the items in it, or after pressing EXIT.
If the DISPLAY HOLD LED is light up, the window doesn’t close after selecting an item. Press EXIT to close the window, and go back to the underlying page.
MESSAGE WINDOWS
Sometimes, a message appears in the display, warning about an error or a wrong operation:
Not a Standard
MIDI File
Press ENTER or EXIT to exit one of these windows.
Other messages ask for an answer, as in the “Are you sure” window below:
Display and User Interface 21
Message windows
Realtime/Keyboard track (Upper 1-3, Lower).
Drum track (Style track view).
Percussion track (Style track view).
Grouped Drum and Percussion tracks.
Bass track (Style track view).
Grouped accompaniment tracks. This symbol indicates the five grouped accompaniment tracks (Acc1-5).
Accompaniment tracks (Style track view).
Sequencer tracks.
Selected track or parameter. When this symbol
appears, you can execute any available operation on the selected item.
(no icon) The track is in mute, and can’t play on the keyboard.
GRAYED-OUT NON-AVAILABLE PARAMETERS
Currently non-available parameters are now shown in “gray” in the display, i.e. with a “ghost” texture. Here is an example of a grayed-out parameter, compared to a normal parameter:
Press ENTER/YES for Yes, or EXIT/NO for No.
SYMBOLS AND ICONS
Text in solid black
Text in gray
Many icons and symbols, on the custom display, show the status of a parameter or the display content.
Edit environment |
|
|
|
|
Disk Menu |
Disk:Load |
|
||
Load |
Format |
|
NEWNAME.SET |
| |
Save |
New Dir |
|
LIVE.SET |
|
Copy |
Rename |
|
ETHNICA.SET |
| |
Erase |
Utilities |
FD |
LOAD OPEN |
CLOSE |
Menu |
|
Edit pages |
|
|
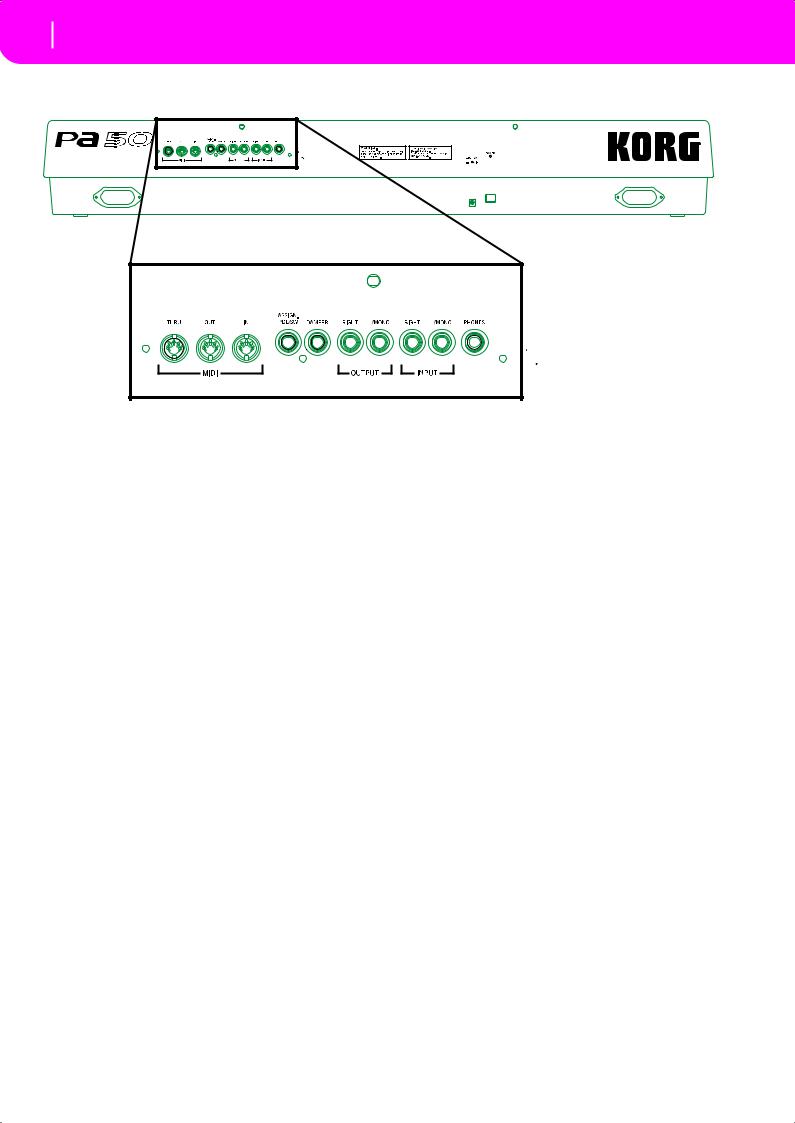
22Rear panel
5.REAR PANEL
1 2
3 |
4 5 |
6 |
7 |
8 |
1 AC POWER ADAPTER CONNECTOR
Plug the supplied power adapter into this connector.
2 POWER switch
Use this switch to turn the instrument on or off.
3 MIDI INTERFACE
The MIDI interface allows your Pa50 to be connected to an external controller (master keyboard, MIDI guitar, wind controller, MIDI accordion…), to an expander, or to a computer running a sequencer or an editor. For more information on how to use the MIDI interface, see the MIDI chapter.
IN |
This connector receives MIDI data from a |
|
computer or a controller. Connect it to an |
|
external controller’s or computer’s MIDI OUT. |
OUT |
This connector sends MIDI data generated by |
|
Pa50’s keyboard, controllers, and/or the inter- |
|
nal sequencer. Connect it to an expander’s or |
|
computer’s MIDI IN. |
THRU |
This connector sends an exact copy of the data |
|
received on the IN connector. Use it to cascade |
|
the Pa50 with other MIDI instruments. |
4 ASSIGNABLE PEDAL/FOOTSWITCH
5 DAMPER
Use this to connect a Damper pedal, like the KORG PS1, PS or DS1H. To change its polarity, see “Damper Pol. (Damper Polarity)” on page 126.
6 OUTPUTS
Use these unbalanced connectors to send the audio signal (sound) to a mixer, a PA system, a set of powered monitors, or your hi-fi system. Set the output level with the MASTER VOLUME slider.
7 INPUT 1 and 2
Use these unbalanced connectors to input another keyboard/ synthesizer, a (non-powered) mixer’s output, or a CD/tape player (line impedance). The signal is automatically routed to the speakers, the Audio Outputs and the Phones.
8 PHONES
Use this connector to connect a pair of headphones. You can use headphones with an impedance of 16-200Ω (50Ω suggested). Use a headphone distributor to connect more than one pair of headphones.
Use this to connect a continuous or footswitch pedal, like the KORG EXP2 or XVP10. To program it, see “P/S (Pedal/ Switch)” on page 126.

BASIC GUIDE
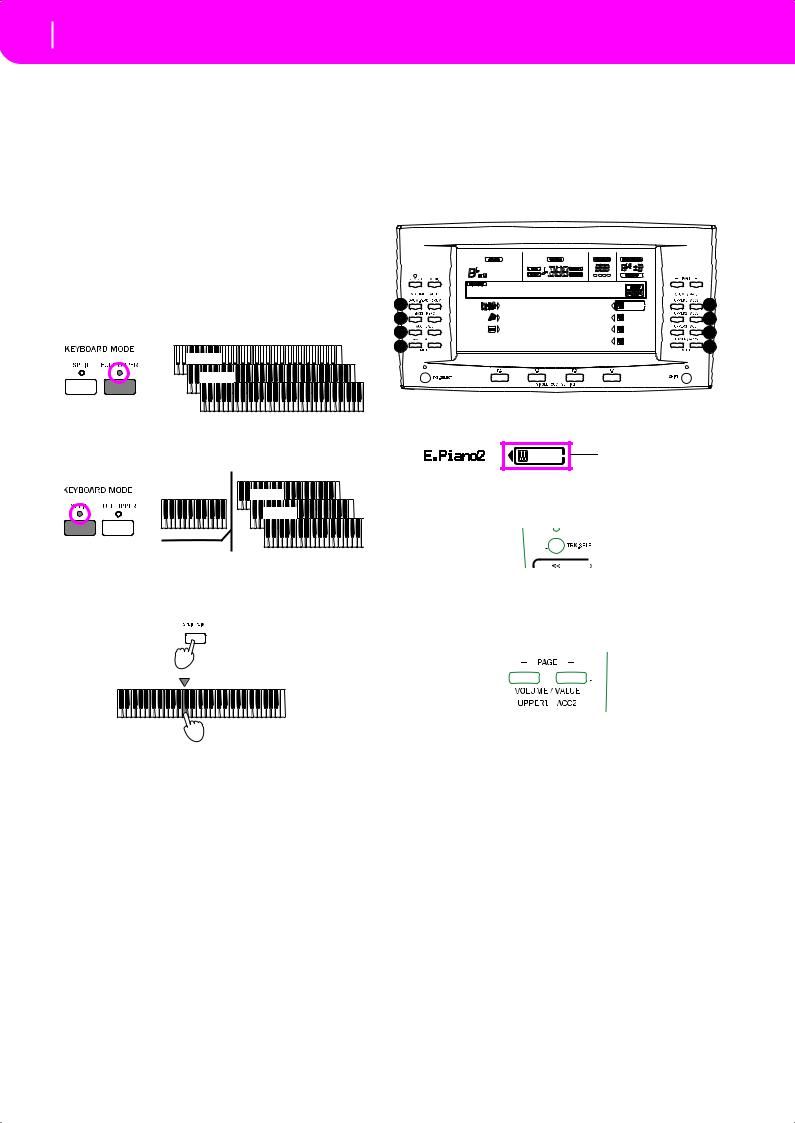
24 Basic operations
Playing on the keyboard
6. BASIC OPERATIONS
PLAYING ON THE KEYBOARD
Just play on the keyboard. You will hear the Realtime tracks playing. There are four Realtime tracks: Upper 1-3 and Lower. They may play all at the same time, or just one or a few of them, depending on their Mute status. If you cannot hear a track, check the mute status of that part.
Tracks can be set in different ways: use the KEYBOARD MODE section to select the way they are configured on the keyboard.
•Press FULL UPPER to play the Upper 1-3 tracks on the full range of the keyboard, just as you would on a piano.
Upper 1

 Upper 2


Upper 3
•Press SPLIT to let the Upper 1-3 tracks play on the right of the Split Point, and the Lower track on the left.
|
Upper 1 |
Lower |
Upper 2 |
|
Upper 3 |
Split Point
•Keep the SPLIT POINT button pressed, and play a note to change the point where the keyboard is divided in an Upper and a Lower part.
Lower |
Upper |
SELECTING, MUTING/UNMUTING AND SOLOING A TRACK
Selecting. Use the VOLUME/VALUE (A-H) buttons to select a track.
|
BossaNova |
|STS1 |
|
|
A |
Drum/Perc |
Piano01 |
E |
|
B |
Bass01 |
Guitar01 |
F |
|
C |
Acc.1-5 |
StrngEns2 |
G |
|
|
VoxPad1 |
|||
D |
|
H |
||
|
|
|
||
The selected track is shown with a solid square surrounding its status icons.
Selected track
If you can’t see the track you are looking for, use the TRACK SELECT button to scroll up or down the tracks, and find the hidden ones.
Mute/unmute. Press both VOLUME/VALUE (A-H) buttons to mute or unmute a track. For example, if you are in the main page that appears after turning the instrument on, and you want to mute the Upper 1 track, press the E (UPPER1/ ACC2) buttons together.
To memorize the selected split point note, press the GLOBAL button, then press WRITE to save the Global in memory (see “The Write window” on page 125).
The mute/play status is shown by the relevant icon in the display:
 Play status; the track plays on the keyboard. (no icon) Mute status; the track doesn’t play on the key-
board.
Solo. While in the Style Play, Song Play and Song modes, you can solo one of the tracks. Just keep the SHIFT button pressed, and press both VOLUME/VALUE buttons corresponding to the track you wish to solo.
To exit the solo mode, keep the SHIFT button pressed again, and press both VOLUME/VALUE buttons corresponding to the soloed track.
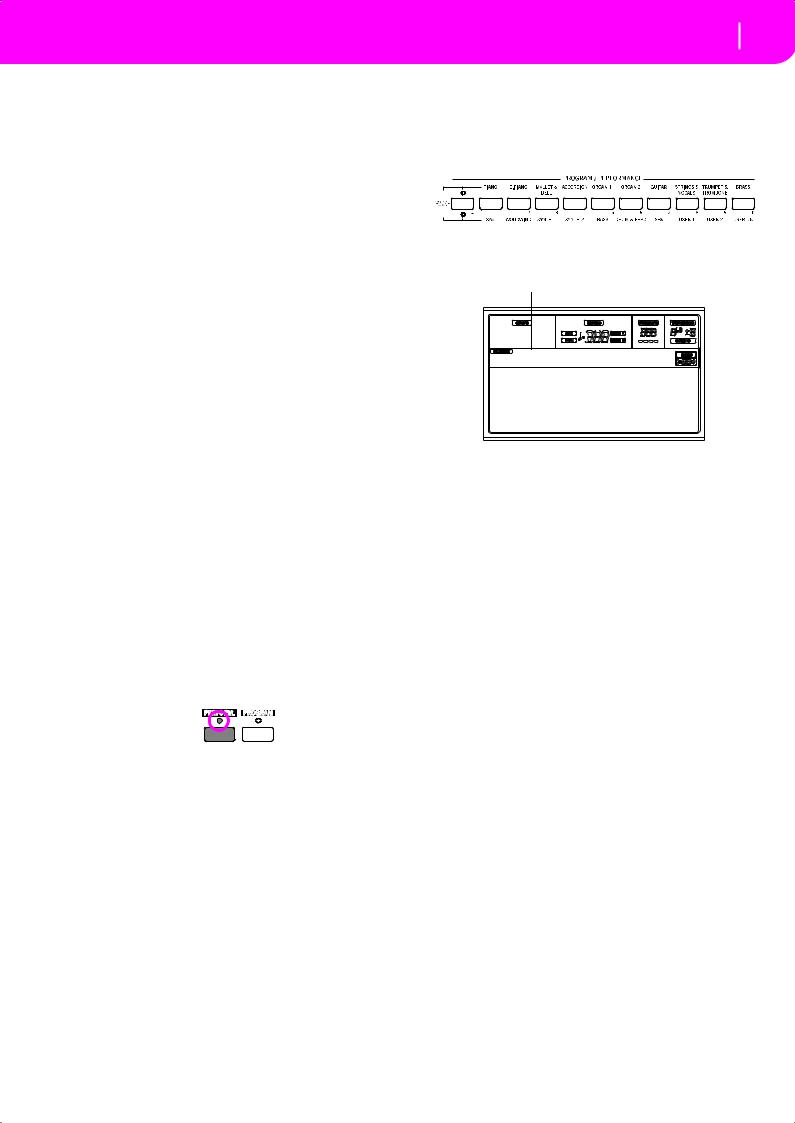
SELECTING A PERFORMANCE
A Performance is a set of Programs and settings for the Keyboard and Style tracks, that makes selecting complex combinations live fast and easy. When the STYLE CHANGE LED is on, a Performance can also select a different Style.
It is always advisable to use Performances, rather than single Programs, when playing even a solo sound, since a Performance lets you select the right effects, transposition, plus many other parameters, together with the Programs.
Data type |
|
Parameters |
|
|
|
Realtime |
Upper 1, Upper 2, |
Master Transpose, Pro- |
Tracks |
Upper 3, Lower |
gram, Volume, Pan, |
|
|
Octave, Scale, Detune, |
|
|
Pitch Bend, Poly/Mono/ |
|
|
Drum, Int/Ext, Damper, |
|
|
Dynamic Range, Joystick |
|
|
C&D Effect Send level, |
|
|
Type, Parameters |
|
|
Program parameters |
|
|
Pads |
|
|
|
Style |
Drum, Percussion, |
Program, Volume, Pan, |
Tracks |
Bass, Acc1, Acc2, Acc3, |
Octave, Detune, Pitch |
|
Acc4, Acc5, |
Bend, Poly/Mono/Drum, |
|
|
Int/Ext, Wrap Around, |
|
|
Keyboard Range |
|
|
A&B Effect Send level, |
|
|
Type, Parameters |
|
|
Program parameters |
|
|
Drum Mapping, |
|
|
Kick&Snare Assignation |
|
|
|
Other “performance” parameters are saved in the Global.
Global |
Chord Recognition Mode, Memory Mode, Velocity |
|
Trigger, Lock |
|
|
1.Press the PERFORM button. This changes the PROGRAM/PERFORMANCE section into a Performance selector.
2.Use the leftmost button of the PROGRAM/PERFORMANCE section to select the first row of ten banks (1-
Basic operations 25
Selecting a Performance
10, upper LED turned on), or the second row of ten banks (11-20, lower LED turned on).
3.Press one of the 1-0 buttons to select the PROGRAM/ PERFORMANCE bank containing the Performance you are looking for.
The Performance Select window appears. There are 8 Performances for each bank.
Last selected Performance
StereoGrand
StereoGrand Blue
ClupPiano Legend
ForrestStr MrJazz
ResonPads OxydBrass
4.Select a Performance using the VOLUME/VALUE (A-H) buttons.
5.If the DISPLAY HOLD LED is on, press EXIT to exit this window.
The STYLE CHANGE button
When you select a Performance, the Style may or may not change, depending on the status of the STYLE CHANGE button. (When you save a Performance, the current Style number is always memorized).
•If the STYLE CHANGE LED is on, the Style memorized in the Performance will be selected.
•If the STYLE CHANGE LED is off, the Style doesn’t change.
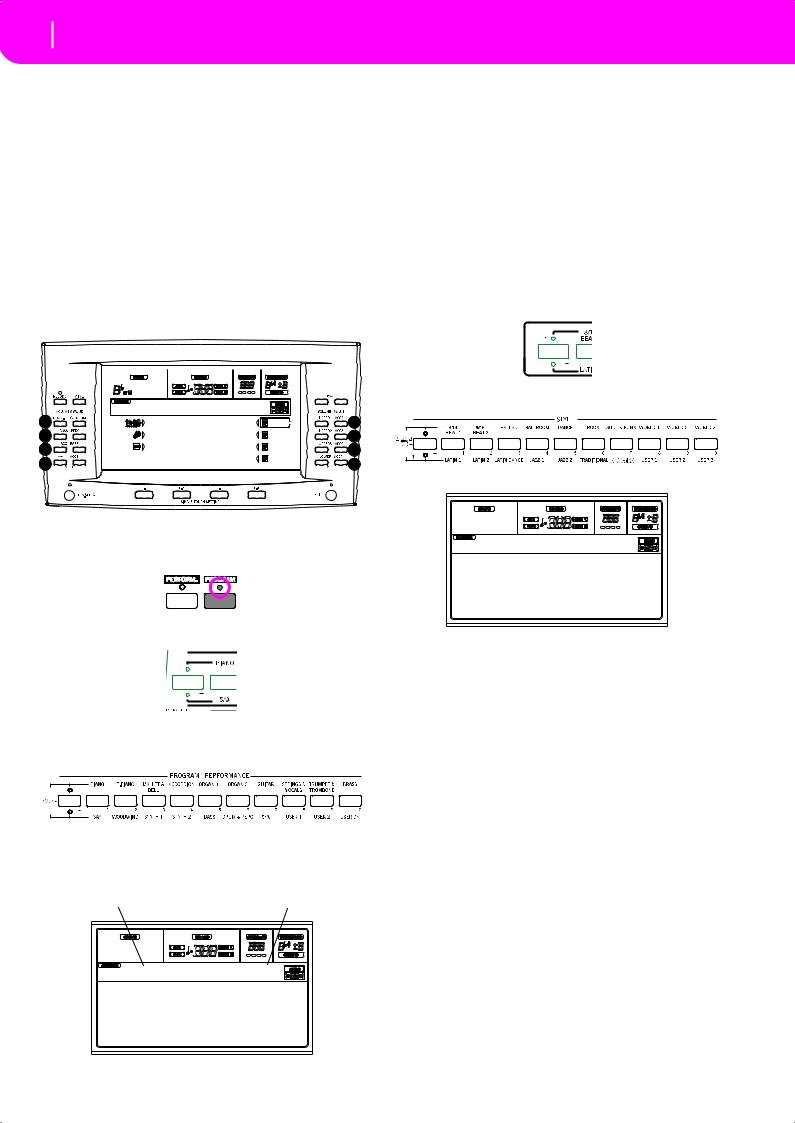
26 Basic operations
Selecting a Program
SELECTING A PROGRAM
You can select a different Program (i.e., sound) to be played by a track. Before selecting a Program, you must select the track you want to assign the Program to.
Note: To assign different Programs to the Style tracks, press TRACK SELECT to see the Style tracks. If you select a Program while grouped tracks (Drum/Percussion or ACC) are selected, the Program will be assigned to the last selected track.
Each Style Element (Variations, Fills…) can have different Programs, so your selection might be automatically reset when selecting a different Element. To avoid this reset, see “Prog (Program)” on page 49.
1.Use the VOLUME/VALUE (E-H) buttons on the right side of the display, to select the Realtime (Keyboard) track you wish to assign a different Program to.
5.Browse all the Programs in the selected bank using the PAGE buttons. There can be various pages for each bank, containing up to 8 Programs each.
6.As you find the Program you are looking for, select it using the VOLUME/VALUE (A-H) buttons.
7.If the DISPLAY HOLD LED is on, press EXIT to exit this window.
SELECTING A STYLE
A Style is a set of rhythm and accompaniment patterns. You can select a Style from the internal memory, or from a floppy disk (see “The DIRECT FD bank” on page 40).
1.Use the leftmost STYLE button to select a row of Style banks (upper, lower).
|
BossaNova |
|STS1 |
|
A |
Drum/Perc |
Piano01 |
|
B |
Bass01 |
Guitar01 |
|
C |
Acc.1-5 |
StrngEns2 |
|
|
VoxPad1 |
||
D |
|
||
|
|
|
|
2. Select the STYLE bank containing the Style you are |
looking for. |
E |
F |
G |
H |
The Style Select window appears. |
2.Press the PROGRAM button. This changes the PROGRAM/PERFORMANCE section into a Program selector.
3.Use the leftmost PROGRAM/PERFORMANCE button to select a row of Program banks (upper, lower).
4.Select the PROGRAM/PERFORMANCE bank containing the Program you are looking for (Program banks are identified by instrument names).
The Program Select window appears. See “Programs (Program Change order)” on page 154 for a list of Factory Programs.
Last selected Program |
Selected track |
Piano T:U1 
Piano1 E.Piano2
Piano2 E.Piano3
Piano3 Harpsi
E.Piano1 Clavinet
Jazz Waltz 1
Mod.Swing1 Slow Blues
Mod.Swing2 Cay Blues
JazzWaltz1 St.LouisB
JazzWaltz2 Big Band1
3.There are 2 pages for each bank, each containing 8 Styles. Select a page using the PAGE buttons.
4.As you find the Style you are looking for, select it using the VOLUME/VALUE (A-H) buttons.
Note: The new Style will enter at the next strong beat.
5.If the DISPLAY HOLD LED is on, press EXIT to exit this window.
The SINGLE TOUCH button
When you select a Style, the Realtime (Keyboard) tracks can be changed or not.
•If the SINGLE TOUCH LED is on, the Single Touch Setting (STS) #1 is automatically selected, and the Realtime tracks are changed. Programs, and the Keyboard Mode, may change.
•If the SINGLE TOUCH LED is off, Realtime tracks don’t change.
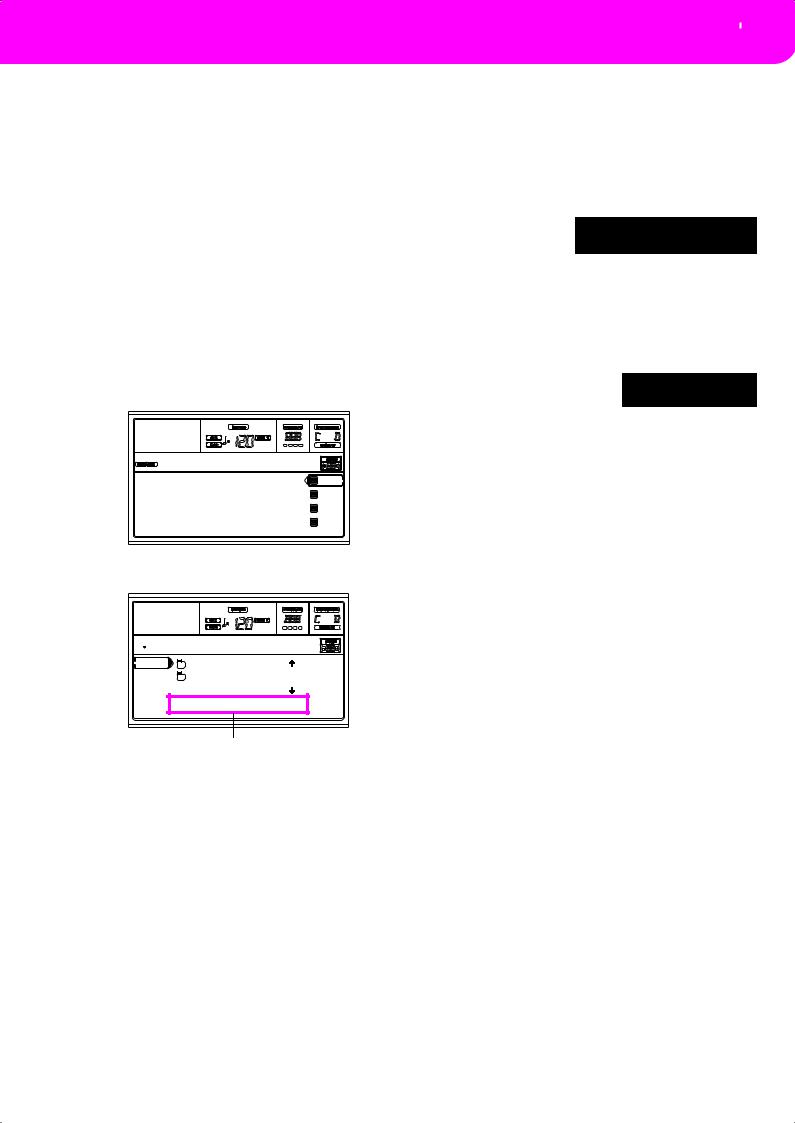
SELECTING A SINGLE TOUCH SETTING (STS)
A Single Touch Setting (STS) contains Realtime (Keyboard) tracks’ settings. Four STS are included in each Style, and can be recalled by pressing the SINGLE TOUCH SETTING (F1F4) buttons under the display.
Note: You can select a STS only when you are in the main page of the Style Play or Backing Sequence operating mode.
CHANGING ALL KEYBOARD TRACKS AT ONCE
Select a Performance or a Single Touch Setting (F1-F4 buttons, when you are in the Style Play main page) to change keyboard Programs and effects at the touch of a button.
PLAYING A SONG FROM FLOPPY DISK
1.Insert the floppy disk containing the Song into the floppy disk drive.
2.Press the SONG PLAY button to access the Song Play mode.
No song
S1: Piano01
S2: Guitar01
Lyrics StrngEns2
VoxPad1
3.Press the A (S1:) VOLUME/VALUE button to open the Song Select window.

 Song Selection
CLUB |
| |
BALLADS |
|
0001 MYSONG.MID |
| |
FD SELECT OPEN CLOSE
Page commands
Note: You can access the Song Select window also by pressing the PAGE+ button from the main page. You can exit this window either by pressing EXIT or PAGE-.
Basic operations 27
Selecting a Single Touch Setting (STS)
4.Press the F1 button to select the floppy disk drive (FD). The disk content appears.
5.Use the TEMPO/VALUE controls, or the VOLUME/ VALUE (E-H) buttons to scroll the list. The E-F buttons
are the Scroll Up ( ), while the G-H buttons are the Scroll Down (
 ).
).
Move the file you are looking for to the first line of the display.
6.If the file you are
looking for is in a 0001 MYSONG.MID folder (a file whose
name begins with “ ”), move the folder to the first line in the display, then select the F3 (OPEN) command. Select the F4 (CLOSE) command to close a folder and go back to the upper level.
7.When the file you are looking for is in the first line of the display, press the F2 (SELECT) button.
8.When the Song appears in S1:MySongthe S1 line on the main page
of the Song Play mode, press
the left (SEQ 1) PLAY/STOP button to start the playback.
Note: If the BALANCE slider is all the way to the right, Sequencer 1 is at the minimum volume and can’t be heard.
9.If you wish to play a different Song on the Sequencer 2 at the same time, press the B (S2:) VOLUME/VALUE button (press it twice if a Song is already selected for Sequencer 2), and repeat the above procedure to select a Song for Sequencer 2. Use the right (SEQ 2) PLAY/ STOP button to start/stop the second Song. Use the BALANCE cursor to mix between Sequencer 1 and Sequencer 2.
10.Stop the Song(s) using the PLAY/STOP button for the corresponding Sequencer.
SHORTCUT TO SEE THE ORIGINAL BANK FOR A STYLE, PERFORMANCE OR PROGRAM
You can see the original bank where your Style, Performance or Program came from. Just keep the SHIFT button pressed, and press the lefmost button of the STYLE or PROGRAM/ PERFORMANCE section. A message window will appear, showing the name of the original bank.
Release the SHIFT button to exit the window.
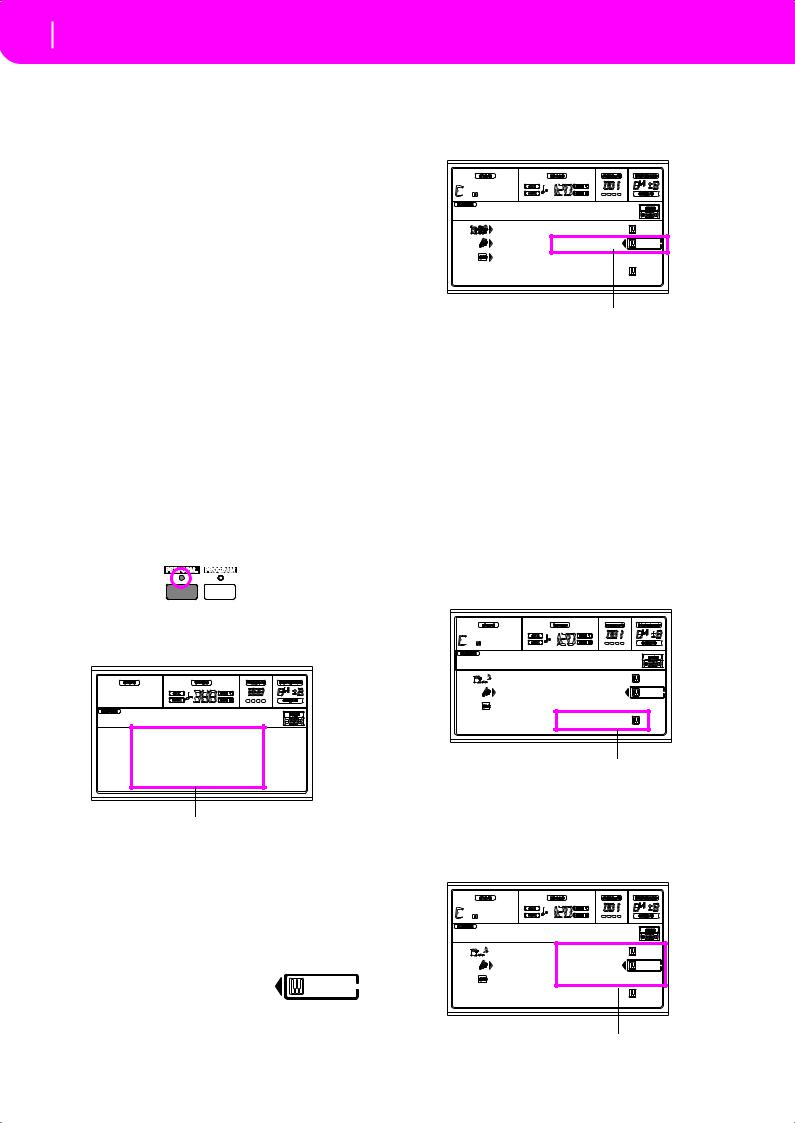
28 Tutorial
1 - Playing in realtime
7. TUTORIAL
This chapter is fully devoted to step-by-step instructions, that we hope may be useful to learn the basics—on-field.
the pointing arrow. You will hear the Dark Pad Program play together with the Grand Piano.
1 - PLAYING IN REALTIME
As soon as you turn your Pa50 on, it is in Style Play mode, and you can play it in realtime. Please follow me…
1 Play on the keyboard.
When you turn the Pa50 on, Performance 1-1 (“StereoGrand”) is automatically selected. This sets the Realtime (Keyboard) tracks for you. In this case (unless someone modified this Performance earlier) you get the Upper 1 track playing on the full keyboard range, with the Grand Piano Program selected.
You may know there are four available Realtime tracks: Upper 1-3 and Lower. Upper Realtime tracks may play on the full range of the keyboard (the selected KEYBOARD MODE shall be FULL UPPER). Otherwise, the Lower track plays on the left of the Split Point, and the Upper tracks on the right (KEYBOARD MODE shall be SPLIT).
If you are not satisfied with this setting at startup, just select another Performance. Or change the track’s settings—as you will see in this tutorial—and save them into Performance 1-1. You’ll soon see how to do it.
2 Select a different Performance.
Is the PERFORM. LED switched on?
If so, press one of the PROGRAM/PERFORMANCE buttons, and select a Performance with the VOLUME/VALUE buttons (on the side of the display).
StereoGrand
StereoGrand Blue
ClupPiano Legend
ForrestStr MrJazz
ResonPads OxydBrass
Select a Performance with the VOLUME/VALUE buttons
Go on trying with the different Performances. We provided 160 of them for you.
3 Select Performance 1-1 (“Grand Piano”) again.
As above: press Performance bank 1, and use the A VOLUME/VALUE buttons to select Performance 1-1.
4 Unmute the Upper 2 track.
Press both F VOLUME/VALUE buttons.
The Upper 2 track will be selected and unmuted. The Play icon will appear, sur-
rounded by the “selected track” frame and accompanied by
SoftBeat |
|STS1 |
Drum/Perc |
GrandPiano |
Bass01 |
DarkPad |
Acc.1-5 |
StrngEns2 |
|
AnalogStr |
Press the F VOLUME/VALUE buttons
5 Press SPLIT on the KEYBOARD MODE section, and play.
Now, the keyboard is split in two parts: the Lower part on the left, and the Upper part on the right. The AnalogStr Program is playing on the Lower part, while the Grand Piano and the Dark Pad are playing on the Upper part.
6 Set the split point.
Not happy with the current split point? Keep the SPLIT POINT button held down, and play the new split point on the keyboard. You can even save this setting in memory (see “The Write window” on page 125).
7 Mute/unmute various tracks.
Press both H VOLUME/VALUE buttons. You will mute the Lower track.
SoftBeat |STS1 

 Drum/Perc GrandPiano
Bass01 DarkPad
 Acc.1-5 StrngEns2
AnalogStr
Press the H VOLUME/VALUE buttons
Press them again to unmute the Lower track.
Try also with the Upper tracks, using the E, F and G VOLUME/VALUE buttons. You will notice the sound becomes more or less fuller-sounding, depending on the number of tracks muted or unmuted.
SoftBeat |STS1 

 Drum/Perc GrandPiano
Bass01 DarkPad
 Acc.1-5 StrngEns2
AnalogStr
Press the E-G VOLUME/VALUE buttons
Loading...