


UBZ-LH68
FM TRANSCEIVER
INSTRUCTION MANUAL
EMETTEUR-RECEPTEUR FM
MODE D’EMPLOI
TRANSCEPTOR DE FM
MANUAL DE INSTRUCCIONES
FM-TRANSCEIVER
BEDIENUNGSANLEITUNG
RICETRASMETTITORE FM
MANUALE DI ISTRUZIONI
FM ZENDONTVANGER
GEBRUIKSAANWIJZING
KENWOOD CORPORATION
© B62-1019-10 (E)
09 08 07 06 05 04 03 02 01

FM TRANSCEIVER
UBZ-LH68
INSTRUCTION MANUAL
KENWOOD CORPORATION

KENWOOD MEANS WIRELESS
Founded more than 50 years ago, KENWOOD’s Car & Home Audio products are in demand around the world. KENWOOD is also a major developer and producer of wireless and digital wireless communications products. KENWOOD provides top quality Amateur Radio products for serious hobbyists, and commercial radio products/ systems for business, industry, & public safety users, worldwide.

INTRODUCTION
KENWOOD welcomes you to Low Power Device (LPD). LPD refers to new, personal, short range 2-way radios for family & friends to keep in touch without the need for a license, radio knowledge, or monthly charges. Your KENWOOD 2-way radio is called a “transceiver”, meaning “transmitter & receiver”.
You can choose from 68 preset channels to communicate with others. For your convenience, Automatic Squelch quiets your transceiver when not receiving calls. For privacy, Tone Squelch keeps your transceiver quiet except for calls you want to hear. When using Tone Squelch, you can also check if your fellow is within a communication range.
Your transceiver provides safety and convenience almost anywhere. The distance depends on your location; you’ll get maximum distance of up to approximately 2 km in open areas, less in buildings or vehicles.
Your KENWOOD transceiver is a precision device. Treat it with care, and you will enjoy years of reliable operation.
i

CONTENTS |
|
PRECAUTIONS ............................................................. |
1 |
UNPACKING ................................................................ |
1 |
INSTALLING/ REMOVING BATTERIES .................................. |
2 |
INSTALLING THE BELT HOOK ........................................... |
3 |
GETTING ACQUAINTED ........................................................ |
4 |
COMMUNICATION RANGE ............................................... |
4 |
ORIENTATION .............................................................. |
4 |
DISPLAY .................................................................... |
5 |
OPERATING BASICS ........................................................... |
6 |
MENU SET-UP ................................................................... |
8 |
CALL TONES ................................................................... |
10 |
SENDING CALL TONES .................................................. |
10 |
CHANGING THE DEFAULT CALL TONES .............................. |
11 |
TONE SQUELCH (CTCSS) .................................................... |
12 |
COMMUNICATION RANGE IN/OUT DETECT .......................... |
15 |
CHANNEL SCAN ............................................................... |
16 |
USING CHANNEL SCAN ................................................. |
18 |
AUXILIARY FUNCTIONS ...................................................... |
19 |
RESET ...................................................................... |
19 |
LAMP CONTROL .......................................................... |
19 |
MONITOR .................................................................. |
21 |
Using the Optional SMC-34 Mic ................................. |
21 |
Not Using the Optional SMC-34 Mic ............................ |
22 |
TRANSMIT POWER SAVE ............................................... |
23 |
KEY LOCK ................................................................. |
24 |
AUTO POWER OFF (APO) ............................................... |
25 |
BEEP ON/OFF ............................................................. |
26 |
OPTIONAL ACCESSORIES .................................................... |
27 |
SMC-34 SPEAKER MICROPHONE ..................................... |
28 |
SPECIFICATIONS .............................................................. |
29 |
FREQUENCY CHART .......................................................... |
30 |
ii

PRECAUTIONS
•Do not modify or attempt to adjust the transceiver for any reason.
•Avoid extremes in exposure to water, heat, and cold. This transceiver is weather resistant but not waterproof.
•Do not expose the transceiver to long periods of direct sunlight, nor place the transceiver close to heating appliances.
•Do not place the transceiver in excessively dusty areas, humid areas, wet areas, nor on unstable surfaces.
•If an abnormal odor or smoke is detected coming from the transceiver, immediately switch OFF the power and remove the batteries or battery pack from the transceiver. Contact your KENWOOD dealer.
UNPACKING
Carefully unpack the transceiver. We recommend that you identify the items listed below before discarding the packing material.
• |
Transceiver .............................. |
1 |
• |
Belt hook ................................. |
1 |
• |
Instruction manual ................... |
1 |
• |
Warranty card .......................... |
1 |
1
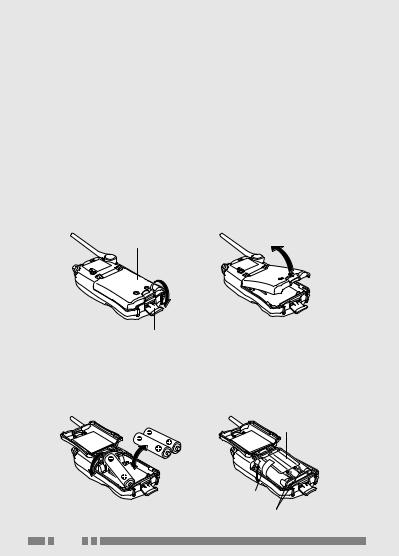
INSTALLING/ REMOVING BATTERIES
This transceiver requires 3 R6 batteries. Use high quality alkaline batteries to enjoy longer periods of battery life. You can also use an optional UPB-1 NiCd battery pack {page 27}. The battery pack is shipped uncharged. First charge the pack using an optional battery charger (UBC-2 or UBC-4) {page 27}. For the charging method, see the instruction manual that comes with the charger.
1Release the battery cover clip, then completely open the battery cover.
•Remove the belt hook first if it has been installed. Battery cover
Battery cover clip
2Insert (or remove) the 3 R6 batteries or the battery pack.
•Mate the battery polarities with those marked on the battery compartment.
Label
Ribbon
Contacts
2
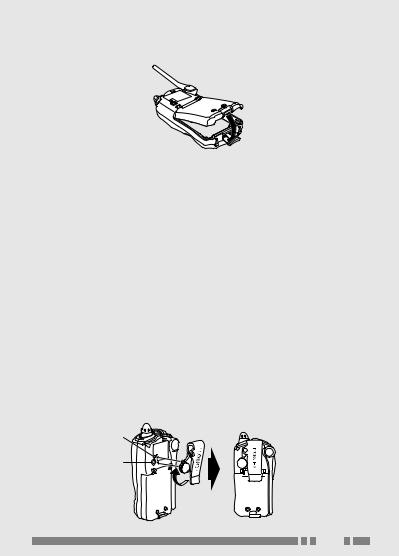
3Close the battery cover, then lock it using the battery cover clip.
The life of alkaline batteries is approximately 60 hours and the life of an optional UPB-1 battery pack is approximately 24 hours; where the ratio of transmission, reception, and standby periods is 1:1:8.
When the battery voltage becomes low, beeps sound and the BATT icon appears and blinks {page 5}. Replace the batteries or recharge the battery pack at this time.
Note: After 10 seconds elapse with no key entries and no call received, Battery Saver automatically functions. It repeats switching ON and OFF the power to the receiver at certain ratios. You cannot switch OFF this function.
INSTALLING THE BELT HOOK
Align the screw with the screw hole and the tab with the tab hole, then turn the screw clockwise until secure.
Tab hole
Screw hole
3

GETTINGACQUAINTED
COMMUNICATION RANGE
This transceiver allows a communication range of up to 2 km in open areas. This distance will be shortened by buildings or foliage in the way. The distance will be further shortened by dense foliage or mountains.
ORIENTATION
Speaker/ Microphone jacks
Lift up the cap carefully when connecting the optional headset or microphone accessory {page 27}.
|
VOL control |
PTT |
Display |
(Push-to-Talk) |
|
switch |
|
POWER switch |
Microphone |
|
|
|
DOWN/ |
Antenna |
MODE/ UP |
|
keys |
or |
Speaker |
|
4
DISPLAY
ert
|
|
w |
|
|
|
|
|
|
|
|
|
|
|
|
|
yu i |
|
|
|
|
|
|
|
|
|
|
|
|
|
|
|||
|
|
q |
|
|
|
|
|
|
|
|
|
|
|
|
|
|
|
|
|
|
|
|
|
|
|
|
|
|
|||||
|
|
|
|
|
|
|
|
|
|
|
|
|
|
|
|
|
|
|
|
|
|
|
|
|
|
|
|
|
|
|
|||
|
|
|
|
|
|
|
|
|
|
|
|
|
|
|
||
|
|
|
|
|
|
|
|
|
|
|
|
|
|
|
|
|
|
!2 !1 |
!0o |
|
|
||||||||||||
|
|
|
||||||||||||||
q |
|
Appears and blinks when the battery voltage is low. |
||||||||||||||
|
|
|
||||||||||||||
w |
|
Appears when Key Lock is ON {page 24}. |
||||||||||||||
|
|
|
||||||||||||||
|
|
Appears while the Auto Power Off (APO) timer |
||||||||||||||
e |
|
is counting {page 25}. Blinks after APO turns |
||||||||||||||
|
|
the power OFF. |
|
|
||||||||||||
r |
|
Appears while Channel Scan is functioning |
||||||||||||||
|
{page 18}. |
|
|
|||||||||||||
|
|
|
|
|||||||||||||
|
|
|
||||||||||||||
t |
|
Appears when your party is within a |
||||||||||||||
|
communication range {page 15}. |
|||||||||||||||
|
||||||||||||||||
|
|
|||||||||||||||
|
|
|
||||||||||||||
y |
|
Appears when Communication Range In/Out |
||||||||||||||
|
Detect is ON {page 15}. |
|
|
|||||||||||||
|
|
|
|
|||||||||||||
|
|
|
||||||||||||||
u |
|
Appears while monitoring {page 21} or receiving. |
||||||||||||||
|
You must not transmit while this icon is visible. |
|||||||||||||||
|
|
|||||||||||||||
|
|
|
|
|
||||||||||||
i |
|
Appears while transmitting. |
|
|
||||||||||||
|
|
|
||||||||||||||
o |
|
Displays the current Menu No. {page 8}. |
||||||||||||||
!0
Appears and blinks when the CTCSS number is changeable {page 13}.
!1
Displays the current CTCSS number (1 to 38) or OFF (“OF”) {page 13}.
!2 

 Displays the current channel number (1 to 68).
ACQUAINTEDGETTING
5
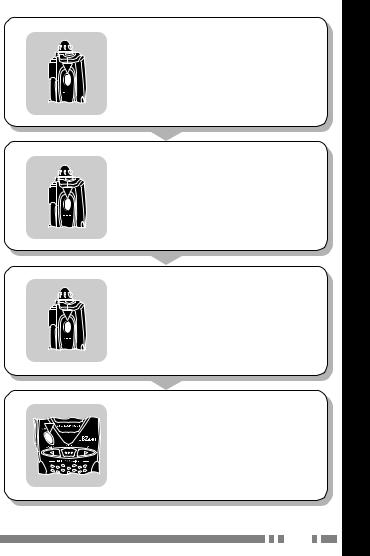
OPERATING BASICS
1 |
Press the POWER switch for |
|
more than 1 second to turn the |
|
transceiver power ON. |
|
|
2 |
|
Turn the VOL control clockwise |
|
|
(or counterclockwise) to |
|
|
increase (or decrease) the |
|
|
volume. |
|
|
• You may need to adjust the |
|
|
volume more precisely while |
|
|
receiving a call in the next step. |
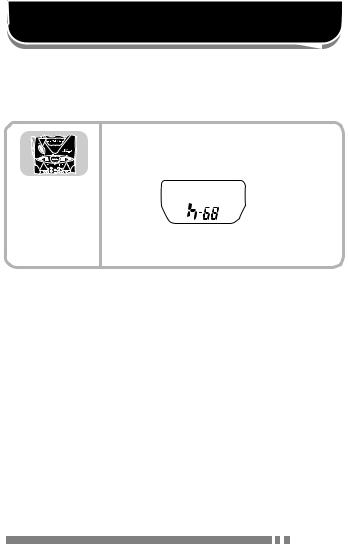
3 |
|
Press the UP or DOWN key to |
|
||
|
|
select the operating channel |
|
|
(1 to 68). |
•You have to select the same channel as your party.
•Press and hold the key to continuously change channels.
When you receive a call, you will hear audio from the speaker.
6
4 |
|
To make or answer a call, press |
|
|
and hold the PTT switch, then |
|
|
speak into the microphone in |
|
|
your normal speaking voice. |
|
|
• Hold the transceiver about 3 to 4 |
|
|
cm from your lips. |
5 |
|
Release the PTT switch to |
|
||
|
||
|
|
receive. |
|
|
|
6 |
Repeat steps 4 and 5 to |
|
continue communication. |
|
|
7 |
To turn the transceiver power |
|
OFF, press the POWER switch |
|
for more than 1 second. |
|
|
BASICS OPERATING
7
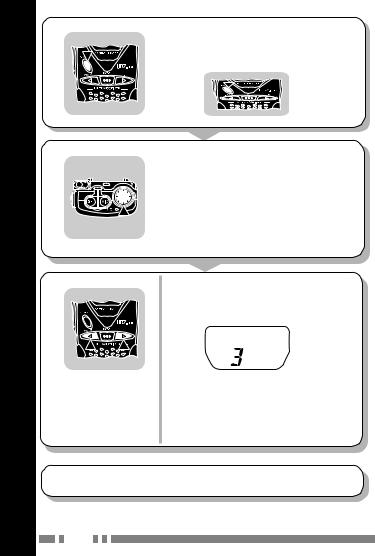
MENU SET-UP
The Menu Set-up function allows you to change numerous settings using the same procedures.
1 |
With the transceiver power OFF, |
|
press and hold the UP key, then press |
|
the POWER switch. |
|
|
2 |
Press the UP or DOWN key to select |
|
the desired menu item. |
|
|
3 |
Press the MODE key to select the |
|
desired parameter. |
|
|
4 |
Press the PTT switch to exit Menu |
|
mode. |
8

|
|
|
|
|
|
|
No. |
|
|
|
|
|
|
|
|
|
|
||
|
|
|
|
|
|
|
|
||
|
|
|
|
|
|
|
|
|
|
|
|
Item Selections |
|
|
|||||
|
|
|
|
You will see |
for ON, |
|
|||
|
|
|
|
and for OFF. |
|
||||
|
|
|
|
|
|
|
|
|
|
No. |
Item |
Function |
|
Selections |
Default |
Ref. |
|||
|
Page |
||||||||
|
|
|
|
|
|
|
|
|
|
|
|
Communication |
|
|
|
||||
1 |
Cd |
range in/out |
|
ON/ OFF |
OFF |
15 |
|||
|
|
detect |
|
|
|
|
|
|
|
|
|
|
|
|
|
|
|||
2 |
SC |
Channel scan |
|
ON (Ad)/ |
OFF (rE) |
17 |
|||
enable |
|
OFF (rE) |
|||||||
|
|
|
|
|
|||||
|
|
|
|
|
|
|
|||
3 |
bP |
Beep |
|
ON/ OFF |
ON |
26 |
|||
|
|
|
|
|
|
|
|
|
|
4 |
LP |
Display light |
|
ON/ OFF |
OFF |
20 |
|||
always ON |
|
||||||||
|
|
|
|
|
|
|
|
||
|
|
|
|
|
|
|
|||
5 |
C1 |
Call tone |
|
Type 1/ |
Type 1 |
11 |
|||
(DOWN key) |
|
Type 2 |
|||||||
|
|
|
|
|
|||||
|
|
|
|
|
|
|
|||
6 |
C2 |
Call tone |
|
Type 1/ |
Type 1 |
11 |
|||
(UP key) |
|
Type 2 |
|||||||
|
|
|
|
|
|||||
|
|
|
|
|
|
|
|||
7 |
AP |
Auto power off |
|
ON/ OFF |
OFF |
25 |
|||
|
|
|
|
|
|
|
|||
8 |
tO |
Transmit limit |
|
10 minutes/ |
10 |
23 |
|||
time |
|
OFF |
minutes |
||||||
|
|
|
|
||||||
|
|
|
|
|
|
|
|||
9 |
Sq |
Squelch |
|
ON/ OFF |
ON |
22 |
|||
|
|
|
|
|
|
|
|
|
|
9
CALL TONES
Call tones sound like a telephone ring, and are convenient for quickly identifying yourself to another party. Persons whom you call will instantly recognize you because of your call tone. The UP and DOWN keys are pre-assigned one tone each; the Mic 3 key on the optional SMC-34 Mic also is assigned one tone.
Note: The Mic 3 key does not operate during Channel Scan {page 16}.
|
Using call tones |
|
Oh! |
|
It's him/her. |
|
Tone |
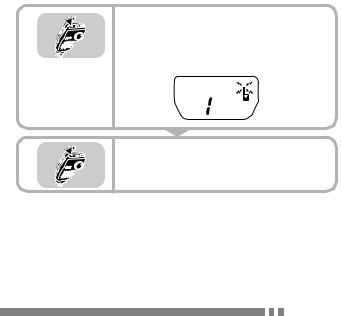
SENDING CALL TONES |
|
1 |
Press and hold the PTT switch, then |
|
press the UP, DOWN, or Mic 3 key. |
|
• The other party will hear the same call |
|
tone that you hear. |
•Simply pressing the Mic 3 key also sends the assigned call tone.
2 |
|
Release the UP, DOWN, or Mic 3 key |
|
|
to stop sending the call tone. |
3 |
|
Speak into the microphone without |
|
||
|
||
|
|
releasing the PTT switch; or, release |
|
|
the PTT switch to receive. |
|
|
|
10
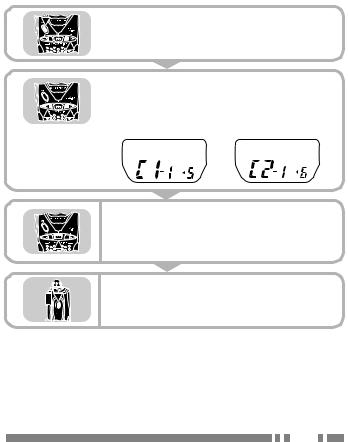
CHANGING THE DEFAULT CALL TONES
You can change the default tones assigned to the UP and DOWN keys. Choose from two selectable tones for each key.
1 |
|
With the transceiver power OFF, press |
|
|
and hold the UP key, then press the |
|
|
POWER switch. |
2 |
|
Press the UP or DOWN key to select |
|
||
|
||
|
|
“C1” (Menu No. 5) to change the DOWN |
|
|
key default, or “C2” (Menu No. 6) to |
|
|
change the UP key default. |
|
|
|
3 |
Press the MODE key to select type 1 |
|
(default) or type 2. |
|
• The selected tone will sound. |
4 |
Press the PTT switch to exit Menu |
|
mode. |
11
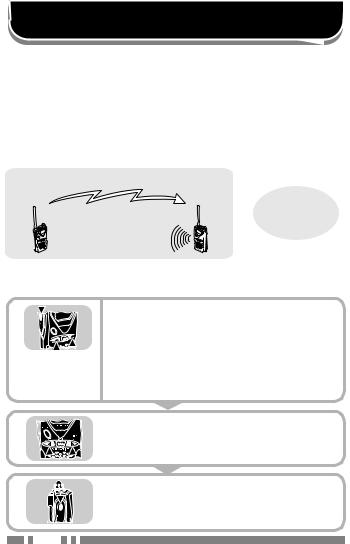
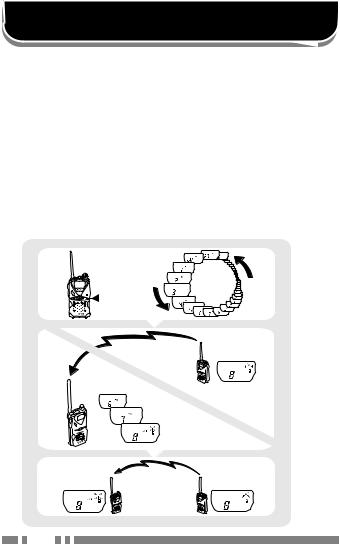
TONE SQUELCH (CTCSS)
You may sometimes want to hear calls from only specific persons. The Continuous Tone Coded Squelch System (CTCSS) allows you to ignore (not hear) unwanted calls from persons in other groups who are using the same channel. Simply select the same CTCSS tone (number) as your party. A CTCSS tone is subaudible and is selectable from among the 38 standard tone frequencies.
Note:
In order to use CTCSS, your party also must use a transceiver which has the CTCSS function.
CTCSS does not cause your conversation to be private. It only relieves you from listening to unwanted conversations.
Received
Not received
Not |
received |
|
Note: You can also use Communication Range In/Out Detect {page 15} with CTCSS when your party uses a KENWOOD UBZ-LH68 transceiver; in this mode, more amount of battery power is consumed than usual.
12
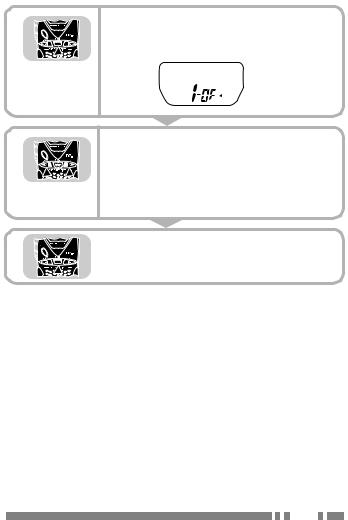
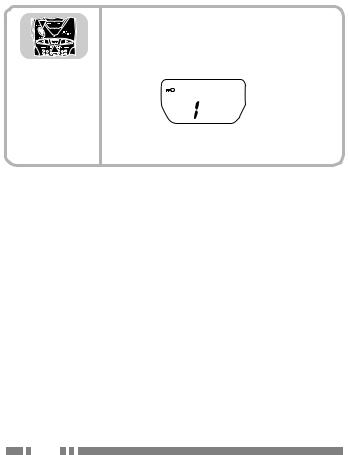
1 |
Press the MODE key. |
|
• The current CTCSS number appears. |
|
The default is OFF (“OF”). |
2 |
Press the UP or DOWN key to select |
|
the desired CTCSS number from 1 to |
|
38 (within approx. 10 seconds). |
•Press and hold the key to continuously change CTCSS numbers.
3 |
Press the MODE key to complete the |
|
selection. |
|
|
13

No. |
Freq. |
No. |
Freq. |
No. |
Freq. |
No. |
Freq. |
|
(Hz) |
(Hz) |
(Hz) |
(Hz) |
|||||
|
|
|
|
|||||
1 |
67.0 |
11 |
97.4 |
21 |
136.5 |
31 |
192.8 |
|
|
|
|
|
|
|
|
|
|
2 |
71.9 |
12 |
100.0 |
22 |
141.3 |
32 |
203.5 |
|
|
|
|
|
|
|
|
|
|
3 |
74.4 |
13 |
103.5 |
23 |
146.2 |
33 |
210.7 |
|
|
|
|
|
|
|
|
|
|
4 |
77.0 |
14 |
107.2 |
24 |
151.4 |
34 |
218.1 |
|
|
|
|
|
|
|
|
|
|
5 |
79.7 |
15 |
110.9 |
25 |
156.7 |
35 |
225.7 |
|
|
|
|
|
|
|
|
|
|
6 |
82.5 |
16 |
114.8 |
26 |
162.2 |
36 |
233.6 |
|
|
|
|
|
|
|
|
|
|
7 |
85.4 |
17 |
118.8 |
27 |
167.9 |
37 |
241.8 |
|
|
|
|
|
|
|
|
|
|
8 |
88.5 |
18 |
123.0 |
28 |
173.8 |
38 |
250.3 |
|
|
|
|
|
|
|
|
|
|
9 |
91.5 |
19 |
127.3 |
29 |
179.9 |
|
|
|
|
|
|
|
|
|
|
|
|
10 |
94.8 |
20 |
131.8 |
30 |
186.2 |
|
|
|
|
|
|
|
|
|
|
|
14
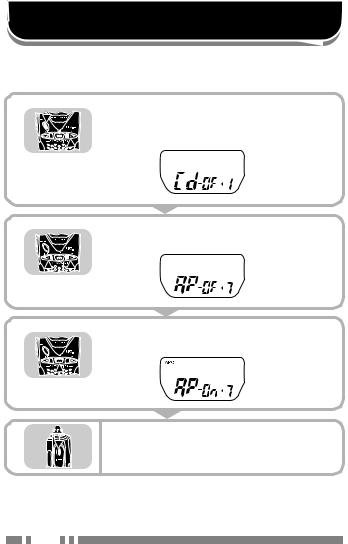
COMMUNICATION RANGE IN/OUT DETECT
With a CTCSS number programmed, this transceiver can also check if your party is within a communication range. When he (or she) is within the range, the In-range icon
(  ) is visible. If out of the range, this icon is invisible.
When your party goes beyond the range, an alarm beep also sounds. In order to monitor your party, the transceiver automatically transmits signals at predetermined intervals to receive acknowledgement.
1 |
|
With the transceiver power OFF, press |
|
|
and hold the UP key, then press the |
|
|
POWER switch. |
2 |
|
Press the UP or DOWN key to select |
|
||
|
||
|
|
“Cd” (Menu No. 1). |
|
|
|
3 |
|
Press the MODE key to switch the |
|
|
function ON (or OFF). |
|
|
• When the function is switched ON, “ ” |
|
|
appears. |
4 |
|
Press the PTT switch to exit Menu |
|
||
|
||
|
|
mode. |
|
|
|
Note: If you have selected OFF for the CTCSS number, you cannot switch this function ON. Selecting OFF for the CTCSS number after switching the function ON switches it OFF automatically. Starting
Channel Scan {page 18} also deactivates this function.
15
CHANNEL SCAN
Channel Scan automatically finds a channel where a call is received. If you program a CTCSS number {page 13}, it finds only a channel where a call with the matching CTCSS number is received. 2 seconds after the signal drops out, Channel Scan resumes monitoring the channels.
Note:
This transceiver does not require an optional SMC-34 Mic to use
Channel Scan. However, you can also use this optional microphone to start or stop Channel Scan {page 28}. If using the SMC-34 Mic, you need not manually enable Channel Scan using Menu Set-up {page 17}.
The APO timer {page 25} does not count while scanning.
16
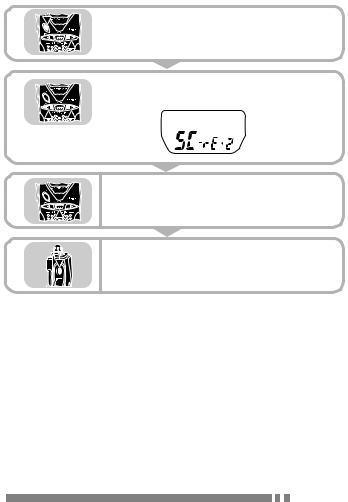
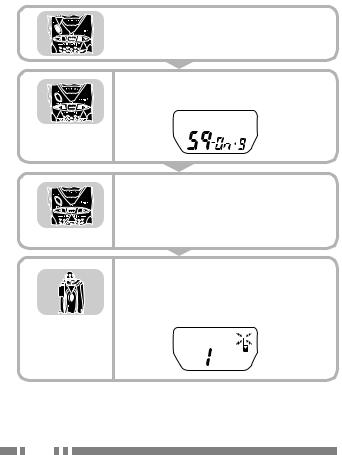
Use Menu Set-up to enable Channel Scan.
1 |
|
With the transceiver power OFF, press |
|
|
and hold the UP key, then press the |
|
|
POWER switch. |
2 |
|
Press the UP or DOWN key to select |
|
||
|
||
|
|
“SC” (Menu No. 2). |
|
|
|
3 |
Press the MODE key to enable the |
|
function (“Ad” selected). |
4 |
Press the PTT switch to exit Menu |
|
mode. |
Note: After enabling Channel Scan, you cannot press and hold the UP or DOWN keys to continuously change channels.
17 
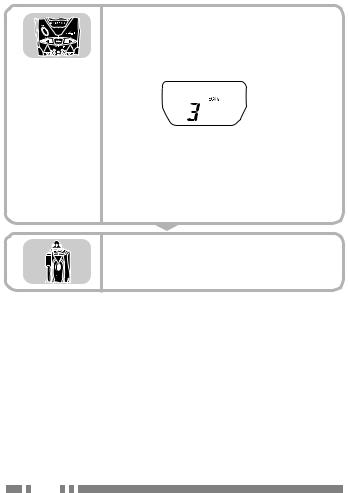
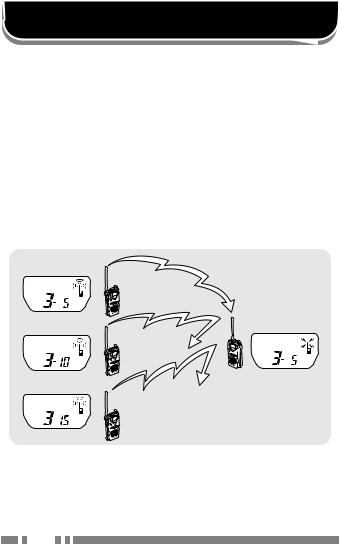
USING CHANNEL SCAN
1 |
Press the UP (or DOWN) key for |
|
more than 1 second to start Channel |
|
Scan. |
•“SCAN” appears.
•To reverse the scan direction, press the DOWN (or UP) key.
•Channel Scan stops when finding a channel where a call is received. The channel number blinks.
2 |
To quit Channel Scan, press the PTT |
|
switch. |
Note:
Use the UP key to monitor the channels in the ascending order, or to change the scan direction to the ascending order. You can use the DOWN key to monitor the channels in the descending order, or to change the scan direction to the descending order.
If using the optional SMC-34 Mic, you may press and hold Mic 1 key in step 1 to monitor activity in the current channel {page 21}.
18
AUXILIARY FUNCTIONS
RESET
You may sometimes want to reset all the transceiver settings to the factory defaults.
With the transceiver power OFF, press and hold the UP and DOWN keys, then press the POWER switch.
•Upon releasing the keys, a beep sounds and Reset is executed.
LAMP CONTROL
The lamp is used to illuminate the Liquid Crystal Display. It turns ON every time you press the UP, DOWN, MODE, or Mic 2 key (on the optional SMC-34 Mic), and when you turn the power ON. The lamp will go out after 5 seconds.
•If you press any key or switch while the lamp is ON, the lamp timer will restart the 5 second countdown.
•The lamp stays ON while holding down the UP or DOWN key to continuously change channels or CTCSS numbers.
19 
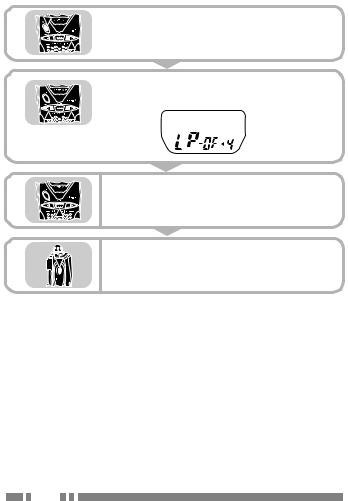
To set the lamp continuously ON:
1 |
|
With the transceiver power OFF, press |
|
|
and hold the UP key, then press the |
|
|
POWER switch. |
2 |
|
Press the UP or DOWN key to select |
|
||
|
||
|
|
“LP” (Menu No. 4). |
|
|
|
3 |
Press the MODE key to switch the |
|
function ON (or OFF). |
4 |
Press the PTT switch to exit Menu |
|
mode. |
Note:
The APO function {page 25} will override the continuous lamp setting. When APO turns OFF the transceiver, it will also turn OFF the lamp. However, the lamp setting will remain and the lamp will again turn ON when the power is turned ON.
The amount of power consumed with lamp continuously ON is slightly more than with lamp OFF.
20
MONITOR
When no signals are present, the Squelch on this transceiver automatically functions to mute the speaker so that you will not hear background noise. You can, however, manually deactivate the Squelch in any situation. You may try this when received signals are too weak to recognize or when you want to adjust the volume while listening to background noise.
■Using the Optional SMC-34 Mic
If you have connected the optional SMC-34 Mic, you can use the Mic 1 key.
1
2
Note:
Press and hold the Mic 1 key.
•The Squelch is deactivated and the busy icon is visible while the key is being held.
Release the Mic 1 key to activate the Squelch.
Before connecting or disconnecting the optional SMC-34 Mic, turn OFF the power to the transceiver.
Deactivating the squelch while using Communication Range
In/Out Detect always causes the In-range icon to appear.
21 
■Not Using the Optional SMC-34 Mic
You also can deactivate the Squelch by using Menu Set-up.
1 |
With the transceiver power OFF, |
|
press and hold the UP key, then |
|
press the POWER switch. |
|
|
2
3
4
Press the UP or DOWN key to select “Sq” (Menu No. 9).
Press the MODE key to switch the Squelch ON or OFF.
•Selecting OFF causes the speaker to be unmuted.
Press the PTT switch to exit Menu mode.
•If you switch the Squelch OFF in step 3, the busy icon appears.
Note: Deactivating the squelch while using Communication Range
In/Out Detect always causes the In-range icon to appear.
22
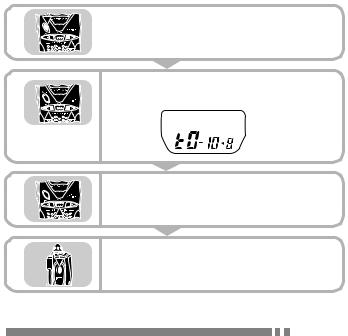
TRANSMIT POWER SAVE
The purpose of Transmit Power Save is to prevent transmitting for too long. This function is useful, for example, when you accidentally keep the PTT switch pressed.
Holding down the PTT switch for more than 10 minutes causes the transceiver to generate a beep and stop transmitting. Release, then press the PTT switch again to resume transmitting.
You can also switch this function OFF.
1 |
With the transceiver power OFF, press |
|
and hold the UP key, then press the |
|
POWER switch. |
|
|
2
3
4
Press the UP or DOWN key to select “tO” (Menu No. 8).
Press the MODE key to switch the function OFF.
Press the PTT switch to exit Menu mode.
23 
KEY LOCK
This function locks most of the keys on the transceiver to prevent accidentally changing any transceiver settings.
With the transceiver power OFF, press and hold the MODE key, then press the POWER switch.
•The Key icon appears.
•To switch Key Lock OFF, repeat the above key operation.
While Key Lock is active, you can still do the following:
•Power ON/OFF {pages 6 and 7}
•Receive/ Transmit {pages 6 and 7}
•Send call tones {page 10}
•Reset {page 19}
•Monitor (with the optional SMC-34 Mic) {page 21}
Note: With the Beep function {page 26} and Key Lock function ON, pressing a locked key causes the transceiver to output an error beep.
24
 Loading...