


UFD 580
Table of contents
 Loading...
Operating Manual
Twin-DVR Sat Receiver
UFD 580/580S
with Hard Disk Drive

Preface
Preface
Dear customer,
This Operating Manual is intended to help you make the fullest use of
the extensive range of functions offered by your new satellite receiver.
We have tried to make the operating instructions as easy as possible
to understand, and to keep them as concise as possible. To help you
understand particular specialist terms that cannot be translated, we
have added a short glossary at the end of the manual.
The power switch is an environmentally friendly feature. If you will not
be using your receiver for a longer period, you should therefore use
the power switch to disconnect it from the power supply to save
energy. For shorter breaks, you can switch the receiver to standby on
the remote control, which uses only a minimal amount of energy.
We wish you good reception and much pleasure using your new
DVR-Sat receiver.
Your
KATHREIN Team
Important Information
If you should experience any unexpected problems with your receiver,
please contact your specialist dealer or our hotline:
Tel.: +49 8031 184-700
Fax: +49 8031 184-676
The programmes available on the satellites and transponders are
subject to continual change. In such cases, it is necessary to reset the
channels as the factory preset programming corresponds to the
situation on the date of manufacture. The information for this reset can
be found on the SAT 1 Videotext/Teletext service, on the Internet or in
TV and radio magazines.
Your receiver is factory fitted with the latest software version. We are,
however, constantly working on adapting the software to the wishes of
our customers and to developments in technology. The “Software and
Channel List Update” section contains additional information.
Please keep the original packaging in case you need to return the
product at any time.
The hard disks are fragile due to their construction and are only
adequately protected in the receiver by the original packaging.
If receiver is not shipped correctly the warranty on the hard disk
will be voided.
UFO
®
micro and UFO
®
mini are registered trademarks of KATHREIN-Werke KG.
DiSEqC™ is a trademark of Eutelsat.

Contents
3
Contents
Preface...............................................................................................................................................................2
Contents ............................................................................................................................................................3
Safety Instructions - Important Information...................................................................................................6
Receiver-Features.............................................................................................................................................7
Remote control RC 660 7
Remote Control Menu Functions ....................................................................................................................8
Controls, Displays und Connections..............................................................................................................9
View of front panel (flap folded down) 9
View of rear panel 9
Front Panel Controls and Displays 9
Rear Panel Controls and Displays 9
Important Note on Initial Operation of the Receiver on a UFO
®
micro System.........................................10
Operating Instructions ...................................................................................................................................11
Menu Concept 11
Alphanumeric Inputs 11
Alphanumeric Assignment of Remote Control Number Buttons 12
Language Selection - OSD 12
Connection and Setup....................................................................................................................................13
Connecting the Unit 13
Sat IF Connection 13
Reception Requirements 13
Reception System Presets 13
Operation on one Antenna Connection 14
TV and Video Recorder Connection 15
Audio Connection 15
SPDIF Connections (Electrical/Optical) 15
Inserting Batteries in the Remote Control 15
Initial Setup .....................................................................................................................................................16
Getting Started 16
Power Failure Safety 16
Error Signalling 16
Receiver Presetting 17
On Screen Display (OSD)...............................................................................................................................18
Important On-Screen Displays 18
Help Function 18
TV Channel Identifier 19
Radio Channel Identifier 19
Error Signalling 19
TV/Radio Channel List 20
Videotext (Teletext).........................................................................................................................................21
Channel List ....................................................................................................................................................22
Selecting a TV Programme 22
Reception Status 22
Selecting a TV Programme by Number 23
Switching to a Radio Programme 24
Common Interface ..........................................................................................................................................25
Tein Functions ................................................................................................................................................27
Picture-in-Picture (PIP) 27
Time-Shift 28
One-Touch Recording 28
TVTV EPG and Timer......................................................................................................................................29
Accessing the TVTV EPG for the First Time 29
Accessing the TVTV EPG 30
“Current” View 30

Contents
4
Programme List 31
Highlights 32
Programmes Sorted by Category 32
Search Function 33
Details 34
Programming a Recording 35
Timer List 37
Key to Symbols 40
Channel List 41
Hard Disk Recorder ........................................................................................................................................42
Recording and Watching TV 42
LNB Configuration - Overview 42
Tuner input 42
Recording 43
Hard Disk Capacity 43
Time-Shift Recording 44
One-Touch Recording (OTR) 45
Timer Recording 46
Stopping a Recording 46
Split Take 48
Playback and Recording 48
Fast Forward/Fast Rewind (no picture) 49
Playback 49
Audio Mode 52
Search 52
Delete 52
Audio Settings ................................................................................................................................................53
Setting the Volume 53
Muting 53
Stereo and Two-Channel Sound Playback 53
AC 3 53
Programme List ..............................................................................................................................................54
Favourites 54
Generating a Favourites List 55
Alphabetical Channel Search 56
Sorting Programmes 58
Deleting Programmes 59
Manually Adding Programmes 59
Selecting the Last Programmes Received 61
Password.........................................................................................................................................................62
Factory Default 62
Entering the Password 62
Parental Control 64
Using the Front Panel.....................................................................................................................................66
Backup Operation 66
Setting System Parameters ...........................................................................................................................67
System Parameters 68
Parental Control 68
System Information 68
Local Time/Timer 68
TV Type 69
Aspect Ratio 69
Screen 69
A/V Mode 69
Adding/Removing Satellites ..........................................................................................................................70
Satellite Setup 70
Entering a Satellite Name 71
Removing Satellites 71

Contents
5
Installation Menu ............................................................................................................................................72
LNB Configuration 72
Antenna Setup 75
Antenna Rotor/Positioner (DiSEqC™1.2) 75
Satellite Scan 76
TP Edit/Scan 77
Important Note on Deleting Transponders 79
DiSEqC™ [UFO] Setup 80
UFO
®
micro 82
Factory Set 82
Logging on to UFOmicro
®
82
Video Recorder Connection ..........................................................................................................................83
Recording 83
Playback 83
Software and Programme List Update .........................................................................................................84
Receiver to Receiver Data Transfer..............................................................................................................86
Preparations 86
Programme List Download 86
Operating System Software Download 86
Technical Appendix........................................................................................................................................87
Technical Features 87
Technical Data 88
Connections 89
Accessories 90
Scart Socket Assignment 90
VHS/S-VHS Switching 90
Connection Example 91
Troubleshooting .............................................................................................................................................92
Short Technical Guide....................................................................................................................................93
Service .............................................................................................................................................................96
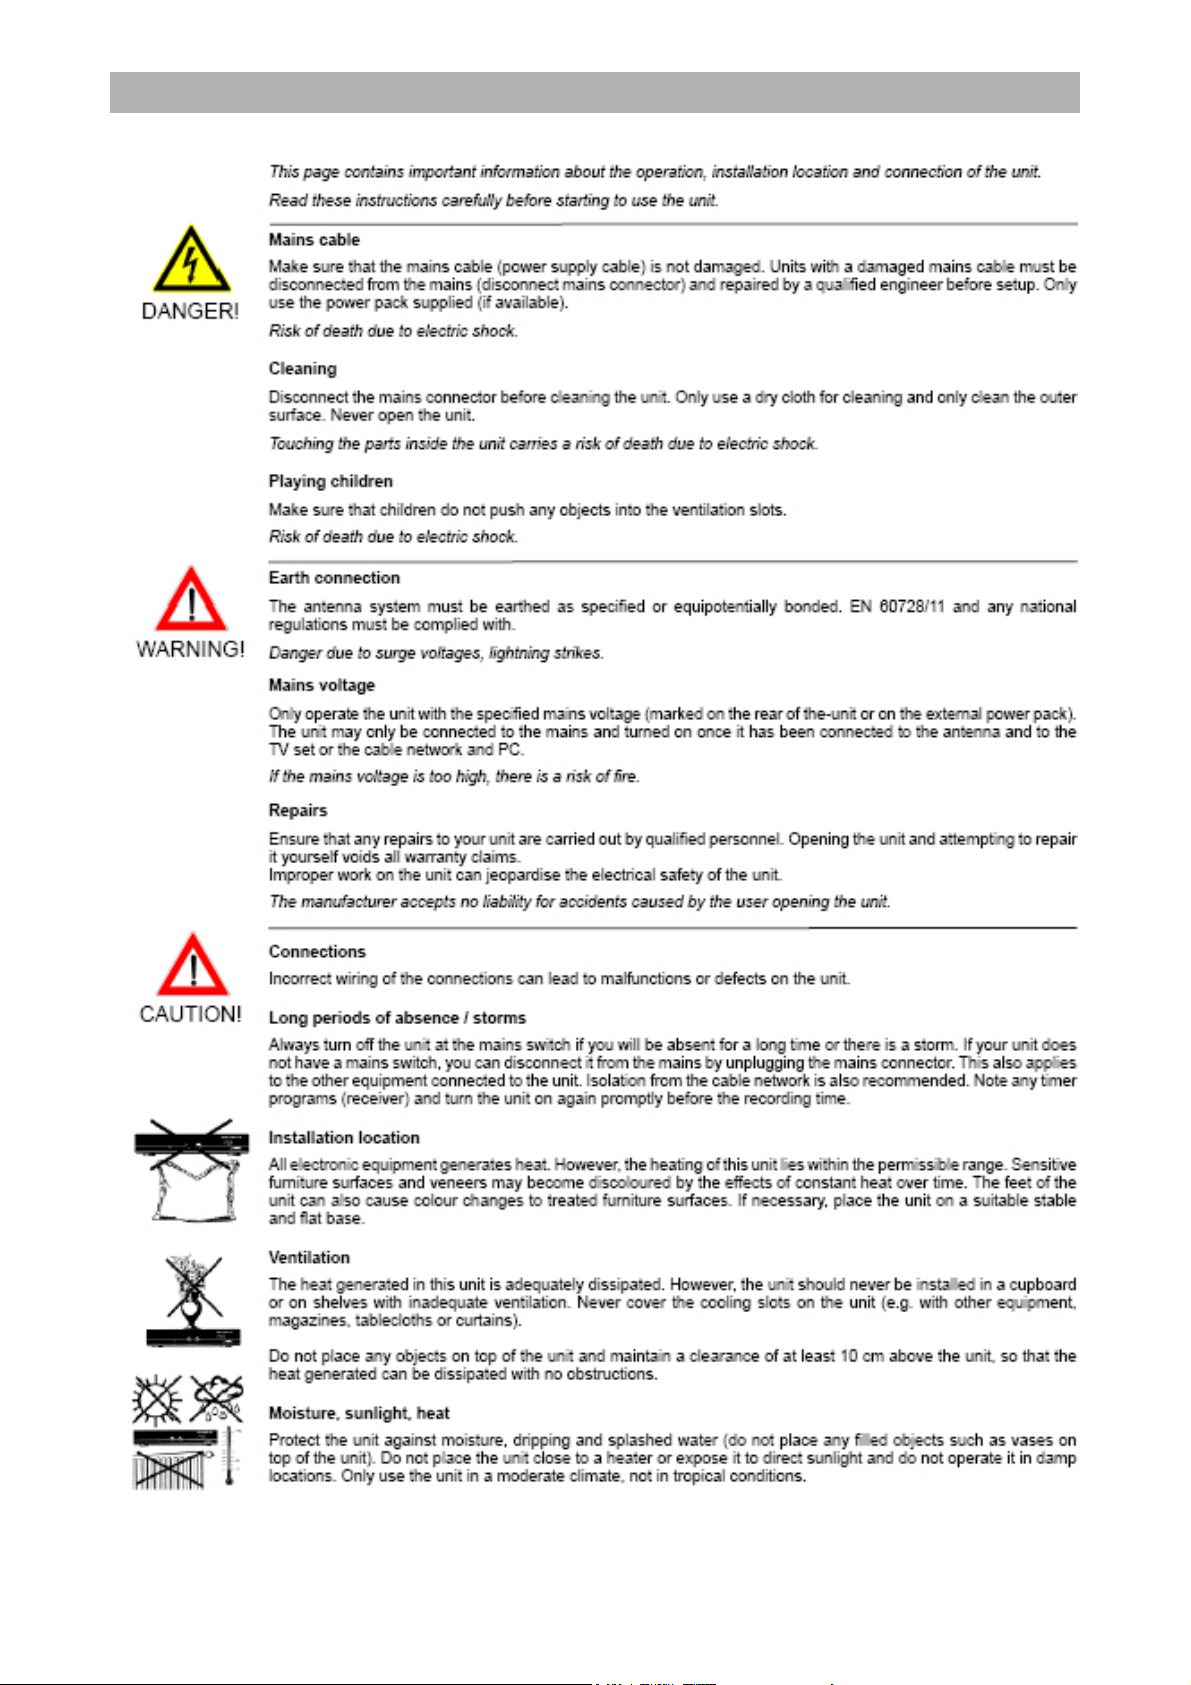
Safety Instructions - Important Information
6
Safety Instructions - Important Information

Receiver-Features
7
Receiver-Features
The UFD 580 has two separate tuners for simultaneous reception of
two programmes, and a hard disk for recording and playback.
Depending on constellation, you can
• view one programme and record another to hard disk,
• play back one programme from the hard disk and record one
programme to hard disk, or
• record two programmes to hard disk and play back one
programme from the hard disk, or
• record two programmes to hard disk and view a programme from
one of the programme packages being received.
To take advantage of all these opportunities, complex operating
procedures are necessary. You should therefore read this operating
manual thoroughly.
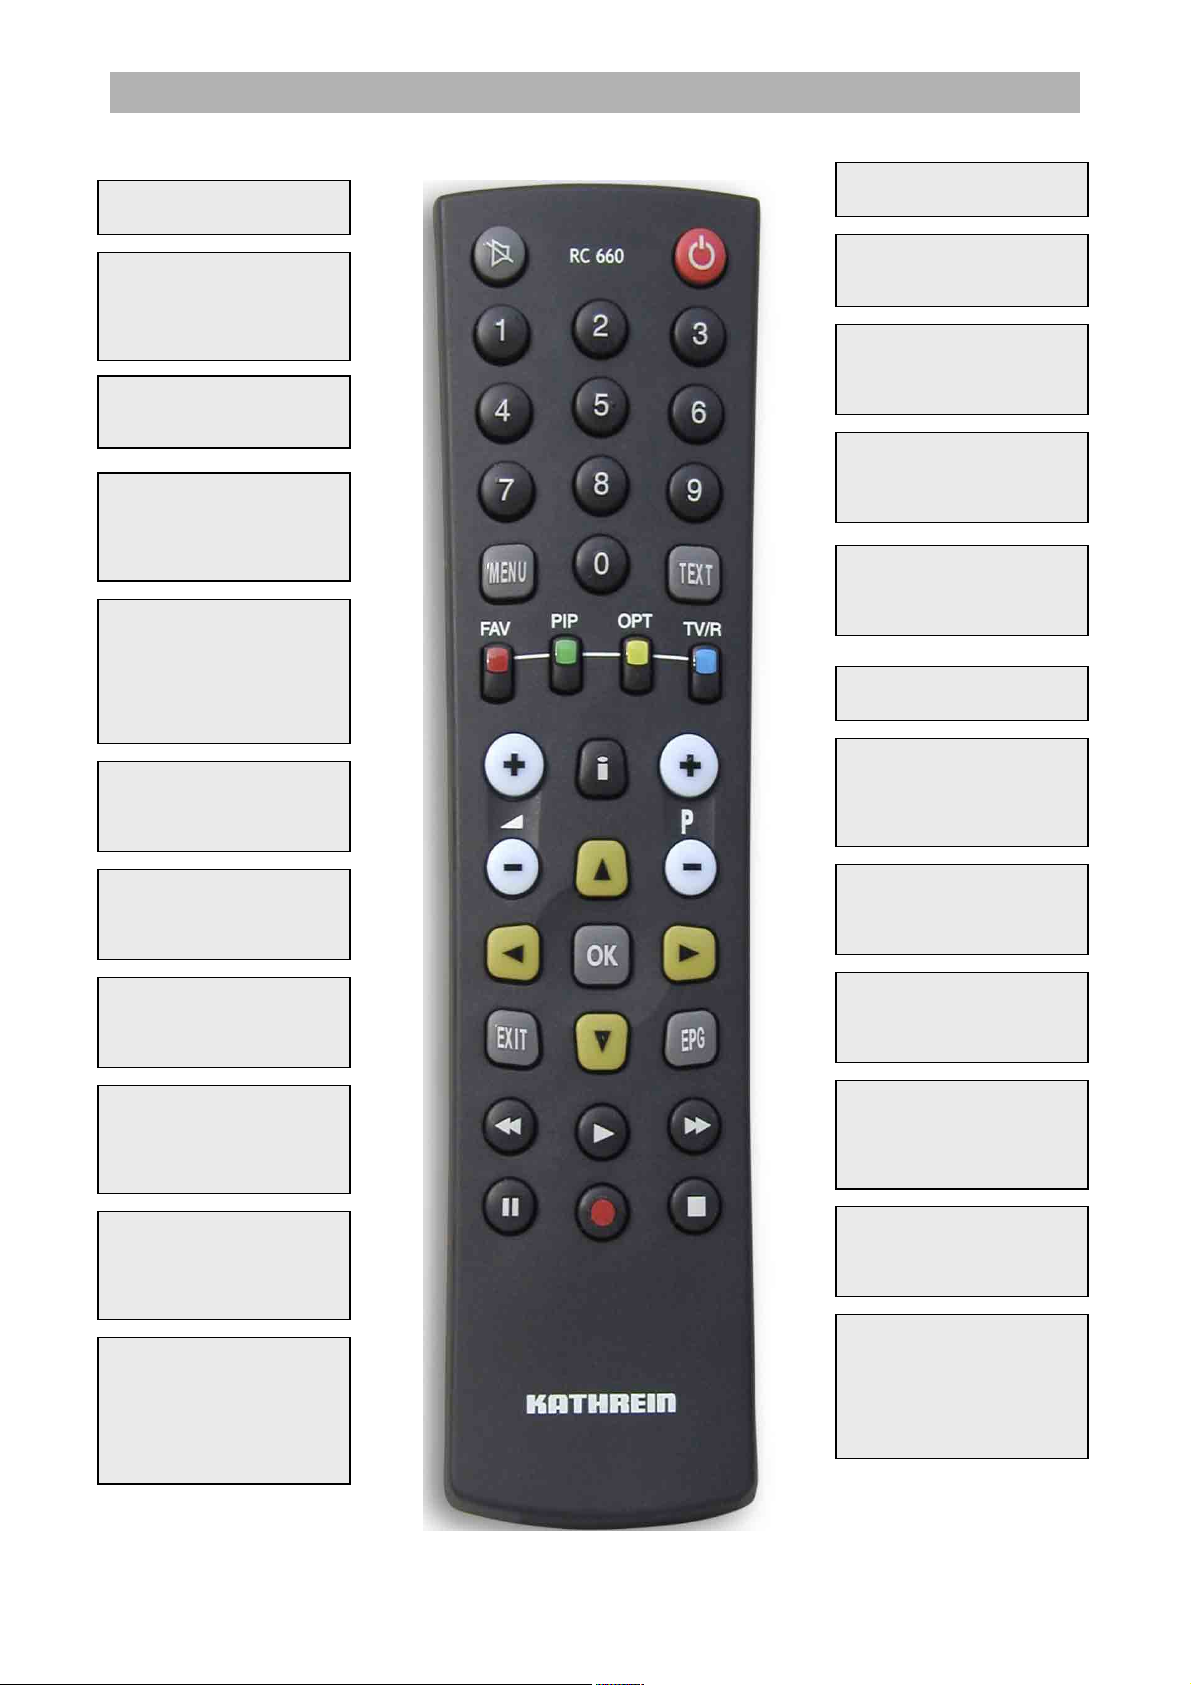
Remote control RC 660
The RC 660 remote control supports up to four devices as well as the
receivers of the UFD 5xx (not UFD 552, 554, 558) and UFD 4xx
families.
To configure a receiver to an infrared code:
Switch on the relevant receiver.
On the remote control simultaneously press
Address 1 =
+
+
to
Address 4 =
+
+
To configure the remote control to an infrared code:
Switch to
Address 1 =
+
to
Address 4.=
+
+
(red) = Kathrein UFD 5xx code for remote control RC 400
The RC 600 and RC 650 remote controls cannot be replaced!
Remote Control Menu Functions
8
Remote Control Menu Functions
Rewind
Fast forward
Freeze frame, video
timeshift
Arrow buttons
Programme info
Confirm input
Electronic Programme
Guide
Prog; Make channel
favourite
picture-in-picture from
2
nd
tuner or from hard
disk Lock channel
Tone selection
Volume
Recording
Slow-motion during
playback
Switch TV/Radio
...
Number input for
programmes, timer etc.
Programm selection
u
p
/down
Menu
Videotext/Teletext
Stop recording/playback
TV freeze frame
Exit menu
Play back hard disk
content
AV mode
Power on/off
Sound on/off
Controls, Displays und Connections
9
Controls, Displays und Connections
This section provides a brief description of all the controls, displays
and connections. The button symbols presented here can also be
found in the description of the operating steps.
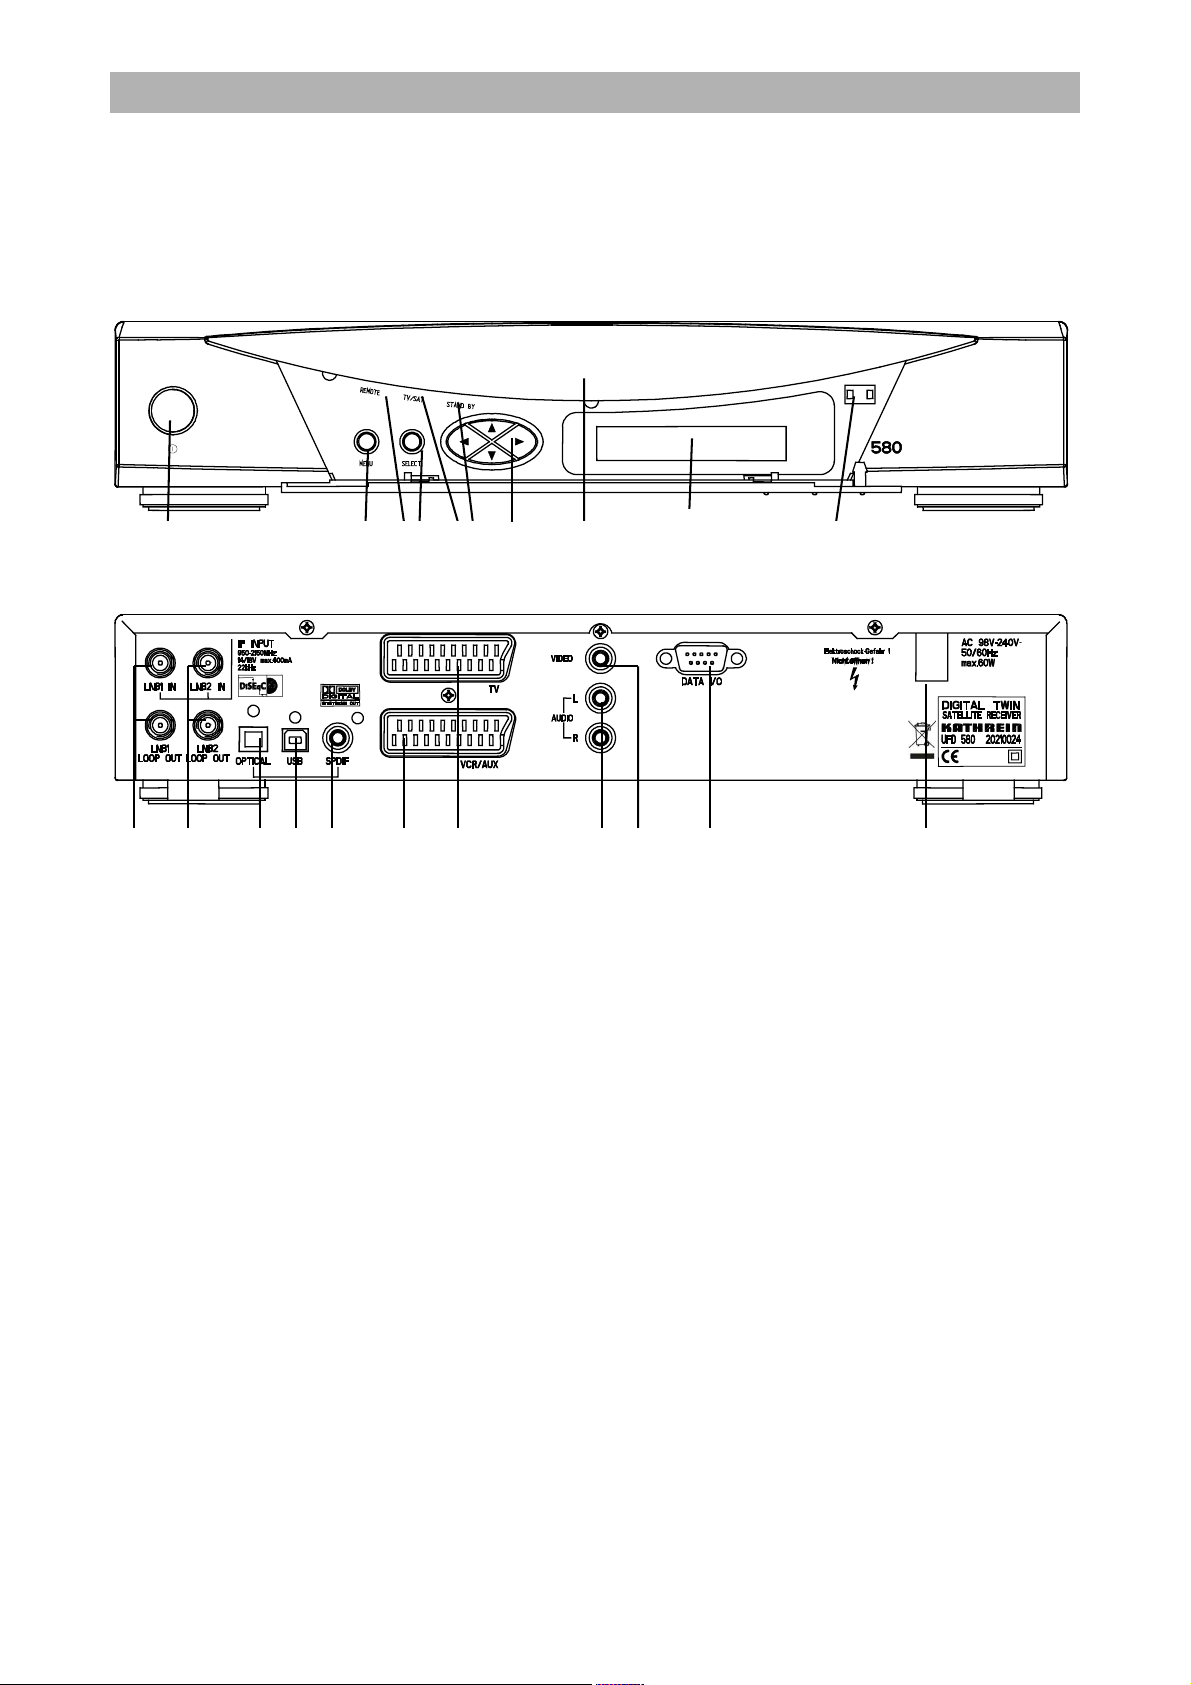
View of front panel (flap folded down)
View of rear panel
Front Panel Controls and Displays
Rear Panel Controls and Displays
1 On/Off switch (with mains disconnect)
2 Menu button to call up or exit menus or
submenus
3 Remote control signal acknowledge
4 Select button to confirm a selection
5 Operation indicator
6 Standby indicator
7 Arrow buttons for menu and programme list
8 LED (4-digit, 7-segment display) to show
programme slot and time, Play and Record
9 Common interface for Pay TV cards*
)
10 Pressure catch for front flap.
Open by lightly applying pressure on the
upper right-hand side
*
)
CA modules and Pay TV cards are not included
1 LNB 1 input and loop-through output
2 LNB 2 input and loop-through output
3 Optical data stream output
(SPDIF/Sony Philips Digital Interchange
Format) for Dolby Digital AC 3 audio
4 USB port (for Service only)
5 Electrical SPDIF data stream output (AC 3)
audio
6 Scart socket for VCR-/AUX connection
7 Scart socket for TV connection
8 Audio outputs (L/R) cinch sockets
9 Video output (FBAS)
10 RS 232 port (for Service only)
11 Mains power cable
1 2 3 4 5 6 7 8 9 10
1 2 3 4 5 6 7 8 9 10 11

Important Note on Initial Operation of the Receiver on a
UFO®micro System
10
Important Note on Initial Operation of the Receiver on a UFO
®
micro System
It is absolutely essential to carry out the following before and while registering receivers on the EXU 544
UFO
®
micro single-cable matrix:
- Connect the receiver to the TV set, but do not yet connect it to the UFO
®
micro ESU 32 outlet!
- You must first check the following settings on the “LNB Configuration” menu and
change them as necessary:
1. Press the
button to switch to the main menu
2. Press
to get to the installation menu and confirm your entry by pressing
3. Press
to get to the LNB configuration menu and confirm your entry by pressing
4. Press
to select the “ASTRA” satellite and confirm your entry by pressing
5. Press
to select “Tuner input” and press
to change the selection to "#1 & #2“
6. Press
to quit the set-up for the “ASTRA” satellite
You must run through steps 4-6 for each satellite received!
7. Press
three times to get back to the start screen
8. Interconnect the “LNB1 LOOP OUT” tuner output and the “LNB2 IN” tuner input by a coaxial
cable (F standard connector).
- Now carry out a UFO
®
micro reset on the receiver, as described below:
1. Press the
button to switch to the main menu
2. Press
to get to the installation menu and confirm your entry by pressing
3. Press
to get to the DiSEqC[UFO] set-up and confirm your entry by pressing
4. Press
to select the UFO option
5. On the UFO menu press
to select “UFO
®
micro”
6. Press
and change your selection to RESET by pressing
Confirm your selection by pressing
7. Press
to quit the UFO menu (press
to save your changes)
8. Press
three times to get back to the starting point
- Press
to switch the receiver to standby mode
- Now you can connect the receiver to the ESU 32 outlet
- Press
to switch the receiver on
- The registration is then performed automatically – the screen briefly shows: “UFO
®
micro active”
- Now perform a UFO
®
micro reset as described above (items 1-8).

Operating Instructions
11
Operating Instructions
Menu Concept
The structure of the menu concept is based on logical operating
sequences.
The current selected programme always appears in the upper right-
hand corner of the screen.
Note:
The selected menus, sub-menus and positions, as well as the
parameters to be set, are each highlighted in colour. The menus are
self-explanatory to a great extent. For additional information, press the
button (See “On-screen display/Help function”).
The main menu is opened by pressing the
button and the sub-
menus are selected using the
buttons.
To access the submenus, press
. The items in the submenus are
selected by pressing the
buttons.
The settings under the various options are made either by pressing
the
buttons or using the number pad. Quit the main menu or
submenus by pressing
.
Alphanumeric Inputs
You use the number pad buttons to enter programme and satellite
names. The numbers and letters appear in the name fields of the
corresponding menus. Place the cursor in the name field. The first
character is automatically given a dark background. You can now use
the number pad to enter letters by pressing the relevant button several
times. For example, the “2” is also used for A, B and C.
Pay attention to the
bar at the bottom o
f
the on-screen display!
It provides guidance
on what to do next.
Pay attention to the bar at the
bottom of the screen with
details on the relevant menu
item!
Operating Instructions
12
Alphanumeric Assignment of Remote Control Number Buttons
Button 1 x 2 x 3 x 4 x 5x
1
.
,
?
1
2
A
B
S
2
3
D
E
F
3
4
G
H
I
4
5
J
K
L
5
6
M
N
O
6
7
P/Q
R
S
7
8
T
U
V
8
9
W
X
Y
Z
0
UNUSED
0
UNUSED
0
Language Selection - OSD
The language for the on-screen display is set as follows:
➙
➙ Menu language ➙
➙ English ➙
The languages available are Dutch, English, French, German, Italian,
Portuguese, Spanish and Turkish.
Connection and Setup
13
Connection and Setup
The following section is intended specifically for specialist dealers.
You only need to pay attention to this section if you are carrying out
the installation yourself.
The “Connection Examples” section provides a range of sample
configurations.
Do not connect the unit to the mains until all installation work has
been properly carried out.
Refer to the information in the “Safety instructions” section.
Connecting the Unit
Sat IF Connection
Connect the Sat IF inputs on the receiver to the satellite reception
system.
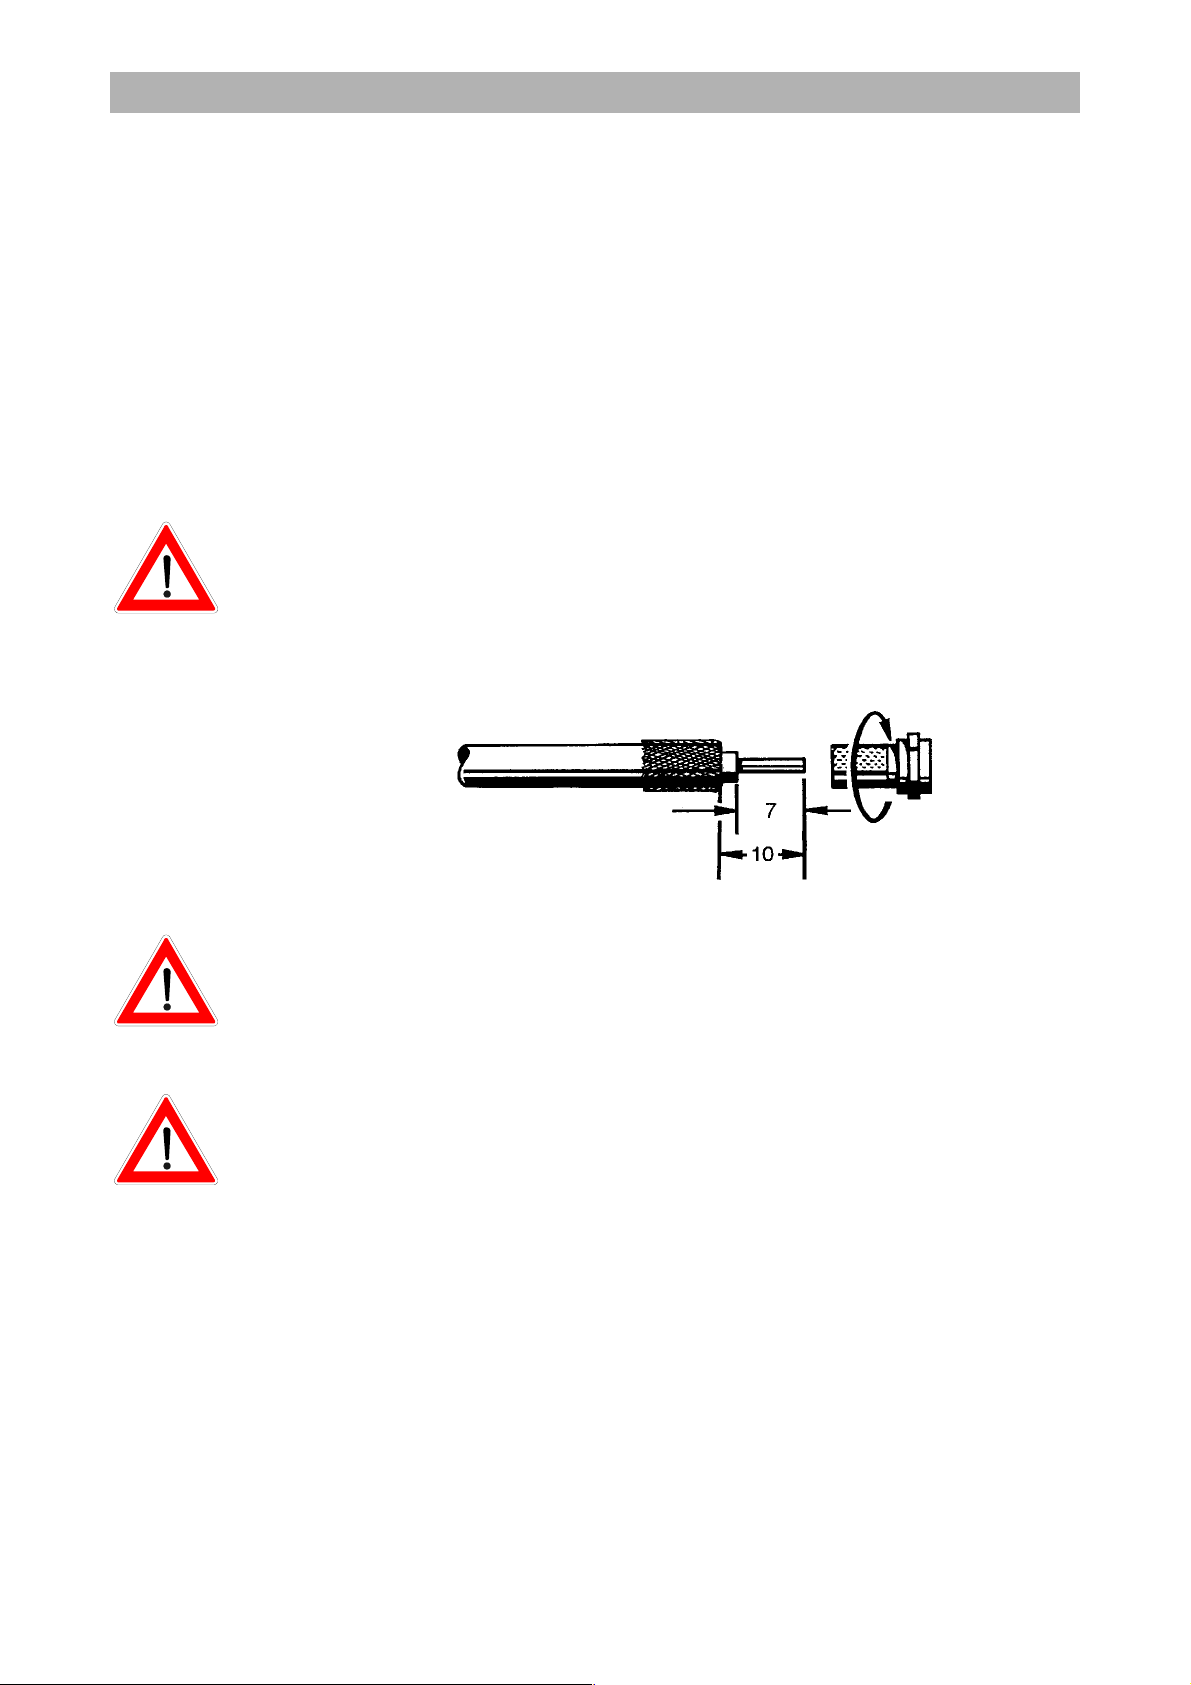
Use coaxial cable with a standard F connector.
If the F connectors are not yet fitted on the cable, strip the insulation
from the cables as shown in the following illustration and carefully
twist the F connectors onto the ends of the cables until they are
securely fitted.
When fitting the connector, make sure that no wires from the braiding
are touching the inner conductor, so no short circuit can occur.
The quality of the reception signal depends on the connection.
Reception Requirements
Make sure that your own satellite antenna system is equipped at least
with a universal LNB for digital reception in the high-band range.
Reception System Presets
The presets for the control signals have been made for standard
reception systems, i.e. 14/18 V for polarity reversal and 22 kHz
switching signal for low/high band changeover on multi-feed reception
systems.
The preset will need to be changed in the installation menu under
“DiSEqC™” if UFO
®
micro or tone burst switching matrices are used in
the receiving system.
Refer to the section headed “Installation menu, DiSEqC™ menu”.
Be sure to follow the operating instructions for the matrix used.

Connection and Setup
14
Operation on one Antenna Connection
To enable you to utilise all the reception and recording properties of
your UFD 580 twin-DVR Sat receiver, such as
1. recording one programme and at the same time viewing any
other programme or zapping through the programmes, and
2. recording two different programmes at the same time,
the two tuner inputs of the Sat receiver must each be supplied with a
dedicated satellite signal from the antenna system/Sat outlet.
The receiver tuner inputs are factory preset on the installation menu
for “#1 & #2” mode, meaning for two separate Sat antennas.
If you only have one antenna connection available, we recommend
you interconnect the output of tuner 1 and the input of tuner 2 by a
coaxial cable with F connectors.
Then “Loop” mode must be selected on the installation menu for the
tuner input.
You will find the “Tuner input” option by pressing the
button. Then
select “Installation”, “LNB configuration”, and confirm the satellite you
are receiving by pressing
. You can then make the settings here,
though a restriction on this is that with tuner 2 you can only receive the
additional programmes of the plane currently set by tuner 1 (e.g.
Horizontal High).
Note: This will only work when receiving one satellite, not in multifeed
reception!
If only tuner 1 is connected (with no connection to tuner 2), the setting
“#1” must be selected for the tuner input. You can then have only the
possibilities offered by a normal “single” receiver available to you.
If this setting is not made, malfunctions will occur and the following
message will be displayed:
Weak signal or no signal!
Coax cable with F connectors
Connection and Setup
15
TV and Video Recorder Connection
Connect the satellite receiver (TV Scart socket) and the TV set by a
Scart cable (see “Connection example”).
If your TV has a stereo feature, you can receive the sound in stereo
via the Scart connection.
Connect the satellite receiver (VCR/AUX Scart socket) and the video
recorder likewise by a Scart cable.
For system reasons, the same video signals are to be found on the
Scart outputs and on the video cinch output.
If you are recording using an external video recorder, remember not to
operate the receiver during recording, otherwise all the on-screen
displays will appear on your recording.
Audio Connection
If you want to play the sound on your hi-fi system, connect the audio
cinch sockets to the input sockets on the hi-fi system with an
appropriate cable (see “Connection example”).
SPDIF Connections (Electrical/Optical)
The electrical SPDIF cinch output and the optical output are for
connection to a Dolby digital system (see “Connection example”).
Inserting Batteries in the Remote Control
Remove the cover on the rear of the remote control.
Insert the two supplied batteries into the remote control. Ensure
correct polarity of the batteries; the + and – markings are indicated
inside the battery compartment.
Slide the cover back into the housing until it locks in place.
Used batteries are special waste.
Do not throw used batteries into your household waste; take them to a
collection point for old batteries.
Electronic equipment is not household waste - in accordance with
directive 2002/96/EC OF THE EUROPEAN PARLIAMENT AND THE
COUNCIL dated 27
th
January 2003 on used electrical and electronic
equipment, it must be disposed of properly.
At the end of its service life, take this unit for disposal at a designated
public collection point.
Initial Setup
16
Initial Setup
Getting Started
Connect the unit to the mains power supply.
Switch on the receiver by pressing the power button on the front of the
unit.
The LED shows “- - - - ”.
The operation indicator LED lights up red, the unit is in standby.
Switch on the receiver by pressing the
button on the remote
control.
The red LED on the front panel of the receiver flashes each time a
button on the remote control is pressed.
The screen displays the factory preset programme. In the bottom
section of the screen is an information bar showing the name of the
programme provider, the time, the timer settings, the programme
status and title, provided those details are being broadcast. The LED
display indicates the programme's memory location number.
The red standby indicator goes out.
You can now receive the factory preset TV and radio programmes and
call them up by pressing the
buttons. Press
(blue) and
to select
radio programmes. Press the blue
button again to return to the TV
programmes.
For details of how to save additional TV and radio programmes, refer
to the "TV/Radio Programme Lists" section.
Please check the time is correct according to whether you are on
Summer or Winter time.
When you switch on, the last reception status set is always
restored.
Power Failure Safety
After a power failure, the receiver automatically powers up,
obtains the time from the reception signal and then returns to
standby. This preserves the timer settings.
Error Signalling
If the message “Weak signal or no signal” appears on the screen as
well as the display for the last programme received, check the
installation of the system and/or the receiver settings. If this only
affects individual programme slots, there may be an interrupted signal
from the programme provider or a fault in the reception system (cable
or satellite system).
First of all, check the connection configuration and whether the default
receiver settings are correct for your system. In case of doubt, consult
a specialist engineer.

Initial Setup
17
Receiver Presetting
Your receiver is factory pre-programmed to receive the ASTRA
(19° East/28°East) and HotBird satellites, as well as Eutelsat 10E and
16E, TurkSat 42E, Telecom 5W and 8W, and others. You do not
normally need to make any additional settings. If you are not
connected to a communal system, you will need a multifeed
arrangement with at least two LNBs in front of the satellite dish in
order to receive multiple satellite systems. Consult your specialist
dealer on this.
Before you change the basic settings of your receiver, write down the
settings on the form provided at the end of this operating manual. You
will then be able to restore the original settings at any time.
On Screen Display (OSD)
18
On Screen Display (OSD)
Important On-Screen Displays
The receiver functions are controlled by a microprocessor and
comprehensive software. The following explanations are intended to
improve your understanding of all procedures and to minimise the risk
of mistakes.
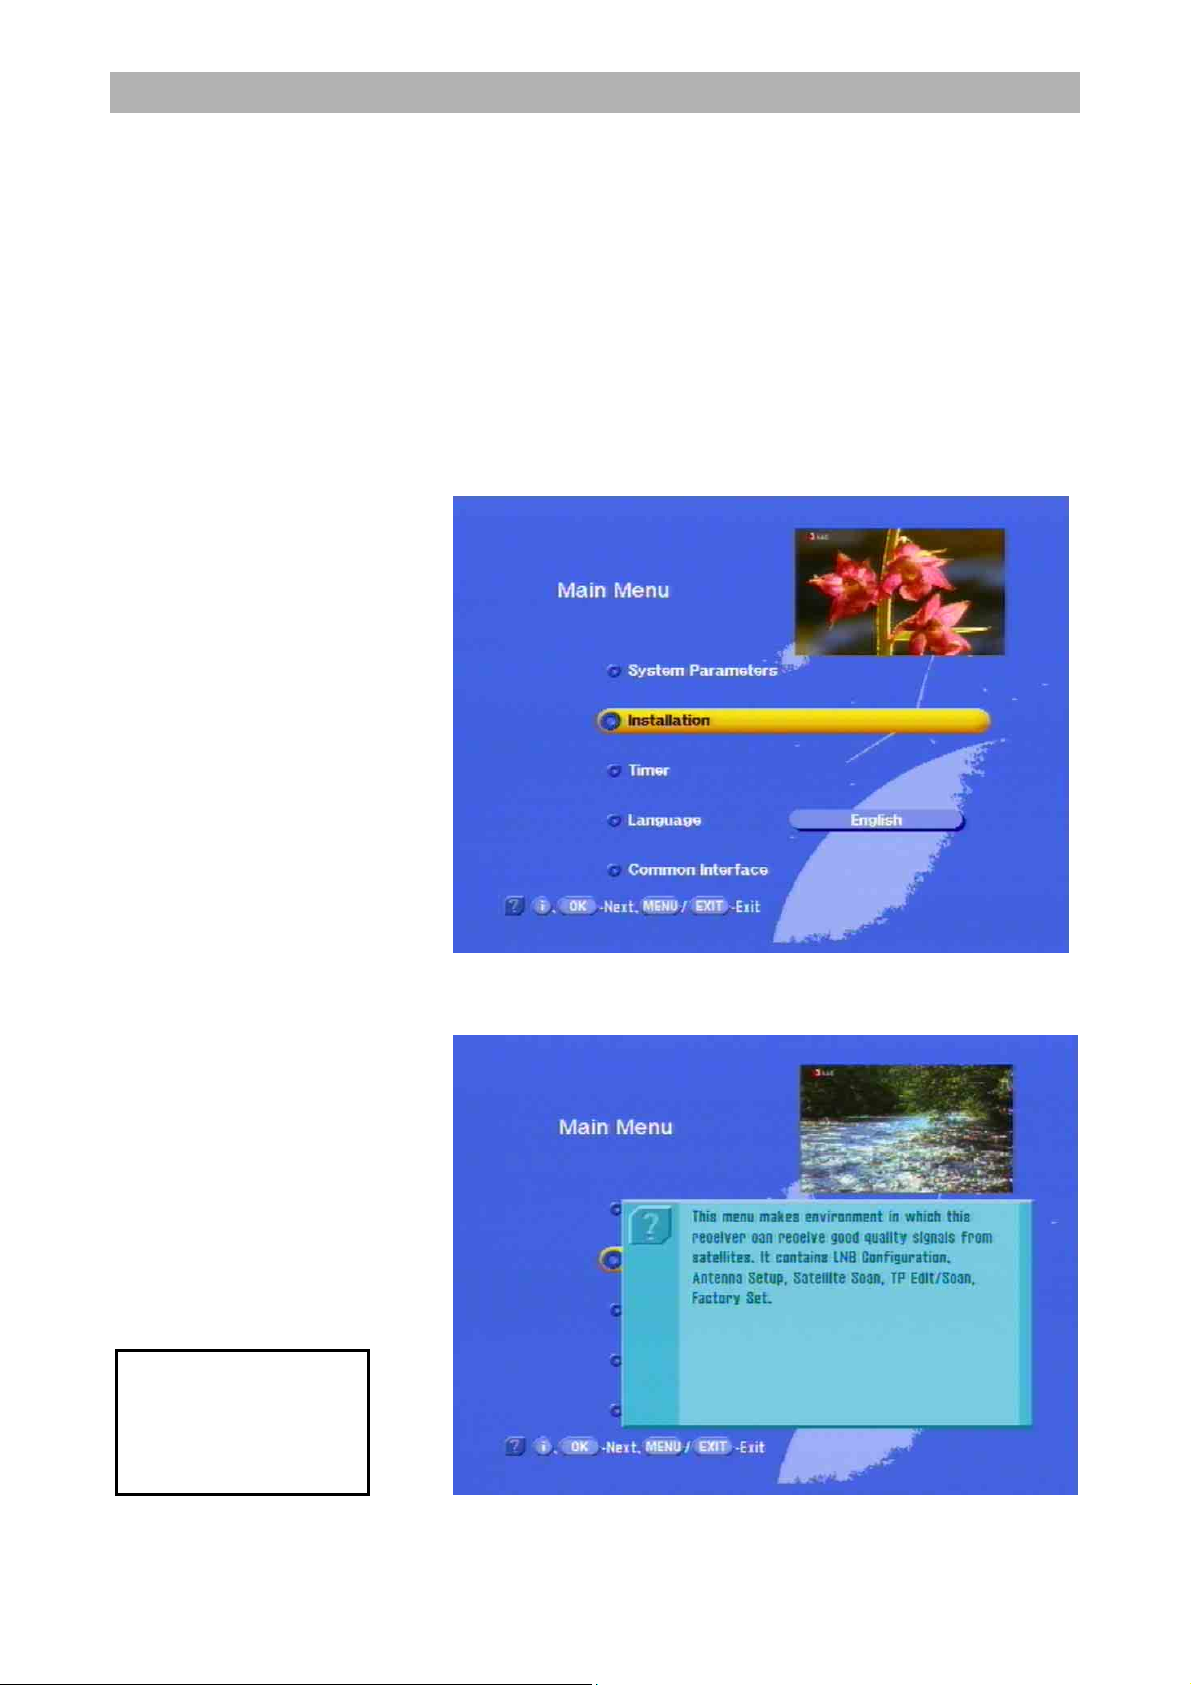
Help Function
You can call up help for each menu or menu function. This help
function provides you with a brief description of the most important
functions of the selected menu options. For example, access the main
menu by pressing
.
You can now view the help display for the “Installation” option by
pressing
.
You will find detailed descriptions of the selected menu items in the
relevant sections of the operating manual.
Pay attention to the
bar at the bottom o
f
the on-screen display!
It provides guidance
on what to do next.
On Screen Display (OSD)
19
Press
to quit the help function and return to the main menu. Press
again to return to the original programme you were receiving.
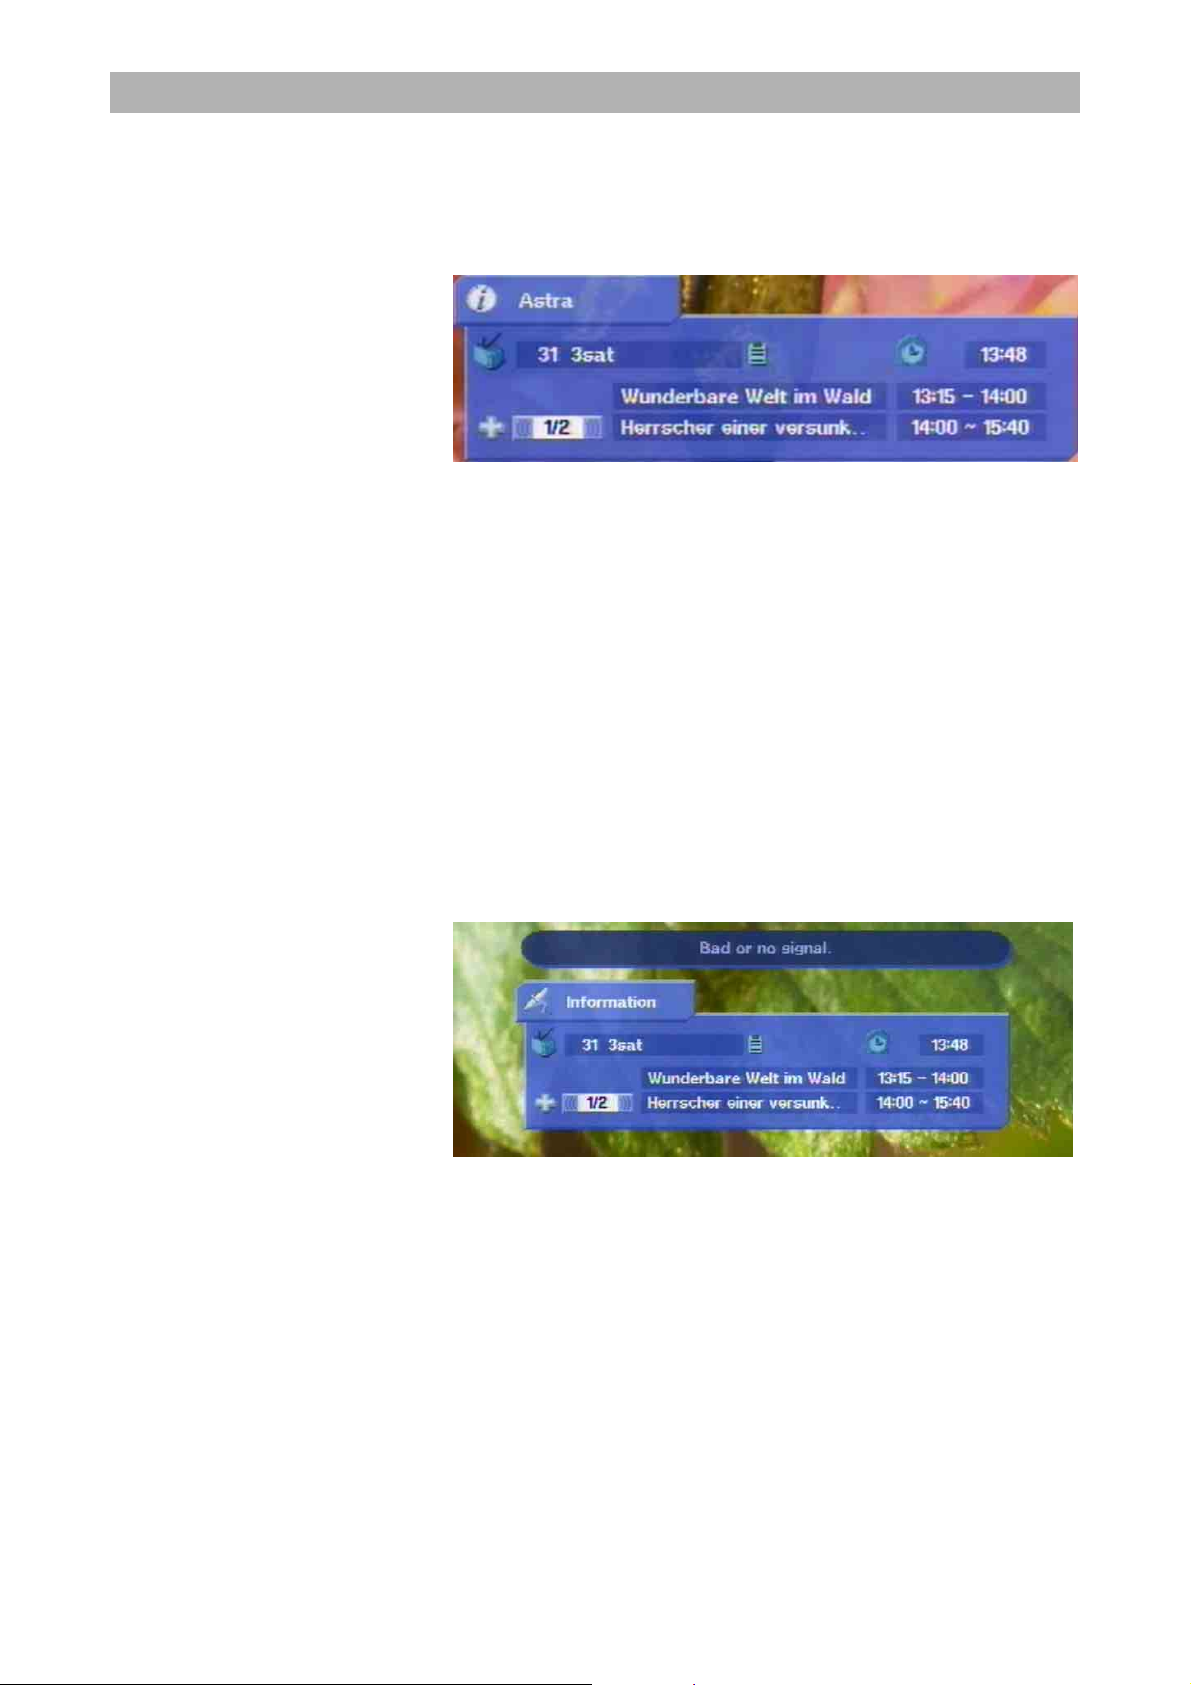
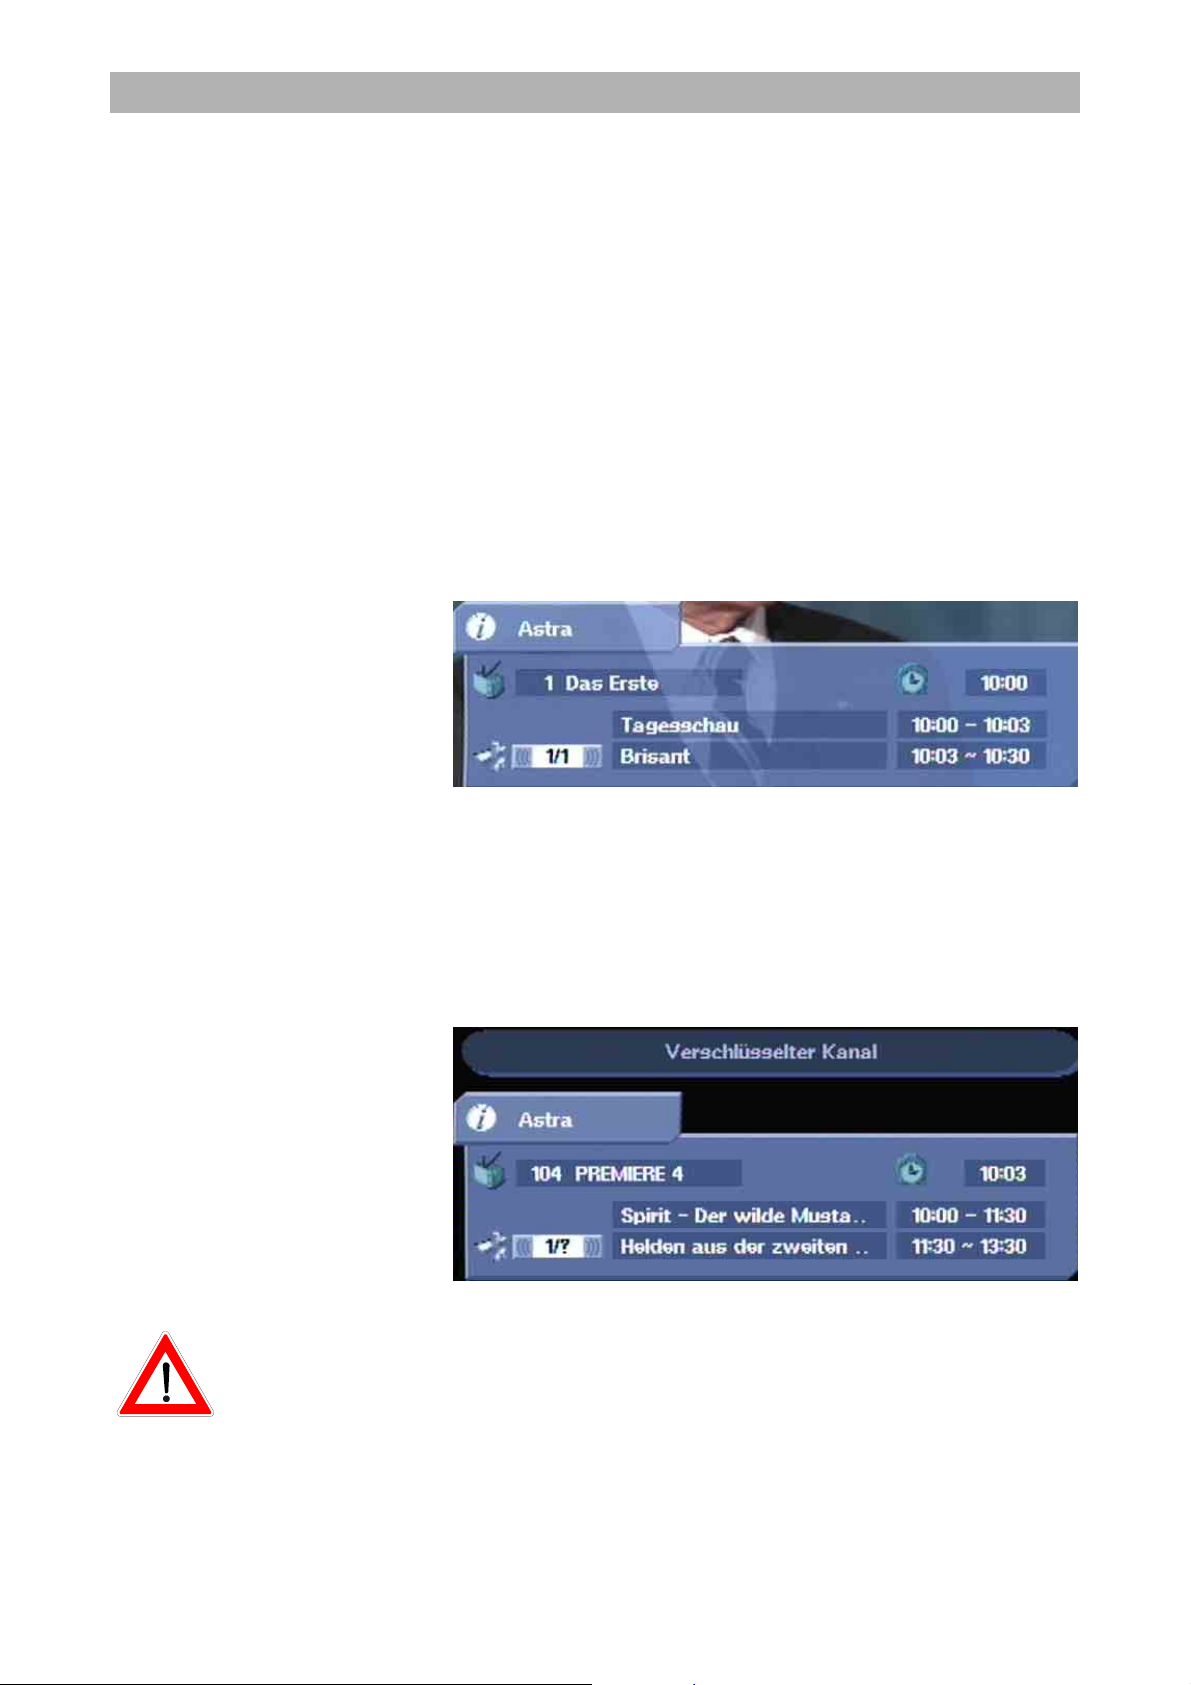
TV Channel Identifier
The channel identifier is displayed for a few seconds each time you
change the programme or constantly if you press the
button. The i
indicates that a channel is being received even if no picture can be
seen (e.g. radio). The TV symbol indicates a TV channel - adjacent to
it is the selected programme, whether Videotext/Teletext is being
received, and the current time. The + on the third line indicates the
programme selection from the master list. If the Favourites list is
selected, the “apple” symbol appears here. This is followed by the
programme title, the start and end time of the current programme, and
the next programme, if this data is being transmitted.
Radio Channel Identifier
The message for the set radio channel has the same layout. A radio
receiver symbol in the top left-hand corner indicates that it is a radio
channel.
Error Signalling
“Weak signal or no signal” indicates that an error has occurred in the
reception system or in the receiver settings, or that the transponder is
not sending. The channel identifier shows a satellite antenna instead
of the
i. Check the Sat IF connection and the LNB configuration. The
list of service settings at the end of this manual can be used to help
you do this.
On Screen Display (OSD)
20
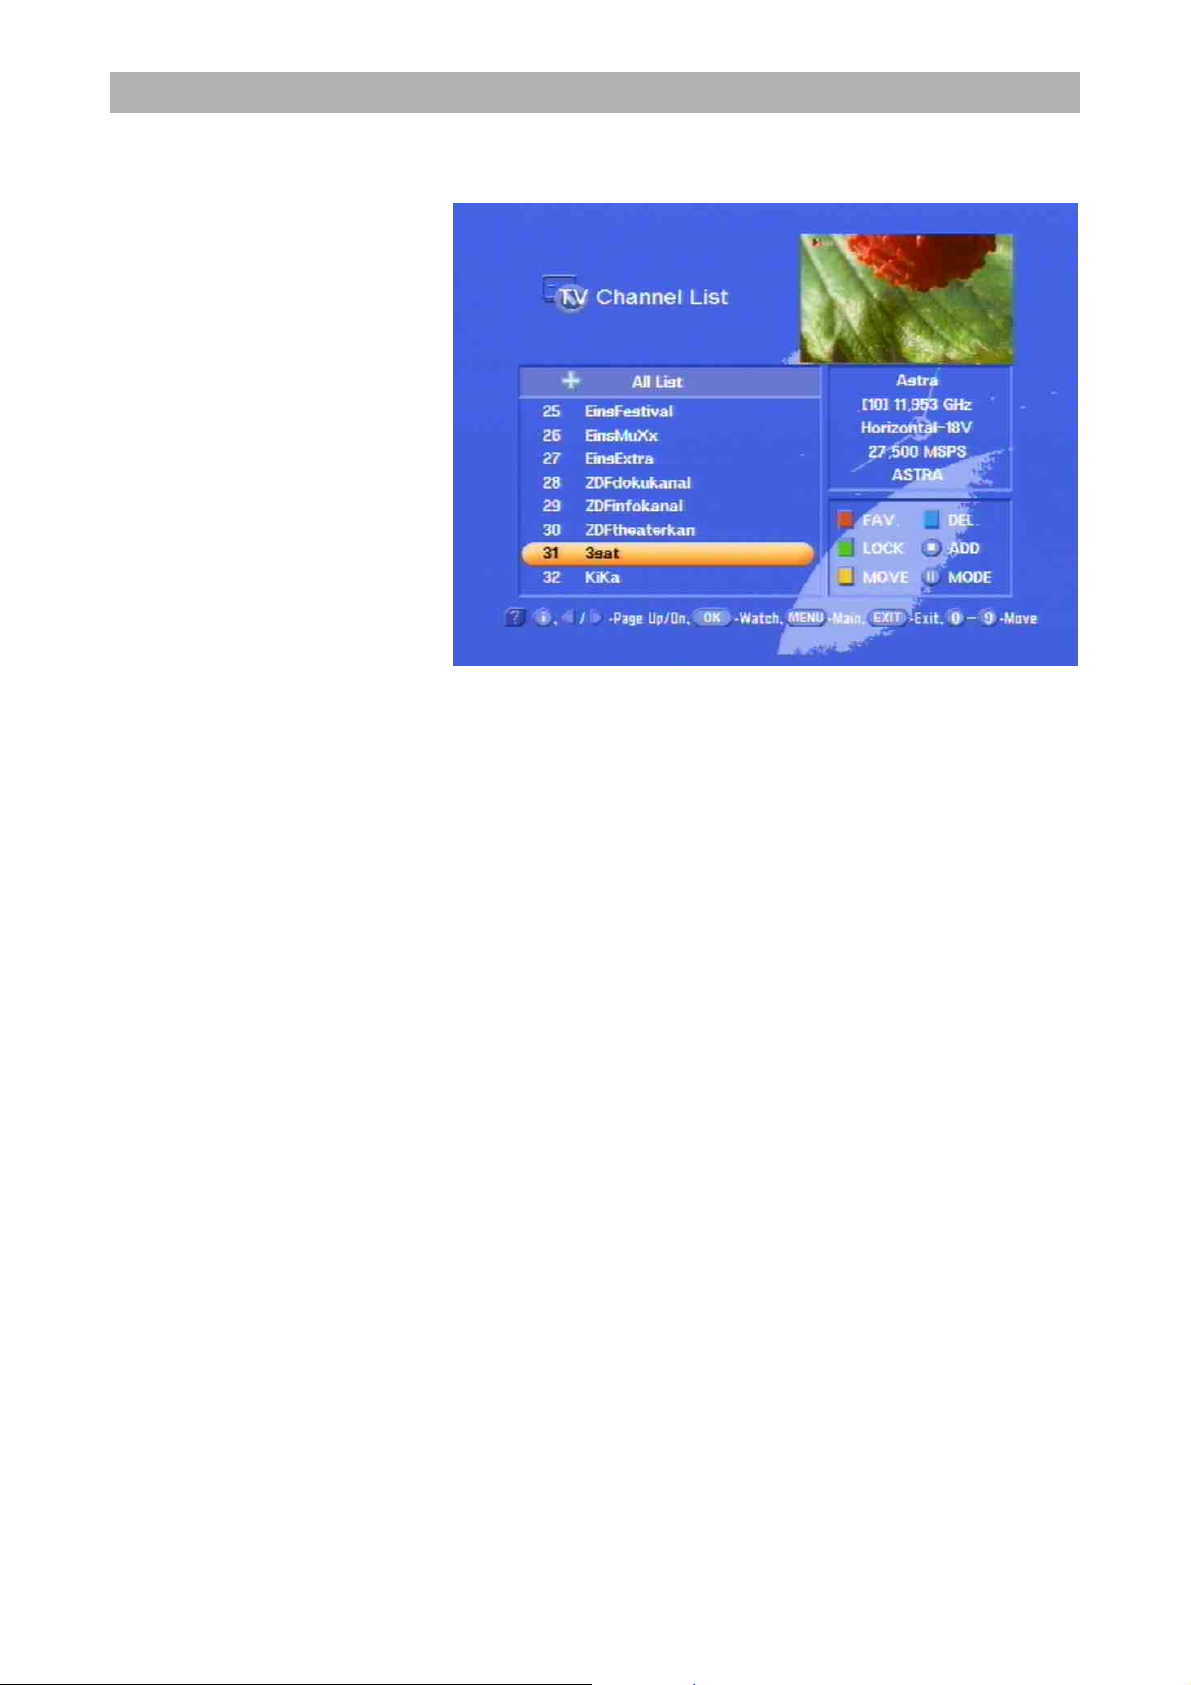
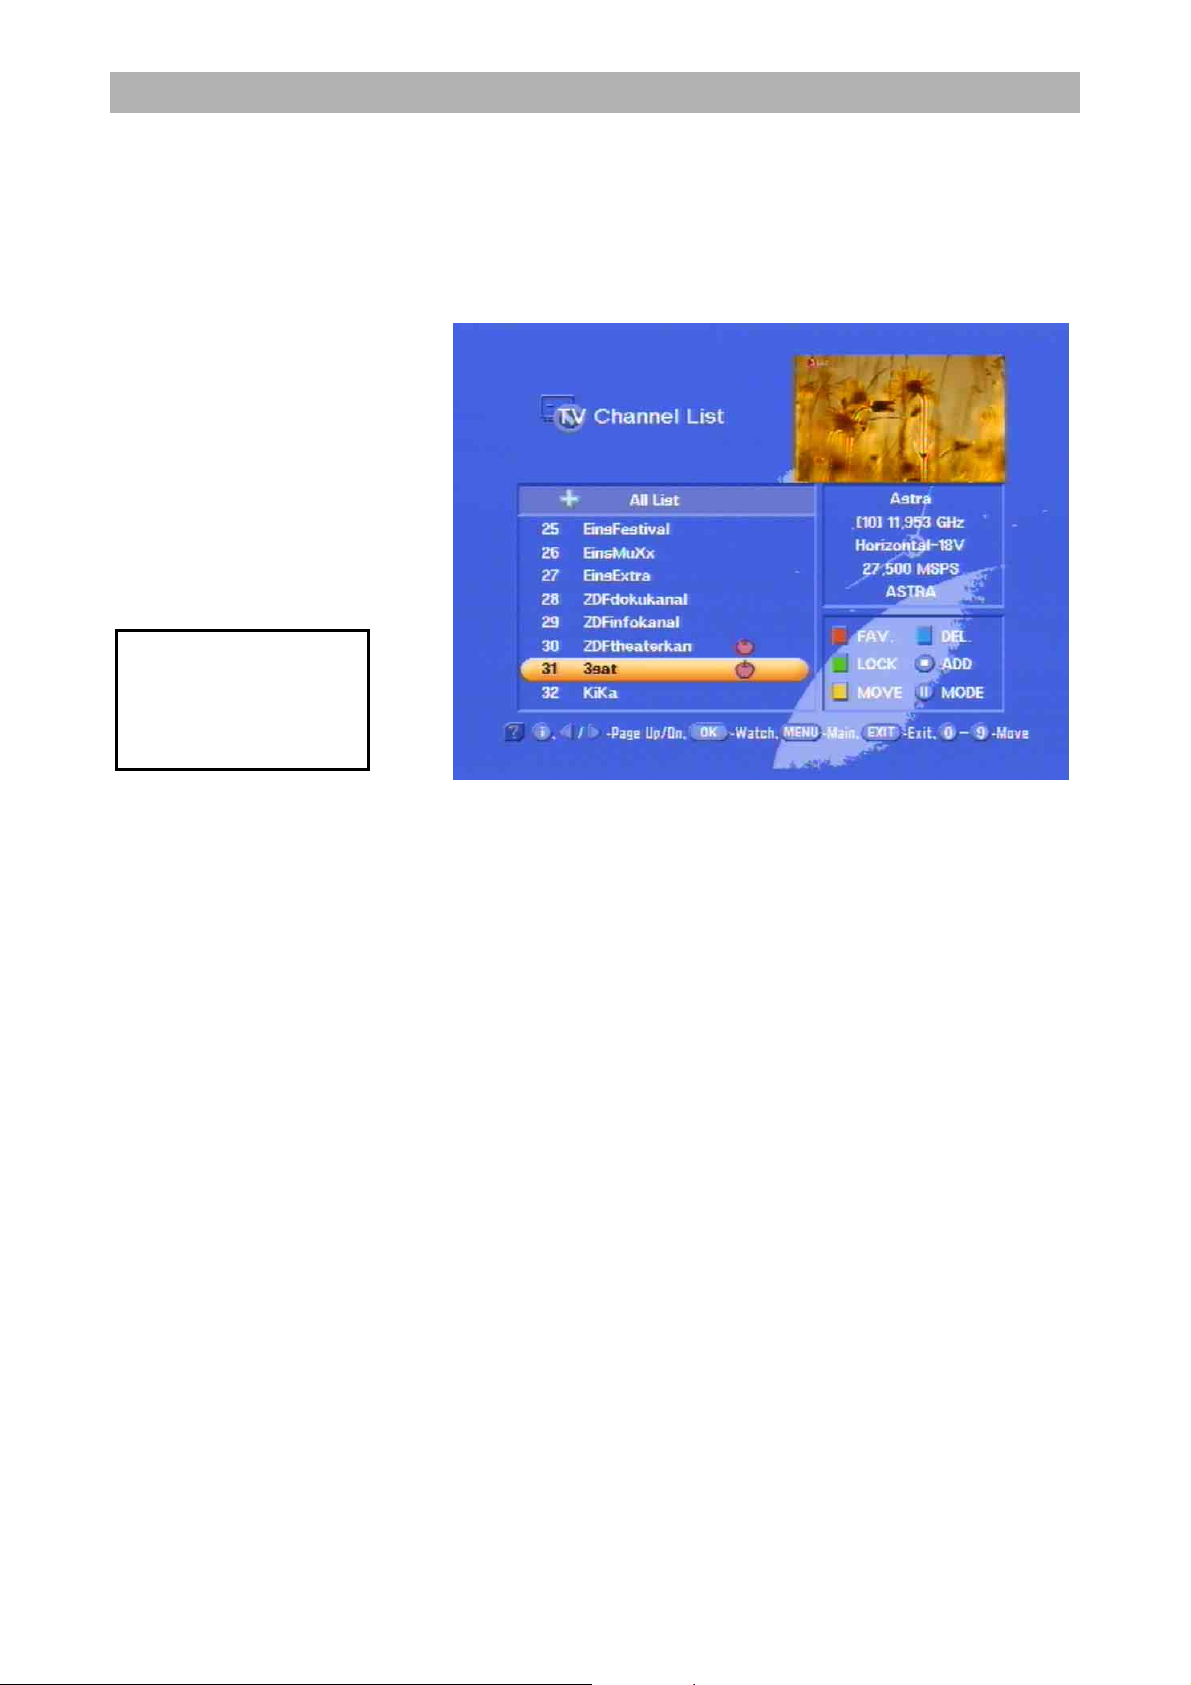
TV/Radio Channel List
Press the
button to access the channel list.
At the top left is a + for the complete list. Information about the
channel, the programme provider, and whether the programme is
currently encrypted, is shown in the column underneath. In the upper
right-hand column are details of the satellites received, the
transponder and its frequency, and the polarisation. The desired
programme can be chosen using the bar cursor or by entering the
relevant number and is then confirmed by pressing
.
In the bottom right-hand corner you will find the “Programme/Channel
Settings” menu. The factory settings for programmes and channels
can be changed here.
Press the
button (red) to save the channel shown as a favourite channel
button (green) to lock the displayed channel
button (yellow) to move the channel to another position
button (blue) to delete the displayed channel from a position
Press
to add a new channel
Press
to select the programme mode of the programme list.
Always follow further instructions or press
to quit.
For more information refer to the “Programme Selection” section.
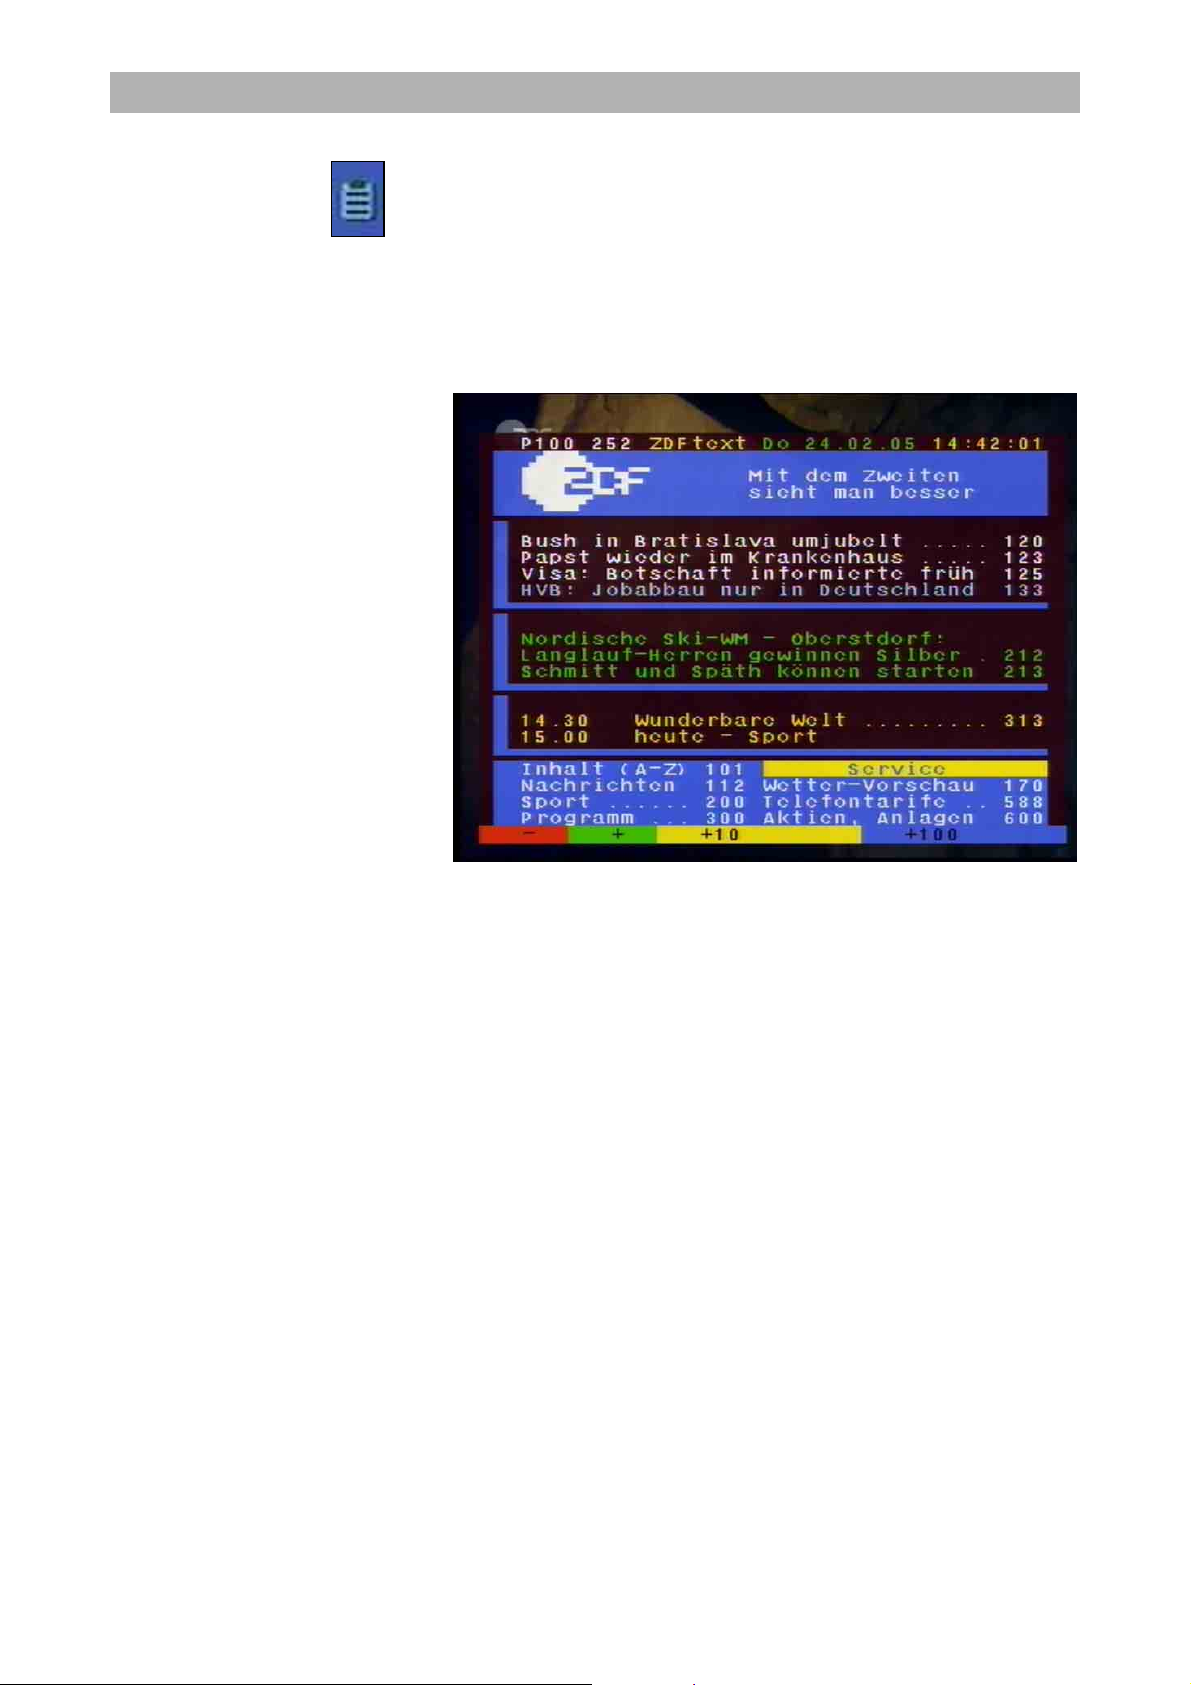
Videotext (Teletext)
21
Videotext (Teletext)
This symbol in the programme display shows you whether
Videotext/Teletext is broadcast for the selected programme.
When you press the
button, the receiver processes the broadcast
Videotext/Teletext service for your TV set to display, even when the
signal is encrypted.
During the search, the programme page (here P100) which is being
searched for is displayed in the top left-hand corner, and the
permanent time display is shown at the top right.
When the search is finished, the Videotext/Teletext being broadcast
by the relevant programme provider appears:
The individual pages can then be opened using the number buttons.
During the search, a white star flashes in the top left-hand corner of
the screen.
Press
or
to exit the Videotext/Teletext.
Channel List
22
Channel List
This section describes how you select TV programmes with your
receiver and how you can set the desired volume.
The description of the functions assumes that the receiver has been
properly connected.
If you wish to connect up the receiver yourself, please read the
“Connection and Setup” section first.
Selecting a TV Programme
Reception Status
The following information describes how to select other programmes
and what the on-screen displays look like.
To select additional TV programmes in ascending or descending order
in the programme memory, simply press the
buttons after turning on
the receiver.
Every time you press the button, an on-screen display shows you the
selected programme together with the time, the programme start and
end times and the programme title on an info bar, provided the
relevant data is being broadcast.
You can permanently show or hide this info bar by pressing the
button.
Encrypted programmes are indicated by the message “Encrypted
channel”:
To view these programmes you will need an authorisation
card - a PCMCIA card or Smartcard - from the Pay TV provider
(see “Common Interface” section).
The CA module and Smartcard are not included in the supply
package.
Channel List
23
A further option for selecting a different programme is to press the
button. The TV channel list is then displayed. The top right-hand
column provides information relating to the satellite being received,
the transponder and its transmission frequency, the polarisation, the
symbol rate and the encryption. The left-hand column shows the
programme location and name, the type of signal being received
(FTA/encrypted), the favourites, and any locked channels.
Press the
buttons to move to the next programme, and use the
buttons to jump to the next or previous page.
You can also select a programme by entering a number.
Press the
button to exit the programme list and return to the
programme already selected.
Selecting a TV Programme by Number
You can select a different TV programme while a programme is
running by entering the new programme's location number. Use the
number pad buttons
to
to enter the programme locations.
Example: You want to select "DSF“ at location number 15 (the order of TV
programmes is fixed in the programme memory, so this only serves as
an example).
To select this programme, press the numbers
and
one after
the other. The receiver waits for about two seconds for input of the
next number.
Do not input leading zeroes in front of the number. The 0 button
is reserved for switching to AV mode.
The procedure for all other programmes - including those with three-
or four-digit location numbers - is exactly the same.
Pay attention to the
bar at the bottom of
the on-screen display!
It provides guidance
on what to do next.

Channel List
24
Switching to a Radio Programme
You can switch from a TV programme to a radio programme
by pressing the blue
button.
The receiver switches to the last radio programme selected. The on-
screen display relating to the programme is shown, just as for a TV
programme. The LED shows a small “r” together with the
programme's location number. You can return to the TV programme
by pressing the same button.
All the functions, such as the channel list, work in the same way in
radio mode as in TV mode.
Common Interface
25
Common Interface
Follow the instructions given by your Pay TV provider.
The Common Interface for insertion of two so-called Conditional
Access modules is located underneath the front flap.
The Smartcard sold by the Pay TV provider, specific to a particular
encryption technology, is inserted into the CA module. The card is not
included in the receiver package.
The cards and modules are issued by the respective Pay TV
providers, and contain the subscriber data and details of the
programmes for which the subscriber has paid. These programmes
are always encrypted.
Contact the Pay TV provider if you are interested in subscribing to a
particular Pay TV channel.
You alone are responsible for use of the cards.
Keep the card and the associated PIN code in a safe placing when not
in use.
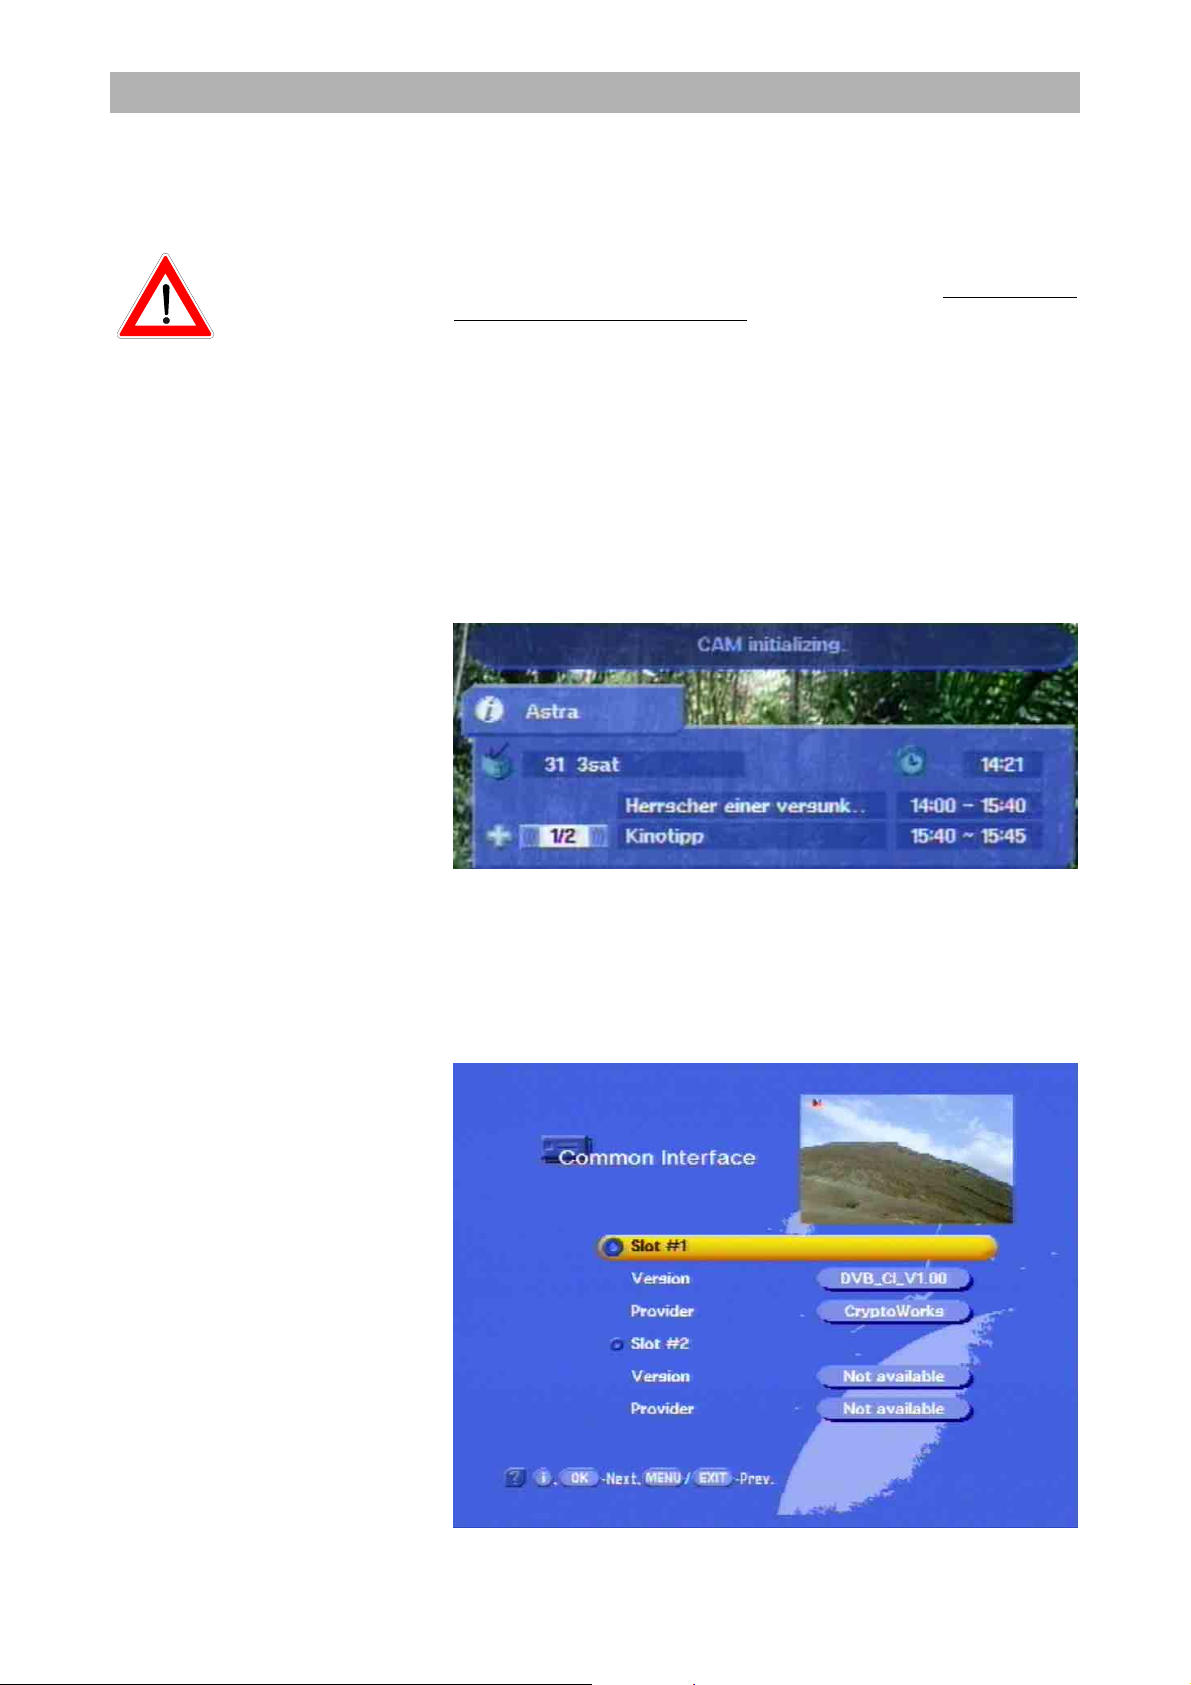
When you turn on the receiver, the following message appears:
A CA module must be inserted for the message to appear, however.
You can find out which card is inserted in the Common Access
module by selecting “Common Interface” from the main menu and
confirming by pressing
.
The screenshots below depend on the specific module and card,
and so are only intended as examples.
Press
to access a menu generated by the module.
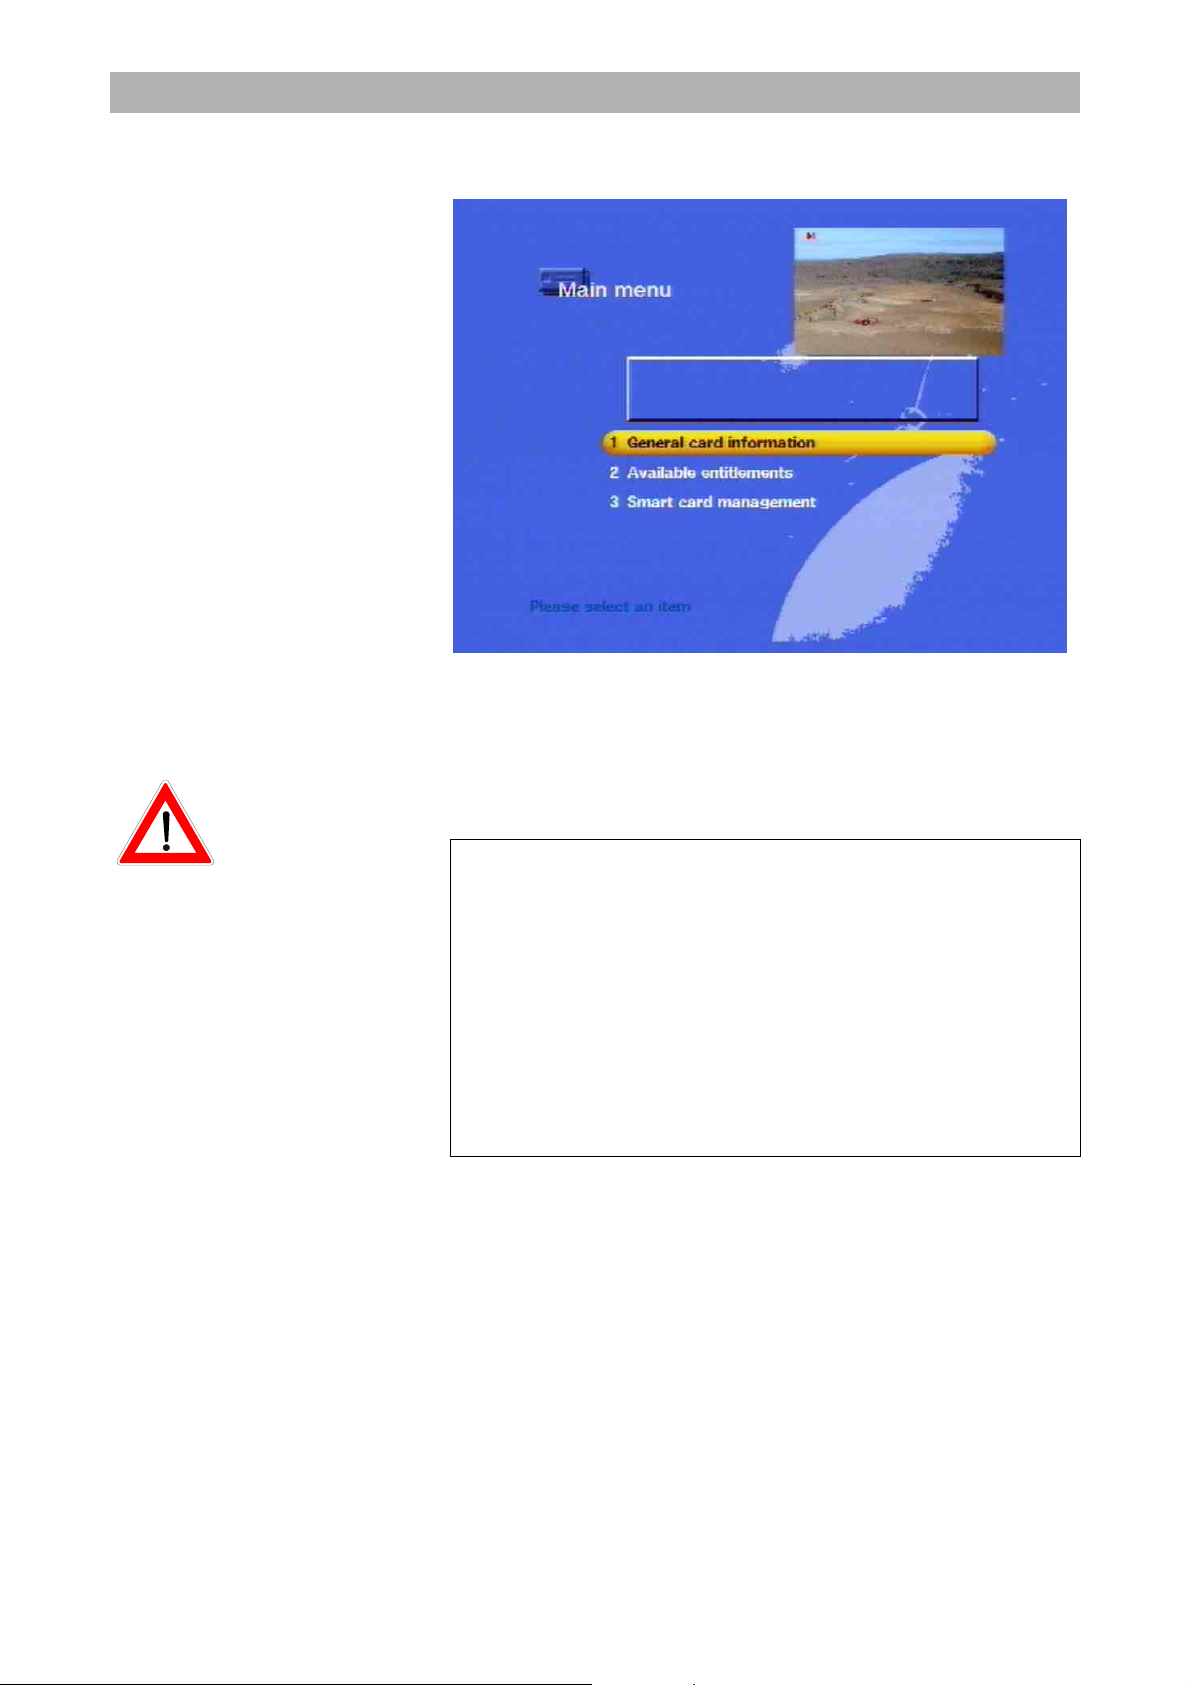
Common Interface
26
From this menu, your card and your PIN code allow you to access
various programmes from your Pay TV provider.
“CryptoWorks” has been selected as an example here. The
details may vary for each CA module.
The displays appear in English, even if you have selected German as
the menu language for the receiver.
Please always follow the instructions supplied by your Pay TV
provider.
Information for Conax, SECA, Viaccess and CryptoWorks users:
Note that with monthly activation intervals, the programme providers
have different procedures for activating Pay TV cards. Activation may
therefore be a few days before or after the beginning of a new month.
During this activation period, the CA module and card must be in the
slot, and the receiver must be turned on a set to the booked Pay TV
channel. Follow the instructions from the Pay TV provider.
For monthly subscription extensions, the card can be re-initialised by
way of the CAM "CAM Re-initialisation" menu.
If your Pay TV card is then still not enabled, we recommend you
briefly withdraw the CA module with the card out of the slot, with the
receiver switched on, and then re-insert it.
This information has nothing to do with the properties of the unit; it is
merely intended to assist you.
Twin Functions
27
Twin Functions
The UFD 580 is equipped with two tuners, enabling you to perform
two separate functions at the same time,
including:
• Picture-in-picture (PIP)
• Time-shift and
• One-touch recording.
Picture-in-Picture (PIP)
The picture-in-picture function permits simultaneous viewing of two
programmes. This allows you to see when a programme you want to
watch begins without having to leave the programme you are currently
watching.
When you press the green
button the first time a window opens up
in the top right-hand corner. The channel is indicated underneath the
picture:
You can then change programme in the main picture with the
buttons.
The programme displayed in the PIP window can be changed with
the
buttons.
Press the
buttons to swap the main picture and PIP
programmes.

Twin Functions
28
Press the green
button a second time to view a picture played back
from the hard disk in the PIP window:
• A picture currently being recorded is framed in red.
• A previously recorded picture is framed in yellow.
The picture caption is prefixed by an H (for hard disk) and the serial
number.
Press the green
button again or the
button to exit the PIP
function.
Time-Shift
The time-shift function is described in the “Hard Disk Recorder”
section. Note that the receiver switches to hard disk mode when
executing this function.
One-Touch Recording
One-touch recording is described in the “Hard Disk Recorder” section.
Note that the receiver remains in TV mode when executing this
function.
TVTV EPG and Timer
29
TVTV EPG and Timer
The EPG is a latest-generation Electronic Programme Guide
replacing the existing EPG and the timer menu. It provides all the EPG
information for around 60 TV channels at no charge, without you
having to change programme, and also offers schedule information up
to a week ahead (depending on programme provider).
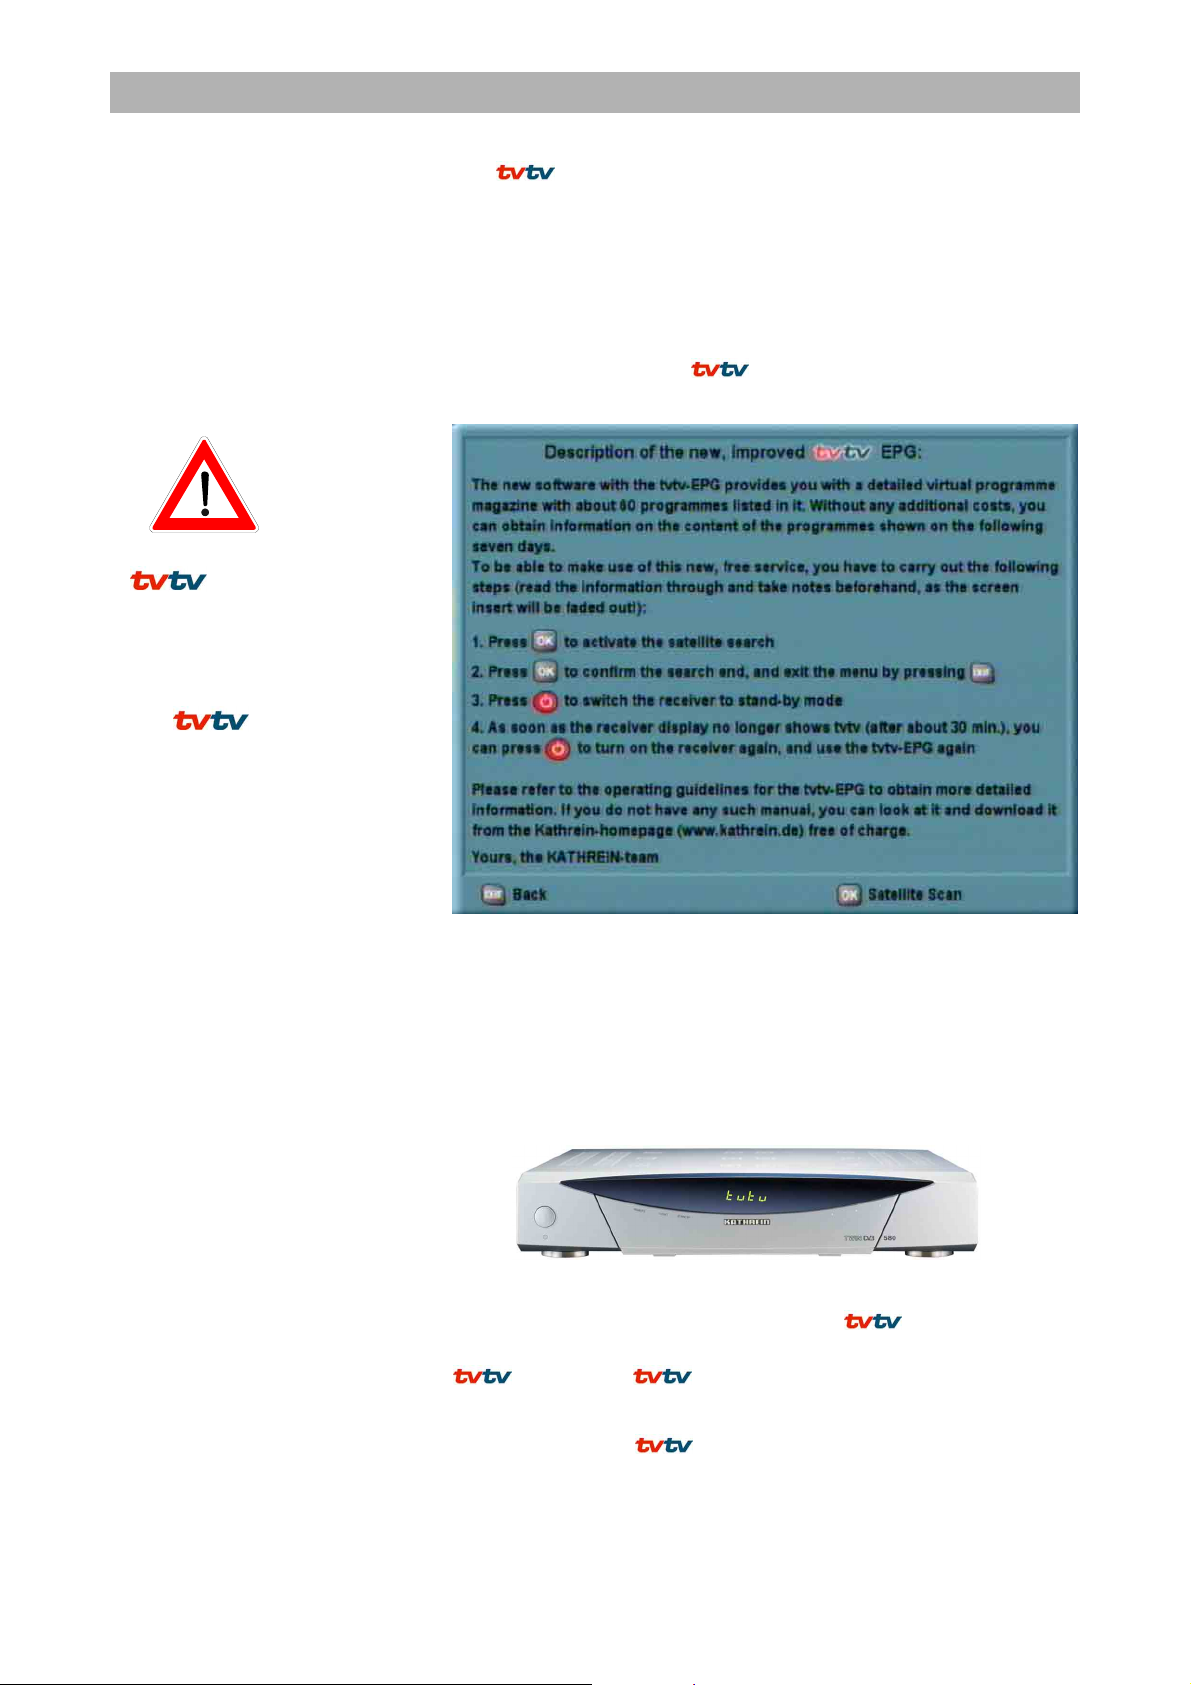
Accessing the TVTV EPG for the First Time
Press
to access the EPG. The first time you access it
(and following a factory reset) you see the following on-screen display:
Press
to switch to the “Satellite search” menu. Use the arrow
buttons (
) to navigate around the menu items and select
options. Confirm your selection and start the scan by pressing
.
When the search is finished press
. Press
three times to quit
the menu and return to the normal TV picture. Then press
to
switch the receiver off. The front panel display indicates:
As soon as the display no longer indicates
you can switch the
receiver back on by pressing the
button and begin using the
EPG. The display is usually shown for about 30
minutes. The download may take anywhere between 20 and 60
minutes, however, depending on how much data is waiting to be
transferred from the
to the receiver.
To ensure the functionality of the
EPG, the satellite scan
for the ASTRA satellite (with
multifeed reception: for “All
satellites”) must be run. This
process downloads the
necessary signal identifiers fo
r
the EPG (SID, TSID
and OID).
TVTV EPG and Timer
30
Accessing the TVTV EPG
The
EPG is accessed by pressing the
button, and
automatically displays the “Current” (Now showing) view (see
“Current” menu item), regardless of which
EPG view you had
been in beforehand.
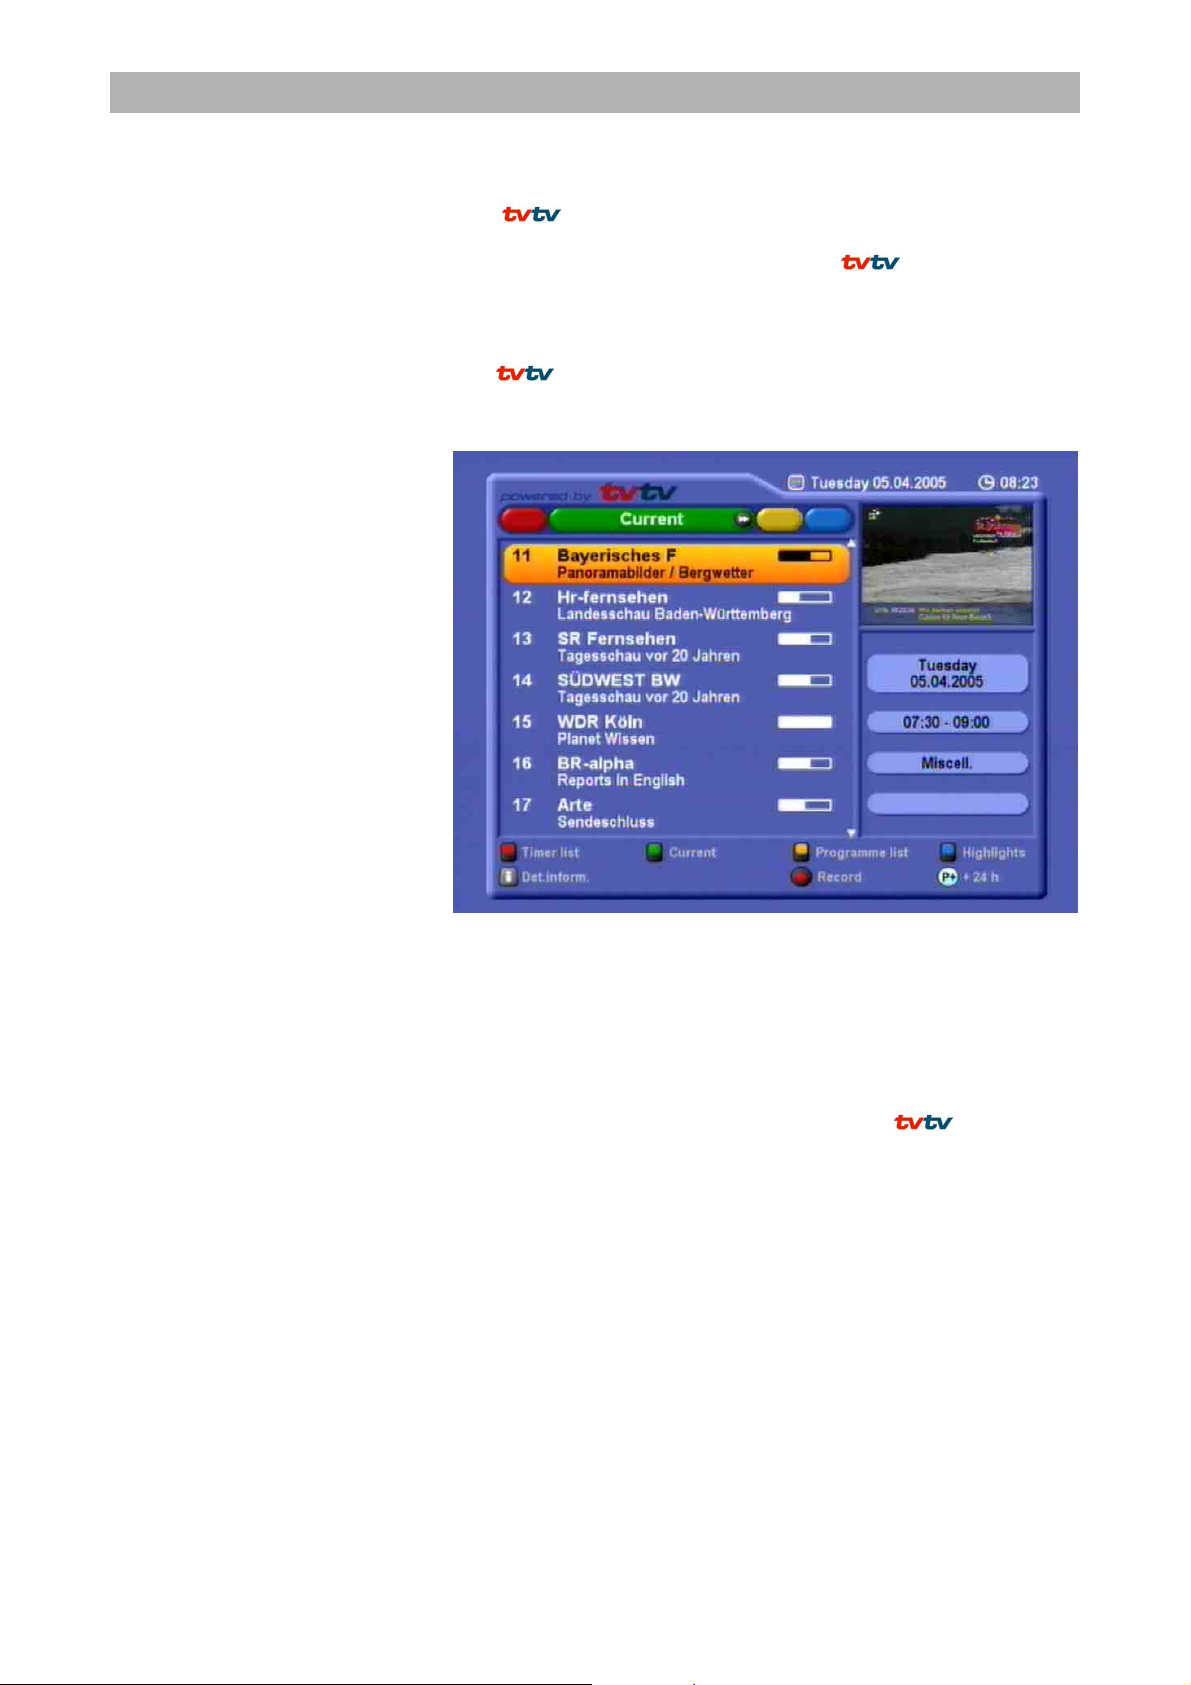
“Current” View
The
EPG automatically displays the “Current” (Now showing)
view when first accessed, highlighting the current selected channel
and the current programme.
In the main window you see the channel number at the left, the
channel name and current programme in the centre, and a progress
bar at the right.
In the top right-hand corner of the picture you see the current day,
date and time. The box at the right indicates the day, date and
duration of the programme, the programme category (in the example:
"Series“), the programme's country of origin and the year it was made.
The bottom section of the display contains the
EPG options
selectable from any EPG view. Press
(red) to view the recording schedule (“Timer list”),
(green) to view the “Current” (Now showing) display,
(yellow) to view the “Programme list” (of the selected channel),
(blue) to view the daily highlight tips (one tip per day, a week
ahead),
to view details of the selected programme, and
(red) to access the Record menu (the timer).
Loading...