


HR-S7500EK
VIDEO CASSETTE RECORDER
HR-S7500EK
VCRTVSAT
TV/VCR
– –:– –
AUDIO
123
2
456
WEEKLY/HEBDO
DAILY/QTDN.VPS/PDC
89
7
AUX
0000
4
0
START
STOP
DATE
TV
DEBUT
FIN
PROG
EXPRESS
30 SEC
1
PROG
TIMER
VIDEOS-VIDEO
STANDBY/ON
SPATIALIZER
TV PROG
TV PROG
COUNTER RESET
REC LINK
(
)
MONO
L –AUDIO– R
3
OK
MENU
O
R
G
P
V
+
T
T
+
V
V
–
T
T
–
V
P
G
R
O
INSTRUCTIONS
REW
SP/LP
DISPLAY
FF
TV PROG/
SHUTTLE
625
JOG
CONTENTS
SAFETY FIRST 2
Safety Precautions ...................... 2
Some Do's And Don'ts ............... 4
QUICK SET UP GUIDE 5
CHECK THE CONTENTS ........... 5
INSTALLATION .......................... 6
AUTO SET UP............................ 8
BASIC OPERATIONS 10
Playback .................................. 10
Recording ................................ 12
Video Plus+ Timer
Programming ........................... 14
Express Timer Programming ..... 16
ADVANCED OPERATIONS 19
Recording According To
Tape Type................................. 19
Playback/Recording According
To Tape Characteristics............. 20
Playback Picture Adjustment .... 22
Looking For The Scene
You Want ................................. 23
Selecting The Sound You
Want ........................................ 24
Automatic Satellite Programme
Recording ................................ 26
Remote Control Functions ........ 28
Minimizing Picture Degradation
While Editing ........................... 30
Edit From A Camcorder ............ 31
Edit To Or From Another Video
Recorder .................................. 32
Other Functions ....................... 34
SYSTEM CONNECTIONS 37
Connection To A Stereo
System ..................................... 37
SUBSIDIARY SETTINGS 38
Video Channel Set ................... 38
Tuner Set .................................. 40
Clock Set ................................. 47
Video Plus+ Setup .................... 48
SUBSIDIARY INFORMATION 49
Questions And Answers ........... 49
Troubleshooting ....................... 50
Index ....................................... 52
SPECIFICATIONS Back Cover
LPT0053-001B
2
SAFETY FIRST
Safety Precautions
The rating plate and the safety caution are on the rear of the unit.
WARNING: DANGEROUS VOLTAGE INSIDE
WARNING: TO PREVENT FIRE OR SHOCK HAZARD, DO NOT EXPOSE THIS UNIT TO RAIN
OR MOISTURE.
IMPORTANT
n Please read the various precautions on p. 2 – 4 of this instruction manual before installing or operating the
recorder.
n It should be noted that it may be unlawful to re-record pre-recorded tapes, records, or discs without the consent
of the owner of copyright in the sound or video recording, broadcast or cable programme and in any literary,
dramatic, musical, or artistic work embodied therein.
IMPORTANT
Connection to the mains supply in the United Kingdom.
DO NOT cut off the mains plug from this equipment. If the plug fitted is not suitable for the power points in your
home or the cable is too short to reach a power point, then obtain a proper safety approved extension lead/
adapter or consult your dealer.
In the unlikely event of the plug fuse failing be sure to replace the fuse only with an identical approved type, as
originally fitted, and to replace the fuse cover. If the fuse fails again consult your nearest JVC dealer.
If nonetheless the mains plug is cut off remove the fuse and dispose of the plug immediately, to avoid a possible
shock hazard by inadvertent connection to the mains supply.
If this product is not supplied fitted with a mains plug then follow the instructions given below:
DO NOT make any connection to the Larger Terminal coded E or Green.
The wires in the mains lead are coloured in accordance with the following code:
Blue to N (Neutral) or Black
Brown to L (Live) or Red
If these colours do not correspond with the terminal identifications of your plug, connect as follows:
Blue wire to terminal coded N (Neutral) or coloured Black.
Brown wire to terminal coded L (Live) or coloured Red.
If in doubt — consult a competent electrician.
625
n Cassettes marked "S-VHS" and "VHS" can be used with this video cassette recorder. However, S-VHS recordings are possible only
with cassettes marked "S-VHS".
n Video Plus+ and PlusCode are trademarks of Gemstar Development Corporation. The Video Plus+ system is manufactured under
license from Gemstar Development Corporation.
n Certain audio features of this product manufactured under a license from Desper Products, Inc. Spatializert is a trademark owned
by Desper Products, Inc.

CAUTION
n When you are not using the recorder for a long period of time, it is recommended that you disconnect the
power cord from the mains outlet.
n Dangerous voltage inside. Refer internal servicing to qualified service personnel. To prevent electric shock or
fire hazard, remove the power cord from the mains outlet prior to connecting or disconnecting any signal lead
or aerial.
The STANDBY/ON button does not completely shut off mains power from the unit, but switches operating
current on and off. "
Video tapes recorded with this video recorder in the LP (Long Play) mode cannot be played back on a singlespeed video recorder.
" shows electrical power standby and " " shows ON.
Failure to heed the following precautions may result in damage to the recorder, remote control or video
cassette.
1. DO NOT place the recorder . . .
... in an environment prone to extreme temperatures or humidity.
... in direct sunlight.
... in a dusty environment.
... in an environment where strong magnetic fields are generated.
... on a surface that is unstable or subject to vibration.
2.
DO NOT block the recorder’s ventilation openings.
3.
DO NOT place heavy objects on the recorder or remote control.
4.
DO NOT place anything which might spill on top of the recorder or remote control.
5.
AVOID violent shocks to the recorder during transport.
3
MOISTURE CONDENSATION
Moisture in the air will condense on the recorder when you move it from a cold place to a warm place, or under
extremely humid conditions—just as water droplets form in the surface of a glass filled with cold liquid. Moisture
condensation on the head drum will cause damage to the tape. In conditions where condensation may occur, keep
the recorder turned on for a few hours to let the moisture dry.
ABOUT HEAD CLEANING
Accumulation of dirt and other particles on the video heads may cause the playback picture to become blurred or
interrupted. Be sure to contact your nearest JVC dealer if such troubles occur.

4
SAFETY FIRST (cont.)
Some Do's And Don'ts On The Safe
Use Of Equipment
This equipment has been designed and manufactured to meet international safety standards but, like any
electrical equipment, care must be taken if you are to obtain the best results and safety is to be assured.
DO read the operating instructions before you attempt to use the equipment.
DO ensure that all electrical connections (including the mains plug, extension leads and interconnec-
tions between pieces of equipment) are properly made and in accordance with the manufacturer's
instructions. Switch off and withdraw the mains plug when making or changing connections.
DO consult your dealer if you are ever in doubt about the installation, operation or safety of your equip-
ment.
DO be careful with glass panels or doors on equipment.
DON'T continue to operate the equipment if you are in any doubt about it working normally, or if it is
damaged in any way — switch off, withdraw the mains plug and consult your dealer.
DON'T remove any fixed cover as this may expose dangerous voltages.
DON'T leave equipment switched on when it is unattended unless it is specifically stated that it is de-
signed for unattended operation or has a standby mode. Switch off using the switch on the
equipment and make sure that your family knows how to do this. Special arrangements may need
to be made for infirm or handicapped people.
DON'T use equipment such as personal stereos or radios so that you are distracted from the requirements
of road safety. It is illegal to watch television whilst driving.
DON'T listen to headphones at high volume, as such use can permanently damage your hearing.
DON'T obstruct the ventilation of the equipment, for example with curtains or soft furnishings. Overheat-
ing will cause damage and shorten the life of the equipment.
DON'T use makeshift stands and NEVER fix legs with wood screws — to ensure complete safety always
fit the manufacturer's approved stand or legs with the fixings provided according to the instructions.
DON'T allow electrical equipment to be exposed to rain or moisture.
ABOVE ALL...
— NEVER let anyone especially children push anything into holes, slots or any other opening in the
case — this could result in a fatal electrical shock;
— NEVER guess or take chances with electrical equipment of any kind — it is better to be safe than
sorry!
QUICK SET UP GUIDE
T
V
P
R
O
G
+
T
V
P
R
O
G
–
T
V
–
T
V
+
0000
START
DEBUT
STOP
FIN
DATE
MENU
OK
TV
PROG
TV/VCR
DAILY/QTDN.VPS/PDC
AUX
WEEKLY/HEBDO
PROG
30 SEC
– –:– –
AUDIO
123
456
7
89
0
2
4
1
3
EXPRESS
VCR
TV
SAT
Dear Customer,
Thank you for purchasing this JVC Video Cassette Recorder.
Please use this QUICK SET UP GUIDE to help you to set up your video cassette
recorder.
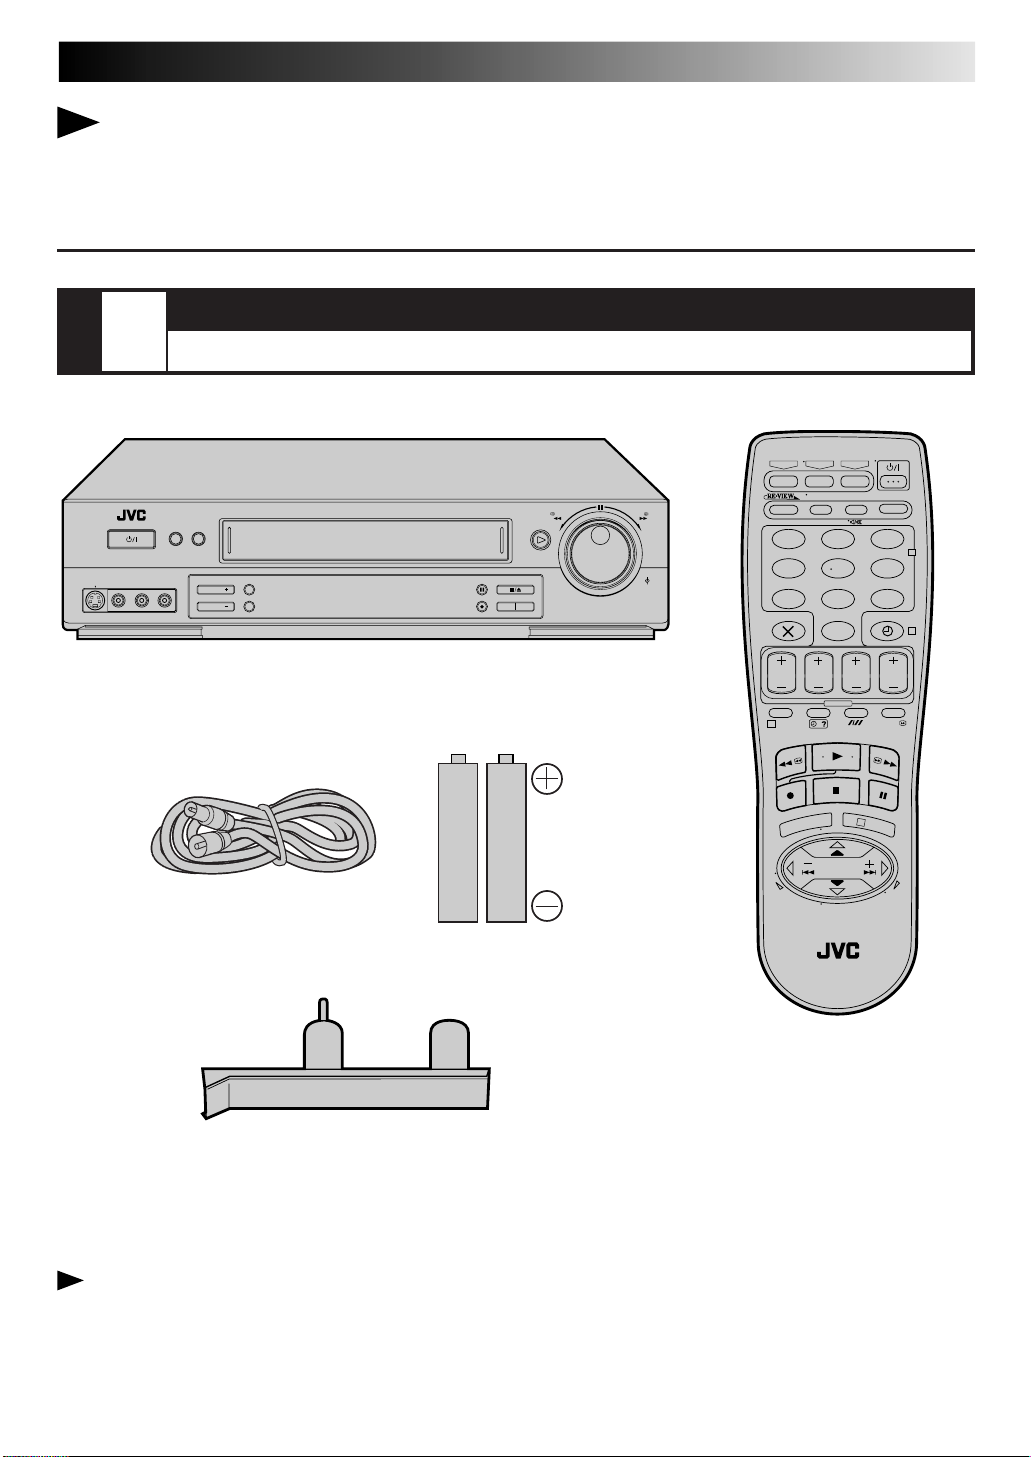
CHECK THE CONTENTS
5
1
STEP
STANDBY/ON
(
)
VIDEOS-VIDEO
L –AUDIO– R
MONO
CHECK ALL THE CONTENTS SHOWN BELOW
TIMER
SPATIALIZER
COUNTER RESET
TV PROG
REC LINK
TV PROG
Video Cassette Recorder
RF Cable
REW
DISPLAY
SP/LP
"AA" Batteries (x 2)
FF
TV PROG/
JOG
SHUTTLE
Infrared Remote Control Unit
Connector Cover
(for front panel connectors)
You are now ready to install your video recorder.

6
QUICK SET UP GUIDE (cont.)
INSTALLATION
2
STEP
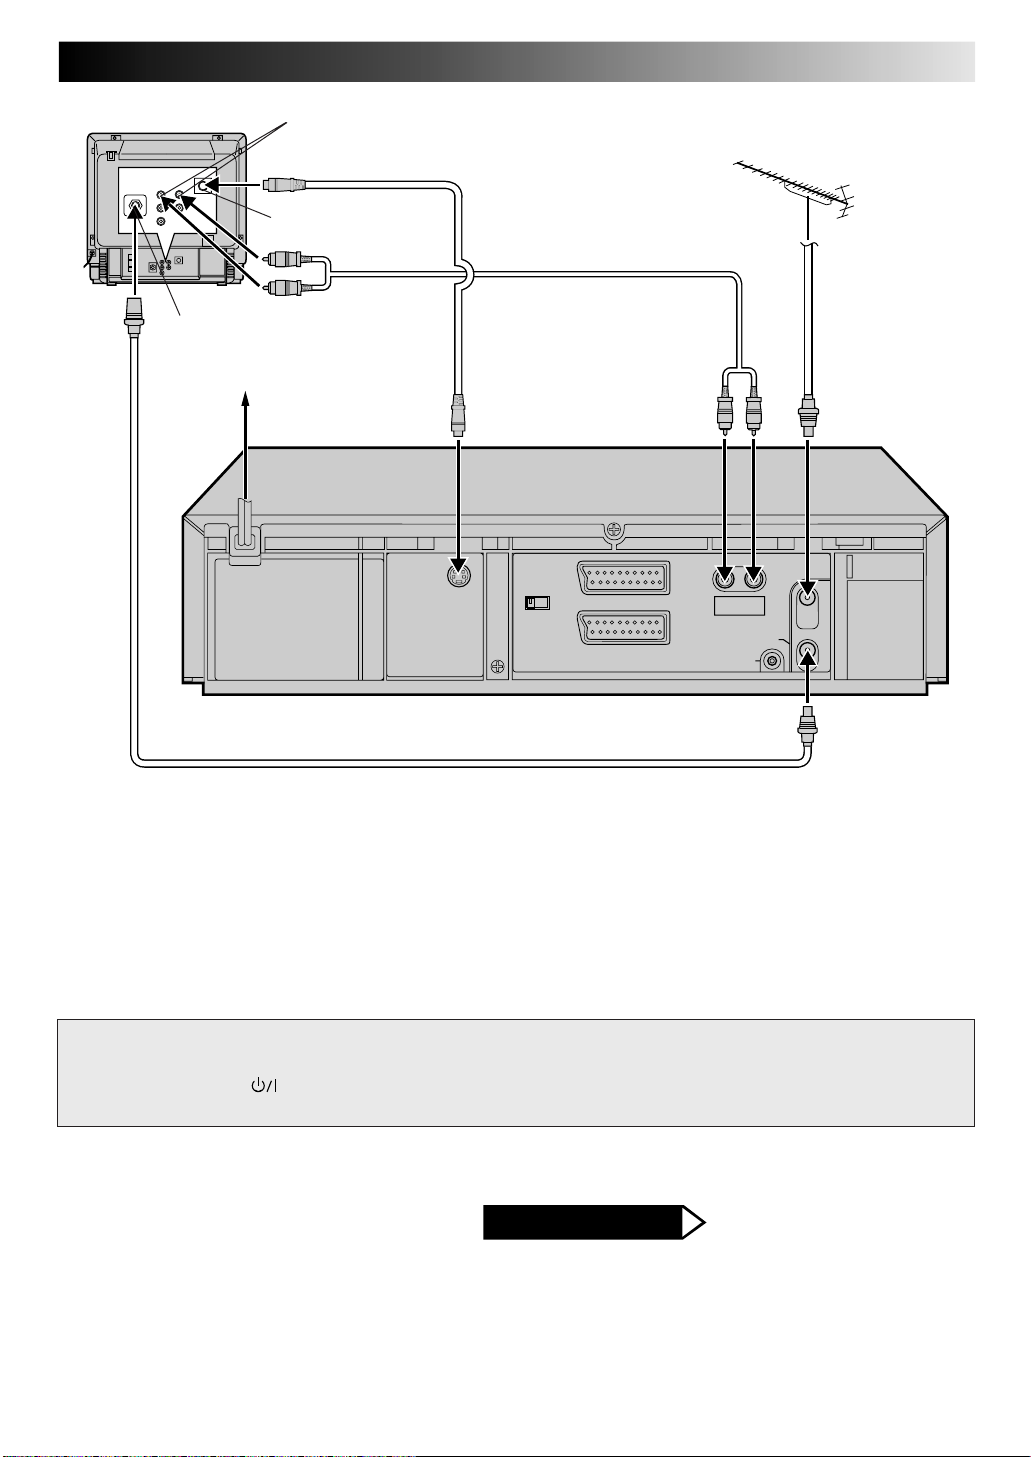
CONNECT VIDEO RECORDER TO TV
Place the recorder on a stable, flat surface.
Back of TV
21-pin SCART Cable (not provided)
Aerial connector
21-pin AV input connector
(SCART)
Mains Power Cord
Mains outlet
RF Cable (provided)
Make this
connection if
your TV has a
21-pin AV input
connector (SCART) in
order to reduce the
possibility of interference.
And if you are using a stereo
TV, you will need this cable
in order to enjoy stereo
playback of videotapes.
S OUT
AV1 OUT
COMP. Y/C
AV1 IN/OUT
AV2 IN
R
AUDIO
PAUSE
TV Aerial Cable
(not provided)
ANT. IN
L
OUT
RF OUT
Back of Recorder
RF CONNECTION
To connect to a TV with NO 21-pin AV input connector
(SCART) . . .
1– Disconnect the TV aerial cable from the TV.
2– Connect the TV aerial cable to the ANT. IN jack on the rear
panel of the recorder.
3– Connect the provided RF cable between the RF OUT jack on
the rear panel of the recorder and the TV’s aerial connector.
AV1 OUT switch
AV CONNECTION
To connect to a TV with 21-pin AV input connector (SCART) . . .
1– Connect the aerial, recorder and TV as per “RF CONNECTION”.
2– Connect an optional SCART cable between the AV1 IN/OUT
socket on the rear panel of the recorder and the TV’s 21-pin
AV input connector (SCART).
3– Set the AV1 OUT switch to the appropriate position. See "AV1
OUTPUT SIGNAL SELECTION FOR AV CONNECTION"
below.
AV1 OUTPUT SIGNAL SELECTION FOR AV CONNECTION
The AV1 IN/OUT connector accepts only a composite signal (regular video signal), but can deliver either a composite video
signal or a Y/C signal (a signal in which the luminance and chrominance signals are separated) according to the setting of the
rear panel AV1 OUT switch.
● If your TV's 21-pin AV input connector (SCART) is compatible only with the regular video signal, set this switch to COMP.
● If your TV's 21-pin AV input connector (SCART) is compatible with the Y/C signal, set this switch to Y/C. You can obtain high-
quality S-VHS pictures.
NOTES:
●
Set your TV to the VIDEO (or AV), Y/C, or RGB mode according to the type of your TV's SCART connector.
●
For switching the TV's mode, refer to the instruction manual of your television.
●
To obtain high-quality S-VHS pictures, you can also use the S-VIDEO CONNECTION described on page 7.
ATTENTION
n Do NOT Plug the mains power cord into a mains outlet until all connections are completed.
n Do NOT press the button on the recorder or on the remote control to turn on the recorder's
power before you start the Auto Set Up procedure described on page 8.
7
Back of TV
Aerial connector
Mains outlet
Mains Power Cord
AUDIO IN connectors
S-VIDEO IN connector
S-Video cable (not provided)
Audio cable (not provided)
S OUT
AV1 OUT
COMP. Y/C
AV1 IN/OUT
AV2 IN
R
AUDIO
PAUSE
OUT
ANT. IN
L
RF OUT
Back of Recorder
RF Cable (provided)
S-VIDEO CONNECTION
To connect to a TV with S-VIDEO/AUDIO IN connectors . . .
1– Connect the aerial, recorder and TV as per "RF CONNEC-
TION" (Z pg. 6).
2– Connect the recorder's S OUT connector to the TV's S-
VIDEO IN connector.
3– Connect the recorder's AUDIO OUT connectors to the TV's
AUDIO IN connectors.
NOTES:
●
You can obtain high-quality S-VHS pictures.
●
If your television is not stereo-capable, use the recorder's
AUDIO OUT connectors to connect to an audio amplifier for
Hi-Fi stereo sound reproduction. (Z pg. 37)
●
To operate the recorder with your TV using the S-VIDEO
connection, set your TV to the VIDEO (or AV mode).
●
For switching the TV's mode, refer to the instruction manual
of your television.
ATTENTION
n Do NOT Plug the mains power cord into a mains outlet until all connections are completed.
n Do NOT press the button on the recorder or on the remote control to turn on the recorder's
power before you start the Auto Set Up procedure described on page 8.
AFTER YOU FINISH THIS STEP
Go to Step 3 – AUTO SET UP
8
QUICK SET UP GUIDE (cont.)
AUTO SET UP
3
STEP
The Auto Set Up function sets the tuner channels, clock, Video Plus+ assigned Guide Program numbers and the video channel*
automatically the first time the button on the recorder or on the remote is pressed to turn on the recorder after the mains power
cord has been plugged into a mains outlet.
* Useful if you have connected the video recorder to
your TV via RF connection (
Channel (RF output channel) is the channel on
which your TV receives picture and sound signals
from the video recorder through the RF cable.
SET THE TUNER CHANNELS, CLOCK, GUIDE PROGRAM NUMBERS AND VIDEO CHANNEL*
Before performing the following procedure, make sure that:
n the TV aerial cable is connected to the recorder.
n the mains power cord is plugged into the mains outlet.
n batteries have been installed in the remote control.
2
or "– – :– –". Auto Set Up usually takes about 4 – 12
refer to next page.
your TV via both the provided RF cable and a
21-pin SCART cable (AV connection) or via
the provided RF cable, an S-Video cable and
an audio cable (S-VIDEO connection) and if
the TV is turned on and set to its AV mode,
the AUTO SET screen will appear.
If you have connected the video
recorder to your TV via the provided
RF cable only (RF connection) —
the channel that is shown on the display panel is your Video Channel.
To view picture signals from the video recorder, set your TV to the Video
Channel. — Refer to the instructions supplied with your TV set for how to do
this.
3
.
If you have connected the video recorder to your TV via both the provided
RF cable and a 21-pin SCART cable (AV connection), or via the provided RF
cable, an S-Video cable and an audio cable (S-VIDEO connection)
—
you do not need the video channel so you have to set the video channel to off.
Press TV PROG – until the display
panel shows "_OUT
Video Channel to off.
To view picture signals from the video recorder, set your TV to its AV mode.
— Refer to the instructions supplied with your TV set for how to do this.
3
– –
" to set the
.
[MENU] : EXIT
Beginning End
AUTO SET
PLEASE WAIT
0
– –:– –
123
456
89
7
0
1
3
Z
pg. 6). Video
2
4
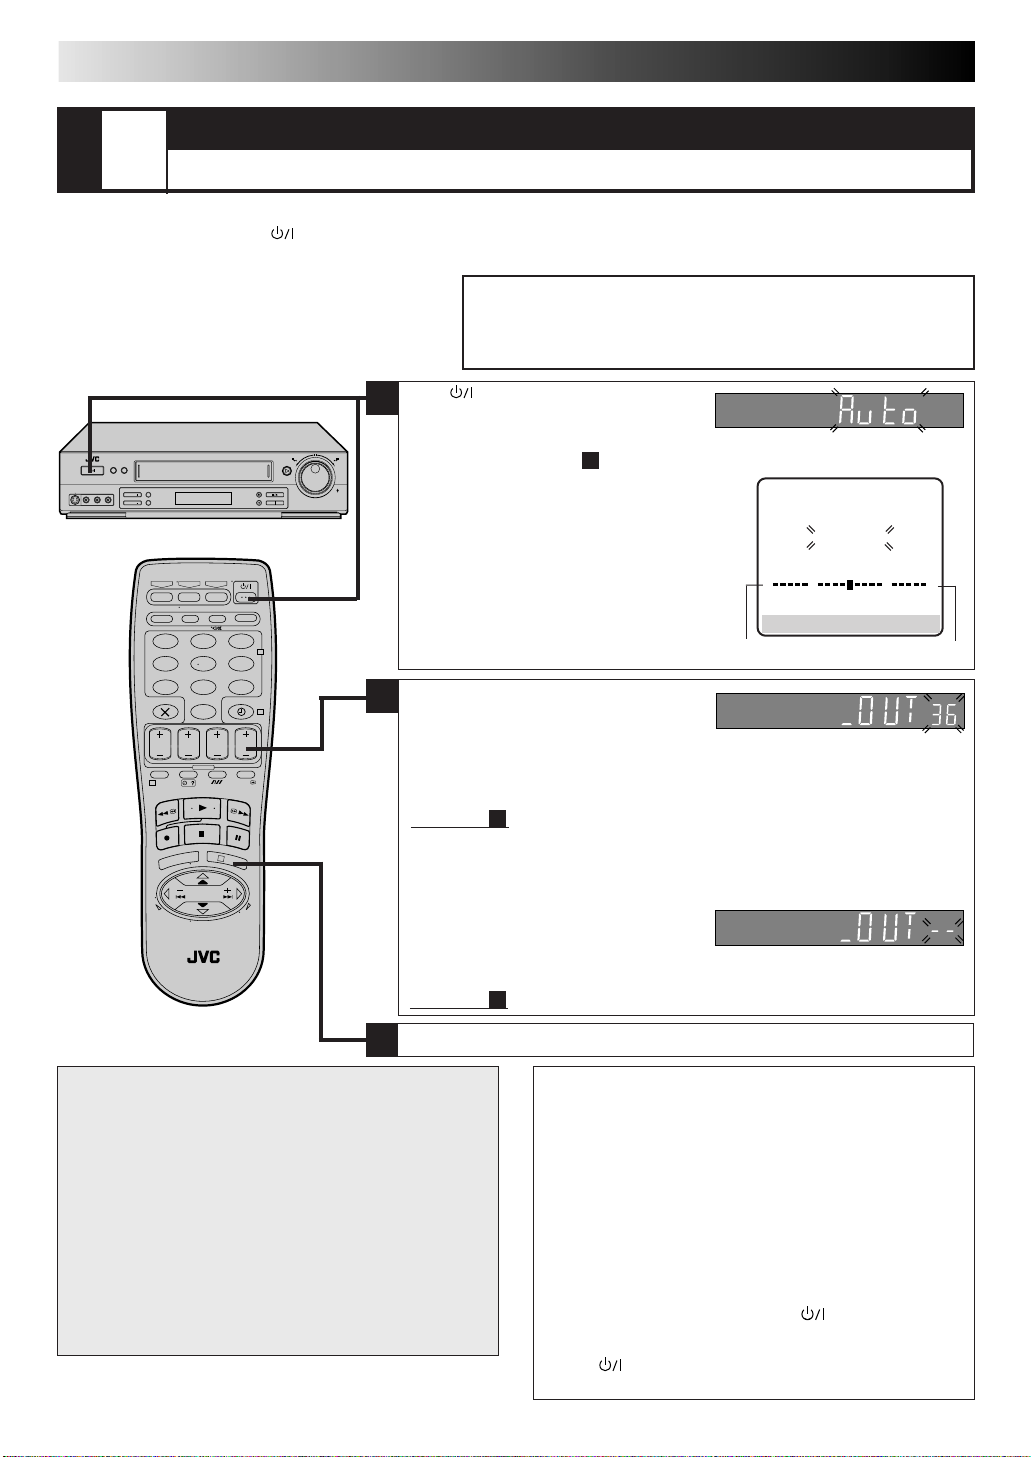
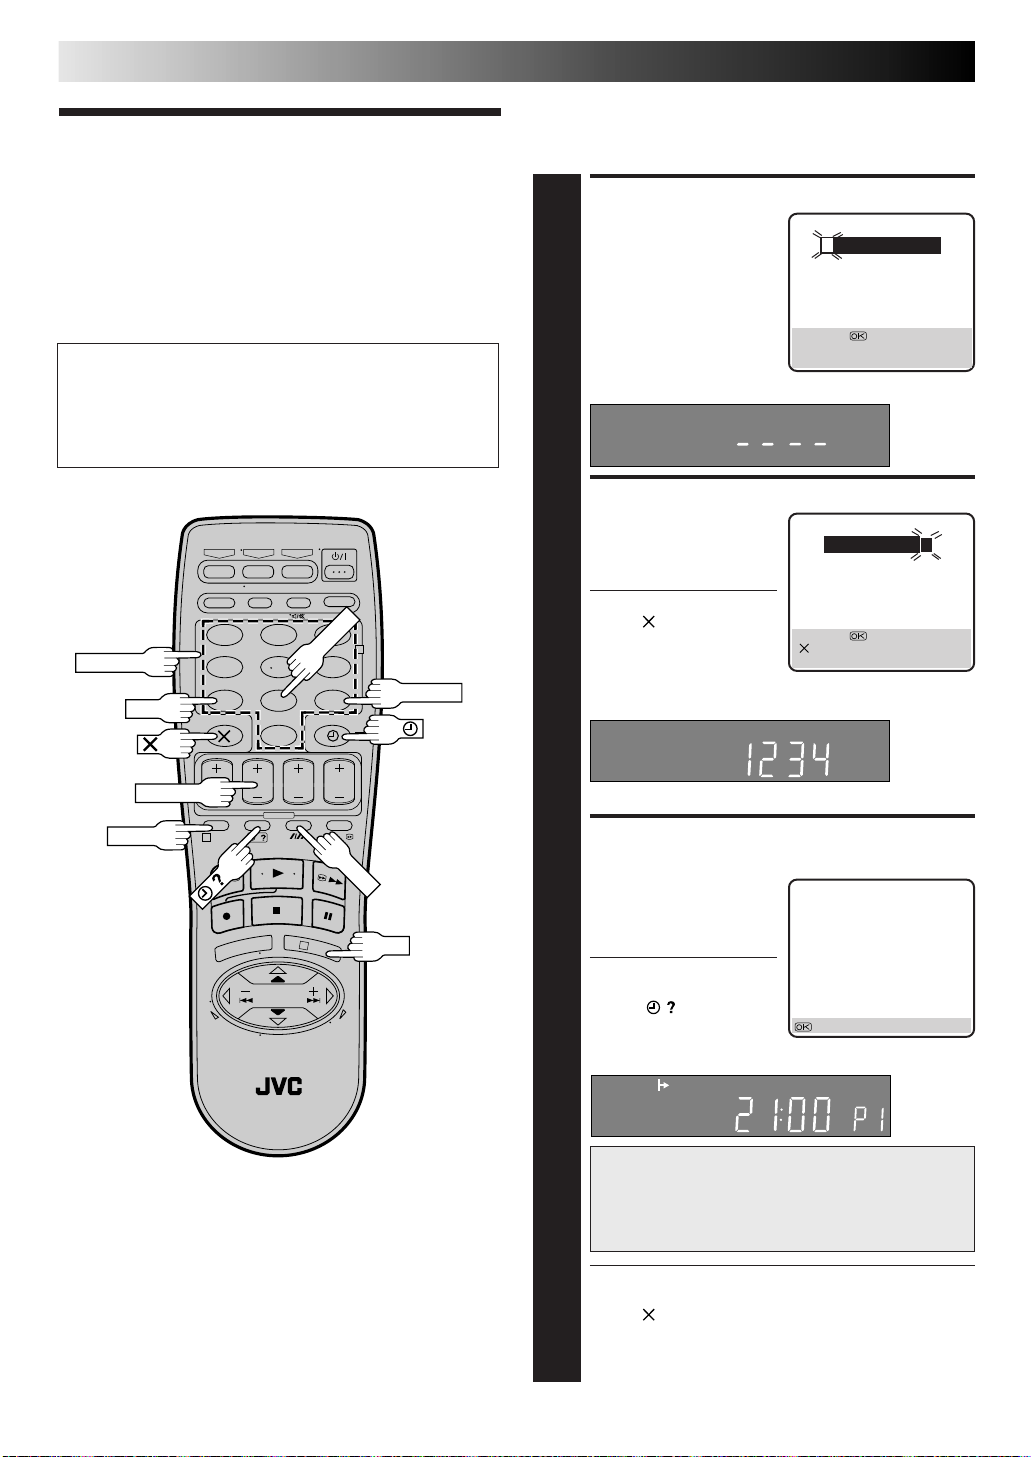
Press .
1
"Auto" appears on the display panel and
blinks; do NOT press any button on the
recorder or remote control until the display panel shows either the display as
illustrated below in item
minutes; the duration varies by area.
● If "– –:– –" appears on the display panel,
● If you have connected the video recorder to
●
2
Go to item
●
Go to item
+++
Press OK to finish Auto Set Up and refer to next page to check the results.
3
ATTENTION
Once you have performed Auto Set Up, all the stored
stations, Guide Program numbers and the video channel
remain in the recorder's memory and the recorder will not
perform Auto Set Up again. If there is a power cut and the
recorder's memory backup expires you only need to reset
the clock. (
If you have moved to a different area, perform each setting
as required.
n Video Channel setting (for RF connection users)
n Tuner setting
n Clock setting
If a new station begins broadcasting in your area, perform
tuner setting (
setting (
Z pg. 47)
Z pg. 38
Z pg. 40
Z pg. 47
Z pg. 40) and, if necessary, video channel
Z pg. 38).
NOTES:
●
Auto channel set function takes place first; it assigns
automatically all receivable stations in your area.
●
Auto clock set function sets the clock automatically.
●
During auto channel set, the recorder recognizes each
station name of the detected stations and stores them in
the recorder's memory, then automatically sets the Video
Plus+ assigned Guide Program number for those stations
according to the broadcast area.
●
For RF connection users: The video recorder detects the
channels which are not occupied by local stations and
selects one channel automatically for your Video Channel
that is located in the middle of more than 5 vacant channels.
●
If there is power cut or if you press or MENU while
Auto Set Up is in progress, Auto Set Up will be interrupted; be sure to turn off the recorder power once and
press
Auto Set Up.
to turn the power back on in order to re-start
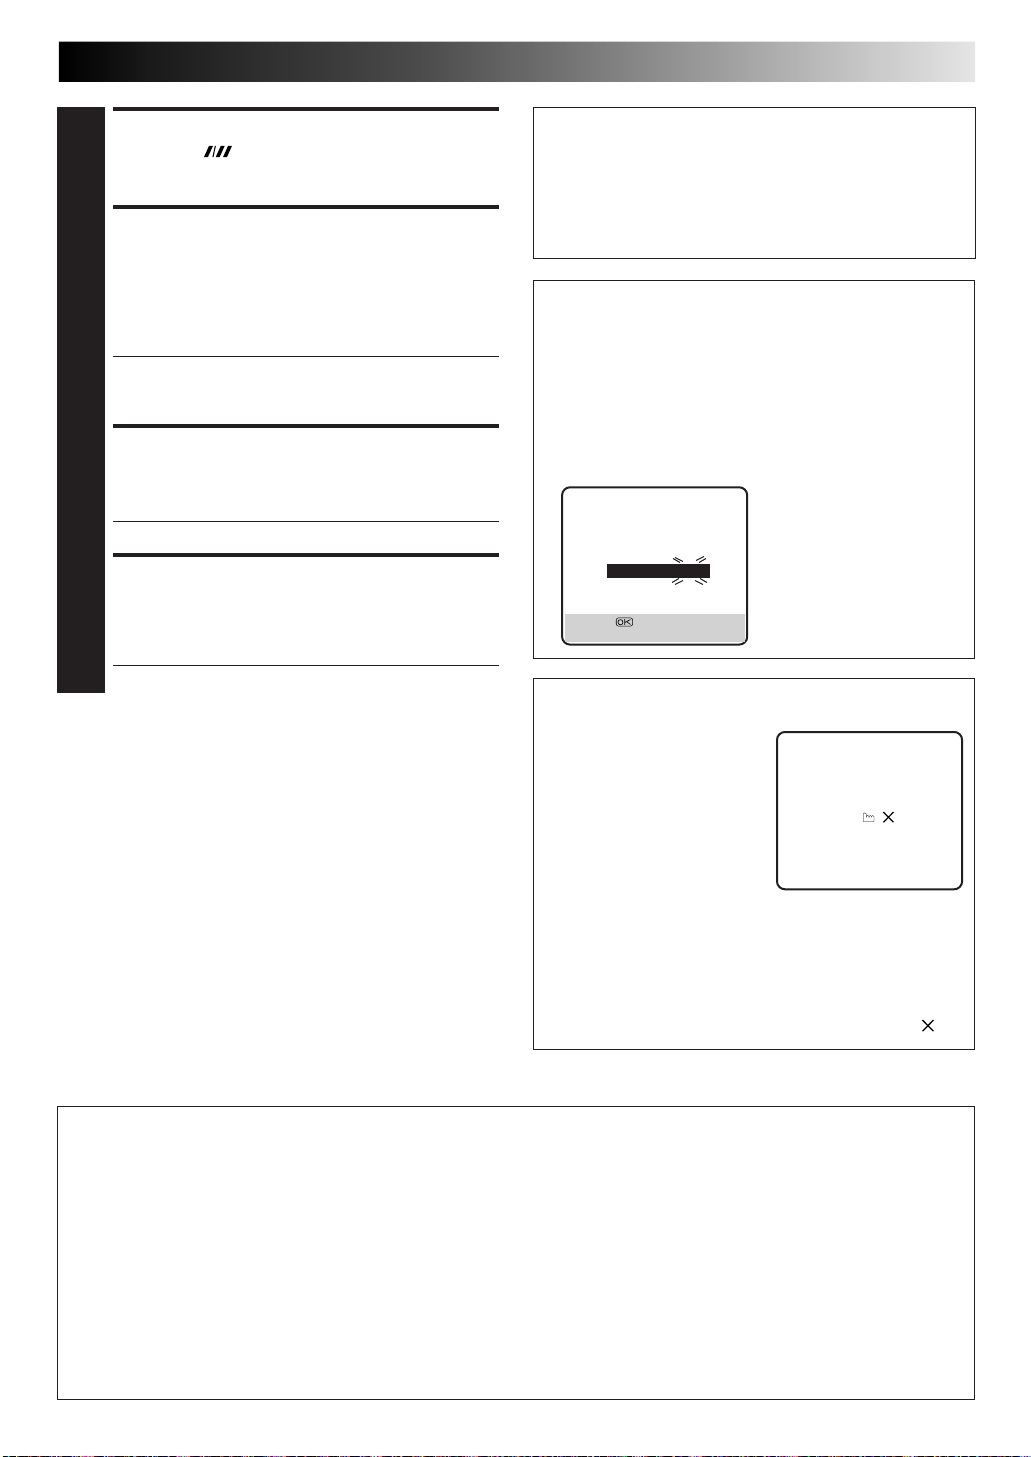
Auto Set Up results appear on the display panel
A
B
C
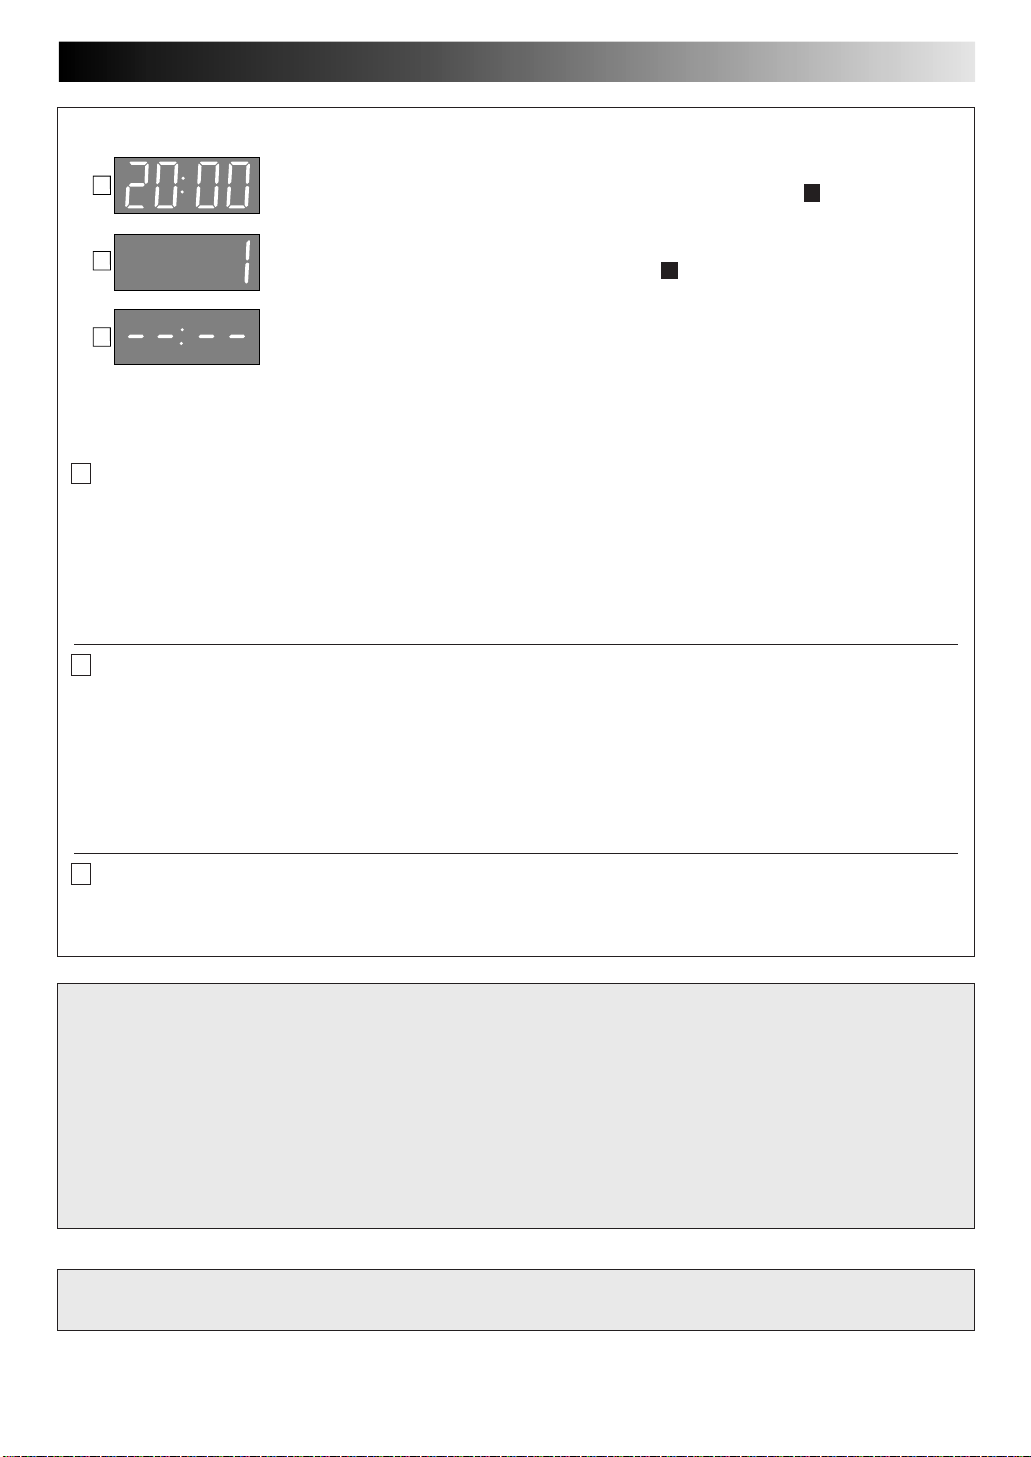
When both auto channel set and auto clock set have been completed successfully the
correct current time will be displayed after the OK button is pressed in item
When auto channel set has been completed successfully but auto clock set has not, "(PR)1"
will be displayed after the OK button is pressed in item
When neither auto channel set nor auto clock set has been completed successfully, "– –:– –"
will be displayed.
* You can check if the Guide Program numbers have been set correctly when you perform Video Plus+ Timer Programming
(Z pg. 14); if the correct preset position number is displayed in step 3, this confirms that the Guide Program number for the
PlusCode number you enter in step 2 has been set correctly.
3
on page 8.
3
on page 8.
A If both auto channel set and auto clock set have been performed successfully:
1
Turn on the TV and select its VIDEO channel or AV mode, then make sure that all necessary stations have been stored in the
recorder's memory by using the TV PROG button(s).
● If station names (ID — Z pg. 45) have also been stored in the recorder's memory, the station name will be displayed at the
top left corner of the screen for about 5 seconds each time the recorder is tuned to a different station.
● If you want to set the tuner manually such as to add or skip channels, to change preset positions, or to set or change station
names, see pages 42 – 44.
Now you have finished the basic set up and can use your recorder for both playback and recording.
9
B If auto channel set has succeeded but auto clock set has not:
1
Turn on the TV and select its VIDEO channel or AV mode, then make sure that all necessary stations have been stored in the
recorder's memory by using the TV PROG button(s).
● If station names (ID —
top left corner of the screen for about 5 seconds each time the recorder is tuned to a different station.
● If you want to set the tuner manually such as to add or skip channels, to change preset positions, or to set or change station
names, see pages 42 – 44.
Z pg. 45) have also been stored in the recorder's memory, the station name will be displayed at the
2 Perform "Clock Set" on page 47.
Now you have finished the basic set up and can use your recorder for both playback and recording.
C If both auto channel set and auto clock set have failed:
Make sure the TV aerial cable is connected properly to the recorder and turn off the recorder power once, then turn the
1
recorder power back on again.
● The recorder will try Auto Set Up again.
IMPORTANT
n In certain reception conditions, station names may not be stored correctly, and auto Guide Program Number Set may not work
properly. If the Guide Program numbers are not set properly, when you timer-record a TV programme using Video Plus+, the
recorder will record a TV programme of a different station. When programming the timer using Video Plus+, be sure to check
that the preset position corresponding to the broadcasting station you wish to record has been selected (Z pg. 14, "Video
Plus+ Timer Programming").
n Your video recorder memorizes all detected stations even if reception of some of them is poor. In these cases picture quality
may be poor. To delete those stations which have an unacceptable picture Z "Delete A Channel" on page 43.
n If any of the above problems occur, refer to pages 42 – 44 to input station names (Z "Set Stations") or delete unnecessary
stations (Z "Delete A Channel"). You can also change station preset positions (Z "Change Station Preset Position").
n For RF connection users: In certain reception conditions, the Video Channel may not be set correctly and interference may
appear in the TV picture while the recorder's power is on. Set your Video Channel manually. Z pg. 38, "Video Channel Set".
If you have any difficulty with the above procedures call the JVC Customer Service Hot Line
on 0181 208 7654
10
PLAY
STOP/EJECT
SHUTTLE
PLAY
JOG
TV PROG
Playback
BASIC OPERATIONS
The easiest, most basic operation possible with your video
recorder is tape playback. Already-recorded signals on a video
tape are read by your video recorder and displayed on your TV
just like a TV programme.
Turn on the TV and select the VIDEO channel (or AV mode).
2
3
1
PAUSE
4
89
7
0
4
TV PROG
3
1
FF
2
PAUSE
2
REW
4
STOP
3
LOAD A CASSETTE
Make sure the window side is up, the rear label side is
facing you and the arrow on the front of the cassette is
1
point toward the recorder. Don’t apply too much
pressure when inserting.
● The recorder power comes on automatically and the
counter is reset to 0:00:00.
● If the record safety tab has been removed, playback
begins automatically.
FIND PROGRAMME START
POINT
If the tape is advanced past the start point, press REW
or turn the SHUTTLE ring to the left.
2
To go forward, press FF or turn the SHUTTLE ring to the
right.
START PLAYBACK
Press PLAY. "BEST" appears blinking in the recorder's
display panel during automatic tracking (Z pg. 20)
3
● Playback picture quality of LP recordings will not be
as high as SP recordings.
STOP PLAYBACK
Press STOP on the remote or STOP/EJECT on the
recorder’s front panel. Then press STOP/EJECT to
4
remove the cassette.
Usable cassettes
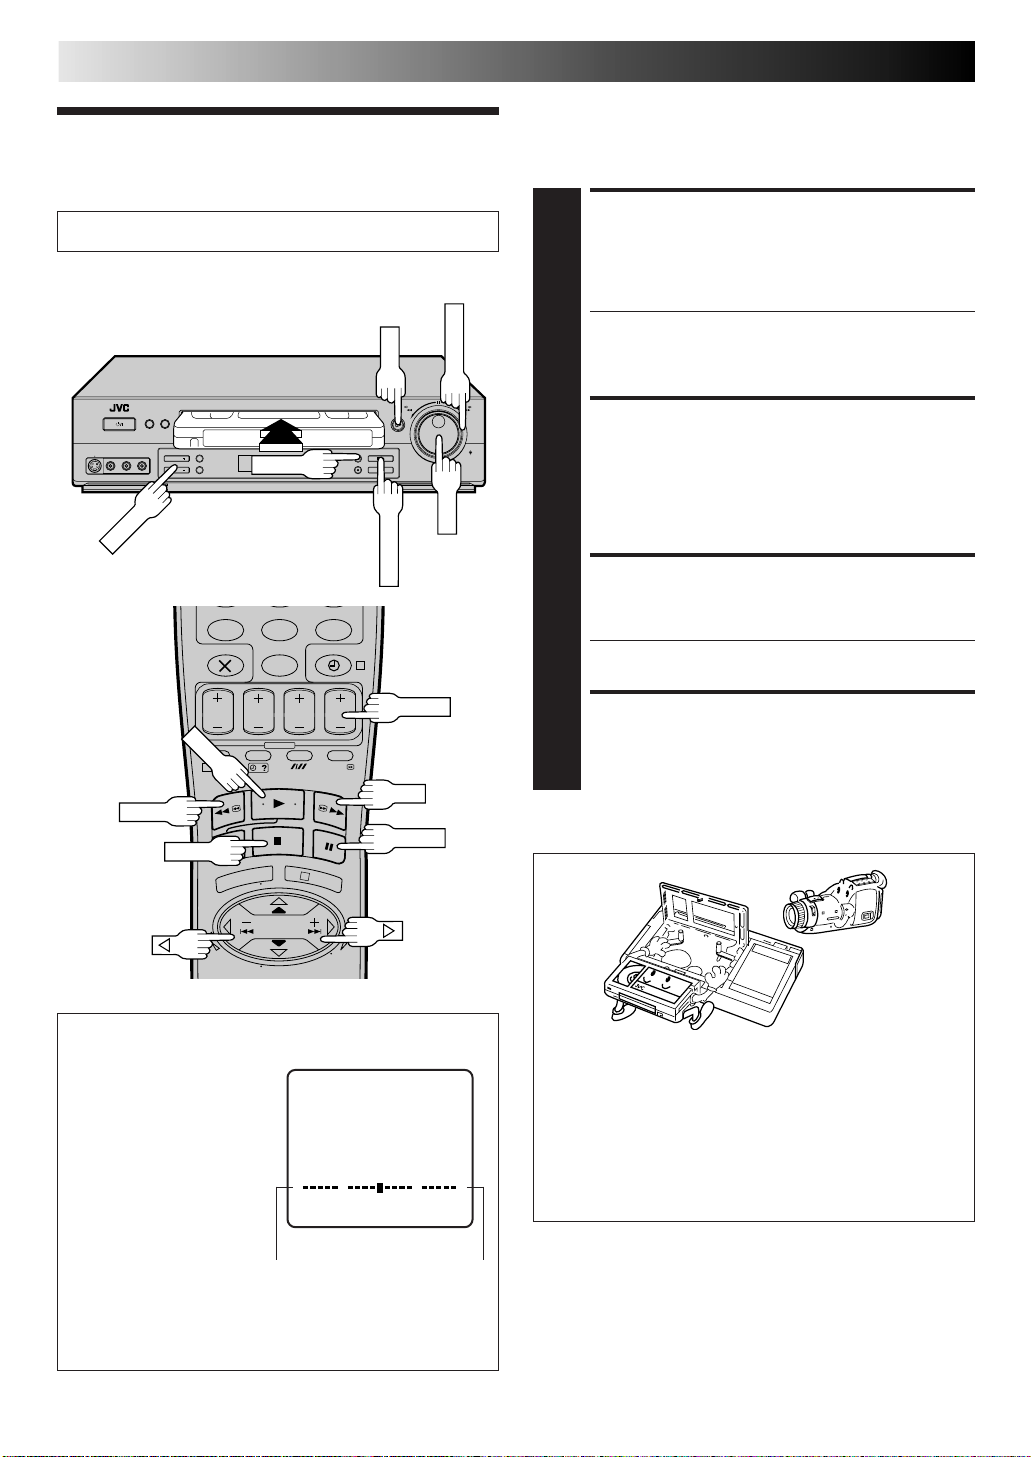
Tape Position Indicator
The tape position indicator
appears on screen when,
from the Stop mode, you
press FF, REW or perform an
Index Search. The position of
“5” in relation to “0”
(beginning) or “+” (end)
shows you where you are on
the tape.
”O.S.D.” (
be set to “ON”, or the
indicator will not appear.
Z pg. 34) must
0
Beginning End
NOTE:
Depending on the type of tape used, there may be times
when the indication is not correct.
3
1:23:45
REMAIN 2:35
+++
● Compact VHS camcorder recordings can be played on
this video recorder. Simply place the recorded cassette
into a VHS Cassette Adapter and it can be used just like
any full-sized VHS cassette.
● This video recorder can record on regular VHS and
Super VHS cassettes. While only VHS signals can be
recorded on regular VHS cassettes, both VHS and Super
VHS signals can be recorded and played back using
Super VHS cassettes.

11
NOTE:
Refer to the SHUTTLE ring illustration below as you read the
following procedures.
Still
S
e
l
s
o
r
e
v
e
R
o
l
s
e
s
r
e
y
v
a
e
l
p
R
e
h
s
c
r
r
e
a
v
e
e
s
R
w
m
o
t
w
i
o
n
P
l
a
y
F
s
o
e
r
w
a
a
r
c
r
d
h
Still Picture/Frame-By-Frame
Playback
PAUSE DURING PLAYBACK
Press PAUSE. If there is vertical jitter, use the TV PROG
buttons to correct the picture.
1
ACTIVATE FRAME-BY-FRAME
PLAYBACK
Turn the JOG dial to the right for forward frame-by-
frame playback, or to the left for reverse frame-by-frame
2
playback.
OR
Press PAUSE. Each time PAUSE is pressed the tape will
advance one frame.
OR
Press or . Each time one of these buttons is pressed
the tape will move one frame in the direction of the
arrow.
To resume normal playback, press PLAY.
Slow Motion
ACTIVATE SLOW-MOTION
PLAYBACK
During playback or still picture, turn the SHUTTLE ring
to the right for forward slow motion, or to the left for
1
reverse slow motion (refer to the illustration above).
OR
During still picture, press and hold PAUSE for 2
seconds, then release. Press and release again to return
to still picture.
OR
During still picture, press and hold or . Release to
return to still picture.
To resume normal playback, press PLAY.
%
%
%
%
Variable-Speed Search
ACTIVATE VARIABLE-SPEED
SEARCH
During playback or still, turn the SHUTTLE ring to the
right for forward variable-speed search, or to the left for
1
reverse variable-speed search (refer to the illustration at
left).
OR
During playback, press or .
● The more times you press, the faster the playback
picture moves.
● To decrease speed, press the button for the opposite
direction.
To resume normal playback, press PLAY.
%
%
High-Speed (Turbo) Search
ACTIVATE HIGH-SPEED
SEARCH
During playback or still, turn the SHUTTLE ring all the
way to the right for forward high-speed search, or to the
1
left for reverse high-speed search. Releasing SHUTTLE
resumes still picture playback.
OR
● For forward high-speed search, turn the SHUTTLE
ring all the way to the right and release it within 1
second.
● For reverse high-speed search, turn the SHUTTLE ring
all the way to the left and release it within 1 second.
OR
During playback or still picture, press FF for forward
high-speed search, or REW for reverse high-speed
search.
To resume normal playback, press PLAY.
NOTE:
For short searches, press and hold FF or REW for more than
2 seconds during playback or still picture. When released,
normal playback resumes.
ATTENTION
In the search, still, slow-motion or frame-by-frame
playback mode,
● the picture will be distorted.
● noise bars will appear.
● there will be loss of colour with a tape recorded in LP
mode.
12
STOP
PLAY
RECORD
STOP/EJECT
SP/LP
TV PROG
Recording
Turn on the TV and select the VIDEO channel (or AV mode).
5
1
PAUSE
5
2
NUMBER
RECORD
4
4
123
456
7
1
6
89
0
3
– –:– –
2
4
SP/LP
PLAY
3
TV PROG
4,5
PAUSE
3
2
5
2
6
BASIC OPERATIONS (cont.)
TV signals being received by the recorder’s built-in tuner can be
recorded onto a video tape. You can “capture” a TV programme
using your video recorder.
LOAD A CASSETTE
Insert a cassette with the record safety tab intact (See
below).
1
● The counter is reset to 0:00:00 and the recorder
power comes on automatically.
CHOOSE A PROGRAMME
Press TV PROG +/– or the NUMBER keys to select the
preset you wish to record.
2
● The TV PROG dial can also be used to select a preset.
SET TAPE SPEED
Press SP/LP ( ). Check the SP/LP indicator on the
recorder display panel to confirm the selected tape
3
speed.
● Picture quality of LP recordings will not be as high as
on SP recordings.
START RECORDING
Press and hold RECORD and press PLAY on the remote
control, or press RECORD on the recorder.
4
B.E.S.T. takes place at the beginning of both the
first SP and the first LP recording after inserting the
cassette (Z pg. 20).
● You can not change the preset whilst recording is in
progress. To change the preset, see step 5.
PAUSE/RESUME
RECORDING
Press PAUSE. Press PLAY to resume recording.
● During the Record Pause mode, you can change the
5
preset by pressing the TV PROG +/– buttons or the
NUMBER keys or by turning the TV PROG dial.
STOP RECORDING
Press STOP on the remote control or STOP/EJECT on
the recorder. Then press STOP/EJECT to remove the
6
cassette.
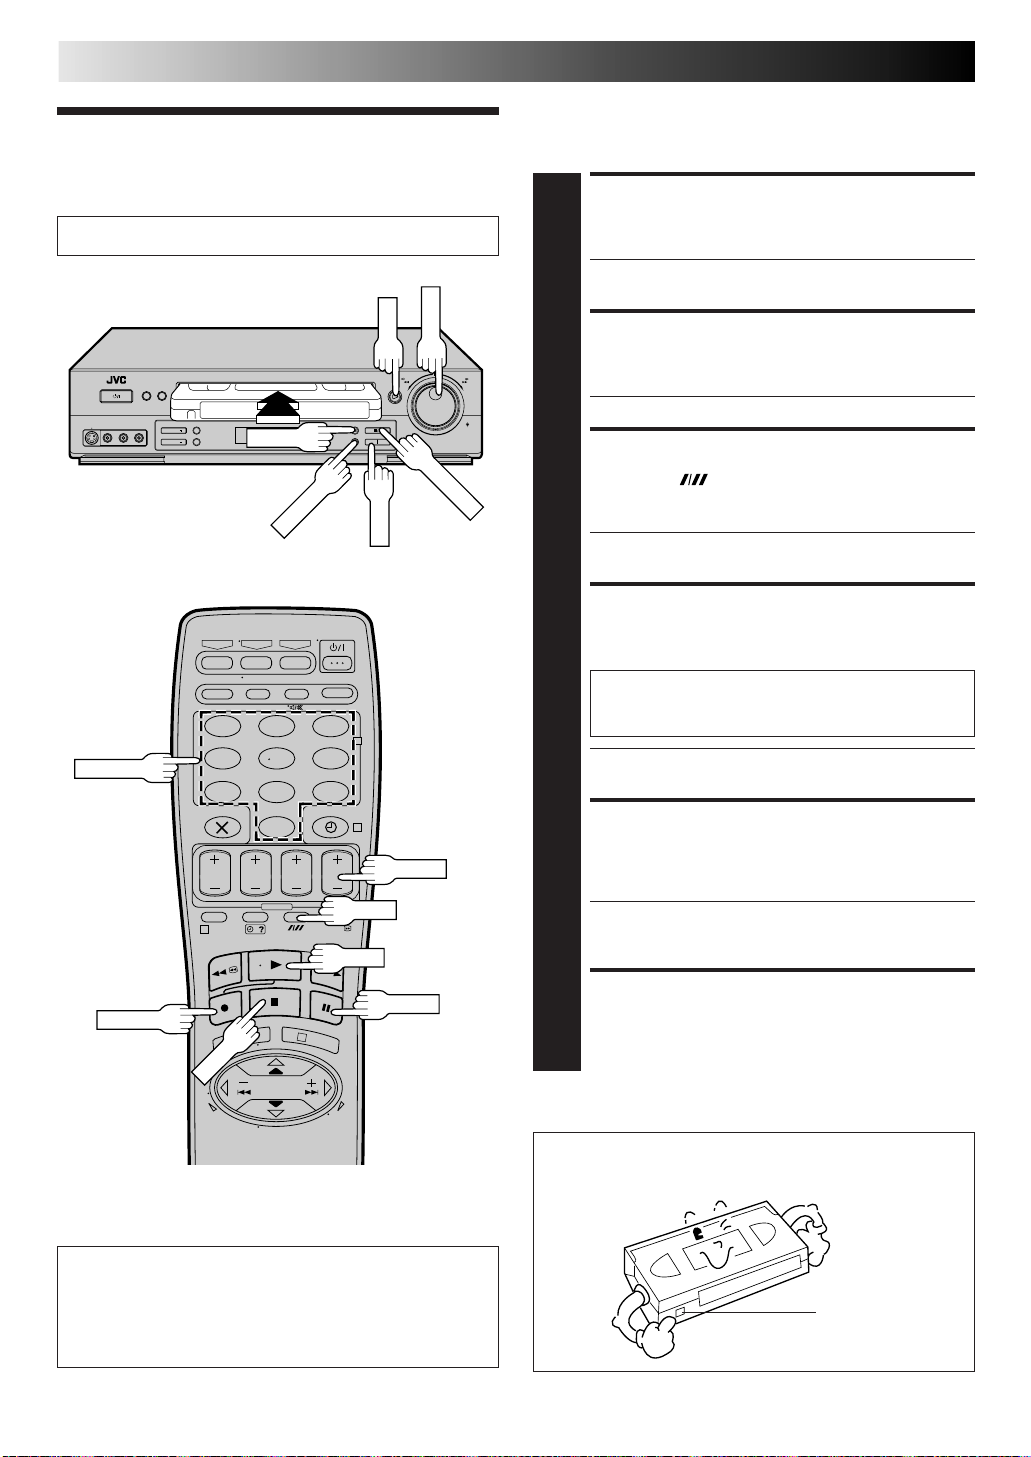
Accidental erasure prevention
● To prevent accidental recording on a recorded cassette,
remove its safety tab. To record on it later, cover the hole
with adhesive tape.
Recording Resume Function
If there is a power outage during recording (or Instant
Timer Recording or timer recording), the recording will
resume automatically when power is restored to the
recorder unless the recorder's memory backup has expired.
Record safety tab

Record One Programme
RECORD
DISPLAY
TV PROG
COUNTER RESET
While Watching Another
SELECT PRESET TO WATCH
Once recording is in progress, all you need to do is to
set the preset controls on the TV for the station you
1
wish to view.
● The programme selected with the TV’s preset controls
appears on the TV screen while the one selected with
the recorder's TV PROG buttons is recorded on the
tape.
Elapsed Recording Time
Indication
You can check the exact time of a recording.
13
– –:– –
0000
123
456
89
7
0
1
2
4
3
Tape Remaining Time
DISPLAY REMAINING TIME
Press DISPLAY (or – –:– –) until the time remaining on
the tape appears.
1
● The display panel shows the tape remaining time
with " " displayed.
● By pressing the DISPLAY (or – –:– –) button, you can
change the display to show the counter reading,
preset position*, clock time or tape remaining time.
* Preset position is not displayed during playback.
– –:– –
TV PROG
SET COUNTER DISPLAY
Press DISPLAY (or – –:– –) until a counter reading
appears on the dispay panel.
1
RESET COUNTER
Press COUNTER RESET or 0000 before starting
recording or playback.
2
● The counter is reset to “0:00:00” and shows the exact
elapsed time as the tape runs.
Instant Timer Recording (ITR)
This easy method allows you to record for any length of time
from 30 mins. to 6 hours (selectable in 30-min. increments),
and shuts off the recorder after recording is finished.
START RECORDING
Press RECORD on the recorder.
1
ENGAGE ITR MODE
Press RECORD again. " " blinks and 0:30 appears on
the front display panel.
2
SET RECORDING
DURATION
If you want to record for more than 30 minutes, press
RECORD to extend the time. Each press extends
3
recording time by 30 minutes.
NOTE:
You can only perform ITR using the RECORD button on the
recorder's front panel.
NOTE:
Depending on the type of tape used, there may be times when
the tape remaining time reading may not appear right away, or
is not correct. "– –:– –" may sometimes appear, or the display
may blink on occasion.
14
SP/LP
DAILY
Video Plus+
Timer
Programming
Before performing Video Plus+ Timer Programming:
● Make sure that the recorder's built-in clock is set
properly.
● Insert a cassette with the safety tab in place. The recorder
will come on automatically.
● Turn on the TV and select the VIDEO channel (or AV mode).
– –:– –
2
NUMBER
5
PDC
123
456
89
7
0
2
4
WEEKLY
7
BASIC OPERATIONS (cont.)
With Video Plus+, timer programming is greatly simplified
because each TV programme has a corresponding code number
which your recorder is able to recognise.
ACCESS VIDEO PLUS+ SCREEN
Press PROG.
VIDEO PLUS+
1
[0 – 9] =
[+/–] : EXPRESS PROGRAMING
[PROG] : EXIT
The front display panel looks like this:
ENTER PLUSCODE NUMBER
Press the NUMBER keys to
enter the PlusCode
2
number of the programme
you wish to record.
● If you make a mistake,
press and input the
correct number.
The PlusCode number you enter appears on the front
display panel:
VIDEO PLUS+
12345678
[0 – 9] =
[ ] : DELETE
[PROG] : EXIT
1,6
PROG
STOP+/–
1
3
4
OK
3,6
The display panel shows only a 4-digit number.
ACCESS VIDEO PLUS+ PROGRAM
SCREEN
Press OK, and the Video
Plus+ Program screen
3
appears (if you’re just
starting out, “P1” appears).
The display panel shows the
programme start time.
Pressing changes the
display to the programme
stop time, then the date and
preset position.
IMPORTANT
Make sure the preset position number you wish to
record is displayed; if not, see "Video Plus+ Setup"
on page 48 and set the Guide Program number for
that PlusCode number correctly.
● If the number you entered is invalid, "ERROR" appears
on the screen and "Err" appears on the display panel.
Press and input a valid PlusCode number.
● If the "GUIDE PROG SET" screen appears, see
"ATTENTION – Regarding Guide Program Number
Set" on page 15.
VIDEO PLUS+ 123456789
START STOP
21:00 = 22:00
SP VPS/PDC OFF
DATE TV PROG
25.12 1
: OK
SP
– P1 –
BBC 1
15
SET TAPE SPEED
Press SP/LP ( ) to set the tape speed.
4
SET PDC MODE
Press PDC to select "ON" or "OFF".
If "VPS/PDC ON" is displayed on the screen or "VPS/
5
PDC" is lit on the display panel, PDC is set to ON.
If "VPS/PDC OFF" is displayed on the screen or "VPS/
PDC" is not lit on the display panel, PDC is set to OFF.
Z "PDC Recording" in the column below.
● VPS (Video Programme System) recording is not
currently available in the U.K. and not possible with
this recorder.
RETURN TO NORMAL SCREEN
Press PROG or OK. "PROGRAM COMPLETED" appears
on the screen for about 5 seconds, then normal screen
6
appears.
● Repeat steps 1 – 6 for each additional programme.
ENGAGE RECORDER’S TIMER
MODE
Press ‰ (TIMER). The recorder turns off automatically
and ‰ appears on the display panel.
7
● To disengage the timer, press ‰ (TIMER) again.
NOTES:
●
To Change The Stop Time . . .
. . . press STOP +/– after pressing OK in step 3. You can
compensate for anticipated programme schedule delays this
way.
●
To Timer-Record Weekly Or Daily Serials . . .
. . . after pressing OK in step 3, press WEEKLY (NUMBER key
“9”) for weekly serials or DAILY (NUMBER key “8”) for daily
serials (Monday – Friday). Either "WEEKLY" or "DAILY"
appears on the screen. Pressing the button again makes the
corresponding indication disappear.
●
You can programme this recorder to timer-record as many as 8
programmes. If you try to programme the recorder to record a
ninth, "PROGRAM FULL" appears on screen and "FULL"
appears on the front display panel. To record the extra
programme, you must first cancel any unnecessary
programmes (Z pg. 18).
●
It is not possible to timer-record a TV programme with a
PlusCode number which starts with "0".
Satellite Receiver Users
To timer-record a satellite broadcast using Video Plus+:
1 Set "AV2 SELECT" to the appropriate mode. Z pg. 33
2 Perform steps 1 – 7.
3 Set the satellite receiver to the appropriate channel
before the selected programme begins.
4 Leave the satellite receiver's power on.
ATTENTION
Regarding Guide Program Number Set
"GUIDE PROG SET" appears after performing step 3 if the
Guide Program number for the PlusCode number you
entered has not been set.
● Press the NUMBER keys or %fi to input the preset
position number on which your recorder receives that
station, then press OK or . The Video Plus+ Program
screen appears.
GUIDE PROG SET
GUIDE PROG TV PROG
2 – –
[5∞] =
[PROG] : EXIT
%
(Ex.) To timer-record a BBC2
programme with Video Plus+.
* If your recorder receives
BBC2 on the preset position
2, press OK or after
entering "2".
%
Timer Warning
If you have programmed your
recorder to timer-record a
programme or a series of
programmes, a warning
appears on the screen to tell
you that the recording is due
to start in 5 minutes.
NOTES:
●
The warning only appears if you’re not in the Timer
mode at the time.
●
If this recorder is being used as the player for tape
dubbing, the warning screen will be recorded on the
tape in the other video recorder.
The warning blinks for the entire 5 minutes leading up to
the start of timer recording. To clear the display, press .
– WARNING–
TIMER RECORDING
TO START SOON
[ ]
PDC Recording
Now available from some TV stations, PDC (Programme Delivery Control) is a service designed to assure safe, accurate timer
recording. With this system, special code signals are transmitted together with the audio/video signals. These code signals
control your video recorder and have precedence over the advertised times which you may have preset into the timer. This
means that your recorder will start and stop recording when the preset TV programmes actually start and end — even if the
broadcast time of a preset TV programme is changed from what has been advertised. PDC is currently available nationally on
BBC1, BBC2, Ch.4 and Ch.5, except from a few small relay transmitters. Ch.3 operates a PDC service only in a very few areas.
All channels intend to offer this service in due course. Check your TV programme listing guide for latest information. If the
channel you intend to record does not offer a PDC service your recorder will not start recording if PDC has been selected. Be
sure to set PDC to "OFF" if PDC is not available on your selected channel (Z step 5 above).
NOTES:
●
PDC recording is also possible when a satellite receiver or a cable system is connected to AV2 IN on your recorder.
●
PDC recording is also possible via the AV1 IN/OUT connector and the front panel connectors.
16
DAILY
STOP+/–
DATE+/–
PDC
SP/LP
Express Timer
Programming
BASIC OPERATIONS (cont.)
If you don’t know the PlusCode number for the programme you
wish to record, use the following procedure to set your recorder
to timer-record the programme.
ACCESS VIDEO PLUS+
SCREEN
Press PROG.
Before performing Express Timer Programming:
● Make sure that the recorder's built-in clock is set
properly.
● Insert a cassette with the safety tab in place. The recorder
will come on automatically.
● Turn on the TV and select the VIDEO channel (or AV mode).
– –:– –
123
456
89
7
0
1
2
WEEKLY
4
TV PROG+/–
2,3
1,9
8
4
START+/–
PROG
5
7
3
OK
9
10
6
1
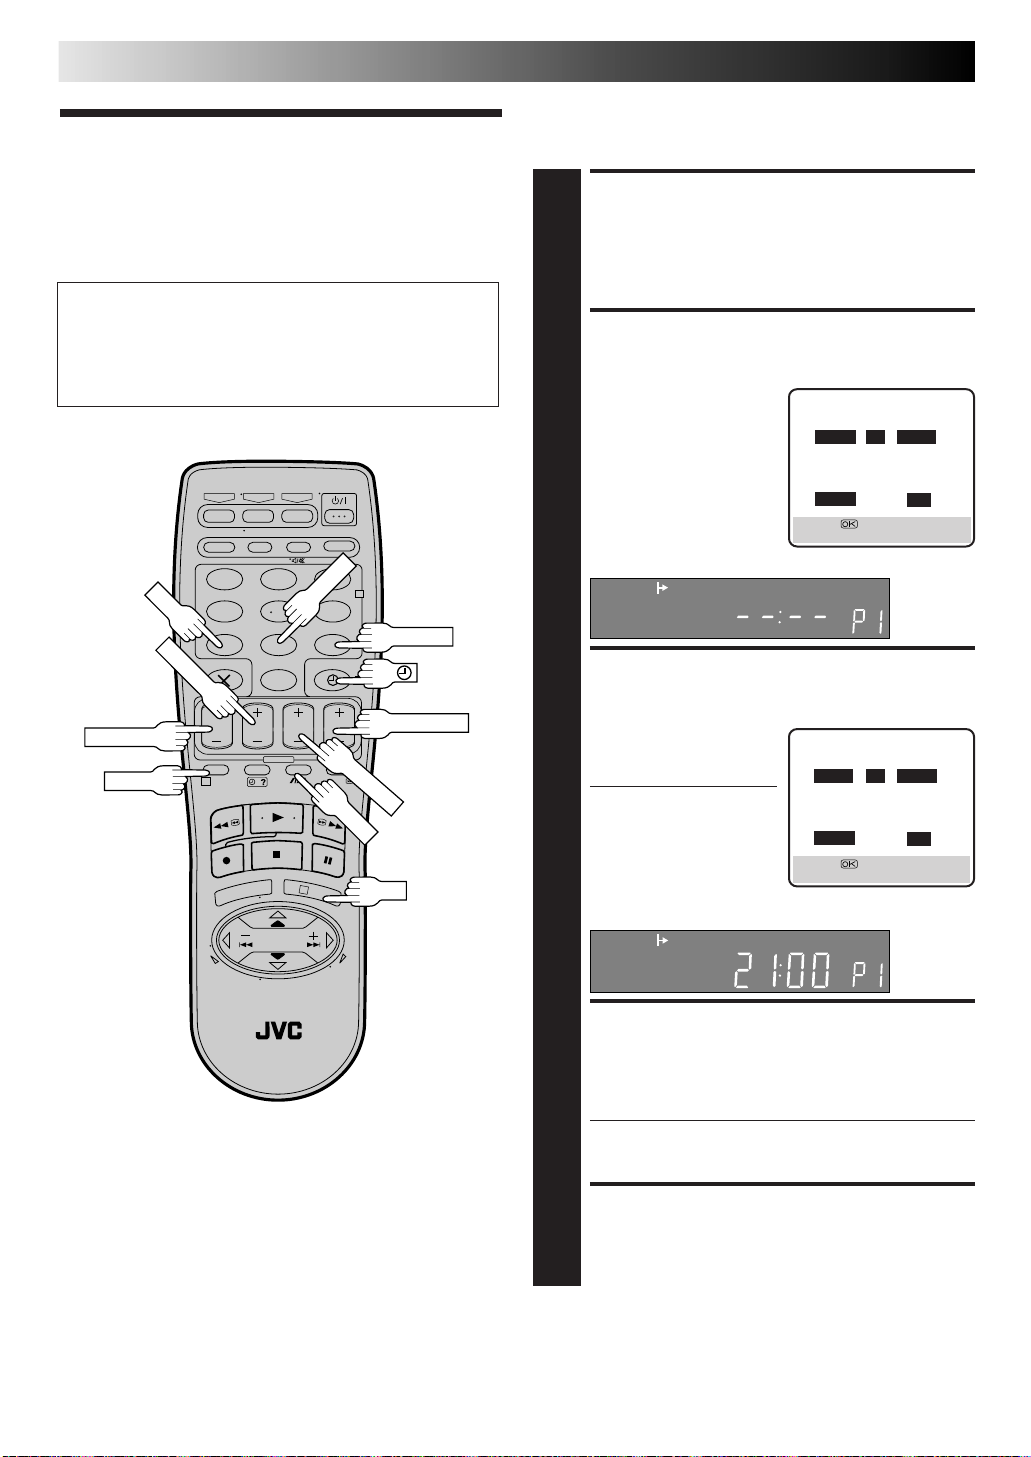
ACCESS PROGRAMME
SCREEN
Press START +/–. (If you’re
just starting out, “P1”
2
appears.)
The front display panel looks like this:
ENTER PROGRAMME
START TIME
Press START +/– to enter
the time you want
3
recording to start.
● Press and hold START
+/– to move in 30-
minute increments, or
press and release
repeatedly to move 1
minute at a time.
The front display panel looks like this:
– P1 –
START STOP
– –:– – = – –:– –
SP VPS/PDC OFF
DATE TV PROG
– –.– – – –
[+/–] =
[PROG] : EXIT
SP
– P1 –
START STOP
21:00 = – –:– –
SP VPS/PDC OFF
DATE TV PROG
– –.– – – –
[+/–] =
[PROG] : EXIT
SP
ENTER PROGRAMME STOP
TIME
Press STOP +/– to enter the time you want recording to
stop.
4
● Press and hold STOP +/– to move in 30-minute
increments, or press and release repeatedly to move 1
minute at a time.
ENTER PROGRAMME DATE
Press DATE +/– to enter the date on which you wish to
record. (The current date first appears on screen. The
5
date you enter will appear in its place.)
17
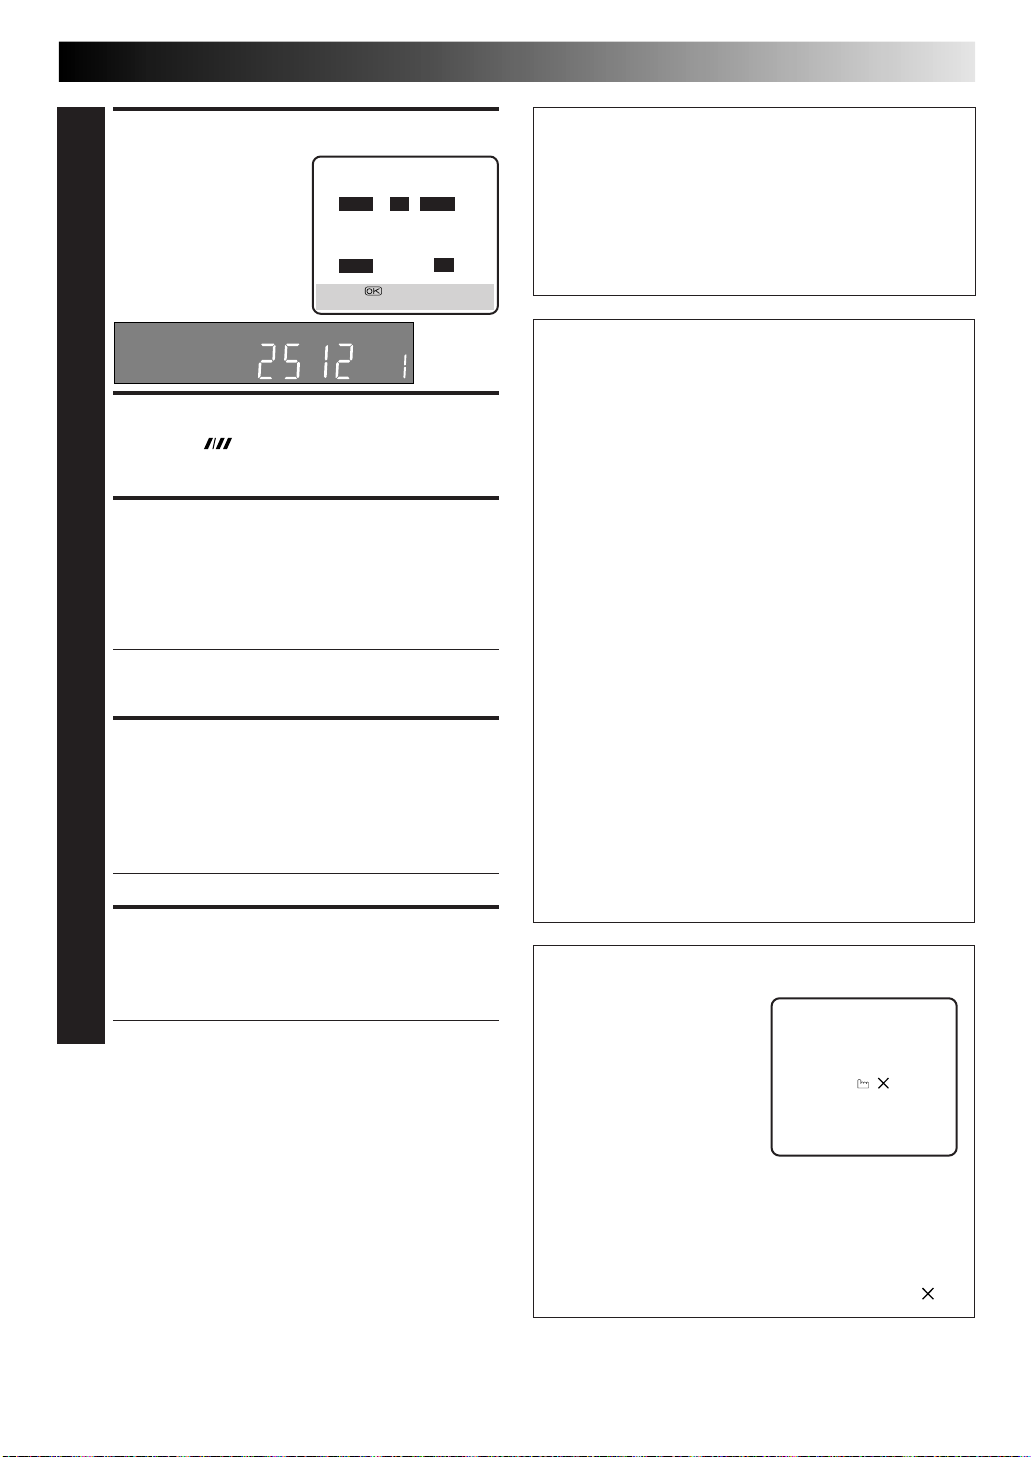
ENTER PRESET POSITION
Press TV PROG +/– to
enter the preset position
6
corresponding to the
broadcasting station you
wish to record.
[+/–] =
[PROG] : EXIT
– P1 –
START STOP
21:00 = 22:00
SP VPS/PDC OFF
DATE TV PROG
25.12 1
SP
BBC 1
SET TAPE SPEED
Press SP/LP ( ) to set the tape speed.
7
SET PDC MODE
Press PDC to select "ON" or "OFF".
If "VPS/PDC ON" is displayed on the screen or "VPS/
PDC" is lit on the display panel, PDC is set to ON.
8
If "VPS/PDC OFF" is displayed on the screen or "VPS/
PDC" is not lit on the display panel, PDC is set to OFF.
Z "PDC Recording" in the right column.
● VPS (Video Programme System) recording is not
currently available in the U.K. and not possible with
this recorder.
RETURN TO NORMAL
SCREEN
After confirming all information is correct, press PROG
or OK. "PROGRAM COMPLETED" appears on the
9
screen for about 5 seconds, then normal screen
appears.
● Repeat steps 1 – 9 for each additional programme.
ENGAGE RECORDER’S
TIMER MODE
Press ‰ (TIMER). The recorder turns off automatically
and ‰ appears on the display panel.
10
● To disengage the timer, press ‰ (TIMER) again.
To Timer-Record Weekly Or Daily Serials . . .
. . . anytime during steps 2 through 9, press WEEKLY (NUMBER
key “9”) for weekly serials or DAILY (NUMBER key “8”) for
daily serials (Monday – Friday). Either "WEEKLY" or "DAILY"
appears on the screen. Pressing the button again makes the
corresponding indication disappear.
NOTE:
You can programme this recorder to timer-record as many as 8
programmes. If you try to programme the recorder to record a
ninth, "PROGRAM FULL" appears on screen and "FULL" appears
on the front display panel. To record the extra programme, you
must first cancel any unnecessary programmes (Z pg. 18).
Satellite Receiver Users
To timer-record a satellite broadcast using Express Timer
Programming:
1 Set "AV2 SELECT" to the appropriate mode. Z pg. 33
2 Perform steps 1 – 10. Enter "L-2" for the preset position
in step 6.
3 Set the satellite receiver to the appropriate channel
before the selected programme begins.
4 Leave the satellite receiver's power on.
PDC Recording
Now available from some TV stations, PDC (Programme
Delivery Control) is a service designed to assure safe,
accurate timer recording. With this system, special code
signals are transmitted together with the audio/video
signals. These code signals control your video recorder and
have precedence over the advertised times which you may
have preset into the timer. This means that your recorder
will start and stop recording when the preset TV
programmes actually start and end — even if the broadcast
time of a preset TV programme is changed from what has
been advertised. PDC is currently available nationally on
BBC1, BBC2, Ch.4 and Ch.5, except from a few small relay
transmitters. Ch.3 operates a PDC service only in a very
few areas. All channels intend to offer this service in due
course. Check your TV programme listing guide for latest
information. If the channel you intend to record does not
offer a PDC service your recorder will not start recording if
PDC has been selected. Be sure to set PDC to "OFF" if PDC
is not available on your selected channel.
(Z step 8 in the left column).
NOTES:
●
Set the start time (PDC time) exactly as advertised in the
TV listing. A different time than advertised will result in
no recording.
●
PDC recording is also possible when a satellite receiver
or a cable system is connected to AV2 IN on your
recorder.
●
PDC recording is also possible via the AV1 IN/OUT
connector and the front panel connectors.
Timer Warning
If you have programmed your
recorder to timer-record a
programme or a series of
programmes, a warning
appears on the screen to tell
you that the recording is due
to start in 5 minutes.
NOTES:
●
The warning only appears if you’re not in the Timer
mode at the time.
●
If this recorder is being used as the player for tape
dubbing, the warning screen will be recorded on the
tape in the other video recorder.
The warning blinks for the entire 5 minutes leading up to
the start of timer recording. To clear the display, press .
– WARNING–
TIMER RECORDING
TO START SOON
[ ]
 Loading...