


AC-2500E
High Pressure Washer

Introduction
THANK YOU for purchasing a John Deere product.
READ THIS MANUAL carefully to learn how to operate and service your machine correctly. Failure to do so could resultin personal injury or equipmentdamage.This manual and safety signs on your machine may also be available in other languages. (See your John Deere dealer to order.)
THIS MANUALSHOULD BE CONSIDERED a permanent part of your machine and should remain with the machine when you sell it.
MEASUREMENTS in this manual are given in both metric and customary U.S. unit equivalents. Use only correct replacement parts and fasteners. Metric and inch fasteners may require a specific metric or inch wrench.
RIGHT HANDAND LEFT HAND sides are determined by facing the motor end of the machine.
The SERIAL NUMBER is located in the Specification or Identification Numbers section. Accurately record all the numbers to help in tracing the machine should it be stolen. Your dealer also needs these numbers when you order parts. File the identification numbers in a secure place off the machine.
WARRANTY is provided from your John Deere dealer for customers who operate and maintain their equipment as described in this manual. The warranty is explained on the warranty certificate shown in this manual.
This warranty provides you the assurance that your dealer will back products where defects appear within the warranty period. Should the equipment be abused, or modified to change its performance beyond the original factory specifications, the warranty will become void.
2 |
Operator’s Manual |

Contents
|
Page |
Safety ........................................................................ |
5 |
Controls ................................................................. |
13 |
Preparing the Washer ............................................ |
14 |
Operating the Washer ............................................ |
18 |
Troubleshooting ..................................................... |
24 |
Storage .................................................................... |
26 |
Specifications ......................................................... |
29 |
Warranty .................................................................. |
30 |
Notes ........................................................................ |
31 |
All information, illustrations and specifications in this manual are based on the latest information available at the time of publication. The right is reserved to make changes at any time without notice.
Operator’s Manual |
3 |

Contents
4 |
Operator’s Manual |
Safety
RECOGNIZE SAFETY INFORMATION
This is the safety alert symbol. When you see this symbol on your machine or in this manual, be alert to the potential for personal injury.
Follow recommended precautions and safe operating practices.
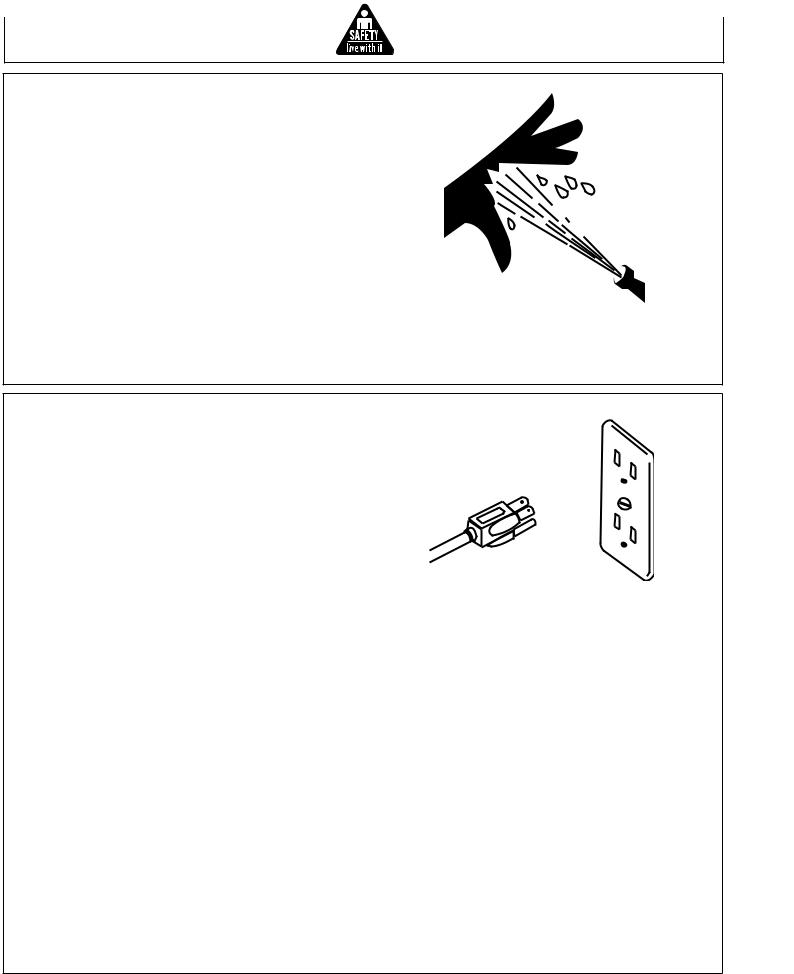
UNDERSTAND SIGNAL WORDS
Asignal word--DANGER, WARNING or CAUTION--is used with the safety-alert symbol. DANGER identifies the most serious hazards.
DANGER or WARNING safety signs are located near specific hazards. General precautions are listed on CAUTION safety signs. CAUTION also calls attention to safety messages in this manual.
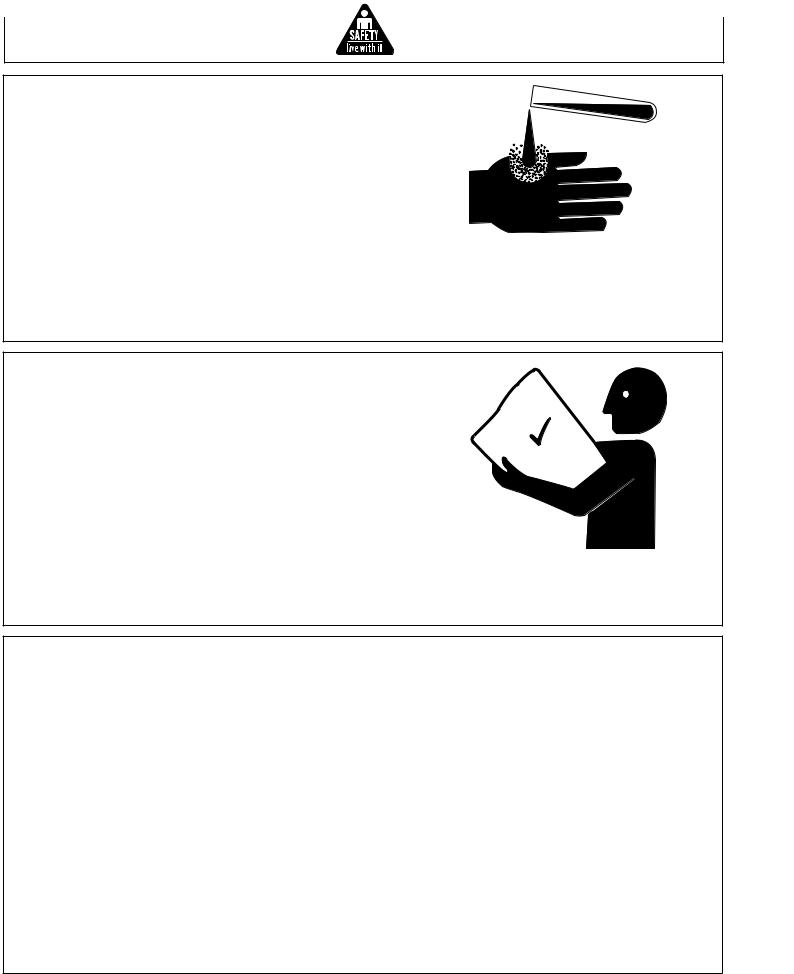
FOLLOW SAFETY INSTRUCTIONS
Carefully read all safety messages in this manual and on your machine safety signs. Keep safety signs in good condition. Replace missing or damaged safety signs. Be sure new equipment components and repair parts include the current safety signs. Replacement safety signs are available from your John Deere dealer.
Learn how to operate the machine and how to use controls properly. Do not let anyone operate without instruction.
Keep your machine in proper working condition. Unauthorized modifications to the machine may impair the function and/or safety and affect machine life.
If you do no understand any part of this manual and need assistance, contact your John Deere dealer.
|
|
|
|
|
|
|
|
|
|
|
|
|
|
|
|
|
|
N |
|
|
|
||
|
|
|
|
|
|
|
|
|
|
|
|
|
|
|
|
IO |
|
|
SIN |
||||
|
|
|
|
|
|
|
|
|
|
|
|
|
|
|
T |
|
|
|
|
||||
|
|
|
|
|
|
|
|
|
|
|
|
|
|
U |
|
|
|
ON |
|
S |
|||
|
|
|
|
|
|
|
|
|
|
|
|
|
A |
|
|
|
TI |
|
|
|
|||
|
|
|
|
|
|
|
|
|
|
|
|
C |
|
|
|
AU |
|
|
|
AL |
|||
|
|
|
|
|
|
|
|
|
|
|
|
|
|
|
|
OC |
|
|
NU |
|
|||
|
|
|
|
|
|
G |
|
|
|
|
|
|
IN |
|
|
HEMA |
|
SIN |
|||||
|
|
|
|
|
|
|
|
|
|
|
NS |
|
OT |
|
ION |
LS |
|||||||
|
|
|
|
|
|
|
|
|
|
|
|
|
|
|
|
UT |
|
|
|
||||
|
|
|
|
|
N |
|
|
|
|
TIO |
ALS |
|
O |
CA |
|
|
|
UA |
|||||
|
|
|
NI |
|
|
|
AU |
|
|
|
|
|
AN |
|
|||||||||
|
R |
|
|
|
OC |
|
|
NU |
|
|
|
|
|
EM |
|
|
|
||||||
A |
|
|
|
IN |
|
|
|
|
EMA |
SIN |
|
OTH |
|
|
|
|
|
||||||
W |
|
|
GS |
|
O |
TH |
|
ION |
|
LS |
|
|
|
|
|
|
|
|
|
||||
|
|
|
|
. |
|
|
|
UT |
|
|
|
|
|
|
|
|
|
|
|||||
|
|
IN |
|
|
O |
CA |
|
UA |
|
|
|
|
|
|
|
|
|
||||||
RN |
|
|
LS |
|
|
|
AN |
|
|
|
|
|
|
|
|
|
|
|
|||||
WA |
|
|
NUA |
|
|
|
|
|
EM |
|
|
|
|
|
|
|
|
|
|
|
|||
HEMA |
SIN |
OTH |
|
|
|
|
|
|
|
|
|
|
|
|
|||||||||
T |
|
|
ING |
|
. |
|
|
|
|
|
|
|
|
|
|
|
|
|
|
|
|
|
|
|
RN |
|
LS |
|
|
|
|
|
|
|
|
|
|
|
|
|
|
|
|
|
|||
A |
|
|
UA |
|
|
|
|
|
|
|
|
|
|
|
|
|
|
|
|
|
|
||
W |
|
|
AN |
|
|
|
|
|
|
|
|
|
|
|
|
|
|
|
|
|
|
|
|
|
EM |
|
|
|
|
|
|
|
|
|
|
|
|
|
|
|
|
|
|
|
|
||
TH |
|
|
|
|
|
|
|
|
|
|
|
|
|
|
|
|
|
|
|
|
|
|
|
Operator’s Manual |
5 |
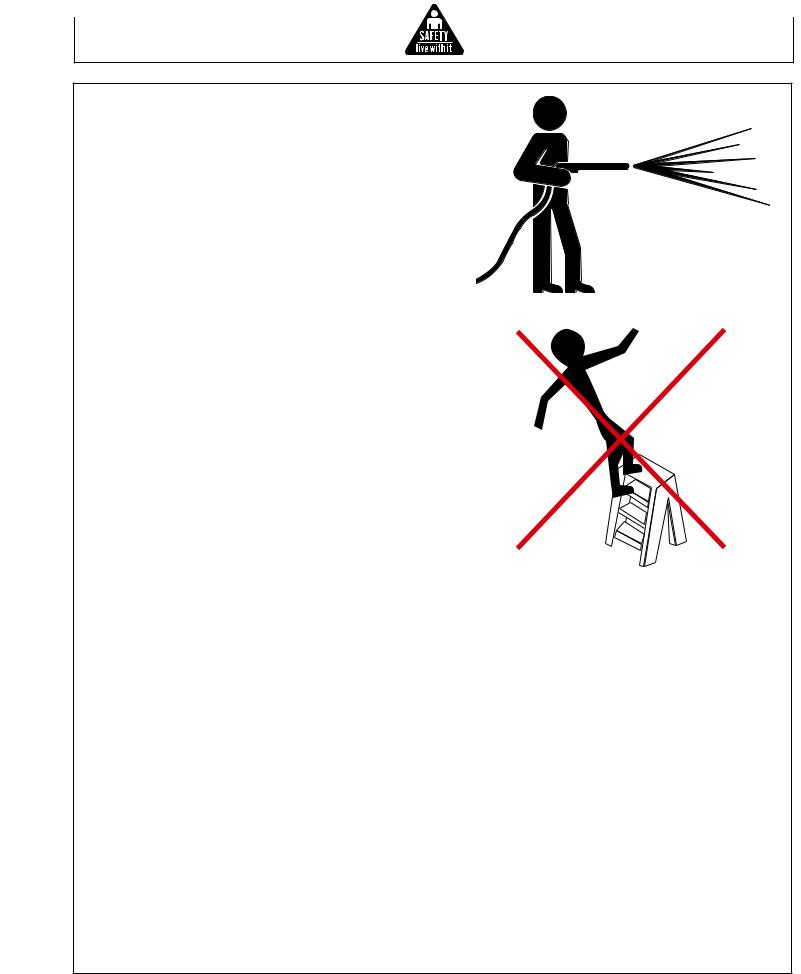
PROTECT AGAINST HIGH PRESSURE SPRAY
Spray from high pressure nozzles can penetrate the skin and cause serious injury. Keep spray from contacting hands or body.
Never point the gun at yourself or anyone else. Never put your hand, fingers or body directly over the spray nozzle.Always keep operating area clear of all persons. Use extreme caution when operating near children.
If an accident does occur and the spray appears to have penetrated the skin, SEEK EMERGENCY MEDICAL CARE. DO NOT TREAT AS A SIMPLE CUT. If you are using cleaning agents, be prepared to tell a physician exactly what kind.
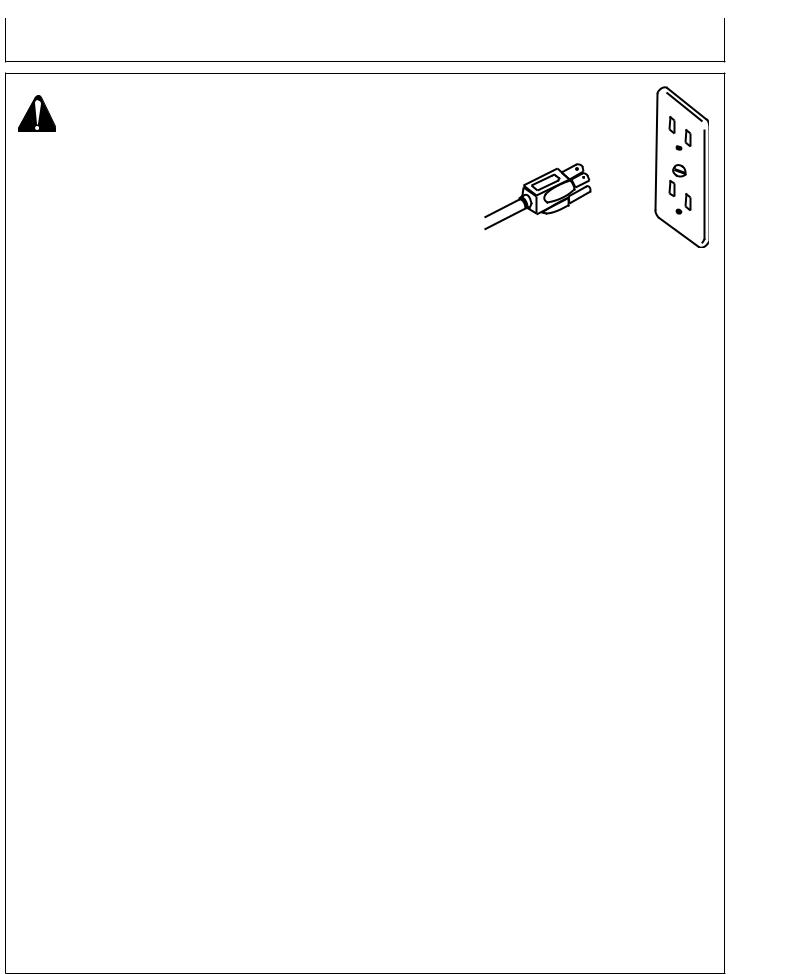
GROUNDING INSTRUCTIONS
This product must be grounded. If it should malfunction or breakdown, grounding provides a path of least resistance for electric current to reduce the risk of electric shock. This product is equipped with a cord having an equipment-grounding conductor and a grounding plug. The plug must be plugged into an appropriate outlet that is properly installed and grounded in accordance with local codes and ordinances.
DANGER - Improper connection of the equipmentgrounding conductor can result in a risk of electrocution. Check with a qualified electrician or service person if you are in doubt as to whether the outlet is properly grounded. Do not modify the plug provided with the product--if it will not fit, have a proper outlet installed by a qualified electrician.
GROUND FAULT CIRCUIT INTERRUPTER PROTECTION
This pressure washer is provided with a Ground Fault Circuit Interrupter (GFCI) built into the power cord. This device provides additional protection from the risk of electric shock. Should replacement of the plug or power cord become necessary, use only identical replacement parts that include GFCI protection.
DO NOT drop the GFCI as damage could result. If the GFCI is accidentally dropped, be certain to test the GFCI before using to ensure it is working properly. (Follow instructions on GFCI for test procedures.)
DO NOT pull on the electrical cord to disconnect from the outlet, OR carry the unit by the cord.
6 |
Operator’s Manual |

EXTENSION CORDS
Extension cords are not recommended for use on this pressure washer. If the use of an extension cord is unavoidable, it must be plugged into a GFCI found in circuit boxes or protected receptacles.
Use only 3-wire extension cords that have 3-prong grounding type plugs and 3-pole cord connectors that accept the plug from the washer. Use only extension cords that are intended for outdoor use.These extension cords are identified by a marking “Acceptable for use with outdoor appliances; store indoors while not in use”. Use only extension cords having an electrical rating not less than the rating of the product. Do not use damaged extension cords. Examine extension cord before using and replace if damaged. Do not abuse extension cord and do not yank any cord to disconnect. Keep cord away from heat and sharp edges. Always disconnect the extension cord from the receptacle before disconnecting the product from the extension cord.
WARNING: To reduce the risk of electrocution, keep all connections dry and off the ground. Do not touch plug with wet hands.
Use of smaller cords will cause electric motor stalling or circuit breaker stoppage.
Check power cord for damage before using. There is a hazard of electrical shock from crushing, cutting or heat damage.
Always be certain the unit is receiving proper voltage. Before plugging the unit into a compatible power source, be certain the switch is in the "OFF" position. Disconnect when not in use.
DO NOT use the unit in an area where flammable gas vapors may be present. An electric spark could cause an explosion or fire.
DO NOT direct water spray on or into electrical installations of any kind. This includes electrical outlets, light bulbs, fuse boxes, transformers, the unit itself, etc. Severe electrical shock may occur.
John Deere does not recommend the owner attempt any electrical repairs to this unit.
|
AC1000E-C |
AC1500E-C |
|
|
|
Cable Length |
Wire Gauge |
Wire Gauge |
Up to 50 Feet |
14 AWG |
12 AWG |
50 to 100 Feet |
12 AWG |
10 AWG |
Operator’s Manual |
7 |
CLEANING DETERGENT PRECAUTIONS
DO NOTuse solvents or highly corrosive detergents or acid type cleaners with this pressure washer. Use only mild detergents.
KNOW YOUR DETERGENTS! Be prepared to tell a physician exactly what you are using in the event of an emergency. Read the Material Safety Data Sheet (MSDS) provided with your detergent and all detergent labels. Follow all appropriate instructions regarding preparation use, safety and transportation. Keep ALL detergents out of the reach of children.
DO NOT use this pressure washer to dispense hazardous detergents.
DO NOTalter the detergent injection feature in any manner not prescribed in this manual. Use only genuine John Deere replacement parts for necessary repairs.
HANDLE CHEMICAL PRODUCTS SAFELY
Direct exposure to hazardous chemicals can cause injury. Potentially hazardous chemicals used with the pressure washer includes such items as detergents.
AMaterialSafetyDataSheet(MSDS)providesspecificdetailsondetergents; physical and health hazards, safety procedures and emergency response techniques.
Check the MSDS before you start any job using a detergent. That way you will know exactly what the risks are and how to do the job safely. Then follow procedures and recommended equipment. (See your John Deere dealer for MSDS Sheets on products used with this equipment.)
ADJUSTMENT PRECAUTIONS
NEVER alter or modify the equipment, be sure any accessory items and system components being used will withstand the pressure developed. Use ONLY genuine Mi-T-M parts for repair of your pressure washer. Failure to do so can cause hazardous operating conditions and will void warranty.
NEVER make adjustments to the machinery while it is connected to the power source.
Know how to stop the pressure washer and bleed pressures quickly. Be thoroughly familiar with controls.
Before servicing the unit; turn the unit off, disconnect from the power source, relieve the water pressure, and allow the unit to cool down. Service in a clean, dry, flat area.
Follow the maintenance instructions specified in this manual.
MSDS
8 |
Operator’s Manual |
IMPORTANT SAFETY INSTRUCTIONS
WARNING: To reduce the risk of injury, read this operator’s manual completely. When using this product, the following basic precautions should always be followed:
1.Read all the instructions before using the product.
2.This product is equipped with a Ground Fault Circuit Interrupter (GFCI) in the power cord to reduce the risk of electrical shock. If replacement of the plug or cord is needed, use only identical replacement parts.
3.Follow the grounding instructions included in this manual.
4.High pressure water spray can cut skin. Do not direct spray at persons. Keep operating area clear of all persons or pets. Warn children that the water spray can cut. Supervise children closely.
5.Do not allow children or untrained person to operate the washer.
6.Do not spray electrical switches, receptacles or light bulbs, or glass or fragile objects that may shatter.
7.Dirt and debris removed by spray can cause eye injury. Wear eye protection.
8.NEVER squeeze the trigger unless securely braced.The thrust from the water traveling through the nozzle may be powerful enough to cause the operator to lose balance if unprepared. Wet surfaces can be slippery. Wear shoes and keep both feet on the ground. Do not climb on items being cleaned. Do not overreach or stand on unstable support. Keep good footing and balance at all times. NEVER trigger the gun while on a ladder or roof.
9.When the spray trigger is released, water pressure is trapped in the discharge hose. Release trapped pressure by triggering the spray gun after the washer is turned off.
10.Do not operate the washer when fatigued or under the influence of drugs or chemicals. Stay alert. Watch what you are doing.
11.Follow the maintenance instruction specified in this manual.
12.ALWAYS hold on firmly to the gun/wand assembly when starting and operating the unit. Failure to do so can cause the wand to fall and whip dangerously. NEVER operate the gun with the trigger wired in the open position. To prevent accidental discharge, the trigger gun should be securely locked when not in use.
Operator’s Manual |
9 |

IMPORTANT SAFETY INSTRUCTIONS
13.NEVER ALLOW CHILDREN OR ADOLESCENTS TO OPERATE THIS UNIT!
14.Read and follow all handling, operations, maintenance and safety instructions listed in this manual and provide such information to ANYONE who will be operating this unit.
15.This pressure washer is provided with a Ground Fault Circuit Interrupter (GFCI) built into the plug or the power supply cord, Should replacement of the cord or plug become necessary, use only identical replacement parts that include GFCI protection.
16.In freezing temperatures, the unit must always be warm enough to ensure there is no ice formation in the pump. DO NOT start this unit if it has been transported in an open or underheated vehicle without first allowing the pump to thaw.
17.When connecting the water inlet to the water supply mains, local regulations of your water company must be observed. In some areas the unit must not be connected directly to the public drinking water supply. This is to ensure that there is no feedback of the detergents into the water supply. (Direct connection is permitted if a back flow preventer is installed.)
18.High pressure hoses should be inspected daily for signs of wear. If evidence of failure exists, promptly replace all suspect hoses to prevent the possibility of injury from the high pressure spray. If a hose or fitting is leaking , NEVER place your hand directly on the leak.
19.DO NOT operate the unit if you see any pump oil or water leaks from the machine. DO NOT resume operation until the unit has been inspected and repaired by a qualified service person.
20.DO NOT operate the unit without all protective covers in place.
21.To reduce the risk of injury, maintain a safe distance from persons while operating this unit. Close supervision is necessary when operating the unit near children.
22.DO NOT leave pressurized unit unattended. Shut off the unit and release trapped pressure before leaving.
23.DO NOT move the unit by pulling on the hose.
SAVE THESE INSTRUCTIONS
10 |
Operator’s Manual |
WEAR PROTECTIVE CLOTHING
Wear close fitting clothing and safety equipment appropriate to the job.
Wear a suitable hearing protective device such as earmuffs or earplugs to protect against objectionable or uncomfortable loud noises.
Operating equipment safely requires the full attention of the operator. Do not wear radio or music headphones while operating machine.
PREPARE FOR EMERGENCIES
Keep a first aid kit and fire extinguisher handy.
Keep emergency numbers for doctors, ambulance service, hospital and fire department near your telephone.
Be prepared if a fire starts.
INSPECT HIGH PRESSURE WASHER
Be sure all covers, guards and shields are in place. Locate all operating controls and safety labels. Keep all hardware and plumbing fittings tight.
Inspectpowercordfordamagebeforeusing.Thereisahazard of electrical shock from crushing, cutting or heat damage.
Inspect high pressure hose for kinking, cuts or abrasive wear.
SERVICE HIGH PRESSURE WASHER SAFELY
Before servicing washer, disconnect unit from power source, relieve water pressure and allow unit to cool down.
Service washer in a clean dry flat area.
Operator’s Manual |
11 |

SAFETY SIGNS
34-1253
Location: Wand
 WARNING
RISK OF INJECTION OR SEVERE INJURY. Never put your hand, fingers or body directly  over the spray nozzle.
 ADVERTENCIA
RIESGO DE INYECCION O LISION SEVERA Nunca coloque la mano, los dedos o el cuerpo directamente sobre la boquilla de rocío.
34-0631 Location: Motor Housing
34-1477 Location: Frame Assembly
34-1473 Location: Electrical Box
34-1471 Location: Frame Assembly
12
 WARNING
RISK OF ELECTROCUTION.
DO NOT REMOVE THIS TAG.
1.Connect only to a properly grounded outlet. Do not remove ground pin.
2.Inspect cord before using. Do not use if cord is damaged.
3.Keep all connections dry and off the ground.
4.Do not touch plug with wet hands.
5.This unit may be provided with a Ground Fault Circuit Interrupter (GFCI) built into the power cord plug. If replacement of the plug or cord is needed, use only identical replacement parts. If this unit is not provided with a GFCI, this unit should only be connected to a power supply receptacle protected by a ground fault circuit interrupter.
6.Do not use an extension cord with this machine.
7.Read the operator's manual before using.
FAILURETO FOLLOWTHE ABOVE
INSTRUCTIONS COULD RESULT
IN A SEVERE ELECTRICAL SHOCK.
34-1035-E/F/S-111899-ENG
34-1035 Location: Electrical Cord
Operator’s Manual

|
Controls |
|
|
CONTROLS |
|
|
|
A -- Motor Overload |
D -- Pump |
G -- Detergent Strainer |
K -- Water Inlet |
B -- On/Off Switch |
E -- GFCI |
H -- Detergent Hose |
L -- Water Outlet |
C -- Motor |
F -- Power Cord |
I -- Adjustable Unloader |
M -- High Pressure |
|
|
Knob |
Discharge Hose |
|
|
J -- Adjustable Injector |
N -- Gun Assembly |
|
|
|
O -- Quick Connect Nozzle |
Operator’s Manual |
13 |
Preparing the Washer
SET-UP
WARNING: RISK OF EXPLOSION! DO NOT OPERATE UNIT IN AN AREA WHERE FLAMMABLE GAS
VAPORS MAY BE PRESENT. AN ELECTRIC SPARK MAY CAUSE AN EXPLOSION.
RISKOFBURSTING!DONOTSTORE/OPERATE UNIT IN A FREEZING ENVIRONMENT
1.Thisunitshouldonlybeplacedonalevelsurfacetoensureproper lubrication for the water pump while operating. NEVER spray water directly on the unit!
2.Do not place unit in an area:
a.where there is evidence of oil or gas leaks.
b.where flammable gas vapors may be present.
3.Do not allow the unit to be exposed to rain, snow or freezing temperatures. If any part of the unit becomes frozen; excessive pressure may build up in the unit which could cause it to burst, resulting in possible serious injury to the operator or bystanders.
4.Before initial use, replace the oil travel plug with the dipstick provided with the unit. Be certain the oil level is in the center of the sight glass before each use. If low, fill with John Deere HyGuard pump oil. DO NOT OVERFILL!
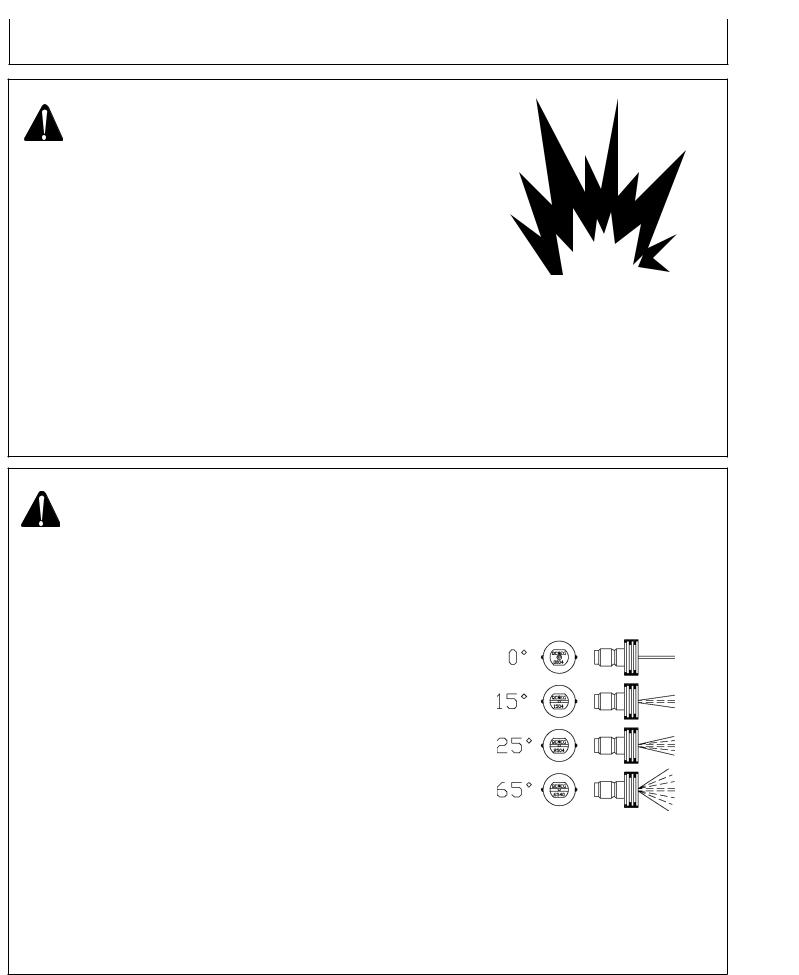
NOZZLE REVIEW
WARNING: RISK OF INJECTION CAUSING SEVERE INJURY!
NEVER LOOK DIRECTLY AT THE NOZZLE ORIFICEUNLESSITISDISCONNECTEDFROMTHE GUN/WAND ASSEMBLY!
Various nozzles may be quick-connected into the end of the wand to change the spray pattern or use the detergent feature. When using Quick Connects (Q.C.), be certain the connection is securely locked. If not, the high pressure water may shoot the nozzle from the wand, causing severe injury or serious damage. To determine spray fan, refer to the actual number stamped on the nozzle. The first two digits indicate the spray fan in degrees, i.e.; 00=0”, 15=15°, 25=25°, 65=detergent/low pressure.
1. The 0” nozzle (RED): This is a blasting nozzle. It delivers a very concentrated stream of water. Be cautious when using the straight narrow stream. It is not recommended for use on painted or wood surfaces, or items attached with adhesive backings. Uses: Removing weeds from sidewalk cracks, stubborn stains from concrete, masonry, aluminum and steel, caked mud from equipment, and cleaning lawn mower undersides.
2. The 15° nozzle (YELLOW): This is a chiseling nozzle. The spray should be directed at a 45° angle to the surface and used like a scraper to remove paint, grease and dirt. Uses: Surface preparation (removing mildew stains and paint chips).
3. The25°nozzle (GREEN): Thisisaflushingnozzle. Thispatternis best suited for flushing dirt, mud, and grime. Uses: Wet sweeping leaves from walks, curbs and driveways, cleaning stable floors, washing swimming pool bottoms, degreasing engines.
4. The 65° nozzle (BLACK): This is a low pressure detergent application nozzle. This broad spray pattern distributes solution over vast areas under low pressure. Uses: Detergent application, misting or rinsing.
14 |
Operator’s Manual |

Preparing the Washer
NOZZLE CONNECTION
WARNING: RISK OF SEVERE INJURY! THE TRIGGER GUN SHOULD ALWAYS BE LOCKED IN THE OFF POSITION WHEN NOT IN USE!
1.Be certain the trigger gun is locked in the "OFF" position.
2.Thenozzleassemblyshouldbedisconnectedfromthe gun/wandassemblyatthisbyretractingthelockingring on the quick-connect fitting to remove the nozzle.
WATER SUPPLY
1.Select a water supply hose which is a quality grade of garden hose measuring at least 3/4" ID and no longer than 50 feet.
2Check the water inlet strainer to ensure it is clean and free of anyobstructions.Periodiccleaningofthewaterstrainerwillhelp prevent pump problems. As a strainer becomes obstructed, it restricts proper flow of water to the pump. This can result in cavitations which will cause premature failure of pump packings and valves. Using a screw driver, remove the screen; clean or replace if necessary.
3.Connect the hoses.
a.Connect one end of the water supply hose to the water inlet of the unit.
b.Connecttheotherendofthehosetoyourpressurized water supply.
NOTE: Do not use a non-pressurized water supply (i.e. from a well or pond) with this unit.
c.Connectthehighpressuredischargehosetothewateroutlet of the unit.
4.Follow the incoming water requirements listed below:
a.Waterpressuremustbeaminimumof25poundspersquare inch (PSI) and a maximum of 125 PSI. (A typical outdoor faucet will generally supply this PSI if turned completely "ON".)
b.IncomingGPMmustbeapproximatelyonegallonmorethan theoutgoingGPMstatedonthepressurewashernameplate. (You can check GPM by timing how long it takes to fill a 5 gallon container.
c.Incomingwatertemperaturemustnotexceed125°F (52°C). Excessivepumpdamagemayresultifthewatertemperature exceeds this acceptable level.
5.Never allow the unit to operate without the incoming water line attached and the water supply turned all the way on.
Operator’s Manual |
15 |
Preparing the Washer
POWER CORD CONNECTION
WARNING: RISK OF ELECTROCUTION! THIS UNIT MUST BE CONNECTED TO A PROPERLY GROUNDED OUTLET. DO NOT USE AN ADAPTER OR REMOVE THE THIRD GROUNDING PRONG.
TO REDUCE THE RISK OF ELECTROCUTION, KEEPALL CONNECTIONS DRY AND OFF THE GROUND. DO NOT TOUCH PLUG WITH WET HANDS.
1.Make certain the motor switch is in the "OFF" position.
2.Ensureelectricalsupplyisidenticaltothespecificationslistedonthepressure washer data plate.
3.GROUNDINGINSTRUCTIONS: Thisproductmustbegrounded. Ifitshould malfunction or breakdown, grounding provides a path of least resistance for electric current to reduce the risk of electric shock. This product is equipped with a cord having an equipment-grounding conductor. The plug must be plugged into an appropriate outlet that is properly installed and grounded in accordance with all local codes and ordinances.
4.DANGER: Improper connection of the equipment-grounding conductor can result in a risk of electrocution. Check with a qualified electrician or service personnel if you are in doubt as to whether the outlet is properly grounded. Do not modify the plug - if it will not fit the outlet, have a proper outlet installed by a qualified electrician. Do not use any type of adaptor with this product.
5.GROUNDFAULTCIRCUITINTERRUPTERPROTECTION: Thispressure washer is provided with a Ground Fault Circuit Interrupter (GFCI) built into the plug or the power supply cord, test the GFCI each time it is plugged into an outlet according to instructions on the GFCI. DO NOT use the pressure washerifthetestfails! TheGFCIprovides additional protectionfromtherisk ofelectricshock. Shouldreplacementoftheplugorcordbecomenecessary, use only identical replacement parts that include GFCI protection.
6.EXTENSION CORDS: Mi-T-M DOES NOT RECOMMEND THE USE OF EXTENSION CORDS! If use of an extension cord is unavoidable, it must be plugged into a GFCI found in circuit boxes or protected receptacles.
Use only 3-wire extension cords that have 3-prong grounding-type plugs and 3-pole cord connectors that accept the plug from the product.
Useonlyextensioncordsthat areintendedforoutdooruse.Theseextension cordsareidentifiedbyamarking"Acceptableforusewithoutdoorappliances; storeindoorswhilenotinuse." Useonlyextensioncordshavinganelectrical rating not less than the rating of the product. Do not use damaged extension cords. Examine extension cord before using and replace if damaged. Do not abuse extension cord and do not pull on any cord to disconnect. Keep cord away from heat and sharp edges. Always connect or disconnect the extension cord from the receptacle before connecting or disconnecting the product from the extension cord.
7.Ensure the area between the pressure washer cord and outlet is kept dry.
8.Insert the male plug into a grounded AC outlet. DO NOT use an adapter
OR remove the grounding plug!!
16 |
Operator’s Manual |

Preparing the Washer
UNLOADER
The unloader valve on your machine is equipped with an adjustment knob to adjust the pressure. Should less pressure be required, simply turn the adjustment knob counterclockwise. To set back to maximum, turn adjustment knob completely clockwise. DO NOT OVERTIGHTEN!
CAUTION: RISK OF UNIT DAMAGE! DO NOT OVERTIGHTEN THE UNLOADER. BREAKAGE WILL RESULT IN IMMEDIATE LOSS OF WATER PRESSUREAND COSTLY REPAIRS.
THERMAL RELIEF VALVE
To ensure the bypass water temperature does not exceed acceptable levels, never allow the pressure washer to operate in the bypass mode (with the unit running and the trigger closed) for more than three minutes.
Athermalreliefvalvehasbeenaddedtothisunittoprotectthepump.Itmaybegin to open and release water if the water temperature in the pump has exceeded 140°F. Thiswillallowfresh,coolwatertoenterthesystem,thereforepreventing premature failure of pump packings.
PRE-START INSPECTION PROCEDURES
Before starting the unit, perform the following procedures:
1.Check the oil level in the pump.
2.Inspect the inlet water strainer. Clean or replace if necessary. See "Water Supply".
3.Check all hose connections to ensure they are securely tightened. See "Water Supply".
4.Inspect for system water leaks and oil leaks. Be sure that all damaged partsarereplacedandthatthemechanicalproblemsarecorrectedpriorto operation of the unit. If service is needed, contact Customer Service.
5.Inspect high pressure hose for kinking, cuts or leaks. If a cut or leak is found, DO NOT USE HOSE! Replace hose before starting unit. See "Miscellaneous Safety Precautions". Be sure that all damaged parts are replaced and that the mechanical problems are corrected prior to operation of the unit. If you need service, contact Customer Service.
6.Inspect electrical cord for cuts. If a cut is found, DO NOT TOUCH OR USE ELECTRICAL CORD! Replace cord before starting the unit.
Operator’s Manual |
17 |

Operating the Washer
PRIMING THE PUMP
1.It is essential to prime the pump on initial start-up and each time the water supply is disconnected from the unit after initial use.
2.Lay the high pressure hose out to remove any loops. Water flow will constrict the hose, creating tight loops if the hose is not straight.
3.Securely connect the gun assembly to the high pressure hose.
NOTE: The nozzle assembly should NOT be connected to the gun assembly at this time. See "Nozzle Connection" .
4.With the trigger gun locked in the "OFF" position, turn the water supply completely on. Pointing the gun in a safe direction, unlock the trigger gun and squeeze the trigger.
5.Low pressure water will begin flowing from the hose/gun assembly. This allows the unit to prime and purge any air from the system. The unit is primed when water flow is uninterrupted by air.
6.Once the unit is primed, release the trigger and lock the gun in the "OFF" position. Securely connect the nozzle assy. (See "Nozzle Connection")
18 |
Operator’s Manual |
Operating the Washer
START-UP
WARNING: RISK OF INJECTION CAUSING SEVERE INJURY! KEEP CLEAR OF NOZZLE! NEVER PLACE HAND OR FINGERS IN FRONT OF NOZZLE!
DO NOT DIRECT DISCHARGE STREAM AT PEOPLE OR PETS!
BE CERTAIN THE ADJUSTABLE NOZZLE ASSY. IS SECURELY CONNECTED TO THE WAND TO PREVENT AN ACCIDENTAL DISCHARGE!
CAUTION: RISK OF DAMAGE.DO NOT ALLOW SPRAY PATTERN TO REMAIN ON A FIXED AREA FOR AN EXTENDED PERIOD OF TIME. POSSIBLE DAMAGE MAY OCCUR TO THE AREA.
1.Refer to the "Safety Precautions" before starting the unit.
2.Locate the Safety Decals on your unit and heed their warnings.
3.With the gun locked in the "OFF" position, point the trigger gun away from yourself or anyone else. Ensure water supply is turned completely on.
4.Disengage the safety lock-off on the gun and squeeze the trigger. Low pressure water will begin flowing from the nozzle.
5.Before starting the unit, brace yourself as the gun will kick-back from the high pressure created by the pump once the unit has started.
6.Move the On/Off Switch to the "ON" position. This switch includes a circuit breaker for protection of the motor. In case of excess load, the circuit breaker will automatically move the switch to the "OFF" position. To restart, move the On/Off Switch to the "ON" position again.
7.Once the unit is turned on, perform the following procedures with the gun open:
a.Inspect for system water leaks and oil leaks. If an oil leak is found, TURN UNIT OFF IMMEDIATELY! Be sure that all damaged parts are replaced and that the mechanical problems are corrected prior to operation of the unit. If you require service, contact your John Deere dealer.
b.Inspect high pressure hose for kinking cuts and leaks. If a cut or leak is found, DO NOT TOUCH HOSE AT CUT OR LEAK!!! TURN UNIT OFF IMMEDIATELY! Replace hose before re-starting the unit. See "Miscellaneous Safety Precautions”. Be sure that all damaged parts are replacedandthatthemechanicalproblemsarecorrectedpriortooperation of the unit. If you require service, contact your John Deere dealer.
c.Inspect electrical cord for cuts. If a cut is found, DO NOT TOUCH OR USE ELECTRICAL CORD! Replace cord before starting the unit.
8.Trigger the gun several times and try adjusting the spray pattern. Be certain toLOCKthetriggerguninthe"OFF"positionwhenevermovingtheadjustable nozzle. NEVER look directly into the nozzle! High pressure water creates a risk of severe injury!
9.Do not allow unit to operate in bypass mode (with trigger closed) for more than three minutes without triggering the gun. Failure to follow this simple rule can cause premature failure of pump packing seals, resulting in costly pump repair.
10.Because your pressure washer delivers a high pressure spray and a variety of spray patterns, there are many cleaning jobs that can be done without the use of detergents. If a cleaning agent is required, see "Cleaning With Detergents" for the correct procedures.
Operator’s Manual |
19 |
Operating the Washer
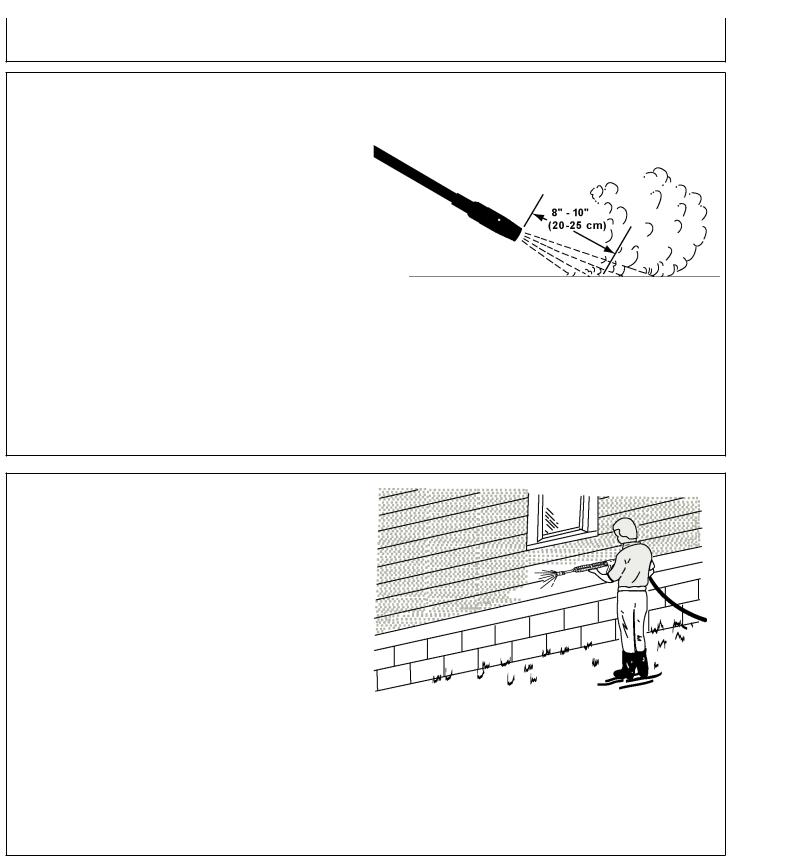
CLEANING HORIZONTAL SURFACES
Move nozzle wand from side to side. Direct spray at an angle to force debris ahead and away from the cleared area.
Depending on the material to be removed and nozzle pressure, hold nozzle end 8 to 10 inches (20 to 25 cm) from the surface and use slow, overlapping strokes. If debris is easy to remove, move nozzle back to cover more area for faster cleaning.
CLEANING VERTICAL SURFACES
IMPORTANT: Remember that the washer can deliver a high pressure spray that can break glass and gouge soft wood and other materials.
When cleaning building interiors or exteriors without detergents, work from top to bottom. This will help eliminate streaks. In interiors, start with the ceiling first, then the walls and the floor last.
Clean around windows carefully. If glass panes are not well-caulked and puttied, the high pressure spray could break the glass.
Never spray directly overhead. Always spray ahead to avoid dripping or falling debris.
20 |
Operator’s Manual |
 Loading...