


C116-C
Jenn Air C116-C, C206-C, C206B-C, C236-C, C236W-C Owner's Manual
...
I.IENN-AIR
Useand Care Manual
Electric Grill-Range Cooktops
(_ MODELS Cl16-C, C206-C, C236-C,
C316-C
Printed in. U.S,A. Part No, 204777B Cat. No. CC102UB
©1989 Jenn-Air Company 1/90
SAFETY
PRECAUTIONS
Readbefore operating your cooktop
All appliances -- regardlessof the manufacturer-- have the
potentialthroughimproperorcarelessusetocreatesafetyprob-
lems. Therefore the following safety precautions should be
observed:
1. Besure your appliance is properly installed and grounded
by aqualified technician.
2. Neveruseyour appliance for warming or heating the room.
3. Children should not be left alone or unattended in area
where appliance is in use. They should never be allowed
to sit or stand on any part of the appliance.
4. Wear proper apparel. Loose-fitting or hanging garments
should neverbe worn while using the appliance.
5. Do not repair or replace any part of the appliance unless
specifically recommended in this manual. All other
servicing should be referred to an authorized Jenn-Air
ServiceContractor.
6. Flammable materials should not be stored near surface
units.
7. Do not use water on grease fires. Smother fire or flame
or usedry chemical or foam-type extinguisher.
8. Use only dry potholders. Moist or damp potholders on
hot surfaces may result in burns from steam. Do not let
potholder touch hot heating elements. Do not usea towel
or other bulky cloth.
9. Use proper pan size. Many appliances are equipped with
one ormore surface units of different size. Selectcookware
having flat bottoms largeenough to cover the surface unit
heating element. The use of undersized cookware will :
expose a portion of the heating element to direct contact
and may result in ignition of clothing. Proper relationship
of cookware to heating element will also improve efficiency
and performance.
10. Never leavesurface units unattended at high heatsettings.
Boil over causes smoking and greasy spillovers that may
ignite.
11. On conventional element cooktops make sure that drip
pans are in place. Absence of these pans during cooking
maysubject wiring or components underneath to damage.
12. Do not use aluminum foil to line surface unit drip pans
or grill basin. Installation of these liners may result in an
electric shock or fire hazard.
13. Glazed cookware -- only certain types of glass, glass-
ceramic, ceramic, earthenware, or other glazed cookware
are suitable for cooktop surface without breaking due to
the sudden change in temperature. Use only such
cookware asyou know hasbeenapproved for this purpose.
14. Cookware handlesshould beturned inward and not extend
over adjacent surface heating elements to avoid burns,
ignition of flammable materials andspillage due to uninten-
tional contact with the cookware.
15. Do not soak or immerse removable heating elements in
water.
16. CAUTION -- Do not store items of interest to children
in cabinets abovecooktop--children climbing on the cook-
top to reach items could be seriously injured.
17. Do not touch surface units or areas near units. Surface
units or heating elements may be hot even though they
are dark in color. Areas near surface units may become
hot enough to cause burns. During and after use, do not
touch or let clothing or other flammable materials contact
these areas until they have had sufficient time to cool.
Other surfaces may become hot enough to cause burns
-- among these surfaces are the cooktop.
18. Do not cook on glass-ceramic cooking surface ifthe cook-
top is broken. Cleaning solutions and spillovers may pene-
trate the broken cooktop and create a shock hazard.
Contact an authorized Jenn-Air ServiceContractor.
19. Clean glass-ceramic cooktops with caution. If wet sponge
or cloth is used to wipe spills on a hot cooking area, be
careful to avoid steam burns. Some cleansers can produce
noxious fumes ifapplied to a hot surface.
20. Do not operate with damaged cooking element after any
product malfunction until proper repair has been made.
21. Keepall switches "OFF" when unit is not in use.
3
Ventilation System
The built-in ventilation systemremoves cooking vapors, odors and smokefrom foods
preparedon the cooktop,grill and grill accessories.
Regularuse of this systemwill insure a more comfortable and lesshumid kitchen
which is free of heavy cooking odors and fumes that normally create a frequent
needfor cleaning and redecorating.
Using the Ventilation System
• To operate the ventilation system manually, push the on/off switch located
in front of the air grille.
• The ventilationsystem will operate automatica/ly when the grill element is
in use.
• Besidesusing the ventilation systemto remove cookingvapors and fumes,
it can be used to cool bakedpies, cakes or hot pans.To cool an item, set
it on the air grille and turn on the fan. The air being pulled over the item
will quicklycool it. Becareful notto coverthe entire air grille.
• The fan can be used to remove strong odors from the kitchen as when
choppingonions nearthe fan.
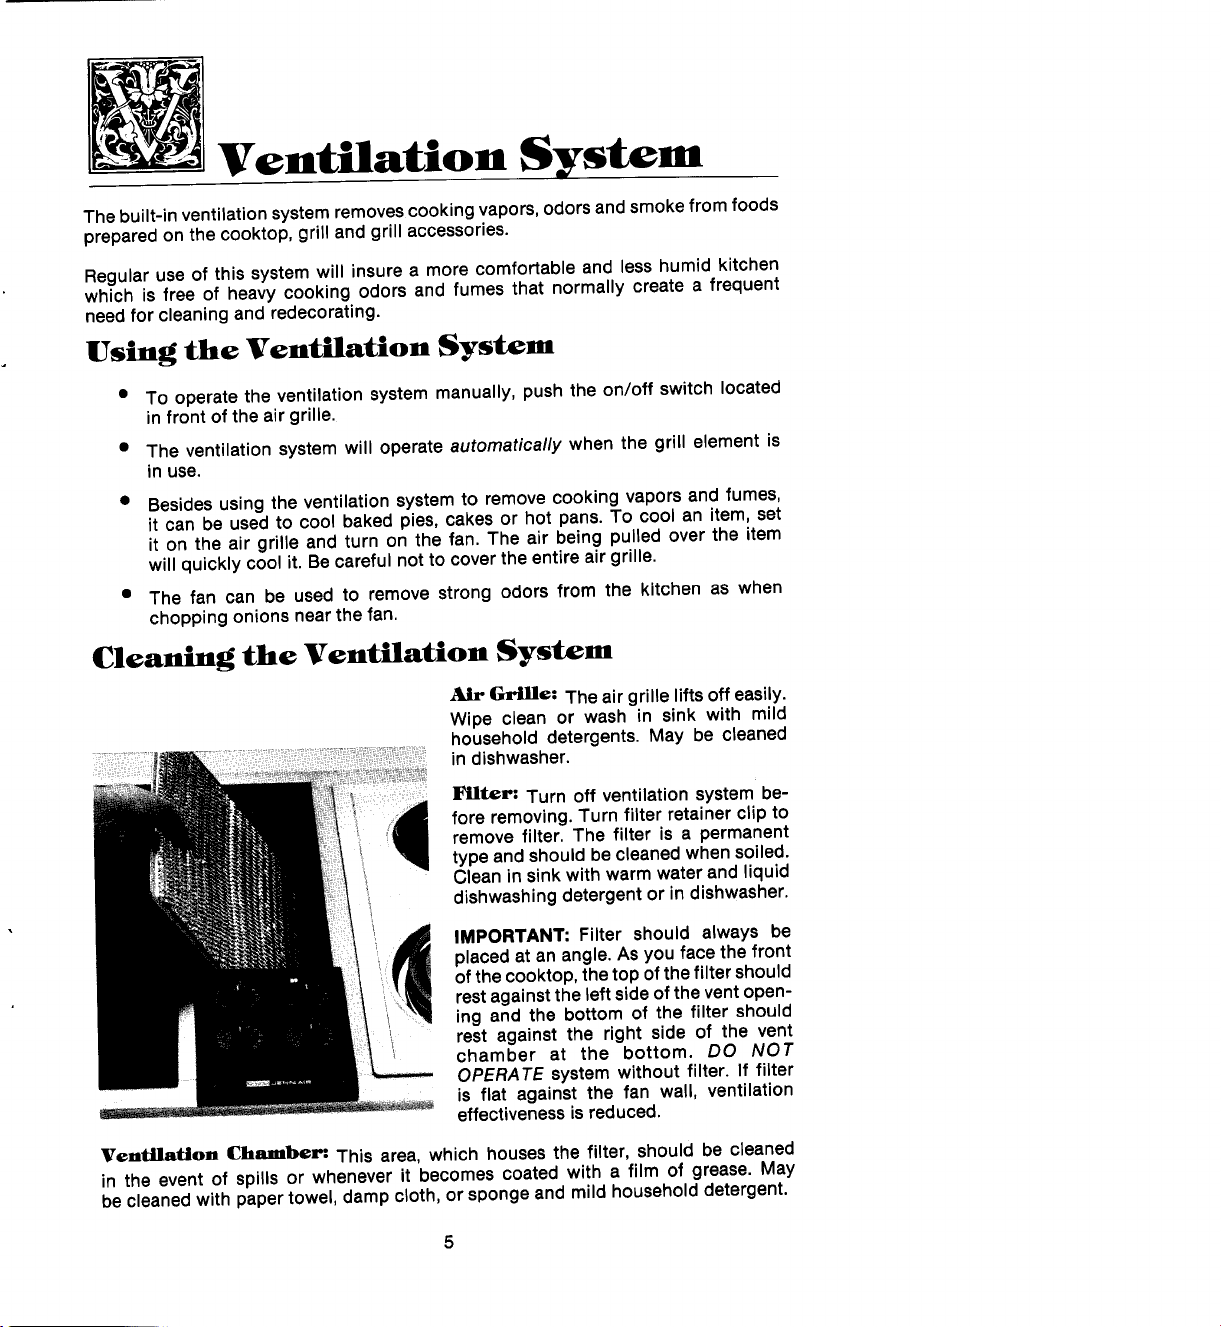
Cleaning the Ventilation System
Grille: The air grille lifts off easily.
Wipe clean or wash in sink with mild
household detergents. May be cleaned
in dishwasher.
Filter: Turn off ventilation system be-
fore removing.Turn filter retainer clip to
remove filter. The filter is a permanent
type and should becleaned when soiled.
Clean in sinkwith warm water and liquid
dishwashingdetergentor in dishwasher.
• _ IMPORTANT: Filter should always be
placed at an angle. As you face the front
_'i of thecooktop,thetop of thefilter should
restagainstthe left side of the ventopen-
ing and the bottom of the filter should
rest against the right side of the vent
chamber at the bottom. DO NOT
OPERATE system without filter. If filter
is flat against the fan wall, ventilation
effectivenessisreduced.
VentHattlon Chamber= This area, which housesthe filter, should be cleaned
in the event of spills or whenever it becomes coated with a film of grease. May
be cleanedwith papertowel, dampcloth, or spongeand mild householddetergent.
5
Surface Controls
The variable heat controls for the cooktop cartridges and grill element provide flexibil-
ity in heat setting selection.
To Set Controls
• Since the controls are a push-turn type, they must be pushed down before turning.
To set (from the OFFposition), push down on control knob and turn in either direction
to desired heat setting.
• When control is in any position, other than OFF, it may be turned in any direction
without pushing down.
• A red indicator light will glow when a surface heating element is ON, There is a light
for each cooking bay area.
4."
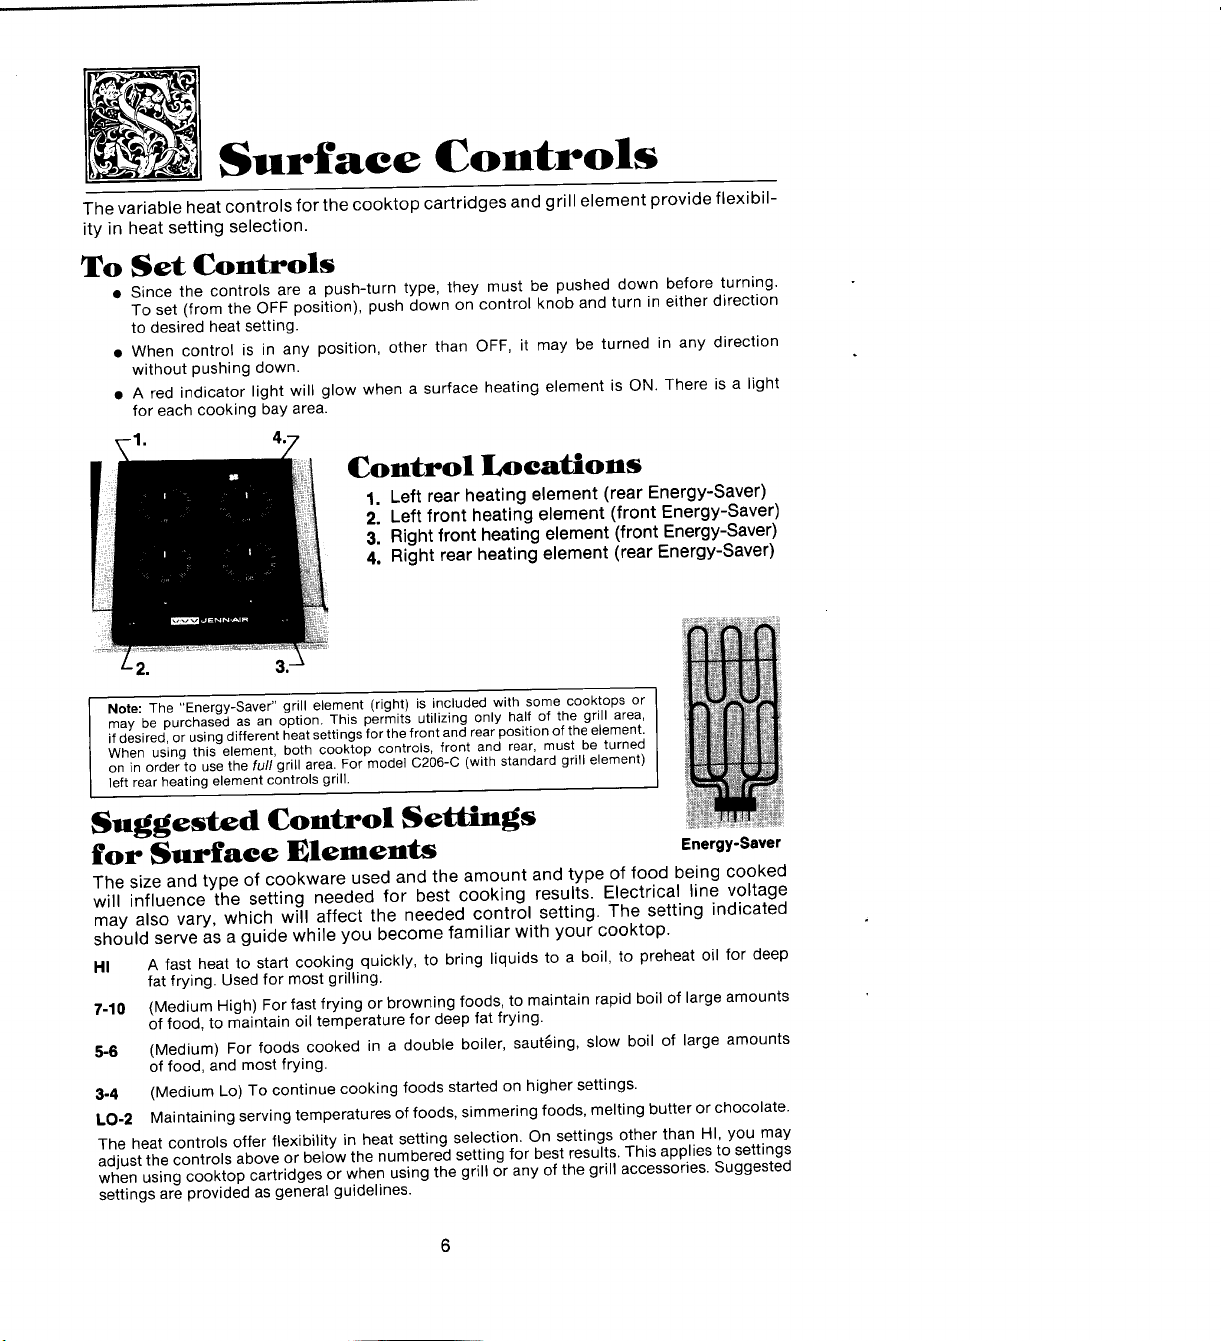
Control Locations
1. Left rear heating element (rear Energy-Saver)
2. Left front heating element (front Energy-Saver)
3. Right front heating element (front Energy-Saver)
4. Right rear heating element (rear Energy-Saver)
2. 3,
Note: The "Energy-Saver" grill element (right) is included with some cooktops or
may be purchased as an option. This permits utilizing only half of the grill area,
if desired, or using different heat settings for the front and rear position of the element.
When using this element, both cooktop controls, front and rear, must be turned
on in order to use the full grill area. For model C206-C (with standard grill element)
left rear heating element controls grill.
Suggested Control Settings
for Surface Elements e,erg-S.,e,
The size and type of cookware used and the amount and type of food being cooked
will influence the setting needed for best cooking results. Electrical line voltage
may also vary, which will affect the needed control setting. The setting indicated
should serve as a guide while you become familiar with your cooktop.
HI A fast heat to start cooking quickly, to bring liquids to a boil, to preheat oil for deep
fat frying. Used for mostgrilling.
7-18 (Medium High) Forfastfrying or browning foods, to maintain rapid boil of large amounts
of food, to maintain oil temperature for deep fat frying.
5-6 (Medium) For foods cooked in a double boiler, saut6ing, slow boil of large amounts
of food, and most frying.
3-4 (Medium Lo) To continue cooking foods started on higher settings.
LO-2 Maintaining serving temperatures of foods, simmering foods, melting butter or chocolate.
The heat controls offer flexibility in heat setting selection. On settings other than HI, you may
adjust the controls above or below the numbered setting for best results.This applies to settings
when using cooktop cartridges or when using the grill or any of the grill accessories. Suggested
settings areprovided asgeneral guidelines.
Using Cooktop
Cartridges
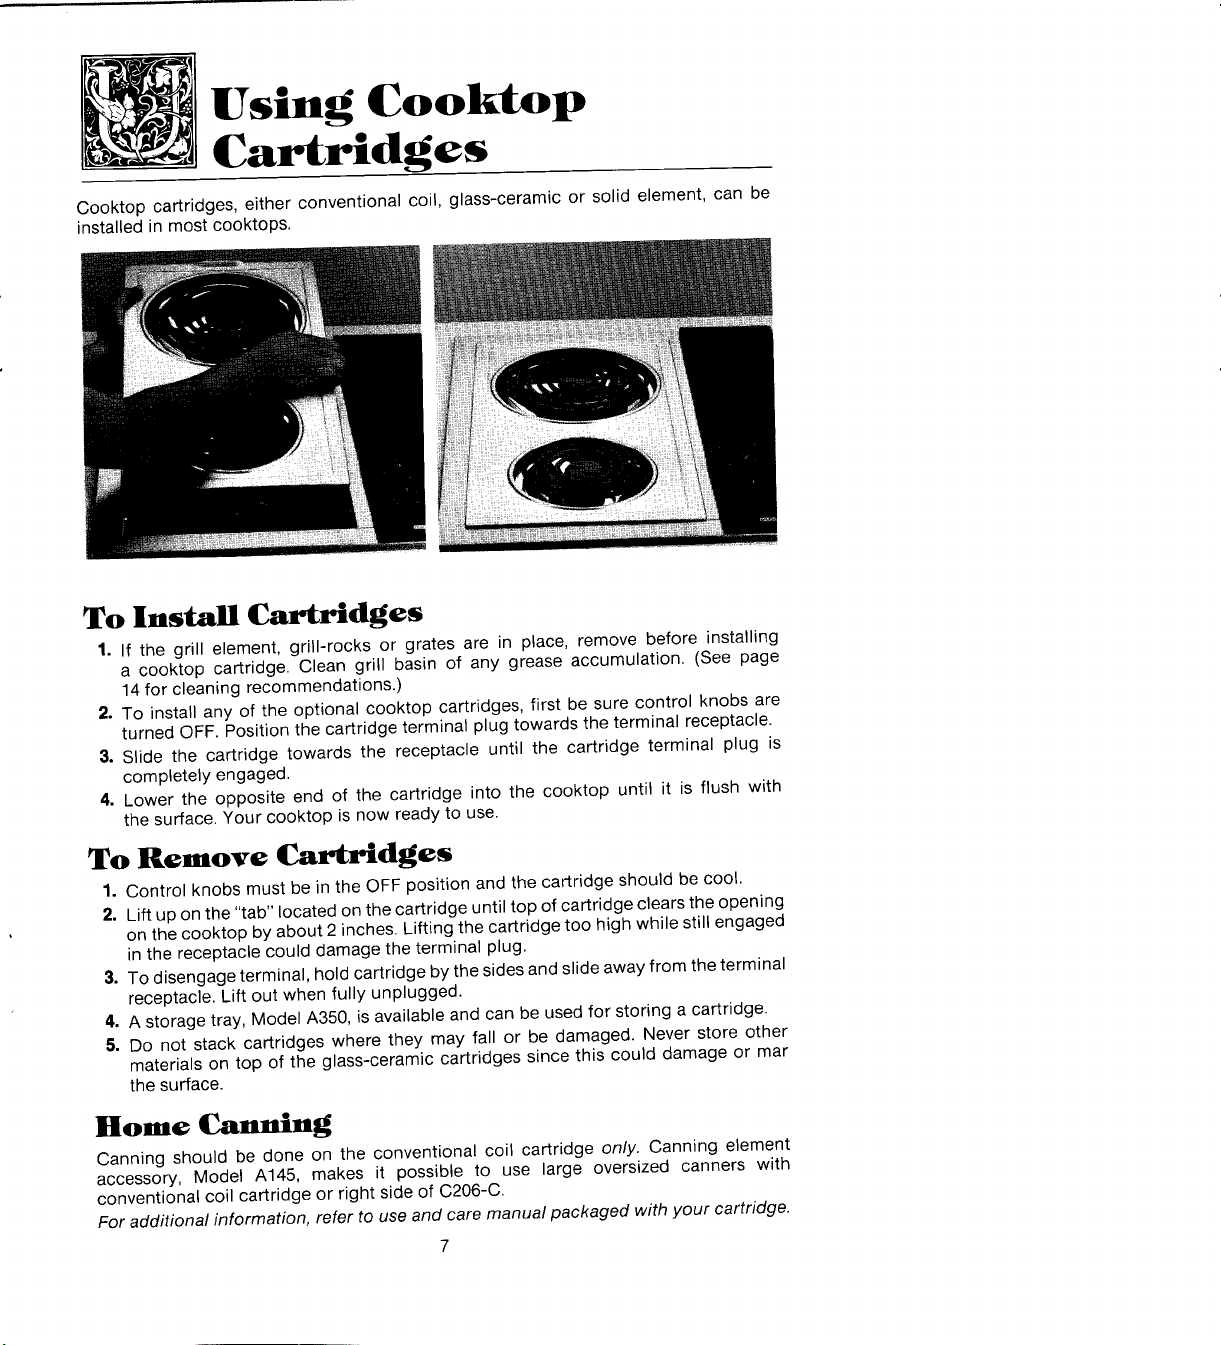
Cooktop cartridges, either conventional coil, glass-ceramic or solid element, can be
installed in most cooktops.
To Install Cartridges
1. If the grill element, grill-rocks or grates are in place, remove before installing
a cooktop cartridge. Clean grill basin of any grease accumulation. (See page
14 for cleaning recommendations.)
2. To install any of the optional cooktop cartridges, first be sure control knobs are
turned OFF. Position the cartridge terminal plug towards the terminal receptacle.
3. Slide the cartridge towards the receptacle until the cartridge terminal plug is
completely engaged.
4. Lower the opposite end of the cartridge into the cooktop until it is flush with
the surface. Your cooktop is now ready to use.
To Remove Cartridges
1. Control knobs must be in the OFF position and the cartridge should be cool.
2. Lift up on the "tab" located on the cartridge until top of cartridge clears the opening
on the cooktop by about 2 inches. Lifting the cartridge too high while still engaged
in the receptacle could damage the terminal plug.
3, To disengage terminal, hold cartridge by the sides and slide away from the terminal
receptacle. Lift out when fully unplugged.
4, A storage tray, Model A350, is available and can be used for storing a cartridge.
5. Do not stack cartridges where they may fall or be damaged. Never store other
materials on top of the glass-ceramic cartridges since this could damage or mar
the surface.
Home Canning
Canning should be done on the conventional coil cartridge only. Canning element
accessory, Model A145, makes it possible to use large oversized canners with
conventional coil cartridge or right side of C206-C.
For additional information, refer to use and care manual packaged with your cartridge.
7
 Loading...