


SVA1500
SVA1600
SVA1800
SVA2100
SVA Center
simple
set-up guide
. For over 50 years, JBL
of musical and film recording performances to monitoring the
car, or office.
loudspeakers you have
enjoyment that you expected – purchasing additional audio
office, you will once again
the enclosed profile card. on our latest advancements, our customers and build
expectations.

Introduction
JBL’s SVA Series takes advantage of our latest technology to deliver incredibly clean, detailed sound. Incorporating JBL’s Symmetrical Vertical Array™ and exclusive Bi-Radial® horn, these loudspeakers deliver sound that is distributed over a wide soundstage with pinpoint imaging. Because the horn should be directed at ear level in order
to maximize the imaging characteristics, JBL developed an exclusive cast-aluminum adjustable spike foot that can be adjusted while the speaker is in position. The Bi-Radial horn design – which greatly reduces room reverberation – along with video-shielding, allows greater placement flexibility within the room. Ultrawide frequency response and
one. Speaker Placement
Proper placement of the speakers is an important step in obtaining the most realistic soundstage possible. These recommendations are for the optimum placement of the
loudspeakers. Use these placement recommendations as a guide. Slight variations will not diminish your listening pleasure.
high power handling combine to give you clear, powerful sound that you get only from genuine JBL. The SVA loudspeakers are perfect
for today’s Dolby* Digital recordings.
The SVA Center is designed to complement any of the SVA Series loudspeakers.
It is the perfect addition for re-creating the cinematic experience in your home.
SVA2100, SVA1800, SVA1600
1' |
1' |
o |
o |
40–60 |
|
SVA1500 |
|
As Front Speakers
SVA Center
0–2 ft. |
As Surround Speakers
For optimum performance, use the SVA Center with the grille attached.
5–6 ft. |
two. Hookup
Connection Tips
Wire Length |
Recommended Speaker Cable Size |
Up to 20 ft. |
16 gauge |
Up to 30 ft. |
14 gauge |
Greater than 30 ft. |
12 gauge or heavier |
Preparing the Speaker Cable
1. Determine the length of wire necessary to connect your amplifier to the speaker that is farthest away. Remember to allow for extra cable to be able to conceal it under baseboards, or run it around corners.
2.Keep both cable lengths the same in order to help maintain proper signal balance and imaging.
3.Separate about one inch of the two conductors that make up each cable. Then strip off about 3/8" of insulation.
4.Twist each conductor’s thin wires into a tightly bunched spiral.
5.Identify a difference between the two conductors. This may be done in various ways, depending upon the type and brand of cable you are using.
Some of the More Common Differentiating Marks for Conductors Are:
• Different color wire |
• A colored line on one con- |
tor’s outer insulation |
• A strand of thread in one |
ductor’s outer insulation |
• A printed (+) marking on |
conductor |
• Raised ribs on one conduc- |
one of the insulators |
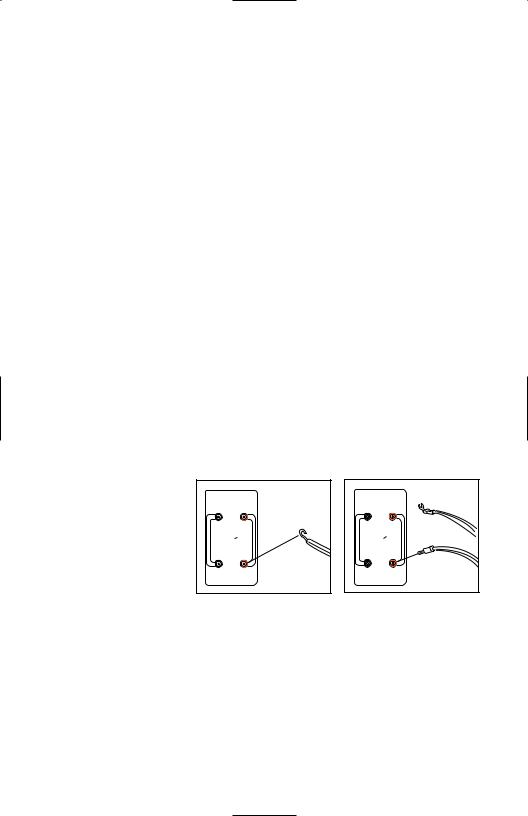
The terminals on the SVA Series loudspeakers can accept several types of speaker cable connections. Remember to connect the red (+) terminal on the receiver/amplifier to the red (+) terminal on the speaker and the black (–) terminal on the receiver/amplifier to the black (–) terminal on the speaker.
–HF +
High Frequency
+2dB
 0dB
0dB
– |
LF |
+ |
–HF +
High Frequency
+2dB
 0dB
0dB
– |
LF |
+ |
Bare wire connecting method. |
Banana/spade connecting method. |
 Loading...