

Invacare CareGuard CG9701 Assembly, Installation And Operating Instructions
CAREGUARD APP
ALTERNATING PRESSURE PUMP
MODEL NO. CG9701
Assembly, Installation and Operating Instructions
NOTE: The above model number contains one (1) Alternating Pressure Pump and one (1) pad.
NOTE: Check ALL parts for shipping damage. In case of
shipping damage, DO NOT use. Contact Carrier/Dealer
for further instruction.
SAFETY SUMMARY
The following recommendations are made for the safe
use of the CareGuard APP Alternating Pressure Pump
and Pad:
WARNING
DO NOT use this equipment without first reading
and understanding this instruction sheet. If you
are unable to understand the W arnings, Cautions,
and Instructions, contact your Invacare dealer
or Invacare Account Services at 1-800-333-6900
before attempting to use this equipment - otherwise, injury or damage may occur.
DO NOT use the pad near open flame or while
smoking, otherwise, injury may result.
Inspect power cord, plug, or air hoses of the
CareGuard APP Alternating Pressure Pump for
breaks, tears, or kinks. If damage is found, DO
NOT use.
WARNING
Use extreme care when handling sharp objects
such as needles near the pad.
The pad has a weight limitation of 250 lbs. (114
kg.).
INSTALLING THE CAREGUARD
APP (FIGURES 1 AND 2)
NOTE: Read the WARNINGS in the SAFETY SUMMARY before installation.
1. Perform one (1) of the following:
A. Place the CareGuard APP Alternating Pres-
sure Pump on a flat surface near the bed.
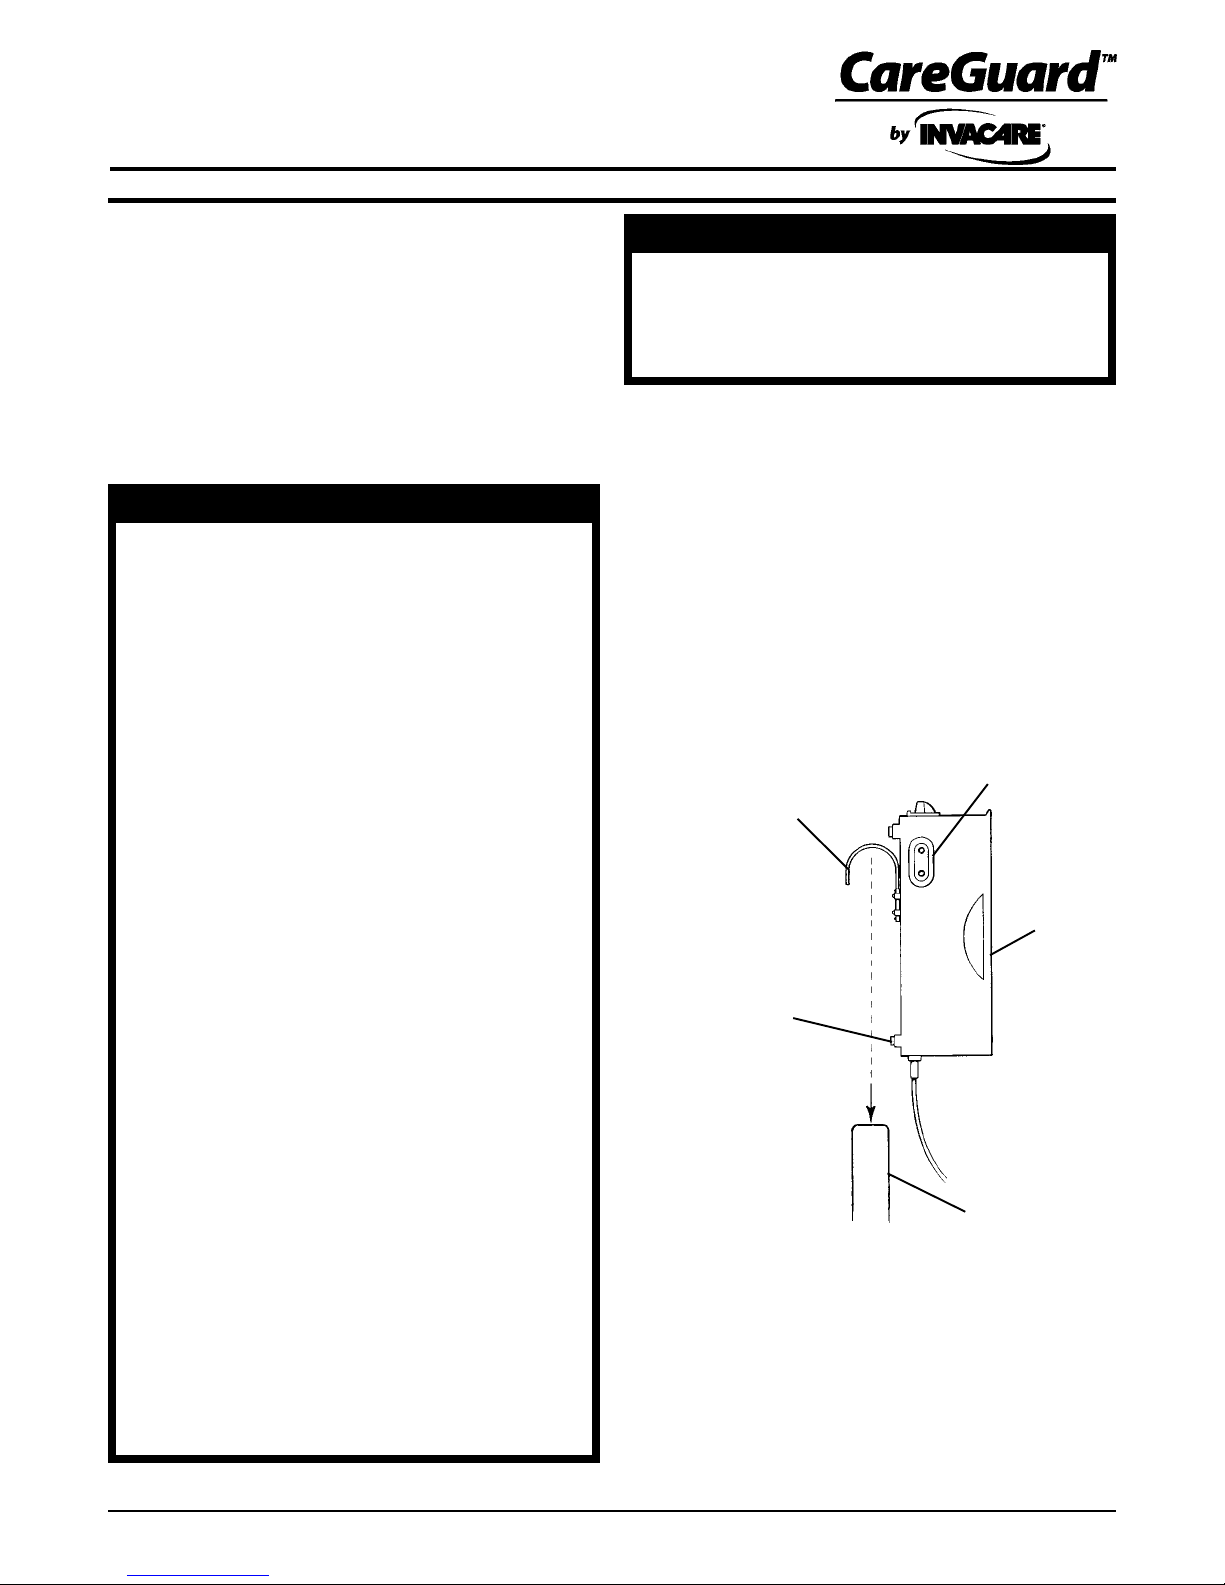
B. Open the hooks on the back of the CareGuard
APP Alternating Pressure Pump and install on
the outside of the bed frame as shown in FIG-
URE 1.
Hose Attachment
Hooks
(2 Each)
DO NOT, under any circumstances, cut or remove
the round grounding prong from any plug used
with or for Invacare products. Some devices are
equipped with three-prong (grounding) plugs for
protection against possible shock hazards. Where
a two-prong wall receptacle is encountered, it is
the personal responsibility and obligation of the
customer to contact a qualified electrician and
have the two-prong receptacle replaced with
a properly grounded three-prong wall receptacle in accordance with the National Electrical
Code. If you must use an extension cord, use
ONLY a three-wire extension cord having the
same or higher electrical rating as the device
being connected.
Ensure that the pad is brought up to room temperature before unfolding.
DO NOT place hot objects such as heating pads
on top of the pad. This may weaken the pad
material and may cause injury.
Pump
Rubber Feet
(4 each)
Outside
Bedframe
FIGURE 1- INSTALLING THE CAREGUARD APP -
ATTACHING PUMP TO BED
2. Place pad on top of bed mattress.
NOTE: Air chamber openings should be at bed end.
3. Install end flaps over mattress corners to secure pad.
1
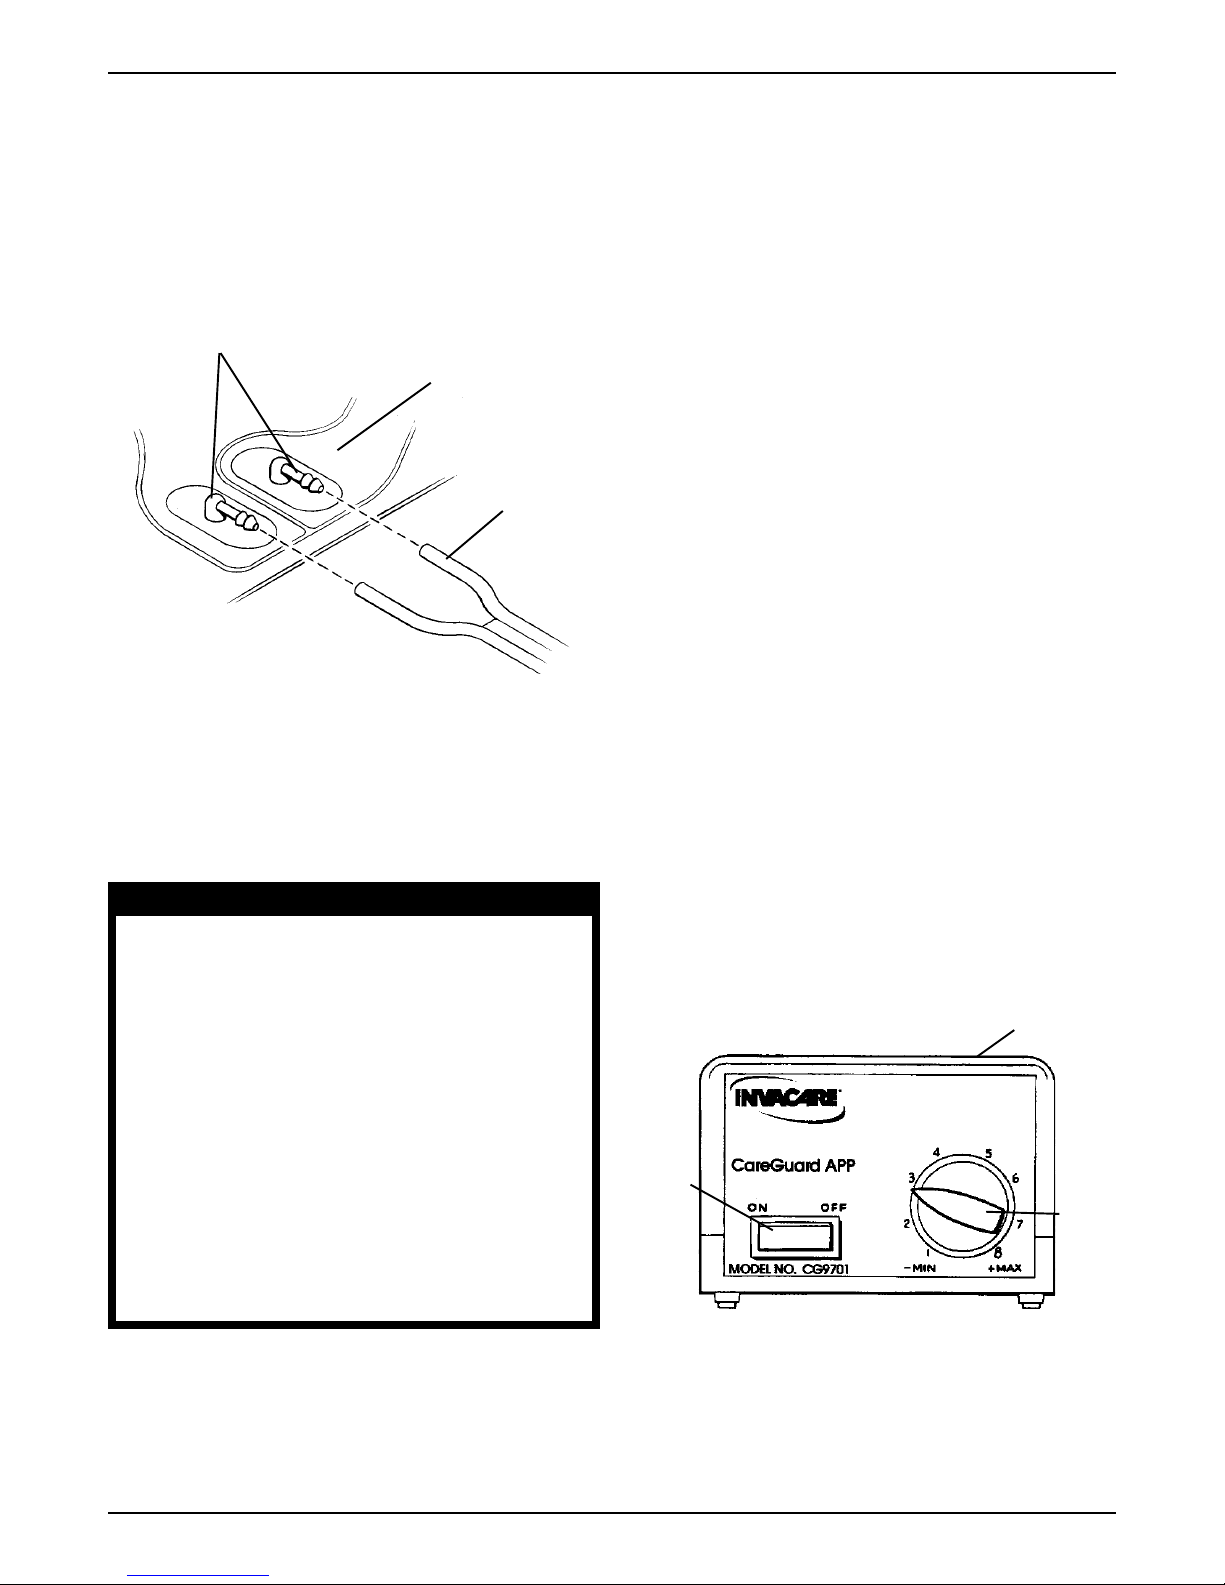
4. Connect other end of air hoses to the pump.
5. Connect air hoses with fittings to the air chamber
openings on the pad (FIGURE 2).
6. Install sheet over pad and bed mattress.
3. Turn knob on pump to the maximum setting (clockwise).
NOTE: It will take approximately 15 minutes for the
pad to be fully inflated at the maximum p.s.i.
7. Refer to USING/ADJUSTING THE PUMP in this
instruction sheet.
Air Chamber Openings
Pad
Hose
FIGURE 2- INSTALLING THE CAREGUARD APP-
ATTACHING HOSE TO PAD
USING/ADJUSTING THE PUMP
(FIGURE 3)
WARNING
DO NOT, under any circumstances, cut or remove
the round grounding prong from any plug used
with or for Invacare products. Some devices are
equipped with three-prong (grounding) plugs for
protection against possible shock hazards. Where
a two-prong wall receptacle is encountered, it is
the personal responsibility and obligation of the
customer to contact a qualified electrician and
have the two-prong receptacle replaced with
a properly grounded three-prong wall receptacle in accordance with the National Electrical
Code. If you must use an extension cord, use
ONLY a three-wire extension cord having the
same or higher electrical rating as the device
being connected.
NOTE: Keep hose attached to the pad and the pump,
otherwise, deflation will occur.
4. Refer to ADJUSTING THE PUMP in this instruction sheet.
Adjusting
NOTE: The pressure of the pump can be adjusted
to provide maximum effectiveness and pressure
relief for the patient.
NOTE: The pressure can be adjusted with a range
from 1 to 8, with 1 being the lowest pressure settting.
NOTE: The pump will cycle every five(5) minutes
inflating and deflating the two air chambers.
1. Put patient on the pad.
2. Set the pressure to desired setting.
3. Slide the flat portion of your hand between the
pad and the matress of the bed.
NOTE: There should be a cushion of air between the pad
and the mattress of the bed. If not, check pump and pad
for leaks, tears, kinks, or breaks. If damage is found, DO
NOT use. Contact Carrier/Dealer for further instructions.
4. If pressure is unacceptable for patient, repeat
STEP 2 until desired pressure is reached.
Pump
Power
Switch
Knob
Using
1. Plug power cord into outlet.
2. Turn power switch to the ON position.
NOTE: The green light will be illuminated when the
pump is in the ON position.
FIGURE 3- USING/ADJUSTING THE PUMP
CARE AND MAINTENANCE
1. The pad can be cleaned by wiping it with a
germicidal disinfectant solution.
2
 Loading...