


BUILT-IN MICROWAVE OVEN
Use and Care Guide
For questions about features, operation/performance, parts, accessories or service, call: 1-866-664-2449.
In Canada, for assistance, installation or service, call: 1-866-664-2449.
FOUR À MICRO-ONDES ENCASTRÉ
Guide d’utilisation et d’entretien
Au Canada, pour assistance, installation ou service composez le 1-866-664-2449.
Table of Contents/Table des matières ......................................... |
2 |
Model/Modèle IBMS1456
W10309354A

TABLE OF CONTENTS |
|
BUILT-IN MICROWAVE OVEN SAFETY....................................... |
3 |
Electrical Requirements ............................................................... |
4 |
PARTS AND FEATURES................................................................ |
5 |
Turntable ...................................................................................... |
5 |
MICROWAVE OVEN CONTROL.................................................... |
5 |
Display.......................................................................................... |
5 |
Start .............................................................................................. |
5 |
Stop .............................................................................................. |
6 |
Add 30 Seconds........................................................................... |
6 |
Selector Dial ................................................................................. |
6 |
Settings Dial ................................................................................. |
6 |
Clock ............................................................................................ |
6 |
Tones............................................................................................ |
6 |
Control Lock................................................................................. |
6 |
Cooling Fan .................................................................................. |
6 |
MICROWAVE OVEN USE .............................................................. |
7 |
Food Characteristics.................................................................... |
7 |
Cooking Guidelines...................................................................... |
7 |
Cookware and Dinnerware .......................................................... |
8 |
Aluminum Foil and Metal ............................................................. |
8 |
Microwave Cooking Power.......................................................... |
8 |
Manual Cooking ........................................................................... |
9 |
Doneness ..................................................................................... |
9 |
Cook ............................................................................................. |
9 |
Reheat ........................................................................................ |
10 |
Defrost........................................................................................ |
10 |
Popcorn, Baked Potatoes and Dinner Plate.............................. |
11 |
MICROWAVE OVEN CARE.......................................................... |
12 |
General Cleaning........................................................................ |
12 |
TROUBLESHOOTING .................................................................. |
13 |
ASSISTANCE OR SERVICE......................................................... |
14 |
In the U.S.A. ............................................................................... |
14 |
In Canada ................................................................................... |
14 |
Replacement Parts..................................................................... |
14 |
WARRANTY .................................................................................. |
15 |
TABLE DES MATIÈRES |
|
SÉCURITÉ DU FOUR À MICRO-ONDES ENCASTRÉ............... |
17 |
Spécifications électriques .......................................................... |
19 |
PIÈCES ET CARACTÉRISTIQUES .............................................. |
20 |
Plateau rotatif ............................................................................. |
20 |
TABLEAU DE COMMANDE DU FOUR À MICRO-ONDES ....... |
20 |
Affichage..................................................................................... |
21 |
Start (mise en marche) ............................................................... |
21 |
Stop (arrêt).................................................................................. |
21 |
Add 30 Seconds (ajouter 30 secondes)..................................... |
21 |
Bouton Selector (sélecteur)........................................................ |
21 |
Bouton Settings (réglages)......................................................... |
21 |
Horloge ....................................................................................... |
21 |
Signaux sonores......................................................................... |
21 |
Verrouillage des commandes..................................................... |
21 |
Ventilateur de refroidissement ................................................... |
21 |
UTILISATION DU FOUR À MICRO-ONDES ............................... |
22 |
Caractéristiques des aliments.................................................... |
22 |
Guide de cuisson........................................................................ |
22 |
Ustensiles de cuisson et vaisselle.............................................. |
23 |
Papier d’aluminium et métal....................................................... |
23 |
Puissance de cuisson des micro-ondes.................................... |
23 |
Cuisson manuelle ....................................................................... |
24 |
Degré de cuisson ....................................................................... |
24 |
Cuisson....................................................................................... |
24 |
Réchauffage ............................................................................... |
25 |
Décongélation ............................................................................ |
26 |
Maïs éclaté, pommes de terre au four et assiettée ................... |
27 |
ENTRETIEN DU FOUR À MICRO-ONDES ................................. |
28 |
Nettoyage général ...................................................................... |
28 |
DÉPANNAGE................................................................................. |
29 |
ASSISTANCE OU SERVICE......................................................... |
30 |
Au Canada.................................................................................. |
30 |
Pièces de rechange.................................................................... |
30 |
GARANTIE..................................................................................... |
31 |
2
BUILT-IN MICROWAVE OVEN SAFETY
Your safety and the safety of others are very important.
We have provided many important safety messages in this manual and on your appliance. Always read and obey all safety messages.
This is the safety alert symbol.
This symbol alerts you to potential hazards that can kill or hurt you and others.
All safety messages will follow the safety alert symbol and either the word “DANGER” or “WARNING.” These words mean:
 DANGER
 WARNING
You can be killed or seriously injured if you don't immediately follow instructions.
You can be killed or seriously injured if you don't follow instructions.
All safety messages will tell you what the potential hazard is, tell you how to reduce the chance of injury, and tell you what can happen if the instructions are not followed.
IMPORTANT SAFETY INSTRUCTIONS
When using electrical appliances basic safety precautions should be followed, including the following:
WARNING: To reduce the risk of burns, electric shock, fire, injury to persons, or exposure to excessive microwave energy:
■Read all instructions before using the microwave oven.
■Read and follow the specific “PRECAUTIONS TO AVOID POSSIBLE EXPOSURE TO EXCESSIVE MICROWAVE ENERGY” found in this section.
■The microwave oven must be grounded. Connect only to properly grounded outlet. See “GROUNDING INSTRUCTIONS” found in this section and in the provided Installation Instructions.
■Install or locate the microwave oven only in accordance with the provided Installation Instructions.
■Some products such as whole eggs in the shell and sealed containers – for example, closed glass jars – are able to explode and should not be heated in the microwave oven.
■Use the microwave oven only for its intended use as described in this manual. Do not use corrosive chemicals or vapors in the microwave oven. This type of oven is specifically designed to heat, cook, or dry food. It is not designed for industrial or laboratory use.
■As with any appliance, close supervision is necessary when used by children.
■Do not operate the microwave oven if it has a damaged cord or plug, if it is not working properly, or if it has been damaged or dropped.
■The microwave oven should be serviced only by qualified service personnel. Call an authorized service company for examination, repair, or adjustment.
■See door surface cleaning instructions in the “Microwave Oven Care” section.
■To reduce the risk of fire in the oven cavity:
–Do not overcook food. Carefully attend the microwave oven when paper, plastic, or other combustible materials are placed inside the oven to facilitate cooking.
–Remove wire twist-ties from paper or plastic bags before placing bags in oven.
–If materials inside the oven ignite, keep oven door closed, turn oven off, and disconnect the power cord, or shut off power at the fuse or circuit breaker panel.
–Do not use the cavity for storage purposes. Do not leave paper products, cooking utensils, or food in the cavity when not in use.
■Liquids, such as water, coffee, or tea are able to be overheated beyond the boiling point without appearing to be boiling. Visible bubbling or boiling when the container is removed from the microwave oven is not always present. THIS COULD RESULT IN VERY HOT LIQUIDS SUDDENLY BOILING OVER WHEN THE CONTAINER IS DISTURBED OR A SPOON OR OTHER UTENSIL IS INSERTED INTO THE LIQUID.
To reduce the risk of injury to persons:
–Do not overheat the liquid.
–Stir the liquid both before and halfway through heating it.
–Do not use straight-sided containers with narrow necks.
–After heating, allow the container to stand in the microwave oven for a short time before removing the container.
–Use extreme care when inserting a spoon or other utensil into the container.
■Oversized foods or oversized metal utensils should not be inserted in the microwave oven as they may create a fire or risk of electric shock.
■Do not clean with metal scouring pads. Pieces can burn off the pad and touch electrical parts involving a risk of electric shock.
SAVE THESE INSTRUCTIONS
3
IMPORTANT SAFETY INSTRUCTIONS
■Do not use paper products when appliance is operated in convection, combination, grill or “PAN BROWN” mode (on models with such features).
■Do not store any materials, other than manufacturer’s recommended accessories, in this oven when not in use.
■Do not store anything directly on top of the microwave oven when the microwave oven is in operation.
■Do not cover or block any openings on the microwave oven.
■Do not store this microwave oven outdoors. Do not use the microwave oven near water - for example, near a kitchen sink, in a wet basement, or near a swimming pool, or similar locations.
■Do not immerse cord or plug in water.
■Keep cord away from heated surfaces.
■Do not let cord hang over edge of table or counter.
■Do not mount over a sink.
■Do not cover racks or any other part of the oven with metal foil. This will cause overheating of the oven.
SAVE THESE INSTRUCTIONS
PRECAUTIONS TO AVOID POSSIBLE EXPOSURE TO EXCESSIVE MICROWAVE ENERGY
(a)Do not attempt to operate this oven with the door open since open-door operation can result in harmful exposure to microwave energy. It is important not to defeat or tamper with the safety interlocks.
(b)Do not place any object between the oven front face and the door or allow soil or cleaner residue to accumulate on sealing surfaces.
(c)Do not operate the oven if it is damaged. It is particularly important that the oven door close properly and that there is no damage to the:
(1)Door (bent),
(2)Hinges and latches (broken or loosened),
(3)Door seals and sealing surfaces.
(d)The oven should not be adjusted or repaired by anyone except properly qualified service personnel.
Electrical Requirements
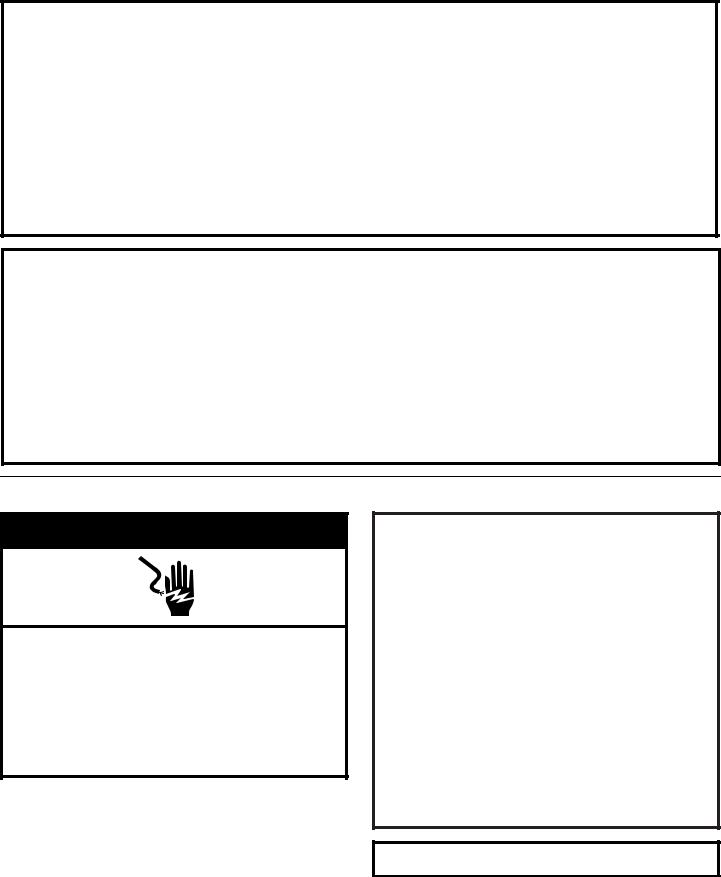
 WARNING
Electrical Shock Hazard
Plug into a grounded 3 prong outlet.
Do not remove ground prong.
Do not use an adapter.
Do not use an extension cord.
Failure to follow these instructions can result in death, fire, or electrical shock.
Observe all governing codes and ordinances.
Required:
■A 120 Volt, 60 Hz, AC only, 15or 20-amp electrical supply with a fuse or circuit breaker.
Recommended:
■A time-delay fuse or time-delay circuit breaker.
■A separate circuit serving only this microwave oven.
GROUNDING INSTRUCTIONS
■For all cord connected appliances:
The microwave oven must be grounded. In the event of an electrical short circuit, grounding reduces the risk of electric shock by providing an escape wire for the electric current. The microwave oven is equipped with a cord having a grounding wire with a grounding plug. The plug must be plugged into an outlet that is properly installed and grounded.
WARNING: Improper use of the grounding plug can result in a risk of electric shock. Consult a qualified electrician or serviceman if the grounding instructions are not completely understood, or if doubt exists as to whether the microwave oven is properly grounded.
Do not use an extension cord. If the power supply cord is too short, have a qualified electrician or serviceman install an outlet near the microwave oven.
SAVETHESE INSTRUCTIONS
This device complies with Part 18 of the FCC Rules.
4

PARTS AND FEATURES
This manual may cover several different models. The model you have purchased may have some or all of the features shown here. The appearance of your particular model may differ slightly from the illustrations in this manual.
A B C
L 
 D
D
K
E
F
J
I |
H |
G |
A. Trim |
|
G. Door handle |
B. Control panel |
|
H. Window |
C. Door lock system |
|
I. Cooking guide label |
D. Microwave oven light |
|
J. Model and serial number plate |
(inaccessible–in ceiling) |
|
K. Frame |
E. Glass turntable |
|
L. Microwave inlet cover |
F. Turntable support, rollers and hub
Turntable
A 

B 

C
A.Turntable
B.Support
C.Hub
The turntable can rotate in either direction to help cook food more evenly. For best cooking results, do not operate the microwave oven without having the turntable in place. See “Assistance or Service” to reorder any of the parts.
To Install: Place the turntable on the support. Fit the raised, curved lines in the center of the turntable bottom between the three spokes of the hub. The rollers on the support should fit inside the turntable bottom ridge.
MICROWAVE OVEN CONTROL
CUPS OZ LBS PIECES SERVINGS
|
SELECTOR |
|
SETTINGS |
|
|
|
OFF |
|
|
|
SET |
|
|
|
STOP |
CLOCK |
MANUAL FOOD |
POWER |
START |
|
|
CLASS |
|
|
|
POPCORN |
DEFROST |
|
|
|
BAKED |
REHEAT |
|
|
POTATOES |
|
|
||
|
|
ADD 30 SECONDS |
||
|
|
|
|
|
CONTROL |
DINNER |
COOK |
|
|
LOCK |
PLATE |
|
|
|
|
|
|
|
|
Display Start
When power is first supplied to the microwave oven, a “:” will appear in the display.
When the microwave oven is in use, the display shows cooking power, quantities, weights and/or prompts. When the microwave oven is not in use, the display shows the time of day.
The START button begins any function. If cooking is interrupted, touching START will resume the preset cycle.
NOTE: To avoid unintentional operation of the microwave oven, a cooking function cannot be started if the microwave oven door has been closed for about 5 minutes or more. “DOOR” will appear in the display until the door is opened and closed.
5

Stop
The STOP button clears any incorrect command and cancels most functions except for the Control Lock. It will not erase the time of day unless the display is in Set Clock mode. See “Clock” section.
The microwave oven will also turn off when the door is opened. Close the door and touch START to resume the cycle.
Add 30 Seconds
With the SELECTOR dial turned to MANUAL, the ADD 30 SECONDS control automatically starts the microwave oven at 100% power for 30 seconds. Each additional touch of the control will add 30 seconds of cook time.
Cook time may be added to a manual cooking cycle at the current power level by touching ADD 30 SECONDS.
NOTE: To avoid unintentional operation of the microwave oven, a cooking function cannot be started if the microwave oven door has been closed for about 5 minutes or more. “DOOR” will appear in the display until the door is opened and closed.
Selector Dial
Use the SELECTOR dial to enter programming modes, or standby mode.
Tones
Tones are audible signals that cannot be turned off, and their volume cannot be changed. These tones indicate the following:
One tone
■Reminder, repeat each minute after the end-of-cycle tones
Two tones
■Hidden feature has been entered or exited
Three tones
■End of cycle
■Invalid entry
Control Lock
The Control Lock shuts down the panel controls to avoid unintended use of the microwave oven.
When the control panel is locked, none of the controls will function. If a control is pressed, “LOC” will appear in the display and invalid entry tones will sound.
To Lock/Unlock Control: Before locking, make sure the microwave oven is off. Press and hold STOP for 3 seconds until the tone sounds. Repeat to unlock the controls.
Settings Dial
Use the SETTINGS dial to select options, set the clock, set cook time and cook power, select food type and amount/weight, and adjust doneness.
Clock
This is a standard 12-hour clock (12:00-11:59).
To Set:
1.Turn SELECTOR dial to SET CLOCK.
2.Turn SETTINGS dial to set the hour.
3.Press START.
The “minutes” digits will flash in the display.
4.Turn SETTINGS dial to set the minutes.
5.Press START to complete the setting.
6.Return SELECTOR dial to OFF position.
To Cancel Clock:
1.Turn SELECTOR dial to SET CLOCK.
The clock-setting display will show, with the hour digits flashing.
2.Press STOP.
The clock will disappear.
3.Return SELECTOR dial to OFF.
Cooling Fan
Depending on the length of the cooking cycle, the cooling fan may continue to run after that cycle has ended. This is normal, and helps eliminate moisture that may accumulate inside the microwave oven before the door is opened.
While the fan is running, “COOL” will appear in the display. The fan will turn off automatically. New cooking functions may be started while “COOL” is still displayed.
6

MICROWAVE OVEN USE
A magnetron in the microwave oven produces microwaves which reflect off the metal floor, walls and ceiling and pass through the turntable and appropriate cookware to the food. Microwaves are attracted to and absorbed by fat, sugar and water molecules in the food, causing them to move, producing friction and heat which cooks the food.
■To avoid damage to the microwave oven, do not lean on or allow children to swing on the microwave oven door.
■To avoid damage to the microwave oven, do not operate microwave oven when it is empty.
■Baby bottles and baby food jars should not be heated in microwave oven.
■Clothes, flowers, fruit, herbs, wood, gourds, paper, including brown paper bags and newspaper, should not be dried in microwave oven.
■Paraffin wax will not melt in the microwave oven because it does not absorb microwaves.
■Use oven mitts or pot holders when removing containers from microwave oven.
■Do not overcook potatoes. At the end of the recommended cook time, potatoes should be slightly firm. Let potatoes stand for 5 minutes. They will finish cooking while standing.
■Do not cook or reheat whole eggs inside the shell. Steam buildup in whole eggs may cause them to burst, requiring significant cleanup of microwave oven cavity. Cover poached eggs and allow a standing time.
Food Characteristics
When microwave cooking, the amount, size and shape, starting temperature, composition and density of the food affect cooking results.
Amount of Food
The more food heated at once, the longer the cook time needed. Check for doneness and add small increments of time if necessary.
Size and Shape
Smaller pieces of food will cook more quickly than larger pieces, and uniformly shaped foods cook more evenly than irregularly shaped food.
Starting Temperature
Room temperature foods will heat faster than refrigerated foods, and refrigerated foods will heat faster than frozen foods.
Composition and Density
Foods high in fat and sugar will reach a higher temperature, and will heat faster than other foods. Heavy, dense foods, such as meat and potatoes, require a longer cook time than the same size of a light, porous food, such as cake.
Cooking Guidelines
Covering
Covering food helps retain moisture, shorten cook time and reduce spattering. Use the lid supplied with cookware. If a lid is not available, wax paper, paper towels or plastic wrap approved for microwave ovens may be used. Plastic wrap should be turned back at one corner to provide an opening to vent steam. Condensation on the door and cavity surfaces is normal during heavy cooking.
Stirring and Turning
Stirring and turning redistribute heat evenly to avoid overcooking the outer edges of food. Stir from outside to center. If possible, turn food over from bottom to top.
Arranging
If heating irregularly shaped or different sized foods, arrange the thinner parts and smaller sized items toward the center. If cooking several items of the same size and shape, place them in a ring pattern, leaving the center of the ring empty.
Piercing
Before heating, use a fork or small knife to pierce or prick foods that have a skin or membrane, such as potatoes, egg yolks, chicken livers, hot dogs, and sausage. Prick in several places to allow steam to vent.
Shielding
Use small, flat pieces of aluminum foil to shield the thin pieces of irregularly shaped foods, bones and foods such as chicken wings, leg tips and fish tail. See “Aluminum Foil and Metal” first.
Standing Time
Food will continue to cook by the natural conduction of heat even after the microwave cooking cycle ends. The length of standing time depends on the volume and density of the food.
7

Cookware and Dinnerware
Cookware and dinnerware must fit on the turntable. Always use oven mitts or pot holders when handling because any dish may become hot from heat transferred from the food. Do not use cookware and dinnerware with gold or silver trim. Use the following chart as a guide, then test before using.
MATERIAL |
RECOMMENDATIONS |
Aluminum Foil, |
See “Aluminum Foil and Metal” section. |
Metal |
|
|
|
Browning Dish |
Bottom must be at least 3/16" (5 mm) |
|
above the turntable. Follow manufacturer’s |
|
recommendations. |
|
|
Ceramic Glass, |
Acceptable for use. |
Glass |
|
|
|
China, |
Follow manufacturer’s recommendations. |
Earthenware |
|
|
|
Melamine |
Follow manufacturer’s recommendations. |
|
|
Paper: Towels, |
Use nonrecycled and those approved by |
Dinnerware, |
the manufacturer for microwave oven use. |
Napkins |
|
|
|
Plastic: Wraps, |
Use those approved by the manufacturer |
Bags, Covers, |
for microwave oven use. |
Dinnerware, |
|
Containers |
|
|
|
Pottery and Clay |
Follow manufacturer’s recommendations. |
|
|
Silicone |
Follow manufacturer’s recommendations. |
Bakeware |
|
|
|
Straw, Wicker, |
Do not use in microwave oven. |
Wooden |
|
Containers |
|
|
|
Wax Paper |
Acceptable for use. |
|
|
To Test Cookware or Dinnerware for Microwave Use:
1.Place cookware or dinnerware in microwave oven with 1 cup (250 mL) of water beside it.
2.Cook at 100% cooking power for 1 minute.
Do not use cookware or dinnerware if it becomes hot and the water stays cool.
Aluminum Foil and Metal
Always use oven mitts or pot holders when removing dishes from the microwave oven.
Aluminum foil and some metal can be used in the microwave oven. If not used properly, arcing (a blue flash of light) can occur and cause damage to the microwave oven.
OK for Use
Racks and bakeware supplied with the microwave oven (on some models), aluminum foil for shielding, and approved meat thermometers may be used with the following guidelines:
■To avoid damage to the microwave oven, do not allow aluminum foil or metal to touch the inside cavity walls, ceiling or floor.
■Always use the turntable.
■To avoid damage to the microwave oven, do not allow contact with another metal object during microwave cooking.
Do Not Use
Metal cookware and bakeware, gold, silver, pewter, nonapproved meat thermometers, skewers, twist ties, foil liners such as sandwich wrappers, staples and objects with gold or silver trim or a metallic glaze should not be used in the microwave oven.
Microwave Cooking Power
Many recipes for microwave cooking specify which cooking power to use by percent or name. For example, 70%=Medium-High.
Use the following chart as a general guide for the suggested cooking power of specific foods.
PERCENT/NAME |
USE |
100%, High |
Quick heating convenience foods and |
(default setting) |
foods with high water content, such as |
|
soups, beverages and most vegetables. |
|
|
90% |
Cooking small, tender pieces of meat, |
|
ground meat, poultry pieces and fish fillets. |
|
Heating cream soups. |
|
|
80% |
Heating rice, pasta or stirrable casseroles. |
|
Cooking and heating foods that need a |
|
cook power lower than high. For example, |
|
whole fish and meat loaf. |
|
|
70%, |
Reheating a single serving of food. |
Medium-High |
|
|
|
60% |
Cooking sensitive foods such as cheese |
|
and egg dishes, pudding and custards. |
|
Cooking non-stirrable casseroles, such as |
|
lasagna. |
|
|
50%, Medium |
Cooking ham, whole poultry and pot |
|
roasts. |
|
Simmering stews. |
|
|
40% |
Melting chocolate. |
|
Heating bread, rolls and pastries. |
|
|
30%, Medium- |
Defrosting bread, fish, meats, poultry and |
Low, Defrost |
precooked foods. |
|
|
20% |
Softening butter, cheese, and ice cream. |
|
|
10%, Low |
Taking chill out of fruit. |
|
|
8

Manual Cooking
Cook time may be set in the following increments, in minutes and seconds:
INCREMENT TIME SETTING
0:05 0:05-1:00
0:15 1:15-3:00
0:30 3:30-6:00
1:00 7:00-30:00
5:00 35:00-90:00
To Use:
1.Place food on the turntable, and close the door.
2.Turn SELECTOR dial to MANUAL.
Turn SETTINGS dial to set cook time. See chart for time increments.
If cooking at 100% power, skip Step 3.
3.Press POWER button.
The display will show the default power of 100%. Turn SETTINGS dial to select cook power
4.Press START.
The display will count down the cook time.
When the cycle ends, “END” will appear in the display, and the end-of-cycle tones will sound, followed by reminder tones.
5.Press STOP to clear the display and/or stop reminder tones.
6.Return SELECTOR dial to OFF.
Doneness
For most automatic cooking functions, the doneness of a particular food item can be adjusted by turning the SETTINGS dial. Increasing or decreasing the doneness adds time to, or subtracts time from the cooking cycle.
For up to 20 seconds after cooking has started, turning the SETTINGS dial will change the doneness value. There are 5 settings: default, “Hi 1,” “Hi 2,” “L 1” and “L 2.” The display shows “----” for the default setting.
Doneness cannot be adjusted for Defrost functions or for the Popcorn function.
Doneness cannot be decreased for Boneless Chicken Breasts function.
Cook
Times and cooking power have been preset for certain microwavable foods. Use the following chart as a guide.
FOOD |
NO. |
QUANTITY/INSTRUCTIONS |
Canned |
1 |
1-4 cups (250 mL-1 L)/ |
Vegetables |
|
Place in microwave-safe container. |
|
|
Cover with plastic wrap and vent. Stir |
|
|
and let stand 2-3 minutes after cooking. |
|
|
|
Cereal |
2 |
1-4 servings/ |
|
|
Use instant cereal. Follow instructions on |
|
|
package. Use microwave-safe bowls |
|
|
with high sides. |
|
|
|
Boneless |
3 |
1-4 pieces, 6 oz (170 g) each/ |
Chicken |
|
Place in microwave-safe dish. Add 2 tbs |
Breasts |
|
(30 mL) water. Cover with plastic wrap |
|
|
and vent. Let stand in microwave oven |
|
|
for 3 minutes after cooking. |
|
|
|
Fresh |
4 |
1-4 cups (250 mL-1 L)/ |
Vegetables |
|
Place in microwave-safe container. Add |
|
|
2-4 tbs (30-60 mL) water. Cover with |
|
|
plastic wrap and vent. Stir and let stand |
|
|
2-3 minutes after cooking. |
|
|
|
Frozen |
5 |
10 or 20 oz (283 or 567 g)/ |
Entrée |
|
Remove from package. Loosen cover on |
|
|
three sides. If entree is not in microwave- |
|
|
safe container, place on plate, cover with |
|
|
plastic wrap and vent. |
|
|
|
Frozen |
6 |
1-4 cups (250 mL-1 L)/ |
Vegetables |
|
Remove from package. Place in |
|
|
microwave-safe container. Cover with |
|
|
plastic wrap and vent. Stir and let stand |
|
|
2-3 minutes after cooking. |
|
|
|
Rice |
7 |
0.5-2 cups (125-500 mL) dry rice (Use |
|
|
medium or long grain rice.)/ |
|
|
Follow measurements on package for |
|
|
ingredient amounts. Place rice and liquid |
in microwave-safe dish. Cover with loose-fitting lid. Let stand 5 minutes after cooking, or until liquid is absorbed. Stir.
To Use Cook:
1.Place food on the turntable.
2.Turn SELECTOR dial to COOK.
3.Press FOOD CLASS control.
The display will show “Fc1” for the first food type.
Press FOOD CLASS repeatedly until the desired food class is displayed. See chart.
4.Turn SETTINGS dial to the desired amount or weight.
5.Press START.
Doneness may be adjusted within 20 seconds after touching START by turning the SETTINGS dial.
The display will count down the cook time.
When the cycle ends, “END” will appear in the display, and the end-of-cycle tones will sound, followed by reminder tones.
6.Press OFF or open the door to clear the display and/or stop reminder tones.
7.Return SELECTOR dial to OFF.
9

Reheat
Times and cooking power have been preset for reheating specific food types. Use the following chart as a guide.
FOOD |
NO. |
QUANTITY/INSTRUCTIONS |
Baked Goods |
1 |
1-6 pieces, 2 oz (57 g) each*/ |
|
|
Place on paper towel. |
|
|
|
Beverage |
2 |
1 or 2 cups, 8 oz (250 mL) each/ |
|
|
Do not cover. The diameter of the cup’s |
|
|
opening will affect how the liquid heats. |
|
|
Beverages in cups with smaller |
|
|
openings may heat faster. |
|
|
|
Casserole |
3 |
1-4 cups (250 mL-1 L)/ |
(refrigerated) |
|
Place in microwave-safe container and |
|
|
cover with plastic wrap. Stir and let |
|
|
stand 2-3 minutes after reheating. |
|
|
|
Pizza |
4 |
1-3 pieces, 3 oz (85 g) each/ |
(refrigerated) |
|
Place on paper towel or paper plate. |
|
|
|
Sauce |
5 |
1-4 cups (250 mL-1 L)/ |
|
|
Place in microwave-safe container. |
|
|
Cover with plastic wrap and vent. Stir |
|
|
and let stand 2-3 minutes after |
|
|
reheating. |
|
|
|
Soup |
6 |
1-4 cups (250 mL-1 L)/ |
|
|
Place in microwave-safe container. |
Cover with plastic wrap and vent. Stir and let stand 2-3 minutes after reheating.
*For smaller rolls, 2 rolls may be counted as 1 piece.
To Use Reheat:
1.Place food on the turntable.
2.Turn SELECTOR dial to REHEAT.
3.Press FOOD CLASS control.
The display will show “Fc1” for the first food type.
Press FOOD CLASS repeatedly until the desired food class is displayed. See chart.
4.Turn SETTINGS dial to the desired amount or weight.
5.Press START.
Doneness may be adjusted within 20 seconds after touching START by turning the SETTINGS dial.
The display will count down the cook time.
When the cycle ends, “END” will appear in the display, and the end-of-cycle tones will sound, followed by reminder tones.
6.Press OFF or open the door to clear the display and/or stop reminder tones.
7.Return SELECTOR dial to OFF.
To Reheat Manually: Follow instructions in “Manual Cooking” section, and use 70% cooking power. See “Microwave Cooking Power” chart.
Defrost
The automatic defrost function can be used, or the microwave oven can be manually set to defrost.
■Unwrap foods and remove lids (for example, from fruit juice containers) before defrosting.
■Shallow packages will defrost more quickly than deep blocks.
■Separate food pieces as soon as possible during or at the end of cycle for more even defrosting.
■Use small pieces of aluminum foil to shield parts of food such as chicken wings, leg tips and fish tails. See “Aluminum Foil and Metal” first.
The automatic defrost function should not be used for food left outside the freezer for more than 20 minutes and frozen readymade food.
Times and cooking power have been preset for defrosting certain food types. Use the following chart as a guide.
FOOD |
NO. |
QUANTITY/INSTRUCTIONS |
Bread |
1 |
0.1-2.0 lbs (45-900 g)/ |
(dinner rolls, muffins, |
|
Place on paper towel. Do not |
buns, bread slices, |
|
cover. |
bread loaf) |
|
|
|
|
|
Fish/Seafood |
2 |
0.2-4.4 lbs (90 g-2 kg)/ |
(fillets, steaks, whole |
|
Remove wrap and place in |
shellfish) |
|
microwave-safe baking dish. |
|
|
Do not cover. |
|
|
|
Meat |
3 |
0.2-6.6 lbs (90 g-3 kg)/ |
(ground, steaks, roasts, |
|
Remove wrap and place in |
stew, chops, ribs) |
|
microwave-safe baking dish. |
|
|
Do not cover. |
|
|
|
Poultry |
4 |
0.2-6.6 lbs (90 g-3 kg)/ |
(whole chicken, |
|
Remove wrap and place |
chicken pieces, |
|
breast side up in microwave- |
Cornish hens, turkey |
|
safe baking dish. Do not |
breast) |
|
cover. |
|
|
|
To Use the Defrost Control:
1.Place food on the turntable.
2.Turn SELECTOR dial to DEFROST.
3.Press FOOD CLASS control.
The display will show “Fc1” for the first food type.
Press FOOD CLASS repeatedly until the desired food class is displayed. See chart.
4.Turn SETTINGS dial to the desired weight.
5.Press START.
The display will count down the cook time.
When the cycle ends, “END” will appear in the display, and the end-of-cycle tones will sound, followed by reminder tones.
6.Press OFF or open the door to clear the display and/or stop reminder tones.
7.Return SELECTOR dial to OFF.
To Defrost Manually: Follow instructions in “Manual Cooking” section, and use 30% cooking power. See “Microwave Cooking Power” chart.
10
 Loading...