


VE-PG4
Turn ON the power
ABOUT THE SETTING SCREEN
Accessing the setting screen
Use the setting screen as follows.
q Open your web browser, then enter the IP address* of
the RoIP Gateway into the address bar.
http://192.168.0.1/
Enter
About the setting screen
q
w
*The default IP address is “192.168.0.1.”
w Push the [ENTER] key.
• The Login Authentication screen will appear.
e Enter “admin” (fixed username) and “admin” (default
password) in their respective input fields in the Login
Authentication window, and then click [OK].
q Enter
w Click
To prevent unauthorized access
Carefully choose your password, and change it occasionally.
• Choose one that is not easy to guess.
• Use numbers, characters and letters (both lower and upper case).
About web browsers
We recommend using Microsoft Internet Explorer 11 or later with
the VE-PG4. Enable JavaScript® and set to allow Cookies on
your web browser to correctly display the setting screen. If other
browsers are used, the screen may not be correctly displayed.
e
r
q Link to the Icom web site
If your PC is connected to the Internet, click the Icom logo
to open the Icom web site.
w Setting menu
Displays the screen name list on a menu line. When you
click each menu title, a list of items drops down, which you
can use to select the desired setting item.
e Setting screen
Displays the settings and values when you click the screen
name.
r Setting buttons
Save or cancel the setting values.
• Items and buttons may dier, depending on the setting.
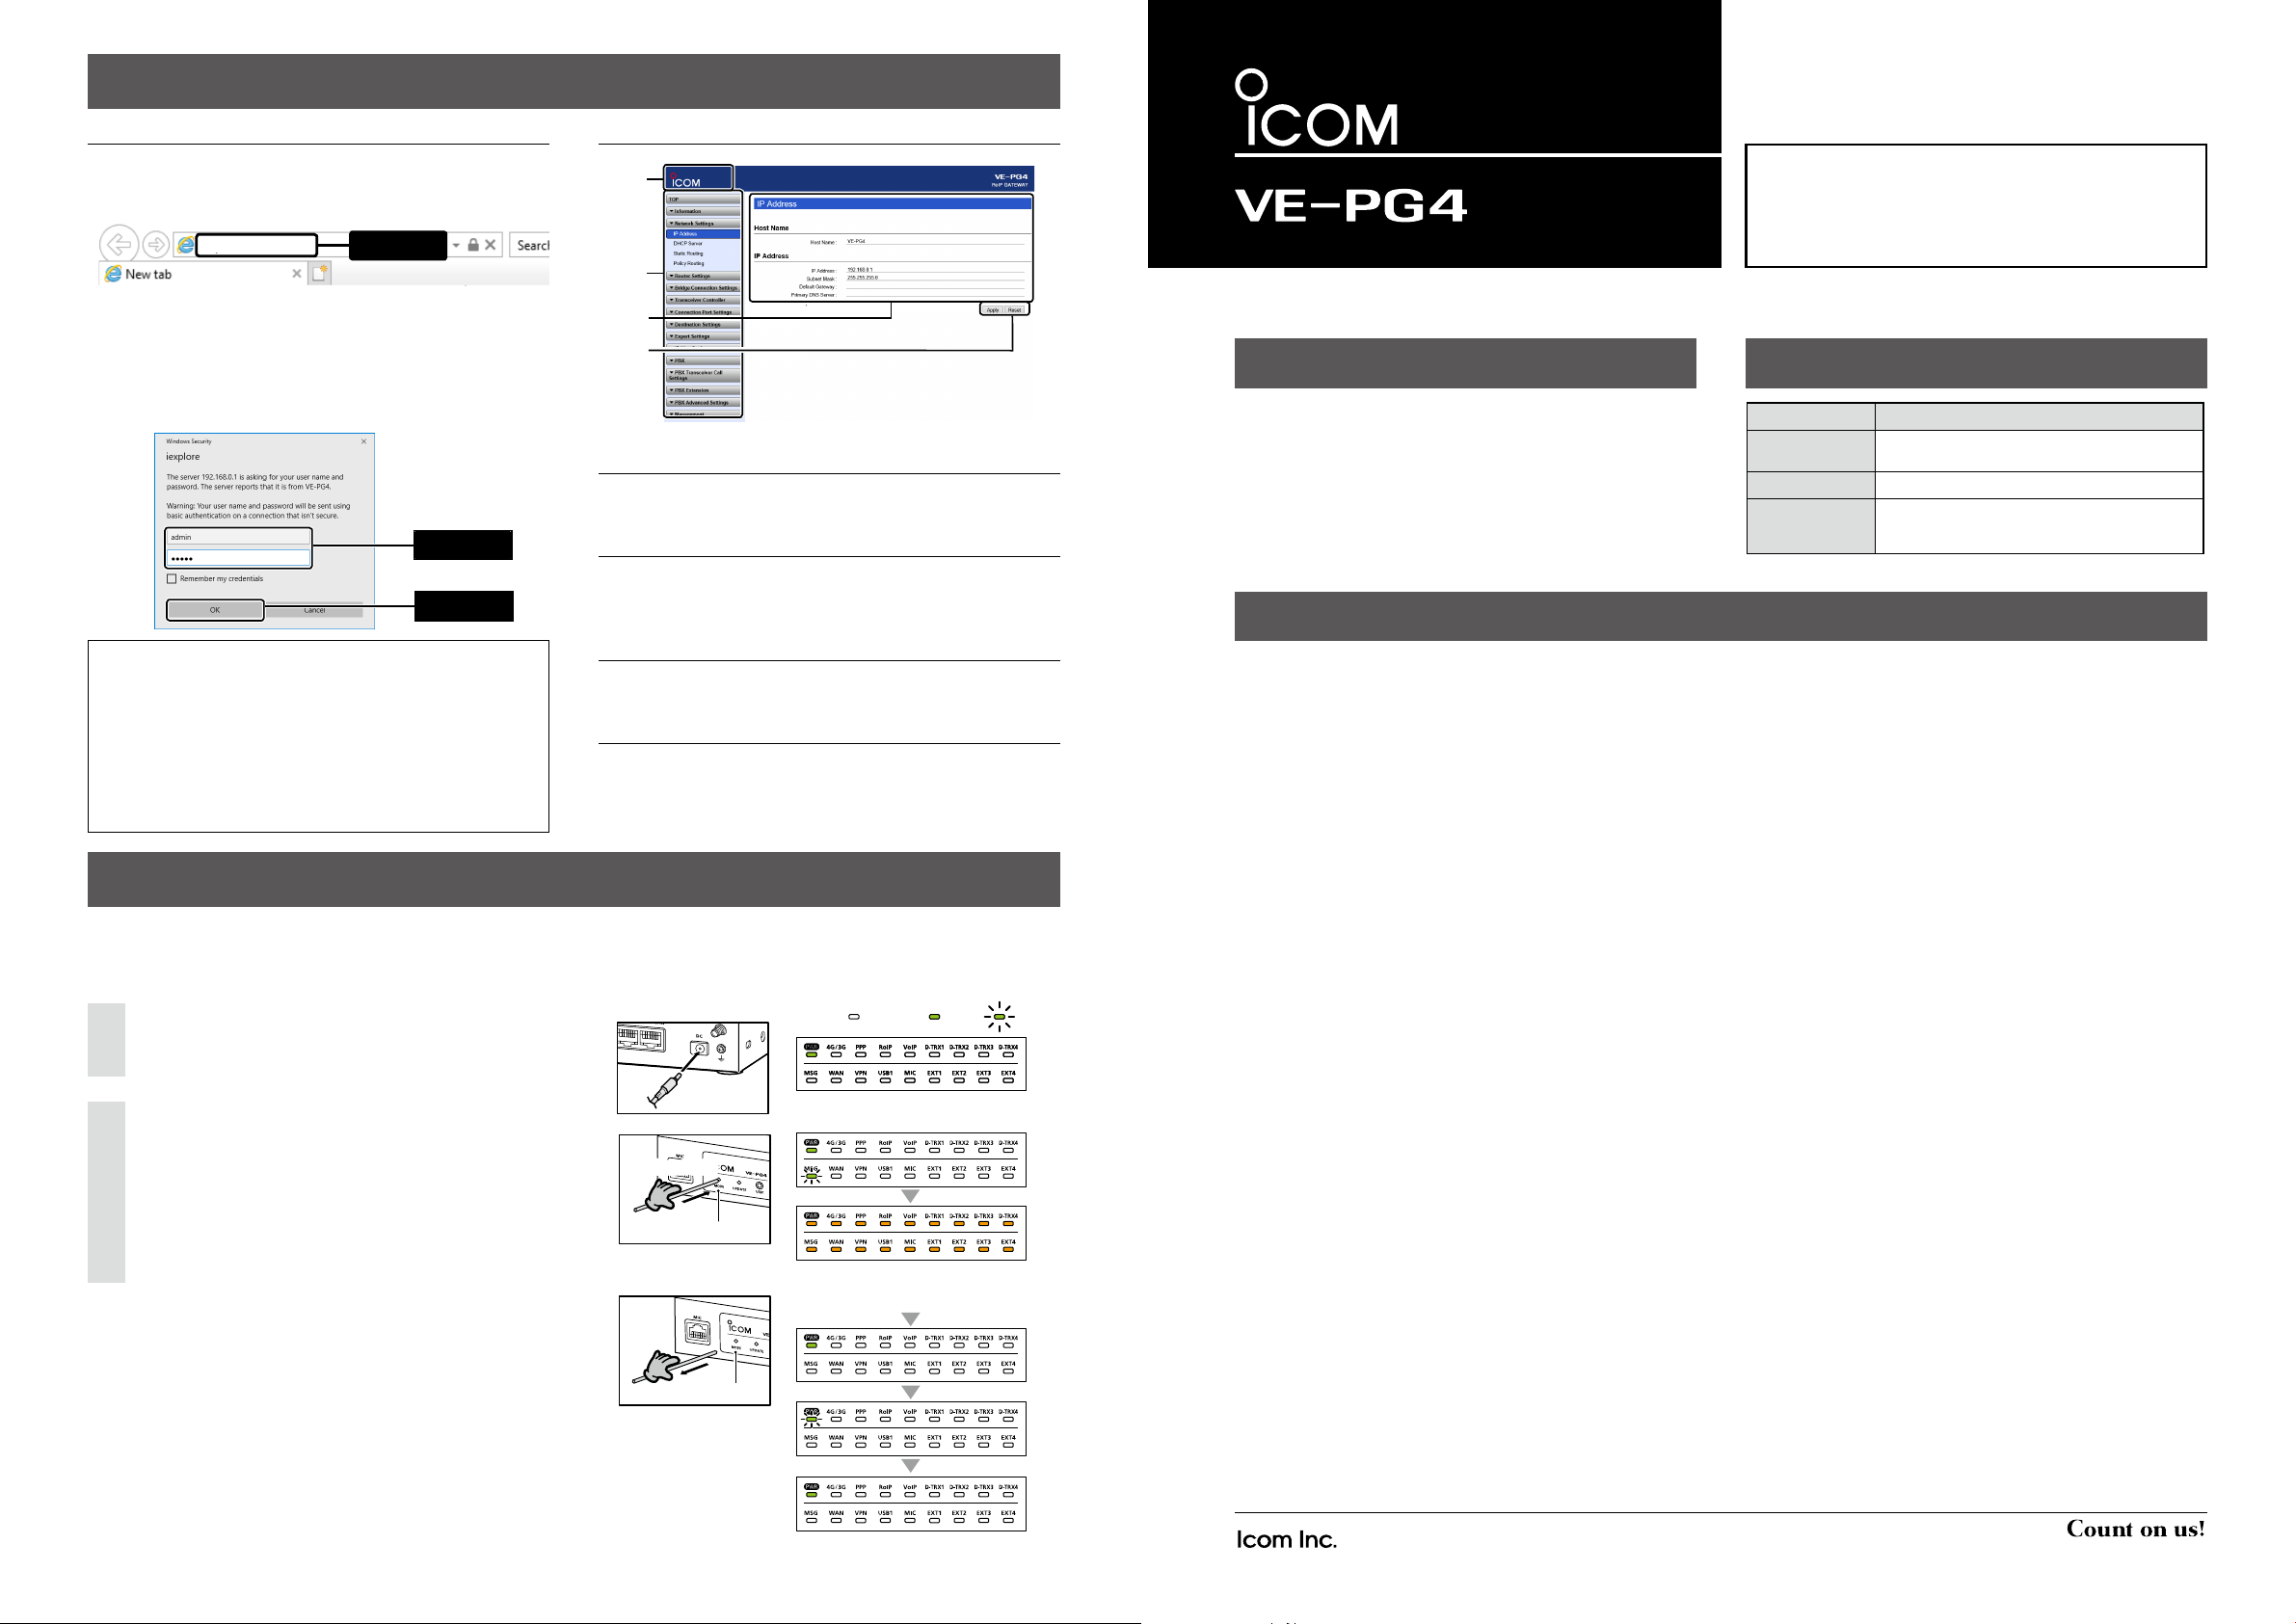
INITIALIZING THE RoIP Gateway
If you cannot access to the RoIP Gateway setting screen, you can initialize the RoIP Gateway.
•
See the RoIP Gateway instruction manual for initializing from the setting screen.
• Initializing clears all the settings.
Disconnect all cables from the RoIP Gateway, and then
1
connect the AC adapter.
• Verify that the [PWR] indicator lights green.
Push in and hold [MODE] on the bottom until all
2
indicators on the front panel light orange.
• When the initialization has been completed,
[PWR] lights green.
• After the initializing, reset the RoIP Gateway’s IP
address, operating mode, and so on.
[Operation][Operation]
AC
adapter
Push in and holdPush in and hold
Use a pin
Release
<Status>
[MODE]
[MODE]
[LED indicator]
[LED indicator]
:Black out
All LEDs light (Orange)
All LEDs blink (Red → Green)
:Light :Blink
PRECAUTIONS
RoIP Gateway
IMPORTANT
READ ALL INSTRUCTIONS carefully and completely
before using the RoIP Gateway.
SAVE THESE INSTRUCTIONS — These instructions
contain important safety and operating instructions for the
RoIP Gateway.
PRECAUTIONS
■ For the RoIP Gateway
R WARNING! NEVER use other than the specified AC
adapter. This may result in an electrical shock, cause a fire
or damage the RoIP Gateway.
R WARNING! NEVER use non-specified accessories or
options. This may result in an electrical shock, cause a fire
or damage the RoIP Gateway.
R WARNING! NEVER connect the AC adapter to other
than the [DC] jack on the rear panel. This may result in an
electrical shock, cause a fire or damage the RoIP Gateway.
R WARNING! NEVER disassemble, modify or repair the
RoIP Gateway. This may result in an electrical shock, cause
a fire or damage the RoIP Gateway.
R WARNING! NEVER install the RoIP Gateway in a
wet place or outside. This may result in an electrical shock,
cause a fire or damage the RoIP Gateway.
R WARNING! NEVER operate or touch the RoIP
Gateway with wet hands. This may result in an electrical
shock or damage the RoIP Gateway.
R WARNING! NEVER connect the ground terminal to a
gas or electric pipe. This may result in an electrical shock or
cause a fire.
R WARNING! NEVER use the RoIP Gateway during
a thunder and lightening storm. Using it may result in an
electrical shock, cause a fire or damage the RoIP Gateway.
Always disconnect the AC adapter before any storm.
R WARNING! Immediately disconnect the AC adapter
if the RoIP Gateway emits an abnormal odor, sound or
smoke. Contact your Icom dealer or distributor for advice.
Thank you for choosing this Icom product.
This product is designed and built with Icom’s state of
the art technology and craftsmanship. With proper care,
this product should provide you with years of trouble-free
operation.
EXPLICIT DEFINITIONS
WORD DEFINITION
RWARNING!
CAUTION
NOTE
CAUTION: NEVER put the RoIP Gateway in any unstable
place (such as on a slanted surface or vibrated place). This
may cause injury and/or damage to the RoIP Gateway.
CAUTION:
without air vents. Heat dissipation may be reduced, and
could damage the RoIP Gateway
CAUTION: Always place the RoIP Gateway in a secure
place to avoid inadvertent use by unauthorized persons.
CAUTION: DO NOT use or place the RoIP Gateway in
areas with temperatures below 0ç (+32ƒ) or above +40ç
(+104ƒ).
CAUTION: DO NOT place the RoIP Gateway in direct
sunlight. This could damage the RoIP Gateway.
CAUTION: DO NOT
magnetic fields or in an area with high static electricity.
could damage the RoIP Gateway.
CAUTION:
use the RoIP Gateway fo
CAUTION: DO NOT use harsh solvents such as
benzine or alcohol to clean the RoIP Gateway, as they can
damage the RoIP Gateway’s surfaces. If the RoIP Gateway
becomes dusty or dirty, wipe it clean with a dry, soft cloth.
CAUTION: Use only the specified cable to connect a
transceiver or repeater to the RoIP Gateway. Using another
cable could cause damage to the RoIP Gateway or to the
transceiver or repeater.
Personal injury, re hazard or electric
shock may occur.
Equipment damage may occur.
If disregarded, inconvenience only. No risk
of personal injury, re or electric shock.
NEVER install the RoIP Gateway in
.
use the RoIP Gateway in strong
Disconnect the AC adapter when you will not
r a long period of time.
a place
This
this
*The indication may differ, depending on the setting.
– 4 –
1-1-32 Kamiminami, Hirano-ku, Osaka 547-0003, Japan
Feb. 2019
– 1 –
A7487W-1EX Printed in Japan
© 2019 Icom Inc.
 Loading...