


B681
Table of contents
 Loading...
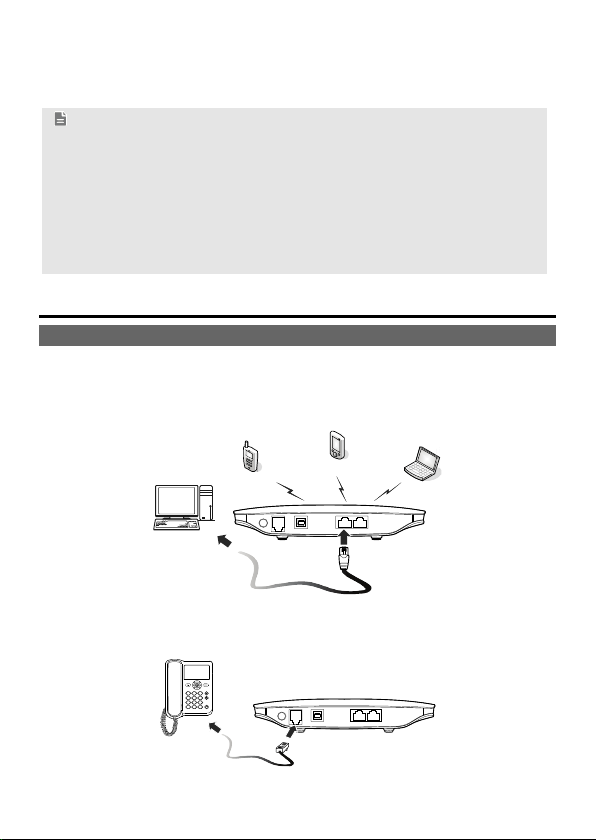
1
B681 Quick Start
Note:
Figures in this guide are only for your reference. For details about the
particular model you have chosen, contact your service provider.
Check the information about the product and its accessories when you
purchase it. Some accessories are not provided in the product package. If
necessary, contact your local dealer to purchase them.
This guide briefly describes the device functions. For details about how to
set the management parameters, see the help information on the web
management page.
1 Getting to Know Your Device
Application Scenarios
Scenario 1:
You can connect your computer to the device to access the Internet. The specific
connection steps depend on your computer's operating system. Follow the
displayed instructions to connect the device to your computer.
Scenario 2:
You can connect a telephone to the device's telephone port to make voice calls.
2
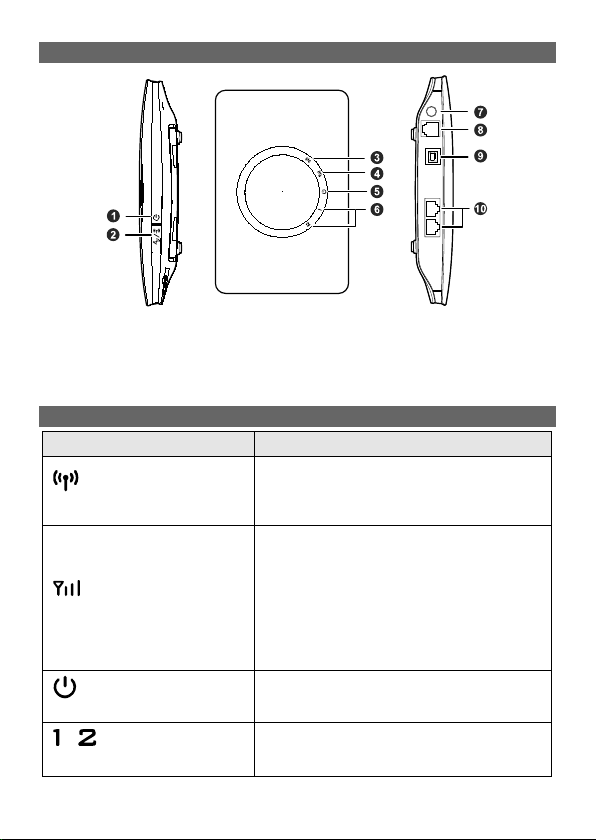
Appearance
1. Power button
2. Wi-Fi/WPS button
3. Wi-Fi/WPS indicator
4. Network status indicator
5. Power indicator
6. LAN indicators
7. External antenna port
8. Telephone port
9. Power port
10. LAN ports
Indicators
Indicator Status
Wi-Fi/WPS indicator
Steady on: Wi-Fi turned on or data transfer
in progress.
Blinking: WPS connection being set up.
Off: Wi-Fi turned off.
Network status indicator
Blinking red fast: Subscriber Identity Module
(SIM) card unavailable (SIM card not
installed or malfunctioning, or PIN code not
verified).
Steady yellow: device registered with the
network.
Steady green: device connected to the
Internet.
Off: no signal received.
Power indicator
Steady on: device powered on.
Off: device powered off.
/
LAN indicators
Steady on: network cable connected.
Blinking: data transfer in progress.
Off: network cable not connected.
3
2 Installation
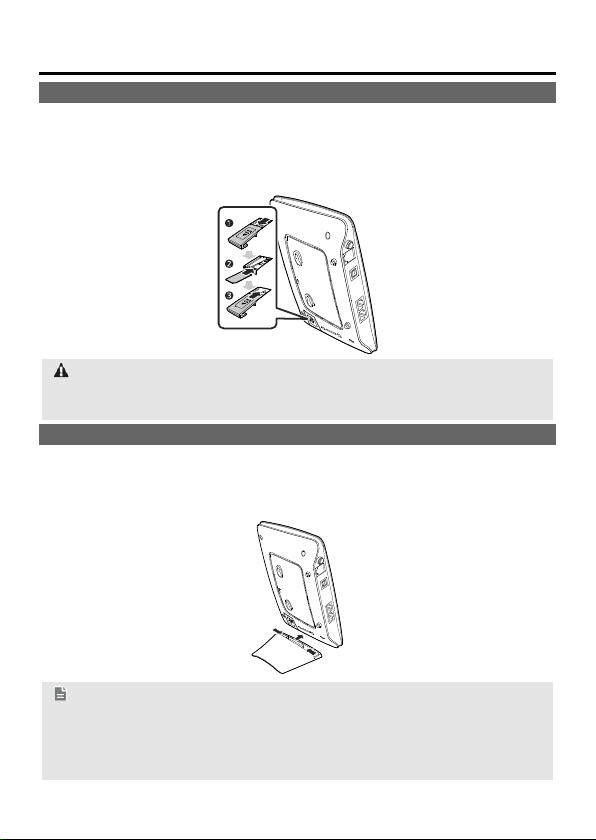
Installing the SIM Card
Step 1 Slide the card cover off.
Step 2 Insert the SIM card into the card slot. Ensure that the gold contact area
faces down and that the beveled edge of the SIM card aligns with that of
the card slot.
Step 3 Slide the card cover back onto the device.
Attention:
Before removing the SIM card, ensure that the device is powered off and
disconnected from the power outlet.
(Optional) Using the Table Stand
You can place the device on a flat surface such as a table or a desk, or hang it on
a wall. You can also use the table stand on the device to place it upright.
To use the table stand, insert its latches into the device's table stand slots, as
shown in the following figure.
Note:
To ensure good signal reception, place the device in a high place or near a
window.
To prevent interference caused by radio signals, place the device at least 1
meter (3.28 feet) away from other electrical devices.
4
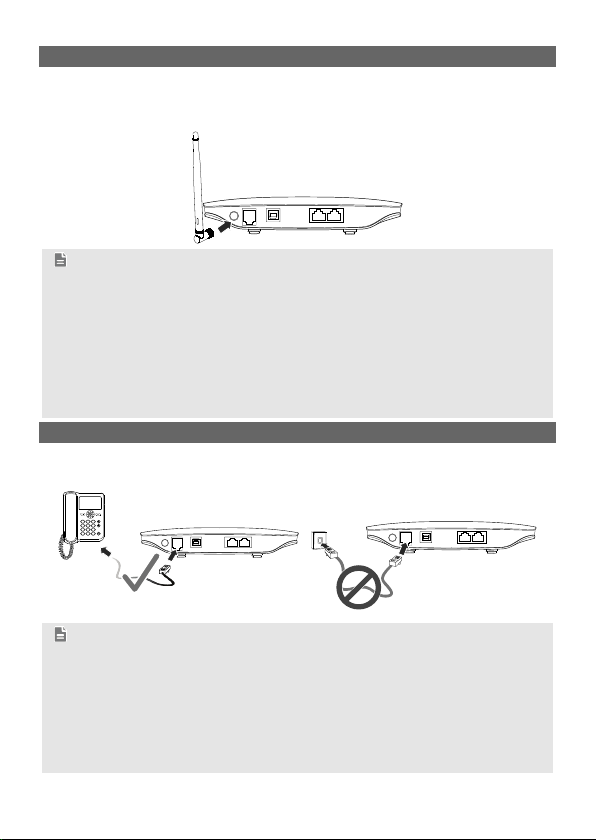
(Optional) Installing an External Antenna
In areas with poor network coverage, connect an external antenna to the device's
external antenna port. Screw the external antenna in fully, as shown in the
following figure.
Note:
Skip this section if you do not need to connect an external antenna to the
device.
Before using an external antenna, log in to the web management page
(http://192.168.1.1) and set antenna mode to external. For details, see the
help information on the web management page.
Only use the external antenna indoors.
You cannot switch between the internal antenna and the external antenna
while using a voice or data service.
(Optional) Connecting to a Telephone
If you want to use the device to make voice calls, connect the device to a
telephone, as shown in the following figure.
Note:
Skip this section if you do not plan to use the device's voice services.
Radio signals can interfere with telephone call connection and quality. To
eliminate the risk of possible interference, place the telephone at least 1
meter (3.28 feet) away from the device.
Do not connect the device to the telephone wall outlet (or any Public
Switched Telephone Network), which will cause excessive heat or even
damage the device.
Loading...