


 Loading...
HP w19 LCD Monitor User's Guide
•Preface
•Safety and Maintenance Guidelines
•Setup
•Using the Monitor
•Drivers and Auto-Adjustment
•Technical Support FAQ
•Specifications
•LCD Monitor Quality and Pixel Policy
•Agency Regulatory Notices
The only warranties for HP products and services are set forth in the express warranty statements accompanying such products and services. Nothing herein should be construed as constituting an additional warranty. HP shall not be liable for technical or editorial errors or omissions contained herein.
HP assumes no responsibility for the use or reliability of its software on equipment that is not furnished by HP.
This document contains proprietary information that is protected by copyright. No part of this document may be photocopied, reproduced, or translated to another language without the prior written consent of HP.
Hewlett-Packard Company
P.O. Box 4010
Cupertino, CA 95015-4010
USA
Copyright © 2006 Hewlett-Packard Development Company, L.P.
Microsoft and Windows are U.S. registered trademarks of Microsoft Corporation.
Adobe and Acrobat are trademarks of Adobe Systems Incorporated.
Bluetooth is a trademark owned by its proprietor and used by Hewlett-Packard Company under license.
HP supports lawful use of technology and does not endorse or encourage the use of its products for purposes other than those permitted by copyright law.
The information in this document is subject to change without notice.
Part number: 431053-002
Back to Contents Page
Preface: HP w19 LCD Monitor
About This Guide • Notational Conventions
About This Guide
This guide is intended for anyone who uses the HP w19 LCD Monitor. It describes the monitor's features, setup, and operation.
The sections are as follows:
•Safety and Maintenance Guidelines
•Setup
•Using the Monitor
•Drivers and Auto-Adjustment
•Technical Support FAQ
•Specifications
•LCD Monitor Quality and Pixel Policy
•Agency Regulatory Notices
Notational Conventions
The following subsections describe notational conventions used in this document.
Notes, Cautions, and Warnings
Throughout this guide, blocks of text may be accompanied by an icon and printed in bold type or in italic type. These blocks are notes, cautions, and warnings, and they are used as follows:
NOTE: A NOTE indicates important information that helps you make better use of your computer system.
CAUTION: A CAUTION indicates either potential damage to hardware or loss of data and tells you how to avoid the problem.
WARNING: A WARNING indicates the potential for bodily harm and tells you how to avoid the problem.
Some warnings may appear in alternate formats and may be unaccompanied by an icon. In such cases, the specific presentation of the warning is mandated by regulatory authority.
Back to Contents Page
Safety and Maintenance Guidelines: HP w19 LCD Monitor
Important Safety Information • Safety Precautions • Maintenance Guidelines • Cleaning the Monitor
Important Safety Information
The power cord is designed for use with your monitor. To use a different cord, use only a power source and connection compatible with this monitor. For information on the correct power cord set to use with your monitor, see Power Cord Set Requirements.
WARNING: To reduce the risk of electric shock or damage to your equipment, do not disable the power cord grounding feature. The grounding plug is an important safety feature. Connect the equipment to a grounded (earthed) power outlet.
WARNING: For your safety, be sure that the grounded power outlet you plug the power cord into is easily accessible to the operator and located as close to the equipment as possible. To disconnect power from the equipment, unplug the power cord from the power outlet by grasping the plug firmly. Never pull on the cord.
CAUTION: To protect your monitor, as well as your PC, connect all power cords for your PC and its peripheral devices (such as a monitor, printer, or scanner) to a surge protection device such as a power strip with surge protection or uninterruptible power supply (UPS).
Not all power strips provide surge protection; the power strips must be specifically labeled as having this ability. Use a power strip whose manufacturer offers a damage replacement policy so you can replace your equipment if surge protection fails.
Safety Precautions
•Avoid applying pressure to the LCD screen; doing so can cause damage.
•Use only a power source and connection compatible with this monitor, as indicated on the label/back plate of the monitor.
•Be sure the total ampere rating of the products connected to the outlet does not exceed the current rating of the electrical outlet, and the total ampere rating of the products connected to the cord does not exceed the rating of the cord. Look on the power label to determine the ampere rating (Amps or A) for each device.
•Install your monitor near an outlet that you can easily reach. Disconnect the monitor by grasping the plug firmly and pulling it from the outlet. Never disconnect the monitor by pulling the cord.
•Do not allow anything to rest on the power cord. Do not walk on the cord.

Maintenance Guidelines
To enhance the performance and extend the life of your monitor:
•Do not open your monitor cabinet or attempt to service this product yourself. If your monitor is not operating properly or has been dropped or damaged, contact your HP authorized dealer, reseller, or service provider.
•Adjust only those controls that are described in the operating instructions.
•Turn your monitor off when not in use. You can substantially increase the life expectancy of your monitor by using a screen saver and turning off the monitor when not in use.
•Keep your monitor in a well-ventilated area, away from excessive light, heat, or moisture.
•Slots and openings in the cabinet are provided for ventilation. These openings must not be blocked or covered. Never push objects of any kind into cabinet slots or other openings.
•Unplug your monitor from the wall outlet before cleaning.
•Do not drop your monitor or place it on an unstable surface.
•When removing the monitor pedestal base, you must lay the monitor face down on a soft area to prevent it from getting scratched, defaced, or broken.
Cleaning the Monitor
The monitor is a high-quality optical device that requires special care when cleaning. To clean the monitor, follow these steps:
1Turn off the PC and the monitor.
2Unplug your monitor from the wall outlet before cleaning.
CAUTION: Do not use benzene, thinner, ammonia, or any volatile substances to clean the monitor screen or cabinet. These chemicals may damage the monitor. Do not use liquid cleaners or aerosol cleaners. Never use water to clean an LCD screen.
3Wipe the screen with a dry, soft, clean cloth.
•If the screen requires additional cleaning, use an antistatic screen cleaner.
4Dust the monitor housing. Use a damp cloth to clean the cabinet.
•If the cabinet requires additional cleaning, use a clean cloth dampened with isopropyl alcohol.
5Plug in the monitor.
6Turn on the monitor and the PC.
Back to Contents Page
Setup: HP w19 LCD Monitor
•Base
•Attaching the Cables
•Attaching Wall Mounting Arm
Back to Contents Page
Base: HP w19 LCD Monitor
Base • Attaching the Base • Removing the Base
Base
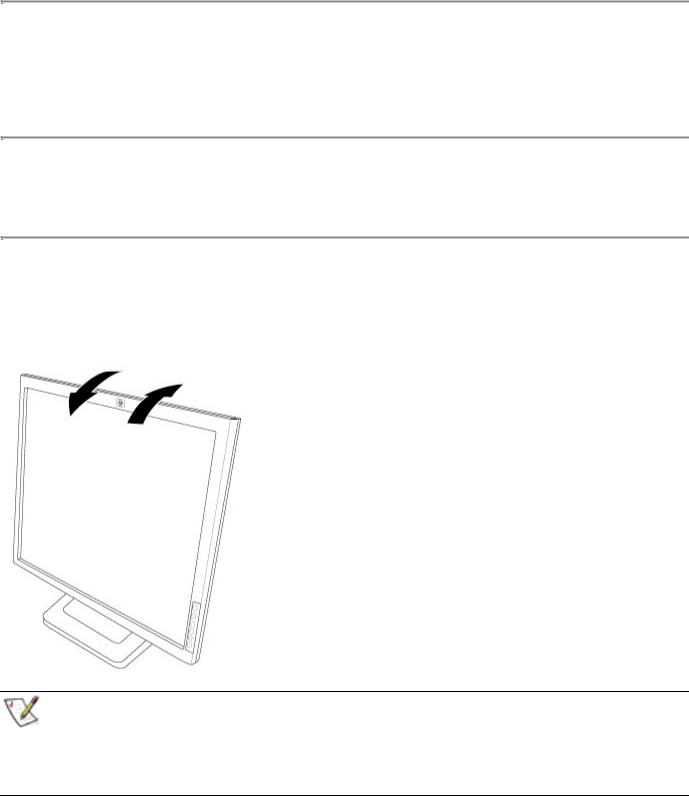
•For optimal viewing it is recommended to look at the full face of the monitor, then adjust the monitor's angle to your own preference.
•Hold the stand so you do not topple the monitor when you change the monitor's angle.
•You are able to adjust the monitor's angle.
NOTE:
•Do not touch the LCD screen when you change the angle. It may cause damage or break the LCD screen.
•Careful attention is required not to catch your fingers or hands when you change the angle.
•The color of the cabinet may vary.
•Outline for reference only.
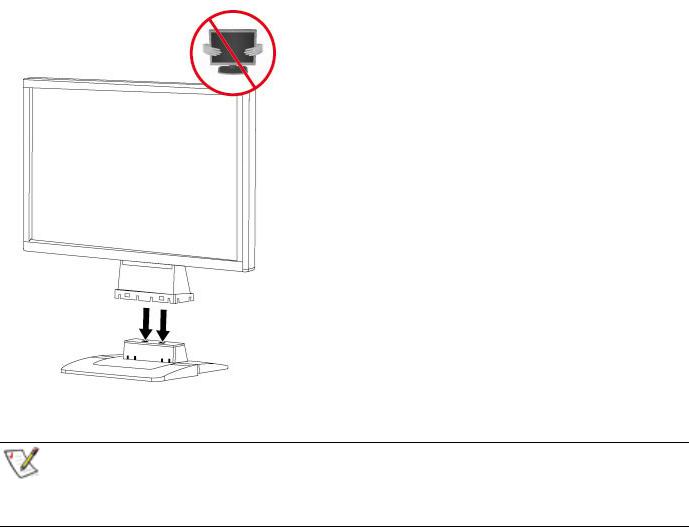
Attaching the Base
1Turn off the monitor and unplug it from the electrical outlet.
2Place the base on a flat work surface.
3 Align the tabs on the base with the corresponding slots on the bottom of the monitor.
NOTE:
•The base will align with the monitor slots in only one position.
•The color of the cabinet may vary.
•Outline for reference only.

Removing the Base
1Place the monitor upside-down on a stable, flat work surface.
2Push release latch on the bottom of the rear cabinet, and push the base toward the back of the monitor at the same time and lift up to remove the base.
NOTE:
•The color of the cabinet may vary.
•Outline for reference only.
CAUTION: Be careful to avoid pinching or scraping fingers when removing the base.
Loading...