


HP OfficeJet Series 300
PrinterFax Copier Scanner
Technical Support Solutions G
Model 300
(PrinterFaxCopier Only)
Model 330
Model 350

1
Product Information
Subject |
|
|
|
Page |
Introduction. . . . . . . . . . . . . . . . . . . . |
. . . . . . |
* . . . . . . . . . . . . . . . . . . . . |
. . . . . *. . . . . . . . . . . . . . . . . . . . |
. . . . .1-2 |
Product Description. . . . . . . . . . . . . . . |
. . . . . |
. . . . . .* . . . . . . . . . . . . . . |
. . . . . . . . . . . *. . . . . . . . . . . . . . . |
. . . .1-2 |
Overview of Product Capabilities. . . . . . . . . |
. . . . . . . . . . . . . . . . .* . . . |
. . . . . . . . . . . . . . . . . . . . . . *. . . . |
. . . . 1-3 |
|
Product Features. . . . . . . . . . . . . . . . . |
. . . . . |
. . . .* . . . . . . . . . . . . . . . . |
. . . . . . . . . *. . . . . . . . . . . . . . . . . |
. . . .1-4 |
Simultaneous Tasking Features. . . . . . . . . . . |
. . . . . . . . . . . . . . .* . . . . . |
. . . . . . . . . . . . . . . . . . . . *. . . . . . |
. . . . 1-6 |
|
Product Specifications. . . . . . . . . . . . . |
. . . . . |
. . . . . . . .* . . . . . . . . . . . . |
. . . . . . . . . . . . . *. . . . . . . . . . . . . |
. . . .1-8 |
Print Cartridges. . . . . . . . . . . . . . . . . . |
. . . . . |
. . .* . . . . . . . . . . . . . . . . . |
. . . . . . . . *. . . . . . . . . . . . . . . . . . |
. . . .1-11 |
Software Programs. . . . . . . . . . . . . . . . |
. . . . . |
. . . . .* . . . . . . . . . . . . . . . |
. . . . . . . . . . *. . . . . . . . . . . . . . . . |
. . . .1-11 |
Media . . . . . . . . . . . . . . . . . . . . . . . . . . |
* . . . . . |
. . . . . . . . . . . . . . . . . . . . |
*. . . . . . . . . . . . . . . . . . . . . . . . . . |
* . . . .1-11 |
Media Tray Capacities. . . . . . . . . . . . . |
. . . . . |
. . . . . . . .* . . . . . . . . . . . . |
. . . . . . . . . . . . . *. . . . . . . . . . . . . |
. . . .1-13 |
Media Print Area. . . . . . . . . . . . . . . . . |
. . . . . |
. . . .* . . . . . . . . . . . . . . . . . |
. . . . . . . . *. . . . . . . . . . . . . . . . . |
. . . .1-14 |
Ordering Information. . . . . . . . . . . . . . |
. . . . . |
. . . . . . .* . . . . . . . . . . . . . . |
. . . . . . . . . . . *. . . . . . . . . . . . . . |
. . . .1-15 |
Product Information1-1

Introduction
This Technical Support Solutions Guide contains information necessary to support the HP Printer/Fax/Copier/Scanner family of products. Although model and country-specific funct the HP OfficeJet product line, the support and service strategy is consistent. The products co commonly referred to as the HP OfficeJet Series 300 except where model or country-specific d This guide is divided into six chapters as follows:
DChapter 1 Product Information
DChapter 2 Installation and Configuration
DChapter 3 Routine Maintenance
DChapter 4 Calibration and Adjustment
DChapter 5 Problem Resolution
DChapter 6 Service and Support Information
This Technical Support Solutions Guide is designed to be used with the HP OfficeJet Models 300, 330, a Guides as a complete technical support reference package. Typical user setup tasks are con and answers to questions related to such tasks can be found there. Refer to the User’s Gu questions about setup, user settings and use are encountered. Refer to this guide for info and service and support programs.
Product Description
The HP OfficeJet Model 300 is a plain paper, thermal inkjet printer,facsimile(fax),convenience co HP OfficeJet Models 330 and 350 are plain paper, thermal inkjet printer, facsimile (fax), convenie scanner machines. Models 330 and 350 can also fax documents directly from a personal com documents into a PC. The Model 350 includes optical character recognition (OCR) software answers to questions about the OCR software, contact Caere directly. All members of this group 3-ECM compatible. Designed to fit on a desktop, they weigh 9.55 kg (21 lb). HP OfficeJet Series 300 have a full-featured printer, which can be used with your PC and either Windows or DOS drive printer memory and a 16 KB printer buffer. The built-in fax machine feature provides many including speed dialing capability for 65 stations, with a 10 seconds per page transmission s memory. As a convenience copier, HP OfficeJet Series 300 machines can be set to copy up to 99 copie at a speed of 50 seconds per page. The Model 330 and 350 versions of the HP OfficeJet Series R300 use Ecli SE which provides the ability to send faxes directly from the PC, receive faxes to the PC, PC-based files. HP OfficeJet Series 300 machines also use a management function that allows th the PC using Windows-based menus. All HP OfficeJet Series 300 machines use cut–sheet plain pap paper tray capacity) and a thermal inkjet cartridge.
1-2 Product Information
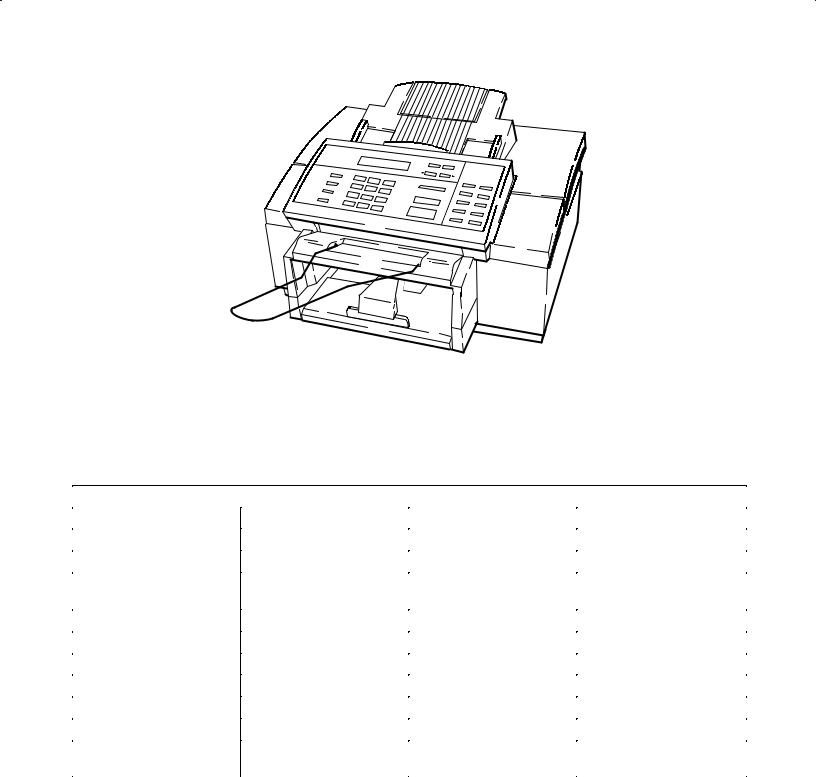
SL1
HP OfficeJet Model Series 300 Printer/Fax/Copier/Scanner
Overview of Product Capabilities
The following table provides an overview of HP OfficeJet Series 300 capabilities.
Overview of HP OfficeJet Series 300 Capabilities
|
Model 300 |
Model 330 |
Model 350 |
|
|
|
|
Print from a PC |
F |
F |
F |
|
|
|
|
Receive a Fax |
F |
F |
F |
|
|
|
|
Fax from the Automatic |
F |
F |
F |
Document Feeder (ADF) |
|
|
|
|
|
|
|
Fax from memory |
F |
F |
F |
|
|
|
|
Copy from the ADF |
F |
F |
F |
|
|
|
|
Print from a PC |
F |
F |
F |
|
|
|
|
Fax from a PC |
|
F |
F |
|
|
|
|
Receive a fax to a PC |
|
F |
F |
|
|
|
|
Scan a document to a PC |
|
F |
F |
|
|
|
|
Scan a document to a PC |
|
|
F |
with OCR* |
|
|
|
|
|
|
|
Note:The Optical Character Recognition (OCR) package used with the Model 350 is OmniPage Limited Edition.
Product Information1-3

Product Features
The following table lists the features of the HP OfficeJet Series 300 printer/fax/copier/scanner
HP OfficeJet Series 300 Features
Feature |
|
Description |
|
Shares a single line with the telephone aAndsweringa |
machine answers all calls. While you |
||
telephone answering machine (TAM) |
greeting plays, the HP OfficeJet listens for a fax |
||
|
If fax tone is detected, the HP OfficeJet takes the |
||
|
|
|
|
Speed dialing |
A two-digit number represents a telephone num |
||
|
Provides quick and easy dialing for up to 60 loca |
||
|
tions and 5 groups of numbers. |
||
|
|
|
|
Fax settings |
Settings allow the user or service person to cu |
||
|
the fax for specific needs. |
||
|
|
|
|
Halftone scanning |
The ability to interpret shades of gray into dot |
||
|
patterns to produce an appearance of gray in a |
||
|
image. Improves the image quality of photograp |
||
|
|
|
|
Error Correction Mode |
Detects errors that occur during the transmiss |
||
|
document and automatically requests resendi |
||
|
the erroneous portion. |
||
|
|
|
|
Automatic Journals |
The HP OfficeJet can be set to print a summary she |
||
|
of each transaction or polling operation, to pr |
||
|
journal of the last 30 transactions, print a reco |
||
|
the speed dial numbers stored in memory, print |
||
|
menu structure diagram with current settings |
||
|
print self-test and demo reports. |
||
|
|
|
|
Print from PC functionality |
Allows printing of print jobs from the personal |
||
|
computer, when using appropriate printer drive |
||
|
|
|
|
Copy functionality |
Allows for up to 99 copies of an original, include |
||
|
copy reduction. |
||
|
|
|
|
Polling and being polled |
Ability to have a document ready for retrieval |
||
|
another fax station and to call other fax stat |
||
|
retrieve information. |
||
|
|
|
|
Sending faxes at deferred times |
The ability to delay fax transmissions to anoth |
||
|
station until a user-set time is reached. |
||
Automatic and fixed print reduction modesPrint reduction modes which fit an incoming document onto a given paper size.
Automatic and manual redialing |
Automatically redials if the line is busy or no |
|
answer; retains the last number dialed. Redials |
|
5 times at 5 minute intervals. |
Backup (Out-of-paper, out-of-ink) receptionStores incoming faxes and print jobs in memory out of paper or ink, or paper or ink is not instal
Remote diagnostics |
Allows remote access to all user settings and |
|
|
machine parameters. |
|
|
|
|
Sending to multiple fax numbers |
The ability to send a document to multiple (up t |
|
|
fax numbers. |
|
(Continued on next page)
1-4 Product Information

HP OfficeJet Features (Continued)
Feature |
Description |
||
|
|
|
|
Memory reception capacity |
Depending upon amount of information on pages |
||
|
sent, memory allows for up to 24 page storage. |
||
|
|
|
|
One-touch feature |
Ten programmable one-touch keys are provided |
||
|
easier, speedier faxing. |
||
|
|
|
|
Fax to/from PC functionality |
The ability to send and receive faxes from the P |
||
(HP OfficeJet Models 330 and 350 only, using |
theusing Eclipse FAX SE functionality. Faxes can be |
||
Eclipse FAX SE software program provided)sent directly from the PC without printing them |
|||
|
faxes can be received either to paper or to the |
||
The Model 300 can receive and print a fax sentwhefreomthey can be viewed, filed or printed. |
|||
a remote PC over the telephone line, but it cannot |
|||
receive and upload a fax to a local PC. |
|
|
|
|
|
|
|
HP OfficeJet Series 300 Manager |
Allows the user to setup and monitor the statu |
||
|
HP OfficeJet from the PC using Windows-based me- |
||
|
nus. |
||
|
|
|
|
Convenience Scanning |
Provides a convenience scanner to scan images |
||
(HP OfficeJet Models 330 and 350 only) |
PC-based files. |
||
|
|
|
|
Software Programs |
Windows and DOS printer drivers, a scanner drive |
||
|
and printer fonts are provided. |
||
|
|
|
|
Product Information1-5

Simultaneous Tasking Features
The HP OfficeJet Series 300 is capable of performing several tasks at the same time. Use the fo reference of which tasks can be performed simultaneously. Attempting to perform concu may result in a display message or error condition.
|
|
|
|
|
Can I? |
|
|
|
|
|||
HP O |
J |
|
|
|
|
|
|
|
|
|
|
|
IfHP OfficeJ et |
Send |
Receive |
|
Send |
|
Receive |
|
Send |
|
Scan |
||
Series 300 is ... |
|
|
|
|
||||||||
a print job |
a paper fax a paper fax |
|
a PC fax |
|
a PC fax |
|
to the PC |
|||||
|
|
|
|
|
||||||||
|
|
All HP OfficeJet Series 300s |
|
HP OfficeJet 330 and 350 |
|
|||||||
|
|
|
|
|
|
|
|
|
|
|
||
Printing |
Yes |
Yes |
|
Yes |
|
Yes |
|
Yes |
|
Yes |
||
a PC file |
prints whenprints when |
|
|
|
|
|
|
|
|
|||
|
|
first print PC print |
|
|
|
|
|
|
|
|
||
|
|
job ends |
job ends |
|
|
|
|
|
|
|
|
|
Printing |
Yes |
Yes |
|
Yes |
|
Yes |
|
Yes |
|
Yes |
||
a paper fax |
prints whenprints when |
|
|
|
|
|
|
|
|
|||
|
|
fax printing first print |
|
|
|
|
|
|
|
|
||
|
|
ends |
job ends |
|
|
|
|
|
|
|
|
|
Receiving |
Yes |
No |
|
No |
|
No |
|
Yes (with |
|
Yes |
||
a paper fax |
prints whenphone line |
isphone line |
isphone line |
isdelay) sent |
|
|
|
|||||
|
|
fax printingbeing used |
|
being used |
|
being used |
|
as soon as |
|
|
|
|
|
|
ends |
|
|
|
|
|
|
first fax is |
|
|
|
|
|
|
|
|
|
|
|
|
complete |
|
|
|
Sending |
|
Yes |
No |
|
No |
|
No |
|
Yes (with |
|
No |
|
a paper fax |
|
phone line |
isphone line |
isphone line |
isdelay) sent |
|
ADF is |
|||||
|
|
|
being used |
|
being used |
|
being used |
as soon as |
being used |
|||
|
|
|
|
|
|
|
|
|
first fax is |
|
|
|
|
|
|
|
|
|
|
|
|
complete |
|
|
|
Copying |
|
Yes |
Yes |
|
No |
|
Yes |
|
Yes |
|
No |
|
|
|
prints whenprints when |
ADF is |
|
|
|
|
|
ADF is |
|||
|
|
copying endscopying endsbeing used |
|
|
|
|
|
being used |
||||
Receiving |
Yes |
No |
|
No |
|
No |
|
Yes (with |
|
Yes |
||
a PC fax |
|
|
phone line |
isphone line |
isphone line |
isdelay) sent |
|
|
|
|||
|
|
|
being used |
|
being used |
|
being used |
as soon as |
|
|
|
|
|
|
|
|
|
|
|
|
|
first fax is |
|
|
|
|
|
|
|
|
|
|
|
|
complete |
|
|
|
Sending |
|
Yes |
No |
|
No |
|
No |
|
Yes (with |
|
Yes |
|
a PC fax |
|
|
phone line |
isphone line |
isphone line |
isdelay) sent |
|
|
|
|||
|
|
|
being used |
|
being used |
|
being used |
as soon as |
|
|
|
|
|
|
|
|
|
|
|
|
|
first fax is |
|
|
|
|
|
|
|
|
|
|
|
|
complete |
|
|
|
Scanning |
Yes |
Yes |
|
No |
|
Yes |
|
Yes |
|
No |
||
|
|
|
|
|
ADF is |
|
|
|
|
|
ADF is |
|
|
|
|
|
|
being used |
|
|
|
|
|
being used |
|
|
|
|
|
|
|
|
|
|
|
|
|
|
1-6 Product Information

The following task combinations can be performed simultaneously.
1.An incoming fax will be stored in memory while:
D faxes in memory are printing
D a local copy is printing
D a print job is printing
D a report is printing
2.A fax can be sent from the automatic document feeder while:
D faxes in memory are printing
D a print job is printing
D a report is printing
3.Print jobs can be printed while:
Da fax is being sent from the automatic document feeder
Da delayed send fax from memory is being sent
Da delayed send fax from the automatic document feeder is being sent
Da broadcast fax from memory is being sent
Da document is polled from the automatic document feeder
4.A delayed send fax from memory can be sent while:
Da print job is printing
5.A broadcast fax from memory can be sent while:
Da print job is printing
6.A delayed send fax from the automatic document feeder can be sent while:
Da print job is printing
7.Remote fax machines can poll the HP OfficeJet Series 300 machine while:
Dfaxes in memory are printing
Da print job is printing
Da report is printing
8.Faxes in memory can be printed while:
Dan incoming fax is stored in memory (and takes over the display)
Product Information1-7
Product Specifications
Review the following table for product specifications of the HP OfficeJet Series 300 machines.
HP OfficeJet Series 300 Specifications
Function |
Specification |
Description |
|
Overall SpecificationsDimensions |
17.25 w x 15.5 d x 11.125 h (inches) |
||
|
|
438 w x 394 d x 283 h (mm) |
|
|
|
|
|
|
Weight |
19.5 lb (8.85 kg) |
|
|
|
|
|
|
Power Source (autoranging)100-240 Vac, 1.0 A, 50-60 Hz |
||
|
|
|
|
|
Power Consumption |
10 watts at idle, 45 watts maximum |
|
|
|
|
|
|
Operating Environment |
Temperature range for best print qualit |
|
|
|
15 °C (59 °F) to 35°C (95 °F) |
|
|
|
Allowable temperature/humidity°C range: 5 |
|
|
|
(41 °F) to 40°C (104 °F), 15-80% RH non- |
|
|
|
condensing |
|
|
|
Maximum noise level generated: |
|
|
|
Sound Power, LwAd = 6.4 B(A) |
|
|
|
Sound Pressure, LpAm = 50 dB(A) |
|
|
|
|
|
Printer SpecificationsPrint Method |
Plain paper drop-on-demand thermal ink |
||
|
|
|
|
|
Printer Memory |
16 KB printer buffer |
|
|
|
|
|
|
Printer Command LanguageHP PCL Level 3 |
||
|
|
|
|
|
Printer Interface |
Parallel (Bi-Centronics) |
|
|
|
|
|
|
Resolution |
Windows: |
|
|
(dots per inch = dpi) |
Presentation mode = 600 x 300 dpi with |
|
|
|
REt |
|
|
|
Normal mode = 600 x 300 dpi with RE |
|
|
|
Fast mode = 300 dpi |
|
|
|
DOS (text): |
|
|
|
Letter quality = 600 x 300 dpi with RE |
|
|
|
Draft quality = 300 dpi with ink reduction |
|
|
|
|
|
|
Print Speed |
Windows print speed: |
|
|
(page(s) per minute = ppm) |
Presentation mode = 1 ppm |
|
|
|
Normal mode = 2.5 ppm |
|
|
|
Fast mode = 3 ppm |
|
|
|
DOS print speed: |
|
(characters per second = cpsLetter quality = 167 cps at 10 cpi (characters per inch = cpi) Draft quality = 240 cps at 10 cpi
Paper Sizes |
U.S. letter = 8.5 x 11 in. |
|
U.S. legal = 8.5 x 14 in. |
|
European A4 = 210 x 297 mm |
|
Executive = 7.25 x 10.5 in |
|
U.S. No. 10 envelope = 4.12 x 9.5 in |
|
European DL envelope = 220 x 110 mm |
|
U.S. transparency = 8.5 x 11 in. |
|
European A4 transparency = 210x297 mm |
1-8 Product Information

HP OfficeJet Series 300 Specifications (continued)
Function |
Specification |
Description |
|
|
|
|
|
Printer Specifications |
Internal Fonts |
Courier (Portrait Orientation): |
|
(continued) |
|
Pitch: 5, 10, 16.67, 20 cpi |
|
|
Point size: 6, 12 pt. |
||
|
|
||
|
|
CG Times (Portrait Orientation): |
|
|
|
Pitch: Proportional |
|
|
|
Point size: 5, 6, 7, 8, 10, 12, 14 pt. |
|
|
|
Letter Gothic (Portrait Orientation): |
|
|
|
Pitch: 6, 12, 24 cpi |
|
|
|
Point size: 6, 12 pt. |
|
|
|
Univers (Portrait Orientation): |
|
|
|
Pitch: Proportional |
|
|
|
Point size: 5, 6, 7, 8, 10, 12, 14 pt. |
|
|
|
Courier (Landscape Orientation): |
|
|
|
Pitch: 10, 16.67, 20 cpi |
|
|
|
Point size: 6, 12, 24 pt. |
|
|
|
Letter Gothic (Landscape Orientation): |
|
|
|
Point and Pitch: 6, 12, 24 pt for 12, 24 cpi; |
|
|
|
4.75, 9.5, 19 pt for 16.67 cpi |
|
|
|
|
|
|
Character Set Support |
PC-8, HP Roman 8, PC-8 |
|
|
|
Danish/Nor, UK ISO 4, German ISO 21, |
|
|
|
French ISO 69, Italian ISO 15, Nor v.1 ISO |
|
|
|
60, Swed Names ISO 11, Spanish ISO 17, |
|
|
|
ASCII, Portug ISO 16, PC-850, ECMA-94 |
|
|
|
Latin 1, HP Legal |
|
|
|
|
|
|
Printing Margins |
U.S. letter-size paper: |
|
|
(These numbers represent |
Top margin = 1.0 mm± 1.0 mm) |
|
|
the |
||
|
maximum printable area |
Bottom margin = 10.9 mm± 0(.6 mm) |
|
|
for this |
||
|
|
Left margin = 6.4 mm± (1.0 mm) |
|
|
device. However, your printer |
||
|
|
Right margin = 6.4 mm± 1(.0 mm) |
|
|
driver may create a smaller |
||
|
printable area.) |
European A4-size paper: |
|
|
|
Top margin = 1.0 mm± 1.0 mm) |
|
|
|
Bottom margin = 10.9 mm± 0(.6 mm) |
|
|
|
Left margin = 3.4 mm± (1.0 mm) |
|
|
|
Right margin = 3.4 mm± 1(.0 mm) |
|
|
Vertical Alignment |
±0.002 in. |
|
|
Scalable TrueTypet Fonts |
|
|
|
Arial Black, CG Goudy Old Style, |
||
|
for MicrosoftE Windows |
Phyllis, Graphite Light, CG Poster |
|
|
|
||
|
|
Bodoni, LucidaCasual, Gill Sans |
|
|
|
Shadow, Milestone Font, Signet |
|
|
|
Roundhand, and PL Benguiat Frisky |
|
|
|
|
|
Product Information1-9
HP OfficeJet Series 300 Specifications (continued)
Function |
Specification |
Description |
|
|
|
|
|
Printer Specifications |
Software Compatibility |
Microsoft Windows 3.1 |
|
(continued) |
|
Microsoft Windows 95 |
|
|
|
MS Word for Windows (6.0 and above) |
|
|
|
WordPerfect for Windows (6.0a and above) |
|
|
|
WordPro (Ami Pro) for Windows |
|
|
|
(3.0 and above) |
|
|
|
MS Excel for Windows (5.0) |
|
|
|
Lotus 1-2-3 for Windows (4.0 and above) |
|
|
|
Also compatible with DOS application |
|
|
|
HP DeskJet 520 |
|
|
|
|
|
Fax Specifications |
Coding Schemes |
MH, MR, MMR |
|
|
|
|
|
|
Compatibility |
CCITT/ITU Group 3 |
|
|
|
|
|
|
Distinctive Ring Detect |
Yes |
|
|
|
|
|
|
Image Memory |
24 pages (CCITT/ITU chart #1, about |
|
|
|
400 kB) |
|
|
|
|
|
|
Modem Speed |
9600, 7200, 4800 and 2400 bits per second |
|
|
|
|
|
|
Paper Sizes |
U.S. letter = 8.5 x 11 in. |
|
|
|
U.S. legal = 8.5 x 14 in. |
|
|
|
European A4 = 210 x 297 mm |
|
|
|
|
|
|
Paper Weight (faxes sent) |
16 to 24 lb (60 to 90 g/m 2 ) |
|
|
Scan Margins (faxes sent) |
Top margin = 3.0 mm± 3.0 mm |
|
|
|
Bottom margin = 0.0 mm± 4.0 mm |
|
|
|
Center line = 0.0 mm± 2.5 mm |
|
|
|
Width = 216.2 mm ± 2.6 mm |
|
|
Scan Resolution |
Standard = 203 x 98 dpi |
|
|
|
Fine = 203 x 196 dpi |
|
|
|
Photo = 203 x 196 dpi (dithered) |
|
|
|
|
|
|
Scan Width |
Maximum = 8.5 inches (216 mm) |
|
|
|
|
|
|
Speed Dialing |
60 locations and 5 groups |
|
|
|
|
|
|
One-Touch Dialing |
10 of the 60 Speed Dial locations |
|
|
|
|
|
|
Transmission Speed |
10 seconds per page |
|
|
|
(CCITT/ITU chart #1 using ECM) |
|
|
|
|
|
|
Reception Speed |
20 seconds per page |
|
|
|
(CCITT/ITU chart #1 using ECM) |
|
|
|
|
|
Copier Specifications |
Copy Speed |
50 seconds per page |
|
|
|
|
|
|
Copier Resolution |
Fine or Standard = 300 x 300 dpi (Bi-level) |
|
|
|
Photo = 300 x 300 dpi (grayscale) |
|
|
|
|
|
|
Paper Sizes |
U.S. letter = 8.5 x 11 in. |
|
|
|
U.S. legal = 8.5 x 14 in. |
|
|
|
European A4 = 210 x 297 mm |
|
|
|
|
|
|
Multiple Copies |
Up to 99 (per full paper tray) |
|
|
|
|
|
|
Copy Reduction |
100%, 95%, 90%, 85%, 80%, |
|
|
|
75% (Legal-to-Letter), 70% |
|
|
|
|
|
1-10 Product Information

HP OfficeJet Series 300 Specifications (continued)
Function |
Specification |
Description |
|
|
|
|
|
Copier Specifications |
Scan Margins |
Top margin = 3.0 mm± 3.0 mm |
|
(Continued) |
|
Bottom margin = 2.0 mm± 3.0 mm |
|
|
|
Left: U.S. letter = 0.0 mm± 3.0 mm |
|
|
|
A4 = 0.0 mm |
± 0.0 mm |
|
|
Right: U.S. letter = 0.0 mm± 3.0 mm |
|
|
|
A4 = 0.0 mm |
± 0.0 mm |
|
|
Width = 216.2 mm |
± 2.6 mm12 |
|
Scan Width |
Maximum = 8.5 inches (216 mm) |
|
|
|
|
|
|
Current Connectivity |
TWAIN 1.6 Interface |
|
|
|
|
|
PC Scan |
Scan Resolution |
Software Determined |
|
Specifications |
|
203 x 196 dpi |
|
|
|
or 300 x 196 dpi |
|
|
|
|
|
Print Cartridges
The HP OfficeJet uses one high–capacity black print cartridge, HP part number 51626A.
When printingtext only letter-size media, ink lasts, on average, about 1000 pages. Text used was C image number 1, the Slerexe Company letter. If text of greater density is printed or quality vary considerably. Ink cartridge longevity is also affected by larger paper sizes conta photos or illustrations. If the ink lasts much less than 1000 pages, ensureboththatpiecesyofutapehave rem from the print cartridge before beginning to use it, and that the conductive part of the c
Software Programs
Several software programs and drivers are provided. The Eclipse FAX SE is provided and use 350. The HP OfficeJet Series 300 Manager programs and Windows drivers are provided with all mod
DEclipse FAX SE allows the user to send high-quality faxes directly from the PC, rec and scan images into PC-based files.
DHP OfficeJet Series 300 Manager lets the user setup the HP OfficeJet Series 300 from the PC, usi Windows-based menus, rather than the device’s front panel. The Manager also serves displaying information and error messages. It also tells the user whether or not t 300 is properly connected.
DWindows drivers are provided. A DOS driver is provided with many applications, but one separately from Hewlett Packard. See “Ordering Information” later in this chapter f to order the DOS driver.
Media
An HP OfficeJet Series 300 works with ordinary bond and photocopy papers. Paper properties are s paper manufacturers, and Hewlett-Packard has no control over such changes. For optim (printing on both sides) for suitability, before you purchase large quantities.
Use plain bond or white photocopy paper of high quality. It should be free of:
D |
Carbon |
D |
Loose Particles |
D |
Cuts or tears |
D |
Dust |
D |
Grease spots |
D Curled, bent or frayed edges |
|
Product Information1-11

Colored bond and photocopy paper (such as pink, yellow, or blue) can be used, as long as it m
D |
Paper Size |
U.S. letter 8 1/2 in x 11 in, (216 x 279 mm) |
|
|
U.S. legal 8 1/2 in x 14 in, (215 x 356 mm) |
|
|
Executive 7.25 x 10.5 in, (184 mm x 267 mm) |
|
|
A4 metric 8.27 x 11.7 in, (210 mm x 297 mm) |
D |
Envelope Size |
U.S. No. 10 4.12 x 9.5 in, (105 x 241 mm) |
|
|
European DL 8.66 x 4.33 in, (220 x 110 mm) |
D |
Paper Type |
Cut sheet |
DCut Edge Conditions Sharp blade cut, with no visible fray
DFinishing Dimensions ± 0.0313 inch of nominal, corners± 0.2090 _
D |
Paper Grain |
Long grain |
|
|
|
|
|
|
D |
Moisture Content |
4% to 6% by weight |
|
|
|
|||
D |
Opacity |
84% minimum |
|
|
|
|
|
|
D |
Packaging |
Polylaminated moisture-proof ream wrap |
||||||
D |
Paper weight |
60 to 135 g/m |
2 |
( |
16 lb to 36 lb), |
2 |
( |
20 lb) recommended |
|
|
75 g/m |
|
|||||
D |
Wax Pick |
2 inch minimum (Dennison) |
|
|
|
|||
When loading paper, observe the following precautions:
DHandle all paper by the edges only
DLoad all paper types the same way
DUse only one paper type in the printer’s paper tray at a time
DAlways load paper print side up in the media tray
Plain paper has a print side which is not visible to the naked eye, so before removing paper f the printer, check the outside package label. Always load the paper into the machine with The print side will be indicated by an arrow or other symbol on the label.
Avoid the following types of media:
DPaper greater than2 135(36g/mlb) or less than 602g/m(16 lb)
DPaper with cutouts or perforations
DMultiple part forms
DCarbon copy forms
DPaper sizes other than those listed in this document
1-12 Product Information

Media Tray Capacities
Sheet capacity for the various paper tray is as follows:
DAccess door assembly (automatic document feed tray for faxes to be sent)
≤ 2
= 20 pages (paper weight20 lb or 75 g/m) Minimum paper width = 6 in. (152 mm) Maximum paper width = 8.5 in. (216 mm) Maximum paper length = 17 in. (432 mm)
DInput Tray = 100 sheets at a paper≤weight20 lb (75 g/m 2 ) or 20 envelopes (U.S. No. 10 or European DL)
DOutput tray = 100 sheets at a paper≤ 20weightlb (75 g/m 2 )
Product Information1-13
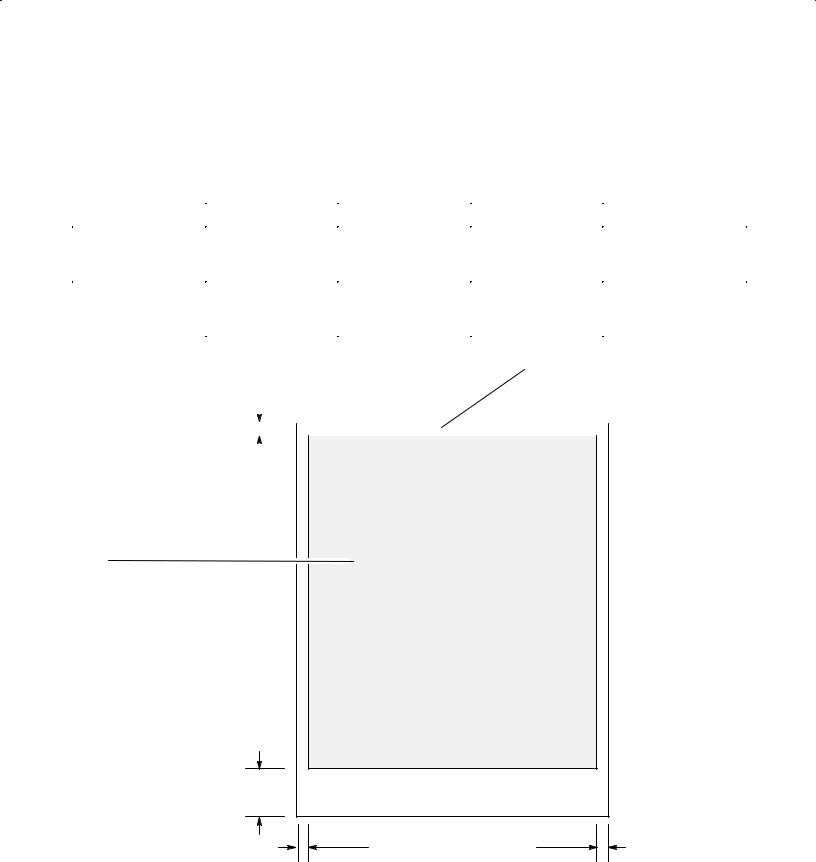
Media Print Area
Maximum printable area for the HP OfficeJet is dependent upon the media size being used. The pr media sizes are shown in the following diagram. Data on the minimum margins that can b amount of variation in those margins is shown in the table above the diagram. The minimum on the diagram.
Paper Size |
Left Margin |
Right Margin |
Top Margin |
|
|
Bottom Margin |
||||||||
|
|
|
|
|
|
|
|
|
|
|
|
|
|
|
U.S. Letter |
0.25 in. ± 0.04 in. |
0.25 in. ± 0.04 in. |
0.04 in. ± 0.04 in. |
|
|
0.42 in. |
± 0.02 in. |
|||||||
8.5 x 11 in. |
(6.4 mm ± 1.0 mm) |
(6.4 mm ± 1.0 mm) |
(1.0 mm ± 1.0 mm) |
|
|
(10.9 mm |
± 0.06 mm) |
|||||||
(215 x 279 mm) |
|
|
|
|
|
|
|
|
|
|
|
|
|
|
|
|
|
|
|
|
|
|
|
|
|
|
|
||
European A4 |
3.4 mm ± 1.0 mm |
3.4 mm ± 1.0 mm |
1.0 mm ± 1.0 mm |
|
|
10.9 mm ± 0.06 mm |
||||||||
210 x 297 mm |
(0.13 in. ± 0.04 in.) |
(0.13 in. ± 0.04 in.) |
(0.04 in. ± 0.04 in.) |
|
|
(0.42 in. |
± 0.02 in.) |
|||||||
(8.27 x 11.7 in.) |
|
|
|
|
|
|
|
|
|
|
|
|
|
|
|
|
|
|
|
|
|
|
|
|
|
|
|
|
|
|
|
|
|
|
|
|
|
Paper Size: |
|
|
||||
|
|
|
|
|
|
|
|
U.S. Letter |
8.5 x 11 in. |
(215 x 279 mm) |
||||
|
|
|
|
|
|
|
|
U.S. Legal |
11 x 14 in. |
(279 x 356 mm) |
||||
|
|
|
|
|
|
|
|
European A4 210 x 297 mm (8.27 x 11.7 in.) |
||||||
|
|
|
|
|
|
|
|
|||||||
|
|
|
|
|
|
|
|
|
|
|
|
|
|
|
|
|
|
|
|
|
|
|
|
|
|
|
|
|
|
|
|
|
|
|
|
|
|
|
|
|
|
|
|
|
|
|
|
|
|
|
|
|
|
|
|
||||
|
1.0 mm |
|
|
|
|
|
|
|
|
|||||
|
(0.04 in.) |
|
|
|
|
|
|
|
|
|||||
Printable area
Letter: |
8.0 by 10.5 in. |
|
(203 by 267 mm) |
Legal: |
8.0 by 13.5 in. |
|
(203 by 343 mm) |
A4 198 by 284 mm
(7.8 by 11.2 in.)
10.9 mm
(0.42 in.)
U.S. = 0.25 in. (6.4 mm) |
U.S. = 0.25 in. (6.4 mm) |
A4 = 3.4 mm (0.13 in.) |
A4 = 3.4 mm (0.13 in.) |
Maximum Media Print Area
1-14 Product Information

Ordering Information
Information on ordering exchange units under the HP Exchange program is provided with th Chapter 6 of this manual.
To order the supplies and accessories listed in the table below, contact your HP dealer. If y you can order directly from HP for fast shipping service:
Within the U.S.: Call 1-800-538-8787 for all supplies/accessoriexceptdocuments.
Call 1-800-227-8164 to order user’s guides and technical reference guides.
Outside the U.S.: For phone numbers and addresses of contacts in Australia, Europe, China refer to the appropriate Product Support table in Chapter 6. The various c different organizations to contact for support.
Availability, technical information and items shipped with the HP OfficeJet are subject to c
Ordering Information
Supply/Accessory |
|
HP Reorder Part Number |
|
|
|
||
Centronics Parallel Interface Cable (shielded)HP C2950A (2 meter), or HP C2951A (3 meter) |
|||
|
|
|
|
High Capacity InkJet Print Cartridge |
51626A |
|
|
|
|
|
|
Media |
|
|
|
HP Premium Transparency Film (U.S. Letter)C3834A |
|
|
|
HP Premium Transparency Film (EuropeanC3835A4) |
|
|
|
HP Premium Glossy Paper (U.S. Letter) |
C3836A |
|
|
HP Premium Glossy Paper (European A4) |
C3837A |
|
|
|
|
|
|
HP OfficeJet and HP OfficeJet Series 300 User’s |
Model 300 |
Model 330 |
Model 350 |
Guides |
|
|
|
United States (English) |
C4662-90001 |
C4661-90001 |
C4663-90001 |
Australia (English) |
|
C4661-90021 |
|
France (French) |
|
C4661-90003 |
|
German (German) |
|
C4661-90005 |
|
Netherlands (Dutch) |
|
C4661-90011 |
|
United Kingdom (English) |
|
C4661-90000 |
|
India (English) |
C4662-90020 |
|
|
Korea (Hungu) |
|
C4661-90018 |
|
China (Chinese) |
C4662-90016 |
|
|
|
|
|
|
HP DeskJet 500 Series Technical Reference GuideC2170-90099 |
|
|
|
|
|
|
|
Access Door (see diagram on next page) |
C2890-60064 |
|
|
|
|
|
|
Tray Wire (Document Catch) (see diagram onC4661next-80001 |
|
|
|
page) |
|
|
|
|
|
|
|
Output Tray Assembly (see diagram on nextC4661page)-60004 |
|
|
|
|
|
|
|
Tray Bridge (see diagram on next page) |
C4661-40006 |
|
|
|
|
|
|
Input Tray Assembly (see diagram on nextC4661page)-60003 |
|
|
|
|
|
||
DOS Drivers |
C2890-10012 (Call HP Driver Distribution Center, |
||
|
Ph (303) 339-7009. Ask for the DOS Driver for HP |
||
|
OfficeJet.) |
|
|
|
|
|
|
Product Information1-15
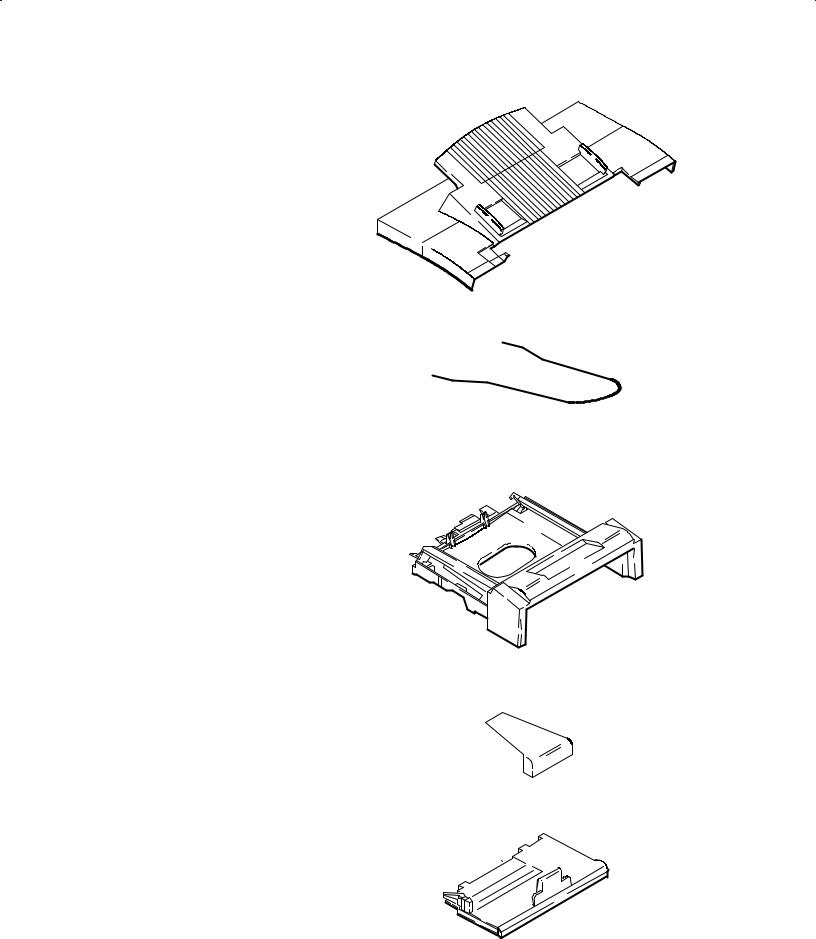
Access Door Assembly
e C 9
Tray Wire (Document Catch)
e C
Output Tray Assembly
e C
Tray Bridge
e C
Input Tray Assembly
e C
r m
1-16 Product Information

2
Installation and Configuration
Subject |
|
|
|
|
Page |
|
Introduction. . . . . . . . . . . . . . . . . . . . . . . . . |
.* . . . . . . . |
. . . . . . . . . . . |
. . . . . . . *. . . |
. . . . . . . . . . . . |
. . . . . . . . . . |
2-3 |
Using Printer Driver Software. . . . . . . . . . . |
. . . . . . . . . |
. . . . . .* . . . . |
. . . . . . . . . . . |
. . . . . . . . . . *. . |
. . . . . . . . . |
2-3 |
Using Microsoft Windows. .3.1. . . . . |
. . . . . . . . . |
. . . . . . . . .* . |
. . . . . . . . . . . . |
. . . . . . . . . . . |
. *. . . . . . . . |
2-4 |
Using Microsoft Windows. .95. . . . . . |
. . . . . . . . . |
. . . . . . . . .* . |
. . . . . . . . . . . . |
. . . . . . . . . . . . |
*. . . . . . . . |
2-4 |
Using DOS software applications. . . . . . . . . . . . . . |
. . . . . . . . . . . |
.* . . . . . . . . . . |
. . . . . . . . . . . . |
. . . *. . . . . |
2-4 |
|
Hardware and Software Requirements. . . . . . . . . . . . . . . . . . . . . |
. . . . .* . . . . . . |
. . . . . . . . . . . . |
. . . . . . . *. |
2-4 |
||
Installing the HP OfficeJet Series 300 Software. . . . . . . . . . . . . . . . . |
. . . . . . . . .* . . |
. . . . . . . . . . . . |
. . . . . . . . |
2-4 |
||
Running the HP OfficeJet Series 300 Manager. . . . . . . |
. . . . . . . . . . . |
. . . . . . . .* . . . |
. . . . . . . . . . . . |
. . . . . . . . |
2-7 |
|
Running Eclipse FAX SE from the HP OfficeJet Series 300.Manager. . . . . . . . . . . |
. . . . . . . . . . . . |
. .* . . . . . |
2-8 |
|||
Changing Parameters and Solving Problems with the OfficeJet Service |
|
|
||||
Application. . . . . . . . . . . . . . . . . . . . . . . . . . |
* . . . . . . . . |
. . . . . . . . . . . |
. . . . . . *. . . . . |
. . . . . . . . . . . . |
. . . . . . . . . |
*2-9 |
Running the Service Application. . . . . . . . . . . . . . |
. . . . . . . . . . . |
.* . . . . . . . . . . |
. . . . . . . . . . . . |
. . . *. . . . . |
2-9 |
|
HP OfficeJet Service Application Characteristics. . . . . . . . . . . . . |
. . . . . . . . . . . |
. .* . . . . . . . . . . |
. . . . . . . . |
2- |
||
Changing Parameters. . . . . . . . . . . . . . . |
. . . . . . . . . |
. .* . . . . . . . . |
. . . . . . . . . . . . |
. . . . . *. . . . . . |
. . . . . . . . . |
2-11 |
Printing a Parameter.Report. . . . . . . . |
. . . . . . . . . |
. . . . . . . .* . . |
. . . . . . . . . . . . |
. . . . . . . . . . . |
*. . . . . . . . . |
2-12 |
Setting the Front Panel Language. . . . . . . . . . . . . . |
. . . . . . . . . . . |
.* . . . . . . . . . . |
. . . . . . . . . . . . |
. . . *. . . . . |
2-13 |
|
Setting Remote Service. . . . . . . . . . . . . |
. . . . . . . . . |
. . . .* . . . . . . |
. . . . . . . . . . . . |
. . . . . . . *. . . . |
. . . . . . . . . |
2-14 |
Using Other PC Fax Programs With Models 330 and. . . .350. . . . . |
. . . . . . . . . . . . |
. . . . .* . . . . . . |
. . . . . . . . |
2-15 |
||
Installing Control Panel and One-Touch. . . . Overlays. . . . . . . . . . . |
. . . . . . . . . . . |
* . . . . . . . . . . . . |
. . . . . . . . |
|
||
Installing a Print Cartridge. . . . . . . . . . . . . . |
. . . . . . . . . |
. . .* . . . . . . . |
. . . . . . . . . . . . |
. . . . . . *. . . . . |
. . . . . . . . . |
2-17 |
Installing an Interface Cable for. . . . .Printing. . . . . . . . . . . . . . . . . |
. . . .* . . . . . . . |
. . . . . . . . . . . . |
. . . . . . *. . |
|
||
Installing the Power. . .Cord. . . . . . . . . . . |
. . . . . . . . . |
. . .* . . . . . . . |
. . . . . . . . . . . . |
. . . . . . *. . . . . |
. . . . . . . . . |
2-19 |
Installing a Tray. Wire. . . . . . . . . . . . . . . . |
. . . . . . . . . |
* . . . . . . . . . . |
. . . . . . . . . . . . |
. . . *. . . . . . . . |
. . . . . . . . . |
2-19 |
Installing an Access Door Assembly. . . . . . . . . . . . . . . |
. . . . . . . . . . . |
* . . . . . . . . . . . |
. . . . . . . . . . . . |
. . *. . . . . . |
2-20 |
|
Installing an Output. . .Tray. . . . . . . . . . . . |
. . . . . . . . . |
. .* . . . . . . . . |
. . . . . . . . . . . . |
. . . . . *. . . . . . . |
. . . . . . . . |
2-20 |
Installing an Input. . .Tray. . . . . . . . . . . . . |
. . . . . . . . . |
.* . . . . . . . . . |
. . . . . . . . . . . . |
. . . . *. . . . . . . . |
. . . . . . . . |
2-21 |
Loading Paper in the Input (Paper). . . .Tray. . . . . . . . |
. . . . . . . . . . . |
. . .* . . . . . . . . |
. . . . . . . . . . . . |
. . . . . *. . . |
2-22 |
|
Loading Envelopes in the Input (Paper). . . . . .Tray. . . . . . . . . . . . . |
. . . . . . .* . . . . |
. . . . . . . . . . . . |
. . . . . . . . |
2-2 |
||
Setting the Paper Size in the Front Panel. . . . . . .Menu. . . . . . . . . . |
. . . . . . . . .* . . |
. . . . . . . . . . . . |
. . . . . . . . |
2 |
||
Setting Up for Printing. . . . . . . . . . . . . . . . . |
. . . . . . . . . |
* . . . . . . . . . . . |
. . . . . . . . . . . |
. . . *. . . . . . . . . |
. . . . . . . . |
2-25 |
Setting Up for Faxing (U.S. and Australian Installations). . . . . . . . . . . . . . . . . . . . . . |
. . . .* . . . . . . . |
. . . . . . . . |
|
|||
Receive fax calls only – no voice calls, on a dedicated. . . . . . . . . . . fax. . . . .line. . . . . . . . . . |
* . . . . . . . |
|
||||
Receive fax and voice calls at the same phone number – without. .an. . .answering. . . . . . . . machine Receive fax and voice calls at the same phone number – with an. . .answering. . . . . . . . . . . . machine
Receive fax and voice calls on the same line with. . . .distinctive. . . . . . . . . . . . ring. . . . . . |
. . . .* . . . . . |
|
||
Setting Up for Distinctive. . .Ring. . . . . . . . . . . . . . . . . . . . |
. . . |
* . . . . . . . . . . . . . . . . . . . . . . . . . |
* . . . . . . . . . . |
2-30 |
Setting the Reception Mode for Incoming. . . . . . . . . .Calls. . . |
. . . . . . . . . . . . .* . . . . . . . . . . . . |
. . . . . . . . . . |
2- |
|
Setting the Number of Rings to.Answer. . . . . . . . . . . . . . . |
. . . |
. . . . . . .* . . . . . . . . . . . . . . . . . . |
. . . . . . . *. . . |
2-32 |
Selecting Tone or Pulse.Dialing. . . . . . . . . . . . . . . . . . . . . . |
. . . |
* . . . . . . . . . . . . . . . . . . . . . . . . . |
* . . . . . . . . . . |
2-33 |
Entering the Date and. . .Time. . . . . . . . . . . . . . . . . . . . . . . |
* . . |
. . . . . . . . . . . . . . . . . . . . . . . *. . . |
. . . . . . . . . . |
2-34 |
Entering the Header Information (company name. .and. . . . fax. . . . .number). . . . . . . . . . . . . |
. .* . . . . . . . |
|
||
Setting Up for Faxing (U.K. Installation). . . . . . . . . . . . . . . |
. . . |
. . . . . . . .* . . . . . . . . . . . . . . . . . . |
. . . . . . . *. . |
2-37 |
Receive fax calls only – no voice calls, on a dedicated. . . . . . . . . . . fax. . . . .line. . . . . . . . . |
.* . . . . . . . |
|
||
Receive fax and voice calls at the same phone number – without. .an. . .answering. . . . . . . . machine Receive fax and voice calls at the same phone number – with an. . .answering. . . . . . . . . . . . machine
Setting Up for Faxing (Germany Installation). . . . . . . . . . . . . . . . . . . . . . . . . . |
* . . . . . . . . . . . . . . . . |
. . . . . . . . 2 |
Receive fax calls only – no voice calls, on . . . . . . . . .a dedicated. . fax. . . . .line. . . . . . . . . . |
* . . . . . . . |
|
Installation and Configuration2-1

Subject |
Page |
Setting Up for Faxing (Germany Installation) (Continued)
Receive fax and voice calls at the same phone number – without. .an. . .answering. . . . . . . . machine Receive fax and voice calls at the same phone number – with an. . .answering. . . . . . . . . . . . machine
Setting Up for Faxing (France Installation). . . . . . . . . . . . . . . . . . . . . . . . . .* . . . . . . . . . . . . . . . . . . . . . . . . . *. Receive fax calls only – no voice calls, on a dedicated. . . . . . . . . . . fax. . . . .line. . . . . . . . . .* . . . . . . .
Receive fax and voice calls at the same phone number – without. .an. . .answering. . . . . . . . machine Receive fax and voice calls at the same phone number – with an. . .answering. . . . . . . . . . . . machine
Setting Up for Faxing (Netherlands Installation). . . . . . . . . . . . . . . . . . . . . . . . . .* . . . . . . . . . . . . . . . . . . . . .
Receive fax calls only – no voice calls, on a dedicated. . . . . . . . . . . fax. . . . .line. . . . . . . . . .* . . . . . . .
Receive fax and voice calls at the same phone number – without. .an. . .answering. . . . . . . . machine Receive fax and voice calls at the same phone number – with an. . .answering. . . . . . . . . . . . machine
2-2 Installation and Configuration

Introduction
In this chapter contains information about installing the software applications provided including the:
DPrinter Drivers
(including Windows driver software)
DHP OfficeJet Series 300 Software
(including the HP OfficeJet Series 300 Manager and Eclipse FAX SE (PC fax applications)
Included is information about installing the:
Dcontrol panel overlay (if a new one is being installed)
Dprint cartridge
Dinterface cable for printing
Dpower cord
Instructions for installing the following customer orderable and installable parts are
Daccess door assembly
Doutput tray assembly
Dinput tray assembly
Dtray wire (document catch) (installation is optional)
Also provided is information on how to:
Dload paper
Dload envelopes
Dset the paper size in the menu
Dset up for printing
Dset up for faxing
Using Printer Driver Software
Detailed information on each of the software installations and their use is provided in t User’s Guides. Also, the applications guides provided with each driver will provide specific installation and use of the software package.
Refer to the options listed below to determine which printer driver the user needs to insta software work with the HP OfficeJet. Printer drivers (also called printer software) are sof user’s printer and allow his software application to access the printer’s features.
Installation and Configuration2-3
Using Microsoft Windows 3.1
Install the HP OfficeJet Series 300 Printer Software for Microsoft Windows 3.1 provided with the HP 300 machine. See the documentation that came with the printer software for installation i
Using Microsoft Windows 95
Ensure that the user has installed the HP OfficeJet Series 300 Printer Software for Microsoft with the HP OfficeJet Series 300 machine. See the documentation that came with the printer sof instructions.
UsingDOS software applications
For each DOS software application used, the user must install a specific printer driver. Th application supplies printer drivers for many printer models. A printer driver that supp already be in the software application. A DOS driver disk can also be ordered separately fro Distribution Center. See the section labeled “Ordering Information” in chapter 1of this guid order this disk. Additional information is providedSettingthisUpsection,for Printingsee.
Hardware and Software Requirements
The following are the minimum computer system requirements:
DParallel port must support bidirectional communication
D4 Megabytes (MB) of Random Access Memory (RAM). 8 MB RAM recommended
D5 MB hard disk space
DWindows 3.1 operating system
Note:To have the customer add the HP OfficeJet Series 300 Manager to the Windows StartUp group, so that the HP OfficeJet Series 300 Manager will run automatically
whenever Windows is started, make sure that the PC has enough memory to run th HP OfficeJet Series 300 Manager simultaneously with all the other applications that will be run. Then, have the customer open the HP OfficeJet Series 300 Manager
and StartUp groups, press the Ctrl key, and click and drag the HP OfficeJet Series 300 Manager icon into the StartUp group.
Installing the HP OfficeJet Series 300 Software
The information provided here will help with the installation of the HP OfficeJet Series 300 So HP OfficeJet Series 300 Manager and Eclipse FAX SE software applications. Additionally, other PC usable with the HP OfficeJet Series 300 are described. Detailed information on custom instal provided in the HP OfficeJet Series 300 User’s Guide for each model.
2-4 Installation and Configuration

Use the following instructions when helping the user install the software for the first ti 300. Have the user perform the following steps:
1.Check that the HP OfficeJet Series 300 device has been properly set up, and that it is connect turned on, and has paper loaded.
2.Close any open applications, saving files if
3.Insert Disk 1 of the HP OfficeJet Series 300 software
into the flexible disk drive.
4.From the Windows Program Manager menu bar, chooseFile/Run. The Run dialog box appears.
5.In theCommand Linebox, type one of the following commands, depending on which flexible d
A:SETUP.EXE orB:SETUP.EXE.
6.An “initializing” screen appears, followed by a screen thatStandardasks the userInstallation,to select
Custom Installation, orUninstall.
We recommend that first-time usersStandardchooseInstallation, which copies all the HP OfficeJet Series 300 software to the hard disk and sets up the device for printing, scanning, and PC faxing. For i Installation, see “Performing a Custom Installation” in the HP OfficeJet Series 300 User’s Guide. about the uninstall option, see “Using the Uninstall Option” in the HP OfficeJet Series 300 User’s G
Click theStandard Installationbutton and thenOK thebutton.
7. A screen appears, allowing the user to specify the directory in which the HP OfficeJet Series installed. The default directoryC:\HPOJET . is
If this is acceptable, clickOK buttonthe . If it is not acceptable, follow the instructions on the s different directory. ThenOKclickbuttonthe.
8.As installation takes place, screens are displayed that provide “must know” informatio Series 300. Reading these screens will give the user a head start on understanding how his new he has read these screens completely before inserting a new installation disk.
9.After all the files have been copied to the hard disk, the setup program tries to communi HP OfficeJet Series 300.
If the device is properly connected and turned on, a screen appears, giving the name of t OfficeJet Series 300 is connected. ClickOK buttonthe .
10.If the setup program cannot find the HP OfficeJet Series 300, follow the troubleshooting inst to correct the problem. ThenRetryclickbuttonthe . The setup program tries again to communicate w OfficeJet Series 300. If it succeeds, a screen appears, giving the name of the port to which the HP O is connected. ClickOK thebutton.
11.The PC Fax Cover Sheet Information dialog box appears. Complete it as directed, pointing field to fill it in. When finished,OK clickbuttonthe.
12.The Fax Header dialog box appears. Complete it as directedOK buttonand click. the
Installation and Configuration2-5
13. The Fax Receive Mode dialog box appears. Complete it as directedOK buttonand click. the
...If This Is the User’s Situation |
Choose This Setting |
The user has a separate telephone number dedicatedAuto. to receiving fax calls only (no voice calls).
The user has one telephone number for both Manualvoiceand. fax calls, anddoesn’thave a telephone answering machine.
The user has one telephone number for both Autovoice(Theand“ringsfax to answer” setting calls, anddoeshave a telephone answering machineofthe. answering machine must be
less than that of the HP OfficeJet.) The user has one telephone number for both Auto,voiceandclickfax Distinctivethe Ring calls, and subscribesdistinctiveto a ringing servicefrom thebutton in the Settings box. telephone company.
14.The Dialing Mode dialog box appears. Complete it as directedOK buttonand click. the
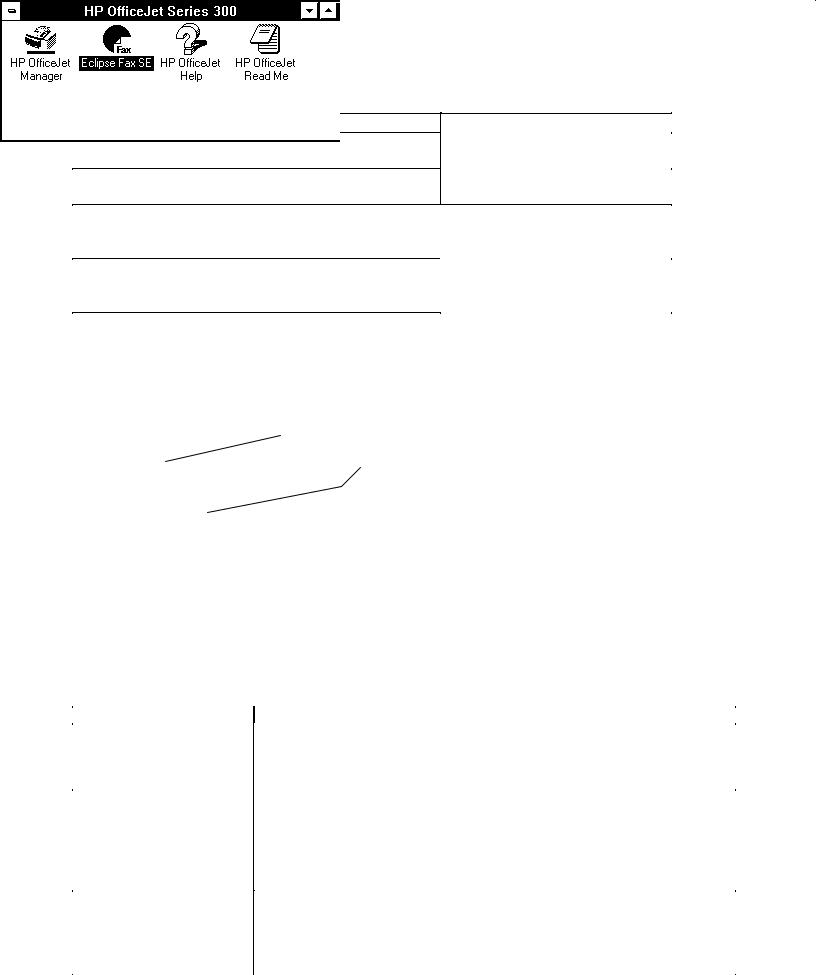
15.Next, the setup program creates the HP OfficeJet Series 300 program group and places it on the It should look similar to this:
The HP OfficeJet
Manager icon
Not present on the
Model 300
16. As a last step, the setup program gives the user the option of reading tips that will help h functions of the new product.
As the first “tips” screen appears, the HP OfficeJet Series 300 prints a Self Test report. This report new internal fonts, reviews the factory device settings, notifies the user about any pri provides product revision information.
Have the user clickExitthebutton when ready to leave the setup program.
If difficulties arise with the installation, review the following recommendations:
Problem |
Recommended Action |
|
|
||
When reinstalling the |
Usesofthesetup program to uninstall the HP OfficeJet Series 300 |
|
software |
||
ware, and the setup |
programtryinstalling again. |
|
|||
says there isn’t enough disk |
|
|
|
|
|
space. |
|
|
|
|
|
The user’s C: drive is full,The HP OfficeJet Series 300 software requires several files to |
|
reside in t |
|||
so he tried to install thatesoftcontains- |
the Windows application. If that drive is full, the setu |
||||
ware on his D: drive, butcannotthe install the HP OfficeJet Series 300 software. Have the user free a |
|||||
setup program still saysspaceheon the drive as he can by either deleting unneeded files or mo |
|||||
don’t have enough diska different drive or onto diskettes. Then tell the user to try instal |
|||||
space. |
|
|
|
|
|
The setup program cannotIfthe user has followed the troubleshooting directions |
|
on the scr |
|||
locate the HP OfficeJet likelySe- |
problem is that a different centronics cable is needed. (Abou |
||||
ries 300. |
centronics cables cannot support bidirectional communications.) |
||||
|
There is also a chance that user’s PC’s centronics port is either not s |
||||
|
cannot support bidirectional communications. |
|
|||
2-6 Installation and Configuration
Problem |
Recommended Action |
|
|
The user is reinstallingMakethesure that the HP OfficeJet Series 300 Manager is not running. Have th |
|||
software. It ran correctlyuserExit from Windows and then try again. Make sure that (1) the dev |
|||
before, but now the setupproperly cabled to the PC, (2) the device is turned on, and (3) the front |
|||
program cannot locatesaysthe“Ready.” |
|||
device. |
|
|
|
The user is trying to |
Either the directory contains files that do not belong to the HP Offi |
||
uninstall the software,300,orbutone or more files are open. Ascertain which of these conditions |
|||
the setup program saysbyitquestioning the user. Correct the problem and try again. |
|||
cannot delete the directory. |
|
||
Running the HP OfficeJet Series 300 Manager
The HP OfficeJet Series 300 Manager is one of two software applications that may be included wi Series 300. The other software application is Eclipse FAX SE (available on the Models 330 and 350, b Model 300), which lets the user do PC faxing and scanning.
The HP OfficeJet Series 300 Manager allows themanageuser tothe way that his or her HP OfficeJet Series 300 works. It can be used it to do the following:
DMonitor the status of the HP OfficeJet Series 300
DPrint logs and reports
DChange the device settings that were made during installation, and make additiona faxing, printing, and copying
Note: The HP OfficeJet Series 300 Manager has one other importantit mustfunction: be running in order to use Eclipse. It canFAX beSE either open as a window or minimized.
To run the HP OfficeJet Series 300 Manager, the user must double-click the HP OfficeJet Series 300 Ma which is placed in the HP OfficeJet Series 300 group during installation. The HP OfficeJet Serie window appears.
The HP OfficeJet
Manager icon
Not present on the
Model 300
The user can minimize or close the HP OfficeJet Series 300 Manager as he would any other Windo Remember that when this application is closed, the user can make copies, print, and send an cannot use Eclipse FAX SE to send and receive PC faxes or do PC scanning. (If the user has a Mod FAX SE is not available.)
Detailed information on use of the Manager is provided in the HP OfficeJet Series 300 User’s Guid
Installation and Configuration2-7

Running Eclipse FAX SE from the HP OfficeJet Series 300 Manager
The HP OfficeJet Series 300 Models 330 and 350 include a software application, Eclipse FAX SE, that all to send and receive faxes directly to his or her PC, rather than to the device itself, and t
Note: Eclipse FAX SE is a separate application from the HP OfficeJet Series 300
Manager, and is not available in the Model 300. Some of the settings that can be made with the HP OfficeJet Series 300 Manager affect PC faxing. In addition,
the HP OfficeJet Series 300 Manager must be running in order to use Eclipse FAX SE . It can be either open as a window or minimized.
There may be times when the user wants to run Eclipse FAX SE directly from the HP OfficeJet S To do so, from the HP OfficeJet Series 300 Manager menu bar, have File/Runthe user Eclipsechoose FAX. SE
Eclipse FAX SE makes it possible for the user to do the following:
DSet up to six phonebooks (lists of names and fax numbers) for use with PC faxes. (Phon similar to the Speed Dial entries that are used for paper faxing.)
DCreate a document in any Windows application and then fax it directly from the PC
DReceive faxes directly to the PC. Once an incoming fax has been received, the user can SE to view, print, and delete it
DForward a fax that has been received to another recipient
DFax a document to a file in order to use it later as a fax document
DScan a document into the PC to be sent as a fax, saved as a file, or printed
DAdd text and images to the faxes
DModify cover pages and include a letterhead and previously created second sheets
DSend two or more documents as a fax.
There are three ways to run Eclipse FAX SE.
1.In the HP OfficeJet Series 300 Manager menu bar,File/RunchooseEclipse FAX SE
2.Double-click the Eclipse FAX SE icon in the HP OfficeJet Series 300 program window.
The Eclipse FAX SE icon (not available in the Model 300)
The Eclipse FAX SE window appears. Note the menu bar across the top of the window. For addit using the Eclipse FAX SE application, refer to the HP OfficeJet Series 300 User’s Guide for the use
3. Click theFaxorScanbutton in the AutoPrompt window.
Detailed information on use of the Eclipse FAX SE is provided in the HP OfficeJet Series 300 User’
2-8 Installation and Configuration
Changing Parameters and Solving Problems with the OfficeJet Service Application
With assistance from a service representative, the OfficeJet Service Application is a program easily change OfficeJet parameters from the PC. The service representative will use this to problems by suggesting parameter changes. The user will key in the changes, and further t or not the problem is solved.
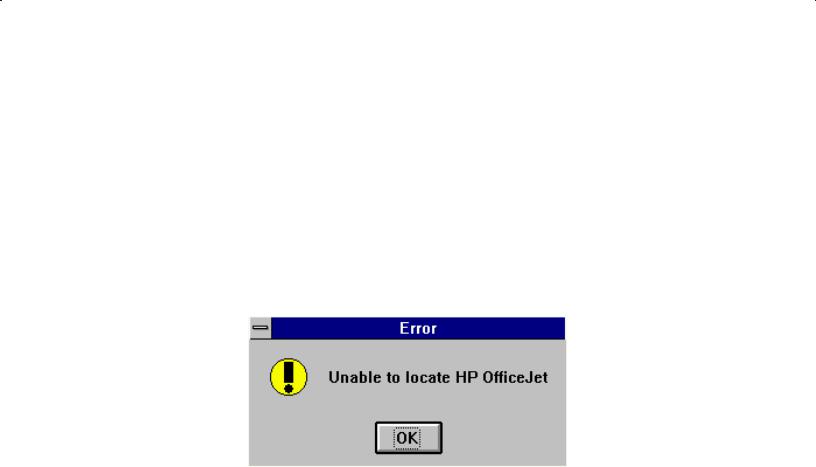
Running the Service Application
Ensure the the HP OfficeJet is connected and powered on. If the HP OfficeJet is not connected a attempt to run the service application will produce the following error message:
Windows 3.1system: To run the Service Application, perform the following steps.
1.From the Program Manager,Filechoose,thenRun.
2.Type the pathname: c:\hpojet\mgr\service.exe. The executable filename that you must r
Note: The actual pathname may differ from c:\hpojet\mgr\service.exe after custom installation. However, the service.exe file will always be in th same directory as the OfficeJet Manager.
3. ClickOK . The window that will appear is shown on the next page of this guide.
Windows 95system: To run the Service Application, perform the following steps.
1.Click onStart. Then chooseRun.
2.Type the pathname: c:\hpojet\mgr\service.exe. The executable filename that you must r
Note: The actual pathname may differ from c:\hpojet\mgr\service.exe after custom installation. However, the service.exe file will always be in th same directory as the OfficeJet Manager.
3. Click OK. The window that will appear is shown on the next page of this guide.
Installation and Configuration2-9
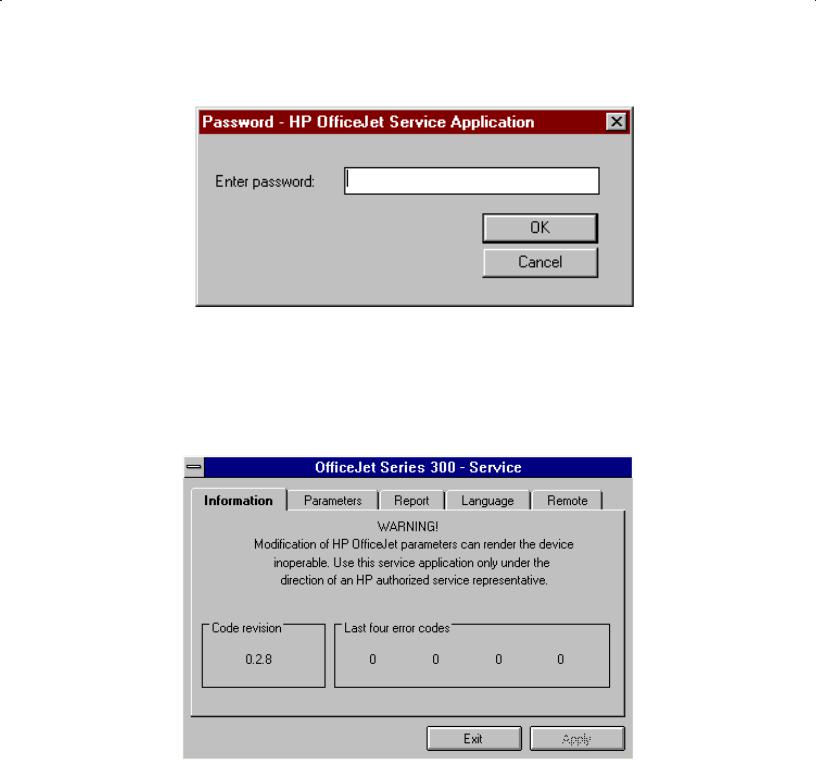
The following window will appear:
To access the HP OfficeJet Service Application, typesolothe.Thenpasswordclick OKThere. will be a delay of approximately 5 to 12 seconds before the HP OfficeJet Series 300 service application appears. on the
HP OfficeJet Service Application Characteristics
When the HP OfficeJet Service Application is up and running, its window will appear as follow
Note: The “Code revision” number or “Last four error codes” numbers may differ from those shown.
The OfficeJet Service Application contains five tab windows. They are:
DInformationDisplays the code revision and the last four system error codes
DParametersUsed to change HP OfficeJet Parameters
DReport Used to print an HP OfficeJet Parameter Report
DLanguage Used to set the HP OfficeJet front panel language
DRemote Used to set the Remote ServiceON orOFF
2-10 Installation and Configuration
Click on the tab (Information, Parameters, Report, Language, or Remote to move between wi
TheApplybutton applies the selected parameter, language, or remote setting to the HP Offic
Exiting the Service Application
|
Whenever exiting the Service Application Program, allow 5 to 10 seconds for t |
|
|
|
terminate the factory and service capability. |
|
|
To exit or quit the program, clickExitbuttonthe.After depressingExitbutton,the be sure to wait 5 to 10 second for the hardware to terminate the factory and service capability before taking any oth observe the HP OfficeJet front panel LCD display for the following events:
DThe phrase “Enter header number” appears on the top line of the HP OfficeJet LCD displa
DA string of characters appears on the bottom line of the HP OfficeJet LCD display.
DThe HP OfficeJet LCD display blanks out briefly and returns to the normal “ready” stat
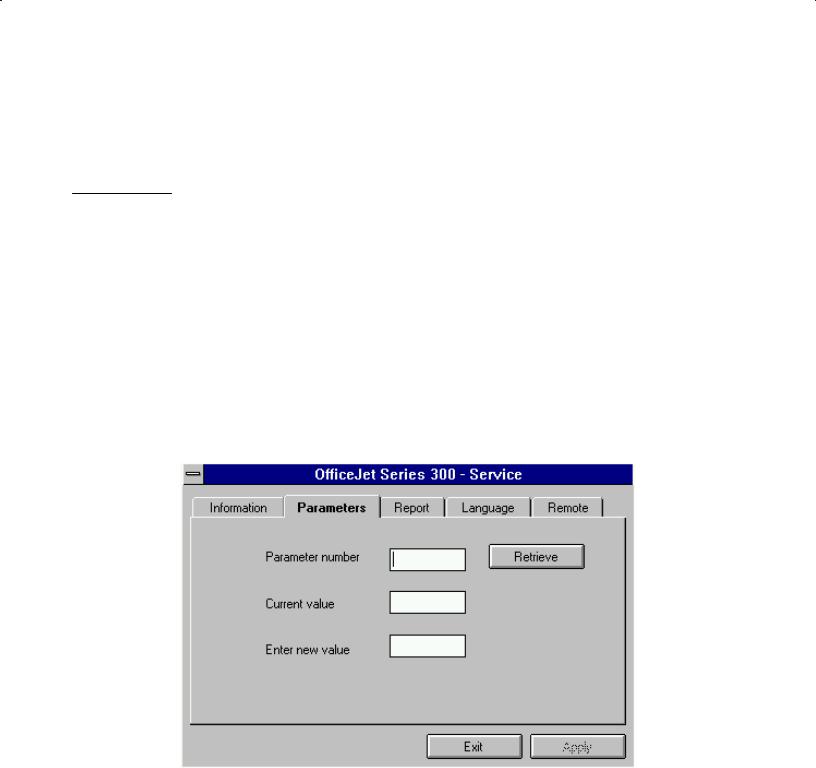
Changing Parameters
Clicking on the “Parameters” tab in the service application main menu causes the window t
To change an HP OfficeJet parameter, perform the following steps:
1.Enter theparameter number.
2.Click onRetrieveto display the current value.
3.Type the new value Enterin the new valuedialog box.
Note:If the user enters the same value in the “Enter new value” dialog box that appea in the “Current value” DialogRetrievebox, theandApplybuttons will be grayed
Installation and Configuration2-11
out. Either change the value in the “Enter new value” dialog box or enter a new parameter number into the Parameter number dialog box.
4. Click on theApplybutton to set the HP OfficeJet with the new parameter value.
If you want to change another parameter, repeat step 1.
Because there minimizeis o button, use the alt and tab keys to hide or show the HP OfficeJet Servi window if another application has covered the Service Application window.
Exiting the Service Application
|
Whenever exiting the Service Application Program, allow 5 to 10 seconds for t |
|
|
|
terminate the factory and service capability. |
|
|
To exit or quit the program, clickExitbuttonthe.After depressingExitbutton,the be sure to wait 5 to 10 second for the hardware to terminate the factory and service capability before taking any oth observe the OfficeJet front panel LCD display for the following events:
DThe phrase “Enter header number” appears on the top line of the HP OfficeJet LCD displa
DA string of characters appear on the bottom line of the HP OfficeJet LCD display.
DThe HP OfficeJet LCD display blanks out briefly and returns to the normal “ready” stat
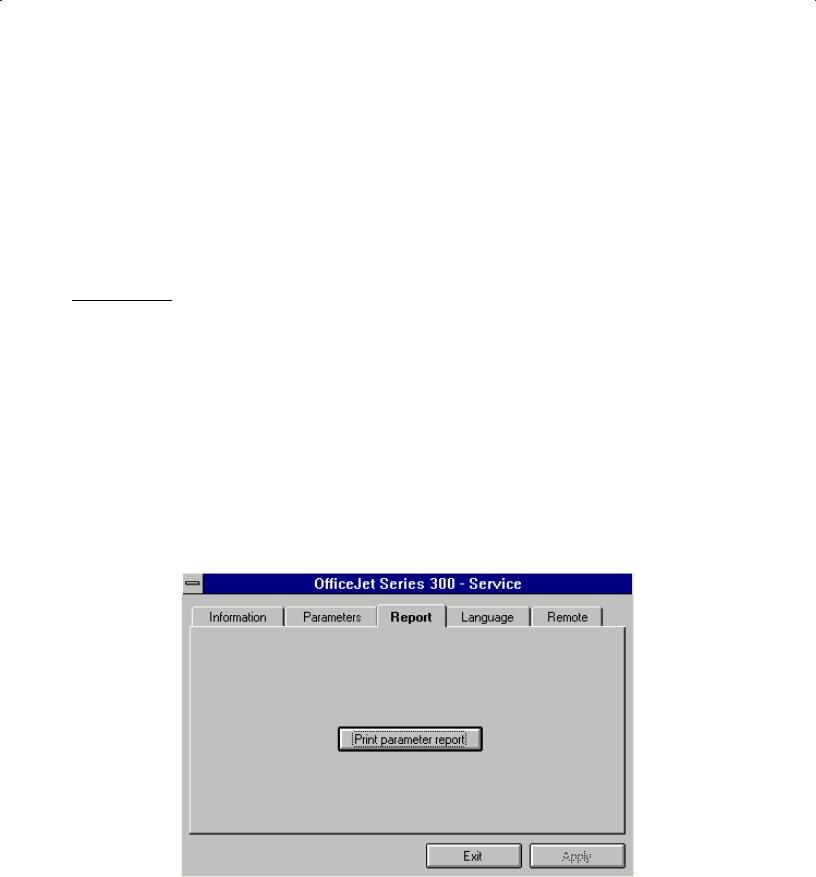
Printing a Parameter Report
Clicking on the “Report tab in the service application main menu causes the window to app
To print a parameter report, clPrintck onparameterthe reportbutton.
Note: There is a 5 second delay before printing begins.
2-12 Installation and Configuration
Exiting the Service Application
|
Whenever exiting the Service Application Program, allow 5 to 10 seconds for t |
|
|
|
terminate the factory and service capability. |
|
|
To exit or quit the program, clickExitbuttonthe.After depressingExitbutton,the be sure to wait 5 to 10 second for the hardware to terminate the factory and service capability before taking any oth observe the OfficeJet front panel LCD display for the following events:
DThe phrase “Enter header number” appears on the top line of the HP OfficeJet LCD displa
DA string of characters appears on the bottom line of the HP OfficeJet LCD display.
DThe HP OfficeJet LCD display blanks out briefly and returns to the normal “ready” sta
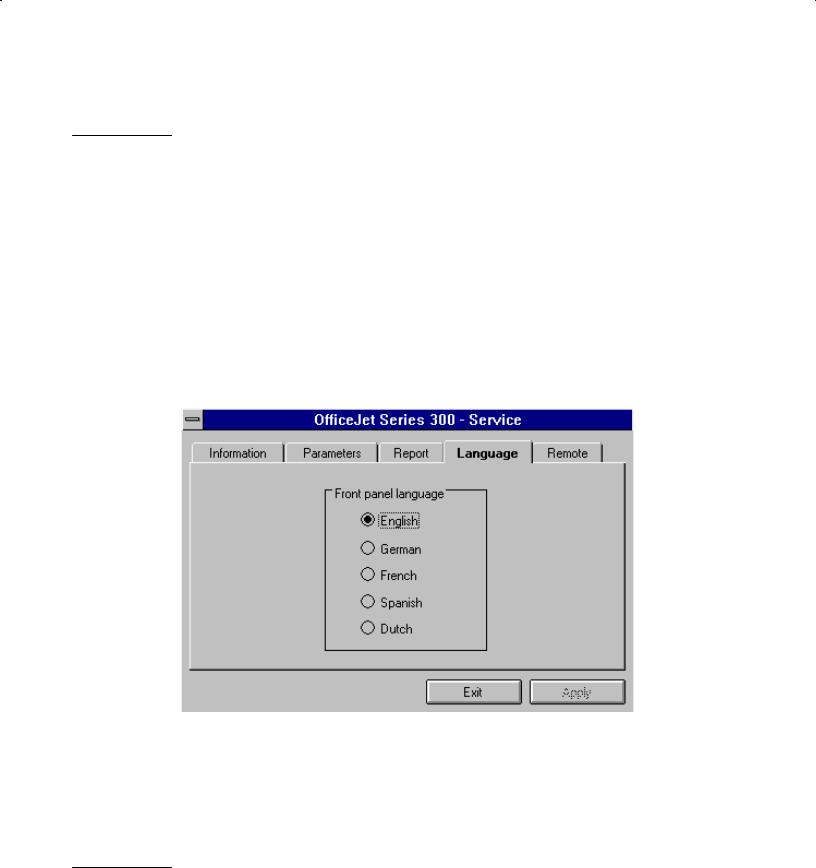
Setting the Front Panel Language
Clicking on the “Language” tab in the service application main menu causes the window to
Select the language. ThenApplyClickto set the front panel language.
Note: It takes 0 to 59 seconds (30 seconds on average) for the front panel menu of the OfficeJet to change.
Exiting the Service Application
|
Whenever exiting the Service Application Program, allow 5 to 10 seconds for t |
|
|
|
terminate the factory and service capability. |
|
|
To exit or quit the program, clickExitbuttonthe.After depressingExitbutton,the be sure to wait 5 to 10 second for the hardware to terminate the factory and service capability before taking any oth observe the OfficeJet front panel LCD display for the following events:
Installation and Configuration2-13
 Loading...