


hp |
Ceiling Mount |
|
mp3130 series |
||
Installation Card |
||
H digital projector |
||
|
Be sure to install the projector into a solid, structural ceiling member:
4Ceiling Mounting Procedure:
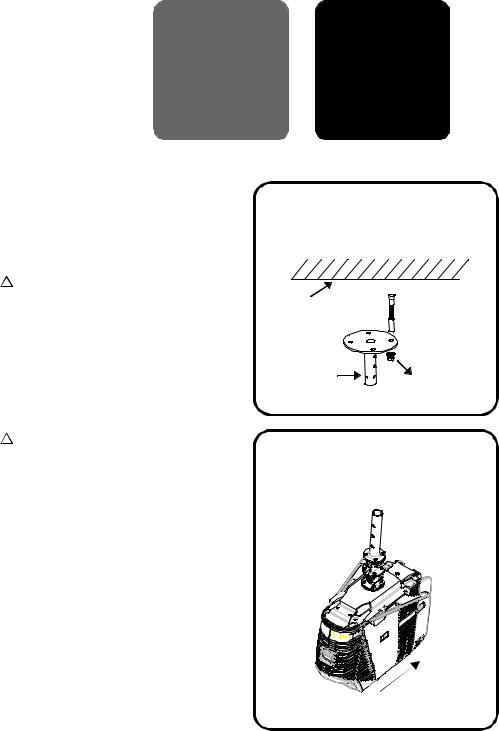
!Before installation, refer to the user manual for the projection distance based upon the desired image size. Use this projection distance to locate the ceiling mount.
uDrill four holes into the structural ceiling member.
Attach the ceiling rod to the ceiling with the four cylinder screws.
Structural Ceiling
Ceiling Rod
Cylinder Screw
!HP recommends that a competent carpenter or electrician install this ceiling mount.
vMount the projector to the ceiling bracket. Slide the projector backwards into the bracket so the hooks engage.
Back
Front
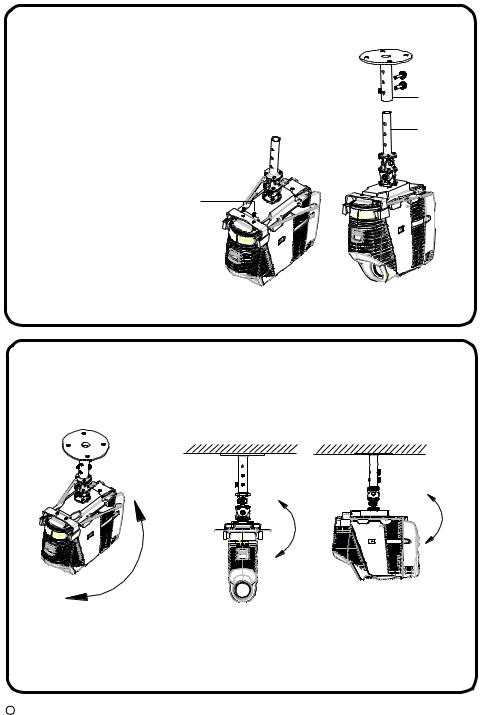
w
Install the front clamp onto the ceiling bracket. The rubber bumper should fit over the tilt button.
Attach the ceiling bracket to the ceiling rod with the two screws. Height adjustments can be made by using different holes on the ceiling rod and ceiling bracket.
vThe total adjustment range is 0 to 1 inches (0~2.5cm). Adjustment can be made in one inch (2.5cm) increment.
Screws
Front Clamp 


x Make necessary roll and yaw adjustments to the projector.
(YAW ADJUSTMENT) |
(ROLL ADJUSTMENT) |
180°
±20°
Ceiling Rod
Ceiling
Bracket
±60°
vOpen the on-screen menu and select Setup > Projector Position. Select the appropriate ceiling option.
CCopyright Hewlett-Packard Development Co., L.P. First Edition (November 2003)
Printed in Taiwan
H digitálníprojektror
Strucný pruvodce
HP
upevnením
série mp3130
stropního držáku
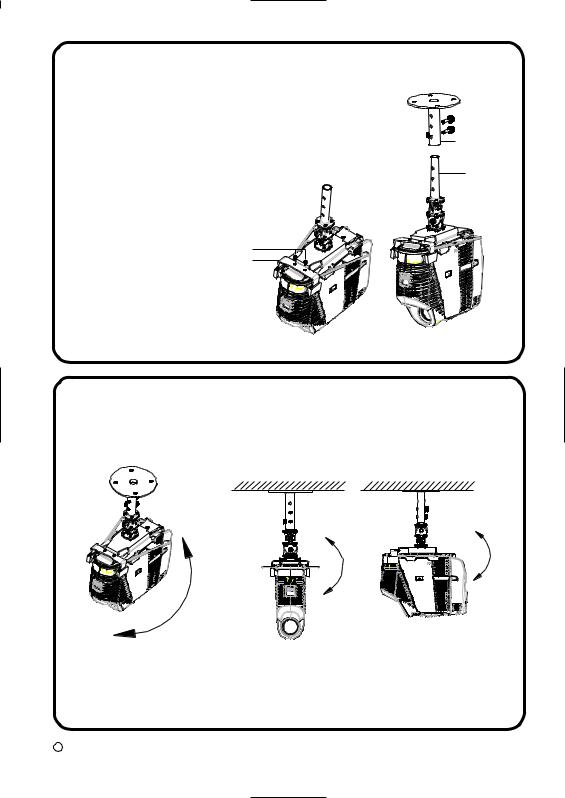
Ujistete se, že projektor upevnujete na strope na pevný nosný konstrukcní prvek:
4Postup pri upevnovánína strop:
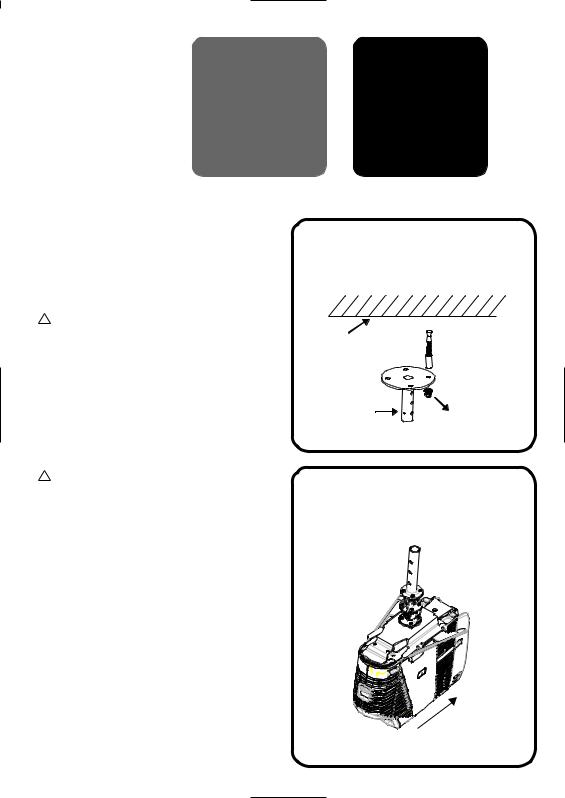
!Pred upevnením nahlédnete do uživatelské prírucky a podle požadované velikosti obrazu urcete projekcní vzdálenost. Použijte tuto projekcnívzálenost pri urcování polohy stropního držáku.
!Firma HP doporucuje, aby stropní držák upevnil kvalifikovaný tesar nebo elektrikár.
uDo nosného konstrukcního prvku vyvrtejte ctyri otvory. Pomocí ctyr válcových šroubu uchyt te stropní tyc ke stropu.
Stropníkonstrukce
Stropnítyc
Válcový šroub
vUpevnete projektor do stropní konzoly. Zasunte projektor pozpátku do konzoly tak, až skoby pevne zapadnou.
Zadnístrana
Prednístrana

w
Upevnete na konzolu prední svorku. Gumový chránic by mel dosedat na tlacítko náklonu.
Pomocí dvou šroubu uchyt te stropní konzolu ke stropní tyci. Pomocí ruzných otvoru na stropní tyci a konzoli mužete prizpusobit výšku.
vCelkový rozsah nastavení je od 0 do 2,5 cm. Nastavení je možné po 2,5 cm krocích. 
Š rouby 


 Prednísvorka


Stropnítyc
Stropníkonzola
x Upravte prícný náklon a vybocení projektoru.
(Ú PRAVA VYBOCENÍ) |
(Ú PRAVA PRÍCNÉ HO NÁ KLONU) |
180°
±60°
±20°
vOtevrete obrazovkové menu a vyberte Nastavení > Pozice projektoru. Vyberte príslušné stropní umístení.
CCopyright Hewlett-Packard Development Co., L.P. Prvnívydání(prosinec 2003)
VytištenonaTaiwanu

Digitaler Projektor |
Installationskarte |
|
der Serie |
||
für die |
||
H hp mp3130 |
||
Deckenmontage |
Der Projektor muss an einer stabilen Deckeneinheit montiert werden:
4Montage des Projektors:
!Je nach gewünschter Bildgröße, die durch den Abstand des Projektors vom Projektionsschirm bestimmt wird, müssen Sie anhand der Angaben im Benutzerhandbuch die Position für die Montage wählen.
!HP empfiehlt, die Deckenmontage von Fachleuten (Elektriker oder Maurer) durchführen zu lassen.
XBohren Sie vier Löcher in die Decke. Befestigen Sie die Deckenhalterung mit den vier Zylinderschrauben an der Decke.
Decke
Deckenhalterung
Zylinderschraube
YMontieren Sie den Projektor an der Deckenschiene. Schieben Sie den Projektor nach hinten auf die Schiene, so dass die Haken einrasten.
Hinten
Vorne
Z
Setzen Sie die Frontklemme auf die Deckenschiene auf. Der
Gummipuffer sollte auf die Schwenktaste passen.
Befestigen Sie die Deckenschiene mit den zwei Schrauben an der Deckenhalterung. Die Höhe kann eingestellt werden, indem Sie verschiedene Löcher der Deckenhalterung und Deckenschiene wählen.
Der gesamte einstellbare Höhenunterschied
beträgt 0 bis 2,5 cm. Der Abstand kann in Schritten von 2,5 cm eingestellt werden.
Schrauben
Frontklemme
Deckenhalterung
Deckenschiene
[Stellen Sie den Projektor auf eine geeignete waagerechte und senkrechte Position ein.
(WAAGERECHTE EINSTELLUNG) (SENKRECHTE EINSTELLUNG)
180°
±60°
±20°
Öffnen Sie das OSD-Menü und wählen Setup > Projector Position. Wählen Sie die geeignete Deckenoption.
CCopyright Hewlett-Packard Development Co., L.P. Erste Ausgabe (Dezember 2003)
Gedruckt in Taiwan
Proyector digital |
Tarjeta de |
|
de la serie |
||
instalación para |
||
H hp mp3130 |
||
montaje en la |
||
|
pared |
Asegúrese de instalar el proyector en un lugar sólido de la estructura del techo:
4Proceso de instalación en el techo:
!Antes de la instalación, consulte el manual del usuario para averiguar la distancia de proyección basándose en el
tamaño de imagen deseado. U t i l i c e e s t a d i s t an c ia d e proyección para ubicar el montaje en el techo.
XPerfore cuatro agujeros en la estructura del techo.
Una la varilla del techo al techo con los cuatro tornillos del cilindro.
Estructura del techo
Varilla del techo
Tornillo del cilindro
!HP recomienda que el montaje en el techo lo realice un carpintero o electricista.
YMonte el proyector en el soporte del techo. Deslice el proyector hacia atrás en el soporte hasta que los ganchos queden fijos.
Posterior
Frontal

Z
Instale la abrazadera frontal en el soporte del techo. El tope de goma debería ajustarse sobre el botón de inclinación.
Una el soporte del techo a la varilla del techo con los dos tornillos. Puede realizar los ajustes de altura usando los distintos agujeros de la varilla del techo y del soporte.
El alcance total de ajuste es de 0 a 1 pulgada (0~2.5cm). Puede realizar el ajuste en incrementos de una pulgada (2.5cm).
Tornillos
Abrazadera frontal
[ Realice los ajustes necesarios de inclinación y giro del proyector.
Varilla del techo
Soporte del techo
(AJUSTE DE GIRO) |
(AJUSTE DE INCLINACIÓN) |
180°
±60°
±20°
Abra el menú en pantalla y seleccione Configuración > Posición del proyector. Seleccione la opción de techo apropiada.
CCopyright Hewlett-Packard Development Co., L.P. Primera edición (diciembre de 2003)
Impreso en Taiwán
 Loading...