


 Loading...
HP Deskjet D1500 series
Windows Help

HP Deskjet D1500 Printer series
HP Photosmart Software Help
© 2007 Hewlett-Packard Development
Company, L.P.
Hewlett-Packard Company notices
The information contained in this document is subject to change without notice.
All rights reserved. Reproduction, adaptation, or translation of this material is prohibited without prior written permission of Hewlett-Packard, except as allowed under copyright laws.
The only warranties for HP products and services are set forth in the express warranty statements accompanying such products and services. Nothing herein should be construed as constituting an additional warranty. HP shall not be liable for technical or editorial errors or omissions contained herein.
Acknowledgements
Windows and Windows XP are U.S. registered trademarks of Microsoft Corporation. Windows Vista is either a registered trademark or trademark of Microsoft Corporation in the United States and/or other countries.
Accessibility
Your HP printer provides a number of features that make it accessible for people with disabilities.
Visual
The printer software is accessible for users with visual impairments or low vision through the use of Windows accessibility options and features. It also supports most assistive technology such as screen readers, Braille readers, and voice-to-text applications. For users who are color blind, colored buttons and tabs used in the software and on the HP printer have simple text or icon labels that convey the appropriate action.
Mobility
For users with mobility impairments, the printer software functions can be executed through keyboard commands. The software also supports Windows accessibility options such as StickyKeys, ToggleKeys, FilterKeys, and MouseKeys. The printer doors, buttons, paper trays, and paper guides can be operated by users with limited strength and reach.
Support
product accessibility, visit HP's Web site at: www.hp.com/accessibility.
For more details about the accessibility of this product and HP's commitment to

Contents
1 |
Welcome.................................................................................................................................... |
5 |
2 |
Special features........................................................................................................................ |
7 |
3 |
Get started |
|
|
Printer at a glance...................................................................................................................... |
8 |
|
Power button and light................................................................................................................ |
9 |
|
Paper tray................................................................................................................................... |
9 |
|
Unfold the paper tray.......................................................................................................... |
10 |
|
Use the paper tray.............................................................................................................. |
11 |
|
Print cartridges.......................................................................................................................... |
11 |
|
Replace print cartridges...................................................................................................... |
11 |
|
Ink-backup mode...................................................................................................................... |
12 |
|
Ink-backup mode output..................................................................................................... |
13 |
|
Exit ink-backup mode......................................................................................................... |
13 |
4 |
Connect the printer |
|
|
USB.......................................................................................................................................... |
14 |
5 |
Print photos |
|
|
Print borderless photos............................................................................................................. |
15 |
|
Print photos with a border......................................................................................................... |
17 |
|
HP Real Life Technologies photo fix........................................................................................ |
19 |
|
Exif Print................................................................................................................................... |
19 |
|
Store and handle photo paper.................................................................................................. |
20 |
|
Save money and ink when printing photos............................................................................... |
20 |
6 |
Print other documents |
|
|
Print e-mail................................................................................................................................ |
21 |
|
Print documents........................................................................................................................ |
22 |
|
Print letters................................................................................................................................ |
23 |
|
Print envelopes......................................................................................................................... |
24 |
|
Print postcards.......................................................................................................................... |
25 |
|
Print index cards and other small media.................................................................................. |
26 |
|
Print labels................................................................................................................................ |
27 |
|
Print transparencies.................................................................................................................. |
28 |
|
Print brochures......................................................................................................................... |
28 |
|
Print greeting cards.................................................................................................................. |
29 |
|
Print booklets............................................................................................................................ |
30 |
|
Print posters.............................................................................................................................. |
32 |
|
Print iron-on transfers............................................................................................................... |
33 |
7 |
Printing tips |
|
|
Print a test page....................................................................................................................... |
35 |
Contents
1

Contents
|
Printing shortcuts...................................................................................................................... |
35 |
|
Create printing shortcuts.................................................................................................... |
36 |
|
Delete printing shortcuts..................................................................................................... |
36 |
|
Set the page order.................................................................................................................... |
37 |
|
Fast/Economical printing.......................................................................................................... |
37 |
|
Print multiple pages on a single sheet of paper........................................................................ |
38 |
|
Print in grayscale...................................................................................................................... |
38 |
|
Two-sided printing.................................................................................................................... |
39 |
|
General Everyday printing........................................................................................................ |
39 |
|
Print preview............................................................................................................................. |
39 |
|
Set a custom paper size........................................................................................................... |
40 |
|
Select a paper type................................................................................................................... |
40 |
|
Change the print speed or quality............................................................................................. |
40 |
|
Print resolution.......................................................................................................................... |
41 |
|
Maximum dpi............................................................................................................................ |
41 |
|
Resize a document .................................................................................................................. |
42 |
|
Bound two-sided documents.................................................................................................... |
42 |
|
Print a Web page...................................................................................................................... |
43 |
|
Presentation printing................................................................................................................. |
44 |
8 |
Printer software |
|
|
Make the HP Deskjet the default printer................................................................................... |
45 |
|
Set default print settings........................................................................................................... |
45 |
|
Printer Properties dialog box.................................................................................................... |
46 |
|
What's This? help..................................................................................................................... |
47 |
|
Download printer software updates.......................................................................................... |
47 |
9 |
Maintenance |
|
|
Install print cartridges............................................................................................................... |
48 |
|
Print cartridges.................................................................................................................... |
48 |
|
Selection numbers.............................................................................................................. |
48 |
|
Printing with one print cartridge.......................................................................................... |
49 |
|
Installation instructions....................................................................................................... |
49 |
|
Align the print cartridges........................................................................................................... |
51 |
|
Automatically clean print cartridges.......................................................................................... |
52 |
|
View estimated ink levels......................................................................................................... |
52 |
|
Maintain the printer body.......................................................................................................... |
53 |
|
Remove ink from your skin and clothing................................................................................... |
53 |
|
Manually clean print cartridges................................................................................................. |
53 |
|
Maintain print cartridges........................................................................................................... |
54 |
|
Printer Toolbox......................................................................................................................... |
55 |
2

Contents |
|
10 Shop for ink supplies ............................................................................................................ |
56 |
11 Troubleshooting |
|
Error messages........................................................................................................................ |
57 |
Print cartridge error messages........................................................................................... |
57 |
Incorrect print cartridge or print cartridge missing........................................................ |
57 |
Print cartridge problem message.................................................................................. |
58 |
Print cartridge carriage is stuck.................................................................................... |
58 |
Incompatible print cartridges........................................................................................ |
58 |
Out of paper........................................................................................................................ |
62 |
There was an error writing to USB port.............................................................................. |
62 |
Two-way communication cannot be established or Printer not responding....................... |
62 |
Installation problems................................................................................................................. |
62 |
Power light is on or flashing...................................................................................................... |
64 |
What the flashing light means............................................................................................ |
65 |
If an error message appears.............................................................................................. |
65 |
If no error message appears.............................................................................................. |
65 |
Printer does not print................................................................................................................ |
65 |
Verify the following............................................................................................................. |
65 |
Unable to print.................................................................................................................... |
66 |
If the printer still does not print........................................................................................... |
71 |
Document prints slowly............................................................................................................. |
71 |
Print cartridge problems........................................................................................................... |
71 |
Resolving print cartridge error messages........................................................................... |
72 |
Print cartridge carriage is stalled........................................................................................ |
74 |
Paper problems........................................................................................................................ |
76 |
Paper jam........................................................................................................................... |
76 |
Out of paper........................................................................................................................ |
77 |
Printer prints on multiple sheets at once............................................................................ |
81 |
Photos do not print correctly..................................................................................................... |
82 |
Check the paper tray.......................................................................................................... |
82 |
Check the printer properties............................................................................................... |
82 |
Problems with borderless documents....................................................................................... |
82 |
Borderless printing guidelines............................................................................................ |
83 |
Image is printed at an angle............................................................................................... |
83 |
Streaks appear in a light portion of a photo........................................................................ |
84 |
Fading occurs on the edges of a photo.............................................................................. |
84 |
Photo has an unwanted border.......................................................................................... |
84 |
For small photo paper................................................................................................... |
85 |
For small photo paper with a tear-off tab...................................................................... |
85 |
Print quality is poor................................................................................................................... |
86 |
Wrong, inaccurate, or bleeding colors................................................................................ |
87 |
Ink is not filling the text or graphics completely.................................................................. |
89 |
The printout has a horizontal band of distortion near the bottom of a borderless |
|
print..................................................................................................................................... |
91 |
Printouts have horizontal streaks or lines........................................................................... |
92 |
Printouts are faded or have dull colors............................................................................... |
93 |
Printouts seem blurry or fuzzy............................................................................................ |
94 |
Printouts are slanted or skewed......................................................................................... |
95 |
Ink streaks on the back of the paper.................................................................................. |
96 |
Contents
3

Contents
|
Document is misprinted............................................................................................................ |
97 |
|
Text and images are misaligned......................................................................................... |
97 |
|
Document is printed off-center or at an angle.................................................................... |
98 |
|
Parts of the document are missing or printed in the wrong place....................................... |
98 |
|
Envelope is printed at an angle.......................................................................................... |
98 |
|
Document does not reflect the new print settings .............................................................. |
98 |
|
If you continue to have problems.............................................................................................. |
98 |
A |
HP support |
|
|
Ink cartridge warranty information............................................................................................ |
99 |
|
Support process....................................................................................................................... |
99 |
|
HP support by phone.............................................................................................................. |
100 |
|
Phone support period....................................................................................................... |
100 |
|
Placing a call.................................................................................................................... |
100 |
|
After the phone support period......................................................................................... |
100 |
B |
Technical information |
|
|
Printer specifications.............................................................................................................. |
101 |
|
Notice to Windows 2000 users............................................................................................... |
101 |
|
Environmental product stewardship program......................................................................... |
101 |
|
Paper use......................................................................................................................... |
102 |
|
Plastics............................................................................................................................. |
102 |
|
Material safety data sheets............................................................................................... |
102 |
|
Recycling program............................................................................................................ |
102 |
|
HP inkjet supplies recycling program............................................................................... |
102 |
|
Energy Star® notice......................................................................................................... |
102 |
|
Disposal of waste equipment by users in private households in the European |
|
|
Union................................................................................................................................ |
104 |
|
Regulatory notices.................................................................................................................. |
104 |
|
FCC statement.................................................................................................................. |
105 |
|
LED indicator statement................................................................................................... |
105 |
|
Notice to users in Korea................................................................................................... |
106 |
|
VCCI (Class B) compliance statement for users in Japan................................................ |
106 |
|
Notice to users in Japan about the power cord................................................................ |
106 |
|
Toxic and hazardous substance table.............................................................................. |
106 |
|
HP Deskjet D1500 Printer series declaration of conformity.............................................. |
107 |
Index............................................................................................................................................ |
108 |
|
4

1 Welcome
Welcome to the HP Deskjet D1500 Printer series Help. For details on how to use your computer and the printer together, see the following table and select an appropriate topic. You can also use the table of contents pane on the left to locate information.
If you are using the product with a Windows 2000 computer, some features may not be available. For more information, see Notice to Windows 2000 users.
 NOTE: For information about installing the software, see the Setup Guide that came with the printer.
Section |
Description |
|
|
Special features |
Learn about some of the printer's special features. |
|
|
Get started |
Learn how to operate the printer and use and replace the print |
|
cartridges. |
|
|
Connect the printer |
Learn how to connect the printer to your computer. |
|
|
Print photos |
Learn how to print photos, adjust the appearance of photos |
|
before you print, store and handle photo paper, and share photos |
|
with friends and family. |
|
|
Print other documents |
Learn how to print a variety of documents, including e-mail, |
|
greeting cards, envelopes, labels, posters, booklets, |
|
transparencies, and iron-on media. |
|
|
Printing tips |
Learn how to use printing shortcuts, select a paper type, change |
|
the print resolution, set the page order, print multiple pages on |
|
a single sheet, preview a document, and use two-sided printing. |
|
|
Printer software |
Learn how to make the HP Deskjet the default printer, set default |
|
print settings, and download printer software updates. |
|
|
Maintenance |
Learn how to install and care for print cartridges, view how much |
|
ink is left in a print cartridge, print a test page, and remove ink |
|
stains. |
|
|
Troubleshooting |
Find a solution to a hardware or software problem. |
|
|
HP support |
Find out how to contact HP support. |
|
|
Shop for ink supplies |
Order supplies for the printer. |
|
|
Printer specifications |
Learn about the paper capacity, requirements, and other |
|
specifications for the printer. |
Welcome
Welcome 5

Chapter 1
(continued)
Section |
Description |
|
|
HP inkjet supplies recycling |
Find out how to recycle print cartridges. |
program |
|
|
|
Welcome
6 Welcome

2 Special features
Congratulations! The HP Deskjet is equipped with several exciting features:
•User friendly: Easy to install and operate.
•Borderless printing: Print 4 x 6 inch photos to the edges of the paper by using the borderless printing feature. For information, see Print borderless photos.
•Estimated ink levels: Know the approximate ink level of each print cartridge with the Estimated Ink Levels option in the printer Toolbox. For information, see View estimated ink levels.
•Ink-backup mode: Print with one print cartridge. For information, see Ink-backup mode.
Special features
Special features |
7 |

3Get started
•Printer at a glance
•Power button and light
•Paper tray
•Print cartridges
•Ink-backup mode
Printer at a glance
Click the links below to learn about the printer features.
1 |
Power button and light |
|
|
2 |
Paper tray |
|
|
1 Print cartridges
started Get
8 Get started
1 USB port
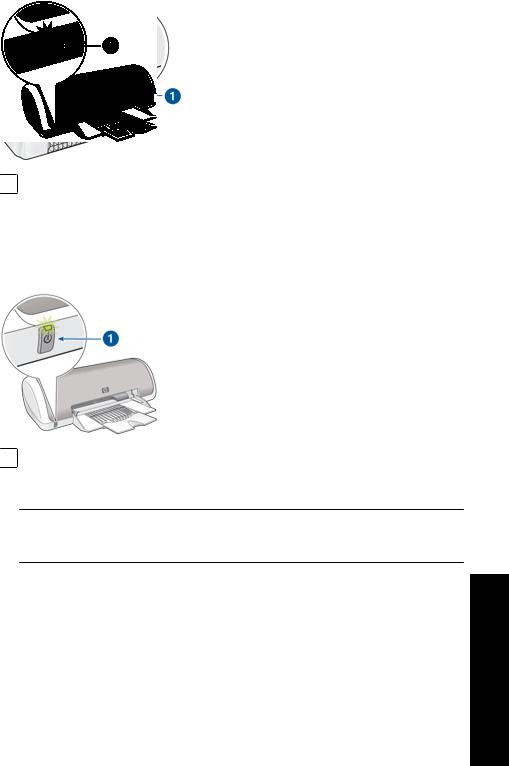
Power button and light
Use the Power button to turn the printer on and off. It can take a few seconds for the printer to turn on after you press the Power button.
1 Power button and light
The Power light flashes when the printer is processing.
 CAUTION: Always use the Power button to turn the printer on and off. Using a power strip, surge protector, or a wall-mounted switch to turn the printer on and off might cause printer failure.
Paper tray
The fold-out paper tray holds paper and other media to be printed. Unfold the paper tray before printing.
•Unfold the paper tray
•Use the paper tray
Get started
Power button and light |
9 |
Chapter 3
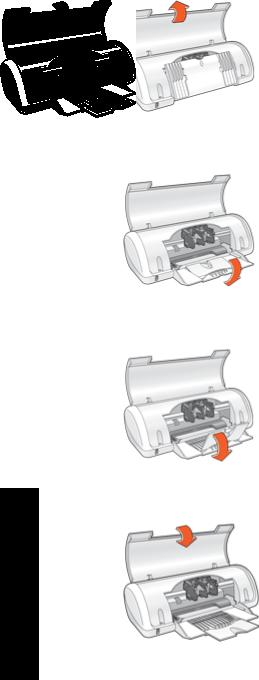
Unfold the paper tray
To unfold the paper tray 1. Raise the printer cover.
2. Lower the paper tray.
3. Fold out the tray extension.
4. Lower the printer cover.
started Get
10 Get started
Use the paper tray
Print on different sizes of media by sliding the paper guide to the right or to the left. The printer deposits printed pages on the top of the paper tray.
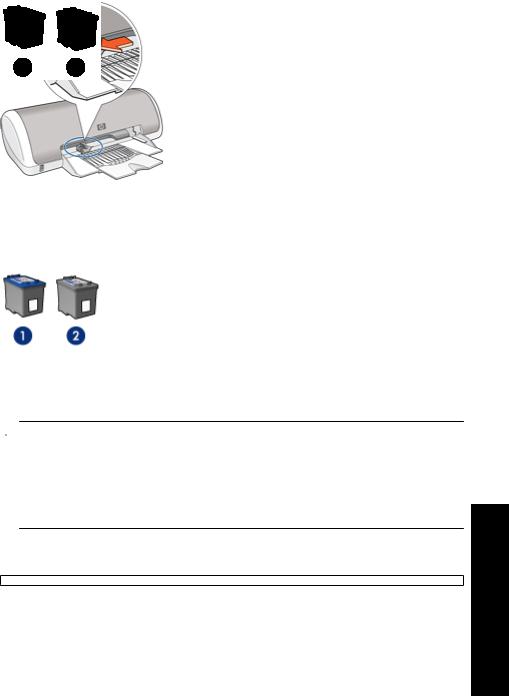
Print cartridges
Two print cartridges can be used with the printer.
1 |
Tri-color print cartridge |
|
|
2 |
Black print cartridge |
|
|
 NOTE: Your printer might be packaged with only a tri-color print cartridge. For better results, install a black print cartridge in addition to the tri-color print cartridge. You can print without a black print cartridge but doing so can cause the printer to print more slowly and printed colors to differ from those you would see if a black print cartridge and a tri-color print cartridge were installed.
For information on ordering print cartridges, see Shop for ink supplies.
Replace print cartridges
When buying print cartridges, look for the print cartridge selection number.
Get started
Print cartridges |
11 |
Chapter 3
You can find the selection number in three places:
•Selection number label: Look at the label on the print cartridge that you are replacing.
1Selection number label
•Printer documentation: For a list of print cartridge selection numbers, see the reference guide that came with the printer.
•Print Cartridge Ordering Information dialog box: For a list of print cartridge selection numbers, open the printer Toolbox, click the Estimated Ink Level tab, and then click the Print Cartridge Information button.
The printer can operate in ink-backup mode. For more information, see Ink-backup mode.
For information about installing a replacement print cartridge, see Installation instructions.
Ink-backup mode
In the ink-backup mode, the printer operates with only one print cartridge. The ink-backup mode is initiated when a print cartridge is removed from the print cartridge carriage.
 NOTE: When the printer operates in ink-backup mode, a message is displayed on screen. If the message is displayed and two print cartridges are installed in the printer, verify that the protective piece of plastic tape has been removed from each print cartridge. When plastic tape covers the print cartridge contacts, the printer cannot detect that the print cartridge is installed.
started Get
12 Get started
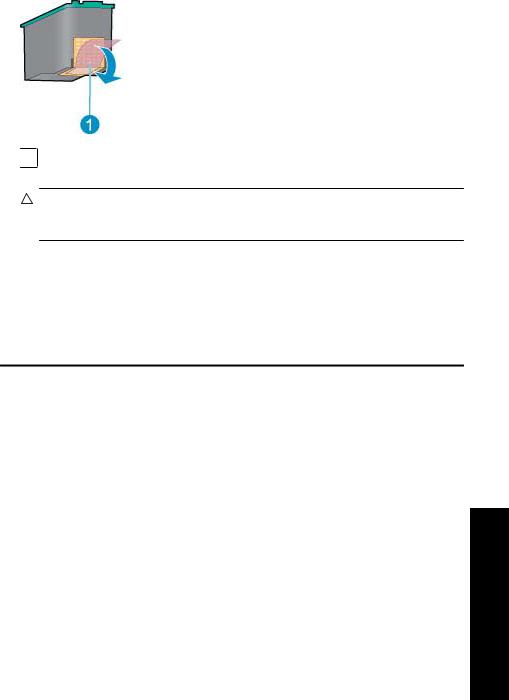
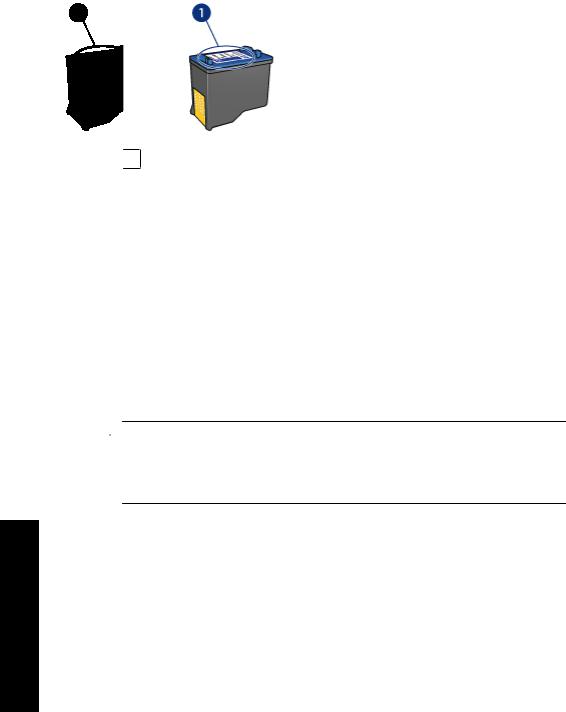
To remove plastic tape from a print cartridge
▲Hold the print cartridge so that the copper strips are on the bottom and facing toward the printer, and then carefully remove the plastic tape.
1 Remove plastic tape
CAUTION: Do not touch the print cartridge ink nozzles or copper contacts. Touching these parts will result in clogs, ink failure, and bad electrical connections. Do not remove the copper strips. They are required electrical contacts.
For more information about ink-backup mode, see the following topics:
•Ink-backup mode output
•Exit ink-backup mode
Ink-backup mode output
Printing in ink-backup mode slows the printer and affects the quality of printouts.
Installed print cartridge |
Result |
|
Black print cartridge |
Colors print as grayscale. |
|
|
|
|
Tri-color print cartridge |
Colors print but black is grayed and is not a true |
|
black. |
||
|
||
|
|
Exit ink-backup mode
Install two print cartridges in the printer to exit ink-backup mode.
For information about installing a print cartridge, see Installation instructions.
Get started
Ink-backup mode |
13 |
printer the Connect
4Connect the printer
• USB
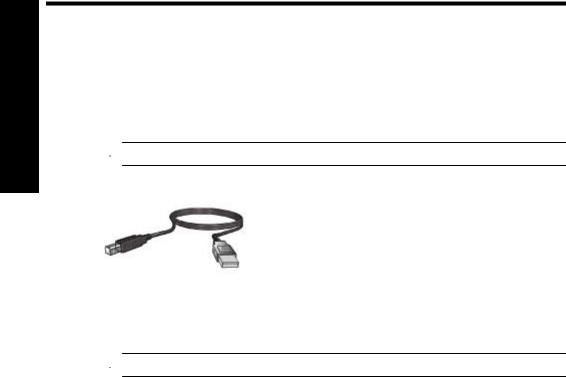
USB
The printer connects to the computer with a universal serial bus (USB) cable.
 NOTE: For best printing performance, use a USB 2.0 compatible cable.
For instructions about connecting the printer with a USB cable, see the Setup Guide that came with the printer.
 NOTE: A USB cable might not be packaged with your printer.
14 Connect the printer
5 Print photos
The printer software offers several features that make printing digital photos easier and improve photo quality.
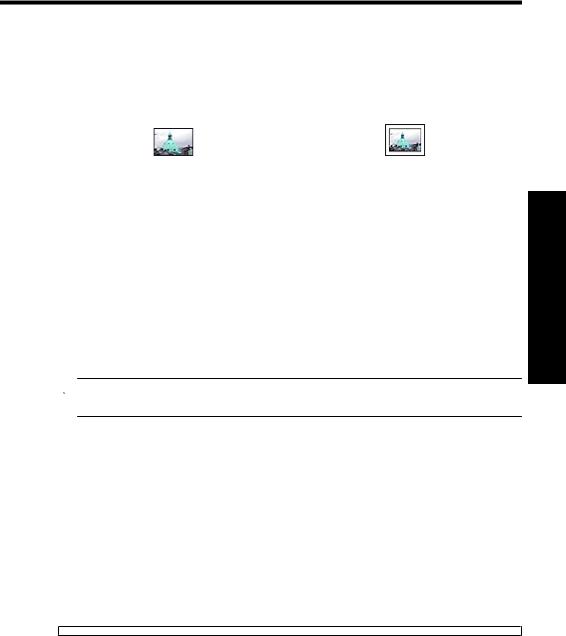
Learn how to print photos
Print borderless photos. |
Print photos with a border. |
Learn how to perform other photo printing tasks
•Print an Exif Print-formatted photo if you have Exif Print-enabled software.
•Prevent photo paper from curling by following the photo paper storage and handling guidelines.
•Save money and ink when printing photos by using HP Everyday Photo Paper.
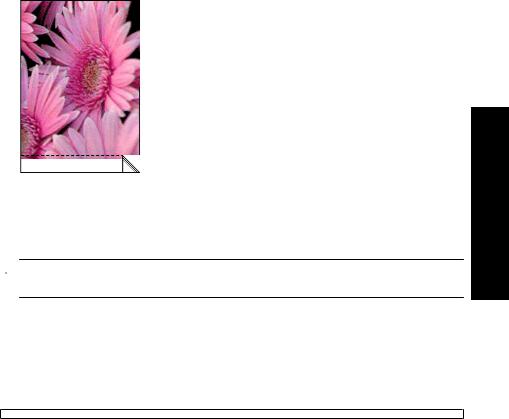
Print borderless photos
To print borderless photos, use 4 x 6 inch photo paper with a 0.5 inch tab (10 x 15 cm with 1.25 cm tab). The photo prints without borders on three sides and with a small border on the bottom edge that you tear off to make the photo completely borderless.
 NOTE: If you are using the product with a Windows 2000 computer, some features may not be available. For more information, see Notice to Windows 2000 users.
Guidelines
•Use 4 x 6 inch photo paper with a 0.5 inch tab (10 x 15 cm with 1.25 cm tab).
•Do not print borderless photos in ink-backup mode. Always have two print cartridges installed in the printer.
For more information, see Ink-backup mode.
•Open the file in a software program such as HP Photosmart Software and resize the photo. Ensure that the size corresponds to the paper size that you want to use.
•For maximum fade resistance, use HP Premium Plus Photo Paper.
•Verify that the photo paper that you are using is flat. For information about preventing photo paper from curling, see the photo paper storage instructions.
•Do not exceed the paper tray capacity: 15 sheets of photo paper.
Print photos
Prepare to print
1.Slide the paper guide all the way to the left.
2.Verify that the photo paper is flat.
Print photos |
15 |
Chapter 5
photos Print
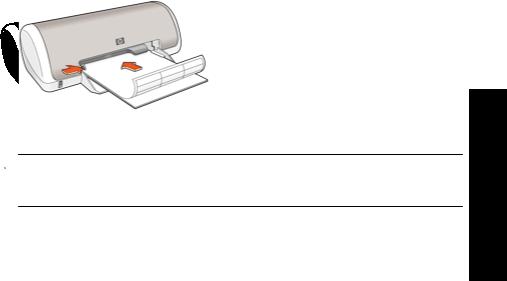
3.Place the photo paper in the right side of the tray. The side to be printed on should face down and the short edge should point towards the printer.
If you are using photo paper that has a tear-off tab, verify that the tab is pointing away from the printer.
4.Push the paper into the printer until it stops.
5.Slide the paper guide firmly against the edge of the paper.
 NOTE: If your software program includes a photo printing feature, follow the instructions that are provided with the software program. Otherwise, follow these instructions.
1.Open the photo in a software program that allows editing, such as HP Photosmart Software.
2.Open the Printer Properties dialog box.
3.Click the Printing Shortcuts tab.
4.In the Printing Shortcuts list, click Photo Printing-Borderless, and then select the following options:
• Print Quality: Normal or Best
 NOTE: For maximum dpi quality, go to the Advanced tab, and then select Enabled from the Maximum dpi drop-down list. For more information, see Maximum dpi.
•Paper Type: An appropriate photo paper type
•Paper Size: An appropriate borderless photo paper size
•Orientation: Portrait or Landscape
16 Print photos
5.If necessary, change the HP Real Life Technologies photo fix setting.
6.Select any other print settings that you want, and then click OK.
If you printed on photo paper with a tear-off tab, remove the tab to make the document completely borderless.
Use the What's This? help to learn about the features that appear in the Printer Properties dialog box.
Print photos with a border
 NOTE: If you are using the product with a Windows 2000 computer, some features may not be available. For more information, see Notice to Windows 2000 users.
Guidelines
•For maximum fade resistance, use HP Premium Plus Photo Paper.
•Verify that the photo paper that you are using is flat. For information about preventing photo paper from curling, see the photo paper storage instructions.
•Do not exceed the paper tray capacity: 15 sheets of photo paper.
Print photos
Prepare to print
1.Slide the paper guide all the way to the left.
2.Verify that the photo paper is flat.
3.Place the photo paper in the right side of the tray. The side to be printed on should face down and the short edge should point towards the printer.
Print photos with a border |
17 |
Chapter 5
4.Push the paper into the printer until it stops.
5.Slide the paper guide firmly against the edge of the paper.
1 Small photos
photos Print
2 Large photos
 NOTE: If your software program includes a photo printing feature, follow the instructions that are provided with the software program. Otherwise, follow these instructions.
1.Open the photo in a software program that allows editing, such as HP Photosmart Software.
2.Open the Printer Properties dialog box.
3.Click the Printing Shortcuts tab.
4.In the Printing Shortcuts list, click Photo Printing-with white borders, and then select the following options:
• Print Quality: Normal or Best
 NOTE: For maximum dpi quality, go to the Advanced tab, and then select Enabled from the Maximum dpi drop-down list. For more information, see Maximum dpi.
•Paper Type: An appropriate photo paper type
•Paper Size: An appropriate photo paper size
•Orientation: Portrait or Landscape
5.If necessary, change the HP Real Life Technologies photo fix setting.
6.Select any other print settings that you want, and then click OK.
Use the What's This? help to learn about the features that appear in the Printer Properties dialog box.
18 Print photos

HP Real Life Technologies photo fix
HP Real Life Technologies enhance the quality of your printed photos.
In most cases, you do not need to change the Basic default print setting. The Basic setting sharpens the images that you print, and improves the quality and clarity of low resolution images, such as those downloaded from the Internet.
You can change the setting to Full if the images that you print are under exposed or over exposed, contain dark areas or red eye, or have colors that appear washed out.
You can also select the Off setting if you prefer to edit the image manually in a software program such as HP Photosmart Software.
 TIP: You can remove red-eye coloring in the photo when using the Off or Basic mode by selecting the Remove red eye check box.
To change the HP Real Life Technologies setting
1.Open the Printer Properties dialog box.
2.Click the Features tab.
3.In the HP Real Life Technologies Photo fix drop-down list, select the appropriate setting for the photo you are printing.
Exif Print
Exif Print (Exchangeable Image File Format 2.2) is an international digital imaging standard that simplifies digital photography and enhances printed photos. When a photo is taken with an Exif Print-enabled digital camera, Exif Print captures information such as exposure time, type of flash, and color saturation, and stores it in the image file. The printer software then uses this information to automatically perform image-specific enhancements to create outstanding photos.
To print Exif Print-enhanced photos, you must have the following items:
•A digital camera that supports Exif Print
•Exif Print-enabled photo software, such as HP Photosmart Software
Print photos
To print Exif Print-enhanced photos
1.Open the photo in an Exif Print-enabled software program that allows editing, such as HP Photosmart Software.
2.Open the Printer Properties dialog box.
3.Click the Features tab.
4.In the Paper Type drop-down list, click More, and then select the appropriate photo paper type.
HP Real Life Technologies photo fix |
19 |

Chapter 5
5.In the Print Quality drop-down list, click Normal or Best.
 NOTE: For maximum dpi quality, go to the Advanced tab, and then select Enabled from the Maximum dpi drop-down list. For more information, see Maximum dpi.
6.Select any other print settings that you want, and then click OK. The printer software automatically optimizes the printed image.
Store and handle photo paper
Follow these instructions to maintain the quality of HP brand photo paper.
photos Print
Storage
•Keep unused photo paper in a sealed plastic bag. Store the packaged photo paper on a flat surface in a cool place.
•When you are ready to print, remove only the paper that you plan to use immediately from the plastic bag. When you have finished printing, return any unused photo paper to the plastic bag.
•Do not leave unused photo paper in the paper tray. The paper might start to curl, which can reduce the quality of your photos.
Handling
•Always hold photo paper by its edges. Fingerprints on photo paper can reduce print quality.
•If the corners of the photo paper curl more than 10 mm (0.4 inch), flatten the paper by putting it in the storage bag, and then gently bending it in the opposite direction of the curl until the paper lies flat.
Photo paper should be flat before it is printed on.
Save money and ink when printing photos
To save money and ink when printing photos, use HP Everyday Photo Paper and set the print quality to Normal.
HP Everyday Photo Paper is designed to create quality photos with less ink.
 NOTE: For higher-quality photos, use HP Premium Plus Photo Paper and set the print quality to Best or Maximum dpi. For more information on enabling the maximum dpi mode, see Maximum dpi.
20 Print photos
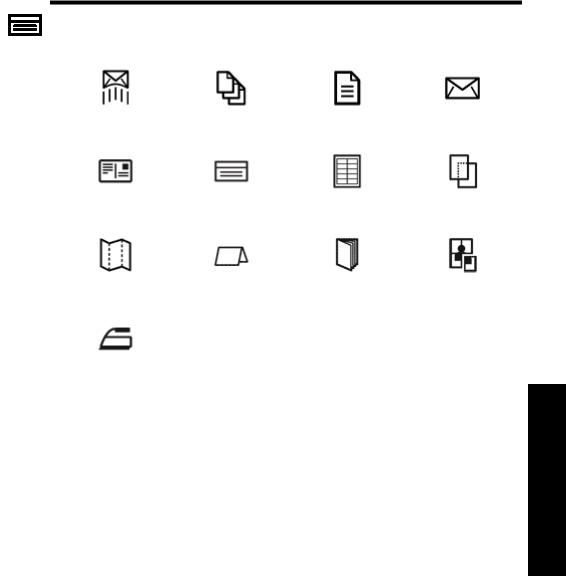
6 Print other documents
Documents |
Letters |
Envelopes |
Postcards |
Index cards |
Labels |
Transparencies |
Brochures |
Greeting cards |
Booklets |
Posters |
Iron-on transfers
Printing tips: Minimize your cost and effort while maximizing the quality of your printouts with printing tips.
Printer software: Learn about the printer software.
Print e-mail
Guidelines
Do not exceed the paper tray capacity: 80 sheets of plain paper.
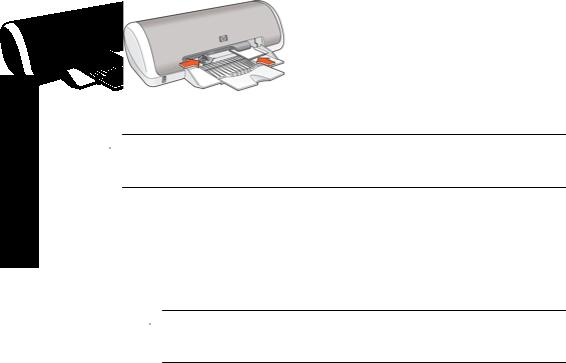
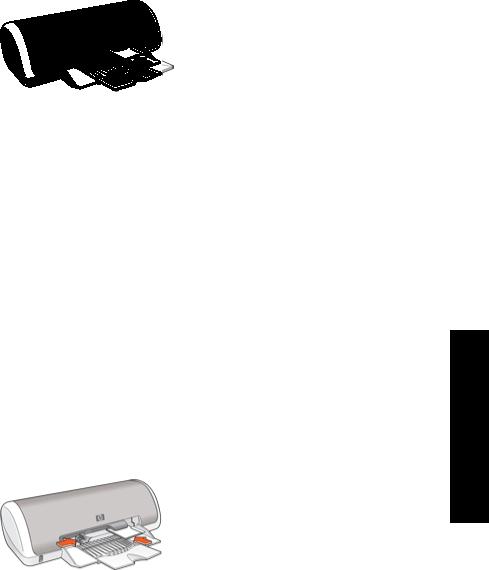
Prepare to print
1.Slide the paper guide all the way to the left.
2.Place plain paper in the right side of the tray. The side to be printed on should face down.
Print other documents
Print other documents |
21 |

Chapter 6
3.Push the paper into the printer until it stops.
4.Slide the paper guide firmly against the edge of the paper.
1.Open the Printer Properties dialog box.
2.Click the Printing Shortcuts tab.
3.In the Printing Shortcuts list, click General Everyday Printing or Fast/Economical Printing, and then specify the following print settings:
•Paper Type: Plain paper
•Paper Size: An appropriate paper size
4.Select any other print settings that you want, and then click OK.
Use the What's This? help to learn about the features that appear in the Printer Properties dialog box.
Print documents
documents other Print
Guidelines
•For draft documents, use Fast/Economical printing.
•To save paper, use Two-sided printing.
•Do not exceed the paper tray capacity: 80 sheets of paper.
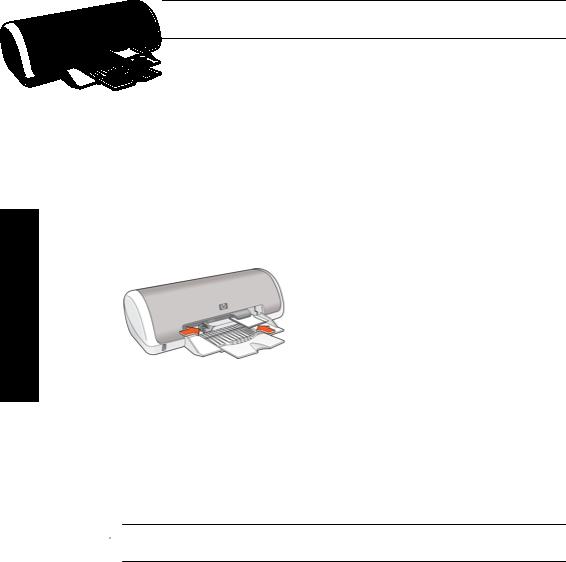
Prepare to print
1.Slide the paper guide all the way to the left.
2.Place plain paper in the right side of the tray. The side to be printed on should face down.
22 Print other documents

3.Push the paper into the printer until it stops.
 NOTE: The paper will extend over the edge of the tray.
4.Slide the paper guide firmly against the edge of the paper.
1.Open the Printer Properties dialog box.
2.Click the Printing Shortcuts tab.
3.In the Printing Shortcuts list, click General Everyday Printing, and then specify the following print settings:
•Paper Type: Plain paper
•Paper Size: An appropriate paper size
4.Select the following print settings:
•Print Quality if you want a print quality other than Normal
•Print On Both Sides if you want to print on both sides of the paper For more information, see Two-sided printing.
5.Select any other print settings that you want, and then click OK.
Use the What's This? help to learn about the features that appear in the Printer Properties dialog box.
Print letters
Guidelines
•For information about printing an envelope, see Print envelopes.
•Do not exceed the paper tray capacity: 80 sheets of paper.
Prepare to print
1.Slide the paper guide all the way to the left.
2.Place plain paper in the right side of the tray. The side to be printed on should face down.
 NOTE: If you are using letterhead paper, the letterhead should face down and point toward the printer.
Print other documents
Print letters |
23 |

Chapter 6
3.Push the paper into the printer until it stops.
4.Slide the paper guide firmly against the edge of the paper.
1.Open the Printer Properties dialog box.
2.Click the Printing Shortcuts tab.
3.In the Printing Shortcuts list, click Presentation Printing, and then specify the following print settings:
•Paper Type: Plain paper
•Paper Size: An appropriate paper size
4.Select any other print settings that you want, and then click OK.
Use the What's This? help to learn about the features that appear in the Printer Properties dialog box.
Print envelopes
Guidelines
• Avoid using envelopes that have the following features:
• Clasps or windows
• Thick, irregular, or curled edges |
||
|
||
other |
• Shiny or embossed coatings |
|
• Wrinkles, tears, or other damage |
||
|
||
documents |
• You can print a single envelope or multiple envelopes. |
|
• Align the envelope edges before inserting the envelopes in the paper tray. |
||
|
||
|
• Do not exceed the paper tray capacity: 10 envelopes. |
|
|
|
|
|
|
Prepare to print
1.Slide the paper guide all the way to the left.
2.Place the envelopes in the right side of the tray. The side to be printed on should face down. The flap should be on the left side.
24 Print other documents
3.Push the envelopes into the printer until they stop.
4.Slide the paper guide firmly against the edge of the envelopes.
1.Open the Printer Properties dialog box.
2.Click the Features tab, and then select the following print settings:
•Paper Type: Plain paper
•Size: An appropriate envelope size
3.Select any other print settings that you want, and then click OK.
Use the What's This? help to learn about the features that appear in the Printer Properties dialog box.
Print postcards
Guidelines
Do not exceed the paper tray capacity: 20 postcards.
Prepare to print
1. |
Slide the paper guide all the way to the left. |
2. |
Place the cards in the right side of the tray. The side to be printed on should face |
|
otherPrintdocuments |
|
down and the short edge should point toward the printer. |
3. |
Push the cards into the printer until they stop. |
4. |
Slide the paper guide firmly against the edge of the cards. |
Print postcards |
25 |
Chapter 6
1.Open the Printer Properties dialog box.
2.Click the Features tab, and then specify the following print settings:
•Paper Type: Click More, click Specialty Papers, and then select an appropriate card type.
•Print Quality: Normal or Best
•Size: An appropriate card size
3.Select any other print settings that you want, and then click OK.
Use the What's This? help to learn about the features that appear in the Printer Properties dialog box.
 NOTE: If an out-of-paper message is displayed, see Out of paper for help in resolving the problem.
Print index cards and other small media
documents other Print
Guidelines
Do not exceed the paper tray capacity: 20 cards.
Prepare to print
1.Slide the paper guide all the way to the left.
2.Place the cards in the right side of the tray. The side to be printed on should face down and the short edge should point toward the printer.
3.Push the cards into the printer until they stop.
4.Slide the paper guide firmly against the edge of the cards.
1.Open the Printer Properties dialog box.
2.Click the Features tab, and then specify the following print settings:
•Paper Type: Plain paper
•Size: An appropriate card size
3.Select any other print settings that you want, and then click OK.
Use the What's This? help to learn about the features that appear in the Printer Properties dialog box.
 NOTE: If an out-of-paper message is displayed, see Out of paper for help in resolving the problem.
26 Print other documents
Print labels
Guidelines
•Use only paper, plastic, or clear labels that are designed specifically for inkjet printers.
•Use only full sheets of labels.
•Avoid using labels that are sticky, wrinkled, or pulling away from the protective backing.
•Do not exceed the paper tray capacity: 15 sheets of labels (use only Letter or A4-size sheets).
Prepare to print
1.Slide the paper guide all the way to the left.
2.Fan the edges of the label sheets to separate them, and then align the edges.
3.Place the label sheets in the right side of the tray. The label side should face down.
4.Push the sheets into the printer until they stop.
5.Slide the paper guide firmly against the edge of the sheets.
 NOTE: If your software program includes a label printing feature, follow the instructions that are provided with the software program. Otherwise, follow the instructions below.
1.Open the Printer Properties dialog box.
2.Click the Printing Shortcuts tab.
3.In the Printing Shortcuts list, click General Everyday Printing, and then specify the following print settings:
•Paper Type: Plain paper
•Paper Size: An appropriate paper size
4.Click OK.
Use the What's This? help to learn about the features that appear in the Printer Properties dialog box.
Print other documents
Print labels |
27 |
Loading...