


Instructions for Installation and Use
Dual Fuel Cooker
Model EG900X

|
CONTENTS |
|
|
Introduction |
3 |
For Your Safety |
4 |
Know your Cooker |
5 |
How to use your Hob |
6 |
How to use your Oven |
7 |
Know your Timer |
8 |
Cooking Advice |
9 |
Cooking Chart |
10 |
Care and Cleaning |
11 |
Troubleshooting |
12 |
Installation |
13-14 |
Electrical Connection |
15 |
Burner and Nozzle Specifications |
|
and Oven Specifications |
16 |
After Sales Service |
18 |
Hotpoint Guarantee |
19 |
Key Contacts |
Back Cover |
Retention of this Instruction Book
This Instruction Book must be kept handy for reference as it contains important details on the safe and proper use of the appliance.
If you sell or pass the appliance to someone else, or move house and leave it behind, make sure this Book is also provided so the new owner can become familiar with the appliance and safety warnings.
If the Book is lost or damaged a copy may be obtained from:
GDA LTD., Morley Way, Peterborough, PE2 9JB
2

INTRODUCTION
Your new dual fuel cooker is guaranteed* and will give lasting service. This guarantee is only applicable if the appliance has been installed in accordance with the installation instructions detailed in this booklet.
To help make best use of your cooking equipment, please read this booklet carefully.
The appliance is designed specifically for domestic use and responsibility will not be accepted for use in any other installation.
Note: When the oven is first used, an odour may be omitted - this will cease after a short period of use.
To help remove the 'new' smell, heat the empty oven to maximum temperature for a minimum of two to three hours, keeping the door closed. Ensure that the room is well ventilated (eg. open a window or use an extractor fan) and that persons who may be sensitive to the odour avoid any fumes. It is suggested that any pets be removed from the room until the smell has ceased.
This odour is due to any temporary finish on oven linings and any moisture absorbed by the insulation.
* The guarantee is subject to the provisions that the appliance:
(a)Has been used solely in accordance with this booklet.
(b)Has been properly connected to a suitable supply voltage as stated on the rating plate, attached to the appliance.
(c)Has not been subjected to misuse or accident or been modified or repaired by any person other than the manufacturers authorised employee or agent.
(d)Has been correctly installed.
IMPORTANT INFORMATION
-this appliance has been designed for private, nonprofessional domestic use in the home.
-read this instruction book carefully, as it provides important advice regarding safe installation, use and maintenance. Keep the instruction book in a safe place for future reference.
-the oven accessories that may come into contact with food are made of materials which comply with the provisions set forth by the EEC Directive 89/109 of 21/ 12/88 and the applicable national norms in force.
-after removing packaging, check that the appliance is intact. If in doubt, DO NOT use the appliance and contact a qualified serviceman.
-some parts are covered with a removable scratch-proof film. Before using the appliance, the film should be removed and the underlying part cleaned with a cloth and a non-abrasive household cleaning product.
-when switching the appliance on for the first time, we recommend you heat the oven on maximum temperature setting for about 30 minutes with nothing in it, to eliminate any residue from manufacture.
-all installation and adjustment operations should be carried out by a qualified serviceman in accordance with the applicable norms in force. Specific instructions are provided within the installation section of this instruction book.
-before connecting the appliance, make sure that the data
on the rating plate (situated underneath the appliance) correspond to the mains electricity and gas supplies.
-check that the capacity of the electrical system and the power outlets are suitable for the maximum power of the appliance (indicated on the rating plate). If in doubt, consult a qualified technical engineer.
-check the condition of the gas pipe regularly and have it replaced by a qualified technical engineer as soon as it shows any signs of wear or anomally.
-under no circumstances should the user replace the power supply cable of the gas connection pipe of this appliance. In the event of damage or the need for replacement, contact an authorised service centre only (see Key Contacts, back page).
-DO NOT leave the appliance plugged in if it is not in use. Switch off at the mains electrical switch and turn off the gas supply.
-During operation, the oven glass door and adjacent parts of the appliance become hot. Make sure, therefore, that children do not touch the appliance. For greater safety, an additional child-safety device is available from our Head Office and our Authorised Service Centres (see enclosed list). When ordering this, please give the code: BAB - followed by the appliance model. The model is stamped on the rating plate affixed to the rear of the appliance and at the back of this booklet.
3

FOR YOUR SAFETY
When used properly your appliance is completely safe but as with any electrical product there are certain precautions that must be observed.
PLEASE READ THE BELOW PRECAUTIONS BEFORE USING YOUR APPLIANCE.
To maintain the efficiency and safety of this appliance, we recommend you do the following:
-only call the Service Centres authorised by the manufacturer.
-always use genuine spare parts.
ALWAYS:
-make sure you remove all packaging and dispose of safely.
-make sure you understand the controls before using the appliance.
-keep children away from the appliance during use.
-take care to avoid heat/steam burns when operating the controls.
-check the shelves are in the correct position before switching on the oven.
-make sure the controls are turned off when you have finished cooking and when not in use.
-ensure the door is closed when using the grill.
-disconnect from the power supply, and allow to cool, before cleaning or performing any maintenance.
-keep the door closed when the appliance is not in use.
-refer servicing to a qualified appliance service engineer.
-keep the appliance clean as a build up of grease or fat from cooking can cause a fire.
-follow the basic principles of food handling and hygiene to prevent the possibility of bacterial growth.
-keep any ventilation slots clear of obstructions.
-grip the handle in the centre when opening the door.
-stand back when opening the door to allow any build up of steam or heat to disperse.
-use dry, good quality oven gloves when removing items.
-dry food thoroughly before frying and lower it slowly into the hot oil or fat. Frozen food in particular, will cause frothing and spitting if added too quickly.
-keep outside of pans clean and free from streaks of oil or fat.
-place pans centrally over the cooking areas making sure handles are kept away from the edge of the hob and cannot be heated by other heating areas/pans.
NEVER:
-use steam cleaners.
-attempt to install or repair the appliance without the assistance of qualified personnel.
-store items above the appliance that children may attempt to reach.
-heat up unopened food containers, as pressure can build up causing the container to burst.
SAFETY ADVICE
-use the appliance to heat up anything other than food.
-use the appliance as a room heater.
-dry any items on the hob.
-install the appliance next to curtains or other soft furnishings.
-allow children to play with or tamper with the controls.
-leave children unsupervised where cooking appliances are installed as all the cooking surfaces get hot during and after use.
-store chemicals, foodstuffs or pressurised containers in or on the appliance, or in cabinets immediately above or next to the appliance.
-use plastic items on or near the appliance.
-use flammable liquids, such as alcohol or gasoline etc. near the appliance when it is in use.
-use adapters, multiple sockets and/or extension leads.
-fill a deep fat frying pan more than 1/3 full of oil, or use a lid on a deep fat frying pan. DO NOT LEAVE UNATTENDED WHILE COOKING.
-pull on the appliance or the supply cable to unplug it from the electrical outlet.
-allow power cables of other appliances to come into contact with hot parts of this appliance.
-expose the appliance to atmospheric agents, such as rain or sunlight.
-operate the appliance with wet hands.
-allow anyone to sit or stand on any part of the appliance.
-remove the oven shelves whilst the oven is hot.
-do not touch burners and cast iron pan supports remain hot for a long time.
-use the oven for storage purposes.
-use the grill to warm plates.
-dry items on the oven doors.
-fry too much food at a time, especially frozen food. This only lowers the temperature or the oil or fat too much, resulting in greasy food.
-use misshapen pans which may be unstable.
-use round base woks directly on the gas pan supports.
-use fish kettles or large preserving pans across two gas burners.
-operate the appliance when barefoot.
IMPORTANT - As with any cooking appliance there could be some fire risk attached to the heating of oil, particularly for deep fat frying. Cooking utensils containing oil must not be left unattended (eg. to answer the telephone) on or in close proximity to the cooking areas.
IN THE EVENT OF A CHIP PAN OR ANY OTHER PAN FIRE:
1.Turn off the burners.
2.Cover the pan with a fire blanket or damp cloth, this will smother the flames and extinguish the fire.
3.Leave the pan to cool for at least 60 minutes before moving it. Injuries are often caused by picking up a hot pan and rushing outside with it.
NEVER USE A FIRE EXTINGUISHER TO PUT OUT A PAN FIRE as the force of the extinguisher is likely to tip the pan over. Never use water to extinguish oil or fat fires.
4

KNOW YOUR COOKER
F |
E |
AAuxiliary gas burner
BSemi-rapid gas burner
CRapid gas burner
DTriple crown gas burner (wok burner)
EIgnitor for gas burners
FFlame Failue Device - Activates if the flame accidentally goes out (spills, drafts, etc.), interrupting the supply of gas to the burner.
GFunction Selector
HTemperature Selector
M Control knobs for gas burners
R Pan support for cookware
P Timer
5
HOW TO USE YOUR HOB
Gas burners
On the control panel, the following symbols are indicated around each knob "M".
Off
High flame
Low flame
The symbols 
 near the knobs indicate the position of each burner on the hob.
The burners are fitted with a flame failure device. This device interrupts the gas supply should the burner flame go out during operation.
To light one of the burners, proceed as follows:
•turn the appropriate control knob anti-clockwise until the pointer is on the high-flame symbol.
•press the knob down fully to activate the automatic gas ignition.
•keep the knob pressed down for about 6 seconds with the flame lit to allow the flame failure device to heat.
•release the knob, checking that the flame is stable. If it is not, repeat the operation.
For minimum power, turn the knob towards the low flame symbol. Intermediate positions are possible by simply setting the knob anywhere between the high and the low flame symbol.
Important:
•Do not activate the automatic ignition device for more than 15 consecutive seconds.
•Difficulty in ignition is sometimes due to air inside the gas duct.
•If a burner flame accidentally goes out, the gas continues to exit for a few moments before the flame failure device is activated. Turn the control knob to the off position and do not attempt ignition again for at least 1 minute, thereby letting the gas disperse, which could otherwise be a danger.
•When the appliance is not in operation, check that all
control knobs are set to the off position "  ". The main gas supply tap should also be turned off.
Practical advice on using the hob:
To obtain maximum efficiency from the burners, we recommend you only use pans with a diameter suitable for the burner being used, so that the flame does not extend beyond the pan base (see the following table).
When a liquid starts boiling, we recommend you turn the flame down just enough to keep the liquid simmering.
BURNER |
O Pan Diameter (cm) |
||
A. Auxiliary |
6 |
- |
14 |
B. Semi-rapid |
15 |
- |
20 |
C. Rapid |
21 |
- |
26 |
D. Triple ring |
24 |
- |
26 |
|
|
|
|
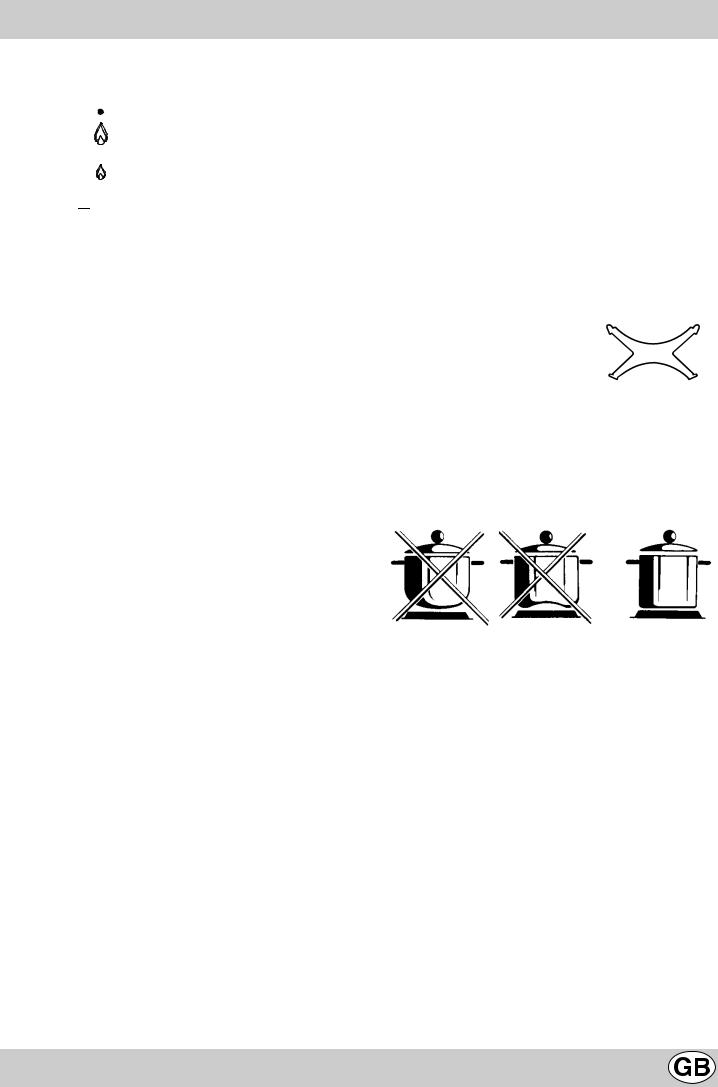
The hob is fitted with a reducing pan stand (shown right) which should only be used on the auxiliary burner 'A'.
For the best performance of your burners, keep the following in mind:
All types of pans can be used on the burners. The important thing is that the bottom should be completely flat.
6
 Loading...