


EN

2
Thank you for choosing this product.
We are proud to offer the ideal product for you and the best complete range of home appliances for your daily routine.
 Please read and follow these instructions carefully and operate the machine accordingly. This booklet provides important guidelines for safe use, installation, maintenance and some useful advice for best results when using your machine. Keep all documentation in a safe place for future reference or for any future owners.
Please check that the following items are delivered with the appliance:
•Instruction manual
•Guarantee card
•Energy label
Check that no damage has occurred to the machine during transit. If it as, call for service by Customer Service Centre. Failure to comply with the above can compromise the safety of the appliance. You may be charged for a service call if a problem with your machine is caused by misuse or by incorrect installation.
To contact the Service, ensure that you have the unique 16-character code available, also called the "serial number". This code is a unique code for your product, printed on the sticker that can be found inside the door opening.
WEEE contains both polluting substances (which |
|
|
can cause negative consequences for the |
EN |
|
environment) and basic components (which can |
||
|
||
be re-used). It is important to have WEEE |
|
|
subjected to specific treatments, in order to |
|
|
remove and dispose properly all pollutants, and |
|
|
recover and recycle all materials. Individuals can |
|
|
play an important role in ensuring that WEEE |
|
|
does not become an environmental issue; it is |
|
|
essential to follow some basic rules: |
|
!WEEE should not be treated as household waste;
!WEEE should be handed over to the relevant collection points managed by the municipality or by registered companies. In many countries, for large WEEE, home collection could be present.
In many countries, when you buy a new appliance, the old one may be returned to the retailer who has to collect it free of charge on a one-to-one basis, as long as the equipment is of equivalent type and has the same functions as the supplied equipment.
Contents
1.GENERAL SAFETY RULES
2.WATER CONTAINERS
3.DOOR, FILTER AND CONDENSER
4.PRACTICAL HINTS
5.REMOTE CONTROL (WI-FI)
6.QUICK USER GUIDE
7.CONTROLS AND PROGRAMMES
8.TROUBLESHOOTING AND WARRANTY
Environmental conditions
This appliance is marked according to the European directive 2012/19/EU on Waste Electrical and Electronic Equipment (WEEE).
3

1.GENERAL SAFETY RULES
!This appliance is intended to be used in household and similar applications such as:
-Staff kitchen areas in shops, offices and other working environments;
-Farm houses;
-By clients in hotels, motels and other residential type environments;
-Bed and breakfast type environments. A different use of this appliance
from |
household |
environment |
or |
from typical |
housekeeping |
functions, as commercial use by expert or trained users, is excluded even in the above applications. If the appliance is used in a manner inconsistent with this it may reduce the life of the appliance and may void the manufacturer’s warranty. Any damage to the appliance or other damage or loss arising through use that is not consistent with domestic or household use
(even if located in a domestic or household environment) shall not be accepted by the manufacturer to the fullest extent permitted by law.
!This appliance can be used by children aged from 8 years and above and persons with reduced physical, sensory or mental capabilities or lack of experience and knowledge if they have been given supervision or instruction concerning use of the appliance
in a safe way and understand the hazards involved.
Children shall not play with the appliance. Cleaning and user maintenance shall not be made by children without supervision.
!Children should be supervised to ensure that they do not play with the appliance.
!Children of less than 3 years should be kept away unless continuously supervised.
 WARNING
Misuse of a tumble dryer may create a fire hazard.
!This machine is solely for domestic use, i.e. to dry household textiles and garments.
!Ensure that the instructions for installation and use are fully understood before operating the appliance.
!Do not touch the appliance when hands or feet are damp or wet.
!Do not lean on the door when loading the machine or use the door to lift or move the machine.
4

!Do not continue to use this machine if it appears to be faulty.
!The tumble dryer is not to be used if industrial chemicals have been used for cleaning.
!The final part of a tumble dryer cycle occurs without heat (cool down cycle) to ensure that the items are left at a temperature that ensures that the items will not be damaged.
EN
 WARNING
Do not use the product if the fluff filter is not in position or is damaged; fluff could be ignited.
!Lint and fluff must not be allowed to collect on the floor around the outside of the machine.
 WARNING
Where the hot surface
symbol  is located the temperature rise during operation of the tumble dryer may be in excess of 60 degrees C.
!Always remove the plug before cleaning the appliance.
!The drum inside may be very hot. Always allow the dryer to complete the cool down period before removing the laundry.
 WARNING
Never stop a tumble dryer before the end of the drying cycle unless all items are quickly removed and spread out so that the heat is dissipated.
Installation
!Do not install the product in a low temperature room or in a room where there is a risk of frost occurring. At temperature around freezing point the product may not be able to operate properly: there is a risk of damage if the water is allowed to freeze in the hydraulic circuit (valves, hoses, pumps). For a better product performance the ambient room temperature must be between 5-35°C. Please note that operating in cold condition
(between +2 and +5°C) might simply some water condensation and water drops on floor.
5
!In cases where the dryer is installed on top of a washing machine, a suitable stacking kit must be used according to the configuration of your appliance:
−Stacking kit "standard size": for washing machine with minimum depth of 44 cm;
−Stacking kit "slim size": for washing machine with minimum depth of 40 cm.
−Universal stacking kit with
sliding: for washing machine with minimum depth of 47 cm.
The stacking kit shall be obtainable from service. The instructions for installation and any fixing attachments, are provided with the stacking kit.
!NEVER install the dryer up near curtains.
!The appliance must not be installed behind a lockable door, a sliding door or a door with a hinge on the opposite side to that of the tumble dryer.
!For your safety, the appliance must be correctly installed. If there is any doubt about installation, call Service for advice.
!Once the machine is in place the feet should be adjusted to ensure that the machine is level.
Electrical connections and safety instructions
!The technical details (supply voltage and power input) are indicated on the product rating plate.
!Make sure that the electrical system is earthed, complies with all applicable law and that the (electricity) socket is compatible with the plug of the appliance. Otherwise, seek qualified professional assistance.
 WARNING
The appliance must not be supplied through an external switching device, such as a timer, or connected to a circuit that is regularly switched on and off by a utility.
6
!Do not use adapters, multiple connectors and/or extensions.
!The plug should be accessible for disconnection after the appliance has been installed.
!Do not plug the machine in and switch it on at the mains until the installation is completed.
!If the supply cord is damaged, it must be replaced by the manufacturer, its service agent or similarly qualified persons in order to avoid a hazard.
Ventilation
!Adequate ventilation must be provided in the room where the tumble dryer is located to prevent gases from appliances burning other fuels, including open fires, being drawn into the room during operation of the tumble dryer.
!Install the rear of the appliance close to a wall or vertical surface.
!There should be a gap of at least 12 mm between the machine and any obstrubtions.
The inlet and outlet air should be kept clear of obstruction.
!Make sure carpets or rugs do not obstruct the base or any of the ventilation openings.
!Prevent items from falling or |
|
|
collecting behind the dryer as |
|
|
these may obstruct the air inlet |
EN |
|
and outlet. |
||
|
||
!Exhaust air must not be |
|
|
discharged into a flue which is |
|
|
used for exhausting fumes |
|
|
from appliances burning gas or |
|
|
other fuels. |
|
|
!Check regularly that the air |
|
|
flowing around the dryer is not |
|
|
restricted, avoiding accumulation |
|
|
of dust and lint. |
|
|
!Check frequently the fluff filter |
|
|
after use, and clean, if necessary. |
|
 **
**
*
* Air inlet. **Air outlet.
The Laundry
!Always refer to the laundry care labels for directions on suitability for drying.
7

!Fabric softeners, or similar products, should be used as specified by the fabric softener instructions.
!Do not dry unwashed items in the tumble dryer.
!Clothes should be spin dried or thoroughly wrung before they are put into the tumble dryer.
!Clothes that are dripping wet should not be put into the dryer.
 WARNING
Foam rubber materials can, under certain circumstances, when heated become ignited by spontaneous combustion. Items such as foam rubber (latex foam), shower caps, waterproof textiles, rubber backed articles and clothes or pillows fitted with foam rubber pads MUST NOT be dried in the tumble dryer.
!Items that have been soiled with substances such as cooking oil, acetone, alcohol, petrol, kerosene, spot removers, turpentine, waxes and wax removers should be washed in hot water with an extra amount of detergent before being dried in the tumble dryer.
!Remove all objects from pockets such as lighters and matches.
!Lighters and matches must not be left in pockets and NEVER use flammable liquids near the machine.
!Maximum load drying weight: see energy label.
!To consult the product technical specification please refer to the manufacturer website.
 WARNING
Do not tumble dry fabrics treated with dry cleaning fluids.
!Glass fibre curtains should
NEVER be put in this machine. Skin irritation may occur if other garments are contaminated with the glass fibres.
8

2. WATER CONTAINERS
The water removed from the laundry during the drying cycle is collected in a container. When the container is full the relevant indicator light on the control panel will light, and the container MUST be emptied. However, we recommend that the container is emptied after each drying cycle.
Very little water will collect during the first few cycles of a new machine as an internal reservoir is filled first.
To remove the container tank in door drawer *
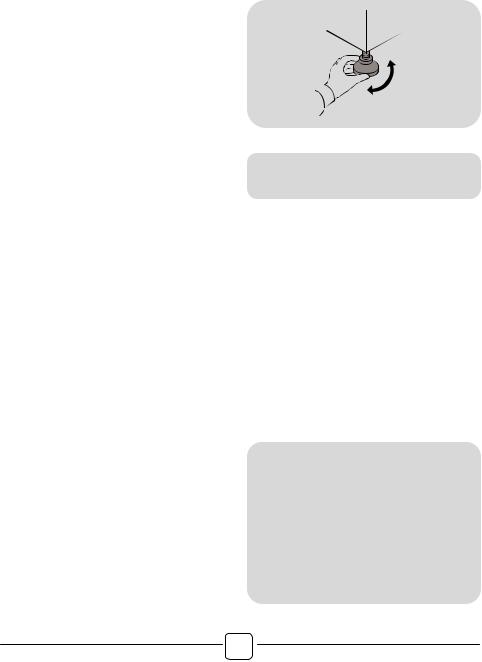
1.Gently pull out the water container holding the handle (A).
When it is full the water container will weigh about 6 kg.
2.Tilt the water container to empty the water out through the spout (B).
When empty, replace the water container back as shown; (C) first insert the base of the container into position as shown (1) then gentle push the top into position (2).
3.Press the programme start button to restart the cycle.
A |
B |
1 |
C |
*Depending on model
ONLY FOR MODELS WITH DRAIN |
|
HOSE KIT |
|
If you have the option of drainage |
EN |
near to the dryer you can use the |
|
discharge kit to provide a permanent |
|
drainage for the water collected in the |
|
container of the dryer. This means |
|
that you don't have to empty the water |
|
container. |
|
To remove the container bottom water drawer *
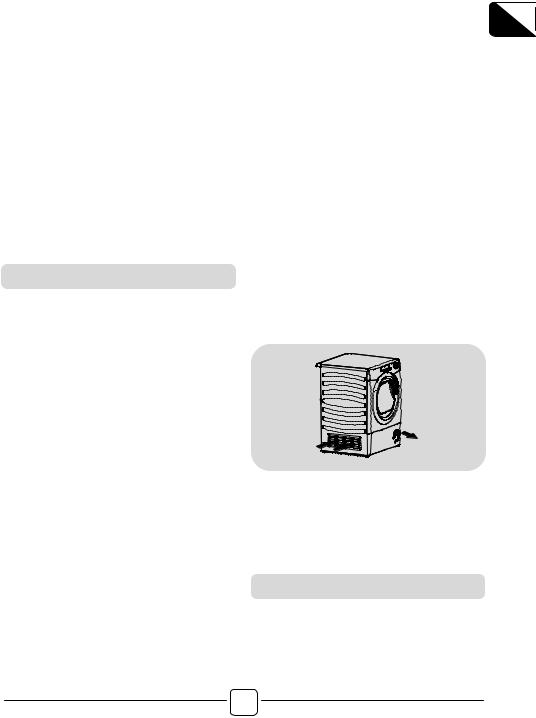
1.Gently pull the bottom of the kickplate so that it unclips from the dryer. The top section can then be unhinged allowing the kickplate to be completely removed (A).
2.Pull firmly on the handgrip and slide the water container out of the dryer (B). Support the container with both hands
(C). When full, the water container will weigh about 4 kg.
3.Open the lid located on the top of the container and empty the water (D).
4.Refit the lid and slide the water container back into position (D). PUSH FIRMLY
INTO PLACE.
5.Refit the kickplate by engaging the hinges at the top and 'snapping' the lower clips into place.
A |
C |
*Depending on model
B |
D |
9
 Loading...