


Satellit 750
AM/FM-stereo/Shortwave/Airwave Band Radio
with SSB (Single Side Band)
OWNER’S MANUAL
Grundig Radio Line By etón re_inventing radio www.etoncorp.com
SATELLIT 750 OWNER’S MANUAL
Grundig Radio Line By
DO YOU NEED HELP? Contact Us
Etón Corporation, 1015 Corporation Way, Palo Alto, CA 94303, USA. 1-800-872-2228 (U.S.); 1-800-637-1648 (Canada); 650-903-3866 (worldwide); M-F, 8:30-4:00, Pacific Standard Time; www.etoncorp.com.
WARNING
•Do not expose this appliance to rain or moisture.
•Do not submerge or expose for extended period to water.
•Protect from high humidity and rain.
•Only operate within specified temperature range (0 °C to 40 °C).
•Unplug immediately if liquid has been spilled or objects have fallen into the apparatus.
•Clean only with a dry cloth. Do not use detergents or chemical solvents as this might damage the finish.
•Unplug and disconnect external antennas (not included) during lightning storms.
•Do not remove cover [or back].
•Refer servicing to qualified service personnel.
ENVIRONMENT
Disposal
According to the European Directive 2002/96/EC all electrical and electronic products must be collected separately by a local collection system.
Please act according to your local rules and do not dispose of your old products with your normal household waste.
3

SATELLIT 750 OWNER’S MANUAL
FEATURES
Thank you for purchasing the Satellit 750. Its features and capabilities are shown below:
•Shortwave (1711-30000 KHz) with SSB (single sideband), LW, AM, FM and Aircraft Band (118-137 MHz)
•Set 9/10 KHz AM tuning; set FM tuning range starting at 87 or 88 MHz
•Dual Conversion and Single Side Band (SSB)
•1000 station memories
•360 degree, rotating AM antenna
•Auto/Manual/Direct frequency key-in and station memory tuning
•Auto Tuning Storage function (ATS) for FM/AM/Shortwave
•Mute function
•24 hour Clock and Dual alarm clock function
•Line in socket (can be used as speaker for MP3)
•Line out socket (radio broadcasting can be transferred to other device)
•External antenna jacks for SW, AM and FM
•Power source: 4D alkaline batteries; AC/DC-6V power supply
•Dimensions: 14.65” x 7.24” x 5.75” and 372mm x 184mm x 146mm (W x H x D)
•Weight: 5.25 lbs (2.38 kg)
•Accessories: owner’s manual, warranty card
•Specifications subject to change
WHAT’S INCLUDED?
AC adapter; Owner’s manual
4

SATELLIT 750 OWNER’S MANUAL
POWER SOURCES
Power the SATELLIT 750 by installing 4 D alkaline, lithium or Ni-MH batteries or by plugging in the included 6 VDC AC adapter. The AC adapter plugs into the 6 Volt DC socket on the left side of the radio. A battery symbol appears in the lower right of the LCD, indicating battery or AC adapter power. If there’s a power failure with the AC adapter attached and batteries installed, the batteries will take over and supply power to the radio.
PREVENTING BATTERY LEAKAGE
To minimize the possibility of battery acid leakage, only use high quality alkaline, lithium or rechargeable nickel-metal-hydride batteries. Never intermix old with new, or different brands or types of batteries. Damage caused by battery acid leakage is not covered by this product’s warranty.
SETTING UP AM AND FM OUTSIDE OF NORTH AMERICA
To use the SATELLIT 750 in North America (U.S. or Canada), no changes to the initial factory settings are needed.
In North America, AM stations are spaced by 10 KHz. In Europe and other areas, they are spaced by 9 KHz. In North America, the FM band begins at 88 MHz. In other parts of the world, it may begin at 76 MHz or 87 MHz. Follow these steps to set this for your area:
To change these settings for your area turn the SATELLIT 750 off. Press the ENTER button and notice that -- appears in the upper right corner of the display. While -- appears, enter 09 or 10 with the numeric keypad and press ENTER. Repeat this procedure and press 88, 87 or 76 and press ENTER.
5

SATELLIT 750 OWNER’S MANUAL
TURNING THE SATELLIT 750 ON AND OFF
Press the POWER button to turn it on and off.
VOLUME CONTROL
With the SATELLIT 750 on, turn the VOLUME knob, located in the lower left front, clockwise to increase the volume, counterclockwise to decrease the volume.
SELECTING FM, MW(AM), LW, SHORTWAVE AND AIRCRAFT BAND
The Satellit 750 receives FM on 88-108 MHz, AM on 520-1710 KHz, Longwave on 100-519 KHz, Shortwave on 1711-29999 KHz and Aircraft on 118 -137 MHz.
Turn the Satellit 750 on. Select FM by pressing the FM button, MW(AM) and Longwave by pressing the MW/LW button (press it twice if necessary), Shortwave by pressing the SW button sequentially until you have selected the desired band (the band number flashes in the upper right corner of the display) and the Aircraft band by pressing the AIR button.
NOTE: Be sure to fully extend the telescopic antenna when listening to SW, FM and AIR. The swivel AM antenna is located at the top of the radio; swivel it for best AM reception.
6

SATELLIT 750 OWNER’S MANUAL
SHORTWAVE LISTENING
To learn about shortwave we recommend the two publications below, published yearly and available from major booksellers. Additionally, the Internet is a great resource for learning about shortwave.
PASSPORT TO WORLD BAND RADIO Published by International Broadcasting Services (IBS); IBS North America, Box 300, Penn’s Park PA 18943. Phone: (215) 598-9018. www.passband.com.
WORLD RADIO TV HANDBOOK Published in the USA by WatsonGuptill Publications, 770 Broadway, 7th Floor, New York, NY 10003-9595. www.watsonguptill.com.
OPTIMIZING SHORTWAVE RECEPTION
Shortwave enables listening to broadcasts over vast distances including other countries and continents. The following information will help you get the best results.
•During the day, use bands with frequencies above 13000 KHz.
•At night, use bands with frequencies below 13000 KHz.
•Around sunset and sunrise, use bands with the entire shortwave range.
•Getting very close to a window improves shortwave reception.
SSB (SINGLE SIDE BAND) TUNING
SSB enables listening to shortwave two way communications using the single sideband mode such as amateur radio, Morse code, weather-fax transmissions and other signals often referred to as ‘utility’ signals. The Internet and your local library are great
7

SATELLIT 750 OWNER’S MANUAL
SSB (SINGLE SIDE BAND) TUNING continued
resources to learn more. Type ‘amateur radio frequencies’ or ‘sideband’ into an Internet search engine.
To use the SSB control, turn on the SATELLIT 750 and go into Shortwave. Press the SSB button and notice that USB appears in the display, to the right of SW. Press the SSB button again and notice that LSB appears to the right of SW. USB is the abbreviation for Upper Sideband, LSB is the abbreviation for Lower Sideband. You will need to use one of these methods to tune in signals. Also notice that on the lower right front of the radio is a control knob labeled SSB BFO. BFO stands for Beat Frequency Oscillator. This control knob is used to fine tune a sideband signal.
ANTENNA ATTENUATOR (ANT.ATT) BUTTON
The ANT.ATT button, located on the upper right front of the radio, is used to attenuate a signal. Tune into a station, then press the ANT.ATT button and notice that the signal strength indicator, located on the left side of the display, changes at three levels. The maximum level is the highest gain and the lowest level is minimum gain. Use the lowest level if the signal is extremely strong and local. Use the intermediate level for average signals and use the highest level for weak signals. Experiment with this control to see how it works best with the signals you listen to and use it to your liking.
RF GAIN CONTROL
On the right front of the radio is the RF Gain control knob. You can leave it fully counterclockwise in the AUTO position, where it will function automatically, or you can turn it clockwise and use it manually to control the RF (radio frequency) gain. Using it manually
8

SATELLIT 750 OWNER’S MANUAL
RF GAIN CONTROL continued
may improve the radio’s rejection of interference from adjacent frequencies that may interfere, especially on Shortwave. This switch does not work in FM.
SQUELCH CONTROL
Using the squelch control eliminates background noise. This control is used mainly in the aircraft band. It does not work in the FM band. This control is on the lower right front of the radio. To engage it, turn it on by turning the knob clockwise. Turn it off by clicking the knob fully counterclockwise.
TUNING IN STATIONS
Stations are tuned using Direct Frequency Entry, the
 Buttons and the Tuning Knob, as described below.
DIRECT FREQUENCY ENTRY TUNING
Use this method when the desired frequency of a radio station is known. Turn on the SATELLIT 750 and select the band of your
choice. AM and SW frequencies are entered in kilohertz (KHz), e.g. 810 KHz or 9475 KHz.; FM frequencies are entered in megahertz (MHz), e.g. 102.9 MHz, ignoring the decimal point. Use the numeric keypad to enter the frequency.
9

SATELLIT 750 OWNER’S MANUAL

 BUTTON TUNING
Turn on the Satellit 750 and select the band of your choice. Quick, short, sequential presses of the
 buttons enables tuning up or down frequency. A longer press engages Auto Tuning. In Auto Tuning the radio scans from one station to the next, stays on the new station for 5 seconds and then moves on. To stop Auto Tuning, press either of the
 buttons.
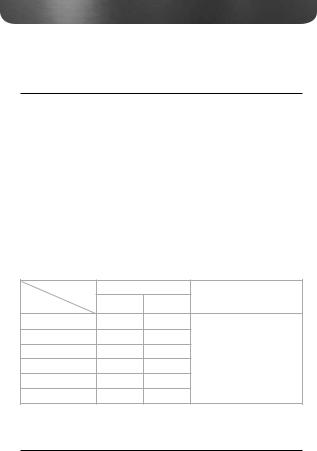
TUNING KNOB
The tuning knob can also be used to tune stations. Select FAST or SLOW tuning with the STEP button, under the tuning knob. FAST/ SLOW tuning is shown in the chart below for each band. If you want to LOCK the tuning knob press the STEP button for about 3 seconds. Do a quick, short press to unlock it.
|
FM |
AM |
SW |
AIR |
SSB |
|
|
|
|
|
|
FAST |
.1 MHz |
10 KHz |
5 KHz |
.025 MHz |
5 KHz |
SLOW |
.01 MHz |
1 KHz |
1 KHz |
.001 MHz |
1 KHz/BFO |
BW (BANDWIDTH) BUTTON
Use the BANDWIDTH button to choose wide or narrow selectivity, which is shown in the lower right corner of the display as WIDE or NARROW. This may help reduce interference on some frequencies. Using WIDE usually results in better audio fidelity, while using narrow limits the audio fidelity somewhat.
10
SATELLIT 750 OWNER’S MANUAL
FM ST. (FM STEREO) BUTTON
Press the FM ST. button when in the FM band to take the radio in or out of stereo reception mode. When it’s in stereo mode, STEREO appears under the left side of the frequency in the display, next to FM. As long as you are not using headphones or earphones, it can be left in mono mode.
BASS AND TREBLE KNOBS
Use these knobs to control the Bass and Treble to your liking. Turning clockwise increases bass or treble. Turning counterclockwise decreases bass or treble.
STORING FREQUENCIES INTO MEMORY
There are two separate sets of 500 memories, allowing for great flexibility of memory storage. Note the chart, below.
Memory PAGE 0, noted as ‘P0’, consists of 500 memories, 100 assigned for MW, SW, SSB and Air Band; 50 memories each assigned for FM and LW.
Memory PAGE 1 – 10, noted as ‘P1’, ‘P2’, etc., consists of 50 memories per page, 500 memories total.
To manually store a frequency into a memory, first choose the page, then the memory location and then store the frequency. In the instructions below note that MEMORY=PRESET. See the instructions below.
•Turn on the radio and tune to a station that you want to store into memory.
11
SATELLIT 750 OWNER’S MANUAL
STORING FREQUENCIES INTO MEMORY continued
•Shortly press the MEMORY button (the address page will flash in the right corner of the LCD.
•Shortly press the PAGE button and use the “  /
/  ” buttons to select the page that you want to store into; press PAGE again to confirm.
•Use “  /
/  ” to select the memory location while it is flashing.
•Press the MEMORY button to confirm it (or it will automatically confirm after 3 seconds).
To automatically store a frequency into the next available memory on the page that you’ve selected, press and release ‘M’. Note that PRESET flashes with the next available memory number. Press ‘M’ to automatically store it into the next available memory or when it stops flashing it’s stored into the memory number that was flashing.
Store |
Storage space in P0 page |
Other storage space |
||
|
|
|
||
Band |
P0 (page) |
ATS |
|
|
|
|
|
||
(FM) |
100 |
√ |
500 MEMORIES |
|
(SW) |
100 |
|
10 pages each with 50 memories |
|
(SSB) |
100 |
|
20 pages each with 25 memories |
|
(AIR) |
100 |
|
25 pages each with 20 memories |
|
|
|
|||
(MW) |
50 |
√ |
50 pages each with 10 memories |
|
(See the system setting chart to change |
||||
(LW) |
50 |
√ |
||
above pages) |
||||
LISTENING TO WHAT’S STORED
•Turn on the radio and go to the correct page by pressing PAGE and entering it with the numeric keypad.
•Press and release the VM/VF button and notice that the PAGE and PRESET show in the display’s upper right corner.
12

SATELLIT 750 OWNER’S MANUAL
LISTENING TO WHAT’S STORED continued
•To go from one memory to another give a quick, short press
to either the up or down tuning button 
 , or use the tuning knob.
•To auto-scan memory press one of the up or down tuning buttons for about 2 seconds and notice that PRESET flashes. The radio scans from one memory to another, staying on each memory for about 5 seconds. To stop the scan give the up or down tuning button a quick, short press.
DELETE ONE MEMORY
•Turn on the radio and press the VM/VF button, causing PAGE and PRESET to appear in the display’s upper right corner.
•Use the numeric keypad, the tuning knob or the up/down tuning buttons ( 
 ) to select the memory that you want to delete. To
delete the memory press the DELETE button for about
DELETE A MEMORY PAGE
•Turn on the radio and select the page that you want to delete by pressing PAGE, note that page flashes in the display’s upper right. While it’s flashing use the numeric keypad, the tuning knob
or the up or down tuning buttons ( 
 ) to select the page that you wish to delete.
•Press and release the VM/VF button so that PAGE and PRESET appear in the display’s upper right corner. If - - appears above PRESET in the display’s upper right corner, the page is already deleted and you don’t have to continue.
•Press DELETE for about 3 seconds or until PAGE starts blinking and press DELETE again.
13

SATELLIT 750 OWNER’S MANUAL
ATS (AUTO TUNING STORAGE)
MEMORY STORAGE
One can automatically store the strongest LW, AM or FM stations into Page 0.
Turn on the radio and select the band that you want ATS to take place in, either MW/LW or FM. Press the MW/LW or FM for 2 seconds. Notice that page 0 (P0) appears in the display’s upper right corner with the presets to the right increasing as the band is scanned and frequencies are stored into the memory.
ACCESSING STORED MEMORIES
The SATELLIT 750’s clock is in 24-hour format and can be set with the radio on or off. When the radio is turned off the clock shows in mid-display. When the radio is turned on the clock shows in the upper right corner of the display.
To set the clock:
1.Press the TIME button for about a second or until you see the hour flashing.
2.While it’s flashing turn the TUNING knob to set it to the correct hour, then press TIME and note that the minutes are flashing.
3.While it’s flashing turn the TUNING knob to set it to the correct minutes, then press TIME.
Note that after setting the hour or minutes you can simply let the flashing number time-out, without pressing the TIME button.
14

SATELLIT 750 OWNER’S MANUAL
ALARM SETTING
The SATELLIT 750 has two, independently programmable alarm timers to turn it on and off at a specified time.
To set an alarm:
1.Press the AL.1 or AL.2 button for a second or until you see the alarm hour flashing in the upper right corner of the display. While it’s flashing adjust the hour with the TUNING knob and press the AL.1 or AL.2 button. Notice that the alarm minutes are flashing.
2.While it’s flashing adjust the alarm minutes with the TUNING knob and press the AL.1 or AL.2 button. Notice the sleep timer flashing in the box at the top of the display.
3.While it’s flashing adjust the time that the radio is to play with the TUNING knob and press the AL.1 or AL.2 button.
Note that after setting the hour or minutes you can simply let the flashing number time-out, without pressing the AL.1 or AL.2 button.
Once the alarm is on (by radio or buzzer), only the POWER, SLEEP, LIGHT/SNOOZE and RESET can be operated. Press the POWER or SLEEP buttons to turn off the alarm.
ALARM BY BUZZER
Press on [AL.1 on/off] key to select “  ” in “Timer A” section. Now, the alarm will be on by the buzzer.
Note: In “Timer A” section:
“
 ” Means timer is set by radio.
“ ” Means timer is set by buzzer.
“” Means Timer is off.
15
SATELLIT 750 OWNER’S MANUAL
LIGHT/SNOOZE BUTTON
When the alarm is activated, press the LIGHT/SNOOZE button to temporarily deactivate the timer for 10 minutes. You can press the LIGHT/SNOOZE button 3 times within the alarm period, after that you can turn off the alarm by press it again.
ALARM ACTIVATION/DEACTIVATION
For the alarm to turn on the radio, it must be activated. To activate the alarm the SATELLIT 750 can be turned on or off.
To activate the alarm, look at the top of the display, to the right of where it reads TIMER A and TIMER B. Use quick, short presses of the AL.1 ON/OFF or AL.2 ON/OFF buttons. When the speaker is there, it wakes you to the radio playing; when the bell is there, it wakes you to an electronic beeper; when nothing is there, the alarm is deactivated.
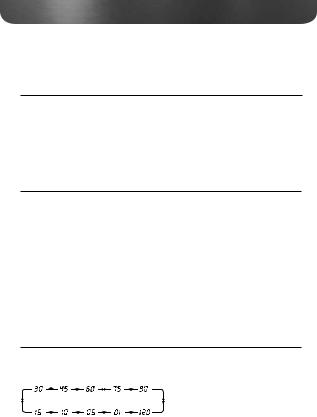
SLEEP TIMER
The sleep timer enables the SATELLIT 750 to play any length of time from 1 – 120 minutes and then turn off.
To turn on the sleep timer, press the SLEEP button on the upper, right front of the radio. Notice that the number of minutes to play appears in the display. While they appear there, press the SLEEP button over and over and it sequences through 1 to 120 minutes. Leave it on the minutes that you want it to play.
16

SATELLIT 750 OWNER’S MANUAL
USING THE LIGHT BUTTON
A quick press of the LIGHT button gives about 5 seconds of illumination to the SIGNAL strength indicator and the display. A long press lights these for as long as the radio is turned on, so be careful if you’re operating on batteries, because it will make them drain faster. If you’re AC adapter is connected, it’s fine to keep the light on while the radio plays.
EARPHONE SOCKET
The earphone socket is on the lower left front of the radio and is labeled EAR. Plug in earphones and headphones using a 3.5 mm (1/8 inch) stereo plug. Turn the volume down before plugging them in.
LINE-IN SOCKET
The LINE-IN socket is on the lower left front of the radio and allows you to route the sound from another device to the Satellit 750. Use a cord with a 3.5 mm (1/8 inch) stereo plug. This socket uses an industry standard line level input.
LINE OUT SOCKETS
On the back of the radio are the left and right line-out sockets, labeled LINE OUT. These sockets use an industry standard line level output and can be routed to any industry standard line level input. The external antenna sockets are used to connect the SATELLIT 750 to advanced performance antennas.
17

SATELLIT 750 OWNER’S MANUAL
EXTERNAL ANTENNA SOCKETS
On the right side of the radio are the 50 Ohm BNC sockets for FM and Shortwave. 50 or 75 Ohm coaxial cable can be used to feed the properly designed antenna. To find antennas we recommend that you perform a web search by typing ‘FM antennas’ or ‘shortwave antennas’ into an Internet search engine.
There is also a black and red socket, labeled 500 Ohms, designed to work with a high impedance Shortwave antenna, 300-600 Ohms, such as a long wire antenna. Plug a long piece of wire, 10 to 35 meters or 30 to 100 feet, into the red socket and position it above ground, running in as much a straight line as possible, not touching any other metal objects. If you do this indoors, position the wire as close to windows as possible. Plug a 10 to 20 meter or 30 to 60 foot wire into the black socket and let it run on the floor or ground.
Or attach the black socket to a cold water pipe with as short a piece of wire as possible.
On the rotateable AM antenna, at the top of the radio, is a socket for 50 or 75 Ohm plug-in AM antennas.
When using external sockets select EXTERNAL with the selector switch on the right side of the radio. When using the internal antennas of the radio, switch it to ANTENNA.
NOTE: always unplug all antennas that are mounted outside when a lightning storm is predicted.
18

SATELLIT 750 OWNER’S MANUAL
RESET BUTTON
The reset button is located to the left under the TUNING knob. Press it only when the radio seems to stop functioning properly. After it’s pressed the AM station spacing will have to be set again for North
America.
EMPTY COMPARTMENT ON BACK OF THE RADIO
Use the small, empty compartment next to the battery compartment as you wish.
SYSTEM CODE SETTING
To enter different system codes turn off the radio and perform a quick, short press of the ENTER button. “_ _” appears on the upper right corner of the display. Enter the system code as below, then push ENTER to confirm the system code.
19

SATELLIT 750 OWNER’S MANUAL
SYSTEM CODE SETTING continued
|
For memory page setting (500 memories) |
|
|
|
|
CODE |
|
|
00 |
|
10 pages; each page 50 memories |
|
|
|
20 |
|
20 pages; each page 25 memories |
|
|
|
25 |
|
25 pages; each page 20 memories |
|
|
|
50 |
|
50 pages; each page 10 memories |
|
|
|
|
|
Step (AM) |
|
|
|
09 |
|
9kHz |
10 |
|
10kHz (North America) |
|
|
|
|
|
Type of batteries |
29 |
|
Normal D size batteries (1.5V each battery) |
|
|
|
28 |
|
Rechargeable batteries (1.2V each battery) |
|
|
|
|
|
FM frequency range |
|
|
|
76 |
|
76-108 MHz (Japan) |
|
|
|
87 |
|
87-108 MHz |
|
|
|
20
SATELLIT 750 OWNER’S MANUAL
SPECIFICATIONS
Frequency range |
|
|
|
|
|
|
|
|
|
|
|
|
|
|
|
|
|
LW |
|
100-519 kHz |
||||||
MW |
|
522-1620 kHz – system code “09” |
||||||
|
|
520-1710 kHz (America) -system code “10” |
||||||
SW |
|
1711-29999 kHz |
||||||
AIR |
|
118-137MHz |
||||||
FM |
|
87-108MHz |
||||||
|
|
76-108MHz |
||||||
|
|
|
|
|
|
|
|
|
speaker |
|
8 ohm / 2W |
||||||
|
|
4 inches |
||||||
|
|
|
|
|
|
|
|
|
Earphone jack |
|
3.5mm, stereo |
||||||
|
|
|
|
|
|
|
|
|
Power consumption |
|
without back light 80mAh |
||||||
|
|
with back light 90 mAh |
||||||
|
|
|
|
|
|
|
|
|
Operation Temp. |
|
-5 to +50 C |
||||||
|
|
|
||||||
Weight |
|
2.66 kg, not including batteries |
||||||
|
|
|
|
|
|
|
|
|
Measurements |
|
L: 372 mm |
||||||
|
|
H: 183 mm |
||||||
|
|
W: 153 mm |
||||||
|
|
|
|
|
|
|
|
|
Power |
|
Batteries : UM1 (alkaline) x 4 |
||||||
|
|
DC: 6V/500mA, negative polarity |
||||||
|
|
|
|
|
|
|
|
|
|
|
|
|
|
|
|
|
|
|
|
|
|
|
|
|
|
|
21

SATELLIT 750 OWNER’S MANUAL
WARRANTY REGISTRATION
To ensure full warranty coverage or product updates, registration of your product should be completed as soon as possible after purchase or receipt. You may use one of the following options to register your product:
1.By visiting our website at http://www.etoncorp.com
2.Mail in enclosed warranty card.
3.Mail your warranty card or information to following address; include your name, full mailing address, phone number, email address, model purchased, date purchased, retail vendor name:
Etón Corporation 1015 Corporation Way
Palo Alto, CA 94303 USA
LIMITED WARRANTY
Retain the warranty information from your warranty card with your proof of purchase or the Limited Warranty information can also be viewed at www.etoncorp.com.
SERVICE FOR YOUR PRODUCT
To obtain service for your product, we recommend first contacting an Etón service representative at 1-800-872-2228 US, 1-800-637-1648 Canada, (650) 903-3866, customersvc@etoncorp. com or your respective country distributor in Europe (see enclosed
22
 Loading...