


GE Security GEA-CE4-D36N-IP, GEA-CE3-D36P-IP, GEA-C3-D36N-IP, GEA-C3-D36P-IP, GEA-C4-D36N-IP User Manual
...Legend
User Manual
Copyright Copyright © 2006, GE Security Inc. All rights reserved.
This document may not be copied or otherwise reproduced, in whole or in part, except as specifically permitted under US and international copyright law, without the prior written consent from GE.
Document number: 1052027B (January 2006)
Disclaimer THE INFORMATION IN THIS DOCUMENT IS SUBJECT TO CHANGE WITHOUT NOTICE. GE ASSUMES NO RESPONSIBILITY FOR INACCURACIES OR OMISSIONS AND SPECIFICALLY DISCLAIMS ANY LIABILITIES, LOSSES, OR RISKS, PERSONAL OR OTHERWISE, INCURRED AS A CONSEQUENCE, DIRECTLY OR INDIRECTLY, OF THE USE OR APPLICATION OF ANY OF THE CONTENTS OF THIS DOCUMENT. FOR THE LATEST DOCUMENTATION, CONTACT YOUR LOCAL SUPPLIER OR VISIT US ONLINE AT WWW.GESECURITY.COM.
This publication may contain examples of screen captures and reports used in daily operations. Examples may include fictitious names of individuals and companies. Any similarity to names and addresses of actual businesses or persons is entirely coincidental.
Trademarks and patents GE and the GE monogram are registered trademarks of General Electric. Legend product and logo are trademarks of GE Security.
Other trade names used in this document may be trademarks or registered trademarks of the manufacturers or vendors of the respective products.
Software license agreement GE software supplied with GE products is proprietary and furnished under license and can be used or copied only in accordance with the license terms.
THE ENCLOSED PROGRAM IS FURNISHED SUBJECT TO THE TERMS AND CONDITIONS OF THIS AGREEMENT. RETENTION OF THE PROGRAM FOR MORE THAN 30 DAYS, OPENING OF THE SEALED WRAPPER, IF ANY, SURROUNDING THE PROGRAM, OR USE OF THE PROGRAM IN ANY MANNER WILL BE CONSIDERED ACCEPTANCE OF THE AGREEMENT TERMS. IF THESE TERMS ARE NOT ACCEPTABLE, RETURN THE UNUSED PROGRAM AND ANY ACCOMPANYING DOCUMENTATION TO GE FOR A FULL REFUND OF THE LICENSE FEE PAID. (FOR INFORMATION REGARDING THE RETURN OF PROGRAMS ENCODED OR INCORPORATED WITHIN EQUIPMENT, CONTACT THE NEAREST GE SALES OFFICE.)
Intended use Use this product only for the purpose it was designed for; refer to the data sheet and user documentation. For the latest product information, contact your local supplier or visit us online at www.gesecurity.com.
FCC compliance his equipment has been tested and found to comply with the limits for a Class A digital device, pursuant to part 15 of the FCC Rules. These limits are designed to provide reasonable protection against harmful interference when the equipment is operated in a commercial environment. This equipment generates, uses, and can radiate radio frequency energy and, if not installed and used in accordance with the instruction manual, may cause harmful interference to radio communications.
Changes or modifications not expressly approved by the party responsible for compliance could void the user’s authority to operate the equipment.

iii
Contents
Contents. . . . . . . . . . . . . . . . . . . . . . . . . . . . . . . . . . . . . . . . . . . . . . . . . . . . . . . . . . . . . . . . . . . . . . . . . . . .iii
Preface . . . . . . . . . . . . . . . . . . . . . . . . . . . . . . . . . . . . . . . . . . . . . . . . . . . . . . . . . . . . . . . . . . . . . . . . . . . . . . . . . . . . . . . . vii
Conventions used in this document. . . . . . . . . . . . . . . . . . . . . . . . . . . . . . . . . . . . . . . . . . . . . . . . . . . . . . . . . . . . . . . .vii Safety terms and symbols. . . . . . . . . . . . . . . . . . . . . . . . . . . . . . . . . . . . . . . . . . . . . . . . . . . . . . . . . . . . . . . . . . . . . . . . .vii References . . . . . . . . . . . . . . . . . . . . . . . . . . . . . . . . . . . . . . . . . . . . . . . . . . . . . . . . . . . . . . . . . . . . . . . . . . . . . . . . . . . . . . viii
Chapter 1. Introduction . . . . . . . . . . . . . . . . . . . . . . . . . . . . . . . . . . . . . . . . . . . . . . . . . . . . . . . . . . . . 1
Product overview. . . . . . . . . . . . . . . . . . . . . . . . . . . . . . . . . . . . . . . . . . . . . . . . . . . . . . . . . . . . . . . . . . . . . . . . . . . . . . . . 2
What’s new in this release . . . . . . . . . . . . . . . . . . . . . . . . . . . . . . . . . . . . . . . . . . . . . . . . . . . . . . . . . . . . . . . . . . . . . . . . .3 Changed protocol switch assignments . . . . . . . . . . . . . . . . . . . . . . . . . . . . . . . . . . . . . . . . . . . . . . . . . . . . . . . . . . . . .4 Moving camera assemblies between domes . . . . . . . . . . . . . . . . . . . . . . . . . . . . . . . . . . . . . . . . . . . . . . . . . . . . . . . .5
Chapter 2. Accessing the programming interface . . . . . . . . . . . . . . . . . . . . . . . . . . . . . . . . . . . . 7
When is logging on necessary . . . . . . . . . . . . . . . . . . . . . . . . . . . . . . . . . . . . . . . . . . . . . . . . . . . . . . . . . . . . . . . . . . . . 8 Starting from a keypad. . . . . . . . . . . . . . . . . . . . . . . . . . . . . . . . . . . . . . . . . . . . . . . . . . . . . . . . . . . . . . . . . . . . . . . . . . . 8
Chapter 3. Programming tools . . . . . . . . . . . . . . . . . . . . . . . . . . . . . . . . . . . . . . . . . . . . . . . . . . . . 11
Joystick modes. . . . . . . . . . . . . . . . . . . . . . . . . . . . . . . . . . . . . . . . . . . . . . . . . . . . . . . . . . . . . . . . . . . . . . . . . . . . . . . . . 12
Joystick as simulated mouse . . . . . . . . . . . . . . . . . . . . . . . . . . . . . . . . . . . . . . . . . . . . . . . . . . . . . . . . . . . . . . . . . . . . . 12 Joystick as PTZ controller . . . . . . . . . . . . . . . . . . . . . . . . . . . . . . . . . . . . . . . . . . . . . . . . . . . . . . . . . . . . . . . . . . . . . . . . 12
Using the graphical keyboard. . . . . . . . . . . . . . . . . . . . . . . . . . . . . . . . . . . . . . . . . . . . . . . . . . . . . . . . . . . . . . . . . . . . 13 Inactivity timer. . . . . . . . . . . . . . . . . . . . . . . . . . . . . . . . . . . . . . . . . . . . . . . . . . . . . . . . . . . . . . . . . . . . . . . . . . . . . . . . . 13 Keypad shortcuts. . . . . . . . . . . . . . . . . . . . . . . . . . . . . . . . . . . . . . . . . . . . . . . . . . . . . . . . . . . . . . . . . . . . . . . . . . . . . . . 14
Chapter 4. Basic programming . . . . . . . . . . . . . . . . . . . . . . . . . . . . . . . . . . . . . . . . . . . . . . . . . . . . 15
Presets . . . . . . . . . . . . . . . . . . . . . . . . . . . . . . . . . . . . . . . . . . . . . . . . . . . . . . . . . . . . . . . . . . . . . . . . . . . . . . . . . . . . . . . . 16
Programming presets from the keypad . . . . . . . . . . . . . . . . . . . . . . . . . . . . . . . . . . . . . . . . . . . . . . . . . . . . . . . . . . . 16
Programming presets with the programming interface . . . . . . . . . . . . . . . . . . . . . . . . . . . . . . . . . . . . . . . . . . . . 16
ShadowTours . . . . . . . . . . . . . . . . . . . . . . . . . . . . . . . . . . . . . . . . . . . . . . . . . . . . . . . . . . . . . . . . . . . . . . . . . . . . . . . . . . 18

ivLegend User Manual
Chapter 5. Advanced programming. . . . . . . . . . . . . . . . . . . . . . . . . . . . . . . . . . . . . . . . . . . . . . . . 21
Confirming settings . . . . . . . . . . . . . . . . . . . . . . . . . . . . . . . . . . . . . . . . . . . . . . . . . . . . . . . . . . . . . . . . . . . . . . . . . . . . 22 Setup menu. . . . . . . . . . . . . . . . . . . . . . . . . . . . . . . . . . . . . . . . . . . . . . . . . . . . . . . . . . . . . . . . . . . . . . . . . . . . . . . . . . . . 22
Memory page. . . . . . . . . . . . . . . . . . . . . . . . . . . . . . . . . . . . . . . . . . . . . . . . . . . . . . . . . . . . . . . . . . . . . . . . . . . . . . . . . . . . 22 Passcode page . . . . . . . . . . . . . . . . . . . . . . . . . . . . . . . . . . . . . . . . . . . . . . . . . . . . . . . . . . . . . . . . . . . . . . . . . . . . . . . . . . 23 Title/Date page . . . . . . . . . . . . . . . . . . . . . . . . . . . . . . . . . . . . . . . . . . . . . . . . . . . . . . . . . . . . . . . . . . . . . . . . . . . . . . . . . . 25 Network page . . . . . . . . . . . . . . . . . . . . . . . . . . . . . . . . . . . . . . . . . . . . . . . . . . . . . . . . . . . . . . . . . . . . . . . . . . . . . . . . . . . 26 Preferences page . . . . . . . . . . . . . . . . . . . . . . . . . . . . . . . . . . . . . . . . . . . . . . . . . . . . . . . . . . . . . . . . . . . . . . . . . . . . . . . . 27
Camera menu. . . . . . . . . . . . . . . . . . . . . . . . . . . . . . . . . . . . . . . . . . . . . . . . . . . . . . . . . . . . . . . . . . . . . . . . . . . . . . . . . . 31
Privacy Masks page . . . . . . . . . . . . . . . . . . . . . . . . . . . . . . . . . . . . . . . . . . . . . . . . . . . . . . . . . . . . . . . . . . . . . . . . . . . . . . 31 Settings page . . . . . . . . . . . . . . . . . . . . . . . . . . . . . . . . . . . . . . . . . . . . . . . . . . . . . . . . . . . . . . . . . . . . . . . . . . . . . . . . . . . . 34
Actions menu . . . . . . . . . . . . . . . . . . . . . . . . . . . . . . . . . . . . . . . . . . . . . . . . . . . . . . . . . . . . . . . . . . . . . . . . . . . . . . . . . . 42
Presets page. . . . . . . . . . . . . . . . . . . . . . . . . . . . . . . . . . . . . . . . . . . . . . . . . . . . . . . . . . . . . . . . . . . . . . . . . . . . . . . . . . . . . 42 ShadowTours page . . . . . . . . . . . . . . . . . . . . . . . . . . . . . . . . . . . . . . . . . . . . . . . . . . . . . . . . . . . . . . . . . . . . . . . . . . . . . . 49 Macros page. . . . . . . . . . . . . . . . . . . . . . . . . . . . . . . . . . . . . . . . . . . . . . . . . . . . . . . . . . . . . . . . . . . . . . . . . . . . . . . . . . . . . 51 Areas page . . . . . . . . . . . . . . . . . . . . . . . . . . . . . . . . . . . . . . . . . . . . . . . . . . . . . . . . . . . . . . . . . . . . . . . . . . . . . . . . . . . . . . 54 Time schedule page. . . . . . . . . . . . . . . . . . . . . . . . . . . . . . . . . . . . . . . . . . . . . . . . . . . . . . . . . . . . . . . . . . . . . . . . . . . . . . 57
Alarms menu . . . . . . . . . . . . . . . . . . . . . . . . . . . . . . . . . . . . . . . . . . . . . . . . . . . . . . . . . . . . . . . . . . . . . . . . . . . . . . . . . . 60
Programming tips for dome alarms . . . . . . . . . . . . . . . . . . . . . . . . . . . . . . . . . . . . . . . . . . . . . . . . . . . . . . . . . . . . . . . 60 Summary page . . . . . . . . . . . . . . . . . . . . . . . . . . . . . . . . . . . . . . . . . . . . . . . . . . . . . . . . . . . . . . . . . . . . . . . . . . . . . . . . . . 61 Contact Setup page . . . . . . . . . . . . . . . . . . . . . . . . . . . . . . . . . . . . . . . . . . . . . . . . . . . . . . . . . . . . . . . . . . . . . . . . . . . . . . 63 Priority page . . . . . . . . . . . . . . . . . . . . . . . . . . . . . . . . . . . . . . . . . . . . . . . . . . . . . . . . . . . . . . . . . . . . . . . . . . . . . . . . . . . . . 64 Display page. . . . . . . . . . . . . . . . . . . . . . . . . . . . . . . . . . . . . . . . . . . . . . . . . . . . . . . . . . . . . . . . . . . . . . . . . . . . . . . . . . . . . 65 Relay Status page. . . . . . . . . . . . . . . . . . . . . . . . . . . . . . . . . . . . . . . . . . . . . . . . . . . . . . . . . . . . . . . . . . . . . . . . . . . . . . . . 67
Control menu . . . . . . . . . . . . . . . . . . . . . . . . . . . . . . . . . . . . . . . . . . . . . . . . . . . . . . . . . . . . . . . . . . . . . . . . . . . . . . . . . . 68
Command Map page. . . . . . . . . . . . . . . . . . . . . . . . . . . . . . . . . . . . . . . . . . . . . . . . . . . . . . . . . . . . . . . . . . . . . . . . . . . . . 68 Power-on and Resume page . . . . . . . . . . . . . . . . . . . . . . . . . . . . . . . . . . . . . . . . . . . . . . . . . . . . . . . . . . . . . . . . . . . . . 70 Speeds/Tracking page . . . . . . . . . . . . . . . . . . . . . . . . . . . . . . . . . . . . . . . . . . . . . . . . . . . . . . . . . . . . . . . . . . . . . . . . . . . 72
System menu . . . . . . . . . . . . . . . . . . . . . . . . . . . . . . . . . . . . . . . . . . . . . . . . . . . . . . . . . . . . . . . . . . . . . . . . . . . . . . . . . . 74
Diagnostics page . . . . . . . . . . . . . . . . . . . . . . . . . . . . . . . . . . . . . . . . . . . . . . . . . . . . . . . . . . . . . . . . . . . . . . . . . . . . . . . . 75 Status page. . . . . . . . . . . . . . . . . . . . . . . . . . . . . . . . . . . . . . . . . . . . . . . . . . . . . . . . . . . . . . . . . . . . . . . . . . . . . . . . . . . . . . 75 Logs page . . . . . . . . . . . . . . . . . . . . . . . . . . . . . . . . . . . . . . . . . . . . . . . . . . . . . . . . . . . . . . . . . . . . . . . . . . . . . . . . . . . . . . . 76
Exit . . . . . . . . . . . . . . . . . . . . . . . . . . . . . . . . . . . . . . . . . . . . . . . . . . . . . . . . . . . . . . . . . . . . . . . . . . . . . . . . . . . . . . . . . . . 77
Chapter 6. System operation . . . . . . . . . . . . . . . . . . . . . . . . . . . . . . . . . . . . . . . . . . . . . . . . . . . . . . 79
Controllers and commands. . . . . . . . . . . . . . . . . . . . . . . . . . . . . . . . . . . . . . . . . . . . . . . . . . . . . . . . . . . . . . . . . . . . . . 80 Autopan limitations . . . . . . . . . . . . . . . . . . . . . . . . . . . . . . . . . . . . . . . . . . . . . . . . . . . . . . . . . . . . . . . . . . . . . . . . . . . . 80 Keypad limitations for calling up presets . . . . . . . . . . . . . . . . . . . . . . . . . . . . . . . . . . . . . . . . . . . . . . . . . . . . . . . . . 80 Rebooting versus resetting a dome . . . . . . . . . . . . . . . . . . . . . . . . . . . . . . . . . . . . . . . . . . . . . . . . . . . . . . . . . . . . . . 81
Rebooting the dome . . . . . . . . . . . . . . . . . . . . . . . . . . . . . . . . . . . . . . . . . . . . . . . . . . . . . . . . . . . . . . . . . . . . . . . . . . . . . 81 Resetting the dome . . . . . . . . . . . . . . . . . . . . . . . . . . . . . . . . . . . . . . . . . . . . . . . . . . . . . . . . . . . . . . . . . . . . . . . . . . . . . . 81

v
Chapter 7. Troubleshooting, maintenance, support. . . . . . . . . . . . . . . . . . . . . . . . . . . . . . . . . . 83
Troubleshooting. . . . . . . . . . . . . . . . . . . . . . . . . . . . . . . . . . . . . . . . . . . . . . . . . . . . . . . . . . . . . . . . . . . . . . . . . . . . . . . . 84
Identifying a dome. . . . . . . . . . . . . . . . . . . . . . . . . . . . . . . . . . . . . . . . . . . . . . . . . . . . . . . . . . . . . . . . . . . . . . . . . . . . . . . 84 Troubleshooting your Legend system. . . . . . . . . . . . . . . . . . . . . . . . . . . . . . . . . . . . . . . . . . . . . . . . . . . . . . . . . . . . . 84
Maintenance . . . . . . . . . . . . . . . . . . . . . . . . . . . . . . . . . . . . . . . . . . . . . . . . . . . . . . . . . . . . . . . . . . . . . . . . . . . . . . . . . . . 85
Updating the software . . . . . . . . . . . . . . . . . . . . . . . . . . . . . . . . . . . . . . . . . . . . . . . . . . . . . . . . . . . . . . . . . . . . . . . . . . . 85
Contacting technical support . . . . . . . . . . . . . . . . . . . . . . . . . . . . . . . . . . . . . . . . . . . . . . . . . . . . . . . . . . . . . . . . . . . . 88
Online publication library . . . . . . . . . . . . . . . . . . . . . . . . . . . . . . . . . . . . . . . . . . . . . . . . . . . . . . . . . . . . . . . . . . . . . . . . 88
Appendix A. System defaults . . . . . . . . . . . . . . . . . . . . . . . . . . . . . . . . . . . . . . . . . . . . . . . . . . . . . . . 89
Default programming settings . . . . . . . . . . . . . . . . . . . . . . . . . . . . . . . . . . . . . . . . . . . . . . . . . . . . . . . . . . . . . . . . . . . 90 Default title positions . . . . . . . . . . . . . . . . . . . . . . . . . . . . . . . . . . . . . . . . . . . . . . . . . . . . . . . . . . . . . . . . . . . . . . . . . . . 91
Appendix B. Compatible commands . . . . . . . . . . . . . . . . . . . . . . . . . . . . . . . . . . . . . . . . . . . . . . . . . 93
Additionally supported Pelco D and Pelco P commands. . . . . . . . . . . . . . . . . . . . . . . . . . . . . . . . . . . . . . . . . . . . . 94 Additionally supported Tyco/AD commands. . . . . . . . . . . . . . . . . . . . . . . . . . . . . . . . . . . . . . . . . . . . . . . . . . . . . . . 94 Additionally supported Ultrak commands . . . . . . . . . . . . . . . . . . . . . . . . . . . . . . . . . . . . . . . . . . . . . . . . . . . . . . . . . 95
Appendix C. Software upgrade instructions . . . . . . . . . . . . . . . . . . . . . . . . . . . . . . . . . . . . . . . . . . 97
Installation overview . . . . . . . . . . . . . . . . . . . . . . . . . . . . . . . . . . . . . . . . . . . . . . . . . . . . . . . . . . . . . . . . . . . . . . . . . . . 98
Required equipment (not provided) . . . . . . . . . . . . . . . . . . . . . . . . . . . . . . . . . . . . . . . . . . . . . . . . . . . . . . . . . . . . . . . 98 Two upgrade anomalies with v2.1.9 . . . . . . . . . . . . . . . . . . . . . . . . . . . . . . . . . . . . . . . . . . . . . . . . . . . . . . . . . . . . . . 98
Upgrading from v1.8.5 to v1.8.6 . . . . . . . . . . . . . . . . . . . . . . . . . . . . . . . . . . . . . . . . . . . . . . . . . . . . . . . . . . . . . . . . . . 99 Upgrading from v1.8.6 to v2.1.9 . . . . . . . . . . . . . . . . . . . . . . . . . . . . . . . . . . . . . . . . . . . . . . . . . . . . . . . . . . . . . . . . .101
Index . . . . . . . . . . . . . . . . . . . . . . . . . . . . . . . . . . . . . . . . . . . . . . . . . . . . . . . . . . . . . . . . . . . . . . . . . . . . . 103

viLegend User Manual

vii
Preface
This is the GE Legend User Manual for all models with v2.1.9 software. This document includes an overview of the product and detailed instructions explaining:
•how to program; and
•how to operate.
There is also information describing how to contact technical support if you have questions or concerns. To use this document effectively, you should have the following minimum qualifications:
•a basic knowledge of CCTV systems and components; and
•a basic knowledge of electrical wiring and low-voltage electrical connections.
Read these instructions and all ancillary documentation entirely before installing or operating this product. The most current versions of this and related documentation may be found on our website. Refer to Online publication library on page 8 for instructions on accessing our online publication library.
Note: A qualified service person, complying with all applicable codes, should perform all required hardware installation.
Conventions used in this document
The following conventions are used in this document:
Bold |
Menu items and buttons. |
|
|
Italic |
Emphasis of an instruction or point; special terms. |
|
|
|
File names, path names, windows, panes, tabs, fields, variables, and other GUI elements. |
|
|
|
Titles of books and various documents. |
|
|
Blue italic |
(Electronic version.) Hyperlinks to cross-references, related topics, and URL addresses. |
|
|
Monospace |
Text that displays on the computer screen. |
|
Programming or coding sequences. |
|
|
Safety terms and symbols
These terms may appear in this manual:
CAUTION: Cautions identify conditions or practices that may result in damage to the equipment or other property.
WARNING: Warnings identify conditions or practices that could result in equipment damage or serious personal injury.

viii |
|
Legend |
|
||
|
|
User Manual |
References
If you want to investigate related topics, these other documents may prove helpful:
•GE Security. Legend v2.1.9 Software Upgrade Installation Instructions (1054754)
•GE Security. Legend AHC Retrofit Installation Instructions (1055588)
•GE Security. Legend Installation Manual (1052026)
•GE Security. KTD-405 Controller Keypad User Manual (1036547)
•GE Security. Networking Cable Types Technical Reference Guide (1047213)

Chapter 1 Introduction
This chapter provides an overview of your Legend dome system and what is new in this release of the product. Refer to the Legend Installation Manual (1052026) for the detailed product contents and system requirements.
In this chapter:
Product overview . . . . . . . . . . . . . . . . . . . . . . . . . . . . . . . . . . . . . . . . . . . 2 What’s new in this release . . . . . . . . . . . . . . . . . . . . . . . . . . . . . . . . . 3
Changed protocol switch assignments . . . . . . . . . . . . . . . . . . . . . . . . 4
2 |
|
Legend |
|
||
|
|
User Manual |
Product overview
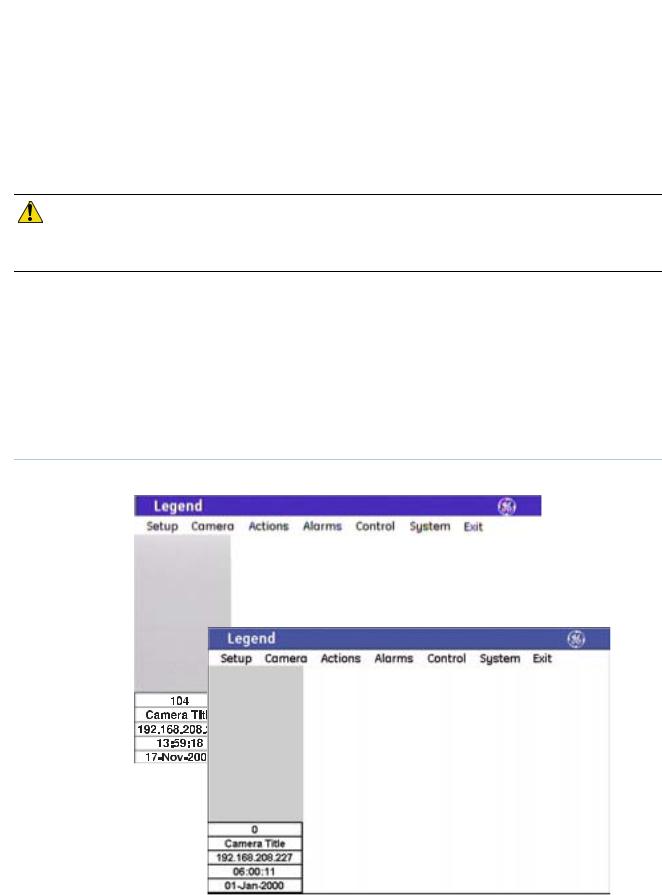
Legend™ is a line of advanced PTZ domes. Besides powerful cameras, Legend domes feature SilkTrak™ direct-drive positioning for smoother camera travel, a graphical programming interface (Figure 1) for easier customization of camera settings, passcodes for protection against unauthorized access, and an Ethernet connection for flashing software upgrades over a standard IP network using a standard web browser.
CAUTION: When flashing software upgrades to the dome over a standard IP network via the dome's Ethernet connection, ensure that the network is secured from unauthorized access. Consider connecting the Ethernet cable only when you are flashing the dome, unless you have the dome connected to a secure, isolated network.
The Legend protocol is backward compatible with the Digiplex protocol. You can replace older domes in an existing Digiplex system with Legend domes. You must, however, replace the entire dome (camera and housing). The hardware is not backward compatible.
The end-user’s system administrator and/or the installer will do the programming. Be aware that the installer may have enabled passcodes for the system during installation by specifying them. There are no passcodes by default.
For additional details, refer to the data sheet and the Legend Installation Manual (1052026) for product specifications and installation instructions.
Figure 1. Main menu of the graphical programming interface
Chapter 1  3
3
Introduction
What’s new in this release
The major changes to this release of the Legend software are:
•time scheduling added (Time schedule page on page 57);
•image freeze on presets added (Edit page on page 44);
•Pelco D (autobaud), Pelco P, and Tyco/AD (RS-422) (Appendix B, Compatible commands) protocols added (Table 2 on page 4)1;
•streaming position reporting added when data is connected to the AUX RS-485 connections;
•alarm reporting added for the Impac (RS-485) and Tyco/AD (RS-422) protocols; and
•overall performance increased.
Note: The Pelco D autobaud protocol provides autobaud detection between 2400, 4800, and 9600 baud. Alarm reporting is a nonprogrammable feature. Refer to the protocol’s manual for details. Streaming position reporting is disabled when the protocol switch is set to A for the Tyco/AD protocol. On-request position reporting continues to be available with the Impac (RS-485) protocol delivered through the MAIN RS-485 connections. It is not in ASCII format as is the streaming position reporting data.
If you purchased a v2.1.9 or later Legend dome, then you have the new AHC (active housing card) that is required for some of the recent software changes. If you are upgrading a Legend dome that has an earlier version of software, you may or may not have to retrofit the dome with a new AHC. It depends upon what features you want to use. The most commonly used features do not require the new AHC.
Table 1 lists what software upgrade changes are usable with the current AHC and which are usable if you retrofit the AHC.
Table 1. Upgrade features available with and without retrofitting the AHC
Upgrade software only |
Upgrade software and retrofit AHC |
|
|
Time scheduling |
Time scheduling |
|
|
Image freeze on presets |
Image freeze on presets |
|
|
Pelco D and Pelco P protocols |
Pelco D and Pelco P protocols |
|
|
|
Tyco/AD protocol |
|
|
|
Streaming position reporting with AUX RS-485 |
|
|
Alarm reporting with Impac (RS-485) |
Alarm reporting with Impac (RS-485) |
|
|
|
Alarm reporting with Tyco/AD (RS-422) |
|
|
Increased performance |
Increased performance |
|
|
If you need to retrofit the AHC, it can be retrofitted in the field. Contact GE Technical Support for one AHC retrofit it per dome. See Appendix C, Software upgrade instructions.
1.The version numbers of these protocols are as follows: Pelco D as documented in the Pelco Engineering Design Standard numbered TF-0002 version 1 rev 1; Tyco/AD as documented in the American Dynamics user guide numbered 8000-2694-01 rev. B; and Ultrak as documented in the Diamond Electronics FastScan/SmartScan Communication Protocol Document dated August 13, 1994.

4 |
|
Legend |
|
||
|
|
User Manual |
Changed protocol switch assignments
With the addition of new protocols, the assignments of the rotary protocol switch have changed.
Be aware that if you were using Pelco D 2400 baud protocol, which was originally assigned to switch 6, you will need to change the DIP switch setting in the housing. It is now incorporated into the Pelco D autobaud protocol and assigned to switch 9.
Here are the new protocol switch assignments.
Table 2. |
Protocol switch assignments |
|
|
|
|
Switch |
|
Protocol |
|
|
|
0 |
|
Digiplex (RS-422) @ 4800 baud |
|
|
|
1 |
|
Impac (RS-485) @ 9600 baud |
|
|
|
2 |
|
For future use |
|
|
|
3 |
|
For future use |
|
|
|
4 |
|
For future use |
|
|
|
5 |
|
ASCII @ 9600 baud |
|
|
|
6 |
|
For future use |
|
|
|
7 |
|
Ultrak @ 9600 baud (even parity) |
|
|
|
8 |
|
Pelco P @ 4800 baud |
|
|
|
9 |
|
Pelco D autobaud @ 2400, 4800, and 9600 |
|
|
|
A |
|
Tyco/AD (RS-422) @ 4800 baud |
|
|
|
B |
|
For future use |
|
|
|
C |
|
For future use |
|
|
|
D |
|
For future use |
|
|
|
E |
|
For factory use |
|
|
|
F |
|
For factory use |
|
|
|

Chapter 1  5
5
Introduction
Moving camera assemblies between domes
Legend domes consist of two primary operational components: the housing cards mounted up in the housing and the camera assembly (PTZ unit). So that camera assemblies can be replaced quickly without reprogramming custom settings, all memory for IP addresses and programmable operations, such as presets and tours, are stored in the housings. If you move camera assemblies that are loaded with different software versions between housings, you need to be aware of the behavioral differences that you can expect to see. Refer to Table 3.
Table 3. Behavioral differences seen when cameras loaded with different software versions are replaced in housings
Software version |
Software version |
Change in boot up and |
|
of existing |
of replacement |
|
|
camera assembly |
camera assembly |
memory behavior |
Intervention required |
|
|
|
|
1.8.5 |
1.8.5 |
Boot-up time remains the |
No user intervention is required. The new camera |
|
|
same and memory is |
assembly will inherit all of the settings from the |
|
|
preserved. |
previous camera assembly. |
|
|
|
|
1.8.5 |
2.1.X |
Boot-up time may be longer for |
No user intervention is required. Any housing data |
|
|
the initial boot up and memory |
formatted with v1.8.5 will be migrated |
|
|
is preserved. |
automatically to v2.1.X during the initial boot up. |
|
|
|
These settings will then be stored in the housing |
|
|
|
memory. All custom settings are preserved. |
|
|
|
|
2.1.X |
1.8.5 |
Boot-up time may be longer |
Some user intervention may be required. Any |
|
|
and memory of custom |
housing data formatted with v2.1.X is ignored, but |
|
|
settings is lost. All custom |
not erased. If the housing contains settings with |
|
|
settings will revert to factory |
v1.8.5, then they will be used. Otherwise, factory |
|
|
defaults. |
default settings are enabled. |
|
|
|
BE AWARE: Storing data in this scenario may |
|
|
|
create setting conflicts and indeterminate results |
|
|
|
when a camera assembly formatted with v2.1.x is |
|
|
|
again placed into the housing. It is recommended |
|
|
|
to erase all settings if a housing is inserted with |
|
|
|
camera assemblies containing v.2.1X followed by |
|
|
|
v1.8.5 followed by v2.1.X. To erase all settings, see |
|
|
|
Memory page on page 22. |
|
|
|
|
2.1.X |
2.1.X |
Boot-up time remains the |
No user intervention is required. The new camera |
|
|
same and memory is |
assembly will inherit all of the settings from the |
|
|
preserved. |
previous camera assembly. |
|
|
|
|

6 |
|
Legend |
|
||
|
|
User Manual |

Chapter 2 Accessing the programming interface
This chapter provides instructions for accessing the dome’s programming interface. Logging on may not be necessary.
When is logging on necessary. . . . . . . . . . . . . . . . . . . . . . . . . . . . . . . . . . 8 Starting from a keypad . . . . . . . . . . . . . . . . . . . . . . . . . . . . . . . . . . . . . . . 8

8 |
|
Legend |
|
||
|
|
User Manual |
When is logging on necessary
If passcodes were turned on (that is, specified) during installation or later, access to the programming interface will be passcode-protected and you will have to log on to the dome to program it. Otherwise, you will be taken directly to the main programming page from the keypad. The passcodes control who has access to the features of your dome. See Passcode page on page 23.
Starting from a keypad
The steps for accessing the programming interface from all GE keypads are similar. The following procedure is based on the KTD-405 keypad, which is currently GE’s most popular keypad. Exceptions to the procedure for other GE keypads are noted. You can also use the GE KTD-400 and KTD-404/304 keypads and other manufacturers’ keypads and controllers using the Pelco D (autobaud), Pelco P, Tyco/AD (RS-422), Ultrak, Impac (RS-485), and ASCII protocols. When using these other protocols, all common commands used for accessing programming, operating the joystick and iris key on the keypad, and controlling presets are supported by the Legend protocol. For an up-to-date list of compatible keypads and protocols, please contact your GE sales representative or Technical Support.
To access the programming interface from a KTD-405 keypad:
1.At the normal display, press and hold the set
(  ) key on the keypad until you hear a beep and the programming code display appears on the keypad’s LCD.
2.At the ENTER PROGRAMMING CODE display, enter the programming access code by pressing the 9, 5, 1, and seq keys.
This code is the same for all GE keypads.
3.At the equipment selection display, press 3 to select CAMERA (keypad v1.2.09 or later) or CAMERA/RCVR (keypad v1.1.06 or earlier).
If you have an older keypad (v1.1.06 or earlier), you will have a second equipment selection display, at which you need to press 1 for CYBERDOME.
Figure 2. Normal display (programming interface accessed)
CAMERA 1
MONITOR 1
Figure 3. ENTER PROGRAMMING CODE display
ENTER PROGRAMMING
CODE: _
Figure 4. Equipment selection display
1=SWITCHER/MPLX 2=ALARMS |
|
v1.2.09 |
|
|
or later |
||
3=CAMERA |
EXIT |
|
|
|
|
||
|
|
|
|
|
|
|
|
1=SWITCHER/MPLX 2=ALARMS |
|
v1.1.06 |
|
3=CAMERA/RCVR |
EXIT |
|
|
|
or |
||
|
|
|
|
|
|
|
earlier |
1=CYBERDOME 2=PTZ |
|
|
|
BACK |
|
} |
|
3=AUXILIARY |
|
||
4.At the ENTER CAMERA SITE NUMBER display, enter the number for the camera site you are programming. This is a 3-digit number (for example, 007, 021, 243).
You can enter one, two, or three digits and press set (  ).
).
5.Continue entering commands with the joystick.
Chapter 2  9
9
Accessing the programming interface
Figure 5. ENTER CAMERA SITE NUMBER display
ENTER CAMERA SITE
NUMBER _ _ _ |
BACK |
Figure 6. SEE MONITOR FOR MENUS display
SEE MONITOR FOR MENUS
HOLD SEQ (3 SEC) TO EXIT
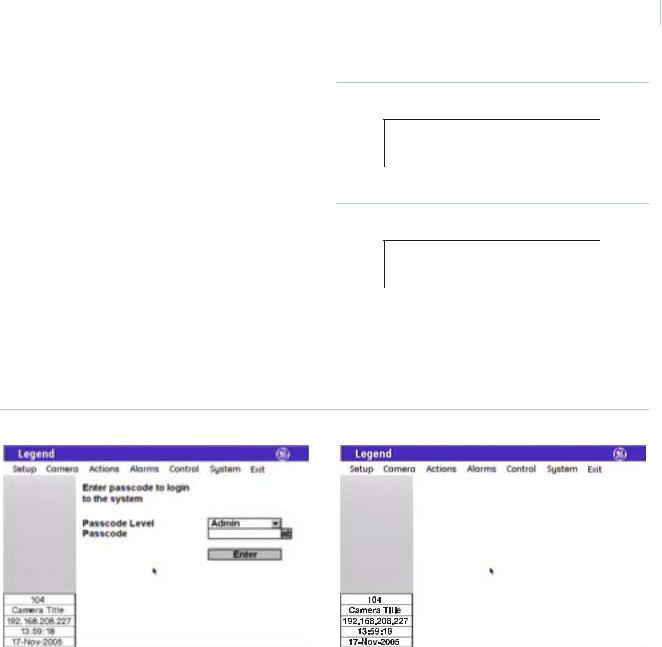
6.If passcodes are turned on, they are required. Select your passcode level and enter your passcode (Figure 7). You will be taken to the main programming page. If passcodes are turned off, they are not required and you will be taken directly to the main programming page.
From the main programming page, you can access any programming parameters that are allowed by your passcode.
Figure 7. Log on (if passcode required) and main programming pages

10 |
|
Legend |
|
||
|
|
User Manual |

Chapter 3 Programming tools
This chapter provides instructions for how to use the keypad joystick and graphical programming interface to program domes.
In this chapter:
Joystick modes . . . . . . . . . . . . . . . . . . . . . . . . . . . . . . . . . . . . . . . . . . . . 12 Joystick as simulated mouse. . . . . . . . . . . . . . . . . . . . . . . . . . . . . . . 12 Joystick as PTZ controller . . . . . . . . . . . . . . . . . . . . . . . . . . . . . . . . 12 Using the graphical keyboard. . . . . . . . . . . . . . . . . . . . . . . . . . . . . . . . . 13 Inactivity timer . . . . . . . . . . . . . . . . . . . . . . . . . . . . . . . . . . . . . . . . . . . . 13 Keypad shortcuts. . . . . . . . . . . . . . . . . . . . . . . . . . . . . . . . . . . . . . . . . . . 14

12 |
|
Legend |
|
||
|
|
User Manual |
Joystick modes
While you are in the graphical programming interface, the joystick of your keypad operates in two modes depending upon what your current action is. While moving among the menus of the programming interface, the joystick is a simulated mouse and you enter commands using the joystick. While controlling live video, the joystick is a PTZ controller. So, whenever you are positioning titles or privacy masks, or programming live video features such as presets and ShadowTours, the joystick is a PTZ controller, in which case, you will use the keypad’s keys to enter commands.
Joystick as simulated mouse
When the joystick is simulating a mouse within the programming interface, it can move the cursor, move a title, or make a selection in the menus.
Moving the cursor or a title
To move the cursor (onscreen arrow) across the menus, or to move a title across the screen during title positioning, push or pull the joystick in any direction. The farther you move the joystick, the faster the cursor will move.
Making a selection
To make a selection in the menus, place the cursor over a menu, button, checkbox, item in a list, or arrow of a drop-down box by pushing or pulling the joystick in any direction, then twist the knob on the joystick.
Figure 8. Twisting the joystick knob to make selection
You can also use the zoom+/- key on the keypad to make selections.
Joystick as PTZ controller
When the joystick is controlling the PTZ movements of the camera within the programming interface, use the keypad’s keys to enter the save and cancel programming commands.
Saving live video programming
To save live video programming, such as positioned titles, privacy masks, presets, and ShadowTours, press the iris + or the set (  ) key on the keypad.
Canceling live video programming
To cancel live video programming, such as positioned titles, privacy masks, presets, and ShadowTours, press the iris - or the esc key on the keypad.

Chapter 3  13
13
Programming tools
Using the graphical keyboard
The programming interface has an internal graphical keyboard for entering passcodes, network data, and custom titles. Open the graphical keyboard (Figure 9) by selecting the icon 1. After you have entered the necessary characters, select Done on the keyboard or press the set (  ) key on the keypad to return to the page. Then select OK to save the changes made to the page. Pressing esc on the keypad while you are still in the keyboard erases the characters shown. You must select OK or Cancel to save or cancel the changes entered on the page.
Figure 9. Using the keyboard of the programming interface
1Select the ab icon to open the keyboard.
2Select the Done icon to close the keyboard.
3Select the OK icon to save changes to the page.
Inactivity timer
The programming interface has a 10-minute keypad inactivity timer. When being used with keypads that do not have their own inactivity timer, the programming interface will time out after 10 minutes of inactivity. When being used with keypads that do have their own inactivity timer and it is less than the 10-minute timer of the programming interface, the programming interface will time out when the keypad does. When being used with keypads that have a longer inactivity timer, the programming interface will time out after 10 minutes of inactivity. Refer to your keypad’s manual to see if it has an inactivity timer and what the duration is so that you know when you can expect the programming interface to time out.

14 |
|
Legend |
|
||
|
|
User Manual |
Keypad shortcuts
The following are keypad shortcut commands carried over from CyberDome programming. Where keypad shortcuts exist for a feature, such as setting presets, you can use keys from the keypad, instead of menus from the programming interface, to program the feature. See Table 4. You can then go into the programming interface and customize the programmed feature with titles and other attributes.
Table 4. Keypad shortcuts
Command |
Keypad shortcuta |
|
Set a preset |
store | (number) | store |
|
|
|
|
Set the left autopan limit |
store | |
| store |
|
|
|
Set the right autopan limit |
store | |
| store |
|
|
|
aFor details, see the KTD-405 Controller Keypad User Manual (1036547).
See Autopan limitations on page 80 for restrictions for setting autopan limits.

Chapter 4 Basic programming
This chapter provides programming instructions for the most commonly used dome operations (presets and ShadowTours). The dome is otherwise ready to operate using its defaults. If you want to customize the dome’s programming for advanced surveillance applications, go to Advanced programming on page 21.
In this chapter:
Presets. . . . . . . . . . . . . . . . . . . . . . . . . . . . . . . . . . . . . . . . . . . . . . . . . . . 16
Programming presets from the keypad. . . . . . . . . . . . . . . . . . . . . . . 16 Programming presets with the programming interface . . . . . . . . . . 16
ShadowTours. . . . . . . . . . . . . . . . . . . . . . . . . . . . . . . . . . . . . . . . . . . . . . 18

16 |
|
Legend |
|
||
|
|
User Manual |
Presets
You can set presets from the keypad or with the graphical programming interface. If you set your presets from the keypad, you may want to go into the programming interface to customize them with titles and exposure settings.
There are a total of 127 presets (1 through 127) that you can define for your dome. If you are using presets 62 and 63 for your left and right autopan limits, then you have a total of 125 presets that you can define.
The dome also provides the ability to remap any preset or tour command coming in from a keypad to activate any of the 127 presets, 16 tours, or 32 macro actions. This enables you to manually initiate any of the expanded capabilities of the dome from keypad controllers with limited command capability. See Command Map page on page 68.
Note: Most keypads have a limited number of preset numbers they can call. If you have a GE KTD-405 keypad with firmware v1.2.09 or later, and it is operating with Impac RS-485 protocol, then you can call up all 127 preset numbers (1 through 127) directly from the keypad. If, however, you have a GE KTD-405 keypad with an earlier version of firmware, or it is operating with Digiplex RS-422 protocol, then you can use the keypad to call up only the first 63 preset numbers
(1 through 63). If you are using presets 62 and 63 for your left and right autopan limits, then you have a total of 125 or 61 preset numbers that you can call up from the keypad. To verify your keypad’s version, press and hold the mon key on the keypad, until the keypad beeps, then press the >> key.
Programming presets from the keypad
To program presets from the KTD-405 keypad, do the following:
1.Use the joystick to pan, tilt, and zoom the camera to the desired view.
2.Press store on the keypad.
3.Press the number keys on the keypad that correspond to the preset number you want to assign for this position.
4.Press store again.
Note: If the keypad does not allow you to program a desired preset, you may need to change the lowest userdefinable preset in the keypad program menus. Refer to the keypad manual.
5.After programming your presets, you can verify them, one at a time, by pressing the find key on the keypad and then pressing the number keys that correspond to each preset. If you are not satisfied with any views, you can reprogram those preset positions starting with step 1 above.
6.If desired, go into the programming interface to customize the preset with a title and exposure settings. See Presets page on page 42.
Programming presets with the programming interface
To program presets with the programming interface, do the following:
1.Access the programming interface. See Accessing the programming interface on page 7.
a.Press and hold the set (  ) key on the keypad until you hear a beep and the programming code display appears on the keypad’s LCD.
b.Press the 9, 5, 1, and seq keys on the keypad.

Chapter 4  17
17
Basic programming
c. Press 3 to select CAMERA.
Note: If you have an older keypad, the LCD will say CYBERDOME, instead of CAMERA, and you will have an additional self-explanatory screen to step through.
d.Enter the number for the camera site you are programming.
The programming interface will appear on the monitor screen and you will start using the joystick to enter commands.
e.If passcodes are turned on, select your passcode level and enter your passcode. If passcodes are turned off, you will be taken directly to the main programming page.
The programming interface will appear on the monitor screen and you will start using the joystick to enter commands.
2.Select Actions by guiding the joystick to move the cursor over the Actions menu and twisting the joystick knob.
Figure 10. Preset programming page
3.Select Presets.
4.Select the Edit tab.
5.Select a preset number.
6.Select Program.
7.Use the joystick to pan, tilt, and zoom the camera to the desired view.
8.Press the iris+ or set (  ) key on the keypad to save the preset position or press the iris- or esc key to cancel the preset position. Both canceling and saving the preset position returns you to the Edit page.
9.After you have saved a preset position, then you can use the features on the Edit, Display, and Advanced tab pages to customize the preset’s title, duration, and exposure settings. See Presets page on page 42.
18 |
|
Legend |
|
||
|
|
User Manual |
ShadowTours
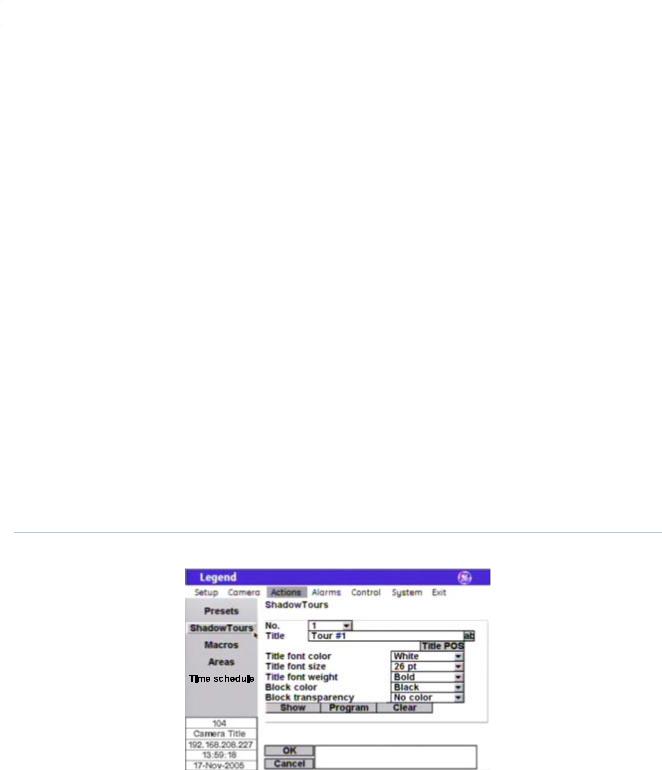
You have a total of 16 ShadowTours (totaling 20 minutes) that you can define for the dome. A ShadowTour is a tour that the camera learns by recording your manual operation of the camera. Use a keypad to manually direct the camera through the desired PTZ movements. The camera stores those movements in memory. The recorded tour can be replayed at any time.
To program ShadowTours with the programming interface, do the following:
1.Access the programming interface. See Accessing the programming interface on page 7.
a.Press and hold the set (  ) key on the keypad until you hear a beep and the programming code display appears on the keypad’s LCD.
b.Press the 9, 5, 1, and seq keys on the keypad.
c.Press 3 to select CAMERA.
Note: If you have an older keypad, the LCD will say CYBERDOME, instead of CAMERA, and you will have an additional self-explanatory screen to step through.
d.Enter the number for the camera site you are programming.
The programming interface will appear on the monitor screen and you will start using the joystick to enter commands.
e.If passcodes are turned on, select your passcode level and enter your passcode. If passcodes are turned off, you will be taken directly to the main programming page.
The programming interface will appear on the monitor screen and you will start using the joystick to enter commands.
2.Select Actions by guiding the joystick to move the cursor over the Actions menu and twisting the joystick knob.
Figure 11. ShadowTour programming page
3.Select ShadowTours.
4.Select a ShadowTour number.
5.Select Program.
6.Press and release the set (  ) key on the keypad to start the ShadowTour timer.
7.Use the joystick to manually direct the camera through the desired PTZ movements

Chapter 4  19
19
Basic programming
8.Press the iris+ or set (  ) key on the keypad to save the ShadowTour or press the iris- or esc key to cancel the ShadowTour. Both canceling and saving the ShadowTour returns you to the ShadowTour page.
9.After you have saved a ShadowTour, then you can use the features on the ShadowTour page to customize the tour’s title. See ShadowTours page on page 49.
10.After programming your tours, you can verify shorter tours (see Inactivity timer on page 13) from within the programming interface by selecting a tour number and Show. View longer ShadowTours out of the programming interface by pressing the tour key on the keypad and the tour number.

20 |
|
Legend |
|
||
|
|
User Manual |

Chapter 5 Advanced programming
This chapter provides programming instructions for customizing the dome’s programming for advanced surveillance applications. You will be using the graphical programming interface. Keypad shortcuts do exist for some programmable features (Keypad shortcuts on page 14), if you prefer to use them. Shortcuts can be quicker when setting a large number of preset positions, but you will use the programming interface to customize such features as exposure settings.
In this chapter:
Confirming settings. . . . . . . . . . . . . . . . . . . . . . . . . . . . . . . . . . . . . . . . . 22 Setup menu . . . . . . . . . . . . . . . . . . . . . . . . . . . . . . . . . . . . . . . . . . . . . . . 22 Camera menu . . . . . . . . . . . . . . . . . . . . . . . . . . . . . . . . . . . . . . . . . . . . . 31 Actions menu. . . . . . . . . . . . . . . . . . . . . . . . . . . . . . . . . . . . . . . . . . . . . . 42 Alarms menu . . . . . . . . . . . . . . . . . . . . . . . . . . . . . . . . . . . . . . . . . . . . . . 60 Control menu . . . . . . . . . . . . . . . . . . . . . . . . . . . . . . . . . . . . . . . . . . . . . 68 System menu . . . . . . . . . . . . . . . . . . . . . . . . . . . . . . . . . . . . . . . . . . . . . . 74 Exit . . . . . . . . . . . . . . . . . . . . . . . . . . . . . . . . . . . . . . . . . . . . . . . . . . . . . 77
22 |
|
Legend |
|
||
|
|
User Manual |
Confirming settings
When changing settings on any programming page, you need to confirm the new settings by selecting OK on that page. When establishing live video settings (for example, ShadowTours), you need to save the live video settings (by pressing the iris + or the set (  ) key on the keypad), then save the changes made on the programming page (by selecting OK in the programming interface) when you return to programming mode from live video mode.
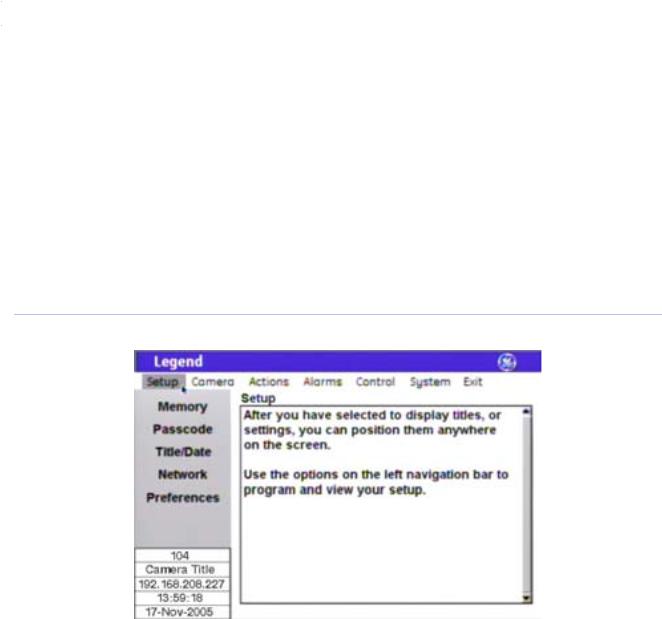
Setup menu
This is the beginning of your system’s setup. Start here to title your dome, turn on/off or change passcodes, establish network connectivity, set the north point, and manage your dome’s memory.
Figure 12. Setup menu
Memory page
Programming and addressing for the dome are stored to the housing. Having the memory stored in the housing allows you to replace cameras or move them between sites without having to reprogram cameras for each new site, because the camera will operate using the housing memory.
The Memory page allows you to manage your dome’s memory during setup and operation. When you clear part or all of your dome’s memory, you are overwriting your custom programmed settings with the factory default settings.
 Loading...