


TC_SCPandT_Couv_PC_UK 23/02/04 17:50 Page 4
2202650

TC_SCPandT_Couv_PC_UK 23/02/04 12:56 Page 2
WARNING: READ BEFORE PLAYING
A very small percentage of individuals may experience epileptic seizures when exposed to certain light patterns or flashing lights. Exposure to certain patterns or backgrounds on a computer screen, or while playing video games, may induce an epileptic seizure in these individuals. Certain conditions may induce previously undetected epileptic symptoms even in persons who have no history of prior seizures or epilepsy.
If you, or anyone in your family, have an epileptic condition, consult your physician prior to playing. If you experience any of the following symptoms while playing a video or computer game -- dizziness, altered vision, eye or muscle twitches, loss of awareness, disorientation, any involuntary movement, or convulsions -- IMMEDIATELY discontinue use and consult your physician before resuming play.
TC_SCPandT_Manuel_PC_UK 23/02/04 12:58 Page 1
Table of Content
GENERAL MENU . . . . . . . . . . . . . . . . . . . . . . . . . . . . . . . . . . . . . . . . . . . . . . . . . . . .
SINGLE PLAYER MODE. . . . . . . . . . . . . . . . . . . . . . . . . . . . . . . . . . . . . . . . . . . . . . 2
The Threat . . . . . . . . . . . . . . . . . . . . . . . . . . . . . . . . . . . . . . . . . . . . . . . . . . . . . . . . . 2 Sam Fisher Profile . . . . . . . . . . . . . . . . . . . . . . . . . . . . . . . . . . . . . . . . . . . . . . . . . . . 2 Third Echelon Team . . . . . . . . . . . . . . . . . . . . . . . . . . . . . . . . . . . . . . . . . . . . . . . . . . . 2 Other characters . . . . . . . . . . . . . . . . . . . . . . . . . . . . . . . . . . . . . . . . . . . . . . . . . . . . . 3 Getting Started . . . . . . . . . . . . . . . . . . . . . . . . . . . . . . . . . . . . . . . . . . . . . . . . . . . . . . 4 Main Menu . . . . . . . . . . . . . . . . . . . . . . . . . . . . . . . . . . . . . . . . . . . . . . . . . . . . . . . . 4 Game Screen . . . . . . . . . . . . . . . . . . . . . . . . . . . . . . . . . . . . . . . . . . . . . . . . . . . . . . . 5 Game Menu . . . . . . . . . . . . . . . . . . . . . . . . . . . . . . . . . . . . . . . . . . . . . . . . . . . . . . . . 6 OPSAT (Operational Satellite Uplink) . . . . . . . . . . . . . . . . . . . . . . . . . . . . . . . . . . . . . . 6 About Stealth Action . . . . . . . . . . . . . . . . . . . . . . . . . . . . . . . . . . . . . . . . . . . . . . . . . . 6 Sam’s Actions and Movements . . . . . . . . . . . . . . . . . . . . . . . . . . . . . . . . . . . . . . . . . . . 6 Weapons, Gadgets, Items, and In-Game Elements . . . . . . . . . . . . . . . . . . . . . . . . . . . . 10
MULTIPLAYER MODE . . . . . . . . . . . . . . . . . . . . . . . . . . . . . . . . . . . . . . . . . . . . . . 14
The Game Principle . . . . . . . . . . . . . . . . . . . . . . . . . . . . . . . . . . . . . . . . . . . . . . . . . . 14
The Different Game Modes . . . . . . . . . . . . . . . . . . . . . . . . . . . . . . . . . . . . . . . . . . . . 14
Controls . . . . . . . . . . . . . . . . . . . . . . . . . . . . . . . . . . . . . . . . . . . . . . . . . . . . . . . . . . 15
Quick Start-Up . . . . . . . . . . . . . . . . . . . . . . . . . . . . . . . . . . . . . . . . . . . . . . . . . . . . . 16
Menus . . . . . . . . . . . . . . . . . . . . . . . . . . . . . . . . . . . . . . . . . . . . . . . . . . . . . . . . . . . 17
Game Screens . . . . . . . . . . . . . . . . . . . . . . . . . . . . . . . . . . . . . . . . . . . . . . . . . . . . . 19
Characters’ Abilities. . . . . . . . . . . . . . . . . . . . . . . . . . . . . . . . . . . . . . . . . . . . . . . . . . 20
Arsenal . . . . . . . . . . . . . . . . . . . . . . . . . . . . . . . . . . . . . . . . . . . . . . . . . . . . . . . . . . 24
The Game Levels . . . . . . . . . . . . . . . . . . . . . . . . . . . . . . . . . . . . . . . . . . . . . . . . . . . 27
The Gameplay Objects . . . . . . . . . . . . . . . . . . . . . . . . . . . . . . . . . . . . . . . . . . . . . . . . 27
Warranty (Complete with template) . . . . . . . . . . . . . . . . . . . . . . . . . . . . . . . . . . . . . . 29 Support Technique (Complete with template) . . . . . . . . . . . . . . . . . . . . . . . . . . . . . . . . 30
1
TC_SCPandT_Manuel_PC_UK 23/02/04 12:58 Page 2
Single Player
The Threat
In response to the growing use of sophisticated digital encryption to conceal potential threats to the national security of the United States, the NSA (National Security Agency) has ushered forth a new dawn of intelligence-gathering techniques. This top-secret initiative, dubbed Third Echelon, marks a return to classical methods of espionage, enhanced with leading-edge surveillance and combat technology for the aggressive collection of stored data in hostile territories. When intelligence deemed critical to national security cannot be obtained by traditional means, Third Echelon is granted clearance to conduct physical operations. Denied to exist by the U.S. government, Third Echelon deploys units known as Splinter Cells: elite intelligence-gathering forces consisting of a lone field operative supported by a remote team. Like a sliver of glass, a Splinter Cell is small, sharp, and nearly invisible.
2006: The U.S. installs a temporary military base on East Timor to train the developing defense force of the “world’s youngest democracy.” Resistance to the U.S. military presence in Southeast Asia is widespread and passionate, but the threat Indonesian militias pose to Timorese democracy is deemed sufficient justification. At the same time, the U.S. doesn’t mind having an excuse to install active military personnel within easy reach of both North Korea and the largest Muslim population in Asia.
Anti-U.S. resentment comes to a head under the leadership of guerilla militia leader Suhadi Sadono, acting with the unofficial support of major corrupt factions of the Indonesian government. Suhadi’s men attack and occupy the U.S. Embassy in Jakarta, taking dozens of civilian and military personnel hostage.
You are Sam Fisher. You’re sent in, not to rescue the hostages, but to destroy top-secret documentation held in the embassy before Suhadi’s men access it.
Sam Fisher Profile
Fisher has been on the front lines of espionage in several defining conflicts throughout the past decades. He has not only survived, but also excelled in the field of covert operations through hard work, insatiable curiosity, and brutal honesty. He has little time for polite niceties and even less for lies.
Though fully aware and confident of his abilities, Fisher understands that his survival has often been a gift of chance. He knows he is human and fallible, and he does not want to die. He has a strange and slightly dark sense of humour.
He is quiet, instinctive, and observant: somebody who watches from the outside. Combat, espionage, and constant training have defined his adult life; his tactical experience has become part of his instinct. Now, even outside of work he is most comfortable on the fringes of society, keenly observant but still removed.
Fisher has acquired an admirable collection of scars and secured his place in Valhalla; he has little left to prove to the world. Now older and wiser, he has no interest in glory. If he fights, it is because he believes the cause is necessary and he is capable.
Third Echelon Team
Colonel Irving Lambert
Born: 1961 in Batcave, NC |
Height: 6’2” |
Weight: 270 lbs. |
THIRD ECHELON Operations Coordinator |
|
|
Lambert is the link between the field agent (or agents) and Third Echelon’s team of researchers, hackers, strategists, and commanders. While Fisher is in the field, he is in constant contact with Lambert via sub dermal microchips and a cochlear implant.
2

TC_SCPandT_Manuel_PC_UK 23/02/04 12:58 Page 3
Dermot P. Brunton
Born: 1963 Height: 5’5” Weight: 136 lbs. SHADOWNET Operations Coordinator
Dermot is the “Irving Lambert” of the SHADOWNET initiative. As his operations specifically prohibit live satellite contact between coordinator and operatives, Dermot’s function is more bureaucratic and managerial.
Anna Grimsdóttir
Born: 1974 in Boston, MA Height: 5’8” Weight: 128 lbs. THIRD ECHELON Communications Lead
Grímsdóttir heads a small team of programmers responsible for providing technological, cryptographic, and data support for the field operative. Grímsdóttir will assist Fisher in his interface with the high-tech components of his missions.
Other characters
Suhadi Sadono
Indonesian Guerilla Leader of the DARAH DAN DOA
Suhadi has been fighting for Indonesian sovereignty since he was 15 years old. He worked his way quickly through the ranks and by his 21st birthday was the leader of the Darah Dan Doa (Blood and Prayer), at that time a gang of a few dozen. By the mid-90s, funded (covertly) by the Kopassus (Indonesian Special Forces) and operation REDBEARD, the Darah Dan Doa had grown into a militia of thousands. Despite the withdrawal of U.S. and CIA support in 1999, the DDD continues to thrive.
Norman Soth
Mercenary
Soth is a CIA-trained mercenary and former freedom fighter operating in Southeast Asia, most notably Indonesia. In 1992 he was part of CIA operation REDBEARD, after which he spent nearly a decade arming and training the Kopassus to stamp down Timorese uprisings.
Dahlia Tal
Shin Bet Agent
Shin Bet, the Israeli Secret Police, handles the country’s less savory intelligencerelated tasks, such as interrogations, public relations, and psyops.
3
TC_SCPandT_Manuel_PC_UK 23/02/04 12:58 Page 4
Getting started
Installation
To install Splinter Cell, follow these simple steps:
1.Start your computer
2.Insert the Splinter Cell Installation CD into your CD-ROM drive. The Autorun Menu should appear.
Note: If the Autorun Menu does not automatically appear, double-click on the My Computer icon located on your desktop and then double-click on the icon that corresponds to your computer’s CD-ROM drive. The Autorun Menu should now appear.
3.Click on the Install Splinter Cell button. The installation wizard now walks you through each step of the setup and installation process for the game. Once you have created a directory for Splinter Cell, the game is installed on your hard drive. The game automatically asks you if you want to install DirectX v9.0. You can not play Splinter Cell without v8.1 or higher on your computer. If you already have a version of DirectX that is v8.1 or higher, simply check the No button, and it does not install DirectX. If you are not sure, click Yes, and the DirectX installer performs its own verification.
4.After installing the game, select “Ubisoft: Splinter Cell Pandora Tomorrow: Play Splinter Cell Pandora Tomorrow” from your computer’s Start menu or double-click the “Play Splinter Cell Pandora Tomorrow” shortcut on your desktop. Doing either starts the game.
Note: The Splinter Cell Pandora Tomorrow Play CD must be in your CD-ROM drive to start the game.
Uninstalling /Reinstalling the game
To uninstall Splinter Cell Pandora Tomorrow, follow these simple steps:
1.Start your computer
2.Insert either Splinter Cell Pandora Tomorrow CD into your CD-ROM drive. The Autorun Menu should appear.
3.When it appears, click on the Uninstall Splinter Cell button. The uninstall wizard automatically asks if you really want to uninstall the game. If you are sure you want to remove Splinter Cell Pandora Tomorrow from your hard drive, click the Yes button. If you don’t want to uninstall the game, click No, which cancels the process. If you uninstall Splinter Cell, all previously saved games remain on your hard drive, unless you answer Yes to the “Delete all configuration and saved games files” question.
Note: You can also uninstall Splinter Cell Pandora Tomorrow by using the Add/Remove Programs control panel in Windows.
Main Menu
From the initial Startup screen, you can select one of the following three menu options:
•Single Player
•Multiplayer
•Extras
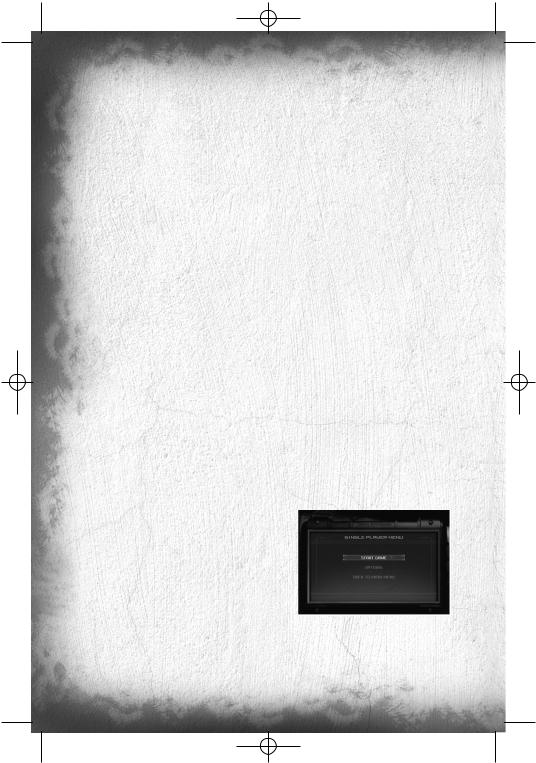
Single Player Menu
Select Single Player if you’d like to play the single-player game. You will be taken to the Single Player menu, which contains the following options:
4
TC_SCPandT_Manuel_PC_UK 23/02/04 12:58 Page 5
Start Game
Begin a new game or resume a previous game. When you select this option, you will be taken to the Profiles screen, where you can create a profile, load an existing profile, or even delete an old one. You can create up to 10 different profiles with up to three different saves for each. Once you are ready, select your profile to start a new game. To play an existing saved game, you must select a player profile and then select a saved game to load.
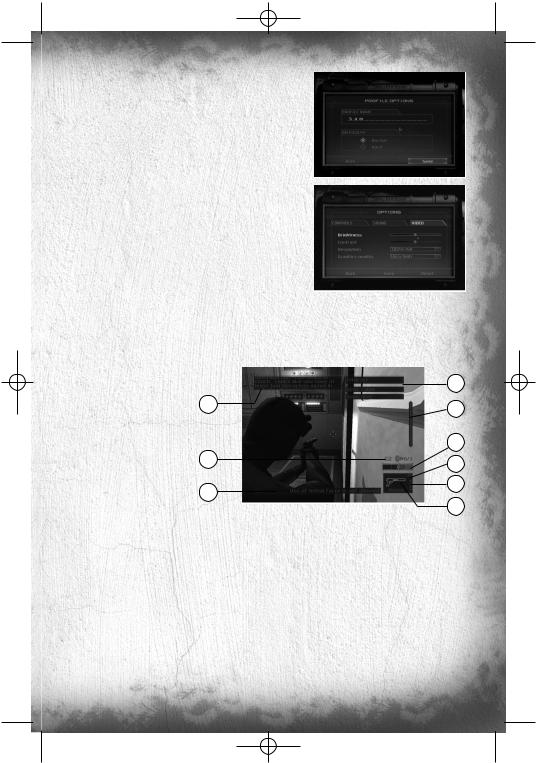
Options
Select Options to adjust sound and video settings, such as brightness and contrast.
Back to Main Menu
Select this option to go back to the Main Menu of the game.
Multiplayer Menu
Select Multiplayer if you’d like to play multiplayer Splinter Cell Pandora Tomorrow on lan or online.
Extras
Game Screen
3
6 |
1 |
|
|
7 |
|
1.Life Bar: This represents the status of Sam’s health/life.
2.Stealth Meter: The meter moves left and right to represent the amount of light in Sam’s area.
3.Interaction System: This system appears when you can interact with an object or person in the environment.
4.Objective: Displays the next goal to reach in your mission.
5.Selected Weapon, Gadget, or Item: Displays the current selection.
6.Communication Box: Appears at the top of the screen when you receive a communication.
7.OPSAT: When a small flashing envelope appears above your OPSAT, a new goal or a new note is available. Press F1 to open your OPSAT and read it.
8.Total Ammo.
9.Ammo in One Magazine.
5
TC_SCPandT_Manuel_PC_UK 23/02/04 12:58 Page 6
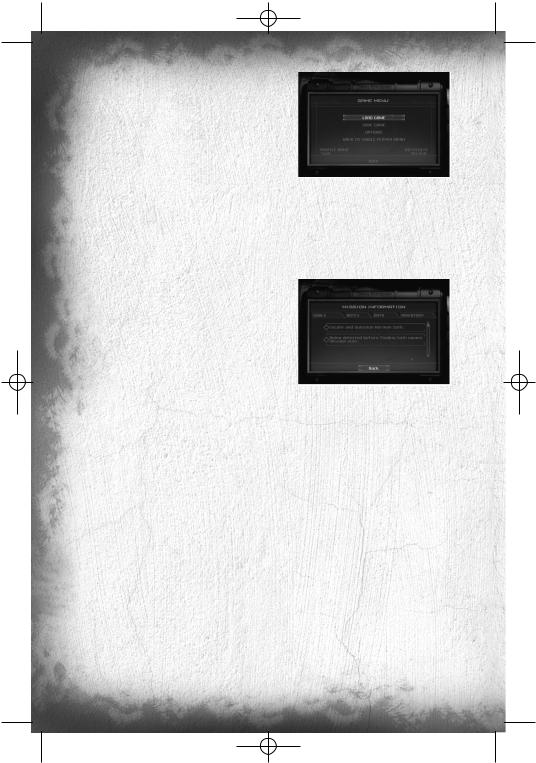
GAME MENU
During the game, press Esc to access the Game menu.
•Load Game: Load a saved game or restart a level. During the game you can also press F5 to do a quicksave, which you can reload by pressing F8.
•Save game: To save the current game.
•Options: Adjust the controls, sound and video settings.
•Back to Single Player Menu: Go back to the Single Player menu.
OPSAT (Operational Satellite Uplink)
The OPSAT is a compact, wrist-mounted version of a standard civilian PDA designed for military use. It enables Sam to receive mission objectives and updates from Third Echelon headquarters. The OPSAT also displays real-time images from Sticky Cameras. During the game, press F1 to open your OPSAT.
•Goals: View the specific details of your mission objectives.
•Notes: Read additional hints and clues that may have been gathered during the mission.
•Data: Recon data provides intelligence about enemies, locations, or other key elements pertinent to the operation. Pay special attention to the data sticks, as they contain key information.
•Inventory: The inventory section provides information about the items and equipment you are carrying.
About Stealth Action
Sam’s ability to operate covertly is his most valuable asset against overwhelming enemy forces. The visibility meter on Sam’s OPSAT is an important indicator of stealth. If it is completely to the left, Sam is invisible to enemy surveillance. If it is completely to the right, Sam is in critical danger of being detected and/or intercepted. Remaining under the cover of shadows is an important stealth technique, but crouching, moving slowly, and keeping your back to the wall also contribute to Sam’s invisibility.
A Splinter Cell operative must defy not only enemy eyes, but also enemy ears. Consider that while running and jumping are sometimes necessary movements, they also generate sound – a golden invitation for an enemy patrol to investigate your position. Moving slowly while crouched is much more likely to avoid enemy investigation.
Alarms
Note that if an enemy detects Sam, or even suspects the presence of an intruder, they have been specifically trained to alert nearby comrades or trigger an alarm, rather than engage Sam by themselves. They will be more prepared and armed each time a new alarm level is reached. And because of the extremely covert nature of Splinter Cell operations, indiscretion with alarms can lead to Third Echelon aborting a mission.
Sam’s Actions and Movements
Each time Sam can perform a special action, an Interaction System window will open. Press Action (Enter) and hold it, and then use your mouse wheel or qand mto select the action you want to perform. Release Action (Enter) to validate your choice.
6
TC_SCPandT_Manuel_PC_UK 23/02/04 12:58 Page 7
Basic movement
The basic movement speed when you press qis the walk. Use the mouse wheel to increase or decrease your movement speed. Since moving slowly allows greater stealth than moving quickly, it is important to remember to exercise control. An enemy who hears you behind him can almost always spin around and shoot faster than you can cross an open area. While it may seem unnerving to move slowly through a well-lit space with an enemy nearby, it’s often lethal to try to dash across the space.
Basic Moves
Sam has a wide range of moves. Knowing how to get around – and how to do it undetected – is critical.
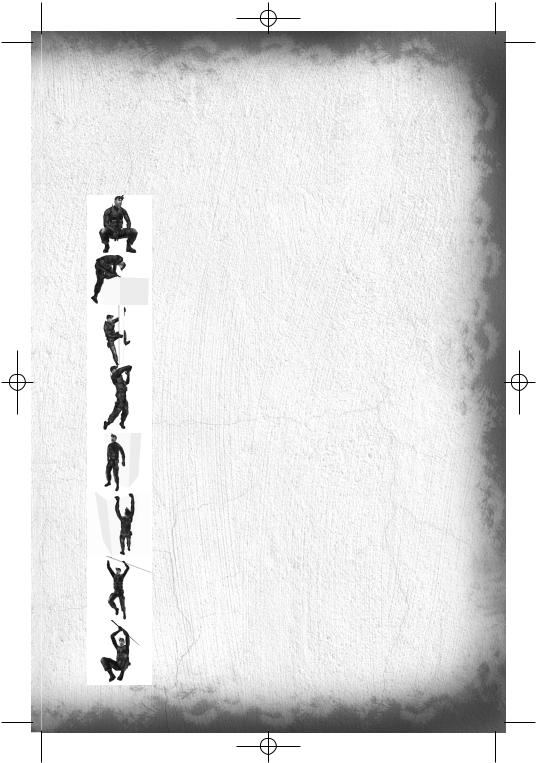
Crouching
Press Crouch (KP 0) to crouch. Movement is slower, but quieter, and Sam is less visible while crouched.
Mantling
Press Jump (Shift) and move forward into low objects like crates or tables and Sam will crawl, or “mantle,” onto them.
Climbing
To climb a pipe, ladder, vertical cable, or fence, simply walk into it. Press Crouch (KP 0) to jump off.
Close Attack
With your weapon holstered, press Fire (left mouse button) when very close to an enemy to hit him with your elbow.
Back to Wall
Press Back to wall (KP 4) when standing or crouched to put Sam’s back to the wall. Sam is less visible with his back to a wall.
Shimmying
Press Jump (Shift) to grab and hang from ledges above Sam’s head. Sam can move left and right as well as pull himself up if there is room. Press Crouch (KP 0) to let go of a ledge.
Hand-over-Hand
Press Jump (Shift) to grab and hold a horizontal pipe. Bring Sam’s legs up to clear obstacles by pressing Jump (Shift) again.
Zip Line
Press Jump (Shift) to grab hold of a sloped wire or zip line. Sam will slide down automatically. Raise Sam’s legs by pressing Jump (Shift) again. Press Crouch (KP 0) to let go.
7
TC_SCPandT_Manuel_PC_UK 23/02/04 12:58 Page 8
Advanced Moves
Advanced moves are just as crucial as basic moves. Mastering these will allow Sam to move through his environment with much greater safety and precision. Many of these advanced moves are combinations that allow Sam to attack. For information on equipping and using weapons, refer to page X.
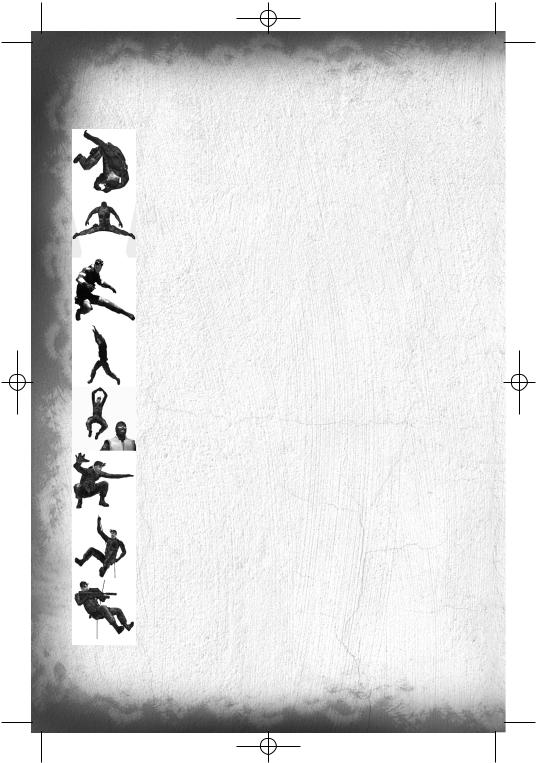
Rolling
Press and hold Crouch (KP 0) while running to do a roll.
Split Jump
If Sam is in a corridor near a wall that is about as wide as he is tall, press jump (Shift) then Jump (Shift) a second time to allow him to enter the Split Jump position.
Half Split Jump
If Sam is in a smaller corridor near a wall, he will be able to do a Half Split Jump. Jump (Shift), then Jump (Shift) a second time to allow him to enter the Half Split Jump position.
Half Split Jump and Jump
From a Half Split Jump, Sam can reach a higher spot. Make Sam face the higher position by moving left to right. Then Jump (Shift) to reach it.
Drop Attack
If you can get above an enemy and drop directly down on him, you will knock him out. Press Crouch (KP 0) to Drop Attack.
Quiet Landing
When falling, quickly press Crouch (KP 0) to do a Quiet Landing.
Rappelling
To rappel from a small chimney, stand near it and select the Rappel interaction. Sam can move up and down the rope. Press Jump (Shift) to kick off the wall.
Rappel Shooting
Sam can equip and fire his weapon while rappelling. Press Use/Equip (KP 1) to equip the selected weapon.
8
TC_SCPandT_Manuel_PC_UK 23/02/04 12:58 Page 9
Hanging Shooting
Sam can equip and fire his weapon while hanging from a pipe, but only if his legs are not tucked. Press Use/Equip (KP 1) to equip the selected weapon.
Upside-Down Shooting
While Sam is holding a horizontal pipe with his legs up, press Use/Equip (KP 1) to draw his weapon, hanging by his legs.
Split Jump Shooting
Sam can equip and fire his weapon while in the Split Jump position. Press Use/Equip (KP 1) to equip the selected weapon.
Back-to-Wall Shooting
When Sam approaches a corner with his back to the wall, he will automatically peek around the corner. Press Use/Equip (KP 1) while peeking to equip the selected weapon, and he can shoot around the corner.
Back-to-Wall Throwing
While peeking, press up and down on the directional pad to select an object you can throw. Press Use/Equip (KP 1) to equip it. While equipped, you can adjust throwing length by pressing Alt Fire (right mouse button). Press Fire (left mouse button) to throw it.
SWAT Turn
While Sam is peeking at an open door or a small corridor, press Action (Enter) to perform a SWAT Turn. The SWAT Turn is a highly trained Special Forces movement that makes you almost invisible.
Non-Player Character-Linked Moves
Sam has several special moves that can only be performed on NPCs (Non-Player Characters). Being able to get close to an enemy without being detected is necessary to execute these moves.
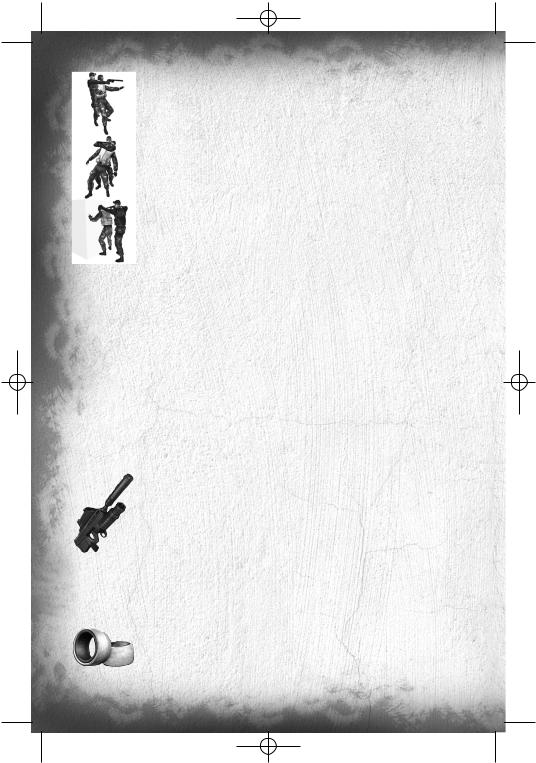
Move Body
Sam will need to hide dead or unconscious bodies in order to prevent them from being discovered. Select the Body interaction to carry a body. Press Action (Enter) to put him down quietly, or simply press Use/Equip (KP 1) to equip a weapon and drop the body in a hurry.
Grabbing
Grab an enemy by sneaking up close to him undetected and selecting the Grab Character interaction.
9
TC_SCPandT_Manuel_PC_UK 23/02/04 12:58 Page 10
Human Shield
While holding an enemy, you can press Use/Equip (KP 1) to equip your sidearm and fire at other enemies while using the enemy you are holding as a human shield.
Interrogation
Some NPCs can be interrogated for useful information. While holding an NPC, select the Interrogate interaction to make him talk.
Forced Cooperation
Some objects in the world can’t be used by Sam, but there may be NPCs who can use the objects for him. To force an NPC to cooperate, grab him, drag him to the object you want him to use, and select the Force Cooperate interaction.
Other Actions
•Reload: Press KP. to manually reload your weapon.
•Whistle: Press V to whistle. Enemies will come to you when they’re hearing the whistle.
•Rate of fire: When you’re using the SC-20K, press F to change your rate of fire.
•Change of vision: Press Del to enter night vision, and End to enter Heat Vision.
Weapons, Gadgets, items, and In-game elements
During the game, press Control to access the quick inventory. Use your mouse to select an item. To use the item, press Fire (Left mouse button).
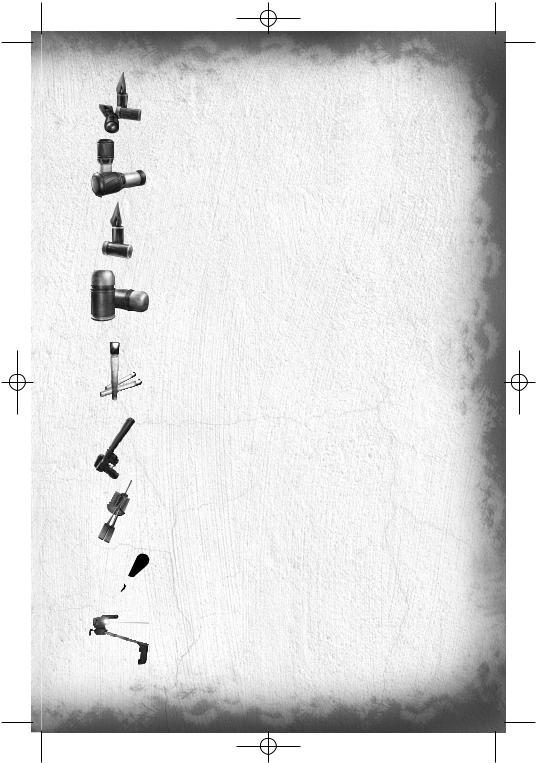
Weapons and Gadgets
SC-20K M.A.W.S. (Modular Assault Weapon System)
The bull-pup configuration of this assault rifle makes it light and compact without sacrificing firepower (5.56x45mm ss109). Its modular configuration allows it to be customized to fit any mission profile. Equipped with a flash/sound suppressor and combined with a multipurpose launcher, the SC-20K becomes the obvious choice of weaponry for Sam when infiltrating enemy territory.
When you’re equipped with the SC-20K rifle, click the middle mouse button to go into Sniper mode. Use the wheel mouse to zoom in or out (you can also use Page Up or Page Down).
SC-20K’s Multipurpose Launcher
Press Fire (Left mouse button) to fire with the launcher. The launcher cannot be fired in Sniper mode.
Ring Airfoil Projectile
A high-impact, zero-penetration projectile designed to incapacitate rather than kill.
Note: The Ring Airfoil is much more effective if it hits the head.
10
TC_SCPandT_Manuel_PC_UK 23/02/04 12:58 Page 11
Sticky Camera
A miniature camera with full pan and zoom functionality, plus night and thermal vision modes. The Sticky Camera feeds its image directly to Sam’s OPSAT. Sticky Cams are reusable. This camera is also used to record conversations not directly accessible by Sam
Sticky Shocker
A high-voltage discharge device coated in adhesive resin. The Sticky Shocker will adhere to an enemy and give him an incapacitating shock.
Hint: Fired into pools of water, the Sticky Shocker can neutralize multiple opponents.
Distraction Camera
This camera can be triggered to attract enemies with sound and then dispense a cloud of incapacitating gas when they are nearby.
Gas Grenade
This standard gas canister grenade can incapacitate groups of enemies. Prolonged exposure causes unconsciousness.
Flash Bang
Grenade with powerful lightning effect that can blind you at medium range.
Chaff Grenade
When exploded, it releases a cloud of magnetic particles, which will disable electronic devices in its radius. This also affects Sam’s gears.
Laser Aiming
The pistol is equipped with Laser Aiming to allow better accuracy. But be careful, the red spot can be detected by enemies.
Lock Pick
Standard set of picks, wrenches, and probes for bypassing standard cylinder locks. Press the different direction keys (q, m, k, or o) until you see and hear the first pin begin to move. This means you press the right key. Keep pressing this key to release one of the pins in the lock. Repeat until all pins are released.
Disposable Pick
Unconventional lock picks, these micro explosive-shaped charges deliver a quick impact to any standard lock cylinder that will shatter the pins and unlock the door.
Laser Microphone: T.A.K. (Tactical Audio Kit)
A laser-operated microphone integrated in the SC pistol that enables the user to read the vibration off certain surfaces (mainly glass windows). Used to listen in on conversations.
11

TC_SCPandT_Manuel_PC_UK 23/02/04 12:58 Page 12
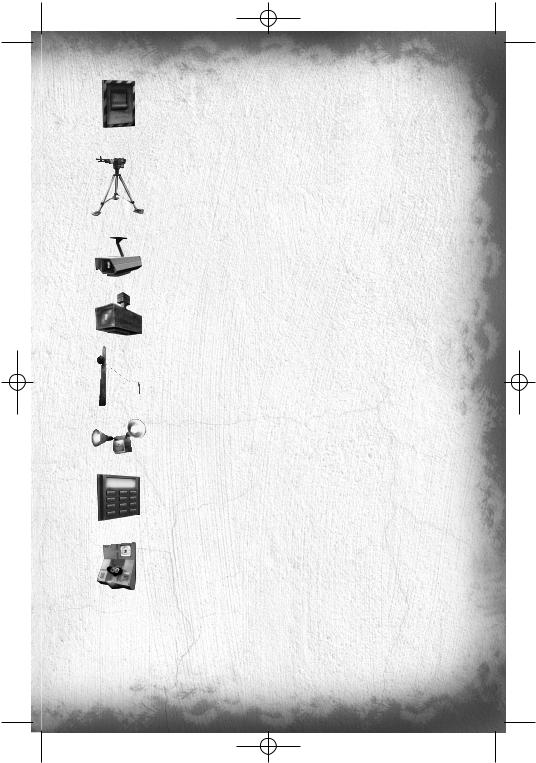
Camera Jammer
The Camera Jammer emits microwave pulses that disrupt the surveillance cameras. The battery has to be recharged after a short time.
Optic Cable
This flexible cable /camera can easily be slipped under doors to view the other side. Complete with night and thermal vision enhancement.
Goggles
Night vision goggles amplify very low existing light, especially lights at the lower end of the infrared spectrum.
The thermal vision headset is an essential tool in low-light situations. This technology differs from night vision in that it captures the upper level of the infrared light spectrum, which is emitted as heat rather than reflected as light.
Items
Some objects, like grenades, flares, or other miscellaneous objects in the world, can be thrown. To throw an object, equip it and press KP1. A series of reticles on-screen will show your aiming trajectory. Use the mouse to aim and the right mouse button to flatten or arch the trajectory. Press the left mouse button to throw the object or press KP1 again to abort the throw.
Wall Mine
The Wall Mine is a motion-sensitive explosive device that can be attached to almost any surface. To deactivate and pick up a Wall Mine, wait for the green light.
Emergency Flare
These standard road flares also emit a great deal of heat, making them useful for distracting heat sensors such as those found on automated turrets.
Frag Grenade
The 14-ounce M67 fragmentation grenade consists of a 2.5” steel sphere surrounding 6.5 ounces of high explosive. Upon detonation, the steel sphere shatters, emitting a burst of high-velocity shrapnel.
Medical Kit
Standard field first-aid kit.
In-Game Elements
Enemy static defenses present a wide range of potential obstacles to overcome – from simple keypads that control doors to automated turrets that detect heat and movement and fire on intruders.
12
TC_SCPandT_Manuel_PC_UK 23/02/04 12:58 Page 13
Alarm Panel
Standard alarm switches that can be triggered by enemies to alert nearby comrades. Because of the extremely covert nature of Sam’s operations, indiscretion with alarms can lead to Third Echelon aborting a mission.
Automated Turret
Heat-and motion-sensing turrets with an Independent Friendly Fire (IFF) recognition system. Turrets can be hacked from their attached control computer. Either deactivate a turret entirely, or disable its IFF system. With IFF disabled, the turret will still attack Sam, but it will also attack enemies. Use the directional pad to navigate in the attached control computer.
Surveillance Camera
Standard, off-the-shelf surveillance cameras that detect movement and have the ability to directly trigger alarms. This type of camera is fragile and can be destroyed.
Armored Camera
Except for the bulletproof casing, these cameras are identical to the standard surveillance camera.
Booby Trap
This basic grenade links to a small cable.
Motion Detector
When Sam is moving too quickly near a motion detector, it releases a powerful lightning effect that can blind at medium range.
Keypad Lock
Standard push-button security pads linked to electromagnetic locking systems in a door. Only the correct code will allow a keypad-locked door to be opened. Multiple failed attempts to enter a code will sound an alarm.
Retinal Scanner
A locking device that reads the unique imprint of a person’s retina before unlocking a door. No one without access can open a retinal scanner–locked door, but those with the correct retinas can sometimes be “convinced” to open them for you. An incorrect retinal scan automatically triggers an alarm.
13
TC_SCPandT_Manuel_PC_UK 23/02/04 12:58 Page 14
MULTIPLAYER MODE
The Game Principle
The game is based on two opposing teams of two human players. The Shadownet team must move forward without being spotted, analyze its environment and fulfill the conditions for victory. The mercenaries’ team (ARGUS.) must prevent the Shadownet team from making progress by tracking them down, finding them and eliminating them.
The Different Game Modes
NEUTRALIZATION Mode
|
Shadownet Team |
ARGUS Corporation |
GOAL |
Find the Viral containers (ND133s) and neutralize |
Protect the containers and eradicate the intruders. |
|
them. |
|
VICTORY |
Neutralize the ND133s or eliminate |
Eradicate all the intruders or protect the ND133s |
|
all the mercenaries. |
within the time limit. |
|
|
|
RULES |
To neutralize a ND133, position yourself in front of |
|
|
it and press ACTION.Neutralization takes time, |
|
|
but you can break off whenever you want and |
|
|
take up again where you left off. |
|
|
|
|
EXTRACTION Mode
|
Shadownet Team |
ARGUS Corporation |
GOAL |
Find the ND133s, take the tubes and bring them |
Prevent the intruders from the tubes and |
|
to the extraction point. |
eradicate the threat they constitute. |
VICTORY |
Bring back enough tubes to the extraction point. |
Eradicate all the intruders or protect the tubes |
|
|
within the time limit. |
|
|
|
RULES |
To take a ND133 tube, position yourself in front of |
Protect the tubes on their supports. |
|
it and press ACTION. Then take it back to |
You can retrieve a tube stolen by an intruder by |
|
an extraction point. |
eliminating the intruder before he reaches |
|
|
the outer limit of sites and passing over the tube. |
|
|
|
SABOTAGE Mode
|
Shadownet Team |
ARGUS Corporation |
GOAL |
Find the ND133s and neutralize them |
Protect the containers from the intruders who try |
|
by placing a modem nearby. |
to neutralize them with their modems. |
VICTORY |
Neutralize the ND133s using your modems, |
Eradicate the intruders or prevent them from |
|
or neutralize the mercenaries. |
neutralizing the ND133s. |
RULES |
Place a modem on a wall near an ND133, by pressing |
Protect the ND133s from the modems. |
|
ACTION. The ND133 will be neutralized at the end |
When a countdown appears, look for the modem |
|
of the countdown. If the modem is destroyed, |
in question and neutralize it by removing it or |
|
placing a new modem will resume countdown where |
shooting it. |
|
it was stopped. Pick a new modem on ammo pack. |
|
|
|
|
14
TC_SCPandT_Manuel_PC_UK 23/02/04 12:58 Page 15
Controls
The Controls are divided into four groups : the Settings (everything concerning the configuration), The General Controls, The Spy controls and the Mercenary Controls.
SETTINGS
Action |
Explanations |
Default Keys Configuration |
MOUSE |
Change your mouse sensitivity |
O and P |
INGAME MENU |
Open the menu when the game is in progress |
Esc |
HUD |
Display HUD explanations |
F4 |
|
|
|
QUIT |
Quit the game |
F12 |
CHAT |
Open the chat interface |
2 |
|
|
|
FULL SCREEN |
Toggle the display to full screen. |
Alt + Enter |
|
|
|
GENERAL CONTROLS
Action |
Explanations |
Default Keys Configuration |
MOVE |
Move your character forward |
W |
MOVE |
Move your character backward |
S |
MOVE |
Move your character to the left |
A |
MOVE |
Move your character to the right |
D |
ACTION |
Interact with your environment and also, |
|
|
Spy : Place a bombe to neutralize a ND133 |
|
|
(sabotage game mode only), Release a suffocating |
Shift |
|
gaz cloud while in the sticky camera view. |
|
|
Mercenary : While keeping a direction pressed, |
|
|
perform a charge. |
|
SPECIAL ACTION 1 |
Perform the special action of your team: |
|
|
Spy : Perform a roll. |
Q |
|
Mercenary : Toggle your lasersight on/off) |
|
SPECIAL ACTION 2 |
Perform the second special action of your team: |
|
|
Spy : Take out /Put away your weapon. |
E |
|
Mercenary : Switch your torchlight on/off) |
|
PRIMARY FIRE |
Use your weapon (Spy : in weapon mode only), |
|
|
and also :|Spy : Throw the gadget binded to gadget |
Left Click |
|
slot 1 at your feet while in third person view. |
|
SECONDARY FIRE |
Fire a gadget (Spy : in weapon mode only), |
|
|
and also :|Spy : Throw the gadget binded to gadget |
Right Click |
|
slot 2 at your feet while in third person view. |
|
|
Mercenary : Hold breath (in snipe Mode). |
|
JUMP |
Make your character jump |
Space |
CROUCH |
Make your character crouch or stand up |
C |
15
TC_SCPandT_Manuel_PC_UK 23/02/04 12:58 Page 16
HACK COMM |
Listen to your enemy’s communication (when a spy |
|
|
bullet or a spy trap is triggered and active) |
H |
|
|
|
SWITCH VISION |
Switch between your different special visions |
TAB |
GADGET 1 |
Select gadget 1 from your inventory |
1 |
GADGET 2 |
Select gadget 2 from your inventory |
2 |
GADGET 3 |
Select gadget 3 from your inventory |
3 |
GADGET 4 |
Select gadget 4 from your inventory |
4 |
ENHANCED REALITY |
Change the Enhanced Reality display mode (off, on) |
F9 |
VISION 1 |
Use your first special vision : |
|
|
Spy : Nightvision. |
F1 |
|
Mercenary : Movement Vision. |
|
VISION 2 |
Use your second special vision : |
|
|
Spy : Thermal vision. |
F2 |
|
Mercenary : EMF Vision. |
|
NEXT GADGET |
Select the next gadget of the inventory |
5 |
|
|
|
PREVIOUS GADGET |
Slect the previous gadget of the inventory |
6 |
BINOCULARS / |
Spy : Use your binoculars |
|
SNIPE |
Mercenary : use your weapon sniper mode. |
Middle Mouse button |
Here is the list of the default controls and actions available for a Shadownet spy :
SPY CONTROLS
Action |
Explanations |
Default Keys Configuration |
BACK TO WALL |
When facing a wall, perform a back to wall |
Z |
Gadgets |
|
|
LASER |
Toggle your laser’s Weapon aiming device on or off. |
L |
|
|
|
Here is the list of the default controls and actions available for a ARGUS mercenary :
MERCENARY CONTROLS
Action |
Explanations |
Default Keys Configuration |
FIRE RATE |
Change your weapon’s fire rate |
F |
RELOAD |
Reload your weapon |
R |
|
|
|
Quick Start-Up
From the Splinter Cell: Pandora Tomorrow general menu, select “MULTIPLAYER” to access the general multiplayer menu. Choose a profile by selecting it click on SELECT to play using this Profile. Choose DELETE to delete a profile and NEW PROFILE to create a new one.
PLEASE NOTE: the profiles created in Single Player mode and those created in Multiplayer mode is common but the options are independent in each game mode (single player or multiplayer).
16

TC_SCPandT_Manuel_PC_UK 23/02/04 12:58 Page 17
If this is the first time you have clicked on “MULTIPLAYER”, you will automatically be invited to create a profile by entering a name. When your profile has been created, you will be automatically directed to two tutorials: the first one trains you as a spy. The second one trains you as a mercenary. You can quit these tutorials any time by pressing ESCAPE ingame and choosing QUIT.
Then you will be taken to the following menu:
•PLAY ON ubi.com: Play on the Internet, using the Ubi.com service.
•PLAY ON LAN: Create or join games on a local network.
•TUTORIALS: A bunch of tips and tools to help you master the game. You can also access tutorial maps.
•OPTIONS: Modify the settings for the profile being used.
Menus
Menu Details
Profile and editing menu for gadgets
The PROFILE OPTIONS field of the main menu enables you to edit the settings relating to your profile:
• EQUIPMENT: To edit the gadgets that each of your characters can use in the game.
Each profile contains details of spy and mercenary equipment. To see what your other character possesses, click on the switch team button. Each character has 4 locations, each of which can accommodate a gadget. To change a gadget, click on it. You will then be taken to a page showing you all the gadgets available for the member of the team you are editing. They are 6 in number. Choose the gadget that you wish to take by clicking on it. The new gadget will appear in your inventory.
Please note: For the spy equipment, it is recommended to allocate grenade-like gadgets on the 1 and 2 slots, as these can be used in emergency with the PRIMARY FIRE and SECONDARY FIRE buttons.
• GAME: To adjust the settings related to the game controls:
Vibration (to activate or deactivate Vibration in the game), Invert Y Axis (to invert the vertical aiming axis), Invert X Axis for Spies (to invert the camera’s horizontal direction of rotation), Auto-Centre (to turn on or off automatic return to the horizontal when mercenaries move forward), Unit System (to display distances in meters or feet).
•AUDIO: To configure the game’s sound settings. You can adjust:
-The effects volume in the game, by modifying the EFFECTS VOLUME option.
-The music volume in the game, by modifying the MUSIC VOLUME option.
-The voice chat volume in the game, by modifying the VOICE VOLUME option.
-The EAX option will notice if this option is Enable or Disable on your system.
•VIDEO: To configure the game’s graphic settings:
-Screen Resolution: enables you to change the game resolution.
-Quality: Choose between LOW, MEDIUM and HIGH to adjust the texture quality.
-Show Test Card: adjust your screen in accordance with the displayed on screen explanations to have a better game experience.
Once you’ve chosen the resolution, click on VALIDATE to set your choices. The game will adopt your new settings and ask you to confirm your changes.
• The KEYBOARD CONFIGURATION heading enables you to configure the key linked to each action of the game. To change the key assigned to an action, click on the key next to the action and press the key you want to assign.
Play on ubi.com Menu
Important Note: You may encounter some troubles connecting to ubi.com if you’re using a firewall on your computer. Here are the ports you’ll have to open to play on ubi.com :
17
TC_SCPandT_Manuel_PC_UK 23/02/04 12:58 Page 18
[TCP] 40000 - 43000 included inbound-outbound [UDP] 44000 inbound-outbound
[UDP] 45000 inbound-outbound [UDP] 45001 inbound-outbound
After reading and accepting the User agreement, enter your ubi.com account name and password. Click the “Save Password” option if you want the game to remember your password. Validate the “Auto-login” option to automatically log in the game using this ubi.com account. Use the “New Profile” and “Account management” options to create a new account or to change your account parameters.
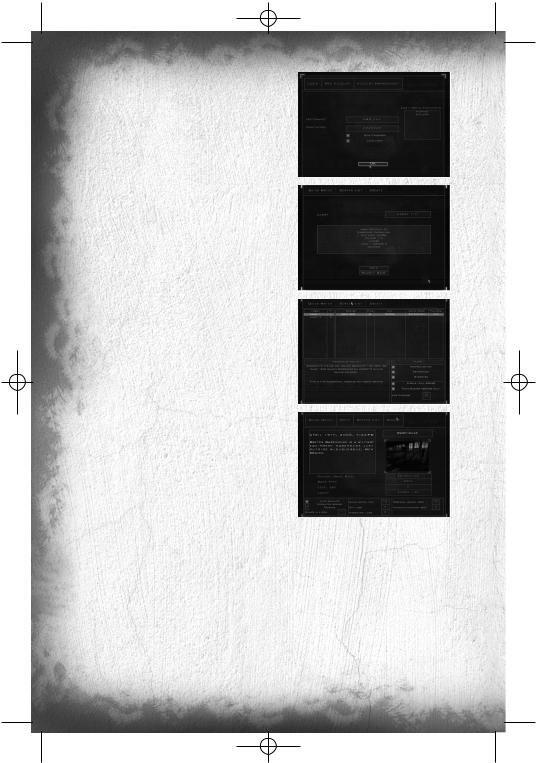
Once logged in, you will be taken to this interface:
•QUICK MATCH: To find a game with an available place which you can join quickly.
•MOTD: Stands for Message Of The Day. This is where you can check all the messages from ubi.com.
•SERVERS LIST: This is where you can search and join existing game sessions. First of all, choose a lobby. The game sessions available for this lobby will appear on the left. You can set some filters at the bottom of the screen to sort the existing sessions. Refresh the sessions list by pressing the REFRESH button. To join a session, select it and click on the JOIN button. You will be taken to the game waiting room. When all the players are ready (They appear white) and you are also ready, launch the game by clicking on the LAUNCH button.
•CREATE MATCH: To set up a game session by specifying the game parameters. Choose the desired level for the game, the game mode, the type of game (free or “Ranking”) and the LEVEL GAP (the tolerated divergence of level between players). Once the settings have been made (at the bottom at the screen), go to the game waiting room by pressing the CREATE button. When all the players are ready (They appear white), and you are also ready, launch the game by clicking on the LAUNCH button.
Menu Play On LAN
•FIND SESSION: To join an existing game. Choose the game you want to join by clicking on the JOIN button. Search for other sessions by clicking on the REFRESH button. Once you’ve selected a game session, you will be taken to the game waiting room. When all the players are ready (they appear white), and you are also ready, launch the game by clicking on the LAUNCH button.
•CREATE SESSION: To set up a game session. You must choose the map for the session, as well as the game mode. When the settings have been made (at the bottom at the screen), you can go to the game waiting room by clicking on the CREATE button. When all the players are ready (they appear white), and you are also ready, launch the game by clicking on the LAUNCH button.
Tutorials Menu
The TUTORIALS heading includes the following sub-headings:
18
TC_SCPandT_Manuel_PC_UK 23/02/04 12:58 Page 19
•VIEW HUD: To consult explanations relating to the items displayed on the game screen.
•TIPS: To obtain Tips or additional explanations concerning the abilities of characters in each team. From the Tips page for spies, click on the SWITCH TEAM button to display the Tips for the other team. To view a Tip, select it and click on the SELECT button.
•SHADOWNET SPY TUTORIAL: Play the Spy’s tutorial map.
•ARGUS MERCENARY TUTORIAL: Play the mercenary’s tutorial.
•VISIT MAP: To visit the level of your choice (alone) within a chosen team. Select the level you want to visit, the team you want to join and the game mode.
Game Screens
Shadownet team member screen
1.Tactical Radar: This radar displays the position of your team-mate and the locked enemies (only appears when something needs to be displayed).
2.ND133 Counter: Displays the number of objectives left to win and the objectives already taken.
3.ND133 Capture Timer: Displays the remaining time for an ND133 to be neutralized by the Shadownet team.
4.Time Remaining in the Game: Displays the time remaining before the end of the mission.
5.Energy Bar: This interface is displayed only when the player is in weapon mode, when the energy bar is refilling. It is an indication of the remaining energy available for the spy electrical gun.
6.Status Messages: Here are displayed messages when your presence has been detected, or to inform you special device status (spy bullet or alarm snare).
7.Interaction Menu: This interface displays the different interactions with an object (in the screenshot example, pick up.
8.Game Info Screen: This window is used to display all the ingame messages (objective taken, alarm triggered, player killed by player, etc.).
9.Life Bar: This Interface displays the player’s remaining life.
10.Current Gadget: This interface displays the current gadget, its name and the number of units of this gadget available (in the screenshot example, the player has 3 Spy bullets).
11.Enhanced Reality: This indicator displays information about the position of the ND133, the distance between the player and this ND133 and its current status.
ARGUS Corporation member screen
1.System Info: Here are displayed messages concerning your equipment status.
2.Status message: Here are displayed intrusions and alarm messages, indicating the name and position of the alarms that have been triggered. Objectives status and special device status as spy trap are also displayed here.
3.Game Info Screen: This window is used to display all the
ingame messages (player killed by player, etc.). The messages are displayed using horizontal scrolling. 4. Life Bar: This Interface displays the player’s remaining life.
19
TC_SCPandT_Manuel_PC_UK 23/02/04 12:58 Page 20
5.Ammunition Indicator: This Interface displays the player’s ammunition. The number on the left is the number of bullets in your current clip. The number on the right represents the number of global remaining bullets.
6.Current Gadget: This interface displays the current gadget, its name and the number of units of this gadget.
7.Tactical Radar: This radar displays the position of the player’s team-mate, the triggered alarms, the locked enemies, etc. (only appears when something needs to be displayed).
8.Time Remaining in the Game: This interface displays the time remaining for the spies to complete the mission.
9.ND133 Counter: Displays the number of objectives left to win and the objectives already taken.
10.ND133 Capture Timer: Displays the remaining time for an ND133 to be neutralized by the Shadownet team.
11.Interaction Menu: This interface displays the different interactions with an object (in the screenshot example, a switch).
12.Enhanced Reality: This indicator gives information about the position of the ND133 or the triggered alarm, and the distance between the player and the ND133 or the alarm. It also give you feedback on its status and the percentage of hacking.
13.Reticule: Your aiming device. Little arrows around it gives you location of surrounding sound relatively to your position. Indicators inside the reticule (upper or lower part) also gives you indications regarding altitude of detected sounds.
Characters’ Abilities
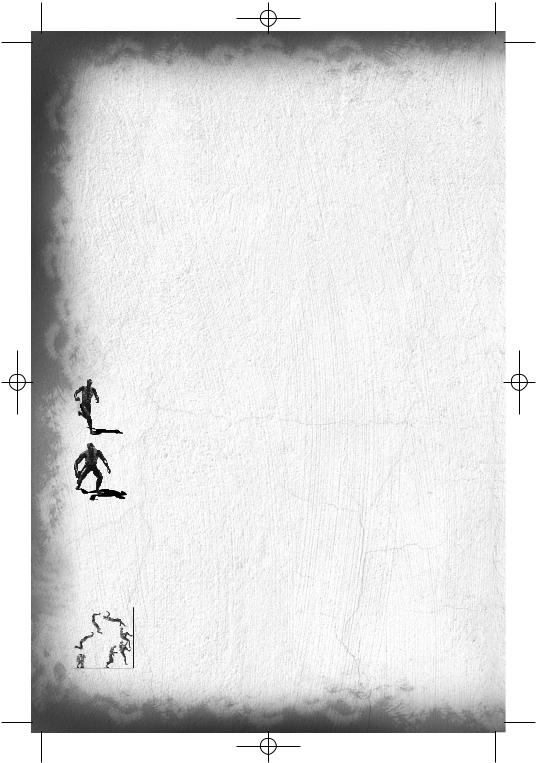
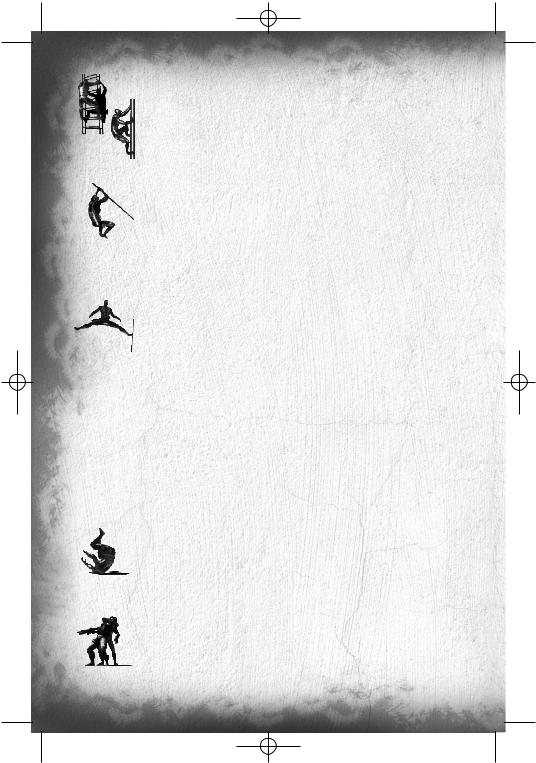
Shadownet team members’ abilities
Basic Actions
Sneak, Walk and Run
You can change your character speed by using the wheel mouse Up to speed up, and wheel mouse Down to slow down.
Crouch
The CROUCH key toggles crouching. Crouching is a good way to ensure slow, quiet movement.
Jump
Pressing the JUMP key will make your character jump straight up in the air. Pressing the JUMP key while running will make the character jump forward. If you press the CROUCH key falling (i.e. when landing from a jump), you will make a silent landing, which is very useful to avoid being located. If you land on an opponent, you may knock him out.
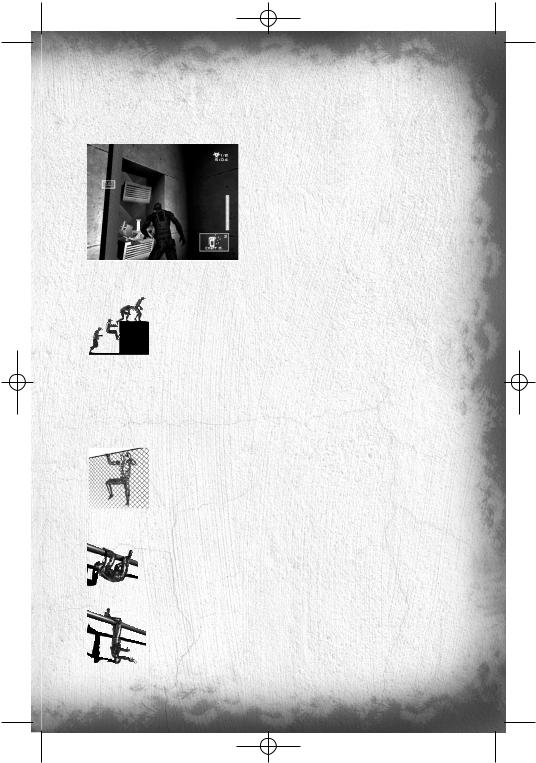
Wall Jump
After a jump, it is also possible to push against a wall. To do this, just move towards the wall and press the JUMP key. The resulting action will depend on how the place is configured:
•If it is possible to cling on a little higher up the wall, your character will push against the wall to gain altitude and be able to cling on.
•If it is not possible to cling on, you character will push against the wall to perform a flip.
20
TC_SCPandT_Manuel_PC_UK 23/02/04 12:58 Page 21
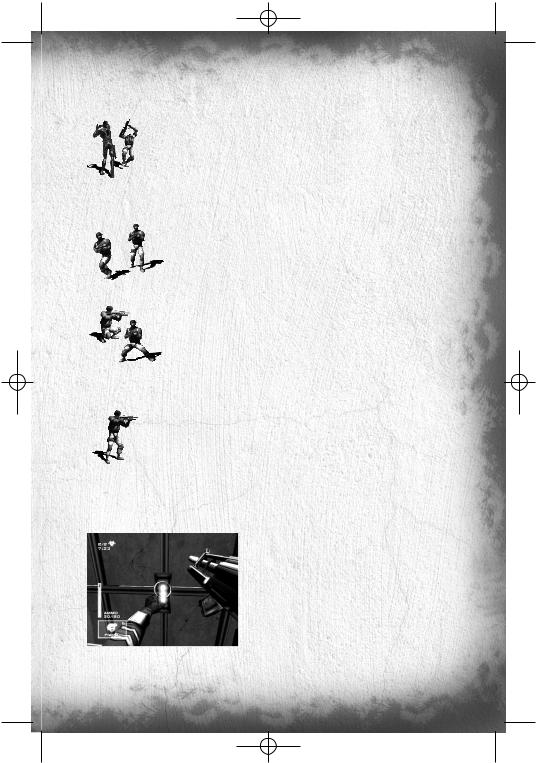
Shoot
To take a weapon in hand, press the WEAPON MODE key. To shoot, press the PRIMARY FIRE key. In this representation mode (second-person, weapon in hand) you cannot jump. However, you can interact with your environment by pressing the ACTION key. To come out of this weapon-in-hand mode, press the WEAPON MODE key.
Use a Gadget
To use one of your gadgets, you must have your weapon in hand. To use a gadget, press SECONDARY FIRE. Some gadgets can be used quickly. The correct procedure is described in the “Quick Inventory” paragraph.
Interact
You can interact with certain items in the universe by pushing the ACTION key. These actions include: turning on /off a light switch, using an elevator picking up an object
Special Abilities
The Ledge Hang
If you just miss a jump, fall off a platform or jump up from below a platform, you can hang onto the ledge. Press FORWARD or JUMP to make your character pull himself up onto the ledge. Press BACKWARD or pres JUMP button to release your character from the ledge. Pressing Left and Right while ledge-hanging will allow him to shimmy along the ledge.
Climbing halfway up an object
If you are confronted with an object that you cannot cling onto, but on which you can climb, press the JUMP key for your character to “start” a jump and climb onto the box.
The Fence Climb
You can either initiate climbing by walking or jumping onto these surfaces (press JUMP while keeping FORWARD pressed). Pressing FORWARD or BACKWARD then makes the character climb up and down, while LEFT and RIGHT make him climb from side to side. To release the character from the surface, press JUMP. If you reach the top of a climbable wall, your character will automatically climb up off the wall if you continue to push forward. If you are climbing a fence, pressing FORWARD at the top will make your character climb to the other side of the fence.
The Hand-over-Hand Climb
Your character is able to hang from pipes and move under them by swinging hand-over-hand. All you have to do is position yourself under the pipe and press JUMP. Once you are hanging on, move along using FORWARD and BACKWARD. Press JUMP to make your character swing his legs up on to the pipe (and JUMP again to make him swing his legs down). Pressing CROUCH will release the character from the pipe.
You can hang from one arm and shoot when you stop moving forward and press WEAPON MODE. If you are hanging with your feet above the pipe and you take your weapon into your hand, you will end up hanging by the feet with the weapon in hand. Press once WEAPON MODE to go back to the initial position. However, if you press CROUCH while hanging by your feet, you will perform a somersault and fall back to the ground below the place where you were hanging on.
21
TC_SCPandT_Manuel_PC_UK 23/02/04 12:58 Page 22
The Ladder Climb and Vertical Pipe Climb
Your character can climb up and down ladders and vertical pipes. Push into a ladder or a pipe (or jump onto it by pressing JUMP) to grab onto it. Pressing FORWARD and BACKWARD will make the character climb up and down. If you press ACTION while pressing BACKWARD, the character will quickly slide down the ladder or the pipe. If you stop pressing BACKWARD, the character will stop sliding. Press CROUCH to jump backwards off the ladder or the pipe.
The Ziplines
You can hang onto, and slide along, a taut rope (zipline). To use this method of movement, position yourself under the zipline and press JUMP. You can accelerate by pressing FORWARD. Once a certain speed has been reached, the character will raise his feet. By pressing BACKWARD, you can slow down his descent. Let go of the rope by pressing
CROUCH.
The Split Jump
You can hold on between two walls by doing the splits. To do this, position yourself between the two walls, near one of the two walls, and press once JUMP. When you are in the air, press a second time JUMP to support yourself against the wall. Your character will end up doing the splits between the two walls. In this position, you can perform the following actions:
•Take out your weapon and shoot.
•Drop back down. To do this, press CROUCH.
•Use the available gadgets in your inventory by pressing SECONDARY FIRE.
The Back to Wall
To stick close to a wall, position yourself facing the wall and press ACTION. To move, use LEFT and RIGHT. Press CROUCH to crouch down. To move out of this position, you have different possibilities:
•Press ACTION again.
•Take your weapon into your hand.
If you are moving up to the corner of a wall, and you keep pressing in the direction of the corner of the wall, your character will shift automatically into SNEAK mode (he will poke his head round the side of the wall to see what is going on). From this position, you can manually target and take your gun by pressing WEAPON MODE. Shoot by pressing PRIMARY FIRE, use a gadget by pressing SECONDARY FIRE. Press WEAPON MODE to put your weapon away.
The Roll
You can perform rolls. To do this, press one of the MOVE keys and press ROLL. The length of your roll will depend on your initial speed.
The Grab
You can slip up behind an enemy and grab hold of him. To do this, position yourself behind a mercenary and press ACTION. From this position you can:
•Move towards him with the same controls.
•Break your victim’s neck by pressing ACTION.
•Knock your victim out with a blow from the elbow by pressing PRIMARY FIRE. Your opponent will only be knocked out temporarily: he will get up again after a few moments.
22
TC_SCPandT_Manuel_PC_UK 23/02/04 12:58 Page 23
Whatever the situation, you can only grab hold of a mercenary for a limited period of time. Beyond this time-limit, the mercenary will suffocate and collapse.
The “Elbow Shot”
You are capable of striking out with your elbow in such a way that a mercenary is temporarily neutralized or disoriented. To perform an “elbow shot”, make contact with the enemy and press PRIMARY FIRE. If you are in front of your opponent or to one side of him, you will knock him back.
ARGUS Corporation members’ abilities
Basic Actions
Sneak, Walk and Run
You can change your character speed by using the wheel mouse Up to speed up, and wheel mouse Down to slow down.
Crouch
The CROUCH key toggles crouching.
Jump
Pressing the JUMP key will make your character jump straight up in the air. Pressing the JUMP key while running will make the character jump forward.
Shoot
Aim by moving the onscreen reticule using the mouse. To shoot, press PRIMARY FIRE. Change shooting mode by pressing and holding WEAPON MODE:
•BURST: You shoot a burst of 3 bullets each time you press PRIMARY FIRE.
•FULL-AUTO: You shoot a continuous burst of fire so long as you keep PRIMARY FIRE pressed down.
The current shooting mode is indicated by an icon on your weapon.
Reload
Reload manually your weapon by pressing RELOAD. Reloading is automatic when there are no more bullets available in your current clip.
Use a Gadget
To use a gadget, press SECONDARY FIRE.
Interact
You can interact with certain items in the universe by pressing ACTION. These actions include: turning on /off a light switch, using an elevator or picking up an object.
23
TC_SCPandT_Manuel_PC_UK 23/02/04 12:58 Page 24
Special Abilities
Pupil Adaptation
This ability is a version of a natural phenomenon: when you go into a very dark room, it is virtually impossible to make out the slightest shape. After a few seconds, the pupil dilates, allowing more light to enter the eye, slightly improving your vision in the darkness. So, if the mercenary remains motionless, or if he moves very slowly through a dark room, the ambient light will gradually increase. This increase enables the mercenary to discern certain shapes and – why not? – a few spies too!
Charge / Weapon Slam.
You can swing your weapon at your opponent to push him back at close range by pressing ACTION. When moving weapon slamming will turn will cause your character to dash forward to perform a charge in the specified direction. Please note the it’ll take a few seconds to recover your full speed after a charge.
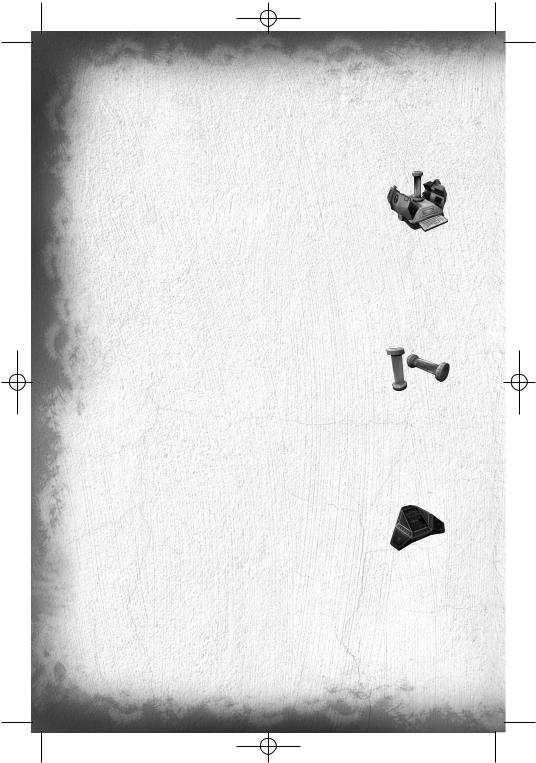
Arsenal
Weapon
The spy is obliged to kill no-one and to leave no traces. To meet this obligation, he only has one non-lethal weapon: the Sticky Shocker. This weapon emits electrical discharges that put the person they hit into temporary shock. The player can fire limited-consecutive discharges before his weapon is completely discharged. It recharges automatically, in the course of time. To shoot, you must hold the weapon in your hand. When you are holding it, press PRIMARY FIRE to fire. Your weapon has a secondary function that enables it to fire Smoke Grenades and Sticky Cameras, among other things (the list of gadgets is provided in the “Shadownet team members’ gadgets” section).
ARGUS members have a special weapon. This weapon operates with high-velocity projectiles. It has two shooting modes: BURST and FULL-AUTO. You have 5 clips with 30 bullets. You can reload by pressing RELOAD. If you find yourself short of ammunition, you can reload near ammunitions pack, that you will find in each level. Your weapon also has a secondary function that enables it to fire Fragmentation Grenades and Flares, among other things.
The Gadgets
Shadownet team members’ gadgets
Enhanced Reality.
This function is similar to military targeting systems. It enables you to locate an ND133, providing a 2D representation of its position, its state and its distance from you. You can toggle Enhanced Reality on and off, by pressing ENHANCED REALITY.
Night Vision Goggles.
Night Vision Goggles amplify the ambient light, particularly emissions from the lower end of the infrared spectrum. To use Night Vision, press
NIGHTVISION.
Thermal Vision Goggles.
Thermal Vision Goggles are similar to Night Vision Goggles, except that they pick up the upper part of the infrared spectrum, namely heat emissions rather than light emissions. This vision mode displays heat sources in red on the screen. But remember that the range of these goggles is limited. To use the Thermal Vision Goggles, press THERMAL.
24
TC_SCPandT_Manuel_PC_UK 23/02/04 12:58 Page 25
Binoculars.
This tool can be used at any time and provides a more detailed view of certain zones. You can zoom in and out using ZOOM IN and ZOOM OUT. You can also use Thermal Vision or Night Vision, or lock an ND133 to locate it more easily. To use the binoculars, press BINOCULARS.
Please note : when targeting someone using binoculars, you can intercept his communications.
The following gadgets can all be operated in the same way : select it from the inventory, then take your weapon in your hand, aim and fire the gadget by pressing SECONDARY FIRE.
Spy Bullets.
These are double-purpose cartridges: they either temporarily mark an enemy hit by the bullet (he appears on your radar, and on your team-mate’s radar) or, if the bullet hits a wall or another part of the décor, it transforms the zone around the point of impact into a radar (making it possible to locate any enemy entering this action zone). When an enemy is tagged, you can hear his communications as well.
Sticky Cameras.
This miniature camera has many functions (zoom, Night Vision, Thermal Vision, gas jet).
Chaff Grenade.
This grenade emits electromagnetic particles when it explodes. These particles disrupt and neutralize electronic devices (surveillance cameras, motion detectors, laser mines as well as mercenaries visions). When the particles have discharged their magnetic field, the neutralized devices operate normally again.
Alarm Snare.
This accessory is also double-purpose. It emits a series of noises similar to those made by a spy (logical and realistic sequences of sounds). The aim is to fool the mercenaries. When fired near a detection system (camera, presence detector, etc.), it can also trigger the detection system, again deceiving the mercenaries
Flashbang Grenade.
This grenade temporarily blinds the mercenaries when it explodes in their field of vision.
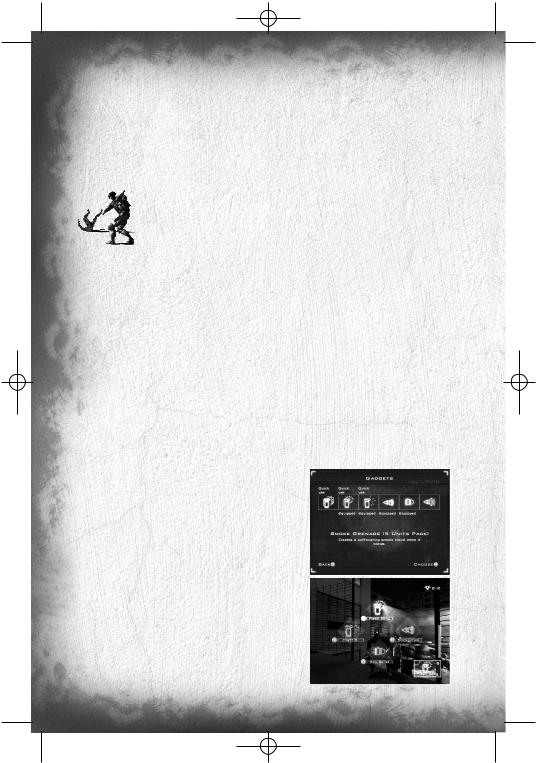
Smoke Grenade.
This grenade gives off a cloud of smoke when it explodes. The cloud enables Shadownet team members to move forward without being spotted. The smoke also slows down, hampers and neutralizes any ARGUS members within the cloud.
ARGUS members’ gadgets
Enhanced Reality.
This function is similar to military targeting systems. It enables you to locate ND133s and alarms that have just been triggered, providing a 2D representation of their position, their state and the distance between you and these items.
Flashlight.
This flashlight can be used to peer into dark places, in search of intruders. To use it, press TORCH LIGHT.
Laser sight.
The Laser sight is a laser beam projected from the weapon that makes it possible to identify a character, even if he is in shadow. To activate the Laser sight, press LASER. The position of a spotted enemy will be transferred on your teammate’s radar as well.
25
TC_SCPandT_Manuel_PC_UK 23/02/04 12:58 Page 26
EMF (Electro Magnetic Field) Vision.
With EMF Vision, you can locate interference given off by electronic devices. If an object with functioning electronics, especially the spy goggles when used for special vision, and the spy weapon, is within the field of vision, it is picked up by EMF Vision and displayed in white. A spy going through a phosphorescent grenade will also appear in EMF Vision. To activate this vision, press EMF.
Motion Vision.
With Motion Vision, you can “reveal” air turbulence created by spies or objects in motion. Whenever a moving object is located, a frame appears around it, making it easier to distinguish the object in question. If the object disappears from the direct field of vision (without obstacles between the object and the player), or if the object’s speed is too low, the frame gradually disappears. To activate Motion Vision, press MOVEMENT.
Binoculars in Snipe Mode.
The mercenaries have special binoculars that enable them to zoom in (3 possible zoom levels, with a magnification of 2, 4 or 6) and – above all – fire (only in Single Shot mode). To shift into this special view mode, press SNIPE. You can change zoom mode with ZOOM IN and ZOOM OUT. To hold your breath, for greater precision when aiming, keep BREATH pressed down. You can only hold your breath so long as the breath gauge is not empty (this gauge is located to the left of your reticule in zoomed vision mode).
Please note : when targeting someone using snipe binoculars, you can intercept his communications.
Mines.
You possess a deadly mine capable of identity recognition (it only detects spies). It has a double activation system. You can choose the mode of activation when you lay the mine. If you choose LASER MINE, you lay a mine that is activated by a laser beam projected by the mine itself. Any spy who cuts through the beam sets off the mine. However, if you choose PROXIMITY MINE, you lay a mine that is activated by a motion detector. Any spy who passes too quickly through the detector’s range will set off the mine. To lay a mine, position yourself in front of a wall and press SECONDARY FIRE. If you give a short press, you will lay a PROXIMITY MINE. However, if you keep SECONDARY FIRE pressed down, a menu appears from which you can choose the mine you wish to lay (make your choice using the FORWARD and BACKWARD). Release SECONDARY FIRE to lay the mine. You can remove a mine that has already been laid (provided your stock of mines is not at its maximum level) by going near it and pressing button ACTION.
Spy Trap.
This device is a locating system. When in operation, it is activated if a spy cuts through the laser beam emitted by the Trap, thereby marking him with a transmitter that makes him visible on the radars of all members of the ARGUS. The device is placed against a wall, in the same way as a mine. Select it from the inventory, position yourself facing a wall and press button ACTION. You can listen to an enemy tagged by a spy trap. Position of a tagged enemy will be transferred on your teammate’s radar as well.
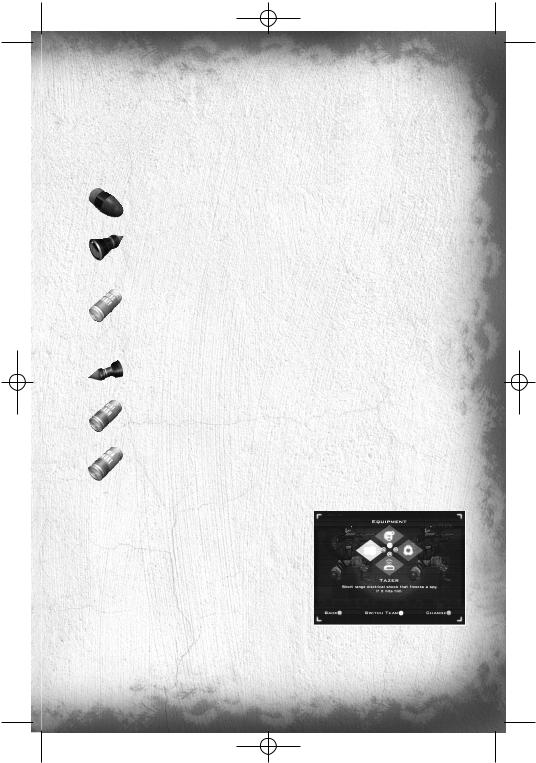
Tazer.
This defense system fires a strong electrical discharge at anyone nearby. The person who is hit is immobilized for a few seconds. To use the Tazer, press on SECONDARY FIRE. If someone is near you, that person will receive an electric shock.
The following gadgets can all be operated in the same way : select it from the inventory, then take your weapon in your hand, aim and fire the gadget by pressing SECONDARY FIRE.
Flares.
The Flare produces dynamic light that is fairly short-lived. It lights up with a radius of a few meters
Fragmentation Grenade.
The Fragmentation Grenade is a deadly grenade that, on exploding, inflicts damage on anyone within the explosion zone.
26
TC_SCPandT_Manuel_PC_UK 23/02/04 12:58 Page 27
Phosphorescent grenade.
This grenade diffuses a large cloud of phosphorescent particles, which will stick on any character going through it. These particles can be seen in EMF vision and will diffuse some light. Also the character will leave clearly visible footsteps as he’s walking away. This gadget is very convenient to mark and track a spy.
The Game Levels
There are many, varied game environments and they are – above all – interactive. They constitute an integral part of the game, affecting both teams.
Passive Defenses
Trigger mechanisms are located in the level (motion detectors, surveillance cameras, lasers, etc.). If an intruder sets off one of these mechanisms, he either activates an intruder alarm that gives his position or an alarm that sections off the zone in which he is located. In both cases, the intruder’s stealthy progress is jeopardized.
These mechanisms can be seen using Thermal Vision. They are indestructible but it is possible to neutralize them temporarily using the Sticky Shocker or the Chaff Grenade. Any item neutralized by one or both of these means is encircled by electric arcs and gives off smoke.
Please note : disabling defenses with a sticky shocker or a chaff grenade will prevent giving precise location of the intrusion as general warning message will be sent to mercenaries (“security failure”)
Surveillance Cameras.
The Surveillance Cameras emit sound and light (GREEN when they see nothing; RED when the alarm is activated). A character is located when he enters the camera’s cone of vision.
Motion Detectors.
These detectors can locate any spy who penetrates their active zone. The indicator lights on the housing are green if the detector has located nothing and red if they have detected something.
Lasers.
Whenever a spy cuts through the laser beam, he sets off the associated alarm.
An alarm stops automatically after a few seconds if nothing appears to trigger the alarm once again. Please note : triggered laser alarm system can cause temporary isolation of certain areas.
The Gameplay Objects
Some décor items are gameplay elements.
Destructible Lights.
To destroy certain light sources, take out your weapon, aim and fire.
Extinguishers.
When you shoot at an Extinguisher, a cloud of “smoke” appears at the bullet’s point of impact, blinding mercenaries who are passing through the cloud.
Ammunition Reloads.
Enable you to reload bullets for your weapon and stock up on grenades. Press ACTION in front of the box to reload.
Health Reloads.
Enable you to refill your life. Press ACTION in front of the box to get back to full life.
27
TC_SCPandT_Manuel_PC_UK 23/02/04 12:58 Page 28
Ready for your next challenge?
Log on to www.splintercell.com & set your sights on the top of the worldwide multiplayer ranking. The Splinter Cell community are waiting to help you become the best! The official website, the best source for info, materials & goodies.
“You Got the Game, Now Get the Guide. Prima's Official Strategy Guide: Tom Clancy's Splinter Cell® Pandora Tomorrow.”
Register your game!
To get an insider knwoledge for the coming Ubi Soft games, receive exclusive offers, participate in focus groups, or help create games... please take a few minutes to register your game, on:
http://register.ubi.com/pandora
Copyrights
© 2004 Ubisoft Entertainment. All Rights Reserved. Splinter Cell, Sam Fisher, Splinter Cell: Pandora Tomorrow, Ubisoft, ubi.com, and the Ubisoft logo are trademarks of Ubisoft Entertainment in the U.S. and/or other countries. All other trademarks are the property of their respective owners.
Unreal Engine is a trademark of Epic Games Inc.
Uses Bink video. Copyright ©1997-2001 by RAD Game Tools, Inc.
Opening Cinematic Music Composed and Produced by Jack Wall, including Lalo Schifrin's Original Splinter Cell Theme.
Original Splinter Cell Theme Composed by Lalo Schifrin.
Music Performed by the Century Fox Orchestra in Los Angeles.
The Sony Ericsson marble logo is the trademark or registered trademark of Sony Ericsson Mobile Communications AB.
Sony is the trademark or registered trademark of Sony Corporation.
Ericsson is the trademark or registered trademark of Telefonaktiebolaget LM Ericsson
RenderWare Physics is a registered trademark of Criterion Software Ltd. Portions of this software are Copyright Criterion Software Ltd 1998-2004
© 2003 Criterion Software Inc.Criterion and RenderWare are registered trademarks of Canon Inc.
28
 Loading...