


Heroes V Manuel UK.qxd 12/04/06 17:43 Page 2
WARNING:
READ BEFORE PLAYING
A very small percentage of individuals may experience epileptic seizures when exposed to certain light patterns or flashing lights. Exposure to certain patterns or backgrounds on a computer screen, or while playing video games, may induce an epileptic seizure in these individuals. Certain conditions may induce previously undetected epileptic symptoms even in persons who have no history of prior seizures or epilepsy. If you, or anyone in your family, have an epileptic condition, consult your physician prior to playing. If you experience any of the following symptoms while playing a video or computer game -- dizziness, altered vision, eye or muscle twitches, loss of awareness, disorientation, any involuntary movement, or convulsions - IMMEDIATELY discontinue use and consult your physician before resuming play.
The PEGI age rating system:
Age Rating categories:
Les catégories de tranche d’âge:
Note: There are some local variations!
Note: Il peut y avoir quelques variations en fonction du pays!
|
|
BAD LANGUAGE |
DISCRIMINATION |
DRUGS |
Content Descriptors: |
|
LA FAMILIARITÉ |
LA DISCRIMINATION |
LES |
|
DE LANGAGE |
|
DROGUES |
|
|
|
|||
Description du contenu: |
|
FEAR |
SEXUAL CONTENT |
VIOLENCE |
|
|
LA PEUR |
LE CONTENU |
LA |
|
|
|
SEXUEL |
VIOLENCE |
For further information about the Pan European Game Information (PEGI) rating system please visit:
Pour de plus amples informations concernant l’évaluation du système d’information de jeu Pan Européen (PEGI), vous pouvez consulter:
Para obtener más información sobre el sistema de calificación de juegos (PEGI), por favor visite:
Per ulteriori informazioni sul sistema europeo di valutazione delle informazioni del gioco (PEGI) vi preghiamo di visitare:
Für weitere Informationen über das europäische Spiel-Informationen Bewertungs-System (PEGI) besuchen Sie bitte:
http://www.pegi.info
TABLE OF CONTENTS |
|
GETTING STARTED...................................................................... |
4 |
System Requirements............................................................... |
4 |
Installation...................................................................................... |
4 |
GAME SETUP...................................................................................... |
5 |
Main Menu......................................................................................... |
5 |
Profile and Difficulty Level ................................................. |
6 |
Single Player.................................................................................... |
7 |
PLAYING THE GAME.................................................................. |
8 |
Basic controls ................................................................................. |
8 |
Tooltips ............................................................................................... |
8 |
Mission Objectives ...................................................................... |
9 |
Adventure Map.............................................................................. |
9 |
Hero Management................................................................... |
16 |
Town Screen.................................................................................. |
20 |
BATTLE............................................................................................... |
26 |
MULTIPLAYER............................................................................... |
32 |
Multiplayer menu .................................................................... |
32 |
Hot Seat............................................................................................ |
33 |
LAN game ........................................................................................ |
33 |
Ubi.com game............................................................................. |
34 |
Creating a multiplayer game......................................... |
35 |
Special multiplayer modes .............................................. |
36 |
APPENDIXES ................................................................................. |
39 |
Gameplay settings.................................................................. |
39 |
Audio and Graphics settings ........................................... |
39 |
Game controls............................................................................ |
40 |
TECHNICAL SUPPORT................................................................ |
43 |
WARRANTY ....................................................................................... |
44 |
2 |
3 |
Heroes V Manuel UK.qxd 12/04/06 17:43 Page 4
GETTING STARTED
System Requirements
Supported OS: Windows® 2000/NT/XP (XP recommended) Processor: 1.5 GHz Pentium® IV or AMD Athlon™
(2.4 GHz recommended) RAM: 512 MB
Video Card: 64 MB DirectX® 9.0-compatible video card (128 MB recommended) (see supported list*)
Sound Card: DirectX 9.0-compatible sound card
DirectX Version: DirectX 9.0c or higher (included on disc) DVD-ROM: 4x DVD-ROM
Hard Drive Space: 2 GB free
Peripherals Supported: Windows-compatible mouse and keyboard Multiplayer: Internet connection
*Supported Video Cards at Time of Release
NVIDIA® GeForce™ 3/4/FX/6 families (GeForce 4 MX NOT supported) ATI® Radeon® 8500/9000/X families Matrox Parhelia™
Laptop versions of these cards may work but are NOT supported. These chipsets are the only ones that will run this game. Additional
chipsets may be supported after release. For an up-to-date list of supported chipsets, please visit the FAQ for this game on our support website at: http://support.ubi.com
Installation
Installing Heroes of Might and Magic® V
Insert the game disc into your DVD/CD Drive. If you have enabled the Autorun option, the game installation will start automatically. Otherwise, double-click on the CD-ROM icon in the My Computer menu. Find Autorun.exe in the list of files and folders and double-click on it to start the installation process. Select “Install” to run the installation and follow the installation wizard guide to successfully install the game on your computer.
Uninstalling Heroes of Might and Magic® V
To uninstall the game, click on the Game Uninstall icon in the Start menu. Follow the uninstallation wizard guide to successfully uninstall the game from your computer.
GAME SETUP
Double-click on the desktop icon or click once on the icon in the Start menu to launch the game.
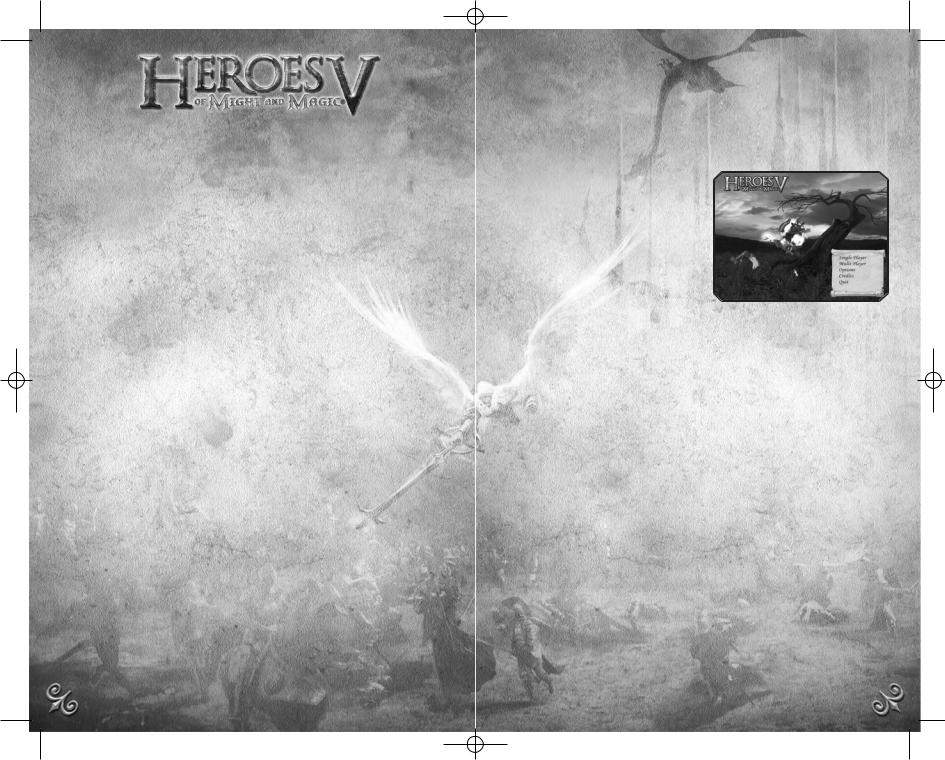
Main Menu
After the game intro, the main menu screen will appear. Here, you can select one of the following options:
Single Player
This option opens the single player game menu, where you can start a scenario
campaign or select an individual mission. Here you can also choose or change your player’s profile. See Page 7 for more details on single player games.
Multiplayer
This option opens the multiplayer game menu, where you can select one of the following modes: playing with several opponents sharing the same PC (Hot Seat), playing with partners on a local area network (LAN) or via Internet. See more details on this in the Multiplayer Page 32.
Options
In the Options menu, you can change graphics and sound settings to better suit your own configuration. You can also change several game settings. Check the appendix section for more details.
This menu is also accessible from the Adventure map, and some game settings are also available from the battle screen.
Credits
Shows the game’s credits.
Quit
Quits the game to the OS.
4 |
5 |

Heroes V Manuel UK.qxd 12/04/06 17:43 Page 6
Save/Load Game
Save game
You can save games in the campaign, custom games and in some network games. To save a game, click on save in the options menu.
The save game panel will appear. You can accept the saved game default name, edit it the appropriate field (1), or overwrite an existing saved game. To do this, simply
select one of the saved games in the list showing the existing ones (2). Once you are, done save your game.
You can also Quick Save and Quick Load with F5 and F8. In this case, don’t enter the save/load screen and the name is always “Quick Save”
Load game
To load a saved game, select it from the saved games list on the left (1). You can check the details of the selected saved game on the right panel (2). After having selected the game, you can either load (3) or delete (4) it from your computer.
Profile and Difficulty Level
Once you have selected single or multiplayer, you can create or select a profile identifying you throughout the entire game. You can create as many profiles as you want. Saves are associated with the loaded profile.
Beneath the profile selection, you can select the difficulty level (1). The difficulty
level is chosen once for the whole campaign for the current profile. The difficulty level determines your PC-controlled adversaries’ “intellect” level, the initial amount of resources given to your party at the beginning of the mission, as well as the might of neutral troops that are your potential enemies. There are 3 levels of difficulty: Normal, Hard and Heroic.
Single Player
From this screen, you can start or continue the campaign , load your saved games, launch a single scenario map or play a multiplayer map against AI opponents.
Campaign
This option gives you access to the main storyline. You can access all missions and sub-campaigns that have been completed
from this screen or start a new campaign from scratch.
Warning!
Before beginning, create a new profile with your in-game name.
Custom Game
Custom games are maps with a separate storyline and are not interlinked. In addition to the missions that have been intentionally created for the single player mode, you can also load multiplayer maps in which your adversaries will be controlled by the AI.
On this screen, a list (1) describing the custom game names, winning conditions, number of players and size is displayed. Select a custom game from the list. Check
the Include MP maps box (2) to display Multiplayer maps.
Under the list, a map description will appear, detailing the scenario associated with the selected custom game.
Set the main options for the selected game using the options panel on the right(3). Click on Create to access the Custom Game.
On this screen, you can select your flag colour (1), faction (2), starting hero (3) and bonus(4).
Use the arrows beside each icon to make your selection. If a Dice icon appears, your choice has been set to random.
Some of these parameters may have been preset and cannot be modified.
6 |
7 |
Heroes V Manuel UK.qxd 12/04/06 17:43 Page 8
PLAYING THE GAME
Basic controls
Camera controls
Scroll the map by moving the cursor to the edge of the screen. Rotate and tilt the camera while holding the right mouse button. Zoom in and out with the mouse wheel.
Keyboard Shortcuts
Many actions in the game are linked to keyboard shortcuts. You can check these shortcuts in the Appendix section at the end of the manual.
Tooltips
During the game, a lot of information will be provided through tooltips and floating icons. Here is a brief description of the main tooltips:
• Tutorial
The first campaign includes a tutorial to help you learn how to play the game. It is composed of pop-up messages and flashing icons.
• Adventure map
Throughout the game, tips appear as soon as you point the cursor at certain objects.
Each tooltip is made up of one or two windows. You can cycle through the windows by clicking on the right mouse button.
• Right-Click
In addition to the standard tooltips, you can right-click on all interactive elements in the game to call a detailed description of the object.
• Battle map
Right-clicking on a creature will display a complete list of its statistics, and a second window will describe all the spells and effects that are active on the creature.
• Floating tips
When your hero interacts with his environment, you will see icons and tips fly off. They will briefly describe how the event has affected you hero’s status.
A more detailed description of some important events will appear just below the resource panel.
• Banner
During the game, the most important events will be described through a banner tip that will appear at the top of the screen, just under the resource bar on the adventure map.
Mission Objectives
Objectives are given at the beginning of the mission and new ones may be added during the missions, depending on events and situations. You must complete all primary objectives in order to complete a mission. Each objective is described in a menu, accessed by pressing the Objective button on the main interface of the adventure map.
Adventure Map
Your experience within the world of Heroes will begin on the adventure map. The events that occur there correspond to the game’s strategic level. This is where the parties develop territories, gather resources, and interact with various objects, neutral units and each other. The adventure screen shows where the current mission’s events are taking place. You can see the terrain within your hero’s field of vision. The rest of the territories are covered by a “fog of war” and are not shown on the map. Most maps also include an underground level, which you can access through specific buildings.
Main interface
|
|
Resource panel. |
|||||
Mini Map. |
|
|
|
|
|
|
|
|
|
|
|
|
|
|
|
|
|
|
|
|
|
|
|
Shows the main |
|
|
|
|
|
|
|
map’s terrain with |
|
|
|
|
|
|
|
its building |
|
|
|
|
|
|
|
schematics. |
|
|
|
|
|
|
Heroe icons |
|
|
|
|
|
|
||
A building’s |
|
|
|
|
|
|
|
|
|
|
|
|
|
Town icons |
|
|
|
|
|
|
|
||
colour corresponds |
|
|
|
|
|
|
|
|
|
|
|
|
|
|
|
to who owns it |
|
|
|
|
|
|
|
(neutral buildings |
|
|
|
|
|
|
Controls field |
|
|
|
|
|
|
||
are white). |
|
|
|
|
|
|
|
|
|
|
|
|
|
|
|
Use the blue arrows to hide interface elements or bring them back.
If you have several heroes, the one you have selected will have his portrait framed in yellow. To select another hero, click on his or her portrait.
8 |
9 |
Heroes V Manuel UK.qxd 12/04/06 17:43 Page 10
Controls field
•Next Hero: select the next hero and centre the camera on him or her.
•Mission objectives: call the mission objectives screen.
•Toggle Underground/Surface: switches the map between underground and surface views.
•End Turn: end current turn. Weekdays are highlighted in blue within the button’s radius.
•Game options: call the game options screen. From this screen you can save and load games, change the game and hardware configuration, exit to the main menu or to the OS.
•Spellbook: open the current hero’s spellbook to the page showing available adventure spells.
•Walk/Dig: Walk the selected hero along the plotted course. If the hero hasn’t moved, the “Dig” icon appears, allowing the hero to search for the grail under his current position.
Travelling
Routes
To set your hero’s route, click on the desired destination or object with the left mouse button. If the hero can reach it, a coloured dotted line corresponding to the hero’s faction’s route will appear. Confirm your destination by clicking on the same spot again.
You can tell the hero to move without choosing a route first by doubleclicking on the destination.
Some events may affect your plotted path:
•If the shortest route to the destination is blocked by an enemy, the game will try to set a new route in order to avoid the threat.
•If the destination is out of the hero’s range, the line outside of the range will appear in grey.
•If your destination or the route to it is controlled by an enemy and there is no way around, the route will be plotted in red.
Terrain and speed
As a rule, open fields and roads are always open to a hero. Rocks, marshes, thickets, lava-flows, forests, rivers etc. are not passable. Rivers can usually be waded through if a path leads down to the water. Deep bodies of water (lakes and seas) can only be travelled by ship. To get on or off, you must find a suitably shallow area.
On dry land, the travelling speed (distance that the hero and his army are able to cover in a day) depends on several factors:
•Terrain type: paved roads enable fast travelling. Across unpaved areas, the speed depends on the terrain’s accordance to the hero’s origins. If a terrain is “Foreign” to the hero, is takes longe to cross.
•Current army: the hero’s speed depends on the speed of the slowest creature in his army.
Calendar and Time
In-game time
On the adventure map, one turn takes one day. When all your heroes have achieved all their objectives or exhausted their movement points, your turn is over. When all the players on the map have finished their turns, a new day begins. After seven days, a new week begins, and after four weeks, a new month.
The current date can be seen through the tooltip attached to the End Turn button on the adventure map screen. The day ends when you click on End of Turn.
When each week starts, the new creatures’ drill is completed in the town buildings, and they become available for enlistment. New creatures can also be hired from the dwellings on the map.
Week of…
At the start of some weeks, the position of the heavenly bodies causes a major event. As a result, new units of a creature type may randomly appear on the adventure map and their number increase in towns. Other weeks will generate other random bonus and penalties. Only experienced astrologers can predict these events…
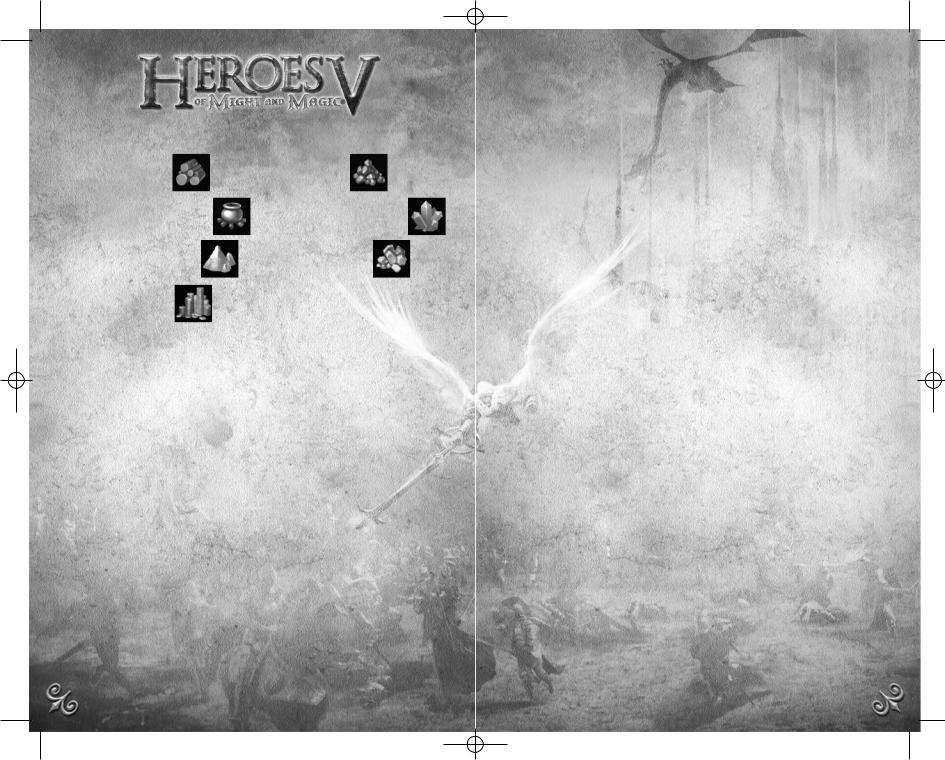
Resources
The resource panel shows your current stock of resources. They belong to your kingdom as a whole, meaning that when you lose a town or a hero, you keep all of your resources.
10 |
11 |
Heroes V Manuel UK.qxd 12/04/06 17:43 Page 12
Gathering resources
There are 7 types of resources that can be gathered by capturing mines on the adventure map.
• Sawmill: Wood |
• Ore pit: Ore |
• Alchemist lab: Mercury |
• Crystal cavern: Crystals |
• Sulphur dune: Sulphur |
• Gem pond: Gems |
• Gold mine: Gold |
|
Other sources of income
There are several other ways to get resources.
•Town buildings: some town buildings can produce resources. You can also use the Marketplace building in your town to trade resources. The more market places you own, the cheaper the rates are.
•Weekly resources: every week, buildings such as mills or mysterious gardens give resources to the first hero to visit them.
•Unique resources: when exploring the adventure map, you will find chests and heaps of resources that you can pick up.
Gold, wood and ore are universal resources. Mercury, crystals, sulphur and gems are rare resources, required for erecting magic guilds, other magic-orientated buildings and for hiring the most powerful allies.
Buildings
On the adventure map, heroes can interact with various buildings. Some of them can be captured. A seized building has the hero’s emblem on it. If the object has not been seized by anyone, there is a stream of light over it.
Towns
A town’s appearance enables you to see how developed it is.
Mines
To guard a mine, you can leave one or more units on it.
Creatures’ dwellings
These buildings can be seized. Unlike town buildings, these dwellings do not accumulate creatures, thus it is advisable to visit them at the beginning of each week. When seized, these buildings also increase the growth of matching creatures types in towns under the player’s control
Garrisons and forts
Garrisons are military buildings guarding key passages on the map. You can leave one or more units to guard a garrison.
Forts let you drill and enlist basic-level creatures in exchange for gold. The Hill Fort is a special building that allows upgrading creatures instead of hiring new ones.
Observation
If seized, magical towers and cartographers enable you to see the surrounding terrain for miles around.
Weekly income sources
These are various mills and gardens. They will offer the stock they have accumulated within the week to the first hero to visit them.
Neutral dwellings
Some buildings belong to neutral creatures. They cannot be seized, but a hero can attack them, defeat the guards and take its contents or hire itsinhabitants.
Restoring magical energy
Magic wells restore the hero’s magical energy.
Temporary bonus
Some buildings and locations, like the rally flag, for instance, will give the visiting hero a temporary luck or morale bonus.
Improving a Hero’s skills and experience
Some buildings can be visited to improve your heroes’ skills, to learn new spells and abilities or to gain extra experience.
Teleportation
Portal buildings allow heroes to teleport from one location to another on the map. They can be two-way and one-way.
In the sea, Whirlpools connect different water areas on the map. When you use them, some creatures in your army may drown.
Underworld portals and ladders connect the surface and underground levels of the map.
12 |
13 |
Heroes V Manuel UK.qxd 12/04/06 17:43 Page 14
Individual items
On the adventure map, you can find heaps of resources as well as artefacts and chests.
A chest can be used in two ways: by improving the kingdom’s financial welfare or gaining extra experience for the hero who found it.
On water, shipwreck, flotsams and floating chests can also contain resources and money, but they may be empty.
Searching for the Tears of Asha
The Tears of Asha is a major artefact that is needed to erect a special building in one of your cities. In most missions, this is not a requirement, but it definitely gives you a major advantage in completing your mission. Searching for the Tears of Asha includes revealing the puzzle map which can be seen on the Mission
Objectives screen. A fragment of the map is revealed each time you visit a special obelisk. The fragment showing the exact location of the Tears of Asha is the last to be revealed. When you know (exactly or approximately) where the Tears of Asha is hidden, you may try to dig it out using the Dig button in the Controls Field.
Digging requires a whole day, meaning that the hero cannot do anything else that day.
Once obtained, the Tears of Asha is to be brought to to a city under the player’s control . If the hero carrying the Tears of Asha is intercepted and defeated by the enemy, the Tears of Asha will disappear.
Opposing forces
Your heroes’ main adversaries are the heroes belonging to the enemy. You may also encounter individual stacks of neutral creatures on the adventure map (“neutral” means they don’t belong to any of the parties, but their attitude towards you may not be neutral!)
Some of the buildings on the map can also be occupied by enemy or neutral units. When trying to capture such a building, you will have to fight its guards.
Neutral units
The neutral units’ attitude toward your hero will be modulated according to several factors.
First of all, their attitude depends on your army’s strength: if your forces are inferior, you will most likely be attacked. If they are more or less equal, the neutral units may be willing to join you for pay. If your strength leaves no considerable chances for them to win, they will try to flee, or offer to join you for free under special circumstances.
In the case of a flight attempt, you may pursue and fight the enemies for extra experience, or let them go to avoid wasting time and troops. In this case, you will gain less experience. Once they have fled or have been defeated, the unit will disappear from the map.
You can increase the probability for neutral units to join your army in several ways:
•The hero’s and the unit’s origins or race are the same.
•The hero already has creatures of the same type in his army.
•The hero has Diplomacy. Diplomacy can also decrease the amount of money needed to convince them to join the hero’s forces.
•The hero specialises in this type of creature.
If a neutral unit wants to join the hero, but the hero has no free slots for new units, the Army Selection screen will appear. On this screen,you can either combine units of the same type or dismiss a unit. If a neutral unit wants to join up for pay, the requested sum is deducted from the resources, if the hero takes on at least one creature.
Evaluating the enemy’s strength
The composition of the neutral unit cannot necessarily be seen, but a unit can often be identified by the figure of the creatures in the unit. The tip also shows an approximation of the number of creatures in the unit.
Enemy units can guard income sources or forts that may block your way. The composition and approximate amount of creatures in stacks can be seen in the tips under hostile heroes, forts and towns.
14 |
15 |
 Loading...