Games PS2 THE MARK OF KRI User Manual
WARNING: READ BEFORE USING YOUR
PLAYSTATION®2 COMPUTER ENTERTAINMENT SYSTEM.
A very small percentage of individuals may experience epileptic seizures when exposed to certain light patterns or flashing lights. Exposure to certain patterns or backgrounds on a television screen or while playing video games, including games played on the PlayStation 2 console, may induce an epileptic seizure in these individuals. Certain conditions may induce previously undetected epileptic symptoms even in persons who have no history of prior seizures or epilepsy. If you, or anyone in your family, has an epileptic condition, consult your physician prior to playing. If you experience any of the following symptoms while playing a video game—dizziness, altered vision, eye or muscle twitches, loss of awareness, disorientation, any involuntary movement, or convulsions— IMMEDIATELY discontinue use and consult your physician before resuming play.
WARNING TO OWNERS OF PROJECTION TELEVISIONS:
Do not connect your PlayStation 2 console to a projection TV without first consulting the user manual for your projection TV, unless it is of the LCD type. Otherwise, it may permanently damage your TV screen.
USE OF UNAUTHORIZED PRODUCT:
The use of software or peripherals not authorized by Sony Computer Entertainment America may damage your console and/or invalidate your warranty. Only official or licensed peripherals should be used in the controller ports or Memory Card slots.
HANDLING YOUR PLAYSTATION 2 FORMAT DISC:
•This disc is intended for use only with PlayStation 2 consoles with the NTSC U/C designation.
•Do not bend it, crush it or submerge it in liquids.
•Do not leave it in direct sunlight or near a radiator or other source of heat. •Be sure to take an occasional rest break during extended play.
•Keep this compact disc clean. Always hold the disc by the edges and keep it in its protective case when not in use. Clean the disc with a lint-free, soft, dry cloth, wiping in straight lines from center to outer edge. Never use solvents or abrasive cleaners.
THE MARK OF KRI™
P L A Y S T A T I O N 2 H I N T L I N E
Hints for all games produced by SCEA are available:
Within the U.S. |
1-900-933-SONY (1-900-933-7669) |
|
$0.95/min. auto hints, |
|
$5.00-$20.00 for card recharge |
Within Canada: |
1-900-451-5757 |
|
$1.50/min. auto hints |
For U. S. callers, automated assistance is available 24 hours a day, 7 days a week. This hint line supports games produced by Sony Computer Entertainment America. No hints will be given on our Consumer Service Line. Callers under 18 years of age, please obtain permission from a parent or guardian before calling. This service requires a touch-tone phone.
Consumer Service/Technical Support
1-800-345-SONY (1-800-345-7669)
Call this number for help with technical support, installation or general questions regarding the PlayStation 2 game console and its peripherals. Representatives are available Monday-Saturday, 6AM-8PM PST, Sunday 7AM-6:30PM PST.
PlayStation 2 Online www.playstation.com
Our news is always hot! Visit our website and find out what’s happening—new titles, new products and the latest information about the PlayStation 2 computer entertainment system.
TM
Getting Started . . . . . . . . . . . . . . .2 Controller Diagram . . . . . . . . . . . .3 Controls . . . . . . . . . . . . . . . . . . . .4 Introduction . . . . . . . . . . . . . . . . .6 Quick Start . . . . . . . . . . . . . . . . . .7 Getting Started . . . . . . . . . . . . . . .8 Welcome to the Inn . . . . . . . . . . . .9 Playing the Game . . . . . . . . . . . . .10 The Combat System . . . . . . . . . . .12 Stealth Attack . . . . . . . . . . . . . . .16 Weapons . . . . . . . . . . . . . . . . . . .20 The Enemies . . . . . . . . . . . . . . . .24
Important Items to
Discover/Pick-Up . . . . . . . . . . . . .26 Saving the Game . . . . . . . . . . . . .28
The Pause Menu . . . . . . . . . . . . .29
Options . . . . . . . . . . . . . . . . . . . .30
The Sage . . . . . . . . . . . . . . . . . . .34
Credits . . . . . . . . . . . . . . . . . . . . .36
Warranty . . . . . . . . . . . . . . . . . . .41
2
GETTING STARTED
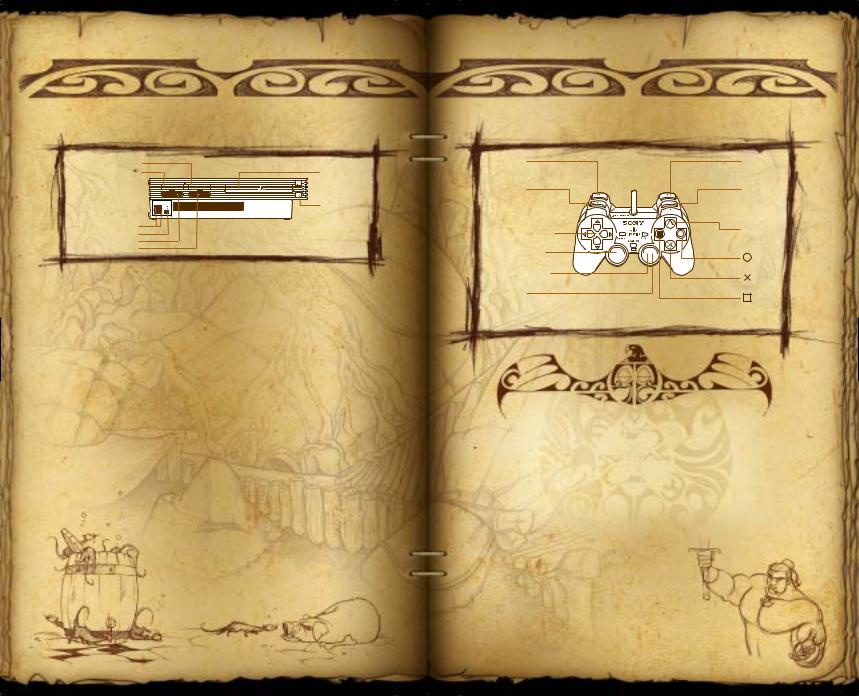
MEMORY CARD slot 2 MEMORY CARD slot 1
disc tray  RESET button
(OPEN) button |
USB connector S400 i.LINK connector controller port 1 controller port 2
Set up your PlayStation®2 computer entertainment system according to the instructions in the Instruction Manual. Make sure the MAIN POWER switch (located on the back of the console) is turned on.
Press the STANDBY/RESET button. When the power indicator lights up, press the OPEN button and the disc tray will open. Place the The Mark of Kri disc on the disc tray with the label side facing up. Press the OPEN button again and the disc tray will close.
Attach game controllers and other peripherals as appropriate. Follow the on-screen instructions and refer to this manual for information on using the software.
Memory Cards
To save game settings and progress, insert a Memory Card (8MB) (for PlayStation 2) into the MEMORY CARD slot 1 of your PlayStation 2 computer entertainment system. You can load saved game data from the same card or any memory card containing previously saved games.
3
CONTROLLER DIAGRAM
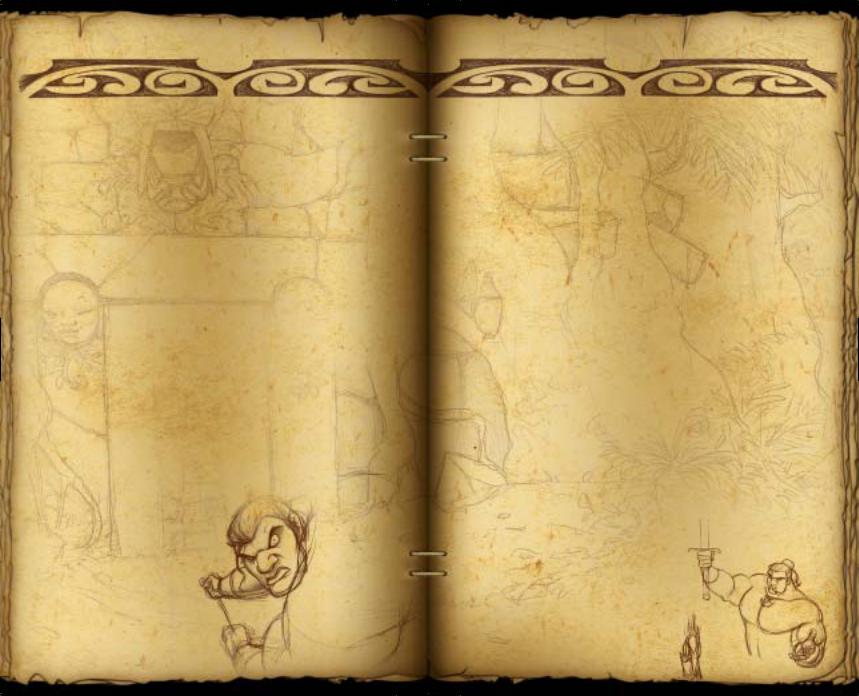
L2 button
Send or Bring back Kuzo
L1 button
Camera view / Manual Aim with Bow
Directional buttons
Left analog stick
Move
Right analog stick
Lock enemy
R3 button
(push Right analog stick like a button)
Unlock enemies
R2 button
Select Weapon /
Retrieve Weapon
R1 button
Defend/Disarm Enemy
 button
Use item/ bird flight and view functions
button
Attack
button
Attack
button
Attack
T I P S & S T R AT E G I E S
MELEE COMBAT
•Block/defend is essential to your survival, learn this skill well.
•Deselect targeted enemies by pressing down on the Right analog stick. Assigning and reassigning comfortably during combat is a valuable skill that should be practiced.
•You do not always need to use the analog stick to move Rau towards an enemy. If he is selected but too far to hit, pressing the corresponding button will turn Rau to face the enemy and pressing the button again will make him leap towards the target.
CONTROLS
Start/Pause game Select menu item
Previous screen
Move
Defend/Disarm Enemy
Focus on enemy Attack ≈ Icon enemy Attack √ Icon enemy Attack Ω Icon enemy
Ground impale
Break focus on enemy
Select weapon
4
START button
Directional button or Left analog stick + ≈ button
ç button
Directional button or
Left analog stick
R1 button (Disarms enemy when Rau is unarmed)
Right analog stick
≈ button
√ button
Ω button
≈ button (When close to living, unlocked enemy on ground)
R3 button (Press Right analog stick like a button)
R2 button (Hold) + Directional button or Left analog stick
5
Put away weapon |
R2 button (Hold) + Directional |
(Stealth Mode) |
button or Left analog |
|
stick to select HAND |
Quick Weapon Retrieve |
R2 button (Tap) when unarmed |
Send Kuzo |
L2 button (When bird |
|
icon in beam of light |
|
is spinning in view) |
Toggle to/from Kuzo’s vision |
ç button |
Hurry Kuzo to perch |
ç button (while Kuzo is in |
|
flight to perch) |
Open doors/Pull switches/Talk |
ç button |
Sneak along wall |
With no weapon drawn, run |
|
into wall. Use Directional |
|
buttons or Left analog stick |
|
to maneuver along wall |
Sneak along roof |
With no weapon drawn, run |
|
to edge of roof. Use Directional |
|
buttons or Left analog stick to |
|
maneuver along edge of roof |
Center Camera View |
L1 button |
Camera View/ |
|
First Person Bow |
L1 button (hold) |
Swing camera view |
L1 button (hold) + |
|
Directional button |
|
or Left analog stick |
6
INTRODUCTION
Long ago, during the first age, a series of dark spells were created. One of these spells had the power to bridge our world and the one of darkness. It was an evil spell with no purpose but that
of destruction.
Before it could be invoked
it was stolen and broken into six separate parts, six lines, six incantations.
T I P S & S T R AT E G I E S
WEAPONS
Remember a head shot with the bow is a silent kill. If it takes more than one arrow to kill an enemy he will possibly alert others. While in first person bow view, wait for the ≈ icon to stop flashing. This signifies your arrow will be a clean kill. You will have to adjust your aim with great care for this to happen.
The spell however was dark and powerful, and not easily destroyed. So instead it was hidden away
in a place where none would find it. Scattered about the world in six separate locations, six different families entrusted with its safekeeping.
But men are mortal, and time can be the enemy of fear. All too soon we forget how the bee will sting and the fire will burn.
As time passed the families forgot what these marks were for, mankind dismissed the ancient warnings about these words of power. They were merely stories; tales from a long passed time.
But the denizens of the world of darkness knew nothing of time, with infinite patience they waited. Then after a millennia, to their dark joy, the spells were rediscovered….
7
QUICK START
1.Press START at the Title screen.
2.Highlight New by pressing the Directional button or Left analog stick µ/≤ and pressing the ≈ button.
3.Select a slot to save new game in by pressing the Directional button or Left analog stick ∫/ñ.
4.Press the ≈ button to begin the game.
5.After the Introduction movie Rau will begin at the Inn.
6.Talk to Rongo the Innkeeper.
7.Press the ç button to speak to him.
8.Rongo will give you a quest.
9.Exit the Inn by moving to
the front door and pressing the ç button.
T I P S & S T R AT E G I E S
Stealth
•Stealth (when all weapons are put away) is the only time that Rau can move silently around the world.
•Flock of birds as a threat: Watch out for flocks of birds that could be disturbed by you when walking near them, as they will attract attention to your location.
8
GETTING STARTED
New Game
1.Press START at the Title screen.
2.Highlight New by pressing
the Directional button or Left analog stick µ/≤ and pressing the ≈ button.
3.Select a slot to save new game in by pressing the
Directional button or Left analog stick ∫/ñ.
4.Press the ≈ button to begin the game.
T I P S & S T R AT E G I E S
WEAPONS
Getting out of trouble: If you are attacked while using the bow, assign targets as you would with any other weapon. Pressing the corresponding button will auto-aim and shoot at the target. You can fire arrows quickly using this style of attack, but be warned your targets will take multiple arrows before being killed, and will not die silently.
Load Game
If you have saved The Mark of Kri games:
1.Press START at the Title screen.
2.Highlight Load by pressing the
Directional button or
Left analog stick µ/≤ and pressing the ≈ button.
3.Select a game to load by pressing
the Directional
button or Left analog stick ∫/ñ.
4.Press the ≈ button to continue the game or choose to see the Sage to quickly access rewards and cheats.
Delete Game
If you have saved The Mark of Kri games:
1.Press START at the Title screen.
2.Highlight Delete by pressing the Directional button or Left analog stick µ/≤ and pressing the ≈ button.
3.Select a game to delete by pressing the Directional button or Left analog stick ∫/ñ.
4.Press the ≈ button to delete the game.
9
WELCOME TO THE INN
Moving Around
Use the Directional buttons or
Left analog stick to move Rau.
Talking
To find out what a person has to say, walk up to them and press the ç button to let the
person tell his or her story. Some may not feel like talking just yet.
Beginning a Quest
All of Rau’s adventures will begin at the Inn. In order to begin a quest, Rau must strike up a conversation with one of the Inn patrons. Each will have a story to tell that implores Rau to take action with his warrior skills. Upon completion of a task, those you assisted will show their appreciation with weapons, gold or valuable information.
Training
Each one of Rau’s missions will demand a new set of skills. It is vital that he train with his adopted father, Baumusu. With the help of some willing dummies, Baumusu will school you in the fine points of attack and defense. Each training session will be customized to a specific type of fighting including weapon attacks and attack combos, stealth, ambush and ways to use the bird Kuzo. To receive training, walk up to Baumusu at the Inn and press the
ç button to talk to him. When he asks if you want to train, select YES. When you are finished training, go to the door of the Inn and press the ç button or choose “Return to Inn” from the Pause Menu.
10
PLAYING
THE GAME
Rau will embark on various quests to rid the land of the barbarians and thieves that have come to power in this lawless realm.
Moving Around
•Press the Directional buttons or Left analog stick to move Rau.
•If you want Rau to
climb up a ladder or hoist himself up on a ledge, walk him close to where he will climb. He will put away his
weapon (if holding one) and begin climbing. Use the Directional button or Left analog stick µ/≤ to move
Rau up and down on a ladder.
KUZO
Kuzo is a magical, ancient bird who has been a friend to Rau’s family since before his birth. Now, Kuzo acts as Rau’s spirit guide.
Scouting Danger
Kuzo can fly ahead or into places that Rau cannot access. Rau can then view everything from Kuzo's position. Take special notice of icons above enemy heads such as arrows, horns or armor. Use the information from Kuzo's view to devise attack strategies or figure out how to navigate seemingly impassible obstructions.
To send Kuzo to a perch, find a Perch Icon and center your vision on it. The Icon will begin to spin. Press the R2 button and Kuzo will fly to the perch. While in flight Kuzo can be accelerated to his perch by pressing the ç button.
11
It is helpful to hold the L1 button while looking around to spot perches above. Then while still holding L1, press L2 to send Kuzo.
•Use the Directional button or Left analog stick to scan around Kuzo’s surroundings. To switch back and
forth between views, press the ç button.
•To send Kuzo to another perch center the next Perch Icon in Kuzo’s field of vision and press the L2 button. Kuzo will reposition himself on the new perch.
•To bring Kuzo back to Rau, press the R2 button when no perch is in the center of either Rau’s or Kuzo’ vision.
Performing Tasks with Kuzo
Kuzo can also perform tasks for Rau.
•If a switch or device is situated below a Perch Icon, Kuzo will activate it when he lands on it.
•If a Save Scroll is next to a Perch Icon, Kuzo will retrieve it.
1st Person Camera
At any time during the game the player can look around by pressing and holding L1 and using the Left analog stick or Directional buttons. When the button is released the camera will return to the original 3rd person view.
End of Level
When Rau stands victorious against all forces in a level, a ring of fire appears. Walk Rau into the ring of fire and he will complete the mission at hand.
12
THE COMBAT SYSTEM
Focus Beam
Point or sweep the Right analog stick in the direction of the enemy or enemies you wish to attack. A beam of light will extend from Rau and when touching an enemy, an Attack Icon will be assigned. While carrying the Broadsword, the focus beam is narrow and allows Rau to focus on three enemies at a time. The Taiaha has a broader beam, allowing Rau to focus on up to six enemies at a time. The Broad Axe allows Rau to lock up to nine enemies at a time. To break focus, press in on the Right analog stick R3, using it as a button.
T I P S & S T R AT E G I E S
MELEE COMBAT
Shocking enemies with your skills: Some well-executed kills will shock the opposition, causing them to back away in fear. This temporary retreat can be used
to your advantage if you want to switch weapons or reassign your targets.
Attack Icons
Sweep the Right analog stick to focus on enemies. The first locked enemy or enemies will always carry the ≈ Icon, followed by the √ icon, then the Ω icon.
13
Moving in Combat
Rau will automatically face and center his motion around the first enemy locked. When Rau faces a new locked enemy, his motion will be centered around the new enemy.
Health Meter
The semi-circle at Rau’s feet or the enemy’s feet represents health and health capacity. You can judge the health of Rau or the enemy by the color of the Health Meter.
•On Rau, the Health Meter appears when he is injured, when R2 is held or pressed, or briefly after resuming the game from Pause. The Health Meter can be set to “always on” via the Pause Menu.
•On an enemy, the Health Meter appears when Rau scores a hit.
The Health Meter color codes are:
•Green – Healthy and uninjured
•Yellow – Moderate damage
•Red – Heavy damage and dangerously close to falling in battle
Basic Attack
To attack one enemy:
1.Use the Right analog stick to pass the Focus Beam
over an enemy. When Rau is focused an ≈ Attack
Icon will appear over the enemy’s head.
2.Press the ≈ button.
 Loading...