


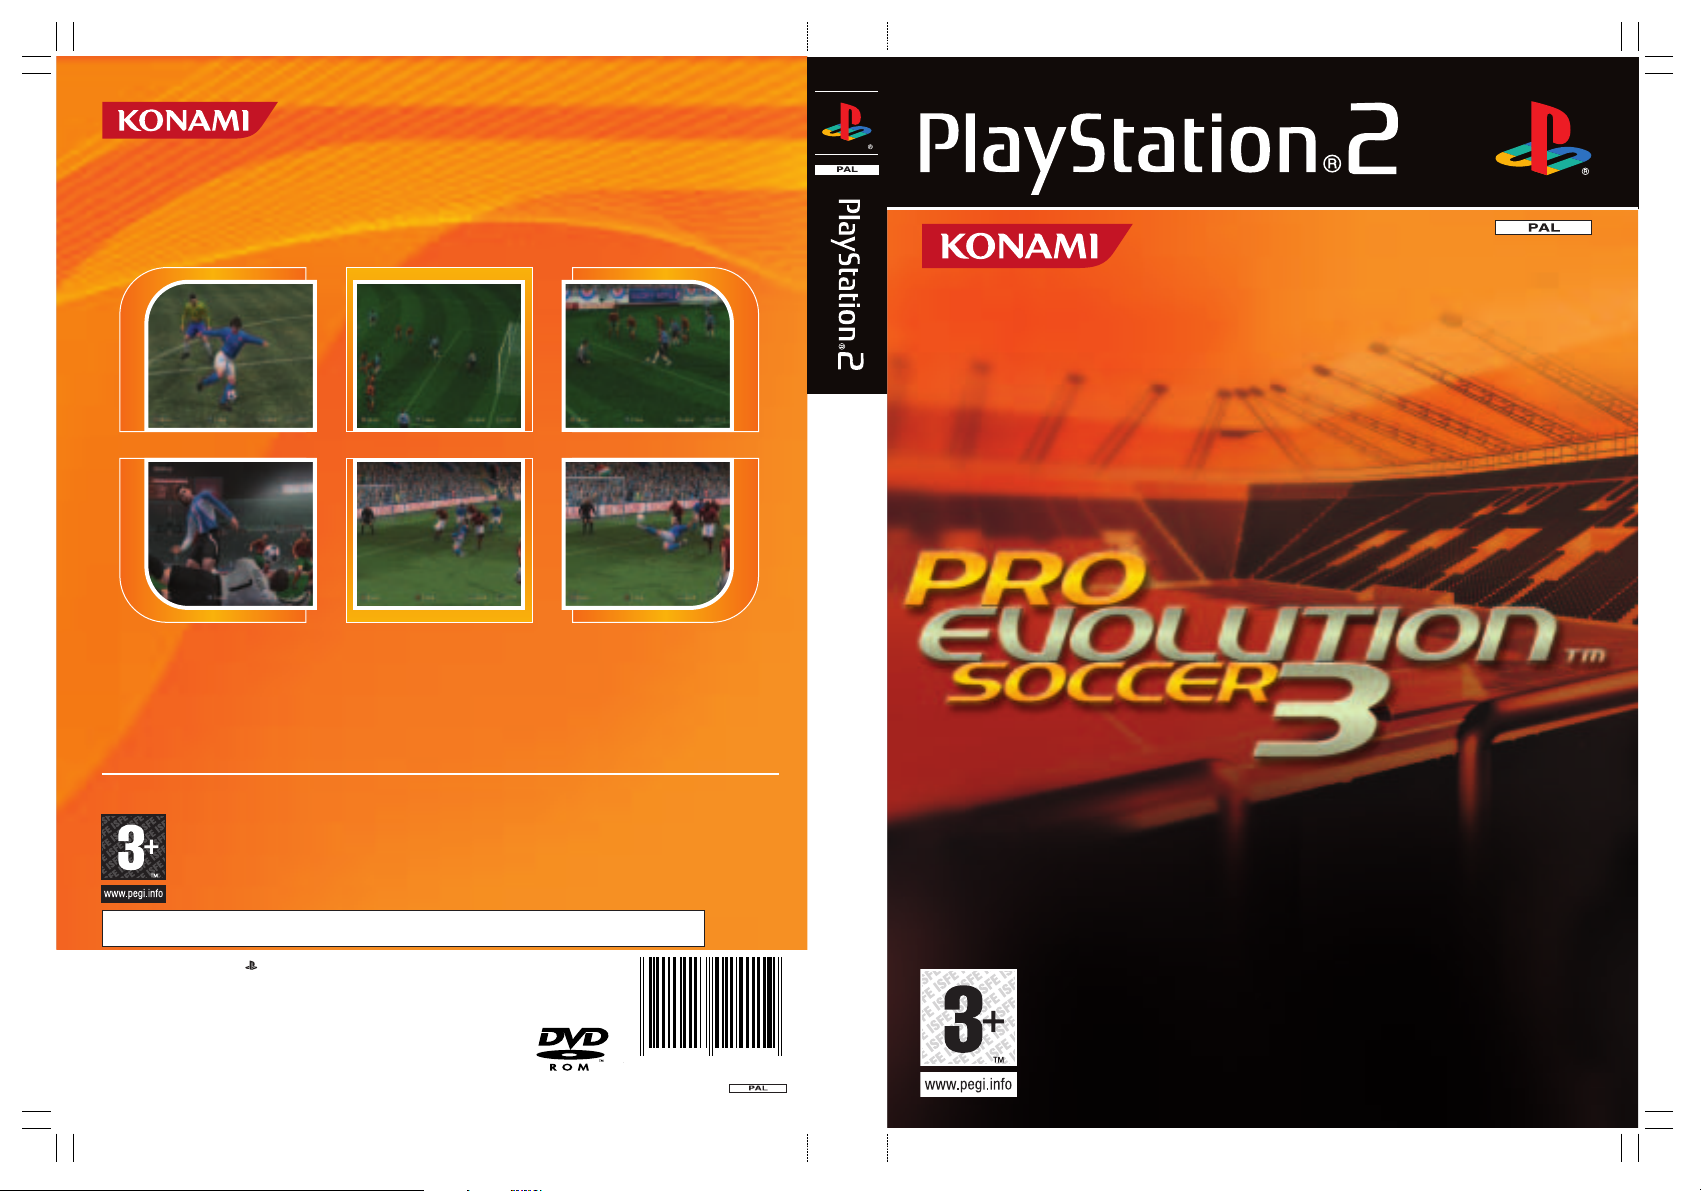
PRO EVOLUTION SOCCER 3
This software is only compatible with the PlayStation®2 computer entertainment system and
4 01 292 7 02 4 1 1 9
" " and "PlayStation" are registered trademarks of Sony Computer Entertainment Inc. All Rights Reserved.
Made in Austria. Pro evolution Soccer 3™ © 2003 KONAMI CORPORATION. Library programmes © 1997-2003
Sony Computer Entertainment Inc. exclusively licensed to Sony Computer Entertainment Europe.
FOR HOME USE ONLY. Unauthorised copying, adaptation, rental, lending, distribution, extraction, re-sale, arcade
use, charging for use, broadcast, public performance and internet, cable or any telecommunications transmission,
access or use of this product or any trademark or copyright work that forms part of this product are prohibited.
Published by Konami of Europe GmbH. Developed by Konami Computer
Entertainment Tokyo.
1 or 2 Player • Memory Card (8MB) (for PlayStation®2) : 1195KB minimum • multitap (for PlayStation®2) adaptable: 1-5 Players (6-8 Players = second multitap required)
Analog Control Compatible: all buttons
SLES
51912
7024119
Pro Evolution Soccer 3
™
Developed by Konami Computer Entertainment Tokyo.
Producer: "Seabass" Takatsuka
©2003 Konami
www.konami-europe.com
A NEW SEASON STARTS!
REAL FOOTBALL IS BACK!
REAL FOOTBALL IS BACK!
A NEW SEASON STARTS!
© 2001 KFA
©1996 JAPAN FOOTBALL ASSOCIATION ©2002 JFA. MAX
adidas, the adidas logo and the 3-Stripe trade mark are registered trade marks of the adidas-Salomon group, used with permission.
the use of real player names and likenesses is authorised by FIFPro and its member associations.
Milan's trademarks, name and logo appear under license from Milan A.C. S.p.A.. Official product manufactured and
distributed by KONAMI under licence granted by Roma International Football Service S.r.l.. Produced under the license from
Lazio Societa Sportiva S.p.A.. Parma and Parma Logo are trademarks of Parma Associazione Calcio S.p.A.. Official
Juventus Product JUVENTUS and the JUVENTUS logo are registered trademarks owned by Juventus F.C. S.p.A..
©1993/all rights reserved Stichting Feyenoord, Rotterdam. Licensed by: Stichting Feyenoord, Rotterdam.
UNITED KINGDOM
London Office,
Jubilee House,
7/9 The Oaks, Ruislip,
Middlesex, HA4 7LF
FRANCE
Paris Office,
23, Rue Cambon,
75001 Paris
DEUTSCHLAND
Konami Of Europe GmbH,
Berner Strasse 103-105,
60437 Frankfurt/Main
ESPAÑA
Madrid Office,
Orense 34-9a
28020 Madrid
NEDERLAND
Konami Of Europe GmbH,
Burglaan 41
7314 BK Apeldoorn
SVERIGE
Scandinavian Office,
Langholmgatan 1b
11733 Stockholm
www.konami-europe.com
Need help with Pro Evolution Soccer 3? Konami UK Hotline Number: 09067 53 50 70
Calls cost 75p per minute. Please obtain bill payer's permission before calling. Over 16’s only.
“”,
“PlayStation”, “Ǹ˛◊” and “DUALSHOCK” are registered trademarks of Sony Computer Entertainment Inc. All Rights Reserved.
4012927024119
SLES-51912
Precautions
•
This disc contains software for the PlayStation®2 computer entertainment system. Never use this disc on any other system,as it could
damage it.
•
This disc conforms to PlayStation®2 specifications for the PAL market only. It cannot be used on other
specification versions of PlayStation®2.
•
Read the PlayStation®2 Instruction Manual carefully to ensure correct usage.
•
When
inserting this disc in the PlayStation®2 always place it with the required playback side facing down.
•
When handling the disc, do not
touch the surface. Hold it by the edge.
•
Keep the disc clean and free of scratches. Should the surface become dirty, wipe it
gently with a soft dry cloth.
•
Do not leave the disc near heat sources or in direct sunlight or excessive moisture.
•
Do not use an
irregularly shaped disc, a cracked or warped disc,or one that has been repaired with adhesives, as it could lead to malfunction.
Pro Evolution Soccer 3 © 2003 KONAMI CORPORATION.
Library programmes © 1997-2003 Sony Computer Entertainment Inc. exclusively licensed to Sony Computer Entertainment Europe. FOR HOME USE ONLY. Unauthorised copying,
adaptation, rental, lending, distribution, extraction, re-sale, arcade use, charging for use, broadcast, public performance and internet, cable or any telecommunications transmission, access
or use of this product or any trademark or copyright work that forms part of this product are prohibited. Published by Konami of Europe GmbH. Developed by Konami Computer
Entertainment Tokyo.
Health Warning
For your health, be sure to take a break of about 15 minutes during every hour of play. Avoid playing when tired or suffering from lack
of sleep. Always play in a well-lit room, sitting as far from the screen as the cord will allow. Some people experience epileptic seizures
when viewing flashing lights or patterns in our daily environment. These people may experience seizures while watching TV pictures or
playing video games. Even players who have never had any seizures may nonetheless have an undetected epileptic condition. Consult
your doctor before playing video games if you have an epileptic condition or immediately should you experience any of the following
symptoms during play: dizziness, altered vision,muscle twitching, other involuntary movements, loss of awareness of your surroundings,
mental confusion, and / or convulsions.
See back page of this manual for Customer Service Numbers.
PIRACY
The unauthorised reproduction of all or any game part of this product and the unauthorised use of registered trademarks are likely to
constitute a criminal offence. PIRACY harms Consumers as well as legitimate Developers, Publishers and Retailers. If you suspect this
game product is an unauthorised copy, or have any other information about pirate product, please call your local Customer Service
number given at the back of this Manual.
SLES-51912
1 or 2 Player • Memory Card (8MB) (for PlayStation®2) : 1195KB minimum
multitap (for PlayStation®2) adaptable: 1-5 Players (6-8 Players = second multitap required) • Analog Control Compatible: all buttons
Thank you for purchasing Pro Evolution Soccer 3 from Konami.
Please read this manual thoroughly before playing the game.
Also, please keep this manual in a safe place so you can refer to it easily later.
(Note: Konami does not re-issue manuals.)
Konami is continuously striving to improve its products. As a result this product may differ slightly from
another depending on the Purchase date.
Pro Evolution Soccer 3 is an original game product created by KONAMI CORPORATION and Konami
Computer Entertainment Tokyo, Inc. The parties reserve, jointly or individually, the copyrights and other
intellectual property rights with respect to this game product.
Quick Start
Quick Formation
The Rules of Play
Basic Rules
Multi-Play
Game Controls
Game Controls during Matches
Just Remember This!
Game Modes
Starting the Game
Selecting Game Modes and Player
Modes
Game Mode Descriptions and Settings
Match Mode
League Mode
Cup Mode
Master League Mode
Training Mode
Edit Mode
Game Options
Continuing a Game
Game Setup
general Settings
Match Setup
Screen Layout during Matches
Game
Save
Saving the game to a memory card
(8MB) (for PlayStation® 2)
03
04
05
07
08
08
15
15
16
17
19
20
22
27
29
33
35
36
36
36
43
46
CONTENTS
PES3_Man Guts_uk.qxd 2/9/03 12:27 pm Page 2
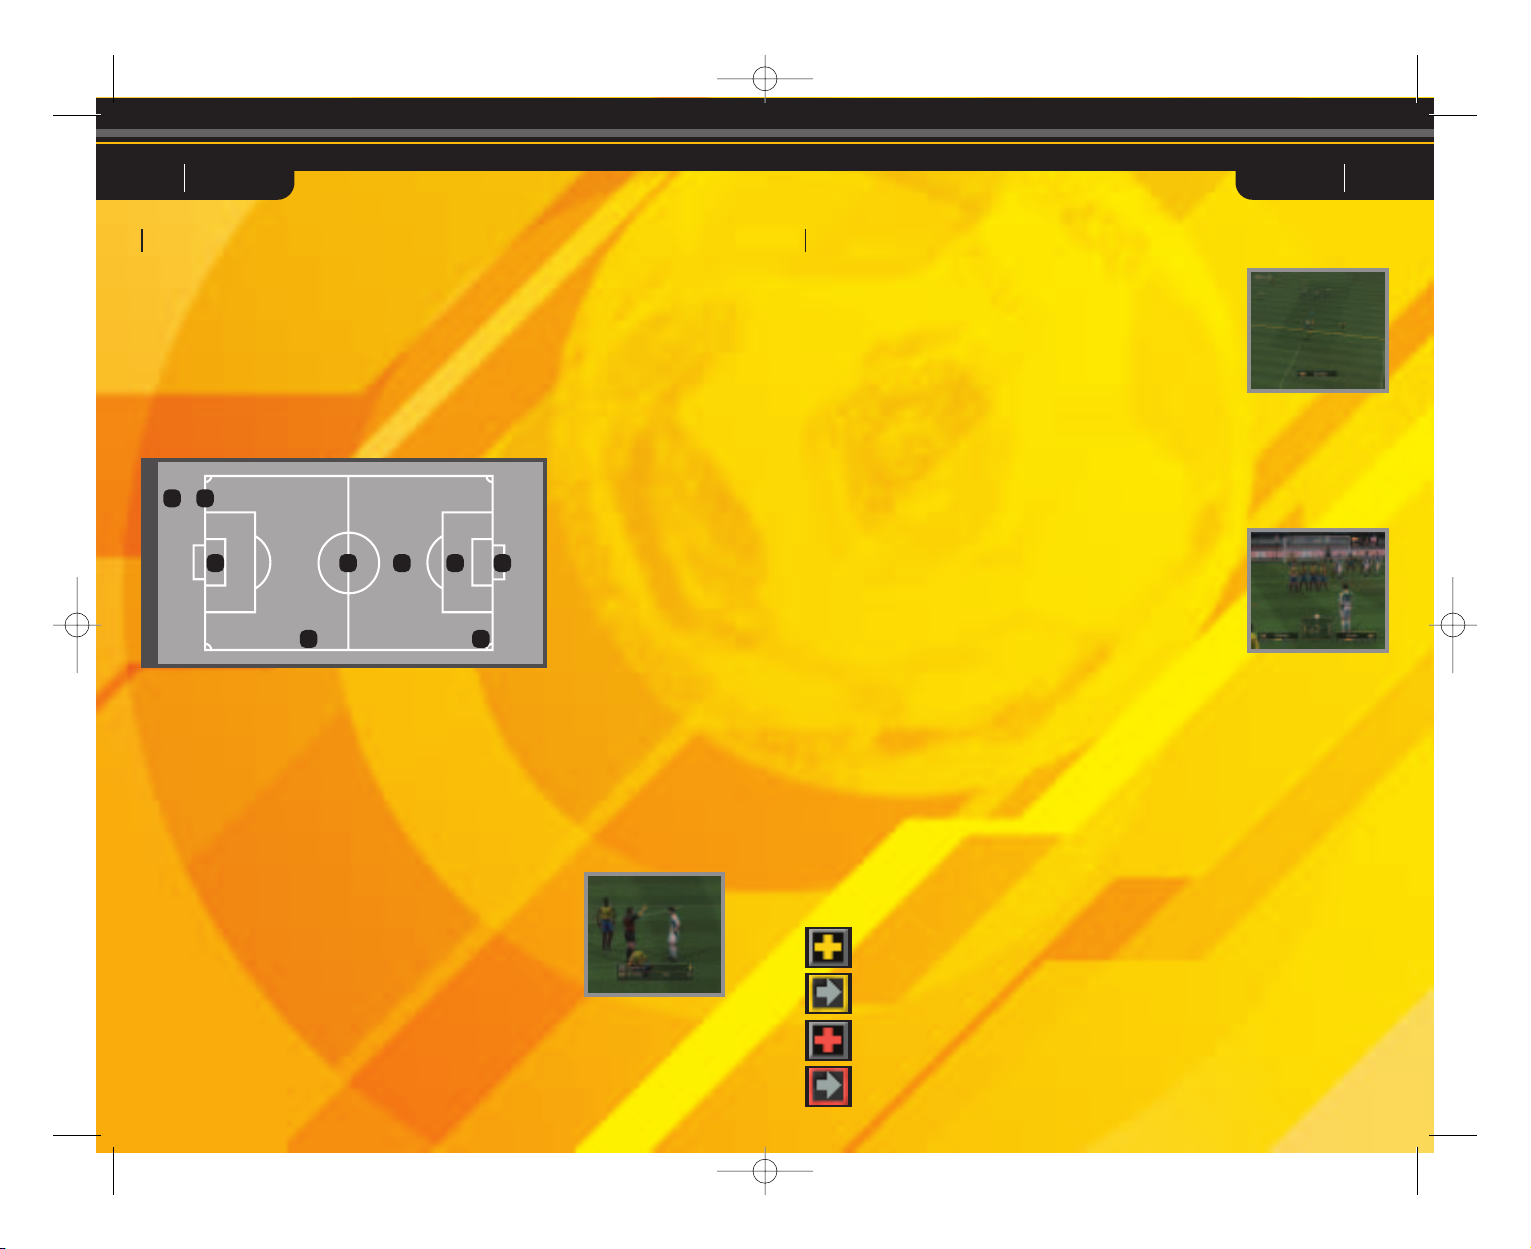
Select this option to quickly and easily
choose a formation. Open “Formation
Settings” from the Setup screen or the
Pause menu and choose “Quick
Settings”. Selecting an option from this
screen will automatically set the
formation to one of the following types.
Balanced
The team’s normal setting. A well-
balanced formation overall.
Defensive
The team will focus primarily on defense.
Effective when the important thing is to
not concede goals.
Attack
The team will sacrifice defense in favour
of attack. Useful when the team is behind
and needs to score at all costs.
Counterattack
The team will focus on scoring off
defense using counterattacks. Effective
when the team is up against a tough
opponent.
Side Attack
The team will attempt to attack from the
sides. Effective when there are strong
players on the wings.
Centre Drive
The team will attempt to attack by driving
through the centre. Effective when the
opponent’s centre is vulnerable.
Forward Pressure
The team will apply pressure aggressively
at the front and try to steal the ball from
the opposing defenders. This tactic can
be used to score on a counterattack after
stealing the ball.
03 PES3 PES304
Starting a Match
The steps are the same for 1-Player Quick Start and 2-Player Quick Start.
1 Team Select
Select the teams to use in the match.
2 Strip Select
Select the strip.
3 Setup
Choose the settings for the match. Except for the entrance scene, these settings can
also be changed at any time during the game.
Formation Settings Edit formations and team rosters and change strategies.
Button configuration Change the controller button assignments to be used
during the match.
Entrance Scene Choose whether or not to display the opening sequence.
Sound Settings Adjust the sound environment.
Camera Type Select the camera type.
4 Match Start
Start the match.
Select this option to skip the settings
and go straight to the game.
P1 Quick Start
Start a player-versus-computer match.
P2 Quick Start
Start a player-versus-player match.
Quick Start
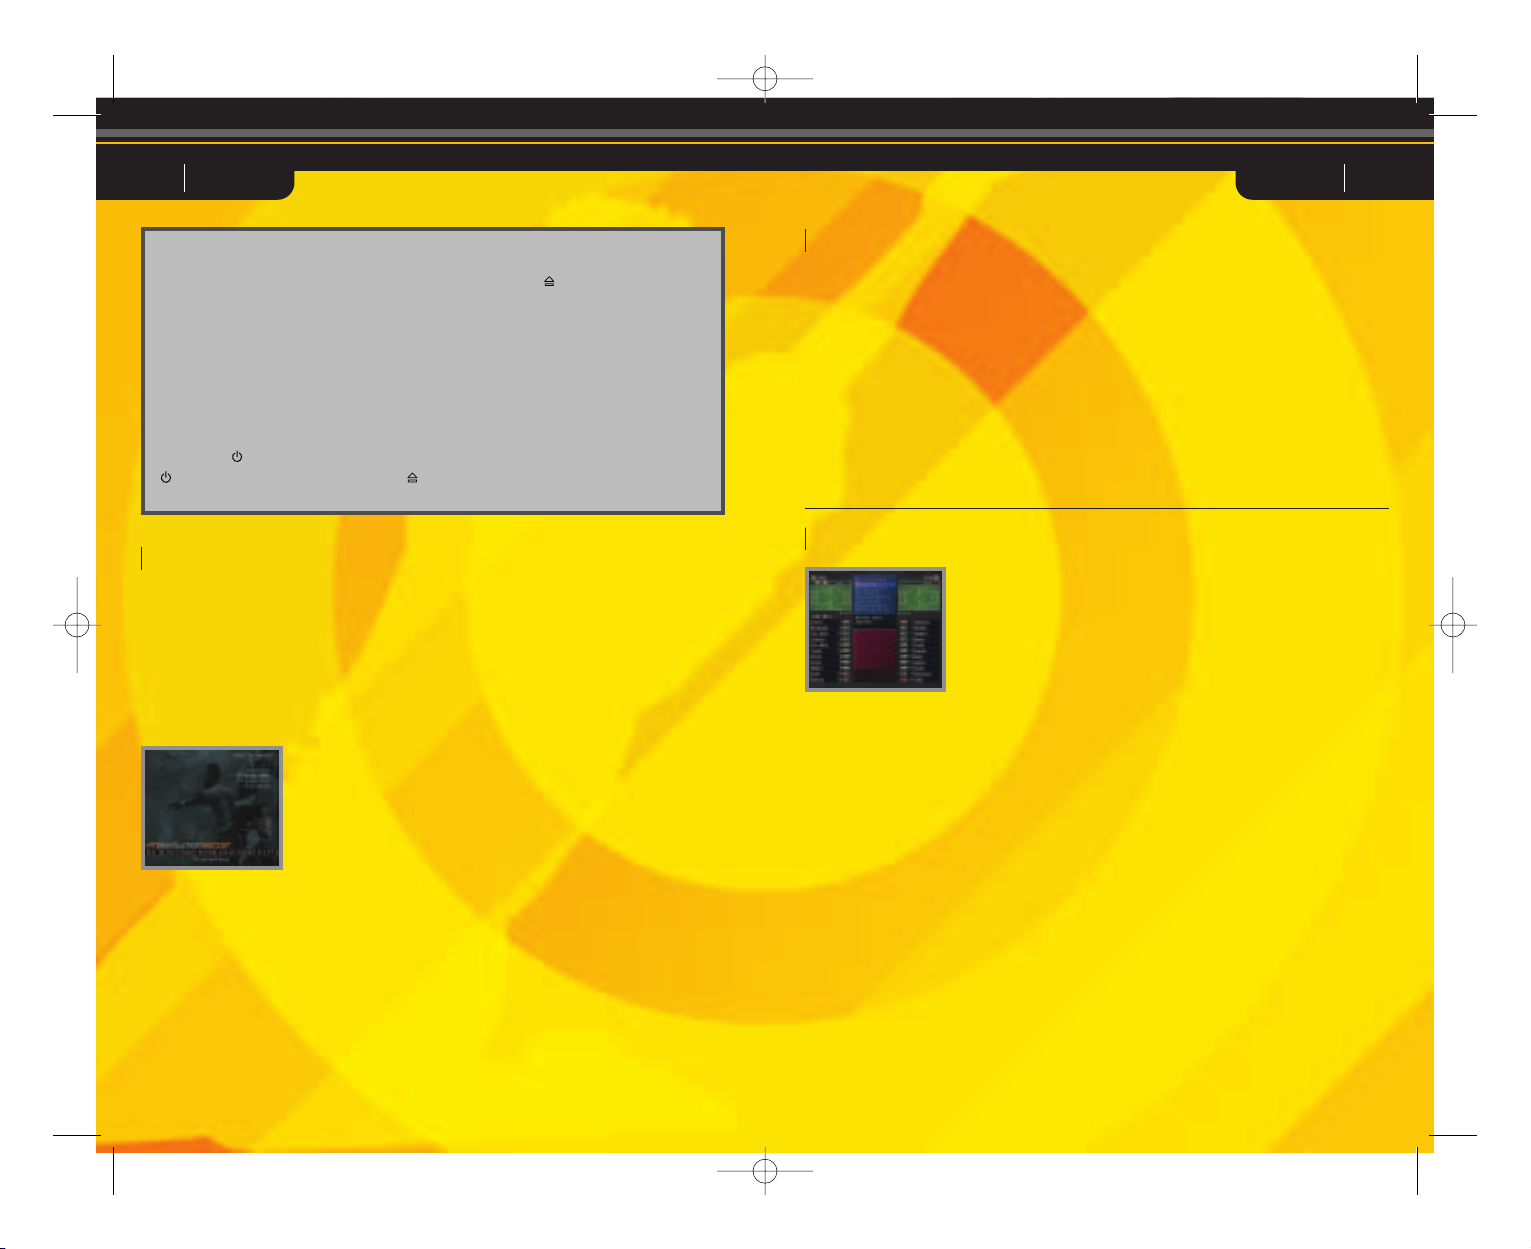
Quick Setting
Set up your PlayStation®2 computer
entertainment system according to the
instructions in its instruction manual.
Attach game controllers and other
accessories, as appropriate.
It is advised that you do not insert or
remove accessories once the power is
on.
Make sure the MAIN POWER switch
(located at the back of the console) is
turned ON.
Press the /RESET button. When the
indicator is green, press the
button. The disc tray opens.
Place the Pro Evolution Soccer 3 disc on
the disc tray with the label side facing
up. Press the button again and the
disc tray closes.
Follow on-screen instructions and refer
to this manual for information on using
the software.
Make sure there is enough free space on
your memory card (8MB) (for
PlayStation®2) before commencing play.
LANGUAGE SELECT SCREEN
Before the main title screen appears you will be asked to select
which language you would like to play the game in.
50Hz/60Hz Mode
When you boot up Pro Evolution Soccer 3, you have to choose between 50Hz or 60Hz
mode. Use the Test screen to check your TV configuration.
Quick Start
PES3_Man Guts_uk.qxd 2/9/03 12:27 pm Page 4
05 PES3 PES306
Match Time
The playing time for each match can be set to 5, 10, 15, 20, 25 or 30 minutes. Match
times can be changed using the Environment Settings in each game mode.
Extra Time
Golden goal/silver goal extra time and penalty shootouts are available depending on
the Game Mode. It is possible to enable/disable extra time, golden goal/silver goal
extra time, and penalty shootouts for Exhibition Matches.
Basic Rules
Game rules are the same as normal
football rules.
Field Terminology
1 Field (pitch and the surrounding area)
2 Centre Circle
3 Touch Line
4 Goal Line (End Line)
5 Goal Area
6 Goal
7 Corner Area
8 Pitch
9 Penalty Area
Offside
An offside is called when an attacking player is closer to the
opponent's goal line than the defense line of the opposing team
at the moment the ball is passed. A free kick is awarded to the
opposing team.
Maximum number of substitutions
For Exhibition and Superstar XI matches, you can select from
three to seven substitute players for a match. For Cup matches
and League matches, the maximum number of players that you
can change will be three. In the Master League, you may have
three substitutes for regular matches, but for pre-season
matches, the maximum is seven.
Out of Play
“Out of play” refers to times when the game is stopped after the
ball has gone into touch or after a foul. Player substitutions
made while the match is in progress will take place when the
ball is next out of play.
Injury
By altering the settings it is possible to determine whether or
not players receive injuries from sliding tackles or other
aggressive play. Injuries can be slight or serious and are
indicated on the screen by yellow and red crosses respectively.
Players with slight injuries may continue to play in the match,
but their performance levels will be conspicuously reduced.
Players with serious injuries will not be allowed to continue in
the match and are sent off the pitch immediately. In League,
Cup and Masters League tournaments, slight injuries may take
several matches to heal properly. A “recovering” icon may be
displayed after a player has healed from a slight or serious
injury. A player with this icon, although no longer injured, is still
not yet at full strength and continues to suffer under a slight
reduction in abilities.
The Rules of Play The Rules of Play
Yellow Cards/Red Cards
Players issued two yellow cards during the same match will be
sent off. Players issued a red card will be sent off immediately.
Players who accumulate a total of two or more yellow cards or
one red card cannot play in the next match.
Forfeited Game
If the number of eligible players on a team drops below seven
before or during a match, that match will be forfeited.
3
2
7
9
4
5
6
8
1
Light Injury
Light Injury
just recovered
Heavy Injury
Heavy Injury
just recovered
PES3_Man Guts_uk.qxd 2/9/03 12:27 pm Page 6
07 PES3 PES308
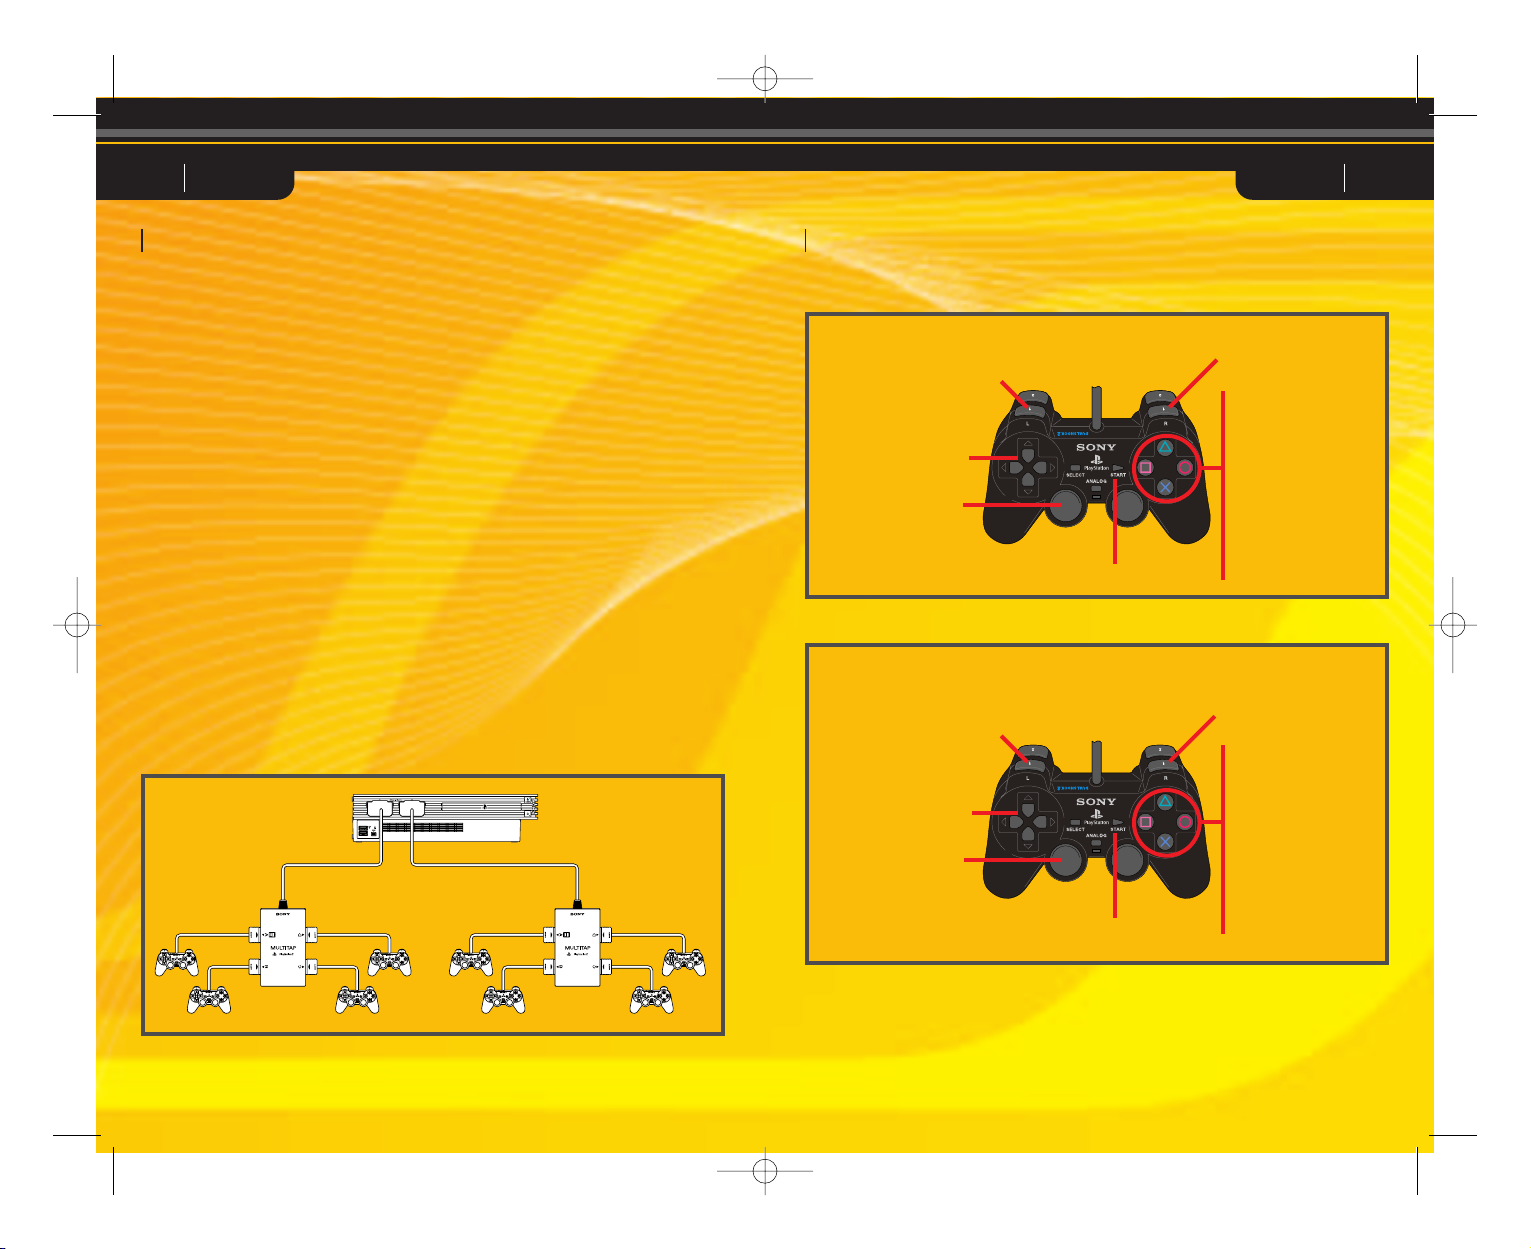
Multi-play
Competitive or co-operative multi-play is possible using additional controllers (sold
separately) and multitaps (for PlayStation®2) (sold separately). Connecting a multitap
(for PlayStation®2) to controller port 1 or controller port 2 makes it possible to attach
controllers to controller ports 1-A, 1-B, 1-C, 1-D and controller ports 2-A, 2-B, 2-C, and
2-D, enabling a maximum of eight people to play simultaneously.
The multitap (for PlayStation®2) is connected to controller port 1 and/or controller port
2 on the console.
Items Necessary
2 players: 2 controllers
3 to 5 players: 1 controller per player and one multitap
(for PlayStation®2) (sold separately)
6 to 8 players: 1 controller per player and two multitaps
( for PlayStation®2) (sold separately)
Precautions When Using the Multitap (for PlayStation™2)
When connecting the multitap (for PlayStation®2), always insert a controller into
controller port 1-A or 2-A before inserting the remaining controllers into controller ports
1-B, 1-C, 1-D, or 2-B, 2-C, and 2-D. inserting
Controller port 1-A (2-A)
Controller port 1-B (2-B)
Controller port 1-D (2-D)
Controller port 1-C (2-C)
Just remember this! Analog Controller (DUALSHOCK®2)
Attack! Basic Attacking Controls
Multi - Play Game Controls During Matches
L1 button/
Switch between players
Directional button/
Move
Left analog stick/
Move
ç button/
Through ball
Ω button/
Centring/Long pass
≈ button/
Short pass
√ button/
Shoot
R1 button/ Dash
START button/Pause
Defend! Basic Defense Controls
L1 button/
Switch between players
Directional button/
Move
Left analog stick/
Move
ç button
(hold down)/
Goalkeeper
Ω button/
Sliding tackle
≈ button/
Apply pressure
√ button
(hold down)/
Clearance/Pressure 2
R1 button/ Dash
START button/Pause
PES3_Man Guts_uk.qxd 2/9/03 12:27 pm Page 8

09 PES3 PES310
* The R3 button is pressed by pushing
down on the right analog stick.
Button assignments for the analog
controller (DUALSHOCK®) are the same
as above.
The basic function of each button is
the same as for the analog controller
(DUALSHOCK®2).
* The left and right analog sticks and the
R3 button are not supported.
This game does not fully support a
digital controller.
Analog controller (DUALSHOCK®2)
L2 button
L1 button
Directional button
Left analog stick
ç button
Ω button
≈ button
√ button
Right analog stick
(R3 button)
R2 button
R1 button
START
button
Game Controls/Attack Game Controls/Attack
Mode indicator/
ANALOG mode button
Passing
Short pass: Press the ≈ button to make
a pass in the direction the directional
button is being held.
Heel pass: Press the directional button in
the opposite direction to that in which the
player’s body is facing, and then
immediately press the ≈ button to
execute a heel pass.
Direct short pass: Press the ≈ button
immediately before trapping the ball to
execute a direct short pass in the
direction the directional button is being
held.
Long Passes
Long pass: Press the Ω button to send a
pass in the direction that the directional
button is being held. The length of the
pass depends on the length of time the Ω
button is held.
Direct long pass: Press the Ω button
immediately before trapping the ball to
send a long pass in the direction that the
directional button is being held. The
length of the pass depends on the length
of time the Ω button is held.
Change sides: Send a long pass to the
opposite wing by holding the directional
button in the desired direction and
pressing the Ω button. The length of the
pass depends on the length of time the Ω
button is held.
Through ball
Through ball: Press the ç button to
make a pass in the direction you are
selecting with the directional button.
Direct through ball: Press the ç button
immediately before trapping the ball to
send a through ball in the direction that
the directional button is being pressed.
Fly Thru pass: While holding L1, press
the ç button to send a chipped through
ball in the direction that the directional
button is being pressed.
One-two passes
One-two pass: Hold down the L1 button
and press the ≈ button to make a short
pass, pressing the ç button immediately
before your team mate receives the ball to
execute a return pass.
One-two pass in the air: Press the ≈
button while holding down the L1 button
to execute a short pass, and then press
the Ω button immediately before the
player traps the ball to execute a return
pass.
Pass and go: Press the R2 button
immediately after passing the ball to
make the player who passed the ball
sprint forward.
Manual passes
Manual pass: Push the right analog stick
in the desired direction and then press the
R3 button to execute the pass. The
strength of the pass is determined by how
long the R3 button is held down.
Manual long pass: While holding down
the L1 button, push the right analog stick
in the desired direction and then press the
R3 button to execute the pass. The
strength of the pass is determined by how
long the R3 button is held down.
Dribbling
Dribble: Press the directional button
when the ball is at your feet.
Jump: When an opponent executes a
sliding tackle, press the R2 button.
Stop the ball: Release the directional
button and press the R1 button to stop
the ball’s movement when dribbling.
Turn and Kick: When changing
directions, press the R2 button to kick the
ball a long distance.
Dash Dribble
Dash Dribble: Press the R1 button while
dribbling.
Super high-speed dribble: When
dribbling, hold down the R1 button and
press the directional button twice, and
again a third time.
High-speed dribble: Press the R2 button
while dribbling. This technique is slower
than the dash dribble, but allows for
better ball control.
Low-speed dribble: Let go of the
directional button while dribbling. When
executing a low-speed dribble, press and
hold the L1 button to maintain the dribble
and use the directional button to change
the direction of the dribble.
PES3_Man Guts_uk.qxd 2/9/03 12:27 pm Page 10

11 PES3 PES312
Centring
Centre to the far side: Press the Ω
button once. When there are two or more
players waiting for a cross, the player
further away will receive the cross.
Centre to the near side: Press the Ω
button twice. When there are two or more
players waiting for the cross, the closest
player will receive the cross.
Centre along the ground: Press the Ω
button three times.
High trajectory: Press the R2 button
when centring the ball to increase the
height of the cross.
Early cross: Hold down the L1 button
and press the ≈ button to execute an
early cross. You can make a cross
anywhere on the field, not only in the
opponent’s half.
Shooting
Shoot: Press the √ button to shoot. The
height of the shot depends on the length
of time the button is held. While the
gauge is displayed, press left/right on the
directional button to alter the direction of
the ball.
Direct shot: Press the √ button with the
ball in the appropriate place to execute
heading shots/volley/shots.
Lob shot
Lob shot: Hold down the L1 button and
press the √ button to fire a shot over the
goalkeeper’s head.
Lob shot 2: Hit a low lob shot by pressing
the √ button and then pressing the R1
button while the gauge is displayed.
Feints
Step over dummy 1: Press the right
analog stick twice in the direction of
movement.
Step over dummy 2: Press the L1 button
twice.
Step over dummy 3: Press the R2 button
twice.
Kick feint 1: Press the right analog stick
twice to the side of the direction of
movement.
Kick feint 2: Press the √ button, and
while the gauge is being displayed, press
the ≈ button to execute a kick feint. For
best results, press the √ and ≈ buttons
at nearly the same time.
Kick feint 3: Press the Ω button, and
while the gauge is being displayed, press
the ≈ button.
Kick feint 4: Go through the motions for
a centring cross, and just before the ball
is kicked, press the ≈ button.
Through feint
Through feint: Just before the ball is
trapped, press and hold the R1 button
without pressing the directional buttons
to step over the ball and allow it to
continue to another player.
Game Controls/Attack Game Controls/Defense
Common Controls Attack/Defense
Dash: Press the R1 button while running.
Super Cancel: Press the R1 and R2 buttons while a player is chasing after the ball to force the
player to stop.
When ball is in the air: When the ball is in the air, press the R2 button + the directional button to
control the player.
Switching between players: Press the L1 button.
Activate/cancel strategies (when in Manual Mode)
L2 button + Ω button: Activate/cancel strategies set for the Ω button.
L2 button + ≈ button: Activate/cancel strategies set for the ≈ button.
L2 button + ç button: Activate/cancel strategies set for the ç button.
L2 button + √ button: Activate/cancel strategies set for the √ button.
Activate/cancel strategies (when in Semi-Auto Mode): Press the L2 button.
Attack/Defense level:
L2 button + R1 button: Move the Attack/Defense Level towards Attack.
L2 button + R2 button: Move the Attack/Defense Level towards Defense.
ANALOG mode button: Enable/disable the left/right analog sticks analog mode
(indicator : red) / digital mode (indicator : off).
Mode Indicator: analog mode (indicator : red) (does not support controller vibration function).
* The Tutorial in Training Mode also gives an explanation of game controls.
Game Controls/Defense
Defense
Pressure
Applying pressure: Press the ≈ button when an opponent is in
possession of the ball to move closer to the ball or to extend a leg for
a tackle. Use this together with the R1 button to dash towards the
ball.
Pressure 2: Press the √ button when an opponent is in possession
of the ball to have the team mate closest to the ball (not counting the
player you are controlling) pressure the ball carrier.
Sliding tackle
Sliding tackle: Use the directional button when an opponent is
in possession of the ball to move closer to the ball, and then
press the Ω button to execute a sliding tackle.
Clearance
Clearance: Press the ≈ button when the ball is in your own
team’s possession to execute a long clearing pass forward.
Goalkeeper
Movement
Moving the goalkeeper out of the goalmouth: Press the ç
button when an opposing player has possession of the ball to
make the goalkeeper sprint towards the ball.
Goalkeeper movement: Hold the ç button and press the L1
button until the cursor points to the goalkeeper. Then, press the
directional button in the direction you want the goalkeeper to
move. (Only when the “GK Cursor” option is set to ON.)
Feeds
Drop-kick 1: Ω button (kicks the ball in the direction that the
directional button is being held)
Drop-kick 2: √ button (kicks the ball in the direction that the
directional button is being held)
Throwing: ≈ button (throws the ball to the team mate in the
direction that the directional button is being held)
PES3_Man Guts_uk.qxd 2/9/03 12:27 pm Page 12
13 PES3 PES314
Corner kicks
Corner kick: Ω button (Hold up on the directional button or the
R1 button for a low trajectory and hold the R2 button for a high
trajectory. Hold down on the directional button for a cross along
the ground. Hold left or right on the directional button for a
curling kick.)
Short corner kicks: Press the ≈ button when taking a corner
kick to execute a short pass to a nearby team mate.
Free kicks
Short pass: Press the ≈ button when taking a free kick to
execute a short pass in the direction that the directional button
is being held.
Long pass: Ω button (Hold up on the directional button or the
R1 button for a low trajectory and hold the R2 button for a high
trajectory. Hold down on the directional button to pass along the
ground. Hold left or right on the directional button for a curling
kick.)
Through ball: Press the ç button when taking a free kick to
execute a through ball in the direction that the directional button
is being held.
Throw-ins
Short throw-in: Press the ≈ button during a throw-in to throw
the ball to a nearby team mate.
Long throw-in: Press the Ω button during a throw-in to
execute a long throw in the direction the thrower is facing.
Lead throw-in: Press the ç button during a throw in to throw
the ball in front of a team mate.
Penalties/Penalty Matches
A maximum of six directions each can be selected for the
goalkeeper and the kicker.
Directional button directions: For a diagonal, press left/down
or right/down on the directional button.
Kicker: Press the √ button to kick the ball in the direction the
directional button is being held.
Goalkeeper: Try to guess the location of the shot before it is
kicked and hold down the directional button in the appropriate
direction.
Replays
Play: Ω button
Play (while the button is held down): Directional button ñ
Reverse play (while the button is held down):
Directional button ∫
Fast play/Reverse play: Right analog stick ñ
/Right analog stick ∫
Pause: ç button
Fast forward: Ω button + directional button ñ
Rewind: Ω button + directional button ∫
Advance frame: ç button + directional button ñ
Rewind frame: ç button + directional button ∫
Beginning of replay: ç button + L2 button
End of replay: ç button + R2 button
Change view: ≈ button
Save: √ button
Controls display ON/OFF: SELECT button
End replay: START button
Rotate camera: L1/R1 buttons
Switch players: L2/R2 buttons
Zoom in: Directional button µ
Zoom out: Directional button ≤
Game Controls Game Controls
Free kick shots
Shots: Press the √ button to shoot. The height of the shot is determined by the length
of the gauge. While the gauge is being displayed, press up on the directional button for
a stronger shot or down for a weaker shot. Hold the R1 button and press the √ button
for a slightly stronger kick, or hold the R2 button and press the √ button for a slightly
weaker kick. You can also press left or right on the directional button to curl the shot.
Free kick wall
Free kick wall: When the opposing team is executing a free kick (just as the kicker is
approaching the ball), press and hold the following buttons to control the players in the
defensive wall.
Controls
√ button: Everyone jumps.
≈ button: No one jumps.
Ω button (tap): One or two players break from the wall. Those that remain in the wall
jump.
Ω button (tap) + ≈ button: One or two players break from the wall. Those that
remain in the wall do not jump.
No buttons pressed: Some players jump and some do not jump.
Set PieceSet Piece
PES3_Man Guts_uk.qxd 2/9/03 12:27 pm Page 14
 Loading...