


™
™
™
™
™

For help, advice and great competitions call the UK Hints and Tips line on
09014 747 333
Call costs 60p per minute at all times. Please obtain the bill payer’s permission before calling.

Contents |
|
INSTALLATION ....................................... |
4 |
BACK FOR MORE .................................... |
7 |
NEW WEAPONS ...................................... |
8 |
NEW ENEMIES ....................................... |
9 |
NEW MULTIPLAYER GAME MODES ......... |
11 |
TECHNICAL SUPPORT ............................. |
12 |
LICENSE AGREEMENT............................. |
13 |
3

Minimum System
Requirements
Requires Unreal™ or Unreal Tournament™
CPU : |
P166 MHz |
Memory : |
32 MB RAM |
Available HD Space : |
450 Mo |
Distribution Media Drive : |
CD-ROM ( 4x ) |
Audio System : |
Windows 9x compatible Sound Card |
Video System : |
4 Mb Video Card |
O/S : |
95 / 98 / 98S |
Installation under Windows® 95 or 98
1.Quit all other applications and insert the Unreal™: Return to Na Pali™ CD into your CD-ROM drive.
2.If Windows® 95 is set up to use the CD AutoPlay feature, Unreal: Return to Na Pali will automatically display its installation screen, shortly after you insert the CD. If AutoPlay is disabled, you will need
4

to start the installation manually. To do this, double click on the My Computer icon, then double click on the CD-ROM icon in the window that opens. This will open the first installation window.
3.Follow the instructions in the installation windows to install Unreal: Return to Na Pali on your computer.
The following steps describe each installation window.
4.The first window shows you what languages Unreal: Return to Na Pali can use, as well as links to some informative web sites (you do not need to use the web sites to complete the installation). Select your preferred language and click Next.
5.The next window asks you where on your computer you’d like to install Unreal: Return to Na Pali. The window suggests a default directory (or folder), usually C:/NaPali. If you want to install to a different hard drive and/or directory, simply delete the default hard drive and directory and type in the new location. Click Reset at any time to return to the default hard drive and directory.
The amount of free space available on the chosen directory’s hard drive is displayed at the bottom of the window. You need 100 megabytes of hard drive space available for a minimum install, or 400 megabytes for a full install.
Click Next when you have decided on a hard drive and directory.
6.The next screen presents you with a list of Unreal: Return to Na Pali components which may be installed. You may choose from the following items:
5

•Unreal: Return to Na Pali Game: The Unreal: Return to Na Pali game engine, which requires 100 megabytes of free space. Installation is required.
•Game Content: Select this component to install all game content onto your hard drive, which requires 450 megabytes of free space. Select this for optimal performance. If you deselect this option, the game content will be loaded from CD each time you play, degrading performance.
•Unreal Editor: Installs the editor program that lets you create your own Unreal levels. This component is not necessary to play the game.
•DirectX: Installs Microsoft’s DirectX drivers for optimal rendering performance, audio support and joystick support. This component is optional, but highly recommended if you do not already have it installed.
Click Next when you have decided which components to install.
7.The next screen lets you review your choices. Click Install when you are ready, or click Back to change your choices.
8.After the game has been installed, the Unreal: Return to Na Pali Options window will appear. It is highly recommended that you select and read the Release Notes for important information about Unreal: Return to Na Pali. After reading the release notes, select Play to play Unreal: Return to Na Pali.
6

Back for More
You survived the wreck of the Vortex Rikers and fought your way off Na Pali, only to find yourself trapped in a stranded life pod, waiting to die. You thought anything would be better than a slow suffocation in orbit . . .
until you were rescued and sent back down to the surface.
The salvage mission they assigned you to actually sounded appealing at first . . . a chance for revenge, to return with plenty of weapons, ammo, armor, health packs . . . maybe even some backup. But the expectation of any support was just a dream . . . like your hope for freedom. Your socalled rescuers sent you back to Na Pali with nothing more than your dispersion pistol and a heart full of bitter resentment. Back to where the Brutes, the Titans and the other Skaarj watchdogs would be waiting. Waiting, but not suspecting. Not even their twisted alien logic could predict that the one creature who escaped, the human who took so many lives and so many risks just to leave Na Pali behind would actually return. But you have returned. And so it begins . . . again.
7
New Weapons
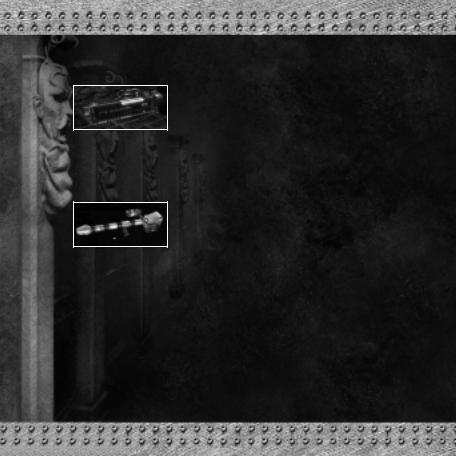
Grenade Launcher
This cumbersome but potent weapon lobs large explosive shells that go off a few seconds after being discharged. The secondary fire ejects a special grenade that detonates when the secondary fire button is hit a second time, or when triggered by another explosion or impact.
Rocket Launcher
The Rocket Launcher is a mediumto long-range destructive device that fires a high-power incendiary missile. The missile explodes on impact and releases a sizeable shockwave. The secondary fire utilizes a responsive missile equipped with a remote guidance system that follows directions indicated by the launcher. For example, move the weapon to the left after deploying the secondary fire, and the missile will veer left. This remote control feature remains active until the missile explodes.
8
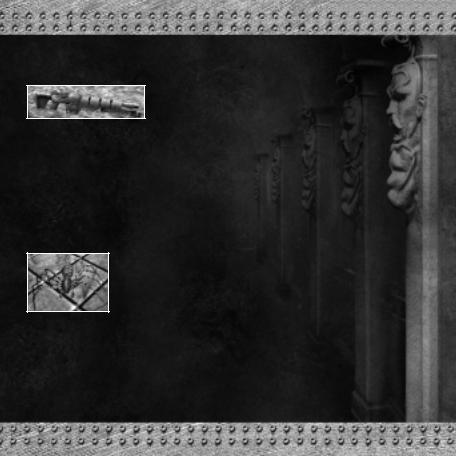
Combat Assault Rifle
This rapid-fire automatic weapon is similar in function to the Minigun, but the Combat Assault Rifle boasts greater accuracy and larger rounds than its formidable cousin. The secondary fire emits a cluster of five rounds that explode on impact. This all-purpose weapon is effective at short, medium and long ranges.
New Enemies
Spiders
Over the millennia of their existence, these large territorial arachnids have evolved their web spinning glands into dangerous projectile weapons. They fire slow-moving but deadly orbs of poisonous plasma that deliver substantial damage. Their close-range fang attack should also be avoided.
9
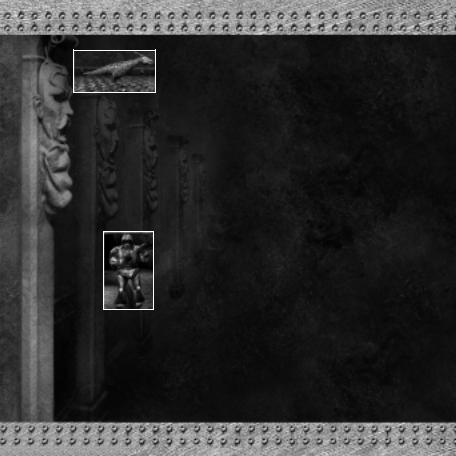
Pack Hunters
Small but blindingly fast, Pack Hunters are reptilian predators equipped with rows of armor-shredding teeth and insatiable appetites. While one or two shots from most weapons will destroy a single Hunter, they compensate for their lack of armor by outnumbering and overwhelming their prey. Masters of efficient killing, a swarm of five to seven Hunters can de-flesh a creature the size of a Brute in a matter of seconds. Since they possess no long-range attacks, and their close-range attacks are so lethal, Pack Hunters are best handled from a distance.
Space Marines
The Space Marine is the pride of the Terran Unified Military Services. These elite combat soldiers are heavily armored and carry the latest Terran weapons, including the CAR, Grenade Launcher, and Rocket Launcher. They often use short range matter transmitters to teleport into battle from dropships above the combat zone. Marines are the toughest opponents you’ll face - they are smart, fast, and deadly.
10
New Multiplayer Game
Modes
Gravity Match
In this mode, the effects of gravity are diminished, allowing players to jump higher and farther. The low gravity also affects projectiles launched from weapons.
Cloak Match
In this mode, a special cloaking device is located somewhere in each level. Any player who gets it (and activates it) becomes partially invisible. When a cloaked player is killed, his killer becomes cloaked and all other cloaking devices are deactivated. From that point on, only one player at a time can be cloaked.
Terran Weapon Match
In this mode, the Rocket Launcher, Grenade Launcher and Combat Assault Rifle are the only weapons available.
Marine Match
This special botmatch pits players against Space Marines, who are much more deadly than normal bots.
11

TECHNICAL SUPPORT
For technical support, the Infogrames United Kingdom Helpline is open to telephone calls from 10:00 to 19:00 Monday to Friday (except Bank Holidays):
Technical Helpline Infogrames UK
21 Castle Street - Castlefield
Manchester
M3 4SW
ENGLAND
Tel: 0161 827 8060/1
E-mail: helpline@uk.infogrames.com
For further information visit the official web site:
http://www.uk.infogrames.com
12
INFOGRAMES END USER LICENSE AGREEMENT
PLEASE READ CAREFULLY. BY USING THIS SOFTWARE, YOU ARE AGREEING TO BE BOUND BY THE TERMS OF THIS LICENSE. IF YOU DO NOT AGREE TO THESE TERMS, PROMTLY RETURN THE PRODUCT IN ITS PACKAGING TO THE PLACE WHERE YOU OBTAINED IT.
GRANT OF LICENCE:
INFOGRAMES (hereinafter "the Licensor") grants you a non-exclusive licence to use this disc and any accompanying documentation (hereinafter collectively known as 'the Software')subject to your acceptance of the following provisions.
USE:
You are permitted to use the Software in machine–readable only on a single computer, except that the multi-player executable file may be installed on more than one computer solely for the purposes of enabling multi-player play in accordance with the Software’s documentation. You may copy the Software only to install it on a single computer and for backup purposes in support of your use of the Software, except that the multi-player executable file may be copied for the purposes of enabling multiplayer play in accordance with the Software’s documentation. If you copy the Software you must reproduce all copyright and other proprietary notices that are on the original copy of the Software.
RESTRICTIONS:
You may not use, copy, modify or transfer the Software, or any copy thereof, in whole or in part, except as expressly provided for in this Agreement. Any attempt to transfer any of the rights, duties or obligations hereunder is void. You may not rent, lease, loan, resell for profit or distribute the Software, or any part hereof. You may not reverse engineer, disassemble, decompile or translate the Software or otherwise attempt to derive the source code of the Software except to the extent that reverse engineering cannot be contractually restricted.
13

NO WARRANTY:
THE SOFTWARE IS LICENSED TO YOU ON AN "AS IS" BASIS, AND THE LICENSOR (INCLUDING ITS SUB-CONTRACTORS, SUPPLIERS AND/OR RESELLERS) MAKES NO EXPRESS OR IMPLIED WARRANTIES OF ANY KIND, INCLUDING WITHOUT LIMITATION, THE IMPLIED WARRANTIES OF MERCHANTABILITY, FITNESS FOR A PARTICULAR PURPOSE, SUITABILITY FOR PURPOSE, SATISFACTORY QUALITY AND THEIR EQUIVALENTS UNDER THE LAWS OF ANY JURISDICTION AND YOU ACCESS THE SOFTWARE ENTIRELY AT YOUR OWN RISK AND OF YOUR OWN VOLITION. THE DISCLAIMER OF WARRANTY REFERRED TO ABOVE CONSTITUTES AN ESSENTIAL PART OF THIS AGREEMENT AND ANY AND ALL USE OF THE SOFTWARE HEREUNDER IS ONLY AUTHORISED SUBJECT TO YOUR ACCEPTANCE OF THE PROVISIONS RELATING TO 'NO WARRANTY' AS DETAILED ABOVE. THIS CLAUSE DOES NOT EFFECT YOUR STATUTORY RIGTHS AS A CONSUMER.
TITLE:
Title, ownership rights, and intellectual property rights in the Software shall remain with the Licensor. The Software is protected by copyright and other intellectual property laws and by international treaties. Title and related rights in the content accessed through the Software is the property of the applicable content owner and is protected by applicable law. The license granted under this Agreement gives you no rights to such content.
TERMINATION:
This Agreement and the licence granted hereunder will terminate automatically if you fail to comply with the provisions contained herein. Upon termination, you must destroy any and all copies of the Software and any related documentation.
14

LIMITATION OF LIABILITY:
IN NO CIRCUMSTANCES SHALL THE LICENSOR (INCLUDING ITS SUB-CONTRACTORS, SUPPLIERS AND/OR RESELLERS) BE LIABLE TO YOU OR ANY OTHER PERSON FOR ANY INDIRECT, SPECIAL, INCIDENTAL, OR CONSEQUENTIAL DAMAGES (WHETHER FORESEEABLE OR NOT) NOR FOR DAMAGES FOR LOSS OF BUSINESS, LOSS OF PROFITS, LOSS OF CONTRACTS OR ANTICIPATED SAVINGS, LOSS OF GOODWILL, WORK STOPPAGE, COMPUTER FAILURE OR MALFUNCTION (WHETHER FORESEEABLE OR NOT) IN CONTRACT, TORT (INCLUDING NEGLIGENCE), BREACH OF STATUTORY DUTY, PRODUCT LIABILITY OR OTHERWISE ARISING FROM OR IN ANY WAY CONNECTED WITH THE USE OF THE SOFTWARE OR THIS AGREEMENT AS SHALL APPLY HAVING REGARD TO THE LAWS OF APPLICABLE JURISDICTIONS. IN NO EVENT WILL THE LICENSOR BE LIABLE FOR ANY DAMAGES IN EXCESS OF THE AMOUNT LICENSOR RECEIVED FROM YOU FOR A LICENCE TO THE SOFTWARE, EVEN IF THE LICENSOR SHALL HAVE BEEN INFORMED OF THE POSSIBILITY OF SUCH DAMAGES. YOUR STATUTORY RIGHTS AS A CONSUMER ARE NOT EFFECTED BY THIS PROVISION.
NON-ASSIGNMENT:
For the avoidance of any doubt, nothing in this Agreement shall entitle you to in any way assign or transfer any or all of the rights granted to you in accordance with the provisions of this Agreement to any third party.
GENERAL:
This Agreement represents the complete agreement concerning the licence granted hereunder and may be amended only by a writing executed by both parties. Any action related to this Agreement will be governed by English law. If any provision of this Agreement is held to be unenforceable, that provision will be removed and the remaining provisions will remain in full force.
15

GT Interactive Credits
Producers |
Jason Schreiber |
|
Cormac Russell |
Director of Sales and Marketing |
Tony Kee |
Product Manager |
Barbara Gleason |
Director of Product |
|
Development Services |
Mary Steer |
QA Manager |
Steve Knopf |
Lead Tester |
Tim Hess |
Testers |
Joe Orr |
|
AJ Pardilla |
|
Chris Dunn |
|
Aaron Harris |
|
Tomasi Akimeta, Jr. |
|
Keith Moran |
|
Doug Price |
Director of Creative Services |
Leslie Mills |
Creative Director |
Vic Merritt |
Production Coordinator |
Liz Fierro |
Graphic Designer |
Michael Marrs |
Localization Manager |
Mark Cárter |
North America |
|
Manual Writer/Editor |
Pete Witcher |
GT Interactive Europe
Localization Manager |
Neil McKenna |
Europe |
|
QA Manager |
Graham Axford |
QA Supervisor |
Tim Wileman |
Code Supervisor |
Kolin Tregaskes |
Lead Tester |
Navino Evans |
Testers |
Germaine Mendes |
|
Alexander Stoikou |
|
Alfred Bailey |
|
Paul McGinniss |
|
Wayne Gatley |
16

Legend Entertainment Credits
Producer |
Mike Verdu |
|
Technical Advisor |
Mark Poesch |
|
Level Designers |
David Kelvin |
|
|
Matthias Worch |
|
Additional Level Design |
Mick Beard |
|
|
Warren Marshall |
|
Programmers |
Duane Beck |
|
|
Jess Crable |
|
Models and Animation |
|
|
Heuristic Park Graphic Production Studios: |
Chris Appel |
|
|
Paul Neuhaus |
|
|
Blanca Anson |
|
|
Suzanne Snelling |
|
|
Joon Choi |
|
|
Nathan Cheever |
|
|
Chris “Xyle” Roberts |
|
|
Robert Wisnewski |
|
Art |
Joel Walden |
|
Music |
Alexander Brandon |
|
Sound Effects |
Alexander Brandon |
|
|
Eric Heberling |
|
|
Tommy Tallarico Studios |
|
Sound Engineers: |
Andy Frasier |
|
|
David Kelvin |
|
Tester and Associate Producer |
Craig Lafferty |
|
Candy and Paychecks |
Rosie Freeman |
17 |
|
|

FRANCAIS
AVERTISSEMENT SUR L’EPILEPSIE
A lire avant toute utilisation d’un jeu vidéo par vous-même ou votre enfant. Certaines personnes sont susceptibles de faire des crises d’épilepsie ou d’avoir des pertes de conscience à la vue de certains types de lumières clignotantes ou d’éléments fréquents dans notre environnement quotidien. Ces personnes s’exposent à des crises lorsqu’elles regardent certaines images télévisées ou lorsqu’elles jouent à certains jeux vidéo. Ces phénomènes peuvent apparaître alors même que le sujet n’a pas d’antécédent médical ou n’a jamais été confronté à une crise d’épilepsie.
Si vous-même ou un membre de votre famille avez déjà présenté des symptômes liés à l’épilepsie (crise ou perte de conscience) en présence de stimulations lumineuses, veuillez consulter votre médecin avant toute utilisation.
Nous conseillons aux parents d’être attentifs à leurs enfants lorsqu’ils jouent avec des jeux vidéo. Si vous-même ou votre enfant présentez l’un des symptômes suivants: vertige, trouble de la vision, contraction des yeux ou des muscles, perte de conscience, trouble de l’orientation, mouvement involontaire ou convulsion, veuillez immédiatement cesser de jouer et consulter un médecin.
Précautions à prendre dans tous les cas pour l’utilisation d’un jeu vidéo
•Ne vous tenez pas trop près de l’écran, jouez à bonne distance de l’écran de télévision et aussi loin que le permet le cordon de raccordement.
•Utilisez de préférence les jeux vidéo sur un écran de petite taille.
•Evitez de jouer si vous êtes fatigué ou si vous manquez de sommeil.
•Assurez-vous que vous jouez dans une pièce bien éclairée.
•En cours d’utilisation, faites des pauses de dix à quinze minutes toutes les heures.

Sommaire |
|
INSTALLATION ....................................... |
21 |
VOUS EN VOULEZ ENCORE ? ................... |
24 |
NOUVELLES ARMES ................................ |
25 |
NOUVEAUX ENNEMIS ............................ |
26 |
NOUVEAUX MODES MULTIJOUEURS....... |
28 |
ASSISTANCE TECHNIQUE ....................... |
29 |
20
Configuration système minimale
Unreal™ ou Unreal Tournament™requis
CPU : |
P166 Mhz |
Mémoire : |
32 MB RAM |
Espace disque : |
450 Mo |
Lecteur : |
CD-ROM 4 X |
Audio : |
Carte son compatible Windows 9x |
Vidéo : |
Carte vidéo 4 Mo |
Système d’exploitation : |
Windows 95 / 98 / 98SE |
Installation sous Windows® 95 ou 98
1.Fermez toutes vos applications, puis insérez le CD Unreal“ : Return to Na Pali“ dans votre lecteur CD-ROM.
2.Si le mode d’exécution automatique du CD-ROM est activé, l’écran d’installation s’affichera automatiquement après insertion du CDROM. Si le mode d’exécution automatique est désactivé, vous devrez procéder à l’installation manuellement : double-cliquez sur Poste de travail, puis sur l’icône du CD-ROM. La première fenêtre d’installation
21 |
s’ouvrira alors. |

3.Suivez les instructions apparaissant dans les fenêtres d’installation pour installer Unreal: Return to Na Pali sur votre ordinateur. Les étapes suivantes décrivent chaque fenêtre d’installation.
4.La première fenêtre vous indique les langues pouvant être sélectionnées, ainsi que des liens vers des sites Web d’information (il n’est pas nécessaire de consulter ces sites Web pour réaliser l’installation). Sélectionnez votre langue, puis cliquez sur Suivant.
5.La fenêtre suivante vous permet de choisir le répertoire dans lequel vous souhaitez installer Unreal: Return to Na Pali. Vous pouvez choisir un répertoire (ou un dossier) par défaut (généralement C:/NaPali). Si vous souhaitez l’installer sur un disque dur et/ou un répertoire différent, effacez simplement les chemins d’accès par défaut du disque dur et du répertoire et entrez le nouveau chemin d’accès. Cliquez sur Réinitialiser à tout moment pour revenir au disque dur et au répertoire par défaut.
La quantité d’espace disque disponible sur le disque dur où se trouve le répertoire est affichée au bas de la fenêtre. Vous avez besoin de 100 mégaoctets d’espace disque disponible pour une installation minimum, ou de 400 mégaoctets pour une installation complète.
Lorsque vous avez choisi le disque dur et le répertoire, cliquez sur Suivant.
6.L’écran suivant présente une liste de composants de Unreal: Return to Na Pali qui peuvent être installés. Vous pourrez choisir parmi les
éléments suivants : |
22 |

• Unreal: Return to Na Pali Game (Jeu Unreal: Return to Na Pali) : c’est le moteur du jeu de Unreal : Return to Na Pali
• Game Content (Contenu du jeu) : sélectionnez ce composant pour installer tout le contenu du jeu sur votre disque dur. Ceci requiert 450 mégaoctets d’espace libre. Sélectionnez cette option pour une performance optimale. Si vous désactivez cette option, le contenu du jeu sera chargé à partir du CD avant chaque partie, mais la qualité du jeu en sera affectée.
• Unreal Editor (Editeur Unreal) : cette option vous permet d’installer l’Editeur pour créer vos propres niveaux de jeu. Cet élément n’est pas indispensable pour jouer à Unreal : Return to Na Pali.
• DirectX : cette option vous permet d’installer les pilotes DirectX de Microsoft pour un rendu et une prise en charge audio et joystick optimaux. Cet élément optionnel est vivement recommandé s’il n’est pas déjà installé sur votre ordinateur.
Cliquez sur Suivant une fois que vous avez installé les éléments désirés.
7. L’écran suivant vous permet de revoir vos choix. Cliquez sur Installer lorsque vous êtes prêt, ou sur Retour pour modifier vos choix.
8. Lorsque le jeu est installé, la fenêtre Options de Unreal: Return to Na Pali apparaît. Nous vous recommandons vivement de consulter les notes de publication pour plus d’informations sur Unreal : Return to Na Pali. Après avoir lu les notes de publication, sélectionnez Play
(Jouer) pour jouer à Unreal: Return to Na Pali.
23
 Loading...