


-
-
-
STUNT
ISLAND
THE STUNT FLYING AND FILMING SIMULATION
-
-
-
HANDBOOK
-
-
-

-
-
-Introduction
-Stunt Island - The Place
-In the spring of 1986, one of the movie industry’s most
important deals was being struck. But this deal included no
-actors, no screenplay, and no director. Just an island.
-Stunt Island was purchased in a joint venture of the major movie studios, Located off the coast of Southern California,
-the island would provide a private place specializing in the
filming of high-risk stunts.
-
During the past decade, obtaining permits to perform stunts
-in public areas became an increasingly difficult task for the
-film studios, Because stunts had evolved into sophisticated, extravagant, and incendiary productions - entire housing
tracks blowing up, airplanes crash-landing in congested areas, multiple car crashes in crowded streets - the pre-filming
-logistics of acquiring a location and acceptable film time were becoming just as difficult as filming the stunt itself.
Having a private place tailored to handle high-risk activities
-would allow the movie studios the opportunity to invest valuable time - otherwise spent on pre-production administrative
-work - into more critical stunt production issues.
-Stunt Island is the worlds first and only stunt haven. If a stunt needs to be done, the only limitations are talent, imagination, and physics.
Stunt Island - The Program
Stunt Island, the program, is entertainment software that recreates the activities of Stunt Island, the place.
You’ll have the opportunity to enter the world of film production as a stunt pilot, editor, director, and/or set designer (you can participate in as few or as many of these activities as you want). No other program has this range of activities set behind the scenes of Hollywood.
Introduction

Table |
of |
Contents |
|
Flight Controls |
30 |
Stunt Island Hall of Fame.. ................... 46 |
||||||||||
|
|
|
|
|
|
|||||||||||
|
|
|
|
|
|
Neutral Position of Control Stick.... |
3 0 |
Competitors Leaving Stunt Island ...... |
.46 |
|||||||
Chapter 1: About Stunt Island |
7 |
Pitch.. .............................................. |
.31 |
The Stunt Assignments.. ....................... |
47 |
|||||||||||
Roll |
................................................... |
|
|
32 |
Stunt |
Assignment |
Clues ....................... |
57 |
||||||||
Your |
Career Opportunities |
|
Yaw.. |
................................................. |
|
|
32 |
Chapter 5: Production: Set Creation |
|
|||||||
on Stunt Island.. ................................ .7 |
Using |
the |
Rudder ............................ |
.32 |
59 |
|||||||||||
About |
This |
Handbook.. .......................... |
7 |
Using the Ailerons ........................... |
32 |
and Filming ............................................ |
|
|||||||||
About |
Your |
Mouse, Joystick, |
|
Engine .. |
Power Controls ...................... |
.34 |
Creating Sets ......................................... |
|
60 |
|||||||
o r |
Keyboard ...................................... |
|
.8 |
Taking Off and Landing ...................... |
.34 |
Island |
View Window |
|
||||||||
The Movie Production Process .............. |
. |
Taking .......................................Off |
.34 |
and It’s Options |
................................ |
6 1 |
||||||||||
Chapter 2: Setting up the Program |
11 |
Using . .................Flaps for Takeoff |
.34 |
Prop Window and Its Options ............ |
.62 |
|||||||||||
Landing ........................................... |
|
.35 |
How to Select Your Stunt Aircraft........ |
6 6 |
||||||||||||
Equipment You’ll |
Need ........................ |
11 |
Landing .. ....................on a Runway |
36 |
How to Place a Prop ............................ |
.67 |
||||||||||
Installing Stunt Island ........................ |
.12 |
Ending ......Flight Without Landing |
3 6 |
How to Move a Prop ............................ |
.68 |
|||||||||||
Changing the Setup ............................. |
.14 |
Autopilot.. ............................................ |
.36 |
How to Delete a Prop .......................... |
.68 |
|||||||||||
Starting Stunt Island ............................ |
.14 |
Crashing or Ejecting.. ........................... 36 |
Special Prop Controls - |
|
||||||||||||
Exiting Stunt Island.. ........................... .17 |
Weapons ....................................... |
Use |
.36 |
The Adjust Window ...................... .. |
6 8 |
|||||||||||
The Places on Stunt Island.. ................ .18 |
Dropping .. ........................... |
Bombs |
.37 |
How to Fine Tune a Prop.. ................... 73 |
||||||||||||
Input Devices Used in Stunt Island...... |
2 0 |
Aircraft ......................................Views |
.38 |
How to Animate a Prop ........................ |
7 5 |
|||||||||||
Selecting an Onscreen Option ........ |
.20 |
Keyboard Keys Available |
|
Animating a Still Prop .................... |
.75 |
|||||||||||
Changing |
Numbers ........................ |
.21 |
During ..................................Flight |
.38 |
Animating a Dynamic Prop ............. |
76 |
||||||||||
Selecting an Item From a List .......... |
22 |
Tips on Successful Flying.. .................. .39 |
Having |
More Than |
One |
|
||||||||||
Joystick Users.. ................................. |
22 |
Recording ..................... |
During Flying |
.39 |
Stunt |
Aircraft ................................... |
|
78 |
||||||||
Joystick Calibration Screen ............ |
.22 |
Preferences ............................ |
Window |
.40 |
How to Set Up Cameras ....................... |
7 8 |
||||||||||
Save and Load File Requesters ............ |
.24 |
Chapter 4: Stunt Pilot of the |
|
The Watch (WTCH) Option ................ |
79 |
|||||||||||
|
|
|
|
|
|
|
Adjust |
Screen |
|
|
||||||
Chapter |
3: |
Aircraft |
|
Year |
Contest.. ....................................... |
.43 |
“Programming” |
Options ............... .. |
8 0 |
|||||||
Checkout |
Procedures.. ......................... .27 |
The |
Contest .......................................... |
|
43 |
Saving and Loading Sets ...................... |
.82 |
|||||||||
Aircraft |
|
vs. Airplane.. ........................... |
.27 |
Getting .. ................ |
Stunt Assignments |
.44 |
Creating |
New Sets |
................................ |
82 |
||||||
Aircraft |
|
Availability .............................. |
.28 |
Payoffs |
and |
Penalties |
|
How to Film a Stunt ............................. |
83 |
|||||||
Onscreen |
Gauges.. |
............................... |
.28 |
on |
Stunt .. ................... |
Performance |
.45 |
Leaving the Production Building ........ |
.84 |
|||||||
Flying Stunt Island Aircraft ................ .. |
3 0 |
Camera ....................................... |
Crew |
.45 |
Questions and Answers.. ..................... |
.85 |
||||||||||
Table of Contents


Installing Stunt Island
Stunt Island comes with an Install program that guides you through the install process.
Stunt Island must be installed onto a hard disk drive. It cannot be played from floppy disks.
In the following instructions we refer to your computer’s |
|
|||||
floppy disk drive as the A: drive and the |
hard disk |
drive as |
the C: |
|||
drive. If your floppy or hard |
disk |
drive |
is |
something other |
than |
|
drive A: or C:, substitute A: |
or C: |
with |
the |
correct |
drive letter(s). |
|
1 . Insert Stunt Island Disk 1 in drive A:. Change to the A: drive by typing A: and pressing Enter. Type INSTALL and press Enter.
2 . A screen stating “This Program installs files onto your hard disk and lets our program know about your equipment configuration” should appear. Press Enter to continue.
Note: During the install process, you can press Esc to back up a step or to abort the Install program.
3 . The Setup screen appears. You will see that an input device, a sound device, and a music device have been selected - this is what the Install program automatically detected.
If you want to change an option, press the up or down arrow keys to highlight the option and press Enter. Use the up and down arrow keys to select an input, sound, or
Chapter 2 Setting Up The Program
music device and then press Enter to accept. Press Esc to cancel. (If you’re using a l0-key pad, make sure the Num Lock key is off.)
Note: To use a Thunder Board or other Sound Blaster compatible card, choose the Sound Blaster option.
If the Install program cannot detect the option you selected, you will see a warning message. If you select the option anyway, the Stunt Island program may “freeze” when you start it, requiring you to restart your computer and go through the setup process explained in the next section.
Once you’ve selected the appropriate options for your |
|
|||||
computer’s current configuration, select |
Install with the |
|||||
above configuration and press Enter. |
|
|
|
|
||
4 . The |
Drive Letter screen appears. If there |
are |
any |
partitions on |
||
your hard drive, or if you have more than one hard drive, |
||||||
the |
Install program will identify them and |
ask |
you |
to |
select |
|
the |
drive on which |
you want to install Stunt |
Island. If |
there |
||
are |
no partitions on |
your hard drive, the |
program |
will |
choose |
|
drive C and go directly to the Destination Path screen.
Note: The Install program notifies you if your computer does not have enough hard disk space and/or memory to install or run Stunt Island. At this point you may want to exit the Install program and make any changes to free up memory or hard disk drive space. If this screen appears due to lack of hard disk space, you can go back to the Drive Letter screen and select
another driver if you have other partitions. (See Appendix C for tips on handling memory problems.)
The Destination Path screen appears. The default subdirectory selected for Stunt Island is \STUNTISL. To change
the subdirectory name, press the Delete key to delete STUNTISL; then type the new subdirectory name you want to use (up to 8 characters). Be sure to include the \ (backslash) at the beginning of the subdirectory name.
The other box on the screen, System Information, shows hard disk space and memory usage. You’re shown the amount currently used, the amount used by the Stunt Island program, and what is left of both after installation. The amount of conventional memory used is only during the use of Stunt Island.
Press Enter to accept the subdirectory name and begin the copying process. You will see a Copy Status screen which visually tracks the copying progress. You will be prompted to insert new disks when necessary.
The Installation Complete screen appears when the installation process is finished. Press Enter at this screen and you’ll go to the directory where you installed the
program; you can then type STUNT to start the program. (See the section “Starting Stunt Island for complete details.)
Put your original disks in a safe, clean place in case you ever need to reinstall the program.
Chapter 2 Setting Up The Program
A-lO Thunderbolt
M a n u f a c t u r e r : ........................ |
.Grumman Corporation |
||
Take-off speed: ........................ |
138 |
m.p.h. |
|
Stall speed: ............................ |
,115 |
m.p.h. |
|
Maximum |
speed: ................... |
.439 m.p.h. |
|
Maximum |
altitude: ................. |
,45,000 feet |
|
Flaps: ...................................... |
|
Yes |
|
Retractable landing gear: ........ |
Yes |
|
|
Changing |
The |
Setup |
Once you’ve |
performed the initial installation, you can change |
|
the setup at |
any |
time. Maybe you’ve just purchased The Sound |
Source to use with your computer, or maybe you just want to make sure the PC speaker sounds are off.
To change the setup, follow these steps:
1. Go to the Stunt Island subdirectory. For instance, if you accepted the default \STUNTISL subdirectory when you installed the program, you would type CD \STUNTISL
and press Enter. Then type STUNT ? and press Enter. You must type the question mark (preceded by a space)
after |
STUNT or you will not get the screen that lets you |
make |
changes. |
2. The Setup screen appears. To change the input, sound, or
music option, press the up or down arrow keys to high-
light |
the |
option you |
want and |
press |
Enter. |
Using |
the |
up |
|
and down arrow keys, select a different input, sound, or |
|||||||||
music |
option and then press Enter to |
accept. Press Esc |
to |
||||||
cancel. (If you’re using a 10-key pad, make sure the Num |
|||||||||
Lock |
key |
is |
off.) |
|
|
|
|
|
|
3. Once |
you’ve |
made |
the changes |
you |
want, |
select |
Install |
||
with the above configuration and press Enter. The Setup program will save the new configuration. The Setup process is complete and the game will start with the new options .
Chapter 2 Setting Up The Program
Starting Stunt Island
1. To start the program, go to the Stunt Island subdirectory.
For |
instance, |
if |
you used |
the |
default |
STUNTISL |
subdirectory |
|||
in the Install program, you would |
type |
CD\ STUNTISL and |
||||||||
press |
Enter. |
|
|
|
|
|
|
|
|
|
2. Type STUNT and press Enter. |
|
|
|
|
|
|
||||
If your screen goes blank, reboot the computer and run |
||||||||||
the Setup program as explained |
in |
the |
previous |
section, |
||||||
making sure to select the correct input, sound, and music |
||||||||||
options for |
your |
computer |
setup. |
If |
you |
still have |
problems |
|||
with |
loading |
the |
program, |
please |
see |
|
Appendix |
C. |
|
|
3. As the program loads you may see “Caching data xxxKin extended [or expanded] memory.” The program is setting up available extended or expanded memory for use with Stunt Island. You will only see this screen if you have extended or expanded memory. Stunt Island works equally well with both - it will use whichever you have the most of (but not both).
4. The Introduction film appears. If you want to bypass this film, click the mouse or joystick button or press any key.
-
-
-
-
-
-
-
-
-
-
-
-
-
-
-
-
Welcome |
to Stunt |
Island! |
|
|
||
When you first |
arrive |
at |
Stunt |
Island, you’re dropped off |
in front |
|
of the production building. |
|
|
||||
Joystick |
users: |
If this |
is the |
first time you’ve loaded |
Stunt |
|
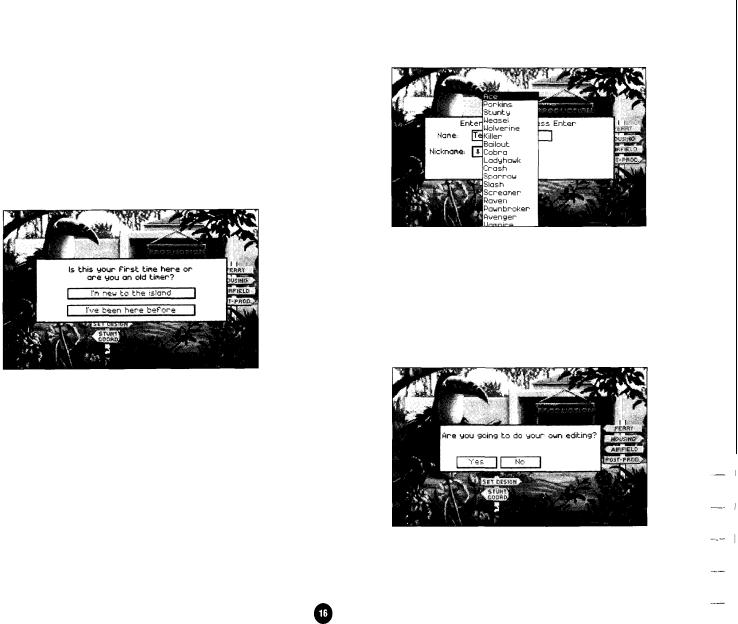
Island and you’re using a joystick, the first thing you see is the Joystick Calibration screen. Follow the onscreen instructions. If you need details on this screen, see page 22.
Next, you may be asked to answer a question about a particular aircraft. Locate the aircraft in this handbook by using the index. Go to the page indicated to find the answer. Type in the answer and press Enter. If you answer the question correctly, the game will begin. If you answer it incorrectly, you’re returned to the DOS prompt. Type STUNT and press Enter to try again.
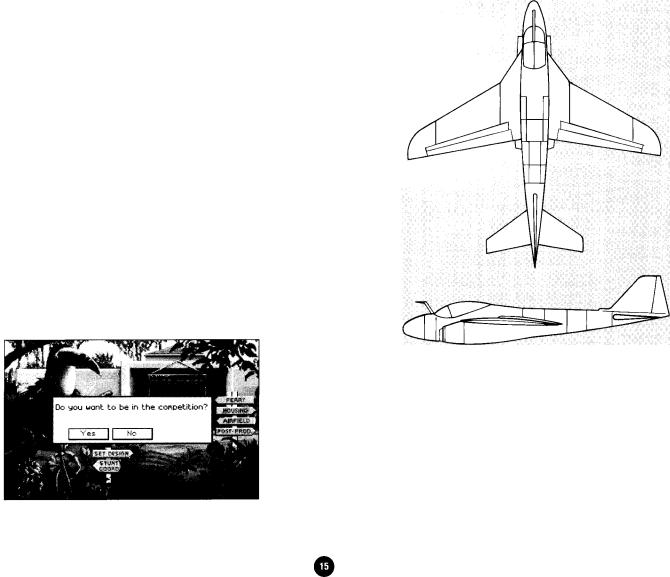
You’re asked, “Do you want to be in the competition?”
NO: If you select No, a pilot will not be set up for you. Also,
Chapter 2 Setting Up The Program
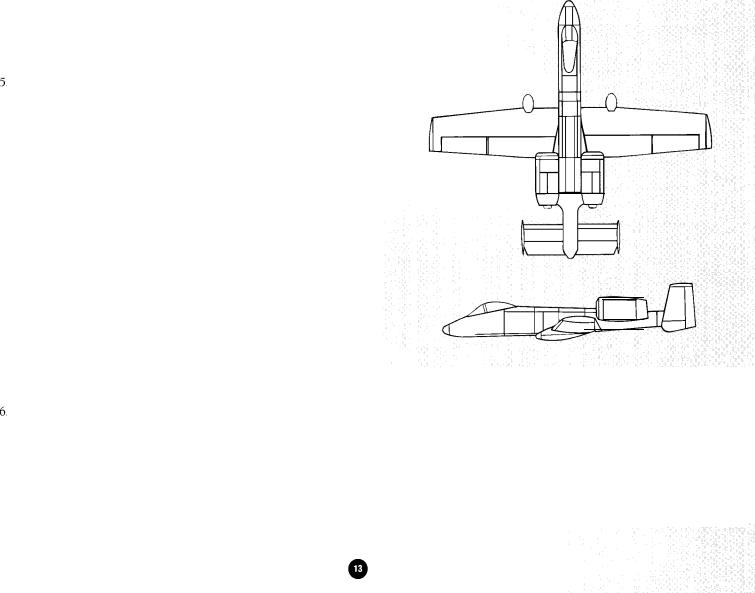
A-E lntruder
Manufacturer* . . . . . . . . . . ...... . . . . . |
. . . . |
..Grumman Corporation |
|
Take - off speed: ........................ |
136 |
m.p.h. |
|
Stall speed: |
............................. |
113 |
m.p.h. |
Maximum |
speed: . . . . . . . . . . . . |
. . . . . . . |
. 644 m.p.h. |
Maximum |
altitude: . . . . . . . . . . |
. . . . . . . |
. 42,400 feet |
Flaps: . .. . . . |
. . . . . . . . . . . . . . . . . . . |
. |
Yes |
Retractable landing gear: ...... |
.. |
Yes |
|
select |
No, everything you’ve done in this last |
session |
of |
play |
will |
|||||||||
not |
be |
recorded. |
Finally, you’re |
asked, |
“Do you |
want |
to |
start |
a |
|||||
new game?” Select Yes to start a new game or |
No to |
see |
the |
Exit |
||||||||||
screens |
and |
return |
to |
DOS. |
|
|
|
|
|
|
|
|||
If |
you |
want |
to |
start |
a |
new |
game with |
a new |
character, answer |
Yes |
||||
to |
“Do |
you want |
to |
start |
a |
new |
game?” |
You’ll |
go |
to |
the |
start |
of the |
|
program where you can enter a new name and choose a new nickname.
|
- |
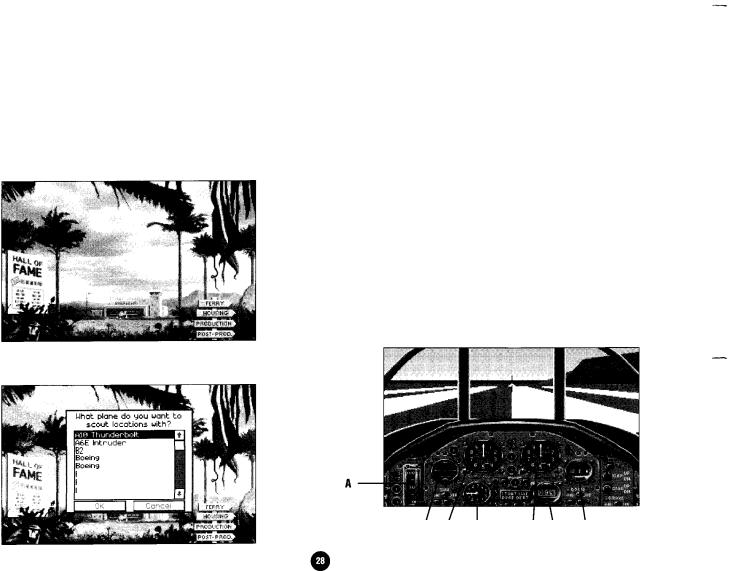
+ Airfield - All the planes are kept here. You can select the |
|
plane in the hangar to get a list of planes to scout locations |
- |
with. |
|
|
- |
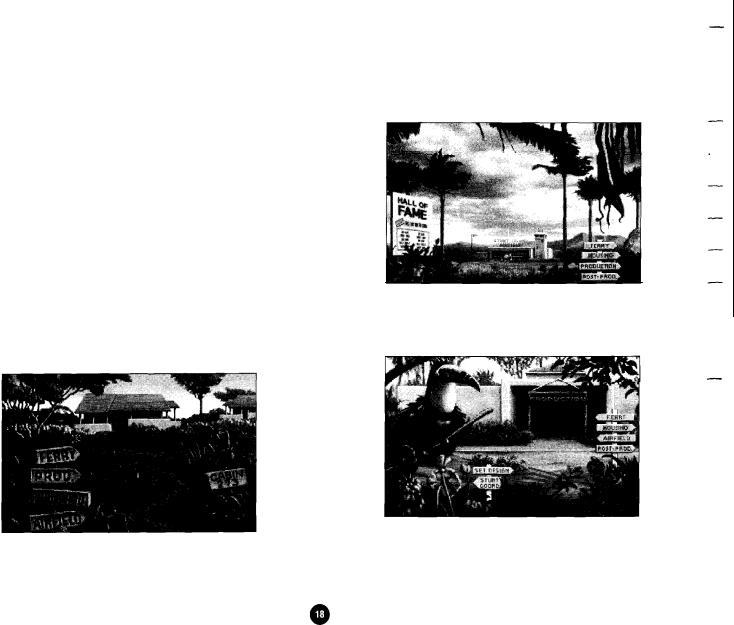
The Places on Stunt Island
Stunt Island has five important places:
+ Housing or Cabin 273 - This is the place you’ll call home during your stay. The housing sign takes you to the outside of your cabin, while the Cabin 273 sign takes you inside.
+ Production Building - This is where you’ll go to get stunt assignments, or design sets and create stunts of your own.
-
- -
-
-
-
-
-
Chapter 2 Setting Up The Program
--
-
+Post-Production Building - This houses all the equipment
-needed to edit a film.
-
-
-
-
-
-+ Ferry Harbor - This is the departure point for all Stunt
Island guests and employees.
-_
--
-
-
-
-
-All the Stunt Island locations are clearly marked with the
following signs. Select the sign to go to that location.
-- |
|
|
|
|
|
|
|
|
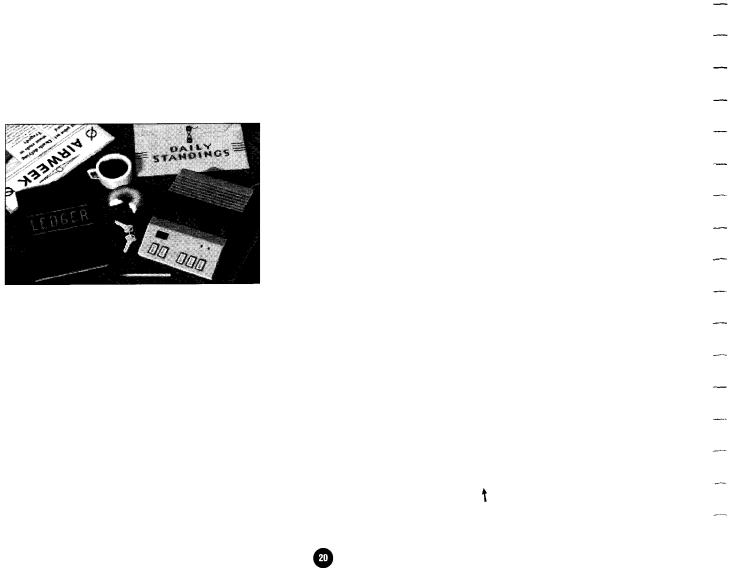
Housing or Cabin 273 - Come here to check your ledger, |
||||||
- |
phone |
messages, |
and |
the daily |
standings. |
Select Housing |
to get |
_- |
to the |
outside |
of your |
cabin and |
select |
Cabin 273 to go |
inside. |
|
|
|
|
|
|
|
|
Beechcraft |
|
Bonanza V-35 |
||
Manufacturer . |
. . . . . . . . . . . . . . . . . . . . . . . . . Beech Aircraft Corp. |
|||
Take-off speed: . |
. . . . . . |
. . . . . . . . . . . . . . .90. . . |
m.p.h. |
|
Stall speed: |
. . . . |
. . . . . |
. . . . . . . . . . . . . . . . . |
. . .m75.p.h. |
Maximum |
speed,. .., . . . . . . . . . . . . . . . . 209 m.p.h. |
|||
Maximu m altitude, |
. . . . . . . . . . . . . . . . . . 17,858 feet |
|||
Flaps: . . . . . . . |
. . . . . |
. . . . . |
. . . . . . . . . . . . ...... . |
Yes |
Retractable |
landing |
gear: . . . . . . . |
. Yes |
|
Chapter 2 Setting Up The Program
-
-
To select an option:
-
Mouse users - Roll the mouse until the pointer is on the option
-you want and then click either mouse button to select it.
Joystick users - Move the joystick until the pointer is on the
-
option you want and then click either joystick button to select it.
-Keyboard users - Press the up, down, left or right arrow keys until the pointer is on the option you want and then press Enter
-to select it.
-As you’re reading the instructions throughout the handbook, you’ll
notice that there are many references to button 1 and button 2.
-
Mouse users - Button 1 is the left button. Button 2 is the right
-button.
-Keyboard users - Button 1 is the Enter key. Button 2 is the / (forward slash) key.
-
Joystick users - Because joystick designs vary greatly, we can’t
-tell you exactly which button is button 1 and which is button 2. Some joysticks even have three or four buttons. If you’re a
-joystick user, you’ll have to do some testing to determine which buttons act as button 1 and 2.
-
Changing Numbers
-In options that have values that can be changed, there are two
ways to change the values:
-
+You can select the - (minus) or + (plus) button next to
-the number to decrease or increase the value. Each
selection with button 1 changes the value by one, while each
-.
B o e i n g |
727 |
|
|
|
Manufacturer.. ......................... Boeing |
Commercial |
|||
|
|
|
Airplane Group |
|
Take-off speed: . . . . . . . . . . . . . |
150 |
m.p.h. |
||
Stall speed: |
,............................ |
125 |
m.p.h. |
|
Maximum |
speed: . . . . . . . . . . . . . . . . . . |
. . 599 m.p.h. |
||
Maximum |
altitude: . . . . . . . . . . . . . . . . |
. . 45,000 feet |
||
Flaps: ...................................... |
|
Yes |
|
|
Retractable |
landing gear: . . . . . . . . |
Yes |
|
|
Chapter 2 Setting Up The Program
selection with button 2 changes the value in larger increment s o f 5 o r 30 .
You can select the value itself and then enter a new number. Use the Backspace or Delete key to delete the current value. Mouse users can highlight the entire field and then type a number to replace the highlighted number.
Selecting an Item From a List
A requester (a window you can interact with) appears when you need to select an item from a list. To choose an item from a requester:
Mouse users - Roll the mouse up or down to position the cross hair on an item, click either mouse button to highlight it, and then click on OK. You can also double-click on an option to select it.
Joystick |
users - Push the joystick forward or |
pull the |
joystick |
|
back to |
position the cross hair on an item and |
then |
click |
either |
joystick |
button to highlight it. Click on OK to |
select |
the |
high- |
lighted |
option. You can also double-click on an |
option |
to |
select it. |
Keyboard users - Press the up or down arrow keys to highlight the option you want and then press Enter to highlight it. Move the cursor to OK and then press Enter to accept the option. Or you can position the cursor on an option and then quickly press Enter twice to select it.
Shortcuts for Selecting Items
The Pg Up and Pg Dn keys move up and down a list one screenful at a time.
Chapter 2 Setting Up The Program
You can also press any letter to jump to that letter in the list. If nothing in the list starts with that letter, nothing will happen.
Joystick Users
Your joystick will be active if it was detected and selected in the Install or Setup program. (Simulated flight yokes like the Flight Yoke 2000 will be treated like a joystick.) If a joystick is detected by the program, you must use it as the flight input device - you will not be able to use the keyboard to control flight. To use an input device other than a joystick, be sure to select a different input device option through the Install or Setup program.
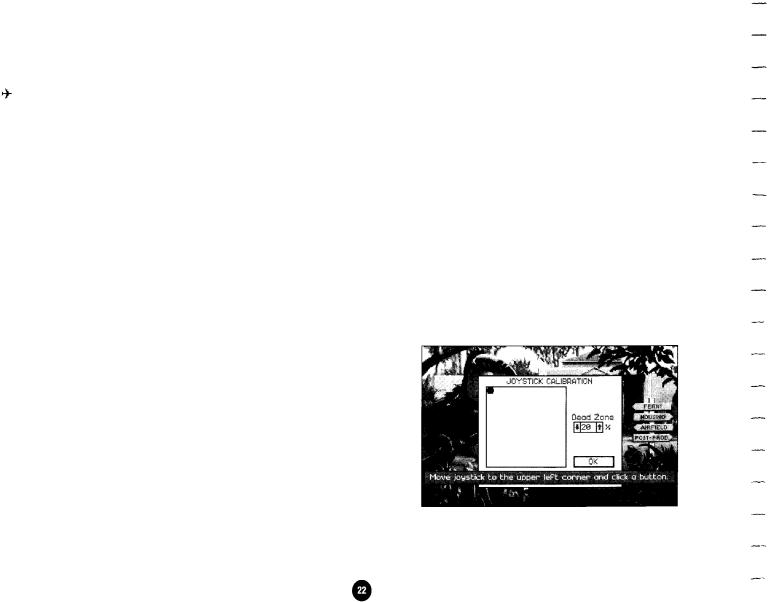
Joystick Calibration Screen
The Joystick Calibration screen automatically appears the first time you load the program if a joystick is detected.
When you see the black dot in the upper left corner of the Joystick Calibration screen, hold the joystick in the upper left

Load File Requesters
The Load requesters basically have the same options as the Save requesters.
Notice that when you load a file, you always see an asterisk followed by a file extension name in the field after Filename. The
asterisk is a “wild card” that represents everything, while the |
file |
|
extension |
is specific to the type of file. This tells the program |
to |
show all |
filenames that end with that specific extension. |
|
For example, if you were loading takes in the editing room, you’d see *.TKE after Filename. This tells the program to show all files that end with .TKE. If you want to load a take that you didn’t save with the .TKE extension, you won’t see it in this list. You’d have to enter *.* or *. [and the extension you used] after Filename to tell the program to show you other files.
You’ll find using extensions is a good way to keep common files grouped together, making them easy to locate.
To open a file or subdirectory, highlight the name and then select OK. You can also double-click on a filename to open it.
Chapter 2 Setting Up The Program

-
A - Engine power: The position of the throttle lever corre-
-sponds to the engine power you selected by pressing keys 1
through 0 on the main keyboard. If your joystick has a throt-
-
tle, use that to control engine power.
-
B - Horizon gauge: Shows the artificial horizon. Notice that
-when you bank or pitch, the artificial horizon line changes to represent that movement.
-
C - Speed indicator: This indicates the speed at which you
-are traveling.
-D - Vertical climb indicator: This gauge shows the change in feet per minute. Each number represents 100 feet. When the
-needle is in the upper half of the gauge, the aircraft is climbing. When the needle is in the lower half of the gauge, the
-
aircraft is descending.
-
E- Altimeter: The altimeter shows the aircraft’s altitude.
-Each revolution of the small hand represents one thousand feet. Each revolution of the large hand represents one
-hundred feet.
-F - Clock: This is the time elapsed since you got into your aircraft.
-
G - Compass: This shows your north, south, east, and west
-direction heading.
- If the cockpit view is off, or if you are in any other view, you’ll
-
Bristol |
Bulldog (Mk |
IIA) |
|
M a n u f a c t u r e r : ......................... |
Bristol Aeroplane Co. |
||
Take-off speed: ....................... |
.65 |
m.p.h. |
|
Stall speed: ............................ |
.55 |
m.p.h. |
|
Maximum |
speed: .................... |
135 |
m.p.h. |
Maximum |
altitude: ................. |
.25,000 feet |
|
Flaps: ...................................... |
|
No |
|
Retractable landing gear: ........ |
No |
|
|
Chapter 3 Aircraft Checkout Procedures
see the necessary in-flight readouts along the bottom of the screen.
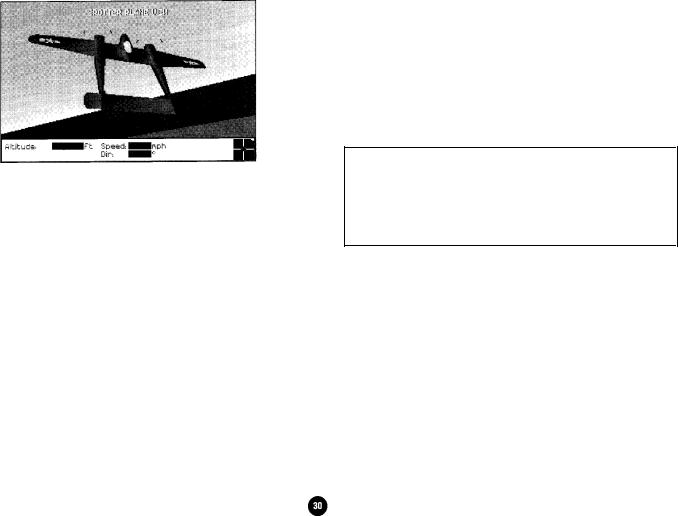
ALTITUDE: The altitude of the aircraft above sea level, expressed in feet.
SPEED: The speed of the aircraft expressed in miles per hour.
DIR: The direction the aircraft is flying measured in degrees. Due north is 0 degrees, due east 90, due south 180, and due west 270.
The red dot on the stick schematic indicates the position of your flight control stick. (See “Flight Controls” for details on how the stick schematic feature works.)
The white dot along the right side of the stick schematic indicates engine power setting.
Chapter 3 Aircraft Checkout Procedures
Flying Stunt Island Aircraft
Some of you more advanced pilots may get into our aircraft and get fidgety - not enough controls for you to manipulate. We’ve automated many of the controls that the pilot normally would adjust because as a stunt pilot, your primary concern is to Suc- cessfully execute a high risk stunt.
Although not necessary, pilots who really want to can work on
their aileron and rudder skills. The use of independent rudder control is explained in “Using the Rudder.”
This section does not go into the aerodynamic forces that affect flying, nor does it cover the dynamics of stalling, which is referred to. If you know little about flying and would like to learn more about the technical details, please see Appendix A.
Flight Controls
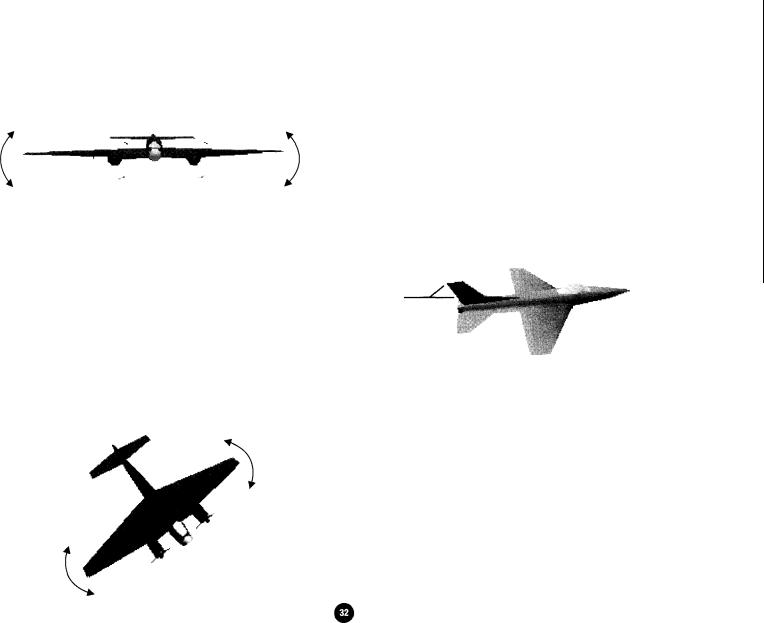
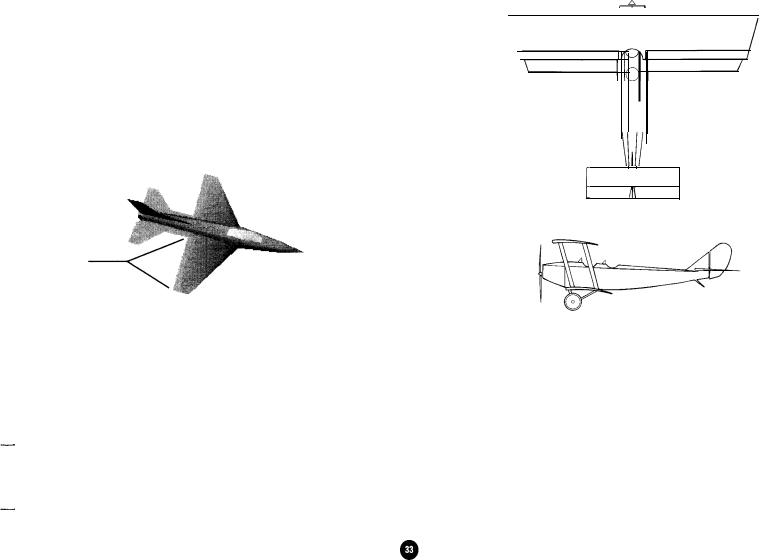
Stunt Island planes can be controlled using a keyboard, a mouse, or a joystick. As the pilot, you control the aircraft’s pitch, roll, and yaw.
A control stick schematic is always displayed on the lower right corner of the information display bar, except in the cockpit view (Fl). When the dot is in the center of the schematic, your control stick is in the “neutral position.”
Neutral Position of Control Stick
If you were in the real cockpit of an aircraft, you would be con-
-
-
-
-
-
-
-
-
-
-
-
-
-
-
-
-
-
-
-

Engine Power Controls
The keyboard controls the power settings for the aircraft’s engine(s). Press a key from 1 to 0 on the main keyboard (not the keypad) to select a power setting. The (+) and (-) keys allow you to gradually adjust the power.
Key |
|
Function |
1 |
10% of available engine power |
|
2 |
20% |
of available engine power |
3 |
30% |
of available engine power |
4 |
40% |
of available engine power |
5 |
50% |
of available engine power |
6 |
60% |
of available engine power |
7 |
70% |
of available engine power |
8 |
80% |
of available engine power |
9 |
90% |
of available engine power |
0 |
100% of available engine power |
|
|
Increase engine power by 2% |
|
|
Decrease engine power by 2% |
|
Backspace |
Cut engine power to 0% |
|
If you are flying with the cockpit view on, the aircraft’s power setting will be displayed on the cockpit panel by the position of the throttle lever. The higher up the throttle lever, the more engine power you have.
For those of you flying with the cockpit view off, the white dot along the right side of the stick schematic will indicate the aircraft’s power setting. When the dot is at the top of the cross hair, the aircraft is at full throttle. The lower the white dot is on the stick schematic, the lower the engine power.
Taking Off and landing
Taking Off
Press 0 to open the engine to full throttle and start the aircraft rolling down the runway. The miles per hour will increase on the airspeed indicator. When the aircraft reaches its take off speed, pull back on the control stick to lift the aircraft into the air. Remember the type of aircraft you are flying; modern jet aircrafts can take off and climb at greater angles, while older aircrafts and propeller aircraft will stall if you pull back too far on the stick.
If you’re flying with Control Centering on, you need to keep rolling the mouse back or keep pressing the down arrow key on the keyboard to simulate pulling back on the flight stick; otherwise, the stick moves back to the neutral position when you stop rolling the mouse.
Once you are established in a stabilized climb (not descending or turning) press G to raise your landing gear (if applicable). Flying with your landing gear down increases drag, which slows the aircraft.
After you level off at the desired altitude, be sure to reduce engine power to somewhere between 60% and 70% for jets and 80% to 90% for propeller aircrafts. Flying at full throttle makes the aircraft much more responsive to the slightest stick movement, which may make it seem harder to control.
Using Flaps for Takeoff
If you want to get your aircraft airborne quickly or if you need
Chapter 3 Aircraft Checkout Procedures
 Loading...