


LU C A S ART S EN T E RTA I N M E N T CO M PA N Y P R E S E N T S
™
™
™
B Y L A W R E N C E H O L L A N D
I N S T R U C T I O N M A N U A L
T A B L E O F C O N T E N T S
LOADING INSTRUCTIONS 6 |
SENSORS 13 |
||
IF YOU HAVE TROUBLE INSTALLING 8 |
ENERGY LEVELS 14 |
||
RUNNING THE GAME 8 |
MULTIFUNCTION DISPLAY (MFD) 16 |
||
QUICK START 9 |
COMBAT MULTIVIEW DISPLAY (CMD) 17 |
||
FAMILY TRANSPORT 10 |
TARGETING CRAFT 18 |
||
MISSION BRIEFING 11 |
IDENTIFYING CRAFT AND CARGO 19 |
||
HANGAR 12 |
CANNONS AND WARHEADS 19 |
||
HOW TO FLY 12 |
FIRING GUN TURRETS 20 |
||
THROTTLE CONTROLS 12 |
TYPES OF BEAM WEAPONS 21 |
||
VIEW CONTROLS 13 |
TYPES OF COUNTERMEASURES 21 |
||
COCKPITS AND HUD 13 |
SHIELDS 21 |
||
|
|
|
|
|
|
|
|
DOCKING AND PICKING UP OBJECTS 22 |
|
SOUND OPTIONS 37 |
IN-FLIGHT COMMUNICATION 22 |
GAME CONTROLLER OPTIONS 38 |
|
IN-FLIGHT MAP 24 |
|
COMBAT SIMULATOR 39 |
ENDING YOUR MISSION 25 |
|
QUICK SKIRMISH 41 |
AWARDS AND PROMOTIONS 26 |
|
TIPS FOR SUCCESS 45 |
THE CONCOURSE 26 |
MULTIPLAYER SPACE COMBAT 48 |
|
TECH LIBRARY 26 |
|
CUSTOMER SUPPORT 65 |
|
|
|
PILOT PROVING GROUND 27 |
PRODUCT LICENSE AGREEMENT 65 |
|
|
||
KEYBOARD COMMANDS 29 |
|
CREDITS 68 |
|
|
|
GENERAL OPTIONS 34 |
|
|
VIDEO OPTIONS 35 |
|
|
|
|
|
|
|
|

2  Star Wars: X-Wing Alliance
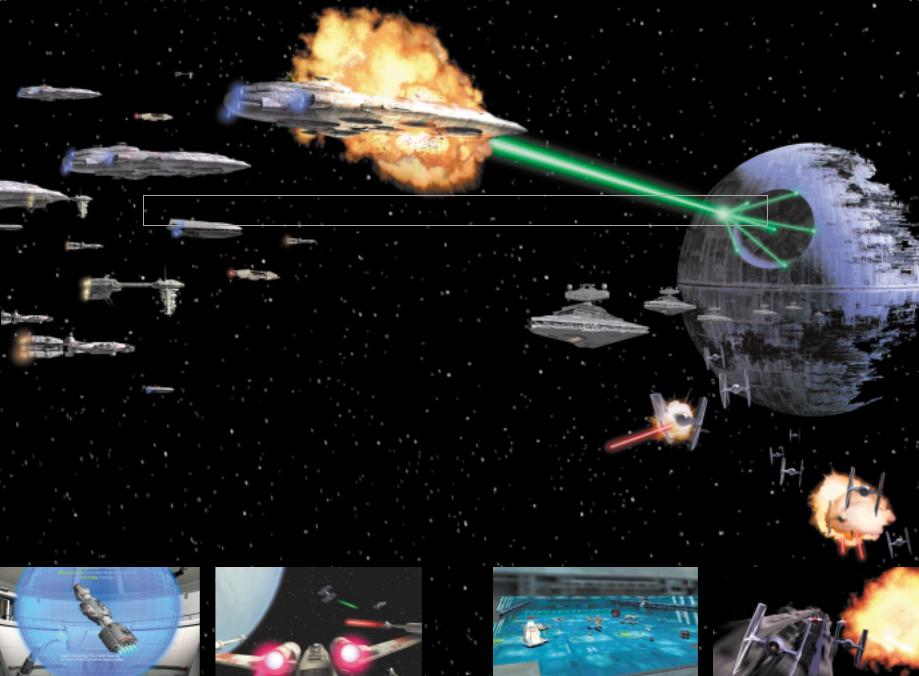
I N T R O D U C T I O N
WITH THE REBELLION SPREADING
THROUGHOUT THE GALAXY, THE
EMPIRE HAS BEGUN TO REGROUP IN A DETERMINED EFFORT TO QUASH IT. MORE AND MORE PLANETS AND CIVILISATIONS ARE BEING PULLED INTO THE BLOODY CONFLICT BETWEEN THESE TWO OPPOSING FORCES. EVEN FAMILIES AND BUSINESSES, BOTH SMALL AND LARGE,
CANNOT ESCAPE THE TURMOIL. AMONG THESE
FAMILIES ARE THE AZZAMEENS, THE OWNERS OF A SMALL BUT THRIVING SHIPPING AND STORAGE COMPANY. TO BUILD THEIR BUSINESS, THE AZZAMEENS HAVE FACED AN UPHILL BATTLE AGAINST THE STRONG-ARM TACTICS OF RIVAL FAMILIES, ORGANISED CRIME, AND CROOKED IMPERIAL-BACKED
CONGLOMERATES. THEIRS IS A WORLD
WHERE BRIBERY, CORRUPTION, DECEIT AND
THIEVERY ARE SIMPLY “BUSINESS AS
USUAL,” AND FAMILY HONOUR MUST PREVAIL ABOVE ALL ELSE.
IN X-WING ALLIANCE, YOU’LL BE
FLYING A SERIES OF COMMERCIAL,
SMUGGLING, AND ESPIONAGE MISSIONS AS
“ACE,” THE YOUNGEST AZZAMEEN SON. YOU’LL DO YOUR PART TO SAVE THE COMPANY AND THE FAMILY FROM HOSTILE
Star Wars: X-Wing Alliance  3
3
TAKEOVER ATTEMPTS BY THEIR RIVALS, THE
VIRAXO. HEADED BY PATRIARCH K’ARMYN
VIRAXO, THIS FAMILY HAS ALWAYS SEEN THE
AZZAMEENS AS ENCROACHING ON THEIR TURF,
AND COULD ESCALATE THE RIVALRY INTO SOMETHING MUCH MORE DEADLY.
GOOD LUCK, ACE... YOU’LL NEED IT.
4  Star Wars: X-Wing Alliance
Your Family
Members
Tomaas Azzameen Your father has been the head of the family shipping company, Twin Suns Transport Services, since its inception, as well as leader of the family. His decisions are usually derived from calm, but calculated, reflection. His success at making the family business grow has caused a rivalry with Viraxo Industries, a less-than-honest shipping business with ties to the Empire.
Antan Azzameen Your uncle cofounded the family cargo company with your father. He tries his best to keep the family neutral and avoid possible reprisals from the Empire, especially after the narrow escape from Hoth. “My first and foremost concern is the Azzameen Family,” he once stated. “It is not healthy to become involved in the struggle between the Empire and the Rebels. Our only enemies are the Viraxo.”
Galin Azzameen Your oldest brother and, appropriately, first in line to inherit the family business. Having always been the quiet, brilliant sibling, Galin is destined to follow Tomaas’ footsteps. Like Tomaas, his strong beliefs in the distinction between right and wrong have inspired a natural sympathy to the Rebel cause just short of allegiance.
Emon Azzameen Your middle brother and second in line to inherit the family business. He’s a skilled pilot whose hot temper sometimes affects his better judgment. If there’s a fight nearby, Emon is probably involved. Aeron once said, “Trouble clings to Emon like iron filings to a magnet, and he wouldn’t want it any other way.”
Aeron Azzameen Your older sister is wellknown as an ingenious computer hacker and systems slicing expert. She’s open to new ideas and opinions, but can be strong-willed once her mind is made up. Olin Garn is the only person outside of blood relatives to experience her sensitive and caring nature. You, though, have always been her favourite in the family.
ANTAN AZZAMEEN |
EMON AZZAMEEN |
AERON AZZAMEEN
GALIN AZZAMEEN
Star Wars: X-Wing Alliance  5
5
Family Friends |
Family Enemy |
Olin Garn Prior to joining the Rebellion, Olin was an experienced freighter pilot and freelance bounty hunter. While contracting with the Azzameens, he became a very close and trusted friend of Aeron. It wasn’t long before the entire Azzameen family adopted him as one of their own.
Emkay He is a heavily modified Kalibac Industries MK-09 Maintenance Droid. He has had many internal modifications that allow him to repair, pilot and copilot most light to medium vessels, including starfighters. He is extremely jealous of other droids and itching for combat. In fact, his enthusiasm for action is so pronounced, there have been discussions about tweaking his aggression circuits.
Dunari A close friend and prior business partner of your father, Dunari now is sole proprietor of one of the most notorious casinos in the galaxy. Although he often deals in questionable goods, his loyalty and friendship with the Azzameens is beyond doubt.
K’Armyn Viraxo He’s patriarch of the Viraxo family and head of the shipping conglomerate, Viraxo Industries. Viraxo is a formidable enemy, and the Azzameens are not in Viraxo’s favour. The Viraxo have dominated the local shipping lanes for years, mostly due to their coercive tactics and close ties with the Empire. With the growth of Twin Suns Transport Services, the Viraxo family is not likely to give up their position without a fight.
For the Azzameens, every day is a battle for survival in the world of commerce. And with the war between the Rebel Alliance and the Empire looming in the background, the fate of your entire family depends on your success.
DUNARI
OLIN GARN
K’ARMYN VIRAXO
EMKAY
TOMAAS AZZAMEEN
6  Star Wars: X-Wing Alliance
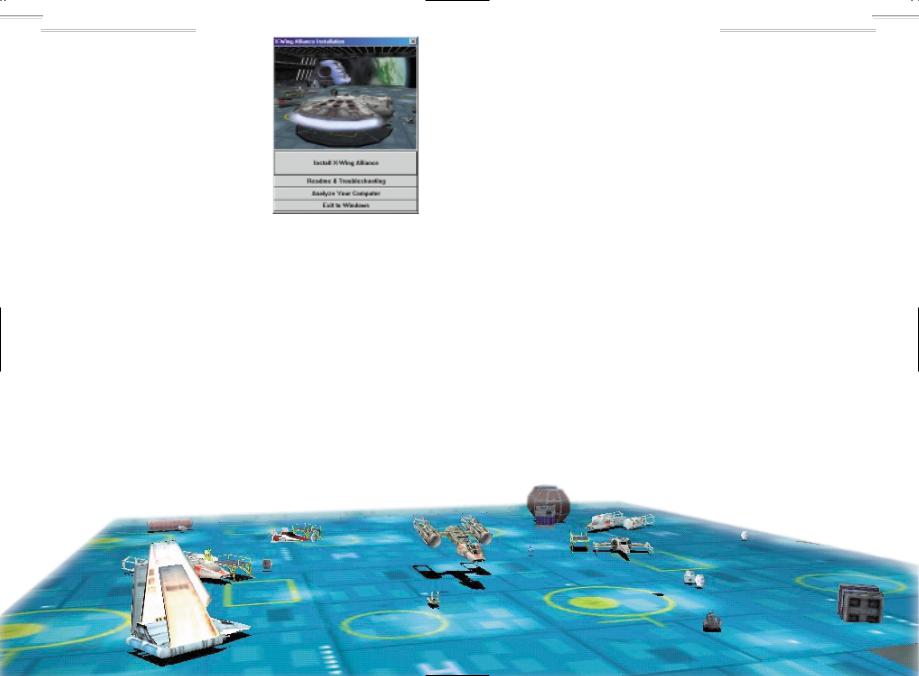
Loading Instructions
To install X-Wing Alliance on your PC:
1 Close all open windows on your desktop and quit all other applications.
2 Put the X-Wing Alliance Disc 1 in your CDROM drive.
3 The X-Wing Alliance Installer will appear. If Autoplay is disabled and the game’s Installer does not appear when you insert the
CD-ROM in the drive, you’ll need to open the Installer manually. To do this, double-click the My Computer icon, then double-click the CD-ROM icon in the window that opens. Double-click the
Alliance.exe file to open the Installer. It has these options:
•Install X-Wing Alliance Installs the game on your hard drive.
•Readme & Troubleshooting These
documents give you the most up-to-date game information, and we strongly suggest you read them. See the Troubleshooting Guide for detailed installation and troubleshooting tips. You can also view the Software License Agreement or install DirectX 6.
•Analyse Your Computer Checks your system to see if it meets game requirements.
•Exit to Windows Returns you to your desktop.
Star Wars: X-Wing Alliance  7
7
4 To install, click the Install X-Wing Alliance button. Follow the onscreen instructions.
5 Choose an installation size, either minimum or complete. (You must do the complete install to play multiplayer.)
6 Next, choose the destination for X-Wing Alliance installation. The default directory is: C:\Program Files\LucasArts\XWingAlliance. If you wish to install elsewhere, specify
a different drive or directory name.
7 You’ll be given the option to create a series of shortcuts in your Start menu. Creating a shortcut will make it easier for you to launch the game. Click the tickboxes to deselect any shortcuts you don’t want.
8 Setup will create an X-Wing Alliance Program Folder for the program icons. Click Next to choose the default (Start Menu\
Programs\LucasArts\XWingAlliance),
or create a new folder or select an existing folder, and then click Next.
9 You’ll be prompted to create a shortcut for your desktop. You’ll also have another opportunity to view the Readme.
10You’ll be prompted to calibrate your joystick before playing.
11A Setup Complete screen will now appear if the program successfully installed.
12After installing the program, you’ll be prompted to install DirectX 6.0, which is necessary to run the program. If DirectX 6.0 (or a later version) is detected on your system, the tickbox to install it will remain empty, and you won’t need to install DirectX. Click Finish to complete the Setup.
8  Star Wars: X-Wing Alliance
13You’ll be prompted to register electronically. (You’ll need to be connected to your Internet Service Provider.)
14You are now ready to play X-Wing
Alliance.
If You Have
Trouble Installing
See the Troubleshooting Guide for more detailed installation instructions and troubleshooting tips. To access the Troubleshooting Guide:
1 Insert an X-Wing Alliance disc, then double-click the My Computer icon.
2 In the window that opens, doubleclick the icon for your CD-ROM drive. This opens the Installer. You may also need to double-click the Alliance.exe file to open the Installer.
3 From the Installer, click Readme & Troubleshooting, then Troubleshooting
Guide.
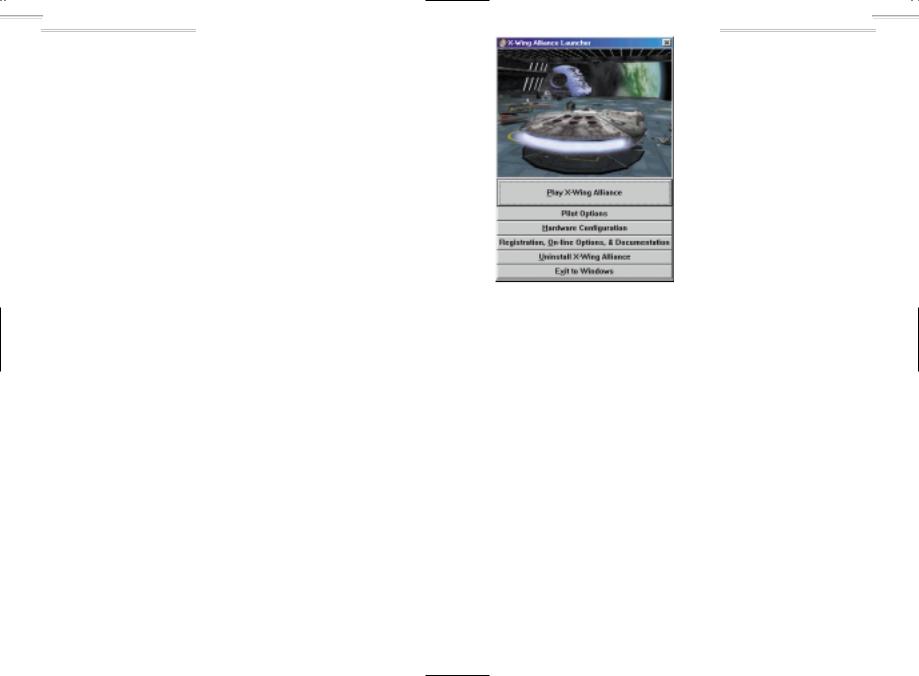
Running the
Game
1 To run the game, insert the X-Wing Alliance Disc 1 into your CD-ROM drive. The game’s Launcher will appear automatically if Autoplay is active.
2 If Autoplay is disabled, find the X- Wing Alliance directory on your hard drive. Double-click the X-Wing Alliance application icon (Alliance.exe), or double-click the CD-ROM icon on My Computer, then double-click
Alliance.exe file.
This Launcher appears whenever you insert a game disc, when you
double-click the CD-ROM icon, when you select the X-Wing Alliance shortcut from your Start menu, and when you double-click the Alliance.exe file.
3 If you have not done so before, select Pilot Options in the Launcher to create a pilot.
4 Select Play X-Wing Alliance in the
Launcher to play the game.
T H E L A U N C H E R
The X-Wing Alliance Launcher
displays
the following options:
•Play X-Wing Alliance This launches the game.
•Pilot Options Use this option to create, delete, or load a pilot. To create a pilot, press Create New Player, then enter a name and click OK. To load a pilot, select a name from the list of pilots you have created, then click the Load Player button. To delete a pilot, select the name from the list, then click Delete Player. Click Done when you are finished.
•Hardware Configuration This option lets
you analyse your computer to see if it meets system requirements, install DirectX and calibrate your joystick.
•Registration, On-line Options and Documentation Here, you can view the Readme document, or see the Troubleshooting Guide for detailed installation and troubleshooting tips. You can also join the LucasArts ExpressClub or go to the LucasArts Web site if you have Internet access.
LAUNCHER SCREEN
•Uninstall X-Wing Alliance Click here to remove the game from your system.
•Exit to Windows Returns you to your desktop.
Getting Started
N A V I G A T I N G
You use your mouse to move through the front end screens, and press your mouse button to select options. You’ll use a joystick when it’s time to fly your missions.
Star Wars: X-Wing Alliance  9
9
Q U I C K S T A R T
To start flying X-Wing Alliance’s first mission right away:
1 Create your pilot, then run the game, as described above.
2 After the cinematic intro, you’ll start in the Family Transport. Click on Emkay, your droid companion, to see your first mission briefing.
3 After watching the briefing, click on the To Hangar button in the lower right corner of the screen.
4 You’ll find yourself at the helm of the
Corellian YT-1300 Light Transport Sabra. Press the SPACEBAR to exit the Hangar. Take a moment to familiarise yourself with the
joystick controls. (For details, see How to Fly on page 12.)
5 Use these basic throttle keys to control your speed:
\Full Stop
[One-Third Throttle (This will allow you to turn the fastest.)
]Two-Thirds Throttle (This will allow you to turn faster than
at full throttle, but not as fast as at one-third.)
∫Full Throttle
6 In the mission it is best to follow Aeron and Emkay’s instructions precisely. Target (T key) and pick up
10  Star Wars: X-Wing Alliance
cargo canister Xi 1, (not Xi 2.) You will need to be within 0.2 km of Xi 1 when you press SHIFT+P. Now follow Aeron to the hyperbuoy to Harlequin Station. Press SPACEBAR when you are within 0.5 km to initiate your hyperdrive.
7 Once you arrive, follow CORT Selu and watch Aeron deliver her cargo, then deliver yours. Target the station, then press SHIFT+D to initiate the autodocking procedure. You must be within 1.0 km.
8 Once both canisters are delivered, a pair of Viraxo ships appear to attack Harlequin Station. You must move to intercept them. As you come within range, they will turn their attack against you. All you have to do to get them to leave is attack each of them. Don’t bother trying to destroy them because they will hyper out the moment they are attacked.
9 Once the Viraxo have departed, it is time to go back and get the supplies you came for. Aeron will pick up Chi 2 (the container with the coolant.) You need to pick up Pi 3, (the container with the fuel cells.) Then hyperspace home and deliver your cargo to your home base. Once again, it is best to let Aeron deliver her cargo first.
10 After both cargo containers have been delivered, your mission is a success and you may enter the Hangar. Since you’ve just delivered your cargo out on the Hangar Platform, simply press the SPACEBAR to initiate the automatic landing procedure.
Family Transport
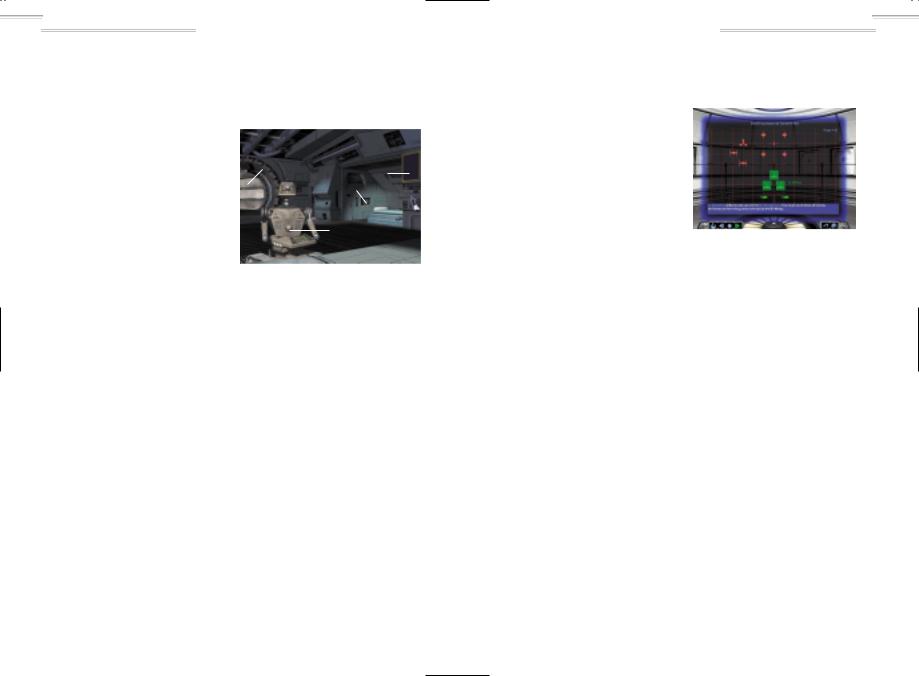
After you’ve launched the game, and moved through the opening screens, you’ll find yourself in a room with Emkay in the foreground.
Combat Simulator |
Medal Case |
|
Play Mission
You’re inside the Azzameen Family Transport. Moving the glove cursor around the room brings up the following choices:
•Play Mission This sends you off on the first of a series of missions you can fly as a member of the Azzameen family (see below).
•Combat Simulator This lets you take part in missions you’ve already flown, play a multiplayer game, or create a Quick Skirmish to fly.
•Pilot Statistics Click on this to see the records for each pilot. You can also read e-mail messages through the Alliance.reb network. Move your cursor over these arrow keys in the lower lefthand corner, and click on one to make your selection.
•Tour of Duty Record Displays the combat record while you’ve flown for the Alliance. This includes total score, number of kills, assists, and craft losses, and indicates how close a pilot
is to achieving a rating promotion.
•Azzameen Mission Record Displays your combat record in missions flown for your family.
•Combat Simulator Record This indicates how a pilot has performed in simulated missions. Only missions you’ve successfully completed can be flown in the Combat Chamber.
•Check E-Mail This is where you’ll receive messages about Azzameen family business, as well as information from around the galaxy. Move the cursor over the message’s title or author, then click on it to read the message.
•Souvenirs Click on any of the various souvenirs hanging inside the room to get an up-close view of them.
•Uniform Once you’ve joined the Alliance, click on your uniform to see your rank.
•Medal Case Displays the awards your pilot has won from the Rebel Alliance.
After you’ve joined the Rebellion, a new option in the Family Transport will replace the Combat Simulator option.
You’ll see:
•Back to Calamari Cruiser This sends you to the Calamari Cruiser Concourse, a “command central” where you’ll be able to access most of the features of the game.
Mission Briefing
Selecting Play Mission from the Family Transport brings up a brief text description of your mission, under the heading Mission Overview. This
Star Wars: X-Wing Alliance  11
11
description will be replaced by a more detailed mission briefing given by Emkay, your droid, complete with diagrams and step-by-step
MISSION BRIEFING SCREEN
instructions. (Later, when you’re flying Rebel Alliance missions, these briefings will be given by your Ship Commander and Briefing Officer.) You’ll also see a row of buttons in the lower left-hand corner, labelled:
•Mission Overview Brings back the text description of the mission you saw earlier. If you select this, click on the View Briefing Map button in the lower left-hand corner to return to the detailed briefing.
•Rewind Starts the mission briefing over.
•Stop Pauses the mission briefing.
•Play Unpauses the mission briefing.
•Forward Skips current page.
When your mission briefing has finished, click on one of these two buttons in the lower right-hand corner:
•Back To Family Transport Returns you to the Azzameen ship if you don’t want to fly the mission. (Later, after you’ve flown several family missions, this will say Back to Concourse.)
•To Hangar Sends you to the screen where you can launch your mission.
12  Star Wars: X-Wing Alliance
Hangar
After you’ve chosen Go to Craft Selection or To Hangar from one of the earlier Mission Briefing screens, you’ll find yourself inside the cockpit of the default craft, with a view of it in the lower middle of the screen. Here’s where you’ll start your mission, or change craft and weapons if you want. Move your mouse in different directions to look all around the Hangar. You can view the Hangar from different angles with the I-O keys. Click the left mouse button to centre view.
FAMILY BASE HANGAR
In the leftand right-hand corners, you’ll see two menus. Press the LEFT ARROW key to activate the left menu, labelled Hangar Menu. Press the RIGHT ARROW key to activate the right menu. The border around each menu title will change colour when you’ve selected it. Press the UP and DOWN ARROW keys to scroll within each active menu. Your selection will be highlighted. Press SPACEBAR to exit the hangar.
How to Fly
Move your joystick up, down, left, or right to control the direction of your craft. Pressing the second joystick button while moving left or right will roll the craft left or right. You can also adjust your joystick settings by pressing the ESC key to go to the Options menu. Keep in mind that no two craft handle exactly the same way.
Throttle Controls
These increase or decrease your craft’s current speed. Throttle is measured on a scale from zero (no throttle) to 100 percent (full throttle). Use:
[for one-third throttle,
]for two-thirds throttle,
∫for full throttle,
\for a full stop.
For fine control of any setting you want, pressing the = key will increase your throttle, and pressing the - key will decrease it. If you have a craft targeted (see Targeting Craft
on page 18 for a more detailed description), you can press the ENTER key to match that craft’s current speed.
Star Wars: X-Wing Alliance  13
13
View Controls |
Sensors |
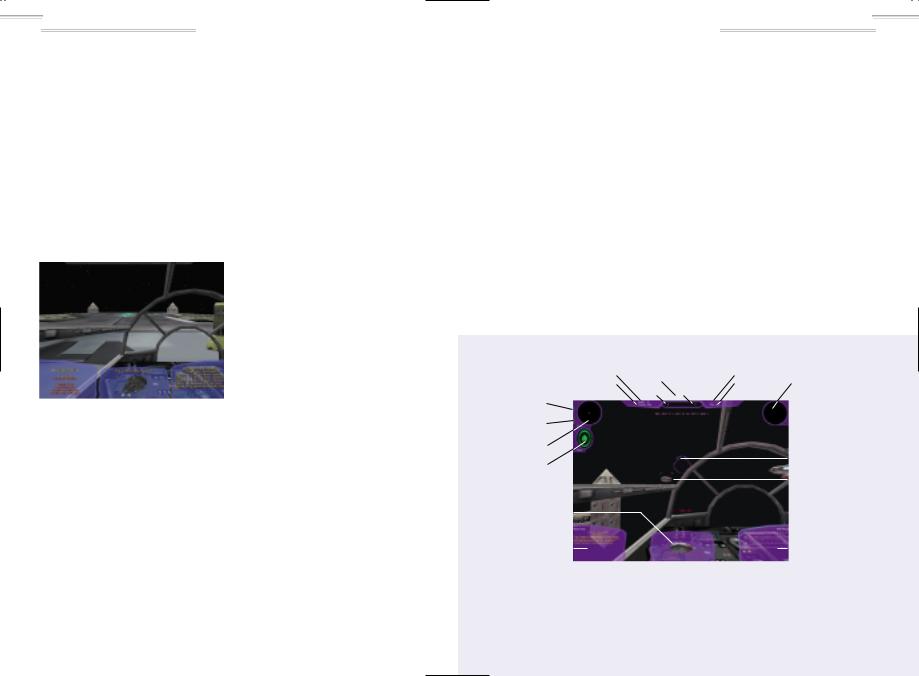
You begin your mission in forward cockpit view. Press your keypad directional keys
(2, 4, 6, 8) to look at the different views around your craft. Use the / key to switch to external camera mode, then press the * key to look all around your craft, using your joystick. See Multifunction Display (MFD) and Combat Multiview Display (CMD), starting on page 17, for a more detailed description of your craft’s cockpit instruments.
In the upper leftand right-hand corners of each cockpit, you’ll see two round sensors. These indicate the friendly and enemy craft and objects in your vicinity, which are shown as dots within each circle. The display on the left shows the craft and objects in front of you, while the display on the right shows the craft and objects behind you. A brighter dot indicates a craft that is near you, while a dimmer dot represents a craft that is farther away. When you target a craft (see Targeting Craft on page 18), a square will appear around a dot on one of the displays, indicating the location of the targeted craft.
Cockpits and HUD
|
|
Speed |
Warheads |
Ship I.D. |
|
|
|||
|
Engine Thrust |
Available |
Mission Clock |
Rear Sensor |
|||||
|
Percentage |
|
|
|
|
|
|
|
|
Laser Cannon |
|
|
|
|
|
|
|
||
Recharge level |
|
|
|
|
|
|
Engine Power |
||
|
|
|
|
|
|
||||
Shield Recharge |
|
|
|
|
|
|
Level |
||
|
|
|
|
|
|
|
|||
Level |
|
|
|
|
|
|
|
||
Forward Sensor |
|
|
|
|
|
|
|
||
Shield/Hull |
|
|
|
|
|
|
Targeting Sight |
||
|
|
|
|
|
|
||||
|
|
|
|
|
|
|
|||
Strength Indicator |
|
|
|
|
|
|
Targeted Ship |
||
Combat Multiview |
|
|
|
|
|
|
|
|
|
|
|
|
|
|
|
|
|
|
|
Display (CMD) |
|
|
|
|
|
|
|
||
Left Multifunction |
|
|
|
|
|
|
|
|
Right Multifunction |
Display (MFD) |
|
|
|
|
|
|
Display (MFD) |
||
CORELLIAN TRANSPORT COCKPIT

14  Star Wars: X-Wing Alliance
|
|
Speed |
Warheads |
Ship I.D. |
|
|
|||
|
Engine Thrust |
Available |
Mission Clock |
Rear Sensor |
|||||
|
Percentage |
|
|
|
|
|
|
|
|
Laser Cannon |
|
|
|
|
|
|
Engine Power |
||
Recharge level |
|
|
|
|
|
|
|||
|
|
|
|
|
|
Level |
|||
Shield Recharge |
|
|
|
|
|
|
|||
|
|
|
|
|
|
|
|||
Level |
|
|
|
|
|
|
|
||
Forward Sensor |
|
|
|
|
|
|
Targeted Ship |
||
|
|
|
|
|
|
||||
|
|
|
|
|
|
|
|||
Shield/Hull |
|
|
|
|
|
|
Targeting Sight |
||
|
|
|
|
|
|
||||
|
|
|
|
|
|
|
|||
Strength Indicator |
|
|
|
|
|
|
|
||
Combat Multiview |
|
|
|
|
|
|
|
|
Laser Cannon |
|
|
|
|
|
|
|
|||
Display (CMD) |
|
|
|
|
|
|
Charge |
||
|
|
|
|
|
|
|
|
|
|
Left Multifunction |
|
|
|
|
|
|
|
|
Right |
Display (MFD) |
|
|
|
|
|
|
Multifunction |
||
|
|
|
|
|
|
|
|
|
Display (MFD) |
X-WING COCKPIT
Each dot is colour coded, to let you know whether they are friendly, hostile, or neutral. The colours you’ll see are:
•Green Rebel craft
•Red Imperial craft
•Purple Family craft
•Yellow Unknown or neutral craft, presumed hostile
•White Mines
•Blue Neutral craft, presumed friendly
•Flashing Yellow/Red Warheads
Energy Levels
Each craft has Energy Level Indicators for weapons, shields, and engines displayed as coloured vertical bars. The Weapons and Shields Energy Level Indicators are located left of the left Sensor Display. The Engines Energy Level Indicator is located right of the right Sensor Display. If your craft is armed with a beam weapon, its Energy Level Indicator will be located below the Engines Energy Level Indicator. (See the HUD diagram above.)
You can redirect power to the different systems from your engines.
Star Wars: X-Wing Alliance  15
15
|
|
|
|
Speed |
Warheads |
Ship I.D. |
|
|
|
||||
|
|
Engine Thrust |
Available |
Mission Clock |
Rear Sensor |
||||||||
|
|
|
Percentage |
|
|
|
|
|
|
|
|
|
|
Laser Cannon |
|
|
|
|
|
|
|
|
|
|
|
|
Engine Power |
Recharge level |
|
|
|
|
|
|
|
|
Level |
||||
Shield Recharge |
|
|
|
|
|
|
|
|
|
|
Beam Weapon |
||
|
|
|
|
|
|
|
|
|
|||||
Level |
|
|
|
|
|
|
|
|
Recharge Level |
||||
|
|
|
|
|
|
|
|
|
|
|
|
|
|
Forward Sensor |
|
|
|
|
|
|
|
|
Beam Weapon |
||||
|
|
|
|
|
|
|
|
||||||
|
|
|
|
|
|
|
|
Indicator |
|||||
|
|
|
|
|
|
|
|
|
|
|
|
|
|
Shield/Hull |
|
|
|
|
|
|
|
|
Targeting Sight |
||||
|
|
|
|
|
|
|
|
||||||
Strength |
|
|
|
|
|
|
|
|
|
||||
Indicator |
|
|
|
|
|
|
|
|
Targeted Ship |
||||
|
|
|
|
|
|
|
|
||||||
Combat Multiview |
|
|
|
|
|
|
|
|
|
|
|
Ion Cannon Charge |
|
Display (CMD) |
|
|
|
|
|
|
|
|
(blue) |
||||
|
|
|
|
|
|
|
|
|
|
|
|
|
Laser Cannon |
|
|
|
|
|
|
|
|
|
|
|
|
|
|
|
|
|
|
|
|
|
|
|
|
|
|
|
Charge (green) |
Left |
|
|
|
|
|
|
|
|
|
|
|
Right |
|
Multifunction |
|
|
|
|
|
|
|
|
Multifunction |
||||
Display (MFD) |
TIE WITH BEAM WEAPON HUD |
|
|
|
|
Display (MFD) |
|||||||
|
|
|
|
|
|
|
|
|
|
||||
Press the F9 key repeatedly to cycle through the different possible recharge rates of your primary weapons. Press the F10 key repeatedly to
do the same for your shields. If your craft has beam weapons, press the F8 key for beam recharge rates. You can also transfer energy from your weapons to your shields by using the ‘ (apostrophe) and “ (quote) keys, and transfer energy from your shields to your weapons by using the ;
(semicolon) key.
This interplay between energy, shields and lasers, called the Energy Array, is
the most crucial aspect of your starfighter. It allows you to control the power output to each of your systems, allocating as much or as little power as needed. Think of it as a central battery that all systems draw from. When all systems are charging at maintenance rates, shields and lasers will decrease as damaged or used. To recharge one of your systems, you must take power away from the engines to redirect it to the system that needs recharging.

16  Star Wars: X-Wing Alliance
For example, if your ship’s shields have taken damage, you must recharge the shields. When you increase the shield charge rate, your ship draws the power from the engines. Therefore, even though your ship remains at the same throttle rate, it will travel at a decreased speed with less manoeuverability. Conversely, if you need to get somewhere in the shortest amount of time, redirect all power to the engines by dropping the laser and shield charge rates to minimum.
•Engines Engines are controlled by thrust. You do not have direct charging control of engine power. When power is redirected to or from lasers, shields or the beam weapon, it is the engine level that increases or decreases. You may be at 100 percent throttle, but if another system is drawing power from the engines, you may not travel at full speed.
•Lasers When your laser recharge rate is at mid-level, laser cannons recharge at maintenance level. As laser cannon shots are fired, laser power will dissipate until it is recharged. If the display is below the mid-level line, laser cannons are charging at a decreased rate, and your ship will lose laser power even if you are not firing them. When the display shows above mid-level, your laser cannons are recharging and will continue to recharge until they are at full capacity. You can quickly transfer energy to your lasers from your shield system, if your craft is equipped with one. Increase your laser recharge rate once you get into heavy combat.
•Shields If your ship is equipped with shields, they will have two levels. You
may double charge your shields by increasing your shield recharge rate until both of the first and second tiers are full. If the shield level display is below mid-level, your shields will lose power, even if your ship is not being damaged. Like your laser system, you can alternatively transfer energy to your shields from your lasers. Recharge your shields if you’ve taken a lot of hits.
Multifunction
Display (MFD)
These two displays, located in the two lower corners of the cockpit, give you important mission information.
Pressing the DELETE key brings up the left MFD, and the PAGE DOWN key brings up the right MFD. The display that has the brighter border is the active MFD. Press the inactive MFD key (either
DELETE or PAGE DOWN) to make it the active MFD. Press this key again to turn the MFD off. Press the LEFT and RIGHT ARROW keys to cycle through these display modes within the active MFD:
•Flight Commands This MFD mode contains the interface for giving orders to your wingmates and support craft. (See the In-Flight Communication/Wingmates Commands section on page 22 for detailed information and instructions.)
•Friendly Craft List Displays a list of friendly craft in the area, along with information about shield and hull damage they’ve
sustained, and their targets. If the list is long, press the UP and DOWN ARROW
keys to see all the craft.
• Enemy Craft List Displays a list of hostile craft in the area, along with information about shield and hull damage they’ve sustained, their targets, and their orders. If
you have a long list, press the UP and
DOWN ARROW keys to see all the craft. Craft names will appear as Unknown until the craft have been identified.
•Damage Assessment Displays the condition of your craft’s systems. If they are damaged, it gives you the time remaining until they are repaired.
•Radio Messages Displays all radio communications you’ve received since the start of the mission. If the list is long, press the UP and DOWN ARROW keys to read all the messages.
•Mission Goals Displays the mission objectives you must achieve (in yellow text), the objectives that have been achieved (in green text), the goals to prevent (in blue text), and the objectives you failed to accomplish (in red text). Some missions will have a number in parenthesis next to a goal. This is displayed when the objective of a mission is to protect or destroy a percentage of craft, and will be updated during your mission. As the mission progresses, new mission objectives will be displayed. You’ll also see the mission outcome, which will either be unresolved, victory or loss.
•Mission Score Displays your name, score, and number of kills you’ve achieved in your current mission. During the races in the Pilot Proving Ground, the score lists the players according to their places in the current contest.
Star Wars: X-Wing Alliance  17
17
Combat Multiview
Display (CMD)
In the lower middle section of your cockpit, you’ll see the Combat Multiview Display, or CMD. It will show the image of any friendly or enemy craft, station, buoy, or mine you’ve targeted, its name, what activity it’s doing, along with the following information once you have identified the target:
• SHD% Shows the strength of the targeted craft’s shields.
COMBAT MULTIVIEW DISPLAY SCREEN
•HULL% Shows the percentage of the targeted craft’s hull that is intact. If you’ve destroyed your target’s shields, you’ll begin decreasing its hull integrity. When the percentage reaches 0, your target will be destroyed.
•SYS% Shows the percentage of the targeted craft’s systems that are functioning properly. Damage to these systems can only be inflicted with ion weapons.
•Distance Shows the distance from the targeted craft to your craft, in kilometres.
18 Star Wars: X-Wing Alliance
•Craft Cargo Displays contents of craft’s cargo bay. Enemy craft (and most neutral craft) must be inspected to reveal their cargo.
•Targeted Component: Displays the component of the vessel currently targeted.
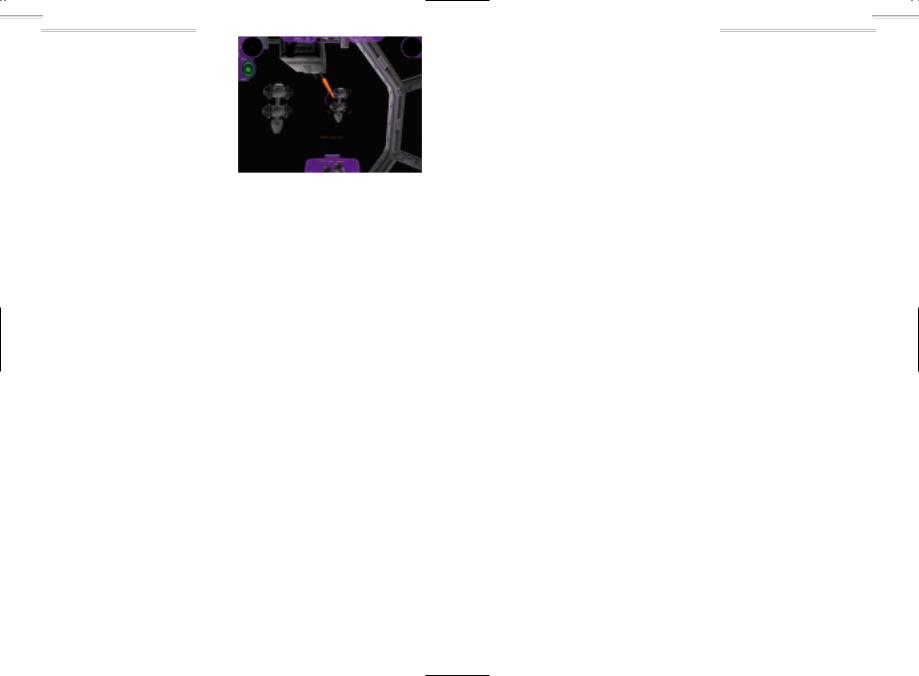
Targeting Craft
In space combat, you’ll have numerous targeting options, which you’ll want to use depending on your situation in a mission.
To cycle through all the available targets, press the T key repeatedly. Press the Y key repeatedly to cycle backwards through these targets. Press the N key to target the nearest nav buoy that locates a hyperspace jump point. To locate and target nearest enemy craft, mine or weapon, press the R key. Press the E key repeatedly to cycle through the enemy craft that are targeting your craft. Press the I key to target the nearest warhead that is targeting your craft. If you aren’t being targeted by a warhead, pressing this key will target the nearest enemy warhead. Press the U key to target the most recent craft to arrive in the combat area.
TARGETED CRAFT
If Imperial craft are attacking a target you want to defend, press the A key to target the nearest attacking craft.
Since you have a mission to perform, the O key is useful, as it targets the nearest mission objective. You can even target individual components of a craft by pressing the , (comma) key. These will be displayed in the lowerright corner of the CMD.
You can also target a craft by pointing your Targeting Reticule at it (see below), then pressing your second joystick button.
Y O U R T A R G E T I N G
R E T I C U L E
This round sight above the CMD is used as a targeting device for your primary weapons, your cannons, as well as your secondary weapons and your warheads. As you’re flying in combat, try to line up a target inside the reticule. When you’re firing laser cannons at a target, the reticule will be illuminated green and you’ll hear a beeping noise when you have a shot lined up with the targeted craft.
If your craft is carrying warheads, the number available will be displayed below the reticule. When you have these weapons armed, yellow brackets will appear within the reticule when you aim it at a targeted craft in range. The brackets will turn red when you’ve locked in on a target, and you should fire your weapon. You’ll also hear a solid tone. Press the first button on your joystick to fire your weapons.
The curved bar above the reticule has four different indicator lights to alert you to possible attacks by enemy craft and weapons. If the left light on the bar comes on, your craft is being attacked by an enemy fighter. If the middle-left light is illuminated, your craft is being targeted by a laser turret on a starship. The middle-right light warns you that a beam weapon is being used on your craft. The right light will flash yellow if an enemy craft is trying to lock a warhead onto your craft, and will turn red if this lock has been achieved.
Identifying and
Inspecting Craft
and Cargo
During some missions, you’ll need to identify unknown craft and see what they’re carrying. To identify a craft, target it, then fly close to it (the distance varies from craft to craft). You’ll then see the craft’s name, along with other important statistics, displayed on your CMD. To inspect a craft, target it, then fly within about 0.5-0.2 km of it. A description of the ship’s contents will appear on your CMD.
Selecting and
Firing Cannons
and Warheads
Depending on the craft you’ve chosen, and the way you’ve configured it, you’ll have a variety of cannons and warheads to fire at a target. Press the
W key repeatedly to cycle through the different available weapons for your
Star Wars: X-Wing Alliance  19
19
craft. If your craft has more than one of the same type of weapon, such as laser cannons, you can press the X key to link their fire, so they’ll all fire at the same time. However, doing this will slow down your rate of fire. On certain craft, you can even link lasers and ion cannons together using the X key. Press the Z key for gun harmonisation. (Gun Harmonisation determines the distance at which your lasers will converge to a single point. Most craft default to automatic, which means that lasers will automatically converge at the distance of the currently targeted craft. The harmonisation can also be manually changed. Some older craft, like the Z-95 Headhunter, do not have automatic harmonisation, so they must always be adjusted manually.)
FIRING LINKED AND UNLINKED WEAPONS
T Y P E S O F C A N N O N S
•Laser Cannons The galaxy’s most commonly used weapon, these fire bolts of coherent light that inflict significant damage.
•Ion Cannons These weapons are useful for disabling craft. Its drawback is that it has a shorter range than a laser cannon.
•Turbolasers Advanced laser cannons typically found only on starships, these awesome weapons cause much more damage than a laser cannon and can also go farther.
20  Star Wars: X-Wing Alliance
T Y P E S O F W A R H E A D S
•Concussion Missiles Best used when dogfighting with slower craft, these weapons can be avoided by a quick, last-second turn.
•Advanced Concussion Missiles
Swift and deadly, these powerful weapons are difficult to avoid.
•Proton Torpedoes The most commonly used warhead in the galaxy, these weapons are too slow to use against fighters, but devastating against much larger capital ships.
•Advanced Proton Torpedoes Fast and powerful enough to be used against fighters and larger ships alike.
•Heavy Rockets These slow weapons can be easily shot down, but if they hit a ship or installation, they can inflict significant damage.
•Space Bombs They are more powerful than heavy rockets and are much harder to shoot down. Their minimal guidance systems make them most useful for destroying stationary or slow moving, heavily armed targets.
•Mag Pulse Warheads While one of these weapons won’t damage a craft’s shields or hull, it can knock out its weapons systems for 30 seconds.
•Ion Pulse Warheads The latest in warhead technology, these weapons act like proton torpedoes to damage shields, and act like ion cannons to disable a craft once its shields are down.
GUN TURRET
Firing Gun
Turrets
If you’re flying in a craft equipped with laser gun turrets, such as the
Millennium Falcon, you can operate its gun turrets yourself. Press the G key to move to the turret. Your craft will continue to fly in a straight line, but you can press the F key to have Emkay, your droid copilot, follow your target and keep it in range.
When you’re inside the gun turret, move your joystick up, down, left, and right to look all around. Your laser cannons are mounted in the upper section of the turret. You’ll see a round targeting reticule in the upper-middle of the screen. Press your first joystick button to fire at the target.
To cycle through multiple turrets (if the craft has them) or return to the cockpit, press the G key again. You can fire your gun turret lasers from the cockpit by linking them with your forward lasers. Press the X key to do this. You can also have your gun turret laser automatically track and fire at your current target by pressing the F key.
Types of Beam
Weapons
These defensive weapons can paralyse and hinder enemy craft, to give you an advantage in space combat. There are three types of beam weapons:
•Tractor Beam Use these to keep another craft from turning.
•Jamming Beam These prevent another craft from firing weapons at your craft. Large targets may require more than one beam to be fully neutralised.
•Decoy Beam With this stealth device, your craft won’t show up on enemy radar screens, and can’t be targeted.
To activate a beam weapon, press the B key. The decoy beam works automatically, but you’ll need to aim the tractor and jamming beams at a targeted craft. If your craft is equipped with a beam weapon, you’ll see a Beam Weapon Charge Indicator below your right sensor.
Types of
Countermeasures
These weapons help you defend your craft against enemy warheads. The two kinds of countermeasures are:
•Chaff This electromagnetic energy shoots out from behind your craft to deflect warheads and beam weapons.
•Flare When fired, this miniature warhead will go after the nearest enemy warhead that is bearing down on you. If no warhead has been launched, it will target the nearest enemy craft.
Star Wars: X-Wing Alliance  21
21
To use either of these countermeasures, press the C key when a warhead is fired at you. If you’re firing flares, it’s best to wait until the warhead is within 0.5 km before activating your countermeasure system.
Shields
When your craft is hit, its shields deflect much of the harmful energy to prevent your craft from being damaged or destroyed. As your shields weaken, however, your craft will be more likely to sustain damage. Your Shield Charge Indicator, located on the left side of the screen below the Forward Sensor Display, will show you how your front and rear shields are holding up.
The ship outline icon displays the integrity of your craft’s hull. If the icon is green, your craft is undamaged; if it’s yellow, your craft is damaged; if it’s red, your craft is in serious danger. The oval surrounding that icon shows the integrity of your craft’s shields, and are also green if undamaged, yellow if damaged, and red if critical. If your shields go down, your craft’s hull will begin to weaken. To recharge your shields, press the ‘ (apostrophe) or
SHIFT+F9 keys to transfer laser energy to shields. Press the SHIFT+‘
(apostrophe) to transfer all laser energy to shields.
If your shields have been damaged, and you need to retreat from battle or defend against frontal attack, press the S key to cycle through the shield settings, and move your shield energy to the front, rear, or wherever you need it most.
 Loading...