


TABLE OF
CONTENTS
TABLE OF CONTENTS |
|
WELCOME TO THE FLEET |
|
Getting Started ........................................................................... |
5 |
Launch Screen .............................................................. |
5 |
Installation.................................................................. |
5 |
Quickstart.................................................................... |
5 |
Main Menu ................................................................................. |
6 |
Tutorials ...................................................................... |
6 |
Skirmish Mode.............................................................. |
6 |
Single Player Campaign.................................................. |
6 |
Dynaverse 3 ................................................................. |
6 |
Exit Game .................................................................... |
6 |
Options Menu ............................................................................. |
7 |
Game Controls .............................................................. |
7 |
Audio Controls.............................................................. |
8 |
Video Controls .............................................................. |
8 |
Keyboard Remapping ..................................................... |
9 |
Basic Starship Controls................................................................. |
10 |
Alert Status ................................................................. |
10 |
Turning ....................................................................... |
10 |
Speed ......................................................................... |
11 |
Targeting ..................................................................... |
11 |
Weapon Selection/Control .............................................. |
12 |
Shields ........................................................................ |
14 |
Communication............................................................. |
14 |
Cloaking ...................................................................... |
15 |
1

TABLE OF |
|
CONTENTS |
|
Scanning ..................................................................... |
16 |
Repairs........................................................................ |
16 |
Advanced Starship Controls ........................................................... |
17 |
Marines ....................................................................... |
17 |
Power Allocation........................................................... |
18 |
Helm Controls .............................................................. |
19 |
Science ....................................................................... |
21 |
Tractor Beam................................................................ |
22 |
Transporters ................................................................. |
23 |
Shuttles ...................................................................... |
23 |
Officers ....................................................................... |
24 |
Mines.......................................................................... |
25 |
Skirmish Mode ............................................................................ |
26 |
Setting up Single Player ................................................ |
26 |
Joining a Multiplayer Skirmish........................................ |
29 |
Hosting a Multiplayer Skirmish ....................................... |
30 |
Film Room ................................................................... |
31 |
Vessel Library ............................................................... |
31 |
Single Player Campaign ................................................................ |
32 |
The Hex Map ................................................................ |
32 |
Loading Saved Games .................................................... |
38 |
Conquest Mode ............................................................. |
38 |
Dynaverse 3 ............................................................................. |
39 |
Signing Up .................................................................. |
39 |
Setting Up Your Character .............................................. |
39 |
Gameplay..................................................................... |
40 |
Dynaverse 101.............................................................. |
41 |
|
TABLE OF |
|
CONTENTS |
Empires |
43 |
The United Federation of Planets |
43 |
Klingon Empire |
44 |
Romulan Empire |
45 |
Borg Collective |
46 |
Ships |
47 |
Weapons |
62 |
Ship Systems |
69 |
Key Bindings |
71 |
Credits |
73 |
Customer Support |
77 |
Software License Agreement |
79 |
2 |
3 |

INTRODUCTION
WELCOME TO THE FLEET
Welcome to the third game in the Starfleet Command series. SFC3 is a game of tactical starship combat set in Star Trek: The Next Generation® era of the Star Trek universe. It contains a single player campaign in which you can experience an epic universal conflict from three sides: Klingon, Romulan, and Federation. In addition to completing story-critical missions while exploring the galaxy, you will be able to take on optional missions to gain prestige, allowing you to hire more experienced officers, buy better ships, and refit your existing ship. These options combine to bring you the most immersive single player SFC yet.
SFC3 also brings you Dynaverse 3, an exciting multiplayer component that allows you to join one of 4 empires and fight alongside and against other captains for control of the galaxy. You’ll be able to form fleets with your friends to raid enemy convoys, siege planets, and attack enemy fortifications. Each victory will bring your side more prestige to bolster its forces for
future conflicts.
Activision and Taldren have worked hard to bring the Starfleet Command series into this universe, and we hope you enjoy it.
GETTING STARTED
GETTING
Launch Screen
The following options are available from the splash screen:
Install: Begins the installation of the game. This button will change to “Play” once the game is installed.
Uninstall: Removes the installation of the game.
Extras: Click here for information on other Activision products.
Support/Info: Click to access the SFC troubleshooting document if you are having problems with the game.
Quit: Closes the launch screen.
Installation
To install the game, insert the SFC3 CD into your CD-ROM drive and choose one of the following actions:
If your CD-ROM drive has AutoPlay enabled, the Launch Screen will appear automatically. Click “Install” and follow the on-screen installation instructions.
If AutoPlay is not enabled, Double-click on the “My Computer” icon on your desktop. Double-click on the CD-ROM drive icon. Double-click on the “Setup” icon. When the Launch Screen appears, click “Install” and follow the onscreen instructions.
Quickstart
If you want to jump into the game and start playing right away, skip ahead to the Basic Starship Controls section on page 10. This section describes the basic controls to play the game. Once you’re comfortable with them you can move on to Advanced Starship Controls on page 18, which goes into more detail on ship systems and tactics.
4 |
5 |

MAIN MENU
MAIN MENU
Double-click on the SFC3 icon on your desktop or select SFC3 from the Start Menu to begin the game. After a brief loading period, you will be greeted by the Main Menu, which contains the
following options:
Explore Tutorials: This section is where new captains can learn the basics of starship control. It covers everything from
helm maneuvers to combat controls. Clicking on this button will allow you to select from six different Starfleet Academy classes. If you’re new to the game, you should play them in order. If you’re a returning captain and are familiar with the basics, feel free to skip ahead.
Single/Multiplayer Skirmish: If you’d like to dispense with story and jump right into combat, this is the section for you. From this menu, you can setup any combat scenario you’d like to play against either computer-controlled or human opponents. Setting up a skirmish and the numerous options available are detailed on page 26.
Single Player Campaign: This menu grants you access to SFC3’s immersive single player missions. You can choose to play as either the Klingons, Romulans, or Federation. As these campaigns feature a storyline which plays out over all three, we recommend you play them in order to get the full scope of the story. However, if you’re disgusted by the idea of playing a sneaky, untrustworthy Romulan, feel free to skip around. More details on the Single Player Campaign can be found on page 32.
Multiplayer Online Campaign: Select this menu to sign on to a Dynaverse 3 server and begin your quest to conquer the galaxy. You’ll need to sign up for an account and choose a team before you’re sent out to battle alongside your friends to destroy the competition. Dynaverse 3 is examined in more detail on page 39. You will need a internet connection to play on the Dynaverse 3.
Options: This button allows you to adjust audio, video and gameplay settings. See page 7 for more information.
Exit Game: This button allows you to exit the game and return to your desktop at any time.
OPTIONS MENU
OPTIONS MENU
This menu allows you to tweak game options to your liking, as well as adjust sound and video options and re-assign keyboard controls (note that keyboard re-mapping is only available from the menu screens; the in-game options menu does not contain this feature).
Camera Controls
This section allows you to change your camera controls while in the game. The following options are available:
Overhead: A view of your ship and its
surroundings from directly overhead, with your ship in the center of the screen. If you have an enemy targeted, the screen will zoom out as your target moves away, allowing you to keep them in sight at all times. In large battles, this is often a better view for strategic planning. You can access this camera angle in game by pressing F1.
Chase: This view locks the camera on your current target. You can access this camera angle in game by pressing F2.
Follow: This is the default view for SFC3. It shows your ship from a 3D perspective just above the plane of attack that can be zoomed in and out with the + and – keys. You can access this camera angle in game by pressing F3.
Enemy: This view places your target in the foreground but still allows you to see your ship. You can access this camera angle in game by pressing F4.
Target: This button will toggle the camera lock on your target. When activated, the camera will always keep your opponent on screen by zooming out (in Overhead mode) or by rotating the camera (in Follow mode). When toggled off, the camera will stay behind your ship. You can also toggle this feature on and off while in game by pressing F5.
Miscellaneous
This section of the menu allows you to set game functions and adjust volume. The following options are available:
Quick Tips: When turned on, a helpful tip will appear if you hold the mouse over most buttons in the game. When turned off, the tips will not appear.
6 |
7 |
OPTIONS MENU
Game Speed: This slider controls the speed of the game and can be set from 1 to 11. Slower speeds give you more time to think and plan, while faster speeds focus more on action and quick-thinking. You can adjust the speed of the game to suit your style of play.
Visible Grid: When activated, this feature will display a visible grid on the playfield. This can help you gauge relative distance to targets and plan certain attacks.
Text Speed: This slider controls the speed at which on-screen text displays. If you find yourself unable to read the text before it scrolls off of the screen, you can slow it down.
Master Volume: This slider controls the overall volume level of the game.
Music Volume: This slider adjusts the volume for only the music of SFC3.
Speech Volume: Use this slider to adjust the volume of the speech in the game.
Texture Options
This menu allows you to turn on and off various advanced graphical
components of the SFC3 engine. If you are experiencing performance problems, turning these options off should help.
Specularity: Controls the way the game reflects light off various surfaces.
Light Maps: Controls the game’s display of lighted surfaces on ship and station models.
Damage Maps: Controls the display of damage textures on a ship model after it has taken fire.
Damage Light Maps: Controls the display of the lighted portions of damage textures on ships in battle.
|
|
OPTIONS MENU |
Performance and Resolution |
|
|
Level of Detail: This slider controls the level of |
of the models in |
|
the game. |
|
|
Particle Density: Controls the detail |
|
|
|
|
|
level of in-game particle effects. |
|
|
Damage Resolution: Controls the |
|
|
amount of damage displayed on a |
|
|
ship’s surface after it has been hit |
|
|
by weapons fire. |
|
|
Ship Fragments Duration: This slider dictates how long pieces of ships will remain floating in space after they have been blown up.
Keyboard Bindings
This section of the options menu allows you to alter the default settings for the keyboard in SFC3 or assign keys to functions which do not normally have a hotkey. To change a key’s function, simply click on the key currently assigned, then press the key you wish to newly assign to that function. If you choose a key already in use, whatever function that key was previously assigned to will now have no key bound to it.
A full list of Star Trek: Star Fleet Command 3’s default key bindings can be found on page 71.
Exiting the Options Menu
If you want to exit out of the options menu without saving the changes you have made, click on the “Back” button in the upper right corner of the screen. To exit and save the changes you have made to the game, click
on “Accept.”
8 |
9 |
BASIC STARSHIP
CONTROLS
BASIC STARSHIP CONTROLS
This section will cover the basics of starship control, allowing you to jump in and start blasting with a minimum of preparation. If you wish to learn about the more advanced options available to captains in SFC3, read on to the Advanced Starship Control section on page 17.
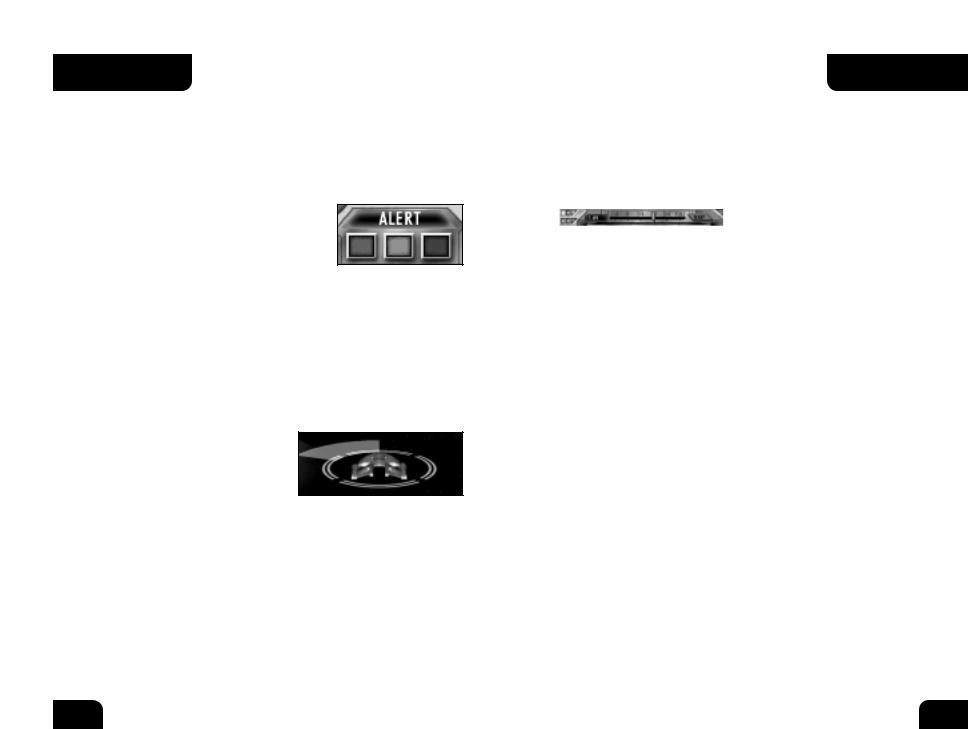
Alert Status
Your ship’s alert status is displayed in the bottom right corner of the game screen, and can be changed by clicking on the colored buttons beneath the indicator. The alert levels are as follows:
Condition Green (Normal): Standard running alert level, non-aggressive. Shields and weapons are powered down.
Yellow Alert: This is a defensive posture used predominantly when entering into a situation of unknown risk. Shields are raised but weapons are
not powered.
Red Alert: Highest alert status and where you will be spending most of your time. Shields are raised and weapons are powered. The ship is ready for combat. Shifting your ship to Red Alert will generally be the first thing you do when entering a mission.
Turning
To turn your ship, simply left click in space in the direction you want your ship to face. A colored arc will appear showing your ship’s projected turn, and the ship will begin turning. Your
starship’s turning speed depends on its mass, engines, and current speed. If you wish for your ship to turn to face a target, left click on that target and the ship will begin turning to face it. You can also use the arrow keys to turn your ship. Pressing and holding the left or right arrow keys will begin extending your ship’s turning arc. Release the button when you have reached the desired end of the turn. The ship will continue turning until it reaches the end of the arc.
BASIC STARSHIP
CONTROLS
Speed
The slider at the bottom of your in-game interface is used to set your speed. The slider represents the fraction of your maximum speed you are traveling and the number to the left of the slider shows your speed. Drag the slider to your desired speed or click directly on the speed you want and the ship will begin accelerating to reach that speed. A ship’s maximum speed
and its acceleration rate depend on its size, mass, |
and condition. |
|
|
Your ship is |
of traveling in |
|
||
|
reverse if needed. By sliding the bar to |
|
|
||
the left of zero, your ship will begin traveling backward and your reverse speed will be displayed with a “-“ in front of it, letting you know you’re
traveling in reverse. Reverse can come in handy in |
when your enemy |
is trying to out-maneuver you and get on your tail. |
|
To the right of the speed slider is the “Warp” button. Pressing this button will cause your ship to jump to warp speed and travel very quickly across the map. Warp has its disadvantages, however, as your go down while at warp and your beam weapons will not fire. You are also only able to travel in a straight line; no course corrections are possible at such high speeds. Press the button once and your engines will charge for a brief moment before your ship is flung forward at warp speed. Pressing the button again will cause you to come out of warp speed. Be aware that the ship come to a halt as soon as the button is pressed; it has a stopping distance in which the warp engines power down. So if you are warping to a planet, make sure you give yourself enough distance to stop, or you may find becoming a fireworks display in the atmosphere. After exiting warp, your engines will require a cool down period before you are able to go to warp again. Warp is very useful for reaching mission objectives a long away, fleeing from battle to recharge your shields, or in short bursts during combat.
Targeting
Your weapons can’t fire at anything unless you first set a target. Targeting is also used to scan ships and objects. To target a ship, station, or other object, right click on it. A box will appear around the target and (if the Target Lock option is on) the camera will center on the target. You will see the target’s name, health, and speed, and a picture of the target will appear in the upper left portion of the interface.
10 |
11 |

BASIC STARSHIP
CONTROLS
appear red if the for friendly
neutral targets. in the upper
showing target speed, and
to cycle through (by default) will cycle while the “Y” key will
targets only.
you can target on that ship if your
enough 24). The currently
is displayed in the right corner of
can cycle through target with the mouse
directly on the subsystem you wish to attack in the upper left of the interface. Use subsystem targeting to weapons or engines, disabling them.
ship targeted, you’re going to want to shoot at it. need to do is to select the weapons you want to fire. both primary and heavy weapons, which differ
the ship belongs to and the weapons loadout you weapons are the main offensive weapons, consisting weapons. These weapons charge much faster than
do less damage. Heavy weapons consist of various weaponry. These weapons are slow to charge but do
than primary weapons.
buttons to the left of the speed control slider can your weapons that are currently charged and have your arcs. Click “Primary” to fire your beam weapons and torpedoes. If the icon to the left of either of these means those weapons are charging and cannot yet fire.
select individual weapons. To do this, simply click on the schematic of your ship in the lower left of the
BASIC STARSHIP
CONTROLS
interface. Once selected, that weapon’s settings will appear in the window above, allowing you to adjust its settings or take it offline to conserve energy. You can also fire that individual weapon by clicking on the “Fire” button.
You are also able to select multiple weapons by holding down the “Shift” or “Ctrl” key and clicking on the weapons you want to group together. After selecting a weapons group, you can assign that
group to a hotkey by holding down the “Ctrl” key and pressing a number from 1-5. After doing this, pressing the corresponding number will automatically select your custom group of weapons.
The names of currently selected weapons will appear in the lower left portion of the game window. When you have an enemy targeted, the name of the weapon will turn green when you can fire it at the target. Weapons in red are unable to fire, and weapons in yellow are ready but the target is not in their arc. To fire all available selected weapons, you can click on Fire in the weapons display, or press the Z key.
The icon for each of your weapons will appear as a dark green color when the weapon is idle. Once activated (by going to Red Alert) the weapons will begin to charge. The current charge of a weapon is indicated by the bright green bar which gradually fills as the weapon charges. Once the entire weapon icon is bright green, that weapon is ready to fire. Firing the weapon depletes its charge, and you must wait for it to recharge before firing it again.
Each of your weapons has a firing arc. That weapon can only fire when its target is within this arc. When a weapon is selected, its firing arc appears in its display box. You can also view the firing arcs of all your ship’s weapons at any time by pressing the pie-shaped Firing Arc button beneath your ship schematic.
This will replace your weapon icons with an overlay displaying the firing arc of each weapon. The white section of each circle represents the area that weapon can “see.”
12 |
13 |

BASIC STARSHIP
CONTROLS
Shields
Shield knowledge is a must for staying alive in the world of SFC3. Every ship in the game, with the exception of Borg ships, is protected by four shields (fore, aft, port, starboard). These shields absorb attacks on the ship and have the ability to recharge after they have taken damage. Once a shield is down, enemy fire will tear into your armor, and then your ship’s hull, damaging your systems.
Your shields activate automatically in Yellow or Red alert. The current strength of each of your shields is visible around your ship schematic in the interface, and is also visible around the ship itself in the game window. This allows you to see which
of your shields is currently stronger and maneuver yourself accordingly. If your enemy has taken out your aft shield, it’s a good idea not to turn your back on them until that shield has recharged.
You are also able to reinforce one of your shield facings at any time, as long as your shield is not fully depleted. To do this, simply click on the shield you wish to reinforce in your ship schematic. The currently reinforced shield is indicated on the schematic and in the game window by a white highlight. Reinforcement causes energy to be diverted from the other three shields to the reinforced one, giving it a boost in strength. This can come in very handy when one of your shields is weakening and you
cannot turn it away from the enemy to recharge. To clear reinforcement orders and return your shields to their regular balance of energy, click on the “NR” button in the upper left of the ship schematic.
Communication
The “Comm” button is located above the target display in the upper left corner of the interface. Clicking this button will bring up the Communications menu, allowing you to access the following features:
Fleet Commands: For select missions in SFC3, you will be assigned other ships to fight alongside you in your battle group. You do not have direct control over these ships, but you can communicate with their captains to give them orders. Clicking on “Fleet Commands” will bring up a list of the
|
BASIC STARSHIP |
|
CONTROLS |
ships currently under your command. Clicking a ship |
will bring up a |
variety of orders you can give that ship, from assigning targets to ordering an ally to capture a ship.
Hail: This button allows you to hail other ships in your area. Hailing ships is sometimes a required part of a mission. Oftentimes, you will be hailed
by other ships in a mission. When this occurs, their will be displayed in text form on the Comm menu. You can then select a response from the given list, or click on the “Target” option to target the ship which is currently speaking.
Mission Objectives: Clicking this button will bring up a list of your current mission objectives. These are the tasks you need to in order to successfully complete your current mission. Objectives will gray out as they are completed. Objectives can be added as you go further into a mission, so this is a good place to check if you ever find yourself wondering where to go next.
Captain’s Log: Clicking this button will bring up a log of all transmissions you have received in the comm menu. You can then cycle through these logs to review communications you may have missed.
Close Channels: This button closes the Comm menu.
Cloaking
Some of the ships you will be flying in SFC3 are equipped with cloaking devices. This allows you to render your ship invisible to your opponents.
You are unable to fire weapons while
cloaked, and your shields are powered down, but you remain unseen. You can activate your cloaking device by pressing the “C” key, or by clicking
on the “Cloak” button in the Science menu.
Be aware that your shields will be down while you are visible to the enemy for a short period of time when engaging or disengaging your cloak, leaving you vulnerable to weapons fire. For this reason, it is a good idea to cloak or de-cloak when you are out of an enemy’s range or firing arcs.
Some enemies have advanced anti-cloaking sensor that can detect your ship while cloaked. If an enemy fires on you while you are cloaked, they have detected you. De-cloak immediately to raise your shields and fight back.
14 |
15 |
BASIC STARSHIP
CONTROLS
Scanning
Your starship is used for things other than combat. In certain missions, you will be required to scan objects or ships in order to gain information about them. To do this, move your ship near the object and press the “Scan” button in the upper left corner of the interface. If you are in scanning range, your Operations officer will give you the scan results. If you are out of range, you will be told to move closer to the object you’re scanning.
Repairs
Your ship will inevitably take some damage during combat. After your shields are knocked down, enemy weapons fire will strike your hull and sometimes damage your systems. If a weapon or system icon turns gray in your ship schematic, it has been knocked offline and requires repairs to used be again. To access your repair menu, click on the “Repair”
button with the wrench on it below your ship schematic. To repair a system, click on its icon. Repairs will begin. The progress of the repairs can be seen on the left side of the menu. Beneath the icon that displays the current system being repaired a progress bar will slowly fill until that system is fully repaired. You can only repair one system at a time. Clicking more than one will add them to the repair queue, and your repair teams will move
on to the next system in the queue when they are available.
BASIC STARSHIP
CONTROLS
ADVANCED STARSHIP
The skills learned in the previous section will get your ship into space
and fighting, but to become a truly legendary captain, you’ll want to master all of your ship’s subsystems. The following section will go much deeper into the workings of your ship and the many tactics to an experienced captain.
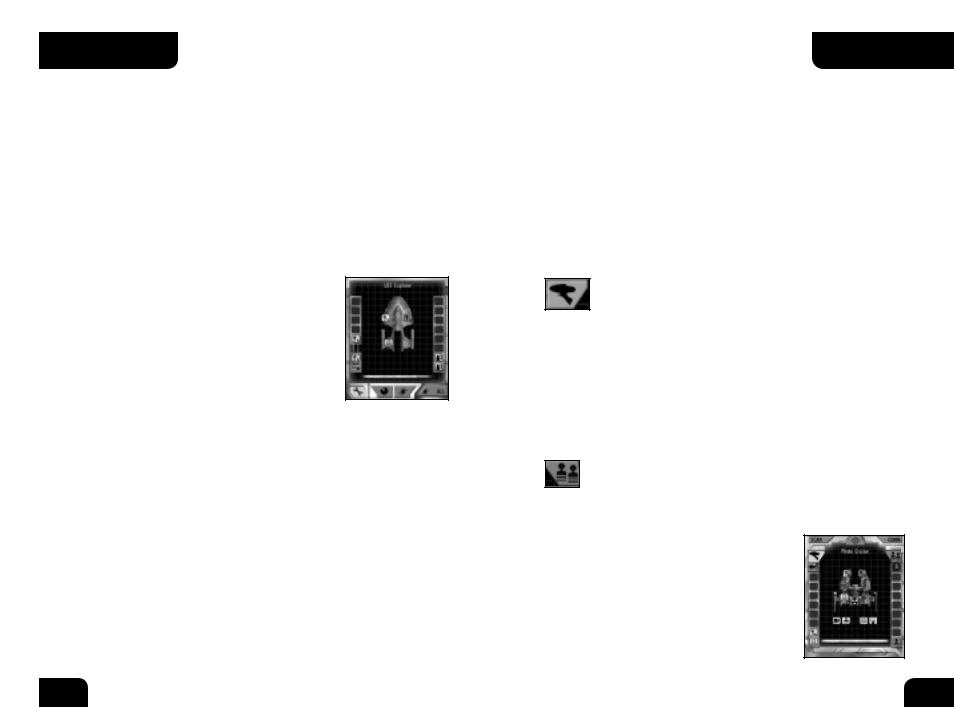
Marines
Each starship is equipped with a complement of marines. These troops can be beamed over to an enemy vessel once its shields are down, allowing you to attempt to capture the ship or sabotage its systems.
The controls for marine functions are located above the target display in the upper left corner of the interface.
Hit and Run: The Phaser icon represents your marines’ ability to beam to an enemy ship and take out key systems. Your current number of marines is displayed in the upper right corner of the
display. Below it are icons representing the number of transporters your ship has and their current status. Select an enemy system by clicking on it in the target display. This system will then appear in the queue on the left hand side of the display. Once an enemy’s shields are down, your marines will beam over and attempt to destroy your target systems in the order you have selected them. Their chance of success depends on the number of marines you have and your Security officer’s skill. By default, marines given hit and run targets will beam over as soon as they have the chance. To pause or delay transport, click on the icon at the top of the target system queue. To resume, click it again.
Capture Raids: If simply pecking away at your opponent’s systems isn’t enough, why not try to take over his entire ship? The marine icon beneath the “Comm” button brings up the Capture menu. In
the center of this menu, you can see the empire in current control of your target. The number to the left of this symbol
represents the number of enemy marines on board the target. The number to the right is the number of your marines currently on board. To get your marines onto the enemy ship, you first need to knock down an enemy’s shields. You can then choose to beam over one marine by clicking the “One Marine” button, or send over as many marines as you have transporters by clicking “All Marines.” Once on board the enemy ship, your marines will engage the enemy in combat. The progress can be seen by simply
16 |
17 |
ADVANCED STARSHIP
CONTROLS
watching the numbers and the slider bar beneath the empire symbol. If your marines are staying alive and their’s aren’t, you’re on your way to victory. Once all the enemy marines have been neutralized, the ship becomes an ally. You can order it around via your Comm menu. Note: Capture works only in the single player campaign.
Power Allocation
The lightning bolt icon below the target display brings up your Power Allocation menu. This menu consists of three sliders: one for
Primary weapons; one for Heavy weapons; and one for Shields. Your warp core produces a set amount of power, and from here you can control how much of that power goes to each system. Your current available power is displayed in the top bar. If any portion of that bar is blue, it means you have power available that is not currently being used. To add that power to a system, grab the blue indicator and slide it to the desired level. The available energy will decrease appropriately.
The power bar for each system has a green indicator on it. This represents the minimum amount of power needed for the system to run. If the allocated power is below that green indicator, the system will operate at a very basic level. Setting the power above the green indicator will allow that system to function even more efficiently. Each bar also contains a red indicator. This bar represents the system powerlinks and no more energy can be assigned to it.
As you move the power allocation bars, other bars will decrease automatically if you try to assign more power than your warp core is outputting. If you have equipped your ship with too many weapons and a small warp core (or your warp core has been damaged), you may not have enough power to keep all your systems “in the green.” In this situation, you can either take individual weapons offline to lower power requirements, or shift power allocations on the fly to keep your ship in fighting shape.
Clicking the Default button will return power levels to their standard levels.
ADVANCED STARSHIP
CONTROLS
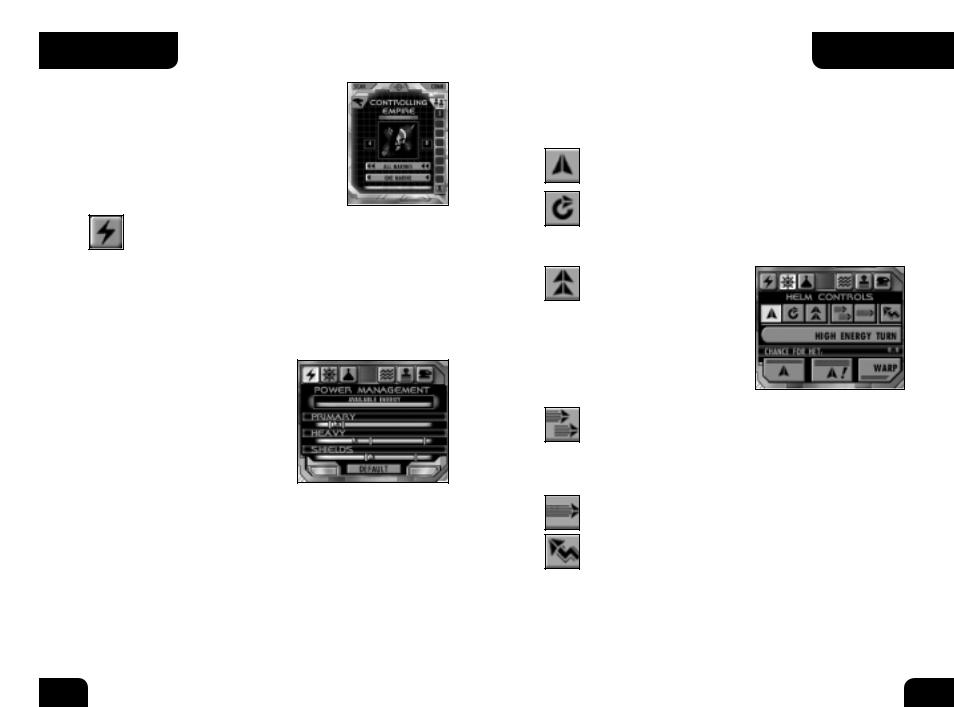
Helm Controls
The Helm Controls menu is accessed by clicking on the “Helm” button. This brings up the helm controls. The following advanced helm maneuvers are available from this menu:
Steady as She Goes: This option will clear any previous helm maneuvers you have selected, returning the ship to regular flight.
Orbit Target: Selecting this maneuver will tell your helmsman to plot a circular path around your target. This is useful for keeping weapons trained on an enemy or for orbiting stations or planets.
The ship will turn itself automatically. Giving a turn order yourself will clear this order.
Follow Your Target: This option tells your helmsman to turn the ship toward the target. No matter where your target is, your ship will automatically turn to face it. This is useful on ships whose main weapons are on the front of the ship. Giving a turn order yourself will clear this order.
Match Target’s Speed: Sets your ship’s speed to match the speed of the current target. Useful when you are behind a target and would like to stay there. Your ship’s speed will adjust along with the target. Even if you try to manually adjust your speed, it will return to that of the target. Changing your speed manually will clear this order.
Maximum Speed: Sets your speed to maximum. Giving a new speed order will clear this order.
Erratic Maneuvers: Orders your helmsman to do his best to evade enemy fire by performing evasive maneuvers. The ship will begin to jink from left to right. You are free to turn while under this order, and can cancel it at anytime by to Steady as
She Goes. While performing erratic maneuvers your ship is harder
to hit. However, it is also harder for your |
to strike |
the enemy. |
|
18 |
19 |
ADVANCED STARSHIP
CONTROLS
High Energy Turn: By using additional energy, your helm officer can force your ship to turn at a much accelerated
rate. However, this is a risky maneuver that puts great strain on the ship’s engines. If the High Energy Turn (HET) fails, your ship will be momentarily paralyzed. Engines and maneuvering thrusters fail and weapons are unavailable, leaving you a sitting duck until your engineer sorts things out. To execute the HET, click the “HET” button. A new display will appear at the bottom of the interface, indicating that your helm officer is preparing to execute the turn. During the charging phase, click on the interface as you would for a regular turn. Once the HET bar is full, your ship will (if the turn is successful) turn to that heading. If the HET fails, you’re dead in your tracks. The approximate chance of success for the HET is displayed below the “HET” button. This percentage depends on the skill of your helm officer, the status of your ship, and how recently you attempted a previous HET.
All Stop: This button sets your speed to zero, bringing the ship to a halt.
Emergency Stop: This maneuver uses the warp engines to bring the ship to a near immediate stop, as opposed to the slow deceleration of All Stop. This is a bit stressful on the engines, and as a result you will be unable to move for a short time after executing an Emergency Stop.
Warp: This button acts identically to the warp button on the main interface. Your ship will engage warp speed, traveling very quickly across the map. Shields drop, beam weapons are unable to be used, and turning is impossible at warp. Click once to engage and again to drop out of warp.
ADVANCED STARSHIP
CONTROLS
Science
The Science button is located next to the Helm
button and allows you to access the following functions:
Anti-Cloak Scan: Allows you to perform an advanced scan to attempt to detect cloaked enemy ships. Click the button to activate the scan. Once your sensors have
charged, your scanners will emit a “ping,” giving you a chance to detect the enemy. Your success depends on the quality of your as well as the skill of your operations officer. If successful, the enemy will be revealed and you can lock onto him and fire while his shields are .
Launch Probe: Launching a probe at an enemy vessel allows you to get an accurate sensor reading on it before it comes into range, allowing you to plan accordingly. Target a distant enemy and click to launch a probe at it. Once the probe is in range, the target’s information will appear on your target display.
Passive Sensors: Activate your passive sensors by clicking the “on” button next to the passive sensor text. This will bring up a sensor display into the upper left portion of the screen. This display acts as a radar, giving you a view of the system around you. Enemy targets are represented by red symbols, allies in blue, and neutral targets in gray. Using the buttons on the passive sensor interface you can zoom in and out, filter planets/ships from the display, or display an overlay of your firing arcs. You can also use the TAB key to toggle passive sensors on or off.
Self Destruct: If you’re having a bad day, why not take everyone else out
with you? Click this button to begin a five second |
. At the end of |
the countdown your ship will blow up and you will die. This can be |
|
somewhat effective in multiplayer team games, but |
else you will |
most likely just lose faster. Click again during the |
to cancel the |
destruct order. |
|
20 |
21 |
ADVANCED STARSHIP
CONTROL
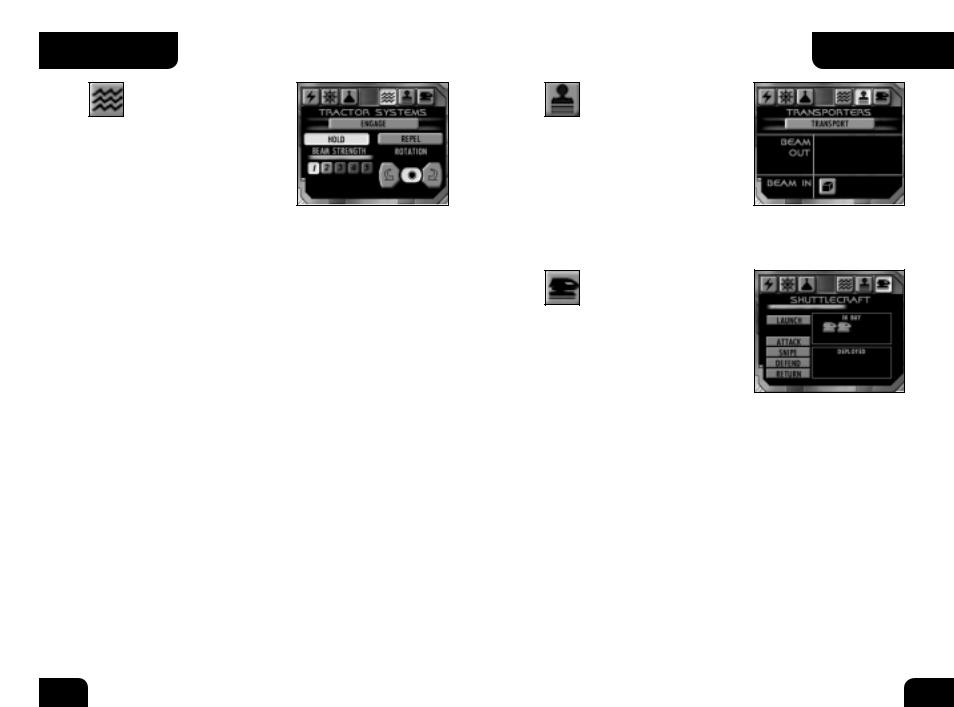
Tractor Beam
Your ship is equipped with a tractor beam, which can be
used to grab and maneuver objects or ships. To access these controls, click on the tractor button located to the right of the sensor button. The following features are available from this menu:
Engage: This button will begin charging
your tractor beam. Once the beam is charged, it will lock on to the current target. If that target is out of range, the beam will lock on once you move within range.
Hold/Repel: These two buttons control the function of your tractor beam. The default setting is “Hold,” which will lock onto a target and hold it in place, allowing you to maneuver it wherever you want. If you find yourself the target of an enemy tractor beam, the Repel setting allows you to use your tractor beam to attempt to break free.
Beam Strength: These controls allow you to set your tractor beam strength from 1 to 5, depending on the level of your installed tractor system. The higher the strength, the longer it will take for your beam to charge and engage. Tractor strengths are used to determine whether or not you are able to repel another tractor beam. In order to successfully repel an opponent’s tractor beam, you need a tractor beam strength equal to or greater than their’s. If your opponent has you locked in a tractor beam at a 3 strength, you will need to repel with a beam of 3, 4, or 5 strength to break free. If you want to grab onto an opponent for a longer period of time, choose the higher strength beams and chances are your opponent will have to try more than once to break free.
Rotation: Once you have locked your target up with a tractor beam, you can move their ship around yours while they are still held in the beam. The left button will rotate the target counter-clockwise, the right button will rotate them clockwise, and the center button halts rotation. Use this function to bring tractored targets into your strongest weapon arc, or to run tractored ships into asteroids or planets.
ADVANCED STARSHIP
CONTROL
Transporters
The transporter button, located next to the tractor beam button,
brings up the transporter controls. At times during your missions, you will be required to beam items or personnel from other ships, or beam them from your ship to another location. Icons appearing in the Beam Out section are ready to be beamed off the ship. Icons in the Beam In section are on a nearby ship and ready to beam
to yours. Click on Energize to activate the transporter.
Shuttles
The shuttle control panel is accessed by clicking on the
shuttle button, located to the right of the transporter button. This menu displays the shuttles currently available and allows you to launch them and assign orders.
Shuttlecraft are small utility ships, used primarily to ferry personnel and
equipment to places the transporters cannot reach. In SFC3, shuttlecraft can be used in combat. Although relatively weak, they can give a knowledgeable captain an advantage during battle, or at the very least frustrate the opponent.
Your current available shuttles are displayed in the In Bay box. Each shuttle has its own icon. To launch a shuttle, click on its icon and then click Launch. The shuttle will emerge from your ship and its current orders. This shuttle now appears in the Deployed box and can be selected there to change its orders or return it to the ship. After a shuttle, the blue bar above the launch button must refill before you can launch another. This represents the time needed to prepare the shuttle and shuttle bay for another launch. Before launching a shuttle, or at any time while deployed, you may change its orders. The following options are available:
Attack: The shuttle will fly to and attack the enemy that is targeted when the order is given. Shuttles are equipped with a weak beam weapon which will not do much damage. However, they can distract an enemy and force him to divert his attention away from you for a short period of time.
22 |
23 |
ADVANCED STARSHIP
CONTROLS
Snipe: The shuttle will maintain its distance from enemy ships, attacking targets from long range. This allows the shuttle to survive longer, as it is more difficult to hit. However, the shuttle’s weapons will do less damage to the enemy.
Defend: Orders the shuttle to defend the current target. If no target is selected, the shuttle will defend the player. Shuttles assigned this order will stay in the vicinity of their target. If an enemy ship approaches, the shuttle will attack. If the enemy disengages, the shuttle will follow for a short distance and then return to its assigned target.
Return: Orders a shuttle to return to your ship. Note that if you are flying at high speeds the shuttle may have a hard time docking.
Officers
Your ship is only as good as its crew, and officers play a large role in SFC3.
While in combat, you can view the status of your officers by clicking on the Officers button located to the left of the alert status indicator.
Your six officer stations are shown along with the name of each officer. To the right of each officer icon is a bar which represents your officer’s health. As your ship takes damage, your officers can be hurt. They can fall unconscious or even die. In these cases, that officer is replaced by a generic crewmen who can do the job, but not as well as a dedicated officer.
Each of your officers has a set of attributes which benefit your ship in gameplay. These attributes can be viewed in the Skirmish setup screen, or while at a Starbase in the single or multiplayer campaign (see page 36 for details).
ADVANCED
STARSHIP CONTROL
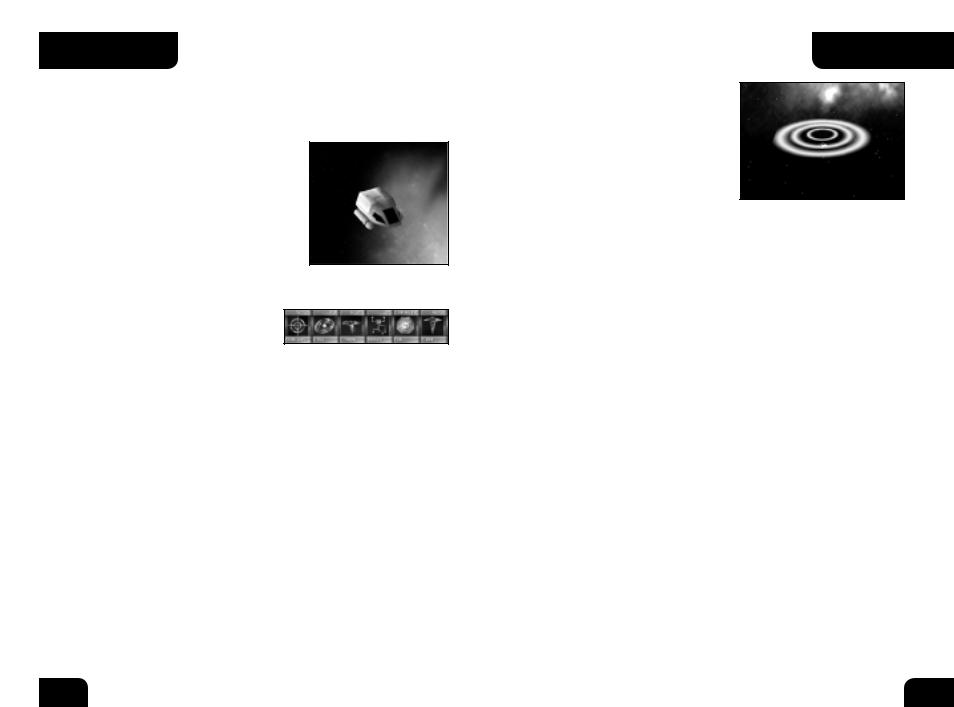
Mines
Your ship is equippped with a standard minelayer, which allows you to lay mines in combat. Do this by pressing the m key. When activated, a mine will be laid behind your ship. The ring around the mine represents the area in which a ship will detonate it. The ring is green when first laid, indicating that
the mine is not yet armed. Once your ship is far enough away from the mine not to detonate it, the mine will arm and the ring will turn red to indicate this.
Whenever a ship (including yours or an ally’s) is in of the mine, it will detonate and damage surrounding vessels. After you lay a mine, you must wait for your minelayer to recharge before laying another. Unlike torpedoes, you can carry only a set number of mines. Mines can be bought in the Skirmish resupply screen or at a starbase in campaign mode. You can also equip the more powerful Antimatter Mine Layer, which will do increased damage when the mines are detonated. See page 28 for details on refittng your ship.
24 |
25 |
 Loading...