Games PC SILENT HUNTER II User Manual
SH2_Manual_Final 9/21/01 2:18 PM Page i
SILENT HUNTER II |
i |
Contents |
|
Contents |
. |
Introduction |
1 |
Getting Started |
2 |
System Requirements |
2 |
Installation |
3 |
Running the Game |
3 |
The Configuration Program |
3 |
Conventions |
5 |
If You Have Problems |
6 |
Playing Single Missions |
8 |
The Single Mission Menu |
8 |
Start a New Mission |
8 |
Create a Mission |
11 |
Select a Saved Mission |
16 |
Returning from Missions |
17 |
Campaign |
18 |
The Campaign Menu |
18 |
Start a New Campaign |
18 |
Select an Existing Campaign |
20 |
Campaign Mission Interface |
20 |
Returning from a Campaign Mission |
21 |
Campaign Features |
22 |
Leaving and Returning to a Campaign |
23 |
Commanding the U-Boat |
25 |
Getting Around the U-boat |
25 |
Time and Time Compression |
27 |
The Message Log |
29 |
Sliding Control Panels |
30 |

SH2_Manual_Final 9/21/01 2:18 PM Page ii
SILENT HUNTER II |
ii |
Contents |
|
The Periscope Station |
32 |
The Plot Screen |
36 |
The Helm Controls |
45 |
The Torpedo Fire Control System |
52 |
The Torpedo Status Screen |
61 |
The UZO Station |
67 |
The Bridge Station |
68 |
The Deck Gun |
69 |
The Machine Guns |
71 |
The External View |
73 |
The Radio Room |
74 |
The Sound Station |
76 |
The Radar Station |
78 |
The Damage Control Station |
81 |
The CaptainÕs Quarters |
85 |
Training Missions |
88 |
Training Mission 1: Interface, Helm and Navigation |
88 |
Training Mission 2: Torpedo Attacks |
104 |
Training Mission 3: Guns and Surface Attacks |
114 |
U-Boat and Weapon Data |
121 |
The Type II U-Boats |
121 |
The Type VII U-Boats |
124 |
The Type IX U-Boats |
127 |
The Type XXI U-Boat |
133 |
Torpedo Armaments |
134 |
Deck Guns |
138 |
Machine Guns |
139 |
Museum |
142 |
Game Options |
144 |
Reference |
149 |
SILENT HUNTER II |
1 |
Introduction |
|
In the struggle against the enemy sea communications, i.e., in the destruction of the enemyÕs overseas trade, the submarine is a particularly suitable weapon with which to challenge the enemyÕs naval superiority. The continuous successful use of the submarine in the war on merchant shipping is, therefore, in the long run, of decisive strategic importance for the total course of the war, since the enemy, who is dependent on his overseas trade, is in the position that, for him, the loss of his sea communications means the loss of the war.
From The U-Boat
CommanderÕs Handbook,
1943 Edition.
Welcome
SILENT HUNTER II is the long-awaited sequel to Silent Hunter, the best selling World War II submarine simulation ever. It incorporates numerous improvements over the original, including a true 3D-rendered environment, 32-bit graphics, 3D sound, accurate floatation physics and a host of user-interface enhancements.
SILENT HUNTER II takes you to the frigid waters of the North Atlantic where you will command a U-boat in the service of the German Kriegsmarine. You will fight U.S. and British forces in the Battle of the Atlantic and attempt to prevent vital supplies and weapons from reaching the Allies in Europe.
Can you beat the odds and survive the entire war as a U-boat commander? Will you become an ace commander or just a grim statistic? Will you wear the KnightÕs Cross or a shroud of seaweed?
Find out in SILENT HUNTER II!

SH2_Manual_Final 9/21/01 2:18 PM Page 2
SILENT HUNTER II |
2 |
Getting Started |
|
Getting Started
This section will help you get started playing SILENT HUNTER II. Users familiar with the original SILENT HUNTER should still scan this section for up-to-date information.
System Requirements
SILENT HUNTER II is designed for Windows 95C/98, and Windows Millennium Edition. In addition, your system should be equipped with the following:
Pentium II 266 MHz or faster CPU
64 megabytes of RAM
650 megabytes of free disk space
8x CD-ROM or 1x DVD-ROM drive or faster
Direct-X 8 or later (included on the CD)
DirectX 8 compliant 3D accelerated video card with 16 megabytes of video RAM
DirectSound-compliant audio
QuickTime 4.0 or later (included on the CD)
For best performance, we recommend the following:
Pentium II 600 MHz or faster
128 megabytes of system RAM
3D accelerated video card with 32 megabytes or more of VRAM
DirectSound-compliant audio with DirectSound3D acceleration.
Note: In the interest of product improvement, information and specifications represented here are subject to change without notice. Any online services advertised as part of this product may be changed or discontinued at any time for any reason.
SILENT HUNTER II |
3 |
Getting Started |
|
Installation
SILENT HUNTER II must be installed before you can run the game. To install, insert the SILENT HUNTER II CD and wait for the launch screen to appear. Click Install and follow the instructions as they appear.
If you have auto-run disabled, you may launch the installer manually. Choose Windows Explorer from the Programs submenu on your Windows Start Menu. Choose the SILENT HUNTER II CD icon to display the files located on the CD. Look for Setup.exe among those files and double-click it to run the installer.
Uninstalling the Game
To uninstall the game, select Uninstall from the Silent Hunter Start menu item. You can also choose Settings from the Windows Start menu and select Control Panel, select Add/Remove Programs, left-click on Silent Hunter II, and click on the Add/Remove button. The game and all its components are then removed from your system, except for your saved games.
Running the Game
From the Start Menu, select:
Programs:Silent HunterII:Silent Hunter II
If this is the first time youÕve run SILENT HUNTER II, the configuration program will launch (see below for details.) Otherwise the intro video will play, after which the Main Menu will appear.
From the Main Menu you can access all of the gameÕs features. See the sections below for details.
The Configuration Program
Before you can run SILENT HUNTER II, you must select a video device and an audio device that the game will use. Pop-up menus

SH2_Manual_Final 9/21/01 2:18 PM Page 4
SILENT HUNTER II |
4 |
Getting Started |
|
are available on the configuration dialogue for selecting these items.
For most systems, selecting Primary Display Driver and Primary Sound Driver will work fine. However, if you have multiple monitors or multiple audio options, you may have to select from several available choices. The configuration program is smart enough to present only options that will work for SILENT HUNTER II.
Your video card will have the single greatest impact on performance in the game of any hardware in your system. If you have multiple monitors to choose from, we recommend choosing the option with the highest 3D-accelerated performance.
Accelerators have made enormous strides in the last few years. If you have an older 3D accelerator, you may want to upgrade to something newer. Not only will you get better performance, but, depending on the features supported, you may see improved image quality as well.
If no video or audio options are available, you will need to make sure your drivers are correctly installed and that your hardware meets the system requirements detailed in the section titled
System Requirements.
You may also select a video mode in which the game will run. Depending on your hardware, you may see the following choices in the display mode menu:
¥640x480 High Color (16)
¥800x600 High Color (16)
¥640x480 True Color (32)
¥800x600 True Color (32)
Note that some video devices donÕt support 32-bit true color rendering, while some others donÕt support 800x600 pixel resolutions.
Note also that higher resolutions and color depths are more
SILENT HUNTER II |
5 |
Getting Started |
|
demanding of the hardware. If you find yourself experiencing performance problems in the game, we recommend first reducing color depth as this will have the greatest impact.
Conventions
SILENT HUNTER II is designed to be operated primarily with the mouse or an equivalent pointing device. Many keyboard commands are also supported and these are explained in the appropriate sections of the manual. When the simulation is running, you can view the available key commands by hitting F1 and mission objectives by hitting ESC.
In most cases the left mouse button is used to choose from a menu of alternative actions or to activate a user-interface control. Occasionally the right mouse button is used to access certain featuresÑfor example, activating a context menu.
If your pointing device is equipped with a wheel or the equivalent, you can use it to scroll through lists. The wheel can also be used as an alternative way to access other features and these are documented in the appropriate areas of the manual.
SILENT HUNTER II is not specifically designed for joysticks or alternative input devices. However, if your input device is programmable (many are) you may find it useful to program some key commands into that device.
Many screens have controls which may not be readily apparent. While these are documented in the manual, moving the mouse over various objects on the screen will bring up Òtool-tipsÓ, messages which explain the functions of those objects.
Some screens in the game have part or all of their area dedicated to a 3D view of the game world. In most cases you can rotate the view by using the left, right, up and down arrow keys. Mouse view control is also an option. Click the right mouse button to toggle in and out of mouse control view. While activated, mouse control view allows you to rotate, elevate and depress your view

SH2_Manual_Final 9/21/01 2:18 PM Page 6
SILENT HUNTER II |
6 |
Getting Started |
|
by moving the mouse. Whether you are using the mouse or the keyboard to rotate the view, you can slow the rotation for fine adjustment by holding down the shift key. Screens in which you can utilize these view controls are the periscope, UZO, bridge, anti-aircraft machine guns and the external 3D view.
If You Have Problems
The most common problem encountered with any new game installation is an outdated video driver. We recommend that you visit your video card manufacturerÕs website for the latest driverÑespecially if you have installed a new version of Direct-X.
If that fails, the official SILENT HUNTER web page will have the latest troubleshooting information:
http://www.silenthunter2.com
Contact technical support over the Internet
Before contacting Ubi Soft Technical Support, please carefully read through this manual. Also, help is available online at:
http://www.ubisoft.com/support
This site takes you to the Ubi Soft Solution Center. Here you can browse our FAQ listings, or search the solution database for the most recently updated information since the gameÕs release or, for fastest e-mail response, you can send in a request for Personal Assistance from a Technical Support Representative.
If you are unable to find an answer to your question using http://www.ubisoft.com/support or this manual, please contact us via one of the following methods:
SILENT HUNTER II |
7 |
Getting Started |
|
Contact technical support by e-mail
You can contact Ubi Soft Support by e-mailing them directly at support@ubisoft.com.
It may take anywhere from 24-72 hours for us to respond to your e-mail, depending upon the volume of messages we receive and the nature of your problem.
Contact technical support by phone
You can also contact us by phone by calling (919) 460-9778. Note that this number is for technical assistance only. We cannot give hints or tips over the Technical Support line. When calling our Technical Support line, please make sure you have the game active at the point where you are experiencing difficulty.
Be advised that our Technical Support Representatives are available to help you Monday - Friday from 9 am - 9 pm (Eastern Standard Time), excluding holidays.
While we do not charge for technical support, normal long distance charges apply. To avoid long distance charges, or to contact a support representative directly after these hours, please feel free to use one of the other support avenues listed above. E-mail responses usually receive a response in less than 2 business days. If we receive your e-mail, you will receive a response!
Contact us by Standard Mail:
Please do not send returns directly to Ubi Soft without first contacting a Technical Support Representative. If you need to return a product, review the Replacement Policy / Warranty in this manual.
Ubi Soft Entertainment
Attn: Customer Support
2000 Aerial Center, Suite 110
Morrisville, NC 27560
SH2_Manual_Final 9/21/01 2:18 PM Page 8
SILENT HUNTER II |
8 |
Playing Single Missions |
|
The Main Menu
The main Silent Hunter II menu allows you to access the following menus: Single Mission, Campaign, Configuration and Museum. Selecting the last option, Quit, will exit out of Silent Hunter II and return you to the Windows Desktop.
Playing Single Missions
This section explains the Single Mission interface. The campaign is discussed in a later section.
To access the Single Mission interface, select Single Mission from the Main Menu.
The Single Mission Menu
The Single Mission Menu gives you access to individual historical scenarios and the mission generator facility. The following options appear on this menu:
Start a New Mission
Create a Mission
Select a Saved Mission
Main Menu
The last option returns you to the main menu.
Start a New Mission
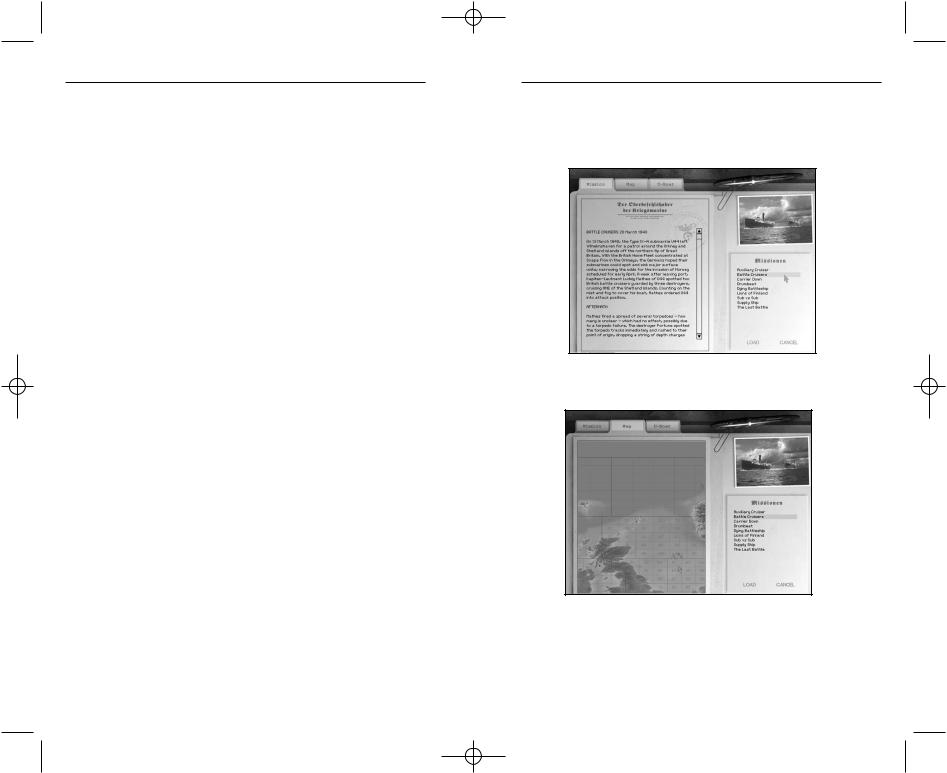
This option allows you to choose from a list of historical and instructional training missions. The historical missions simulate actual documented encounters between U-boats and Allied forces.
The Single Mission screen consists of two main parts:
The list in the lower right corner shows the available missions.
SILENT HUNTER II |
9 |
Playing Single Missions |
|
The area to the left shows one of three things depending on which of the tabs located at the top of the screen is selected
Mission tab: This presents a text description of the mission and any additional information.
Map tab: This presents a map view of the area of operations and objective points.
SH2_Manual_Final 9/21/01 2:18 PM Page 10
10
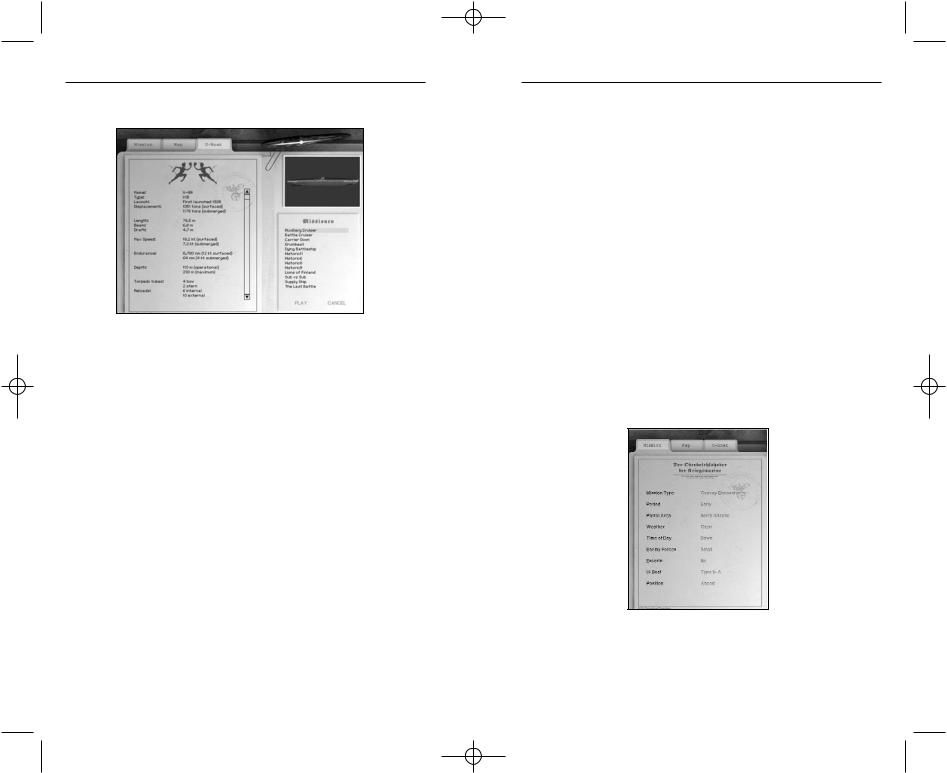
U-Boat tab: This gives you some stats and notes regarding the U- boat you will be commanding in this mission, allows you to change the conning tower insignia and allows you to view the U- boat model in 3D.
The insignia of the U-boat is shown at the top of the U-boat text and on the U-boat in the 3D view. You can change the insignia by clicking in the insignia area above the text to cycle through all of the available insignia.
Insignia textures are stored in the following directory: SH2\Insignia. The insignia artwork in this folder is in TGA format and can be modified. Additional textures placed in that folder will be available when the game is run. If you wish to create your own insignia, each insignia texture must be a 128x128 32-bit alpha-channel TGA. The upper 128x64 segment is applied directly to the front of the conning tower. The lower part is split into two 64x64 segments. The left segment is applied to the starboard side of the conning tower, while the right segment is applied to the port side of the conning tower. Typically these are mirror images, but this is not a requirement.
SILENT HUNTER II |
11 |
Playing Single Missions |
|
To rotate the view of the 3D model, right click in the U-boat window in the top right section of the screen and drag with the mouse. You can also zoom in and out on the U-boat model by left clicking on the U-boat window and dragging with the mouse. A mouse wheel can also be used to control the zoom level.
To play the currently selected mission, click on the word Play located at the bottom of the available mission list.
To return to the Single Mission Menu, click on the word Cancel located at the bottom of the available mission list.
Create a Mission
This option allows you to access the Mission Generator facility. Using this interface, you can set up a variety of U-boat missions.
When creating a custom mission, the Mission tab presents you with a list of menus that allow you to change the parameters of the mission.
To change a parameter, move the mouse cursor over the one you wish to change and click with the left mouse button. For example, to change the weather in the above mission, move the cursor over the word Clear and click once. In every case, repeatedly clicking over the option will cycle through all of the available options for

SH2_Manual_Final 9/21/01 2:18 PM Page 12
SILENT HUNTER II |
12 |
Playing Single Missions |
|
that parameter. You can also click the right mouse button to move through the options in reverse order.
The following sections describe each parameter and its effect on the mission generated.
Mission Type
There are three options available for this parameter:
Convoy encounterÑIn this type of mission, you will encounter a convoy of merchant ships.
Warship encounterÑIn this type of mission, you will encounter various Allied warships.
Submarine encounterÑIn this type of mission You will encounter one or more enemy submarines.
Period
This option allows you to specify the period of the war in which the mission takes place. There are three options:
¥Early (1939-1941)
¥Middle (1942-1943)
¥Late (1944-1945)
These selections will determine the characteristics of the enemies you will encounter and the technology available to both sides. Late war missions tend to be more challenging because the Allies have much better detection equipment and weapons as well as more ships dedicated to antisubmarine warfare.
SILENT HUNTER II |
13 |
Playing Single Missions |
|
Patrol Area
There are seven possible patrol areas in which your scenario may take place:
¥North Atlantic
¥Mediterranean
¥Eastern U.S.
¥Caribbean
¥South Atlantic
¥North Sea
¥Indian Ocean
The Patrol Area determines not only the location of the mission scenario, but the enemy forces you will be facing as well. For example, in the Eastern U.S., Caribbean and South Atlantic areas you will encounter primarily American forces, while in all other areas you will encounter primarily British forces.
Weather
A scenario may have several possible weather conditions. Choose from the following:
¥ClearÑBlue skies, smooth waters, no clouds
¥High CloudsÑWispy clouds, relatively calm seas
¥OvercastÑContinuous gray clouds, reduced visibility, heavier seas
¥Rain SquallsÑVariable clouds, reduced visibility, variable sea conditions
¥FoggyÑGray skies, limited visibility, heavier seas
¥StormÑLimited visibility, rough seas

SH2_Manual_Final 9/21/01 2:18 PM Page 14
SILENT HUNTER II |
14 |
Playing Single Missions |
|
Time of Day
You can set the local time of day using this parameter. Options include:
¥Dawn
¥Morning
¥Noon
¥Afternoon
¥Dusk
¥Night
Enemy Forces
This option determines the size of the main force you will encounter:
¥Small
¥Medium
¥Large
It also affects the number of escorts encountered, if they are present.
In Warship encounters, it also determines the size of the largest warships you will face:
¥Small Ð light cruiser.
¥Medium Ð heavy cruiser
¥Large Ð battleship and/or aircraft carrier
SILENT HUNTER II |
15 |
Playing Single Missions |
|
Escorts
This parameter allows you to decide whether or not you want the enemy units to be escorted. Escorts usually consist of destroyers, destroyer escorts, or corvettes. These units are primarily tasked with antisubmarine duties and their presence will make the mission much tougher. Options are:
¥Yes
¥No
U-Boat
This parameter allows you to select which type of U-boat you will command in the mission. Choose from the following:
¥Type IIA
¥Type IIB
¥Type IIC
¥Type IID
¥Type VIIB
¥Type VIIC
¥Type VIIC/41
¥Type IXA
¥Type IXB
¥Type IXC
¥Type IXC/40
¥Type XXI
Details on each of these boats is available in the reference section of this manual or in the in-game vehicle viewer.

SH2_Manual_Final 9/21/01 2:18 PM Page 16
SILENT HUNTER II |
16 |
Playing Single Missions |
|
Position
This parameter determines the initial position of your U-boat with respect to the enemy forces. The following options are available:
Ahead This is the ideal position for setting up an attack as the enemy is headed straight for you.
Abeam This is still a fairly good position, especially for attacking large convoys.
Behind This is the most difficult position, as you will need to overtake the convoy before launching an attack.
Launching the Mission
Once you have all of the parameters set up, click Play located in the lower right corner of the screen to launch the scenario.
Select a Saved Mission
SILENT HUNTER II allows you to save missions that are in progress. This is done from within the Simulator (see the section titled Saving Missions below under Commanding the U-Boat for details.) This option is used to return to those missions at the place where you left off.
In most respects, the interface is identical to the Start a New Mission option. The main difference is that the list of missions shows those missions that were previously saved. You can review the briefing, the area of operations and the U-boat assigned to the mission using the interface tabs.
To select a saved mission, just move the mouse cursor over the mission name and click the left mouse button. When youÕre ready to play, just click on the word Play below the available mission list.
SILENT HUNTER II |
17 |
Playing Single Missions |
|
Returning from Missions
To end a mission (campaign or single) press the ESC key or the End Mission button on the right side sliding panel.
You will be presented with a debriefing evaluation rating your performance based on the mission objectives.
This screen has three options:
¥Quit returns you to the Single Mission interface
¥Save allows you to save the game in progress (not available for campaign games, see campaign section for details). Saved game names can be up to 28 characters long (letters or numbers only).
¥Resume allows you to return to the game in progress

SH2_Manual_Final 9/21/01 2:18 PM Page 18
SILENT HUNTER II |
18 |
Campaign |
|
Campaign
The Campaign allows you to pursue a career as a U-boat commander that spans the entire duration of World War II. In the Campaign you will do battle with a variety of Allied forces in the desperate sea battles that would decide the Battle of the Atlantic.
The Campaign Menu
Selecting Campaign from the Main Menu brings up the Campaign Menu, which contains the following options:
¥Start a New Campaign
¥Select an Existing Campaign
¥Main Menu
Start a New Campaign
Selecting Start a New Campaign brings up the Campaign signin screen. Type the name you want to use in this campaign (up to 28 letters or numbers only) into the edit field and then click the
Play button at the bottom of the screen to begin.
Your campaign records are stored in the ÔCampaignsÕ subdirectory of the ÔSaveÕ folder that is located within the Silent Hunter II directory. It goes without saying that backing up this file occasionally is a good idea in case you suffer a disk failure.
Campaign Realism Settings
Next you will be asked to select the realism level for this campaign. Three preset difficulty levels are available: Easy, Medium and Hard. If you choose to customize the difficulty, there are a number of settings which can be used to reduce the realism (and hence the difficulty level) of the game. For details about each setting, see the section Realism Settings later in this document.
SILENT HUNTER II |
19 |
Campaign |
|
Note that once you select realism settings for the campaign, they cannot be changed. If this is your first time playing Silent Hunter II, we suggest starting your first campaign using a low level of realism. You can start new campaigns at different realism settings later on, or maintain multiple different campaign files with different settings.
Beginning the Campaign
The Campaign begins with a note from your commanding officer. These appear whenever you are reassigned to a new U-boat and/or area of operations and set the stage for the missions which follow. Click on the word Continue at the bottom right corner of the screen when you are finished reading.
The next screen is your office at your current home base. The office serves as the primary interface to the campaign features. Take a minute to look around.
The folder located on the desk takes you to the next Mission Briefing, which we will discuss later in this section. ItÕs very similar to the Single Mission interface described previously.
From the office you can leave the campaign at any time by clicking on the door at the right. This will return you to the Campaign Menu.
The chalkboard gives you access to the Top Commanders list. This is a list of the historically top scoring U-boat commanders based on tonnage sunk. You will need to score well to get on the Top Commanders list, but perseverance pays off.
The map gives you access to the same world map data used in the simulation. It also includes a record of the ships sunk by you in the campaign at specific locations.
The plaque above the map gives you access to your medals case. Any medals you earn during the course of the campaign will be displayed herein.

SH2_Manual_Final 9/21/01 2:18 PM Page 20
SILENT HUNTER II |
20 |
Campaign |
|
At certain points in the campaign, you will be resupplied at sea and will not return to the base office for briefing. In this case, you will be briefed in the captainÕs cabin. All of the Office interface features are available at this screen.
Select an Existing Campaign
This option allows you to return to a campaign in progress. A list of existing campaign files is shown on the left. Click on the one you wish to load with the left mouse button, then click on the word Play at the lower right corner of the screen. This will return you to the office and the mission where you left off.
Campaign Mission Interface
This tabbed screen, which displays the Mission Briefing, Mission Map and U-Boat Stats, is in most respects identical to the Single Mission Interface. In summary:
The Mission Tab shows the current mission briefing, a textual description of the mission which gives you details, including your primary and secondary objectives, environmental conditions and area of operations.
The Map Tab shows the mission area you will be operating in.
The U-Boat Tab shows you information about the U-boat you have been assigned. Whenever you are reassigned to a new area of operations you will be given a new U-boat to command we recommend that you study its capabilities before launching any missions.
The primary difference between the Campaign Mission Interface and Single Mission Interface is in the mission list shown at the lower right.
While in the Single Mission Interface this was a list of available missions, in the Campaign Interface this lists all of the missions that you have played in the campaign so far. These are listed in
SILENT HUNTER II |
21 |
Campaign |
|
reverse chronological orderÑthat is, the latest mission is at the top while the earliest mission is at the bottom.
By default, the latest mission is always selected when you enter the Campaign. To launch the mission, click the left mouse button with the cursor on the word Play at the lower right corner of the screen.
You can go back and replay an earlier mission at any time by selecting it from the list and left-clicking Play. Note that when you choose to replay an earlier mission in the campaign, the results of playing that mission will not affect your campaign.
When you want to return to the Office, left-click on the word Cancel or click on the area above the briefing folder.
Returning from a Campaign Mission
When the mission has ended (either by pressing the ESC key, returning to base, or getting killed) you will be returned to the Campaign Interface.
Your performance is recorded for every mission you play in the campaign. When you have performed well, you may receive a medal, though this is also dependent on realism settings. If you have chosen less realistic settings, your likelihood of receiving a medal is reduced.
If you have been killed or captured in the course of a campaign mission, you will need to replay that mission.
Most missions have both primary and secondary objectives. If you have failed to achieve all primary mission objectives, you will be required to replay a mission. Secondary mission objectives are optional, but will increase the likelihood of your receiving medals and commendations.
SH2_Manual_Final 9/21/01 2:18 PM Page 22
SILENT HUNTER II |
22 |
Campaign |
|
Campaign Features
This section discusses additional features that are part of the campaign experience.
Top Commanders List
This board shows the most highly rated commanders based on tonnage sunk. This information is taken out of all of the campaign files stored on your computer, plus those commanders in the SILENT HUNTER II ÒHall of Fame.Ó You will need to score well go get on the Top Commanders list, but perseverance will pay off.
The Campaign Map
Located in the office next to the Top Commanders list, the Campaign Map gives you access to the world database developed
for SILENT HUNTER II.
The entire map is not visible at any one time. You can pan around the map by clicking the right mouse button. Just click on the location where you want the map to be centered and the map will be redrawn at the new location.
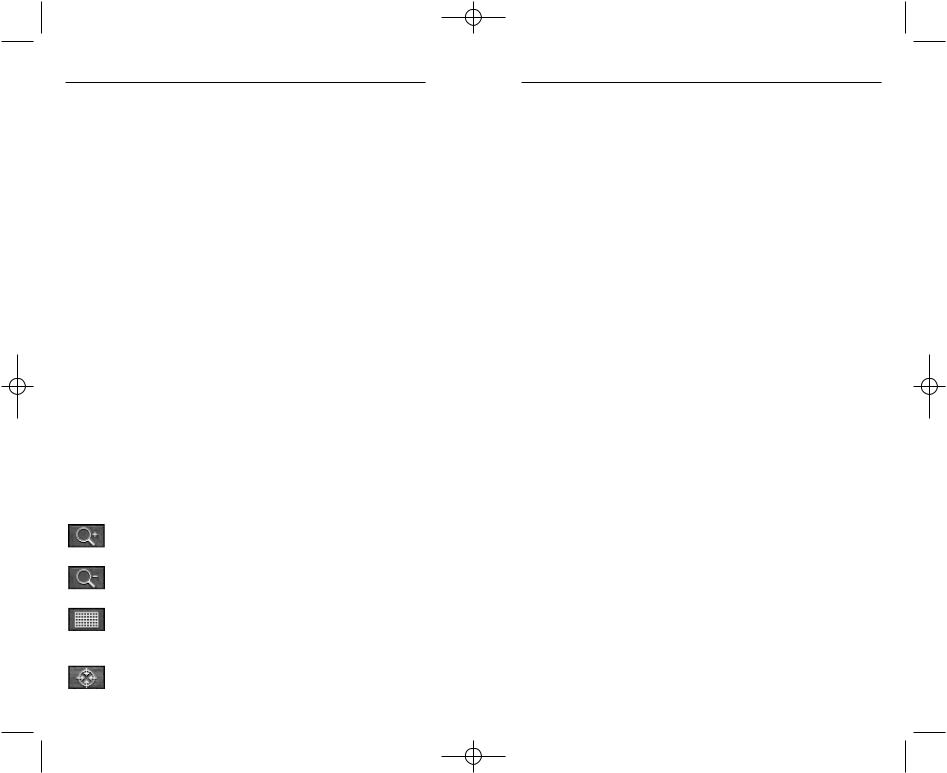
A floating window provides access to some additional map features:
Clicking this button enlarges or zooms the map view in to show small details.
Clicking this button shrinks or zooms the map view out for the ÒbigÓ picture.
Clicking this button cycles between grid modes, showing longitude/latitude lines, Kriegsmarine grid lines, or no grid at all.
Clicking this button will center the map on the starting position of your U-boat.
SILENT HUNTER II |
23 |
Campaign |
|
A map thumbnail located in the floating window allows you to center the large map on any location by clicking the left mouse button in the thumbnail image.
If you have a wheel mouse, you can also zoom the map in or out by rotating the wheel.
The map shows Allied and Axis bases and cities, as well as the locations of all of the ships sunk by you in the course of the missions you have played.
If you roll the mouse cursor over any of these markers, some additional information will be displayed, including date of sinking, mission in which the sinking occurred and the longitude/ latitude of the location.
When you are finished looking at the Campaign Map, click the close box in the upper-right corner of the map display and you will be returned to the Office.
Medals Case
Clicking on the plaque located above the Campaign Map gives you access to the Medals Case. This contains all of the medals you have earned in the course of your missions.
Leaving and Returning to a Campaign
You can leave the campaign at any time by clicking on the door on the right side of the Office. When you leave, the campaign file is automatically saved so that, when you return, everything will be restored.
Whenever you leave a campaign mission, if you have not completed your primary objectives, the game will automatically save the current scenario (if one is in progress). This is stored alongside the campaign file.
When you return to this campaign, the program will note that a

SH2_Manual_Final 9/21/01 2:18 PM Page 24
SILENT HUNTER II |
24 |
Campaign |
|
saved mission is available, but you will return to the Office interface nonetheless. This allows you to review the briefing and other campaign information before returning to the game in progress.
To return to that game, go to the Mission Briefing, then click on the word, Play. You will be notified that a saved game is available for this mission and you will be given the option to reload that game. Click Yes to return to the mission in progress.
If you decide you want to restart the mission from the beginning, just click No when offered the option to reload the saved game.
SILENT HUNTER II |
25 |
Commanding the U-boat |
|
Commanding the U-boat
This section describes the heart of SILENT HUNTER II: the U-boat simulation. Here you will learn the ins and outs of commanding a U-boat.
German U-boats of World War II were complicated weapons platforms designed primarily for one purpose: attacking enemy shipping using the advantages of stealth and surprise. We recommend reading this section carefully and playing through the training missions a few times to get familiar with U-boat operations.
Even experienced players of the original SILENT HUNTER should at least skim this section to familiarize themselves with the various control interfaces. Although weÕve attempted to capture the spirit of the original, there were significant differences between U-boats and U.S. Navy submarines and there are, as well, numerous user interface improvements embodied in SILENT HUNTER II.
When reading the following sections, it will help you to understand some of the concepts if you are at your computer running the game. We suggest starting one of the tutorial missions and trying out some of the game features as you read about them.
Getting Around the U-boat
Mastering SILENT HUNTER II is a process of learning to use the various stations of the U-boat simulator to best effect. Each station simulates a different aspect of U-boat operations, including navigation, sensors, fire control, communications and engineering functions.
SH2_Manual_Final 9/21/01 2:18 PM Page 26
SILENT HUNTER II |
26 |
Commanding the U-boat |
|
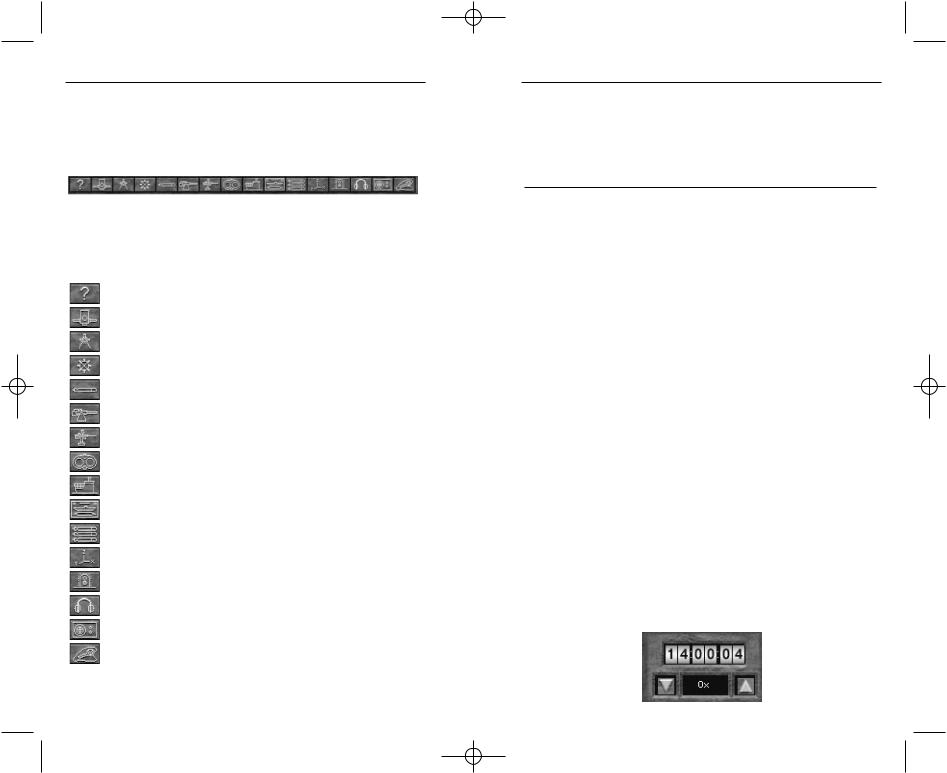
The various stations are accessible using the station bar located at the bottom of every screen:
Clicking on any one of the buttons in the station bar will take you to the corresponding station.
Taken from left to right, the stations are:
Help Screen
The Periscope
The Plot Screen
The Helm Controls and Gauges
The Torpedo Fire Control System
The Deck Gun
The Machine Guns
The UZO Station
The Bridge
The Damage Control Station
The Torpedo Status Screen
The External Camera View
The Radio Room
The Sound Station
The Radar Station
The CaptainÕs Quarters
Note that at various times some of these stations may be disabled or they may not be features of the U-Boat you are commanding.
SILENT HUNTER II |
27 |
Commanding the U-boat |
|
For example the Bridge, Deck Gun, UZO and Machine Guns will not be available when the U-boat is submerged and the type II and XXI U boats do not have deck guns.
Keyboard equivalents: |
|
|
|
ESC |
Exit the simulator |
|
F1 |
Help |
|
F2 |
Periscope |
|
F3 |
Plot |
|
F4 |
Helm and Gauges |
|
F5 |
Torpedo Fire Control |
|
F6 |
Deck Gun |
|
F7 |
Machine Guns |
|
F8 |
UZO |
|
F9 |
Bridge |
|
F10 |
Damage Control |
|
F11 |
Torpedo Status |
|
F12 |
External View |
|
PrintScr |
Radio Room |
|
Scroll Lock |
Sound |
|
Pause |
Radar |
|
NumLock |
CaptainÕs Quarters |
|
|
|
Time and Time Compression
Unlike real life, as the player in SILENT HUNTER II you have complete control of the passage of time in the simulation.
At the lower right corner of every screen you will see the time control panel, which looks like this:
SH2_Manual_Final 9/21/01 2:18 PM Page 28
SILENT HUNTER II |
28 |
Commanding the U-boat |
|
The top part of the time control panel is the boatÕs chronometer. This will tell you the time of day in the Greenwich Mean Time.
Below that you will see the time compression setting flanked by two buttons. The up arrow button increases time compression while the down arrow button decreases time compression.
Keyboard equivalents:
+Increase Time compression
- |
Decrease Time Compression |
Backspace |
Pause the game (0x) |
\ |
Real time (1x) |
If youÕre new to this type of simulation game, time compression is a feature which allows you to increase the rate at which time passes in the game. Why would you want to do this?
Well, some war patrols may take place over an extended period of time and require you to travel several thousand miles. Without time compression, it would literally take you several days to finish a mission.
In addition, in some missions a lot of the time will be spent patrolling an area looking for enemy ships to sink. Time compression allows you to rapidly get through these ÒboringÓ parts so you can focus on the important business of torpedoing enemy shipping.
How does it work? Each time you increase time compression you double the rate at which time passes. Look at the time control panel again. When you see Ô0xÕ in the time compression window it means that the game is paused. You can always pause the game by reducing time compression to Ô0xÕ if you want to take a breather.
SILENT HUNTER II |
29 |
Commanding the U-boat |
|
When you see Ô1xÕ in the time compression window, it means the game is running in ÔrealÕ time; that is, one second of game time takes one second of real world time.
You can increase time compression from 1x up to a maximum of 2048x. At this setting, in each second of real time 2048 seconds (or about 34 minutes of game time) will pass.
There are times when the simulator will reduce time compression automatically down to 1x. Usually this will happen when your sensors encounter a new contact or you are fired upon by an enemy unit.
There are also times when the simulator will limit time compression to a value lower than 2048x. When other units are in visual range time compression will be limited. This is to allow the computer to simulate nearby units with a higher level of fidelity, and to prevent unfortunate occurrences (such as collisions) from happening without giving you a chance to react.
On slower computers and with very complex missions, the simulator may limit time compression due to performance limitations. While we have made every effort to optimize SILENT HUNTER II for the most popular computer systems, it is, at heart, a complex simulation with many computations being performed at any given moment. This overhead is magnified at high time compression levels. There may be moments when your CPU will not be able to keep up with the requested level of time compression, so the simulator will reduce time compression as a means of catching up.
The Message Log
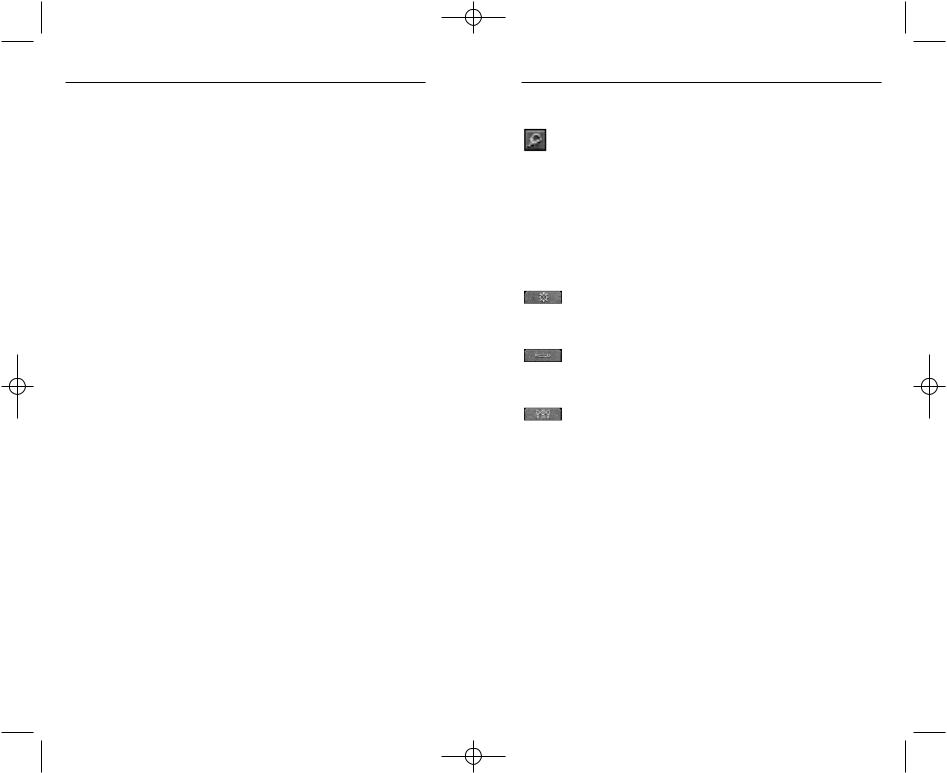
The Message Log informs you of specific events that occur during your mission and records orders that you issue. The log stores messages and events in chronological order so that you have a history of what went on during the mission.
SH2_Manual_Final 9/21/01 2:18 PM Page 30
SILENT HUNTER II |
30 |
Commanding the U-boat |
|
Messages scroll on one at a time and pause for a few seconds to give you time to read them. If a lot of messages are generated, they can stack up a bit. If you like, you can expand the message log by clicking within the log window. Click within the window again to restore the default setting.
You can scroll back and forth through the message log using the arrow buttons adjacent to the log window. The up arrow button lets you view older log messages while the down arrow button takes you through the newest messages.
If you want to view the log in a more convenient form or add your own annotations to the log, the CaptainÕs Quarters interface gives you access to a larger format logbook. See the CaptainÕs Quarters section below for more details.
Sliding Control Panels
Many of the game features may be accessed via sliding control panels, which appear on the left or right side of the screen. In some cases, the functions of specific stations are duplicated on the sliding control panel as a convenience when you want to avoid switching stations.
Moving the mouse pointer to the left or right side of the screen accesses the sliding control panels. When you do this, the panel will appear after about a second. If youÕre running the game, try this now so you get a feel for the behavior. Keyboard shortcuts are also available for each of the sliding panel sections. Note that the sliding panels are not accessible when you have mouse view control enabled.
The panel on the left has controls specifically designed for manipulating the 3D view, while the panel on the right is a multifunction panel, which has four tabs that allow you to select the functions you want to access. The left side panel functions are contextualÐthey will only function at the appropriate view. These functions will be discussed in the appropriate station sections.
SILENT HUNTER II |
31 |
Commanding the U-boat |
|
Note the push pin button located near the bottom of both sliding panels. Normally, when you move the mouse away from the panel, it disappears, freeing up the screen for other controls. However, if you press the push pin button, that panel is ÒpinnedÓ in place and will stay up for as long as you like. You can make the panel go away again by pressing the push pin button again to deselect it.
The four tabs of the multifunction panel (the one on the right) give you access to the following functions:
Helm Control Panel Ð Here you can set the boatÕs heading, its speed and its depth. You can also manually set the rudder position and view the boatÕs current speed.
Torpedo Fire Control Panel Ð This panel allows you to fire torpedoes at the current target or to manually set up a torpedo fire solution.
Command Panel Ð This panel contains general commands that you may issue to your U-boat crew. Commands include:
¥Blow Ballast Ð emergency ascent
¥Crash Dive Ð emergency descent
¥Periscope Depth Ð orders boat to periscope depth
¥Surface Ð orders boat to the surface
¥Rig for Silent Running Ð orders ahead 1/3 and lowers probability of detection by enemy units (submerged only)
¥Rig for Red Ð orders red light condition for night operations
¥Man Deck Gun Ð orders crew to operate deck gun (you must specify the target from the plot screen)
SH2_Manual_Final 9/21/01 2:18 PM Page 32
SILENT HUNTER II |
32 |
Commanding the U-boat |
|
¥Man AA Guns Ð orders crew to operate AA guns
¥Abandon Ship Ð if your boat is severely damaged, you have the option of abandoning ship, you may or may not survive
¥End Mission Ð gives you the option to quit or resume in both campaign and single mission and save in single mission only
Vessel ID PanelÐ This panel allows you to view all of the ships and aircraft you may encounter in the game. You can rotate each model to view it from any angle.
We will explain in detail the functions of each of the above panels in the following sections (for example, the helm panel is discussed in the Helm Controls section below.) As you play the game, it will become evident that the sliding panels provide convenient way to control many aspects of your U-boat.
Keyboard Equivalents:
QShow the Helm Control Panel
WShow the Torpedo Fire Control Panel
EShow the Command Panel
RShow the Vessel ID Panel
The Periscope Station
The Periscope is the primary tool for helping set up underwater torpedo attacks in SILENT HUNTER II. You will want to get familiar with its operations before venturing forth into the deep.
SILENT HUNTER II |
33 |
Commanding the U-boat |
|
The Periscope can only be operated when the submarine is at or above periscope depth, which varies somewhat between the different U-boats, but is usually about 10 to 12 meters.
 Note: The Command Panel has a button labeled Periscope Depth. Pressing this button will order the crew to set the boat to periscope depth. Additionally, the ÔPÕ key will also order periscope depth.
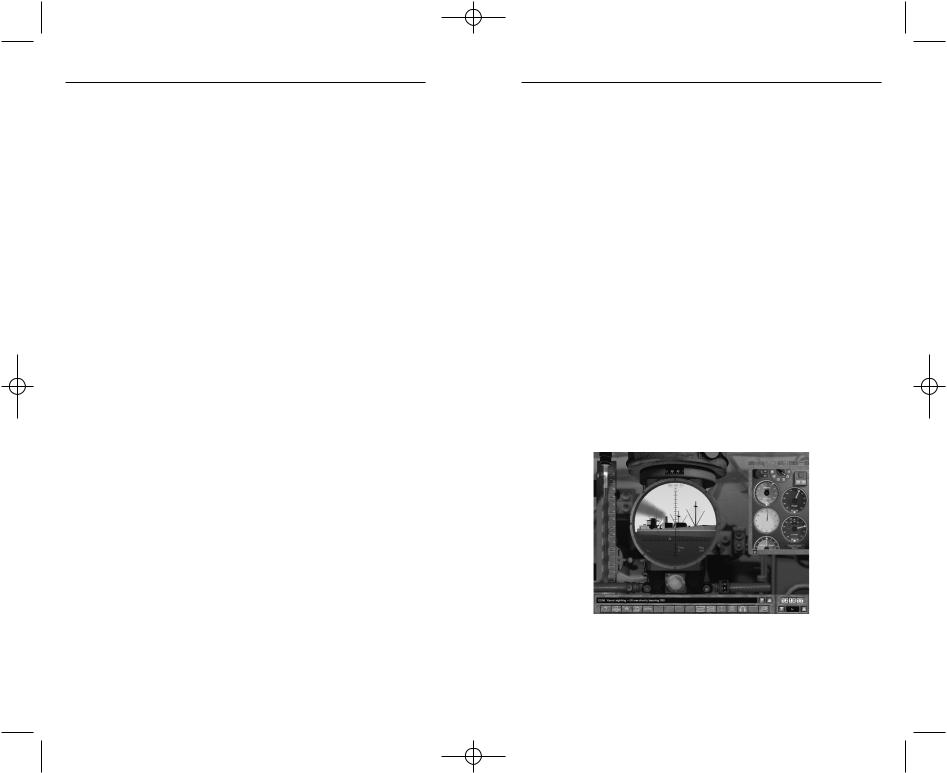
The Periscope gives you a 360-degree view of the area where your U-boat is located. To use the periscope, you must first raise it. You can raise and lower the periscope by clicking on the lever, located above the left periscope handle. You can also use the PageUp/PageDown keys to raise and lower the periscope. You can rotate the periscope view by enabling mouse view control by right clicking or by clicking on either of the periscope handles. The left handle will rotate the view left, while the right handle will rotate the view right. The periscope has two zoom magnification levels, 1X and 4X. You can toggle zoom levels by moving your cursor over the lever above and to the right of the left periscope handle or by pressing the Z key.
SH2_Manual_Final 9/21/01 2:18 PM Page 34
SILENT HUNTER II |
34 |
Commanding the U-boat |
|
A degree indicator at the top of the periscope body shows you the current periscope rotation angle. Note that this angle is relative to the U-boatÕs current heading (where the bow is pointed). This is an important angle to note if you are setting up manual torpedo fire solutions. The red degree indicator within the periscope view glass shows you the absolute compass bearing of your current view.
You can also rotate the periscope view up and down to a limited degree. The degree indicator located next to the right handle shows the current vertical rotation. To rotate the periscope view up or down, click inside this degree indicator. Clicking in the upper half will rotate the view down, while clicking in the lower half will rotate the view up.
The Periscope is one of three stations where torpedo target selection can take place (the others being the UZO and Plot screens, which we will discuss later.) When a valid target appears in the periscope viewfinder, a flashing red triangle will appear beneath it. This indicates that the target is selected for firing and that torpedoes fired using automatic fire control will be aimed at that target.
The red button located on the periscopeÕs left handle has a special function. Normally, if you switch to another station, or point the periscope away from the target the fire control system will not track what target you are interested in. The red button ÒlocksÓ the current target, indicating that all subsequent operations should be directed against it.
When you do this, the triangle indicator will stop flashing and remain steadily on the target, no matter where you aim the periscope. To cancel target lock, just hit the red button again and the fire control system will revert to its normal behavior. When you have a target locked, the small torpedo icon at the lower right above the message box will be colored red. Pressing the L key will also target lock/unlock targets.
SILENT HUNTER II |
35 |
Commanding the U-boat |
|
Now is a good time to discuss some of the features of the view control panel (the one on the left.) The two buttons at the top have functions relevant to (but not unique to) the Periscope.
Heading to view - Orders the crew to change the boatÕs heading to match the direction you are looking. This works not only in the Periscope view, but the Bridge, UZO and External views as well.
View to heading - Rotates the current view to face the U- boatÕs current heading, basically facing forward. It works in the Periscope, Bridge, UZO, deck and AA gun and external views too.
Padlock View - Locks your view on the currently selected target. It works in the Periscope, Bridge and UZO.
Torpedo Camera - Switches into torpedo camera view. If you have External View turned off in your realism settings, this feature will not work. While in torpedo view, it cycles through the torpedoes currently in the water.
The other buttons will be discussed in the appropriate sections.
Keyboard equivalents:
Left arrow |
Rotate periscope left |
Right arrow |
Rotate periscope right |
Up arrow |
Rotate periscope down |
Down arrow |
Rotate periscope up |
LLock or unlock selected target
HHeading to view
VView to heading
POrder crew to move to periscope depth
TLock view on current target
XToggle padlock view
ZZoom in/out

SH2_Manual_Final 9/21/01 2:18 PM Page 36
SILENT HUNTER II |
36 |
Commanding the U-boat |
|
The Plot Screen
Successful U-boat operations require precise navigation in order to reach the convoy routes and to attack targets designated by Commander U-boats.
The Plot screen provides a detailed map view of your area of operations. Depending on your realism settings, it also shows you:
¥The current location of your U-boat
¥The estimated locations of other units which are in range of your sensors
¥Heading, speed, and damage information for other units
¥Contact reports gathered by spotters, aerial reconnaissance and other U-boats
¥Locations of major bases, ports and cities
¥Tracking information for any torpedoes you may have fired
¥Navigation waypoints you may have entered for your U- boat
¥Longitude/latitude grid lines (optional)
SILENT HUNTER II |
37 |
Commanding the U-boat |
|
¥The Kriegsmarine coordinate grid (optional)
¥Location of mission objectives
In addition, a floating window provides access to some additional features:
¥A map thumbnail which allows you to quickly zero in on specific locations
¥Zoom in/out buttons to allow you to magnify very small features or zoom out to show more of the map
¥A grid selector to switch between the standard latitude/ longitude grid, the Kriegsmarine grid, or no grid
¥A center button which immediately centers the map on your U-boat
General Map Features
The chart data used in SILENT HUNTER II is based on the latest USGS and NOAA global information and is accurate down to 30 arc-seconds of resolution. This is a huge amount of information and allows us to zoom in to show very specific details of coastline, elevation and depth information.
If you look closely at the map, you will notice that the ocean areas are rendered in a medium beige color while the land areas are rendered in a brown color. The shading also provides information. The lighter the ocean color, the shallower the water in that area and the lighter the land color, the higher the elevation.
The text area in the floating window can give you more accurate information about depth. When you move the mouse over the map display, the floating window will show you data about the location under the mouse cursor, including:
¥The grid location in the Kriegsmarine grid system
¥The longitude and latitude
SH2_Manual_Final 9/21/01 2:18 PM Page 38
SILENT HUNTER II |
38 |
Commanding the U-boat |
|
¥ The depth in meters below sea level
Note that because of space limitations the amount of depth information stored in the map database is limited. Consequently, any areas of the ocean deeper than 480 meters are shown as Ô∞.Õ Since this is below the crush depth of even the Type XXI U-boat, it should never be an issue.
Getting Around the Map
One of the first things you will notice about the Plot screen is that it is impossible to display the map in its entirety, even at the highest resolution supported by SILENT HUNTER II. In addition, at times you will want to see a large area of the map (for instance, when you are planning a navigation route) and at other times, you will want to zoom in on a very small area (such as when you are planning an attack.)
Fortunately there are a lot of options for moving the map around and zooming in on areas of interest.
First, the zoom in/zoom out buttons on the floating window allow you to:
Enlarge portions of the map to view small details.
Shrink large areas of the map for the ÒbigÓ picture.
A faster, more flexible technique is available. If you press and hold down the Z key, the cursor turns into a magnifying glass tool. Now when you left-click the mouse, the map zooms in and centers on the place you click. To zoom out, right-click the mouse in a similar fashion. You can put away the magnifying glass by releasing the Z key.
The PageUp key will increase the level of zoom, leaving the map centered where it is. Similarly, the PageDown key will decrease the level of zoom.
SILENT HUNTER II |
39 |
Commanding the U-boat |
|
If you just want to shift the map position without zooming, press and hold down the space bar. This brings up the hand tool. Wherever you click with the hand tool, the screen will center.
If your mouse is equipped with a wheel you can use it both to zoom and shift the map center. Rotate the wheel to zoom in and out. Click on the wheel to center the map at the position under the mouse cursor.
If you have a three-button mouse, the center mouse button can still be used to center the map, though the zoom function of the wheel is unavailable.
Sometimes it can be hard to place the area youÕre looking at in the larger picture. The thumbnail map on the floating window can help you with this. First, it shows you the location of the place you are looking in the context of the entire Atlantic region. Second, by clicking in the thumbnail view, you can instantly shift the larger map view to that new location, allowing you to rapidly shift your viewpoint thousands of miles.
ItÕs pretty easy to lose track of your U-boat when shifting the map view around a lot. The center button on the floating window will shift the map to focus on the current location of your U-boat.
Additional view commands are available by right clicking anywhere on the map screen. These options include:
¥CenterÑallows multiple options for centering the map view
¥Set ZoomÑallows you to set the map magnification from 1X all the way to 640X
¥GridÑallows you to turn on and off display of the latitude/longitude grid and Kriegsmarine grid.
If you want to know the distance from any point on the map to any other point on the map, you can use the ruler tool. To bring
SH2_Manual_Final 9/21/01 2:18 PM Page 40
SILENT HUNTER II |
40 |
Commanding the U-boat |
|
up the ruler tool left-click anywhere to set an anchor point, hold down the left mouse button and drag it around. A line will be drawn from the anchor point to the current mouse position.
As you drag the mouse around, note the numbers that appear next to the mouse cursor. The top number is the distance between the two points. If the points are less than 1,000 meters apart, this number will be in meters. Otherwise, it is converted to nautical miles. The bottom number is the bearing from the first point to the current mouse position.
Global Coordinates and the Kriegsmarine Grid
Most navigational charts in the real world rely on standard longitude/latitude coordinates to uniquely specify any location on the planet.
SILENT HUNTER II supports the standard coordinate grid, but it also uses a special grid system developed by the Germans known as the Kriegsmarine grid. In fact, when you receive location information via radio messages that information will be in the form of Kriegsmarine grid coordinates. For this reason it will be very helpful to understand the grid system when playing the game.
Fortunately, the Plot Screen can be configured to display either longitude/latitude lines or the Kriegsmarine grid. The grid select button on the floating window cycles between three different modes:
1.Standard latitude/longitude coordinate grid
2.Kriegsmarine grid
3.No grid
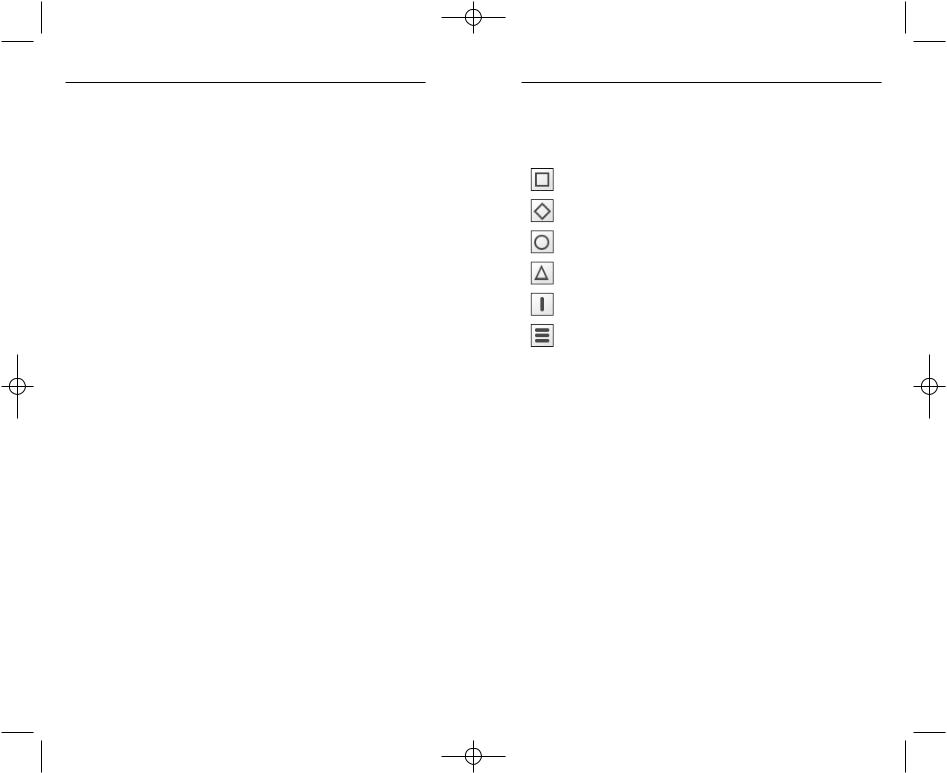
Kriegsmarine grid coordinates take the form:
XXnp
Where XX specifies the grid area, n specifies one of 9 sectors
SILENT HUNTER II |
41 |
Commanding the U-boat |
|
within that area and p specifies one of 9 sub-sectors within that sector. A typical grid area looks like this:
Note how the grid is broken down into a 3x3 group of 9 sectors, and how each of those sectors is broken down into a 3x3 group of 9 sub-sectors. If grid sector DR75 is specified in a radio report, for example, you would find area DR, look for the lower left sector (7) and note that sub-sector 5 is right in the middle.
Entering Way Points and Setting Up Patrols
Often you will want your U-boat to travel to a specific location or patrol a specific region of the ocean. This can be done very easily using waypoints.
Waypoints are map locations which represent navigation points toward which your U-boat will travel. When laid down in sequence, your crew will attempt to visit each waypoint in succession until all waypoints have been visited.
It is also possible to create a patrol ÒloopÓ where the U-boat will continue to visit every waypoint in sequence until you issue a new movement order (or run out of fuel.)
1.Creating waypoints is very easy:
2.Locate your U-boat on the map.
3.Click on the data tag for your U-boat with the left mouse button. While holding down the left mouse button, drag out a line from your U-boat to the location of the first desired waypoint.
SH2_Manual_Final 9/21/01 2:18 PM Page 42
SILENT HUNTER II |
42 |
Commanding the U-boat |
|
Release the left mouse button where you want the first waypoint.
4.Now you can add subsequent waypoints by clicking on other map locations where you want the U-boat to travel. Waypoints are numbered in succession and connected by lines to show the path of intended motion.
5.When you are finished adding waypoints, click the right mouse button.
Once you have laid the last waypoint, your crew will automatically begin the process of navigating the U-boat to all the placed waypoints.
A patrol loop is only slightly more complicated. After you have placed the last waypoint, instead of pressing the right mouse button, position the mouse over the first waypoint (or any other way point you want to be the starting point for the patrol loop) and press the left mouse button. The cursor will change to the ÒloopÓ indicator when youÕve positioned the mouse correctly.
If you want to move your waypoints after placing them you can do so. Left-click the waypoint you want to move to select it, then drag it to a new location. You can also delete waypoints: select the waypoint you wish to delete and press the Del key on your keyboard.
Tactical Use of the Plot Screen
The Plot Screen is more than just a navigational tool. When other ships and aircraft are detected by your sensors or when a contact report is made, a data tag is displayed on the map representing that contact.
SILENT HUNTER II |
43 |
Commanding the U-boat |
|
The shapes displayed in the data tag denote the different types of units, as follows:
Merchant ship or convoy
Warship or task group
Submarine or U-boat
Aircraft
Torpedo
Gun emplacement or other shore-based unit
The color displayed in the data tag also has significance:
¥Blue denotes a friendly unit
¥Red denotes an enemy unit
¥Green denotes a neutral unit
¥Gray denotes a unit of unknown affiliation
Note that the location of any given unit is only an estimate based on input from your U-boatÕs sensors. Radar and lookouts are the most accurate, while sound and radar detectors can provide only rough estimates as to range and bearing. At different times of the war, you may have different sensors on your U-boat, which gives you better or worse detection and localization of potential targets.
To help you gauge the accuracy of a targetÕs location, a light-col- ored region may be drawn around the data tag. This is what we call the ÒuncertaintyÓ region. This region will grow and shrink based on the age and accuracy of the sensor information acquired for that contact. What the uncertainty region is showing you is an estimate of all the possible areas that unit may be located, based on the knowledge at hand.
SH2_Manual_Final 9/21/01 2:18 PM Page 44
SILENT HUNTER II |
44 |
Commanding the U-boat |
|
Each data tag may also be accompanied by a ÒtailÓÑa short line indicating the path of motion or the facing direction of the unit. Note that the facing direction is actually opposite the direction the tail is pointing. In other words, the tail points behind the unit. The tail is only visible when the path of motion or facing direction is known.
Depending on your chosen realism settings, when you move the mouse over a data tag, a small window appears giving you known information about that contact, including its location, heading, speed, composition and the time at which it was last detected. The info window is somewhat context-dependent and will give you slightly different information depending on the nature of
the contact.
Because units may be very close together when the map is zoomed out a lot, the Plot Screen will condense groups of units into single data tags when the map view area is very large in order to keep the display from getting too cluttered up.
At the highest zoom levels the data tags are replaced by representational Òtop-downÓ drawings of each unit, giving you a more intuitive feel for relationships between different units. In this view each marine unit is accompanied by a Òwake,Ó which gives you a sense for the maneuvers that unit has been making recently. This feature is especially interesting when you have torpedoes in the water and want to track their progress towards the target.
Again depending on your realism settings you can select a target for torpedo attack by clicking on it with the mouse pointer. If selected, a red outline will be drawn on the icon. Note that some units cannot be selected for torpedo attack (land units and aircraft, in particular.) In addition, you cannot select a group, so you must be zoomed in enough to select an individual unit.
When selected in this way, the target is considered Òlocked,Ó just as if you had pressed the Target Lock button on the Periscope screen or the L key. If you switch to the Periscope or UZO
SILENT HUNTER II |
45 |
Commanding the U-boat |
|
screens, you will see this unit indicated with a red, non-blinking triangle. When you have a target locked, the small torpedo icon at the lower right above the message box will be colored red.
Since the target is locked, you can go to the Torpedo Fire Control station or panel and fire torpedoes at it.
The Helm Controls
One of the first things you will want to do with your U-boat is to travel to different places in the game world. To do this, you will need to understand the U-boatÕs helm controls.
There are two ways to access the helm controls:
¥The Helm and Gauges screen (accessed by hitting the helm button on the Station bar or the F4 key.)
¥The Helm control panel (accessed using the helm tab on the multifunction sliding panel or the Q key.)
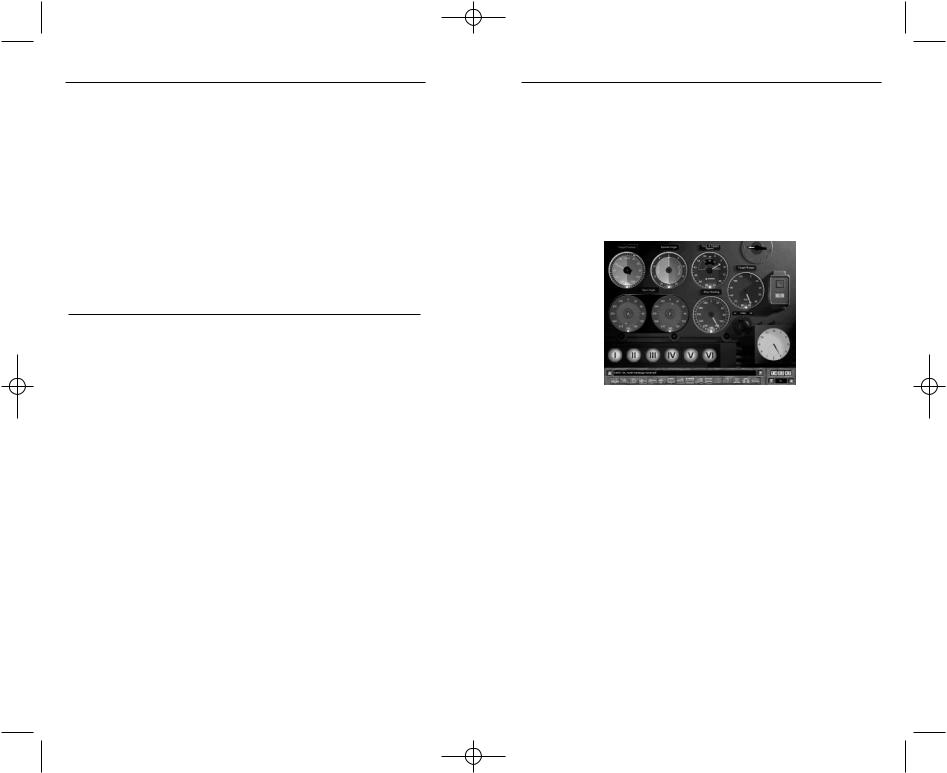
The full Helm and Gauges screen has the following features:
1.The heading indicator/control dial.
2.The engine telegraph.
3.The rudder indicator/control dial
4.The knot meter
5.The depth indicator/control dial
6.The dive plane indicators (fore and aft)
7.The dive bubble
8.The fuel gauge
9.The diesel engine controls
10.The battery charge indicator
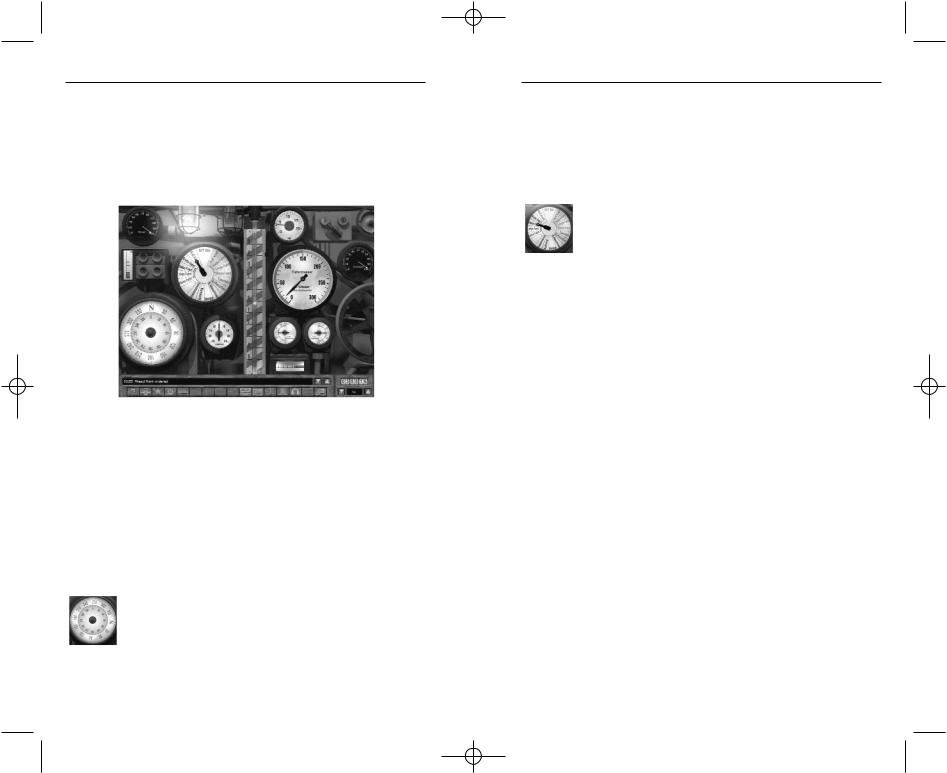
SH2_Manual_Final 9/21/01 2:18 PM Page 46
SILENT HUNTER II |
46 |
Commanding the U-boat |
|
11.The snorkel controls (not available on all U-boats.)
12.The compressed air gauge
13.The CO2 gauge
The Helm control panel duplicates a subset of these features:
1.The heading indicator/control dial
2.The engine telegraph
3.The rudder indicator/control dial
4.The knot meter
5.The depth indicator/control dial
The Heading Indicator/Control Dial
This circular dial tells you the U-boatÕs current compass heading. The current heading may be read from the top of the dial. You can also enter a new heading order by clicking on any compass heading on this
dial. A red line appears when you do this, showing you the current heading order. Your crew will attempt to steer the boat to that heading. During the course of your mission, if you deviate from
SILENT HUNTER II |
47 |
Commanding the U-boat |
|
the ordered heading, perhaps to investigate a contact, and want to return to your previous heading, press the J key.
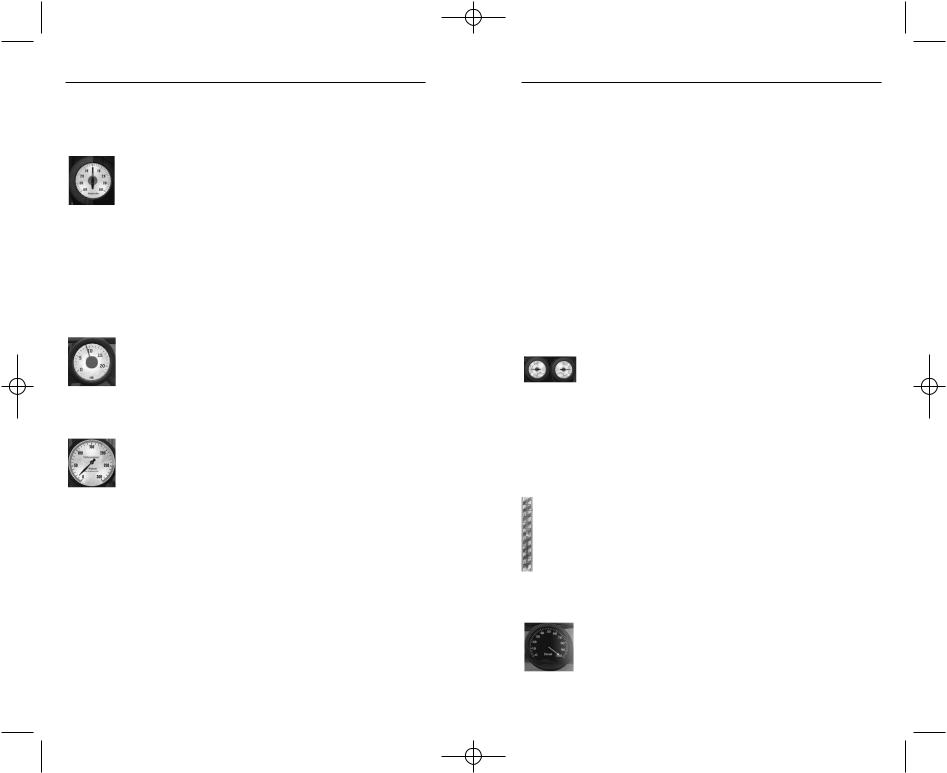
The Engine Telegraph
This dial allows you to order a new speed setting for the U-boat. The black settings to the left are, from bottom to top, ahead slow, ahead one third, ahead standard, ahead full and ahead flank. The red set-
tings to the right are, from bottom to top, back slow, back standard, back full and back emergency. The ÒStopÓ setting at the bottom of the screen shuts down the engines, but does not immediately stop the U-boatÕs forward motion.
Note that the actual speed you get from any setting depends on several factors, including whether the boat is surfaced or submerged, whether the diesel engines or the electric motors are engaged, whether one diesel engine is charging batteries, whether any of the engines are damaged and what sea conditions currently prevail in the U-boatÕs area.
It is also important to note if you run your engines at high rates of speed for extended periods of time you run the risk of experiencing mechanical difficulty.
The telegraph also has several other settings besides those which allow you to set speed. The settings Tauchen (dive), Auftauchen (surface) and Achtung (attention), while historically correct, have no function in the game and are not clickable.
The settings Dieselmotoren and E-Maschinen allow you to specify which powerplant should drive the boat while surfaced.
SH2_Manual_Final 9/21/01 2:18 PM Page 48
SILENT HUNTER II |
48 |
Commanding the U-boat |
|
The Rudder Indicator/Control Dial
This dial shows you the current position of your rudder, which is used to turn the U-boat. It can also be used to manually set the turning rate, something you may want to do depending on your current situation.
To set the rudder position, click on the dial for the rudder position you want. Positions to the left will turn the boat to the left, while positions to the right will turn the boat to the right. Select the 0 setting to make the U-boat go straight again.
The Knot Meter
This dial shows you how fast your U-boat is going in nautical miles per hour (knots).
The Depth Indicator/Control Dial
This dial shows you the depth of your keel (the bottom of the boat) in meters below the surface of the ocean. For this reason, the depth meter will never actually read Ò0Ó but will always read some distance
below 0 (about 5 meters for a type VII U-boat.) For reference, the water depth under the keel of your boat is also shown on this gauge by the gray arrow.
When you want to submerge the U-boat, click on any depth setting you want and the crew will attempt to reach and maintain that setting. The red needle will move to indicate the new depth order.
Be warned that diving too deep may cause a structural failure due to excessive pressure. Every U-boat has what is known as its operational depth, which is shown on the Depth Indicator as the green area. Operating the U-boat below this depth will increasing-
SILENT HUNTER II |
49 |
Commanding the U-boat |
|
ly risk destroying the U-boat the deeper you go. Your crew will also warn you if you are entering shallow waters, that is, areas where depth below keel is less than 30 meters.
Large bodies of water will have layers where the temperature of the water is warmer or cooler. When you pass through a thermal layer or thermo cline, the crew will alert you to this event.
Thermal layers reflect sound waves, which travel very efficiently through water, making it difficult for perusing destroyers to locate your submarine by using hydrophones or active sonar. Operating below the thermal layer can provide you with valuable cover in a combat situation.
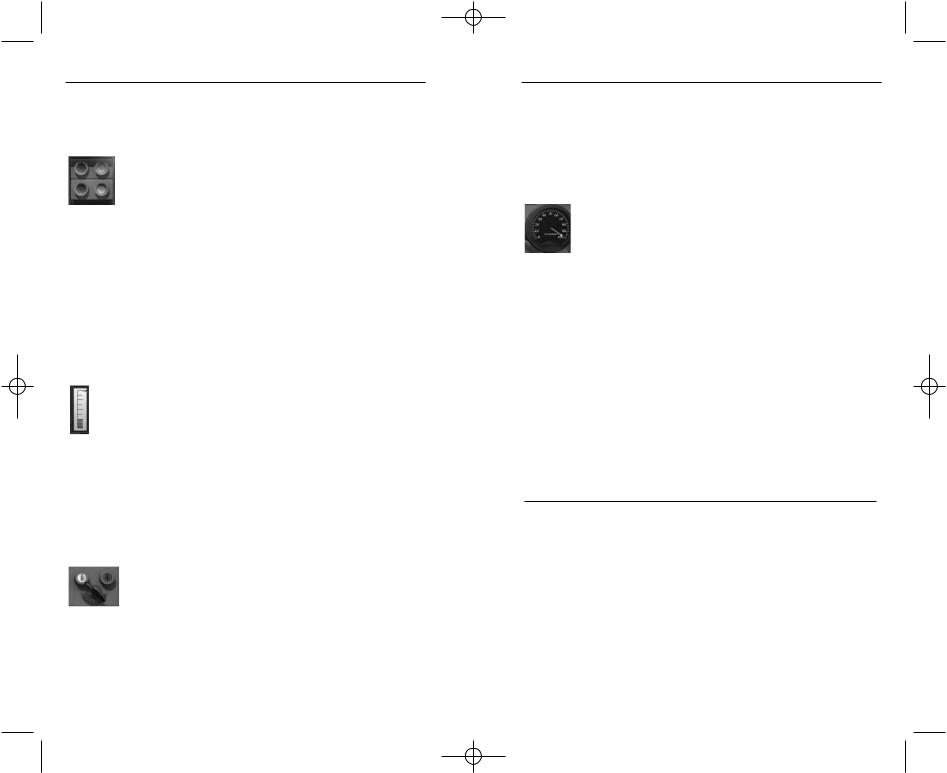
The Dive Plane Indicators
These gauges show you the positions of your dive planes. The gauge on the left shows the position of the aft dive planes, while the one on the right shows
the position of the forward dive planes. The dive planes are controlled automatically and are adjusted to make the U-boats forward motion ÒdriveÓ the boat to the desired depth.
The Dive Bubble
The dive bubble rides in a tube at center screen and
shows the current dive angle of the U-boat. Positions above the zero line indicate that the U-boat is oriented downward, while positions below the zero line
indicate an upward attitude.
The Fuel Gauge
This shows the quantity of diesel fuel remaining in your fuel tanks. You will want to monitor your fuel consumption carefully if you are on a long voyage.
SH2_Manual_Final 9/21/01 2:18 PM Page 50
SILENT HUNTER II |
50 |
Commanding the U-boat |
|
The Diesel Engine Controls
These buttons allow you to view and to change the way your diesel engines are used. The top set controls the portside diesel engine while the bottom set controls the starboard-side diesel engine. Note
that these controls are only active when the U-boat is surfaced or, if the boat is equipped with a snorkel, when you are at snorkel depth.
When the red button is lit, the corresponding engine is being used to charge your batteries. If the green button is lit, then the corresponding engine is being used to propel the U-boat. If both buttons are dark, it means that the engine is currently off line.
The Battery Charge Indicator
Speaking of batteries, this gauge shows you the current battery charge state. When the boat is submerged and running on electric motors, your batteries will gradually be depleted. High speeds will deplete batteries much
faster, so watch your throttle settings when traveling submerged.
Running your diesel engines is the only way to recharge batteries. Plan on staying on the surface a while since it takes a long time to fully recharge the batteries if they are very low.
The Snorkel Controls
Some U-boats are equipped with a snorkel, which allows it to run its diesel engines while submerged (albeit at a very shallow depth.) If the snorkel switch is set to the green position, the snorkel is active and
you may run your diesel engines. If set to the red position, the snorkel is inactive and you must surface to run your diesels. If the U-boat dives below snorkeling depth, the snorkel will be shut off automatically. While operating with the snorkel extended, your
SILENT HUNTER II |
51 |
Commanding the U-boat |
|
U-boat is limited to moving forward only, at a maximum throttle setting of ahead 1/3 regardless of depth.
The Compressed Air Gauge
U-boats use compressed air to empty the ballast tanks, generating positive buoyancy and allowing the U-boat to surface. Most of the time, compressed air usage is not an issue. However, if you overuse
the Òblow ballastÓ command to quickly bring the U-boat to the surface, you may run out, which can, in some situations, make it impossible to surface the U-boat.
Normally it takes about two hours to fully-recharge the compressed air tanks and you must be on the surface to do so.
The CO2 Gauge
As you run submerged, the crew will consume oxygen at a steady rate. As the crew uses oxygen, their respiration replaces it with Carbon Dioxide (CO2). Normally you have about 48 hours worth
of oxygen before you need to surface. Oxygen is refreshed when the U-boat surfaces.
Helm Control Keyboard Equivalents:
[ |
Left rudder in 5 degree increments |
] |
Right rudder in 5 degree increments |
ctrl-[ |
Left full rudder |
ctrl-] |
Right full rudder |
Õ |
Rudder amidships |
~All stop
1Ahead slow
2Ahead 1/3
3Ahead standard
4Ahead full
SH2_Manual_Final 9/21/01 2:18 PM Page 52
SILENT HUNTER II |
52 |
Commanding the U-boat |
|
5Ahead flank
6Back slow
7Back standard
8Back full
9Back emergency
PSet periscope depth
DSet snorkeling depth
FRaise/Lower Snorkel
CCrash dive
BBlow ballast (Emergency surface)
SSurface the boat
The Torpedo Fire Control System
In most cases, World War II torpedoes were unguided weapons that traveled in a straight line with the aid of a gyroscope for stabilization. Determining the course a torpedo must follow in order to impact with a moving target is the problem that must be solved in order to make a successful torpedo attack.
The Torpedo Fire Control screen and the Torpedo Fire Control Panel are your primary interfaces to the torpedo fire control system. In both cases, you may fire automatically at a selected target, or manually set up a fire control solution using the input gauges.
Automatic Mode
Auto mode is the default and recommended mode for most situations. To use the Angle Solver in Auto mode, make sure the ÒAutoÓ switch is set to ÒOnÓ.
Before you can use the Torpedo Fire Control screen you must lock a target in the Periscope, UZO or Plot Screen stations (see the Periscope, UZO and Plot Screen sections for information
SILENT HUNTER II |
53 |
Commanding the U-boat |
|
about target locking.) This informs the fire control system which contact to monitor for targeting information.
The Torpedo Fire Control Panel has no such limitation since it can be viewed from any of the above stations. With the Control Panel, you can fire at any target in view which has a triangle beneath it, indicating that it is selected.
Once you have locked a target, the gauges of the Torpedo Fire Control will reflect the most up-to-date information acquired by the U-boatÕs sensors. The gauges show:
1.Target Position. This gauge shows both relative target bearing (also known as Òangle off the bowÓ) and the heading of the target relative to your U-boat. The outer needle shows relative bearing while the inner needle shows the targetÕs heading. Again, both of these settings are relative to your own U-boatÕs position. So, if a target was both directly behind you and heading in exactly the opposite direction, then both needles would be set to Ô180Õ.
2.Offset angle chosen for the torpedo. Normally this reads Ò0,Ó but you can make slight alterations in a torpedoÕs course by selecting a port or starboard offset using this gauge. This is useful for firing a spread of torpedoes.
SH2_Manual_Final 9/21/01 2:18 PM Page 54
SILENT HUNTER II |
54 |
Commanding the U-boat |
|
3. Both the targetÕs speed and the speed of the selected |
||
torpedo (see the Torpedo Status Screen section for details |
||
1 |
2 |
3 |
about selecting torpedo speed.) 4 |
||
4. Target range estimation, in hundreds of meters (hectome- |
|||
5 |
6 |
7 |
8 |
ters). Using this scale, the dial is set to Ô10Õ when the
target is 1000 meters away. |
9 |
|
5.Aft gyro setting. This is the gyro angle chosen for aft-fired torpedoes.
6.Forward gyro setting. This is the gyro angle chosen for forward-fired torpedoes. The gyro setting is important. Early torpedoes could only be fired if the gyro setting is within ± 90 degrees. Later in the war, this was increased to
± 135 degrees. You will be warned if you attempt to fire a torpedo with a gyro setting outside this range. If this happens, your only choices are to turn the U-boat until the gyro setting falls within range or to fire torpedoes from the aft tubes (if present.)
7.The U-boatÕs current heading.
8.The current firing solution for the selected target. This will increase as better information is acquired for the target. It may also decrease if you lose track of the target for some reason, such as the U-boat submerging or the periscope being lowered or damaged.
9.The run time, in minutes, that will be required for this torpedo to reach the target impact point. When torpedoes are fired, a red needle appears on the same gauge for each torpedo. A red needle gradually ticks off the duration of the torpedoÕs run. When a red needle reaches zero, the corresponding torpedo should have impacted the target.
In addition to the gauges, there are indicator lights for each torpedo tube (up to a maximum of six tubes for type IX and type XXI U- boats.) These lights change color to indicate the status of the tube:
SILENT HUNTER II |
55 |
Commanding the U-boat |
|
¥Green indicates a tube that is loaded and ready to be fired.
¥Red indicates a tube that is currently being reloaded.
¥Grey indicates either that a tube is damaged or that there are no more torpedoes available to load in that tube.
Firing a torpedo is as simple as selecting a torpedo tube using the tube selector (10) and pressing the red fire button (11) adjacent to the solution gauge (8.)
Type II U-boats only have three torpedo tubes, all firing forward. For type VII and type IX U-boats, tubes I through IV fire forward and tubes V (types VII and IX) and VI (type IX only) fire aft. On the type XXI U-boats, all six torpedo tubes fire forward.
Using the Torpedo Fire Control Panel
The control panel has a significant subset of the controls available on the full Torpedo Fire Control screen and has the advantage of being very convenient to use from the Periscope or UZO screens, as illustrated below:
Though smaller, the gauges on this control panel are all duplicates of gauges on the full Torpedo Fire Control interface. Missing are the gyro angle and heading gauges. Otherwise, the control panel has all of the same functionality and may even be used to set up manual firing solutions.

SH2_Manual_Final 9/21/01 2:18 PM Page 56
SILENT HUNTER II |
56 |
Commanding the U-boat |
|
An additional advantage to using the control panel is that you donÕt need to remember to lock the target for automatic tracking. Keep the desired target in your cross hairs so that it remains selected (i.e. the triangle is present) and the control panel will continue to track it. You can also use this technique to quickly shift between multiple targets, which can be useful for convoy encounters.
Using Auto Mode for Torpedo Attacks
Making torpedo attacks in Auto mode is mainly a matter of Òpoint and shoot.Ó The simplest approach is to go to the Periscope screen, line up the scope on the desired target until you see the flashing red arrow beneath it.
Bring up the sliding control panel on the right and choose the second tab, which displays the Torpedo Fire Control panel. Make sure the switch labeled MZ/AZ is set to AZ, indicating that you want to use auto mode.
Use the tube selector at the top of the screen to select the torpedo tube you wish to fire. Just click on the tube number to select that tube, the dial will indicate your selection.
There are several things to consider when selecting a torpedo tube. First, choose one whose indicator is colored green so you know that it is ready to fire.
Second, you need to be aware of the bearing to your target. If the relative target bearing is less than 90 degrees or greater than 270 (you can read this from the angle indicator at the top of the periscope) you should have no problem firing your forward torpedo tubes. However, if the angle is greater than 90 degrees and less than 270 degrees you should either:
¥Choose an aft firing torpedo tube (if you have one.)
¥Turn your U-boat until the target is within the forward firing arc.
SILENT HUNTER II |
57 |
Commanding the U-boat |
|
The reason for this restriction is that torpedo gyroscopes can only turn through ±90 degrees. (Later in the war this increased to ±135 degrees for German torpedoes.) In general, though, the closer the torpedo tubes bear to the target, the better, since torpedo gyros are more accurate at smaller angles than larger angles.
You can fire a torpedo any time you have a valid tube selected. However, you will probably want to wait until you get fairly close to the target. With straight running torpedoes, your odds of a hit greatly improve if you can attack from less than 2000 meters. Many U-boat commanders chose to made their attacks from extremely short distances, under 600 meters.
Use the solution gauge to determine the probability of a torpedo hitting the target. If it reads less than 75%, you should probably try to get closer.
Using Manual Targeting Mode
Manual targeting should be considered by advanced players only as it involves a deeper understanding of the torpedo fire control problem.
To set up a manual firing solution, you will need several pieces of information:
Relative bearing to the target
¥The targetÕs course relative to your U-boat
¥The targetÕs speed
¥The targetÕs range
One way to get this information is by reading the best estimates of your sensors from the Plot screen. Find the object on the plot and move the mouse cursor over it to bring up the info window. Note that sometimes this information is not available because your sensors donÕt have an accurate fix on the target.
 Loading...