


A WORD FROM JOHN WARDLEY
The world of theme parks is one of the most exciting businesses to be in.
Now, you too can be a roller coaster tycoon and make your fortune by designing, building, and operating some of the biggest and most sensational theme parks in the world.
There’s much more to a theme park than roller coasters, height, speed– and making people feel sick! You are about to become a real-estate developer, an engineer, an accountant, a landscape architect, a manager of people, and an entertainer.
Your park must provide a fun day out for everybody, at a price they can afford. They must be kept comfortable and happy, well fed and amused–but you have bills to pay, advertising costs, wages and big problems ahead of you. You will need to use all your skills to be successful.
Here are some tips. As a ride designer, think of yourself as an entertainer; you can make your riders laugh or cry, you can amaze them, mystify them, scare them, amuse them, or terrify them–it’s all under your control. Just think of the power you have!
But entertainers need to understand their audience. Who are you trying to entertain?
…families with young children?
…teenagers who want the ultimate in white-knuckle terror?
…or everyone who comes to your theme park, including grannies and little kids?
Think of a ride on a roller coaster as a journey through an adventure. It must have variation–not just its ups and downs, but also its surprises and shocks, its gentle scenic sections to lull you into a false sense of security, and its wild mean parts to scare the pants off you.
A ride should be impressive, yet fun to watch, and it should fit into the layout and landscape of the park. Your guests must be able to see some of it from the walkways, but keep some bits hidden so they come as a complete surprise during the ride. An adventure journey must take your riders through an exciting, disorientating, and spectacular environment. Position trees, tunnels,
and other obstructions so as to enhance the thrills. Use water for effect, and create hills and valleys through which your ride will race. All these elements are at your fingertips, so use them.
Remember any fool can build a roller coaster with an impressive first drop, but can you keep the fun and action going right through to the end of the ride? When I designed Nemesis at Alton Towers, I wanted to ensure that there was speed and exhilaration even right up to the last section of track before the station so I dug a hole just in front of the station brakes and dropped the ride down through a corkscrew below ground level. It comes as quite a shock when you ride it. If the riders get off feeling that the ride has dulled-out halfway through, they will be disappointed, but if they get off on an emotional high, they’ll come back for more–and they’ll be more likely to buy an on-ride photo of themselves. (Position the camera in the best place for good expressions on riders’ faces to maximise sales).
Locate your big spectaculars towards the back of the park, to draw the guests right through the park past as many “spending opportunities” (food kiosks, etc.) as possible.
Once you’ve designed your coaster, you’ve got to operate it at maximum efficiency. Should you wait till the train is full before you send it out of the station? Keeping riders waiting is boring, and the more frequently the guests walking around the park can see the ride running, the more attracted they’ll be to ride it, but a full train is the most efficient way of running the machine. Even the best-designed roller coaster won’t make money unless it is operated and maintained efficiently.
It has taken me 25 years of hard work to gain my experience in the theme park industry. With RollerCoaster Tycoon, you can get there in 25 minutes!
A plot of land is out there waiting…
…rides are available for you to design and build…
…and guests are ready to visit you and spend lots of money.
Good luck, and have fun.
John Wardley’s official job title is “Consultant Director, The Tussauds Group, Ltd.” but he doesn’t mind being called simply a “Ride Designer”. He has been involved with the design of many of the best European roller coasters, including Nemesis and Oblivion at Alton Towers (England), Megafobia at Oakwood (Wales), The Vampire at Chessington (England), Dragon Khan at Port Aventura (Spain), and many others.
2 |
3 |
WELCOME!
Welcome to RollerCoaster Tycoon! We’re glad you could make it. You’re about to enter the world of professional amusement–and you’re jumping in with both feet.
All over the world, not a year goes by that someone somewhere doesn’t open a new park. Of course, some succeed and others fail. Your benefactors, a secretive holding company located in the British Isles, have been buying up unsuccessful parks for some time now. They’ve got quite a collection. Some are empty lots where the designers never got started; others are partially complete; still more are up and running, but contain flaws. Your job is to take the reins of every one of these parks and, one by one, drive them to success. In each case, the holding company has provided what resources they can, but once you begin, you’re on your own. If you need cash, you’ll be forced to take loans from local banks.
What constitutes success? That’s defined for you at the beginning of each scenario. Early on, the challenges are not particularly difficult–relatively speaking. (Don’t underestimate them.) As you prove yourself, however, you can take on more complex and troublesome projects. Complete them all, and you’ve earned the right to call yourself a roller coaster tycoon!
This guidebook, culled from the experience of others, contains everything you need to know to succeed in the park business–except your own good sense and shrewd entrepreneurial skills–and you’ll need a lot of both to do well. What you won’t find in here are tedious lists of statistics about all the possible rides, types of scenery, and other attractions you can build. Why? As you progress through the scenarios, one of the things you should be doing is having your researchers work to invent new things. Part of the fun is in the discovery–much like your first visit to a new park–and in trying out something novel to see what you can do with it.
HOW TO GET HERE
No matter where you’re coming from, there’s only one way to get to RollerCoaster Tycoon. First, let’s make sure you have what you need to enjoy your visit. After that are complete directions for reaching the park safely.
Necessary Equipment
Before you can install RollerCoaster Tycoon and start playing, check this list to make sure that your computer has everything you need:
•The processor has to be a 90 MHz Pentium® or better. For best performance, we recommend at least a 200 MHz Pentium with MMX.
•Your operating system must be Windows® 95 (or newer).
•You must have at least 16 Mb (megabytes) of RAM. (If you’re running Windows 95, it’s a safe bet you have 16 Mb or more.) For best performance, we recommend 32 Mb or more.
•You must have a 4x speed (or faster) CD-ROM drive.
•Since the installation program will copy parts of RollerCoaster Tycoon onto your hard disk, you must have a lot of empty storage space on your hard drive. How much you need depends on how much of the game you choose to install; the different amounts are calculated for you by the installation program, and it shows you what you need versus what you have. The minimum required is 45 Mb.
•Your computer must be capable of SVGA quality graphics, and your video card must have at least 1 Mb of onboard memory.
• There must be a working mouse (or a device that fulfils the same function) attached to the computer.
•You must have DirectX version 5.0 (or higher). If you don’t have this, you can install version 5.0 as part of the installation process.
•To hear the game sounds and music, you must have a working Windows 95 compatible sound card–and the requisite drivers installed.
If you think you have all of these, but still have a problem running the game, please contact Hasbro Interactive Customer Support for assistance.
Installation
If you have all of the required equipment, then it’s time to install the game. To do so, follow these instructions:
•Turn on your computer.
•Open the CD-ROM drive, place the RollerCoaster Tycoon CD in it, and close the drive.
•RollerCoaster Tycoon is a Windows “AutoPlay” CD-ROM. That means that just putting the disk in the drive for the first time starts up the installation program.
4 |
5 |
If Autoplay Doesn’t Work
If, for whatever reason, the Autoplay feature does not work when you put the CD in the drive, here’s how to start the installation program yourself:
•Double-click your “My Computer” desktop icon.
•In the window that opens, double-click your CD-ROM drive (it’s usually the D drive).
•In the list that appears, find a file named setup.exe and double-click it.
The installation program should begin.
•As is usual in Windows installation procedures, there are two decisions you need to make before the installation process can begin. The first decision is to what directory you want to install the game. You can accept the default, type in a directory path, or use the Browse button to seek out a directory. Click OK when you’re done.
•The second decision is what sort of installation you want to do. Pick one of the options presented:
Minimum - installs all of the files required to play the game, but leaves some of the larger files on the CD. This type of installation strikes a balance between the needs of game speed (more files copied) versus conserving hard disk space (less files copied).
Full - installs the entire game, including all of the larger files. If you have the hard disk space to spare, doing a Full installation can make the game run faster.
•Click Install to continue. (If you change your mind at this point, click Exit.)
•RollerCoaster Tycoon will now copy the files you selected to your hard drive from the CD-ROM.
•After the game itself has been copied over, RollerCoaster Tycoon installs a few necessary utility programs. These include Microsoft’s DirectX drivers (version 5.0). Note that the space these take up was not included in the total noted when you selected what type of installation to do.
Once the installation is complete, the game is ready to go.
To start playing now:
•Leave the RollerCoaster Tycoon CD-ROM in the drive.
•Click the Play button.
To play later:
•Make sure that the RollerCoaster Tycoon CD-ROM is in its drive.
•Open the Windows Start menu,select the Programs menu then open the Hasbro Interactive menu, then open the RollerCoaster Tycoon sub-menu, and then click the RollerCoaster Tycoon option.
OR
•When you put the CD in, you can wait for the Autoplay screen to pop up, then click the Play button.
Have fun!
ENTERING THE PARK
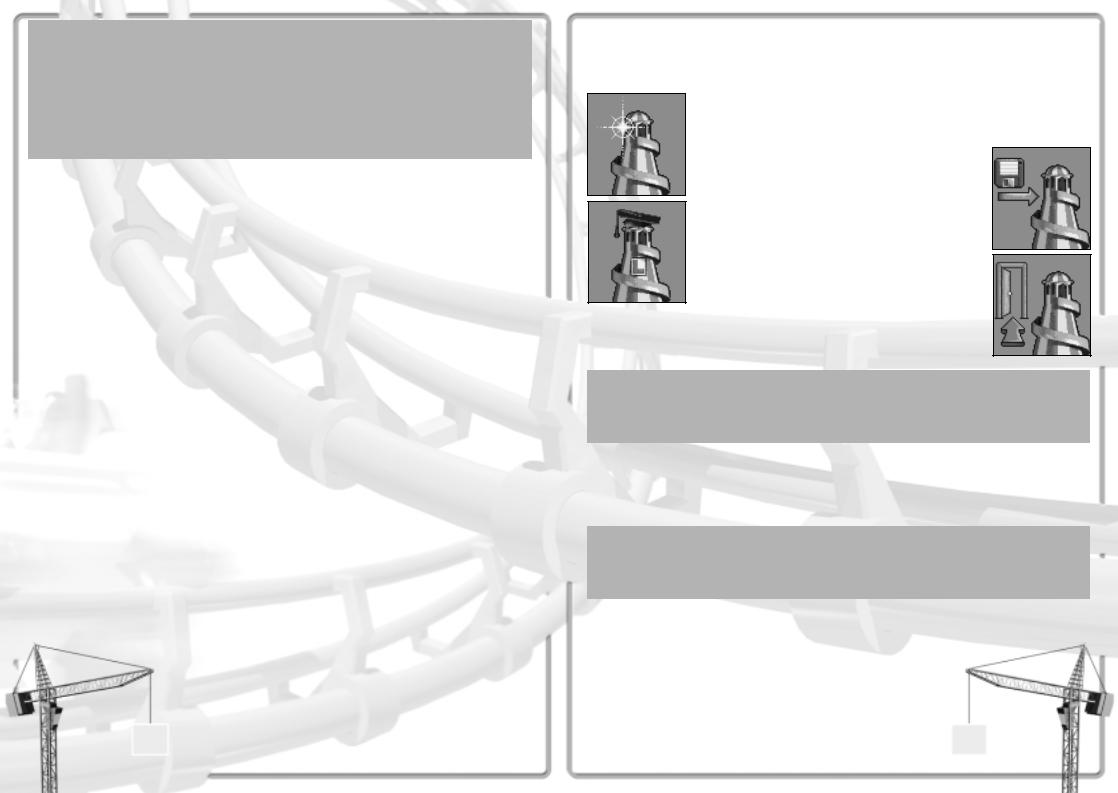
When RollerCoaster Tycoon begins (after the title sequence, that is), you’re left looking at a screen with four big buttons:
Start New Game lets you begin a fresh game–a scenario
of your choosing.
Load Saved Game is what you use to continue a game that you saved previously.
Show Tutorial runs the
beginner’s tutorial.
Exit shuts down the game and returns you to Windows.
Those of you who think you can figure it out for yourself, go ahead and click Start New Game. For the rest of us, here’s a walk
through the tutorial.
If You Get Lost
If at any time you are unsure of what to do, or you run into something you do not understand, please consult the Reference section of this guide. In it, there are point-by-point descriptions of all the major parts of the game.
The Tutorial
The tutorial is a brief guide to how RollerCoaster Tycoon works. When you click the Show Tutorial button, the game runs itself for a while. It starts one of the game scenarios, then goes through the motions, step by step, of setting up a few rides and performing a few other important park management tasks. You can learn a lot by watching this.
Note This!
You don’t have to just sit and watch if you don’t want to. While the tutorial is running, you can click any mouse button or press any key on the keyboard to take over control. The only proviso is that you can’t give control back to the tutorial. Once you take the reins, it’s your park.
As you watch the tutorial, you can follow along in this text; it’s written in the form of instructions and their results, as if you were actually going to do the work yourself. If something the game does in the tutorial is not clear, the chances are good that it’s
explained here. Let’s begin.
6 |
7 |
Click Start New Game. The tutorial skips the menu of scenarios (different parks in different situations) and goes directly into the first scenario on the menu,
Forest Frontiers.
With the park landscape in the background, the first window shows what you need to do to succeed in this scenario. Always read this carefully. In the Forest Frontiers tutorial, you have until October of Year 1 to attract 250 guests into the park and build the park’s rating (a measure of reputation and customer satisfaction) to at least 600.
Click the window close button to close this window.
Click the New Ride button. The Ride Selection window opens.
Select the sleepy looking face tab (Gentle Rides) to see the available gentle rides.
•Select the Merry-Go-Round by clicking on the picture.
•Click the Build This button at the bottom right. The Ride Selection window closes and the Merry-Go-Round Construction window opens.
At this point, the mouse pointer (when held over the landscape) controls where the ride will be built. The landscape area needed to construct the ride is marked, and a yellow arrow indicates the orientation of the ride (which is irrelevant for a Merry-Go-Round, but quite important for many rides).
• Position the cursor between the existing path and the park border fence then click to build the Merry-Go-Round. The cost of construction is deducted from your treasury, which is tracked in a box at the bottom left of the screen. (It’s wise to remain aware of how much money you have to spend.)
Now, you must build the Entrance and Exit for the ride. Once you have established the location of the ride, you use the mouse pointer to choose positions for both. This is a very important step, because every ride must have an Entrance and an Exit, and both must be positioned so that you can build paths to and from the ride, or else your customers will never get there. Every Entrance and every Exit takes up one landscape square. (Note that the Entrance and Exit are free; they come as a package with
construction of the ride itself.)
•Position the Entrance square adjacent to the ride (leaving room for the Exit) and click to build it.
•Construct the Exit in the same way as you did the Entrance.
You now have a completed, but closed, Merry-Go-Round with the required Entrance and Exit, and the Merry-Go-Round 1 window is open. Next, you must build a Queuing Line from the Entrance to the existing path (otherwise, no one will be able to wait in line to board the ride, and that cuts down on business). You also need a path from the Exit to the main Forest Frontiers path.
Click the Footpaths button. The Path Construction window opens.
Click the Queuing Line button (the blue one with people).
•Move the mouse pointer to the landscape square in front of the Entrance and click once. The first stage of the Queuing Line is built, and the cost is deducted from your treasury.
•Move the pointer one square further away, and click again to add another piece.
You now need to connect the Exit and the Queuing Line to the existing path. For this, you’ll use a tarmac footpath.
Click the Tarmac Footpath button (the grey one).
•Using the mouse pointer just as you did when building the Queuing Line, build a path from the Exit to the main path. (Notice the money leaving your account each time.)
•Now, extend the main path to reach the Queuing Line.
Remember
If you make a mistake and build something in the wrong place, you can right-click on what you built to remove it. You will not get all of the construction cost back, but there is usually a refund of some sort. (Removing natural objects such as trees does not count as undoing construction; for removal, there is a separate cost, no refund.)
Now, you have a completed Merry-Go-Round with paths and a waiting area, but it is still closed (as you can see by the sign flashing on the Entrance).
•To open the ride, click the green light on the right side of the Merry-Go-Round 1 window. (If the window isn’t open, click on the Entrance or the ride itself to open the window.)
Now you have an open ride, but the park is still closed.
•Hold the right mouse button down and move your cursor to “drag” the landscape until the park entrance is in view. You see that the main park entrance sign is still flashing a Closed message.
•Click on the entrance to open the Forest Frontiers window.
8 |
9 |
•Click the green light (just like the one that was in the ride window), and the park is open for business.
•Close the Forest Frontiers window.
•Close the Merry-Go-Round 1 window.
You now have one ride working and the park open. It’s time to build something a bit more ambitious.
Click the New Ride button again.
Select the Rollercoasters
tab (the face flying downhill).
•Select the Steel Mini Roller Coaster picture, then click the Build This button. The Select Track Design window opens.
At this point, you can choose to construct one of the pre-designed track layouts, or you can choose to build a custom coaster. We’re being ambitious, so let’s go with the latter.
• Select Build Custom Design, and the Roller Coaster Construction window opens.
The Station Platform is pre-selected as the first item to be built. That’s because on the completed ride, the Entrance and Exit must be adjacent to the station platform. Positioning the station first is good planning.
•Move the mouse pointer over the landscape. The cursor is a white box with a yellow arrow in it (like the Entrance cursor). The box marks where the first piece of Station Platform will be built, and the arrow shows the direction the cars will travel.
•Click once to build the first piece of Station Platform.
•Now, move the mouse pointer back to the construction window and click on the Station Platform picture in the window three times to build the remainder of the platform. The cursor moves forward each time and continues flashing.
Next, we’re going to create the starting rise, the length of track in which a motorised chain pulls the cars up an incline to set up the rest of the ride.
First, we determine the direction of the next piece of track. Near the top of the construction window, select the centre arrow (the Straight button).
Second, we set the grade (rise or drop) of the next piece of track. Below the direction buttons, find and click on the Mild Incline button (just to the right of centre).
Lastly, we add the pulling chain to this section of track. Click on the Chain button (to the right of the incline buttons).
You probably noticed that as you made your selections, some of the choices in the other areas changed from available to unavailable or vice versa. What you can do at any point in the design of a roller
10coaster depends on the structural and functional limits–and the safety regulations–appropriate to the type of track you’re designing.
• Click on the picture of the track piece (as you did for the Station Platform) to add it to the design.
At this point, it might be helpful to know that, even though funds are coming out of your total, you have not irretrievably spent any money yet. Until the roller coaster is completed and has been opened, you can undo the design (one piece at a time) and recoup everything you’ve spent. Once the ride’s been run, however, that is no longer true.
If you understand how you built that straight, inclined, chained section of track, then the rest of the design and construction process should be clear to you. Curves, drops, and everything else are built using exactly the same process–choose a direction, choose a grade, then build the section. As we build this particular design, however, we run into a few of the limits on what we can do. (This is not a complete list, but it covers the issues we run into during the tutorial.)
•In order to switch from a rising track to a dropping track, you must have at least one piece of straight track in the middle.
•There is a limit to how high above the land you can safely raise track using supports. (If you need to go higher, you can raise the land. That’s not covered in the tutorial.)
•You cannot build track underground unless you prepare the land for it.
•Track can be run under or over existing track, provided there is enough room (vertical clearance) for the cars to pass through. However, it is a violation of the safety code to build intersections, so you cannot have the track cross itself at the same level.
If you build yourself into a corner or decide to make a change, you can use the Demolish button
(the bulldozer) to remove the previous section of track.
• The last piece of track must connect to the first piece (the Station Platform) to create a closed loop. The height marks visible on every section of track help you to line things up.
Now that the track itself is complete, you must position and build an Entrance and an Exit for Roller Coaster 1. Only you can decide when the design is done, so the Entrance button is not activated for you (as it was when you built the Merry-Go-Round).
•Click on the Entrance button in the Roller Coaster Construction window.
•Position the Entrance square adjacent to the Station Platform (leaving room for the Exit) and click to build it.
•The Exit button is selected for you when the Entrance is complete. Position the Exit square adjacent to the Station Platform and click to build it. (The Roller Coaster 1 window opens.)
The design and construction of your roller coaster are complete, but you can’t be sure how well it will work unless you test it. Testing also helps you determine how much to charge for it and how popular the ride should be.
• In the Roller Coaster 1 window, click the amber light between the red (Close) and green (Open) lights. The ride begins its test run.
Select the tab with the pocket watch. This shows you the Measurements and Test Data display.
At first, there is no information in this display. When the first test run is complete, much of the missing data is filled in. We explain what all this means later in the manual. For now, what’s important is that the ride runs smoothly.
11
Select the View tab (the video camera).
•Click the red light to shut the roller coaster down (stop the test runs).
•Close the Roller Coaster 1 window.
When you know the coaster works, it’s time to create the associated Queuing Line and other paths.
Click the Footpaths button. The Path Construction window opens.
Click the Queuing Line button.
•Move the mouse pointer to the landscape square in front of the Entrance and click once.
•Move the pointer one square further away, and click again to add another piece.
Click the Tarmac
Footpath button.
•Build a path from the Exit to the main path.
•Now, extend the main path to reach the Queuing Line.
Now, you have a completed, tested roller coaster with paths and a waiting area, but it’s still closed.
•Click on the Entrance to open the Roller Coaster 1 window.
•Click the green light to open the ride.
Now that the new ride is open and functional, you need to set an admission price. This is perhaps the most important decision you make for each ride. Not only does the price influence how much money you make, it also affects the popularity of the ride and, therefore, the attitudes of your guests.
Return to the Roller Coaster 1 window, and click the Income and Costs tab (the coin and ticket).
• Click the small up arrow several times to adjust the Admission Price to £2.00.
Lastly, let’s make sure that the roller coaster is operating in the most efficient manner. After all, you don’t want your guests waiting too long for the ride to start.
Select the Operation Options tab (the gears).
•Click the down arrow to open the Wait For box.
•Choose Wait For Any Load. Leave the Minimum Wait and Maximum Wait times as they are.
This sets the ride to begin when one of two things happens–either the ride has a load of passengers or the cars have been sitting at the Station Platform for the Maximum Wait time. (Even if the ride has a full load, the cars will not leave the station until the Minimum Wait time has elapsed.)
Go to the View tab and close the Roller Coaster 1 window.
You have now built your first rides in your first park! These rides might not be the most exciting in the world, but you’ve learned the basic method for building rides that is the same for all rides in RollerCoaster Tycoon.
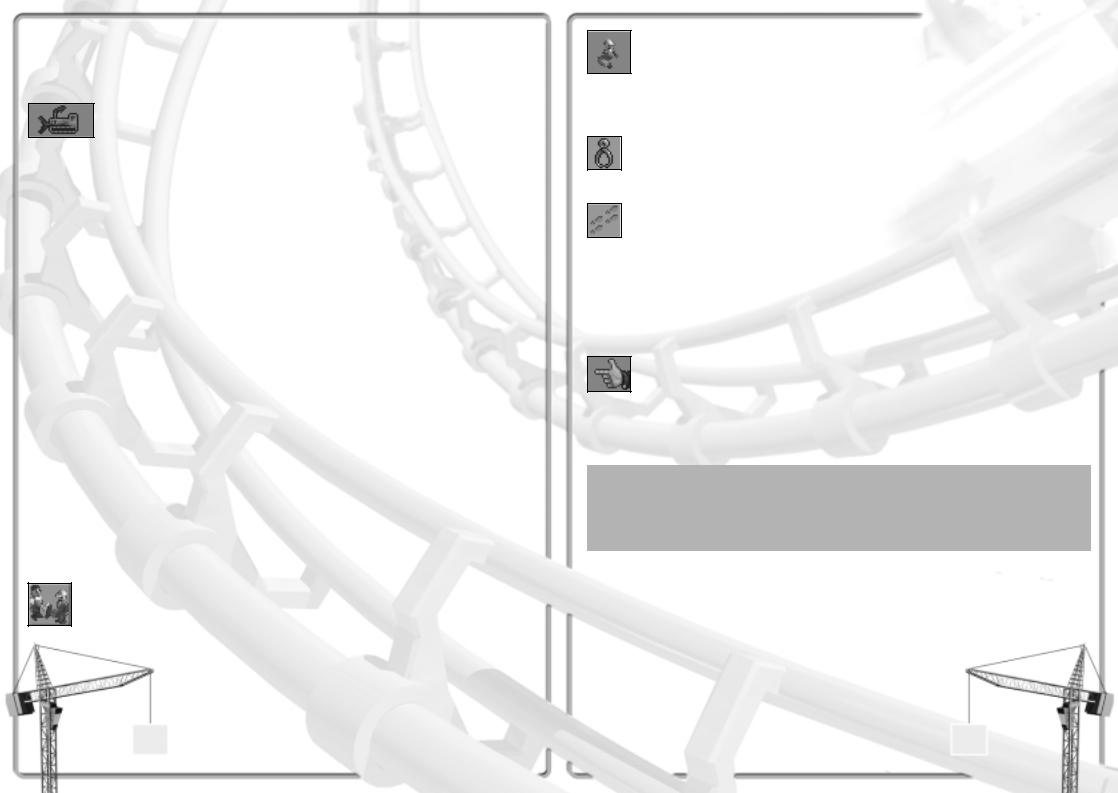
Finally, we must consider the long term operation of the park and the safety of the guests. Every ride is a mechanical device, and machines have a tendency to become worn and break down. We need a Mechanic to perform regular inspections of each ride and repair those that do stop working.
Click the Staff button.
The Staff window opens.
Select the Mechanics tab (the man in the blue work uniform).
• Click the Hire New Mechanic button.
Now you have a Mechanic in your employ, but you need to get him into the park.
•Move the mouse pointer over the landscape and position the Mechanic (hanging from the pincers) directly over one of the paths.
•Click to drop the Mechanic into the park.
Your new employee will wander the park, inspecting every ride on a set schedule (a schedule you can control for each ride using an option on the Operation Options display). When any ride breaks down, a radio call goes out to the nearest Mechanic, and he hurries to fix the ride.
That’s the tutorial! Now that you’ve watched it through, get in there and try a few things yourself. Once you’ve got some practice under your belt, let’s move on to some more possibilities.
12 |
13 |
The Scenarios
As soon as you click the Start New Game button, you’re on your way–but you’re not inside the park yet. RollerCoaster Tycoon includes quite a number of park scenarios. What you see is the
Scenario Selection window.
The name of each available scenario is listed in black letters. (Those you cannot yet reach are greyed out.) Take a look at the list, and pass the mouse pointer over each name, pausing long enough for the Tips box to pop up. This gives you some information about the situation in the park. When you know which scenario you want to enter, just click on the name. (If you change your mind and want to go back to the four buttons,
use the Close Window button in the upper right corner.)
When you have completed a scenario, your success and your score are noted along with the name in the selection window. After you have succeeded at a few of the early scenarios, you can move on to attempt more advanced (and more difficult) scenarios.
THE RIDES
It goes without saying that the main attractions in any park are the rides themselves. Scenery and gardens, shops and stalls, and everything else are necessary to keep guests happy while they’re in the park, but the rides are the reason they come. Variety is the keyword in building rides in your park. After all, would you visit a park that had fifteen Merry-Go-Rounds and nothing else? Probably not.
The entire procedure for constructing a new ride is covered in great detail in the tutorial. Briefly, let’s review the necessary steps:
Click the New Ride button to open the
Ride Selection window.
•Using the tabs, choose a type of ride.
•Select the specific ride by clicking the picture, then click the Build This button.
•Determine the location and direction of the ride, then build it. (For some rides, this is a very simple process; for others, like custom designed roller coasters, it can take some time.)
•Place the Entrance and Exit for the ride.
•Create a queuing line to attach the Entrance to a path, and make sure that the Exit is connected to a path.
•Test the ride, set an admission price, give the ride a name, and determine its colours and other operating characteristics.
•Open the ride.
14
Removing Rides
After you’ve built an attraction, you can choose to demolish it (using the Construction button in the Ride window). When you do so with a newly built ride or shop, you normally get a full refund of the cost of building.
However, once you’ve opened the ride (or shop) and your guests have begun patronising it, you can no longer recoup your entire investment. If you demolish a “used” attraction, your refund is considerably less.
The rides are organised into several types, and each type includes many different rides. (Some of these are not available for construction until your research staff have come up with a safe design.) Each has its own benefits and drawbacks, and each appeals to a certain type of park guest–its specific target audience. What draws a person to a ride depends on the proclivities of that person. Some guests want an intense, thrilling, gut-wrenching experience, while others want to relax and watch the scenery go by. Often, the decisions whether to visit a ride is driven by price considerations. Even the distance between rides can matter; a guest who is tired from walking is less likely to want to do anything, but if your rides are too close together, the park might seem crowded. There are many things to think about when deciding what type of ride to build.
Transport Rides
These are the mildest of the mild. (In fact, in some people’s eyes, they’re not rides at all.) Transport rides carry guests along a fixed track through scenic areas, and they provide a low-thrill experience suitable for even the most squeamish guests. They also act as an alternative to walking. Any transport ride can have multiple stations, and guests use the ride to travel from one station to the other–and from one area of the park to another.
When you build a transport ride, it’s always a custom design. (Please refer to the Building a Custom Ride section for the details on constructing one of these.) Make sure to read the specifications of the ride in the Ride Selection window before you begin construction. For example, some transport rides (like trains) run in only one direction and must travel a circuit, while others (like a monorail) can move back and forth on a single line of track.
Design Tips
•A transport ride is a great way to ferry guests to and from a newly opened area of the park to which you want to draw interest. As an added benefit, you can charge them to get there!
•Don’t be too ambitious too soon. A giant transport network connecting the entire park will be expensive to build. Build it in sections, and let the completed sections run while you save up funds to build the next one and, eventually, connect them all.
•Transport rides with covered cars are popular when it’s raining.
Mild Rides
Low-thrill attractions are the bread and butter |
|
of travelling carnivals, but in a park like yours, |
|
they often play second fiddle to the giant roller |
|
coasters. That doesn’t mean you won’t see a |
|
profit from these. Many guests have little |
|
tolerance for intense rides, and prefer |
15 |
something more calm. |

Most mild rides do not involve custom design, and they tend to take up less space than the more intense attractions. They rarely make guests sick, so you can build them near food service stalls without worry.
Design Tips
•Elevated rides allow your guests to see other rides and areas of the park, which can spark interest in visiting them.
•Covered rides are more popular when it’s raining.
•Rides that provide music often add to the atmosphere of the park, cheering nearby guests.
Roller Coasters
It will come as no surprise to you that the roller coasters are the primary attraction in most parks. Coasters come in many types, starting with the oldstyle wooden tracks and progressing through steel to the newer inverted, hanging, standing, corkscrew, single rail, and many other bizarre permutations. What all of them have in common is that they strive to provide a hair-raising experience, but also walk that fine line between exhilaration and discomfort (or terror). A ride that is too intense gets no riders.
For every different type of roller coaster, there is at least one standard design. You can also, of course, create a custom coaster. (Please refer to the Building a Custom Ride section for the details on constructing one of these.) Whichever you choose, be prepared to use quite a lot of space and spend a significant amount of your funds constructing the track. Each roller coaster is a big draw and will likely bring you profit in time, but you pay up front for the opportunity to add it to your park. When using a standard design, you can watch the information in the Construction window as you position the ride; the price of construction is constantly updated to reflect the cost of building the coaster exactly where the footprint marker stands. (If there is no price listed, you cannot build the ride at the present location.)
Coaster Design Previews
For all of the standard designs, you can take a look at what the completed roller coaster will look like–before you build it. In the roller coaster Design Selection window, select one of the standard designs, then click on the Show Track button (the camera) to see the preview.
Even though you can save your roller coaster designs, these saved construction plans do not have preview pictures associated with them.
Because roller coasters are such popular rides, you should be prepared for crowds–especially when you first open a new track. Build a longer queuing line than you would for a less thrilling ride; it will fill up faster than you think.
Roller coasters are also complex pieces of machinery, and the more complex a ride is, the more often it will break down. Make sure that you have Mechanics in your employ to inspect and repair your coasters. If a ride begins to break down more often than you like, you can schedule inspections more frequently. That usually prevents problems, but as a roller coaster ages, it will deteriorate
gradually until it is no longer safe to operate.
16
Design Tips
•Roller coasters are very expensive, but provide good profit over a long period. Price them high when new, then gradually decrease the admission over time to keep the ride reasonably popular and profitable.
•Coasters are high-intensity, sometimes nausea-inducing rides. It’s not wise to build them too near the food stalls, and providing benches and bathrooms near the Exit is always a good idea.
•Riding less intense rides near a coaster can often help guests get up the nerve to ride the more extreme attraction. Consider surrounding a roller coaster with less exciting rides.
•Scenery and theme items placed near the track can add to the intensity of a ride, especially when you create the illusion of an impending collision. Tracks that cross over or under other parts of your park–footpaths, terrain, other rides, and such–are also more exciting.
•Dropped food is not the only threat to the tidiness of your park. Handymen also deal with the after-effects of ride-induced nausea. Keep enough on staff, or your park paths could become quite disgusting.
•Most roller coasters are not popular when it’s raining.
Thrill Rides
In the excitement department, this is next step up from mild rides. Despite their name, “thrill” rides are generally far less intense than even the tamest roller coasters. Still, these attractions offer a good medium point–exhilarating enough for most guests without being extreme enough to scare them.
Thrill rides generally do not involve custom design, and most of them take up relatively little space in your park. On the down side, many thrill rides seem to lose their novelty more quickly than other types.
Design Tips
•Guests sometimes need to sit down somewhere after an exciting ride. Consider providing benches on the path near the Exit from a thrill ride.
•Some of these rides have a significant nausea factor. Take that into consideration when placing food stalls and toilets.
•When a ride loses its novelty and ceases to make a profit, try lowering the price or advertising for the ride. If that doesn’t work (or seems too expensive to be worth the effort), think about demolishing the ride. If you then build a similar ride in a different area of the park, you can sometimes regain the interest of your guests.
Water Rides
The thrill of riding on fast moving water predates even the earliest amusement parks. Confined and controlled, rushing water can provide your guests with a spine tingling, yet totally safe experience. In hot weather, they also
get a welcome chance to cool off.
17

Water rides come in all types, from the mildest paddle-boats to flume rides that rival roller coasters in intensity and excitement. Almost all of them allow–and some require–custom design. In addition, you can often specify the design of the water craft used in the ride. Make sure to read the ride information in the Ride Selection window before you begin construction.
Design Tips
•Water rides seem to be most popular in dry climates, but they’re welcome in any park.
•Most water rides have a theme. You can increase your guests’ satisfaction by providing scenery near the ride that matches or compliments that theme.
•Like transport rides, well-designed mild water rides give guests a good view of the park, which can increase their interest in visiting other rides.
•Be aware of a ride’s nausea factor, especially for those with spinning rafts and whirlpools. That way, you know when to provide benches and toilets near the Exit.
SHOPS AND STALLS
Even though your guests all came to the park for the rides and other amusements, once they’re inside, they expect to be kept comfortable, too. That means that you should supply drinks, a variety of food, toilets, and other amenities. Of course, your guests expect to pay for most of these things. That’s where shops and stalls come into the picture.
Building shops and stalls is even easier than building simple rides. Unlike a ride, a little shop doesn’t need an Entrance or Exit, and a queuing line is also unnecessary. The only absolute necessity is this: almost all shops have a predetermined front side with a built in access window, and that front side must be positioned next to a path in order for the guests to be able to use it. The only exception is the Information Kiosk, which has access windows on all sides.
Let’s briefly review the necessary steps for building a shop or a stall:
Click the New Ride button to open the
Ride Selection window.
Select the last tab (the eating face).
•Select the specific type of shop by clicking the picture, then click the Build This button.
The yellow arrow in the location pointer indicates the direction the shop will face (the front). Use the Rotate button in the Construction window (the curved red arrow) to spin the shop until it’s facing the right way.
•Determine the location of the shop, making sure that the front side is connected to a path (or a place where you intend a path to be), then click to build it.
•In the Shop window, set the price for each thing the shop sells (or the admission price, in the case of a toilet) and give the shop a name.
•Open the shop.
What types of shops and stalls you can build depends on the successes your researchers have had. Each shop attracts guests according to the person’s needs. For example, if a guest is hungry, he or she will keep an eye out for a food stall. That’s a clue to the method of success with shops and stalls–spread them around the park so that your guests do not need to go far to fulfil a particular urge. The wants that these facilities serve are the kind that can make a guest physically uncomfortable, and that can seriously detract from their park experience.
Food and Drink
The majority of the shops and stalls you can add to your park serve food–and because there is no other food supply, the park makes quite a profit from hungry visitors. As with rides, the key to success in the park food business is variety. Different guests have different tastes, and you make the most people happy when you provide for everyone.
The main drawback to providing food and drinks to your guests is the end result–rubbish. Discarded drink cups, food wrappers, and the occasional thrown away meal add up pretty quickly to a disgusting, messy park. Once you begin serving food, you must provide rubbish bins for your guests to use and hire a Handyman or three to help keep the park tidy. Here are a few tips to keep in mind when building food service areas:
•Drink stands are more popular when placed near food stalls that sell thirst-inducing products–salty things like popcorn, for example.
•Many guests prefer to sit when they eat. Provide a good supply of benches conveniently located near any collection of food stalls.
•Guests tend to eat near where they purchased the food. Rubbish bins positioned near food service stalls are a good idea.
•Very few guests come off of an intense ride looking for a meal. There are better places for your food stalls than near the exit from a roller coaster with a high nausea factor.
•The combination of food and thrilling rides is the primary cause of guests feeling sick. If you have a problem with this in your park, consider moving the food stalls farther from the more intense rides–much farther.
It doesn’t much matter whether you cluster all the food together in “food courts” (with plenty of benches and rubbish bins) or spread the stalls liberally throughout the park–as long as no hungry guest has a long walk to satisfy his or her need for a meal.
18 |
19 |
Info and Souvenirs
As you get more proficient in building rides, stalls, the paths that connect them, and the scenery that decorates those paths, even the most intelligently laid-out park will become large and
complex. That’s when your guests start to want a map of the park. That’s when you need to build an Information Kiosk. (Hopefully, your researchers have developed one by the time you need it.) Supplying park maps helps to greatly decrease the number of
guests who get lost, too.
Another important function of the Information Kiosk is the sale of umbrellas. Rain is a serious problem for most parks, and yours is probably no exception. Though guests will not simply abandon the park when it starts to rain (especially if they paid a significant price to get in), they will avoid certain types of rides (roller coasters, for example) and be drawn to other types (covered ones, specifically). If umbrellas are available for sale, your guests become much less uncomfortable–and therefore less unhappy–in the rain. You also reap a tidy profit selling an item that, while the weather lasts, everyone wants.
Toilets
Even if your park does not yet include any food
or drink vendors, your guests will need toilet facilities and places to wash their hands, change children’s diapers, and that sort of thing. When your park does sell food and drinks, these little buildings become
even more vital to preserving the happiness of your guests.
You build a Toilet just like you would any other shop or stall. Here are a few important considerations to keep in mind:
•Make sure that the building is facing the right way. The doorway must be directly adjacent to a footpath for guests to be able to enter (and leave).
•It’s a good idea to locate the rest rooms close to food service areas. You want them convenient, visible, and easy to find.
•Sometimes, guests will need a toilet after a particularly intense ride. Consider the ride’s nausea factor, too.
•Unless your park is quite centralised, spread these facilities out around the grounds. The idea is to prevent a guest from having to walk too far to relieve any condition that could cause dissatisfaction with your park.
Just like any other ride or service in the park, you can charge admission for use of the rest room. As always, this is a trade off between making enough income to cover the maintenance costs of the facility and keeping your guests satisfied that your park is a good value for their money.
20
FOOTPATHS
A park filled with rides, shops, beautiful gardens, and other entertainment is utterly useless if the guests cannot reach any of the attractions. To be successful, your park must have a system of footpaths to guide visitors through the grounds. This is especially true of larger parks; the more real estate there is to tour, the more vital it is that you provide an efficient, well designed layout of trails.
The footpaths in your park should be more than just a random assemblage of trails that provide access to every attraction. An intelligent park design incorporates a system that keeps your guests moving smoothly from one ride to another (herds them along, if you will). An efficiently laid out path complex provides cues–some subtle and some not–that indicate to a visitor walking the path what direction he or she is meant to travel. You should design your paths to do all this while, concurrently, leading your guests to remain in the park and spending money for as long as possible. (A park, after all, is first and foremost a business enterprise.)
Before we get into the step-by-step guide to laying down footpaths, here are a few pointers toward building an effective park-wide path system. Be forewarned that some of them are a bit manipulative:
•Think of your path system not as tree-like (branches stemming from a central path), but more akin to a flowing waterway. From the moment a guest enters the park, he or she should be channelled along smoothly, and presented with moments of decision (branchings and intersections) only infrequently. This minimises the risk of stalling and congestion.
•The path should loop back on itself so that guests do not often need to turn around and walk back the way they came. This will help to minimise two-way traffic. However, unless you are certain that they will be out of money by the time they reach it, do not provide a route that leads guests back to the park entrance (the exit). Remember, the longer they stay, the more they spend.
•Keep the distance between attractions short, so that no guest has the opportunity to become bored or overly tired while walking from one to another. When a long walk is inevitable, provide benches along the way, especially at the tops of hills.
•Provide transport rides from point to point (every point near a ride) around the park. This will lighten the traffic load on your path system and give tired guests an alternative to walking.
•Make sure that all of your attractions are visible from the footpaths. A guest will not think to patronise a ride he or she does not know exists.
•Avoid creating double-width pathways and large paved areas. These allow your guests to mill around, and can lead to confusion.
•To prevent crowding, provide alternate routes through the busiest areas.
There are two surfaces on which you can lay a normal path (one that conforms to the surface of the land):
horizontal,
flat ground, and
simple hills, those with no irregularities in slope.
21
You should take a good hard look at the area you’re planning on putting paths through. Make a plan in your mind before you begin construction. Even though you do get a refund whenever you remove a path that you misplaced or changed your mind about, the return is never as much as the price of paving (so you lose money on the deal). To build ground-hugging footpaths:
Click the Footpath button (on the Toolbar). This opens the Path Construction window, and the mouse pointer changes to include a footpath icon.
• Next, select the type of paving you want to use. There are four options:
Tarmac is simple paving.
Stone is a fitted layer of cobblestone.
Dirt is a tamped dirt footpath (the least expensive option).
Tiled is a patterned path built of decorative bricks in odd shapes (“crazy paving”).
•Position the mouse pointer over the land square where you want to begin paving.
•Left click to pave the square. To pave over long trails in one fell swoop, you can hold down the mouse button and move the mouse along the path you desire. Every square you pass over is paved. Release the mouse when you’re finished.
•If you need to remove a section of path, right click on it. You get a partial refund of the cost of paving.
Note that you can use the various paving options to repave an existing path in a different style. This costs less than building new sections of footpath.
Crossing Paths
When you create two sections of footpath adjacent to one another, they are connected at an intersection, but only when at least one of them is on horizontal, completely flat land. Footpaths placed side by side on sloped land squares run parallel and do not connect. That means you cannot create a path along the side of a hill
Queuing Lines
Queuing Lines are special footpaths that lead guests form the main path to a ride Entrance. These lanes are also the area where guests who are patiently waiting their turn to get on a ride do their waiting. Without a queuing line, a ride draws much less custom, because those guests who cannot board when they reach the Entrance simply turn away. These paths include distinctive blue and white paving tiles, along with convenient handrails to make their purpose quite clear to your guests.
To build a Queuing Line, you follow exactly the same process as you do when paving footpaths. (In effect, the Queue Line is simply a fifth type of paving.) There is only one difference:
Make sure to click the Queuing Line button as your paving type selection.
There are a few concerns you might want to keep in mind when creating your queues. Some of these might seem obvious, but others are not quite so self-evident.
•No matter how attractive you find the blue and white tiles, Queuing Line should not be placed anywhere except as a passage to connect a ride Entrance to a footpath. The distinctive appearance of queue paving alerts your guests to its function, and you do not profit from confusing the visitors to your park.
•Be very careful how you place the sections of Queuing Line. The first one that you place adjacent to an existing path becomes the entry spot for the queue, and it’s easy to accidentally connect before you intend to. It’s often best to create the queue first, before you run a footpath to meet it (and the ride).
•Build the queue for an attraction longer or shorter depending on the popularity, the load size, and the wait time you expect for the ride. For example, a roller coaster will require a longer queue area than a slide, because the more exciting ride is more popular, each train load carries far more passengers than the slide’s maximum capacity, and the ride on the coaster takes longer to complete. In general, the longer you expect your guests to be forced to wait for a ride, the more queue area you should provide.
•You do not need to build a queue for any shops or stalls, only for rides.
Working the Line
If the wait for a particular ride is excessively long and there isn’t much you can do to relieve the situation, your guests can become restless and unhappy in line. You can hire an Entertainer and assign that person to “work the line”–patrol the queuing area regularly. This tactic often relieves some of the tedium of standing in the queue, and can mollify your stranded guests.
22 |
23 |
Raised Paths and Tunnels
Footpaths that follow the contours of the land are nice, but unless you make major alterations to the land in your park, you’re going to need raised paths–to cross over water, build docks and piers, travel along the sides of hills, reach elevated ride Entrances and Exits, and many other uses. You might also like to construct tunnels for your guests to walk through. With a little imagination, you can make the footpaths through your park almost as entertaining as one of the rides.
Building raised footpaths and subterranean passages is a bit more complicated than placing paths on flat land, but it’s less complex than designing track for a custom ride. We’ll get to the step-by- step instructions in a moment, but first, there are a few general rules you should understand.
•Paths that do not conform to the land, can rise (and fall) only on a certain slope. This is a safety regulation meant to assure the maximum structural strength of your guest-carrying platforms. What it means to you is that you should always plan ahead and know how many sections–and therefore how much horizontal distance–it will take to reach as high (or as low) as you want the path to go.
•When two paths meet, they must be at the same height to connect and allow guests to walk between the two. The height marks are quite helpful for this; you can make them visible using
the Height Marks on Land option on the View Options menu (the eye button on the Toolbar).
Crossing Paths II
A raised footpath can cross over another path, but only if the clearance (the vertical distance) between the two paths is enough that a guest can comfortably walk along both paths.
•Horizontally, raised paths and tunnels can extend indefinitely, but the same is not true of the vertical plane. There are limits to the height and depth (distance from ground level) that the available support structures can safely bear. Safety regulations prohibit any construction beyond what is reasonable.
A footpath, like a track, can only lead underground through a vertical land face that is at least two levels high. This rule applies to both the path section tunnelling into the ground and the one emerging out of the ground.
Once you begin building underground, the landscape switches into the Underground View. (If you need to get into this view later, use the Underground View option on the View Options menu–the eye button on the Toolbar.) Except for the sections where the footpath enters and exits the subterranean world, you build underground paths in the same way as you do bridges and piers.
Crossing Paths III
A footpath in a tunnel can cross under any path that is at or above ground level.
A tunnel path can cross over or under another underground path, too, but only if the clearance (the vertical distance) between the two paths is enough that a guest can comfortably walk along both the upper and lower paths.
To build sections of these special types of footpaths:
Click the Footpath button to open the Path Construction window.
• Select the type of paving you want to use. All four types and queuing line will work.
Click the Free Path button (near the bottom of the window). When you return it to the landscape are, the mouse cursor appears as a land square highlight with an arrow inside.
•Position the mouse pointer over the land square from which you want to build–not the place you want the raised path built, but the square you want that path to lead away from.
•Carefully move the mouse until the arrow in the highlight points in the direction in which you intend to build, then click to approve the setting. The next section of footpath to be built (the potential next section) begins blinking.
Use the directional Arrows to choose which way the section you intend to build will go. You cannot build diagonally; safety regulations
allow only right-angle turns.
Next, click one of the Slope buttons to set the incline of the section. There
are only three options: flat, uphill, and downhill.
•At this point, if you do not see a blinking ‘next section’ of path (you see only the pointer arrow), that means that you cannot build the section with the settings you have selected–that slope, direction, and location. Change something.
When you’re satisfied with the blinking (potential) ‘next section’ of footpath, click the Add This button to actually build it. Before you build, you might want to check the cost of the section; it’s listed
at the bottom of the Add This button. In general, the more support a section needs (the higher a bridge or the lower a tunnel), the more expensive it is to build.
24 |
25 |
•You can continue building from the section you’ve just built (without selecting a new starting point), just like you do when building custom tracks. When you’re done, click the Conform to Ground button to go back to making normal, ground-hugging paths–or just close the Footpath window if you’re finished constructing paths entirely.
If you’ve made a mistake or change your mind, you can remove the section of bridge you just built–not the blinking section (which isn’t built yet) by clicking the Demolish button. You can also use the right mouse button to remove sections of any type of path, as well as any objects in your way.
You can use the various paving options normally to repave existing free-built paths.
PARK MAINTENANCE
Building a park is undeniably the part of the job that allows you to flex your creative muscles, but it’s the day to day operations necessary to keep the park running smoothly that really challenge your foresight and competence. You are responsible for the maintenance of quite a few complex pieces of machinery that–if something goes terribly wrong–could maim or even kill dozens of people. The park is overrun every day by hundreds of guests, and it’s your duty to prevent the less civilised among them from making a mess, breaking things, and ruining the park experience for the rest. It seems like quite a task, and it is, but with a little preparation and some help, you’ll find it’s not as difficult as you might expect.
Safety and Repairs
Safety is perhaps the single most important concern in any park. Let’s face cold reality for a moment; if one of your rides has an accident, it is entirely possible that some of your guests could be hurt or even killed. You can imagine the effect on the popularity of your park (the Park Rating), not to mention that no one in their right mind will pay to get on that ride again–ever.
There is no way to completely eliminate the threat of an accident, but there are steps you can take to minimise the risk. As a bonus, the same procedure also ensures that your rides will break down less often. That cuts ride down-time, thereby increasing your profits.
What is this magical procedure? Regular inspections by a trained Mechanic, that’s what. In the ride window for every ride, there is a tab for Operation Options (the gears). One of the options on this display is Inspection. Using this, you can determine how often one of your park Mechanics takes a good look into the machinery of this attraction. The less time between inspections, the better for your safety record–especially on the bigger, more complicated, more dangerous rides.
Of course, you must have Mechanics to perform the inspections. If you have none, here’s how to get them:
Click the Staff button to open the Staff window.
Select the Mechanic tab.
• Click the Hire New Mechanic button once for each Mechanic you think you need.
For every Mechanic you hire, a Worker window opens. Using the features in this little window, you control that particular employee.
To determine where the Mechanic starts his rounds, use the Pincers button. Move the mouse pointer over the landscape and position the Mechanic (hanging
from the pincers) directly over one of the paths, then click to drop him there.
If you want to limit this Mechanic to a certain area, you can do so using the Patrol Area button. While this button is depressed, you can click on the landscape to mark the area (in blocks of a predetermined size) the Mechanic should patrol. Make sure that a Mechanic’s area includes the Exits from all the rides you expect him to serve; the Exit is the route he uses to gain access to the mechanical works.
Your new employee will wander the park, inspecting rides as his schedules demand.
The other benefit of having Mechanics in your park is that they–and they alone–can repair a ride that has broken down. When any ride stops working, a radio call goes out to the nearest Mechanic, and he hurries to fix the ride. (Do not use the Pincers button to move a Mechanic to a broken ride; using the pincers cancels a Mechanic’s current job order, which would delay or prevent him from repairing the ride.)
Use the Orders tab to make sure that a Mechanic is assigned to the jobs you want him doing. You can have a Mechanic perform inspections, only, spend all his time on repairs, or work as a generalist, doing both.
One last thing–you must pay your Mechanics for their services. Each one you hire takes a certain salary every month. Employee paydays are one of the standard, ongoing operating costs of the park, and you are not notified when they occur. The wise park manager keeps an eye on the finances and is aware of it.
Just a Hint
Rides age just like anything else, and the older they are, the more wear and tear they have experienced–especially the more popular rides. As time goes on, you should consider having the older rides inspected more often. This will help prevent the frequent breakdowns that often accompany the inevitable deterioration of the machinery.
26 |
27 |
 Loading...