


SEGA PC DISC – NOTES ON USE
HEALTH ISSUES
Use this software in a well-lit room, staying a good distance away from the monitor or TV screen to not overtax your eyes. Take breaks of 10 to 20 minutes every hour, and do not play when you are tired or short on sleep. Prolonged use or playing too close to the monitor or television screen may cause a decline in visual acuity.
In rare instances, stimulation from strong light or flashing when staring at a monitor or television screen can cause temporary muscular convulsions or loss of consciousness for some people. If you experience any of these symptoms, consult a doctor before playing this game. If you experience any dizziness, nausea,
or motion-sickness while playing this game, stop the game immediately. Consult a doctor when any discomfort continues.
PRODUCT CARE
Handle the game discs with care to prevent scratches or dirt on either side of the discs. Do not bend the discs or enlarge their center holes.
Clean the discs with a soft cloth, such as a lens cleaning cloth. Wipe lightly, moving in a radial pattern outward from the center hole towards the edge. Never clean the discs with paint thinner, benzene, or other harsh chemicals.
Do not write or attach labels to either side of the discs.
Store the discs in their original case after playing. Do not store the discs in a hot or humid location.
The Medievel II game discs contain software for use on a personal computer. Please do not play the discs on an ordinary CD player, as this may damage the headphones or speakers.
*Also read the manual of your personal computer. *The game discs may not be used for rental business.
*Unauthorized copying of this manual is prohibited.
*Unauthorized copying and reverse engineering of this software is prohibited.
CONTENTS
HAIL COMMANDER! WELCOME TO MEDIEVAL II: TOTAL WAR! . . . . . . . . . . . . . . . . . . . . . . . . 5
INSTALLATION . . . . . . . . . . . . . . . . . . . . . . . . . . . . . . . . . . . . . . . . . . . . . . . . . . . . . . . 5 Requirements . . . . . . . . . . . . . . . . . . . . . . . . . . . . . . . . . . . . . . . . . . . . . . . . . . . . . 5 How to Install . . . . . . . . . . . . . . . . . . . . . . . . . . . . . . . . . . . . . . . . . . . . . . . . . . . . . 5 Installation Key . . . . . . . . . . . . . . . . . . . . . . . . . . . . . . . . . . . . . . . . . . . . . . . . . . . . 5
STARTING MEDIEVAL II: TOTAL WAR . . . . . . . . . . . . . . . . . . . . . . . . . . . . . . . . . . . . . . . . 5
The Main Menu . . . . . . . . . . . . . . . . . . . . . . . . . . . . . . . . . . . . . . . . . . . . . . . . . . . . 5
Single Player Menu . . . . . . . . . . . . . . . . . . . . . . . . . . . . . . . . . . . . . . . . . . . . . . . . . 6
Multiplayer Menu. . . . . . . . . . . . . . . . . . . . . . . . . . . . . . . . . . . . . . . . . . . . . . . . . . . 6
Load Game Menu . . . . . . . . . . . . . . . . . . . . . . . . . . . . . . . . . . . . . . . . . . . . . . . . . . 6
Options Menu . . . . . . . . . . . . . . . . . . . . . . . . . . . . . . . . . . . . . . . . . . . . . . . . . . . . . 7
HELP, ADVICE & THE TUTORIAL. . . . . . . . . . . . . . . . . . . . . . . . . . . . . . . . . . . . . . . . . . . . 7 Learning How to Play . . . . . . . . . . . . . . . . . . . . . . . . . . . . . . . . . . . . . . . . . . . . . . . . 7 The Tutorial – “Hands On” Lessons . . . . . . . . . . . . . . . . . . . . . . . . . . . . . . . . . . . . . . 7 Your Advisors. . . . . . . . . . . . . . . . . . . . . . . . . . . . . . . . . . . . . . . . . . . . . . . . . . . . . . 7 Receiving Advice . . . . . . . . . . . . . . . . . . . . . . . . . . . . . . . . . . . . . . . . . . . . . . . . . . 8 Advice Preferences . . . . . . . . . . . . . . . . . . . . . . . . . . . . . . . . . . . . . . . . . . . . . . . . . 8 Asking for Advice. . . . . . . . . . . . . . . . . . . . . . . . . . . . . . . . . . . . . . . . . . . . . . . . . . . 8 Using Help . . . . . . . . . . . . . . . . . . . . . . . . . . . . . . . . . . . . . . . . . . . . . . . . . . . . . . . 8
CAMPAIGNS . . . . . . . . . . . . . . . . . . . . . . . . . . . . . . . . . . . . . . . . . . . . . . . . . . . . . . . . 8
The Grand Campaign . . . . . . . . . . . . . . . . . . . . . . . . . . . . . . . . . . . . . . . . . . . . . . . . 8
Starting a Grand Campaign. . . . . . . . . . . . . . . . . . . . . . . . . . . . . . . . . . . . . . . . . . . . 9
PLAYING THE GRAND CAMPAIGN . . . . . . . . . . . . . . . . . . . . . . . . . . . . . . . . . . . . . . . . . . . 9 How to Win a Campaign . . . . . . . . . . . . . . . . . . . . . . . . . . . . . . . . . . . . . . . . . . . . . . 9 The Campaign Map View . . . . . . . . . . . . . . . . . . . . . . . . . . . . . . . . . . . . . . . . . . . . . 9 Moving the View . . . . . . . . . . . . . . . . . . . . . . . . . . . . . . . . . . . . . . . . . . . . . . . . . . 10 The Control Panel . . . . . . . . . . . . . . . . . . . . . . . . . . . . . . . . . . . . . . . . . . . . . . . . . 10 The Review Panel . . . . . . . . . . . . . . . . . . . . . . . . . . . . . . . . . . . . . . . . . . . . . . . . . 10 The Mini-map Panel. . . . . . . . . . . . . . . . . . . . . . . . . . . . . . . . . . . . . . . . . . . . . . . . 11 Starting Play - Your First Turn . . . . . . . . . . . . . . . . . . . . . . . . . . . . . . . . . . . . . . . . . 11 Before Ending Your First Turn . . . . . . . . . . . . . . . . . . . . . . . . . . . . . . . . . . . . . . . . . 11
EVENTS & MISSIONS . . . . . . . . . . . . . . . . . . . . . . . . . . . . . . . . . . . . . . . . . . . . . . . . . 12
What Are Events?. . . . . . . . . . . . . . . . . . . . . . . . . . . . . . . . . . . . . . . . . . . . . . . . . . 12
Your First Event Mission . . . . . . . . . . . . . . . . . . . . . . . . . . . . . . . . . . . . . . . . . . . . . 12
Who Gives Missions . . . . . . . . . . . . . . . . . . . . . . . . . . . . . . . . . . . . . . . . . . . . . . . . 12
Mission Rewards & Penalties . . . . . . . . . . . . . . . . . . . . . . . . . . . . . . . . . . . . . . . . . 12
Faction & World Events . . . . . . . . . . . . . . . . . . . . . . . . . . . . . . . . . . . . . . . . . . . . . 13
Historical Events . . . . . . . . . . . . . . . . . . . . . . . . . . . . . . . . . . . . . . . . . . . . . . . . . . 13
CHARACTERS . . . . . . . . . . . . . . . . . . . . . . . . . . . . . . . . . . . . . . . . . . . . . . . . . . . . . . 13
The Characters of Medieval II: Total War . . . . . . . . . . . . . . . . . . . . . . . . . . . . . . . . . . 13
Viewing Character Information . . . . . . . . . . . . . . . . . . . . . . . . . . . . . . . . . . . . . . . . 13
Military Class Characters . . . . . . . . . . . . . . . . . . . . . . . . . . . . . . . . . . . . . . . . . . . . 13
1

Generals . . . . . . . . . . . . . . . . . . . . . . . . . . . . . . . . . . . . . . . . . . . . . . . . . . . . . . . . 13
Captains . . . . . . . . . . . . . . . . . . . . . . . . . . . . . . . . . . . . . . . . . . . . . . . . . . . . . . . . 14
Admirals . . . . . . . . . . . . . . . . . . . . . . . . . . . . . . . . . . . . . . . . . . . . . . . . . . . . . . . . 14
Agent Class Characters. . . . . . . . . . . . . . . . . . . . . . . . . . . . . . . . . . . . . . . . . . . . . . 14
Priests/Imams . . . . . . . . . . . . . . . . . . . . . . . . . . . . . . . . . . . . . . . . . . . . . . . . . . . . 14
Diplomats . . . . . . . . . . . . . . . . . . . . . . . . . . . . . . . . . . . . . . . . . . . . . . . . . . . . . . . 14
Princesses. . . . . . . . . . . . . . . . . . . . . . . . . . . . . . . . . . . . . . . . . . . . . . . . . . . . . . . 14
Spies . . . . . . . . . . . . . . . . . . . . . . . . . . . . . . . . . . . . . . . . . . . . . . . . . . . . . . . . . . 14
Assassins . . . . . . . . . . . . . . . . . . . . . . . . . . . . . . . . . . . . . . . . . . . . . . . . . . . . . . . 15
Merchants. . . . . . . . . . . . . . . . . . . . . . . . . . . . . . . . . . . . . . . . . . . . . . . . . . . . . . . 15
Character Attributes . . . . . . . . . . . . . . . . . . . . . . . . . . . . . . . . . . . . . . . . . . . . . . . . 15
Improving Your Characters . . . . . . . . . . . . . . . . . . . . . . . . . . . . . . . . . . . . . . . . . . . 16
Traits . . . . . . . . . . . . . . . . . . . . . . . . . . . . . . . . . . . . . . . . . . . . . . . . . . . . . . . . . . 16
Retinue. . . . . . . . . . . . . . . . . . . . . . . . . . . . . . . . . . . . . . . . . . . . . . . . . . . . . . . . . 17
USING ARMIES . . . . . . . . . . . . . . . . . . . . . . . . . . . . . . . . . . . . . . . . . . . . . . . . . . . . . 17 Total War Armies . . . . . . . . . . . . . . . . . . . . . . . . . . . . . . . . . . . . . . . . . . . . . . . . . . 17 Who Commands in Battle? . . . . . . . . . . . . . . . . . . . . . . . . . . . . . . . . . . . . . . . . . . . 17 Unit Types. . . . . . . . . . . . . . . . . . . . . . . . . . . . . . . . . . . . . . . . . . . . . . . . . . . . . . . 17 Forming Armies . . . . . . . . . . . . . . . . . . . . . . . . . . . . . . . . . . . . . . . . . . . . . . . . . . . 18 Moving Armies. . . . . . . . . . . . . . . . . . . . . . . . . . . . . . . . . . . . . . . . . . . . . . . . . . . . 18 Merging Armies . . . . . . . . . . . . . . . . . . . . . . . . . . . . . . . . . . . . . . . . . . . . . . . . . . . 19 Splitting Armies. . . . . . . . . . . . . . . . . . . . . . . . . . . . . . . . . . . . . . . . . . . . . . . . . . . 19 Merging Units . . . . . . . . . . . . . . . . . . . . . . . . . . . . . . . . . . . . . . . . . . . . . . . . . . . . 19 Unit Experience. . . . . . . . . . . . . . . . . . . . . . . . . . . . . . . . . . . . . . . . . . . . . . . . . . . 20 Hiring Mercenaries. . . . . . . . . . . . . . . . . . . . . . . . . . . . . . . . . . . . . . . . . . . . . . . . . 20 Building Forts & Watchtowers . . . . . . . . . . . . . . . . . . . . . . . . . . . . . . . . . . . . . . . . . 20 Picking Your Ground . . . . . . . . . . . . . . . . . . . . . . . . . . . . . . . . . . . . . . . . . . . . . . . 21 Setting an Ambush . . . . . . . . . . . . . . . . . . . . . . . . . . . . . . . . . . . . . . . . . . . . . . . . 21 Attacking with an Army . . . . . . . . . . . . . . . . . . . . . . . . . . . . . . . . . . . . . . . . . . . . . 21 Using Reinforcements . . . . . . . . . . . . . . . . . . . . . . . . . . . . . . . . . . . . . . . . . . . . . . 21 Multiple Attacks . . . . . . . . . . . . . . . . . . . . . . . . . . . . . . . . . . . . . . . . . . . . . . . . . . 22
USING FLEETS . . . . . . . . . . . . . . . . . . . . . . . . . . . . . . . . . . . . . . . . . . . . . . . . . . . . . . 22 Total War Fleets. . . . . . . . . . . . . . . . . . . . . . . . . . . . . . . . . . . . . . . . . . . . . . . . . . . 22 Who Commands in Naval Battles? . . . . . . . . . . . . . . . . . . . . . . . . . . . . . . . . . . . . . . 22 Moving Fleets . . . . . . . . . . . . . . . . . . . . . . . . . . . . . . . . . . . . . . . . . . . . . . . . . . . . 22 Using Fleets as Transports . . . . . . . . . . . . . . . . . . . . . . . . . . . . . . . . . . . . . . . . . . . 23 Merging & Splitting Fleets . . . . . . . . . . . . . . . . . . . . . . . . . . . . . . . . . . . . . . . . . . . 23 Attacking with a Fleet . . . . . . . . . . . . . . . . . . . . . . . . . . . . . . . . . . . . . . . . . . . . . . 23 Blockading Ports . . . . . . . . . . . . . . . . . . . . . . . . . . . . . . . . . . . . . . . . . . . . . . . . . . 23 Trouble at Sea . . . . . . . . . . . . . . . . . . . . . . . . . . . . . . . . . . . . . . . . . . . . . . . . . . . . 23
RUNNING SETTLEMENTS . . . . . . . . . . . . . . . . . . . . . . . . . . . . . . . . . . . . . . . . . . . . . . . 24 What do Settlements do? . . . . . . . . . . . . . . . . . . . . . . . . . . . . . . . . . . . . . . . . . . . . 24 How Do I Manage a Settlement? . . . . . . . . . . . . . . . . . . . . . . . . . . . . . . . . . . . . . . . 24 Settlements on the Campaign Map . . . . . . . . . . . . . . . . . . . . . . . . . . . . . . . . . . . . . 24 The Settlement Scroll . . . . . . . . . . . . . . . . . . . . . . . . . . . . . . . . . . . . . . . . . . . . . . 25 Understanding Cities & Castles . . . . . . . . . . . . . . . . . . . . . . . . . . . . . . . . . . . . . . . . 25 Cities . . . . . . . . . . . . . . . . . . . . . . . . . . . . . . . . . . . . . . . . . . . . . . . . . . . . . . . . . . 25 Castles . . . . . . . . . . . . . . . . . . . . . . . . . . . . . . . . . . . . . . . . . . . . . . . . . . . . . . . . . 26 The Governor. . . . . . . . . . . . . . . . . . . . . . . . . . . . . . . . . . . . . . . . . . . . . . . . . . . . . 26 Constructing Buildings . . . . . . . . . . . . . . . . . . . . . . . . . . . . . . . . . . . . . . . . . . . . . . 27 The Building Browser . . . . . . . . . . . . . . . . . . . . . . . . . . . . . . . . . . . . . . . . . . . . . . . 27 Repairing Buildings . . . . . . . . . . . . . . . . . . . . . . . . . . . . . . . . . . . . . . . . . . . . . . . . 28 Recruiting Units, Ships & Agents . . . . . . . . . . . . . . . . . . . . . . . . . . . . . . . . . . . . . . 28 The Unit Information Scroll . . . . . . . . . . . . . . . . . . . . . . . . . . . . . . . . . . . . . . . . . . 29 Recruitment Buildings . . . . . . . . . . . . . . . . . . . . . . . . . . . . . . . . . . . . . . . . . . . . . . 30 Retraining & Upgrading Units . . . . . . . . . . . . . . . . . . . . . . . . . . . . . . . . . . . . . . . . . 30 Upgrading Armor . . . . . . . . . . . . . . . . . . . . . . . . . . . . . . . . . . . . . . . . . . . . . . . . . . 30
Armor Types . . . . . . . . . . . . . . . . . . . . . . . . . . . . . . . . . . . . . . . . . . . . . . . . . . . . . 31
Upgrading Weapons . . . . . . . . . . . . . . . . . . . . . . . . . . . . . . . . . . . . . . . . . . . . . . . . 31
Weapon Types . . . . . . . . . . . . . . . . . . . . . . . . . . . . . . . . . . . . . . . . . . . . . . . . . . . . 31
The Guilds . . . . . . . . . . . . . . . . . . . . . . . . . . . . . . . . . . . . . . . . . . . . . . . . . . . . . . 31
Faction-Specific Buildings . . . . . . . . . . . . . . . . . . . . . . . . . . . . . . . . . . . . . . . . . . . 31
The Settlement Details Scroll . . . . . . . . . . . . . . . . . . . . . . . . . . . . . . . . . . . . . . . . . 32
The Trade Scroll & Trade Resources. . . . . . . . . . . . . . . . . . . . . . . . . . . . . . . . . . . . . 32
Converting Settlements . . . . . . . . . . . . . . . . . . . . . . . . . . . . . . . . . . . . . . . . . . . . . 33
City Upgrading & Conversion. . . . . . . . . . . . . . . . . . . . . . . . . . . . . . . . . . . . . . . . . . 33
Castle Upgrading & Conversion . . . . . . . . . . . . . . . . . . . . . . . . . . . . . . . . . . . . . . . . 33
USING AGENTS . . . . . . . . . . . . . . . . . . . . . . . . . . . . . . . . . . . . . . . . . . . . . . . . . . . . . 33
Using Merchants . . . . . . . . . . . . . . . . . . . . . . . . . . . . . . . . . . . . . . . . . . . . . . . . . . 33
Using Priests & Imams. . . . . . . . . . . . . . . . . . . . . . . . . . . . . . . . . . . . . . . . . . . . . . 34
Using Spies. . . . . . . . . . . . . . . . . . . . . . . . . . . . . . . . . . . . . . . . . . . . . . . . . . . . . . 35
Using Assassins. . . . . . . . . . . . . . . . . . . . . . . . . . . . . . . . . . . . . . . . . . . . . . . . . . . 35
Using Diplomats . . . . . . . . . . . . . . . . . . . . . . . . . . . . . . . . . . . . . . . . . . . . . . . . . . 36
Using Princesses . . . . . . . . . . . . . . . . . . . . . . . . . . . . . . . . . . . . . . . . . . . . . . . . . . 36
RELIGION . . . . . . . . . . . . . . . . . . . . . . . . . . . . . . . . . . . . . . . . . . . . . . . . . . . . . . . . . 37
Religion in Medieval II: Total War . . . . . . . . . . . . . . . . . . . . . . . . . . . . . . . . . . . . . . . 37
Spreading Your Faith . . . . . . . . . . . . . . . . . . . . . . . . . . . . . . . . . . . . . . . . . . . . . . . 37
The Pope . . . . . . . . . . . . . . . . . . . . . . . . . . . . . . . . . . . . . . . . . . . . . . . . . . . . . . . 37
Excommunication & Reconciliation . . . . . . . . . . . . . . . . . . . . . . . . . . . . . . . . . . . . . 37
The Papal States . . . . . . . . . . . . . . . . . . . . . . . . . . . . . . . . . . . . . . . . . . . . . . . . . . 38
The College of Cardinals. . . . . . . . . . . . . . . . . . . . . . . . . . . . . . . . . . . . . . . . . . . . . 38
Papal Elections . . . . . . . . . . . . . . . . . . . . . . . . . . . . . . . . . . . . . . . . . . . . . . . . . . . 39
Election Results . . . . . . . . . . . . . . . . . . . . . . . . . . . . . . . . . . . . . . . . . . . . . . . . . . 39
Special Religious Agents . . . . . . . . . . . . . . . . . . . . . . . . . . . . . . . . . . . . . . . . . . . . 39
CRUSADES & JIHADS . . . . . . . . . . . . . . . . . . . . . . . . . . . . . . . . . . . . . . . . . . . . . . . . . 40 Crusades. . . . . . . . . . . . . . . . . . . . . . . . . . . . . . . . . . . . . . . . . . . . . . . . . . . . . . . . 40 Requesting Crusades . . . . . . . . . . . . . . . . . . . . . . . . . . . . . . . . . . . . . . . . . . . . . . . 40 Joining or Leaving a Crusade . . . . . . . . . . . . . . . . . . . . . . . . . . . . . . . . . . . . . . . . . 41 Crusading Army Effects . . . . . . . . . . . . . . . . . . . . . . . . . . . . . . . . . . . . . . . . . . . . . 41 Ending Crusades . . . . . . . . . . . . . . . . . . . . . . . . . . . . . . . . . . . . . . . . . . . . . . . . . . 41 Jihads. . . . . . . . . . . . . . . . . . . . . . . . . . . . . . . . . . . . . . . . . . . . . . . . . . . . . . . . . . 41
DIPLOMACY. . . . . . . . . . . . . . . . . . . . . . . . . . . . . . . . . . . . . . . . . . . . . . . . . . . . . . . . 42
The Diplomacy Scroll . . . . . . . . . . . . . . . . . . . . . . . . . . . . . . . . . . . . . . . . . . . . . . . 42
Demeanor – Reading Their Reaction . . . . . . . . . . . . . . . . . . . . . . . . . . . . . . . . . . . . 43
Making Proposals & Declarations. . . . . . . . . . . . . . . . . . . . . . . . . . . . . . . . . . . . . . . 43
Proposal Items . . . . . . . . . . . . . . . . . . . . . . . . . . . . . . . . . . . . . . . . . . . . . . . . . . . 44
Proposal Balance . . . . . . . . . . . . . . . . . . . . . . . . . . . . . . . . . . . . . . . . . . . . . . . . . . 44
MANAGING YOUR EMPIRE . . . . . . . . . . . . . . . . . . . . . . . . . . . . . . . . . . . . . . . . . . . . . . 44 The Faction Overview Scroll . . . . . . . . . . . . . . . . . . . . . . . . . . . . . . . . . . . . . . . . . . 44 The Diplomacy Overview Scroll . . . . . . . . . . . . . . . . . . . . . . . . . . . . . . . . . . . . . . . . 44 The Family Tree Scroll . . . . . . . . . . . . . . . . . . . . . . . . . . . . . . . . . . . . . . . . . . . . . . 45 New Family Members. . . . . . . . . . . . . . . . . . . . . . . . . . . . . . . . . . . . . . . . . . . . . . . 45 The Faction Rankings Scroll . . . . . . . . . . . . . . . . . . . . . . . . . . . . . . . . . . . . . . . . . . 45 The Rosters Scroll . . . . . . . . . . . . . . . . . . . . . . . . . . . . . . . . . . . . . . . . . . . . . . . . . 46 Your Job as Faction Leader . . . . . . . . . . . . . . . . . . . . . . . . . . . . . . . . . . . . . . . . . . . 46 How to Make Money. . . . . . . . . . . . . . . . . . . . . . . . . . . . . . . . . . . . . . . . . . . . . . . . 46 Rebellion . . . . . . . . . . . . . . . . . . . . . . . . . . . . . . . . . . . . . . . . . . . . . . . . . . . . . . . 46 How to Deal with Loyalty & Rebellion . . . . . . . . . . . . . . . . . . . . . . . . . . . . . . . . . . . 47
BATTLES IN MEDIEVAL II: TOTAL WAR . . . . . . . . . . . . . . . . . . . . . . . . . . . . . . . . . . . . . . 47
How Battles Work in Total War . . . . . . . . . . . . . . . . . . . . . . . . . . . . . . . . . . . . . . . . 47
The Battle Deployment Scroll . . . . . . . . . . . . . . . . . . . . . . . . . . . . . . . . . . . . . . . . . 47
Attackers & Defenders . . . . . . . . . . . . . . . . . . . . . . . . . . . . . . . . . . . . . . . . . . . . . . 48
2 |
3 |

How to Win Battles . . . . . . . . . . . . . . . . . . . . . . . . . . . . . . . . . . . . . . . . . . . . . . . . 48 Deploying your Units for Battle . . . . . . . . . . . . . . . . . . . . . . . . . . . . . . . . . . . . . . . . 48 Placing Units During Deployment . . . . . . . . . . . . . . . . . . . . . . . . . . . . . . . . . . . . . . 48 The Battle View & HUD . . . . . . . . . . . . . . . . . . . . . . . . . . . . . . . . . . . . . . . . . . . . . 49 The Battlefield View. . . . . . . . . . . . . . . . . . . . . . . . . . . . . . . . . . . . . . . . . . . . . . . . 49 The Battle Control Panel . . . . . . . . . . . . . . . . . . . . . . . . . . . . . . . . . . . . . . . . . . . . 49 The Battle Review Panel. . . . . . . . . . . . . . . . . . . . . . . . . . . . . . . . . . . . . . . . . . . . . 50 States & Effects on Units in Battle . . . . . . . . . . . . . . . . . . . . . . . . . . . . . . . . . . . . . 50 The Battle Mini-map . . . . . . . . . . . . . . . . . . . . . . . . . . . . . . . . . . . . . . . . . . . . . . . 51 The Battle Cameras . . . . . . . . . . . . . . . . . . . . . . . . . . . . . . . . . . . . . . . . . . . . . . . . 52 Morale . . . . . . . . . . . . . . . . . . . . . . . . . . . . . . . . . . . . . . . . . . . . . . . . . . . . . . . . . 52 Routing. . . . . . . . . . . . . . . . . . . . . . . . . . . . . . . . . . . . . . . . . . . . . . . . . . . . . . . . . 53 Factors that Reduce Your Morale. . . . . . . . . . . . . . . . . . . . . . . . . . . . . . . . . . . . . . . 53 Factors that Increase Your Morale . . . . . . . . . . . . . . . . . . . . . . . . . . . . . . . . . . . . . . 53 Ways to Attack the Enemy’s Morale . . . . . . . . . . . . . . . . . . . . . . . . . . . . . . . . . . . . . 53 Fatigue . . . . . . . . . . . . . . . . . . . . . . . . . . . . . . . . . . . . . . . . . . . . . . . . . . . . . . . . . 53 Giving Orders – Moving & Attacking. . . . . . . . . . . . . . . . . . . . . . . . . . . . . . . . . . . . . 53 Multiple Selections, Grouping & Formations. . . . . . . . . . . . . . . . . . . . . . . . . . . . . . . 54 Selecting & Ordering Multiple Units . . . . . . . . . . . . . . . . . . . . . . . . . . . . . . . . . . . . 54 Groups . . . . . . . . . . . . . . . . . . . . . . . . . . . . . . . . . . . . . . . . . . . . . . . . . . . . . . . . . 54 Using AI Assistance . . . . . . . . . . . . . . . . . . . . . . . . . . . . . . . . . . . . . . . . . . . . . . . . 55 Using Formations. . . . . . . . . . . . . . . . . . . . . . . . . . . . . . . . . . . . . . . . . . . . . . . . . . 55 Attacking other Units . . . . . . . . . . . . . . . . . . . . . . . . . . . . . . . . . . . . . . . . . . . . . . . 55 Using Special Abilities . . . . . . . . . . . . . . . . . . . . . . . . . . . . . . . . . . . . . . . . . . . . . . 55 Taking Prisoners . . . . . . . . . . . . . . . . . . . . . . . . . . . . . . . . . . . . . . . . . . . . . . . . . . 56 Battle Results . . . . . . . . . . . . . . . . . . . . . . . . . . . . . . . . . . . . . . . . . . . . . . . . . . . . 56 Prisoner Ransoms . . . . . . . . . . . . . . . . . . . . . . . . . . . . . . . . . . . . . . . . . . . . . . . . . 56
SIEGES & SIEGE BATTLES . . . . . . . . . . . . . . . . . . . . . . . . . . . . . . . . . . . . . . . . . . . . . . 57
Launching a Siege . . . . . . . . . . . . . . . . . . . . . . . . . . . . . . . . . . . . . . . . . . . . . . . . . 57
Victory in Siege Battles . . . . . . . . . . . . . . . . . . . . . . . . . . . . . . . . . . . . . . . . . . . . . 57
Using Siege Equipment & Artillery . . . . . . . . . . . . . . . . . . . . . . . . . . . . . . . . . . . . . 57
Capturing Walls . . . . . . . . . . . . . . . . . . . . . . . . . . . . . . . . . . . . . . . . . . . . . . . . . . . 58
Defending in Siege Battles . . . . . . . . . . . . . . . . . . . . . . . . . . . . . . . . . . . . . . . . . . . 58
Sally Battles . . . . . . . . . . . . . . . . . . . . . . . . . . . . . . . . . . . . . . . . . . . . . . . . . . . . . 58
Using Defensive Fortifications. . . . . . . . . . . . . . . . . . . . . . . . . . . . . . . . . . . . . . . . . 58
HISTORICAL BATTLES . . . . . . . . . . . . . . . . . . . . . . . . . . . . . . . . . . . . . . . . . . . . . . . . . 58
Playing a Historical Battle . . . . . . . . . . . . . . . . . . . . . . . . . . . . . . . . . . . . . . . . . . . 59
Winning a Historical Battle . . . . . . . . . . . . . . . . . . . . . . . . . . . . . . . . . . . . . . . . . . . 59
CUSTOM BATTLES . . . . . . . . . . . . . . . . . . . . . . . . . . . . . . . . . . . . . . . . . . . . . . . . . . . 59
Choosing Conditions. . . . . . . . . . . . . . . . . . . . . . . . . . . . . . . . . . . . . . . . . . . . . . . . 59
Customize Battle . . . . . . . . . . . . . . . . . . . . . . . . . . . . . . . . . . . . . . . . . . . . . . . . . . 60
Selecting Units . . . . . . . . . . . . . . . . . . . . . . . . . . . . . . . . . . . . . . . . . . . . . . . . . . . 60
MULTIPLAYER BATTLES . . . . . . . . . . . . . . . . . . . . . . . . . . . . . . . . . . . . . . . . . . . . . . . . 61 Setting up a Multiplayer Battle . . . . . . . . . . . . . . . . . . . . . . . . . . . . . . . . . . . . . . . . 61 The Multiplayer Lobby . . . . . . . . . . . . . . . . . . . . . . . . . . . . . . . . . . . . . . . . . . . . . . 61 Using Chat . . . . . . . . . . . . . . . . . . . . . . . . . . . . . . . . . . . . . . . . . . . . . . . . . . . . . . 61 Hosting a Multiplayer Game . . . . . . . . . . . . . . . . . . . . . . . . . . . . . . . . . . . . . . . . . . 62
WARRANTY . . . . . . . . . . . . . . . . . . . . . . . . . . . . . . . . . . . . . . . . . . . . . . . . . . . . . . . . 65
CREDITS . . . . . . . . . . . . . . . . . . . . . . . . . . . . . . . . . . . . . . . . . . . . . . . . . . . . . . . . . . 66
HAIL COMMANDER! WELCOME TO MEDIEVAL II: TOTAL WAR!
Medieval II: Total War is a truly epic strategy game that puts you in charge of one of the powers of the Middle Ages, allowing you to lead your soldiers on the field of battle, as well as plan the expansion of your empire across the Old World. Unlike most other strategy games, Total War games separate the action of battle from managing your empire’s affairs. These are the battle and campaign sides of the game respectively.
Medieval II: Total War offers the complete warfare experience, with realistic battle mechanics and historical accuracy. You will need to master the same tactics that actual field commanders used in real combat situations, and you will do it with exactly the same sorts of troops, armor and weapons that took to the field of battle in the Middle Ages. This is the time of great leaders such as Richard the Lionheart and Saladin. This is the time of noble knights, mighty castles, acts of chivalry, religious crusades and deadly treachery. This is your time to conquer the world!
INSTALLATION
Requirements
Please make sure your computer system uses either Windows XP or Windows 2000. Medieval II: Total War is not compatible with earlier versions of Windows, or non-Windows operating systems. Medieval II: Total War also requires the latest DirectX 9.0c compatible drivers for your DVD drive, sound card and video card to operate at its best. If you have any problems running the program, older sound or video drivers are the most likely cause.
How to Install
•Before installing, close all other applications.
•Insert Medieval II: Total War DVD 1 into your DVD drive. If you have Autoplay enabled, the title screen will display shortly after inserting the DVD into your drive. If Autoplay is not enabled, simply double-click on My Computer and then double-click on your DVD Drive to launch the game installer. On the title screen click the Install button to begin the installation process and then follow the on-screen instructions.
•After Medieval II: Total War is installed, your computer will install Microsoft DirectX 9.0c drivers (if you do not already have them). When DirectX installation is complete, you may need to restart your computer for the new drivers to take effect. For more information on DirectX 9.0c, see the relevant Help file.
•Now you can run Medieval II: Total War from the Start menu or by clicking Play on the DVD title screen. Please note that the game requires you to have a Medieval II: Total War DVD in your DVD Drive at all times in order to play the game.
Installation Key
Your copy of the game comes with an installation code, which should be located inside the case. When you install the game you will need to type in this key. Your installation key is unique and without this key, you will not be able to play the game. Please enter the key exactly as it appears on the case.
Keep your installation key safe and private - do not give it to anyone else as this may impair your ability to play multiplayer games.
STARTING MEDIEVAL II: TOTAL WAR
The Main Menu
•Single Player – This will take you to the SINGLE PLAYER MENU from which you can start a Grand Campaign, Custom Battle, Quick Battle or play a Historical Battle.
•Continue Campaign – This will automatically load your last saved campaign game/auto-save and allow you to continue your conquest.
4 |
5 |

•Multiplayer – Accesses all of the multiplayer modes available. For detailed instructions on getting started with multiplayer, see the Multiplayer Battles section of this manual.
•Load Game – Allows you to load saved campaigns, custom battles and battle replay movies.
•Options – Adjusts the options available for Video, Audio and Game Controls.
•Quit – Exit Medieval II: Total War and return to Windows®.
Any options that you cannot currently access will be “greyed-out” until you can use them. To quickly quit the game hit the ESC key on your keyboard.
Single-Player Menu
•Tutorial – The recommended way to start playing Medieval II: Total War! This will guide you through how to play the game.
•Grand Campaign – This begins your epic conquest of the Old World as the ruler of one of the great powers of the Middle Ages.
•Custom Battle – Fight the battles you want to fight, the way you want to fight them. Choose the place, the conditions, the rules, the armies and create your dream battle scenarios.
•Quick Battle – Instantly teleports you to a battlefield where a pre-assembled army awaits your command. You must adapt your tactics to the troops you have been given
to become victorious.
•Historical Battle – This gives you a chance to relive the greatest battles of the medieval era. An opportunity to prove that you yourself could have defeated the superior French army at the Battle of Agincourt.
Clicking on the “Back” button located in the bottom left corner takes you back to the main menu. This option will be available in many of the menu pages. Alternatively, you can press the ESC key on your keyboard.
Multiplayer Menu
•Online Battles – With an internet connection in place, you will be able to test your skill against other aspiring strategists across the world using the GameSpy® engine.
•LAN Battles – This option will allow you to battle your friends across a Local Area Network connection. All users will need a copy of Medieval II: Total War on their computer.
•Player Name – This is your game name/call-sign that is displayed within LAN and Online battles.
•Email Address – This acts as your register to play online and across a LAN.
•Password – For a secure gaming experience, your password is used to protect your
account; this stops other players from using your account online or across a LAN.
DO NOT give out your password; it should be kept private!
•Visit www.totalwar.com – Here you’ll find information, hints and tips for your game, downloads, and links to our user forums.
Load Game Menu
•Load Campaign – This will load any saved games that you have made while playing in the Grand Campaign. This will also include your auto-saves that are created at the end of your last turn.
•Load Custom Battle – This allows you to load your saved preset custom battles and your last quick battle. You are able to save your settings for custom battles when setting them up in the custom battles menu.
•Load Battle Replay – Loading replays will allow you to watch your victories or defeats. While viewing your replay file you are unable to affect units in the battle but you are able to speed up and slow down the battle. This is a great way to learn from your mistakes or
savour your victories.
Saved games can be made throughout different parts of the game. Campaign save games can be created while on the campaign map. Battle replays can be made at the end of each battle. Custom battles have more saving options that will be explained in a later section of this manual.
Options Menu
•Video Settings – This contains all your game settings in regards to your graphics and overall look of the game, for advanced visual options click on the “Show Advanced Options” icon under Graphical Quality.
•Audio Settings – This contains all your sound settings. Use the sliders to adjust the various sound levels in the game.
•Keyboard Settings – This lists all the game shortcut keys for the camera, battles, campaigns and other miscellaneous controls. To save/load your new keys click on the “Load/Save Settings” button. If you want to revert back to the game default keys click on the “Restore Default Settings” button.
•Game Settings – Use the sliders to adjust your in-game camera movement speed - left being slower and right faster. This menu also contains an adjustment for your game unit size, which increases or decreases the amount of units your armies have on the battlefield. Another feature allows the user to play with minimal UI to view more of the battlefield.
•View The Credits – This will present you with the list of the fine men and women that made this game.
Some “Video” and “Audio” settings will be able to be changed via the in-game options panel. This is accessible by pressing the ESC key and choosing the relevant menu option.
HELP, ADVICE & THE TUTORIAL
Learning How to Play
Medieval II: Total War provides a very deep strategy experience with countless options. To ensure that you can focus on ruling your empire rather than reading this manual repeatedly, there are three features to explain how things work:
•The Tutorial
•Your Advisors
•Help Buttons
The Tutorial – “Hands On” Lessons
The first option in the Single Player Menu takes you to the Medieval II: Total War Tutorials – The Norman Conquest, a Prologue that comes in two parts. Starting off is the “Battle of Hastings” where you will receive lessons on how to fight battles in Medieval II: Total War. Then secondly, “The Norman Conquest,” where you will receive hands-on lessons on how to control your empire in a campaign including two siege tutorials, one for a city and one for a castle.
It is very strongly advised that you play through both parts of the Tutorial before starting a Grand Campaign.
Your Advisors
Like any medieval king or sultan, as the ruler of a vast realm you will have advisors to assist you through your reign in Medieval II: Total War. Since there are very different skills to master on the battlefield compared to planning your strategies across the campaign map, you have two different advisors to assist you:
•Sir Robert is your trusty battle mentor. He will give you advice on how to use the battle controls and, more importantly, alert you to situations that arise in battle that require your attention. Listening to Sir Robert is a sure step on the path to victory.
•Lady Gwendolyn is your voice of wisdom when controlling your faction on the campaign map. She can advise you about settlements, recruitment, your empire, diplomacy, religion
6 |
7 |
and anything else you deal with in the strategic side of Medieval II: Total War.
Receiving Advice
When an advisor has something important
to tell you, their portrait will appear on a small panel in the top left corner of the screen. The message will also appear as text in a speech bubble beside their portrait. Sometimes at the end of that speech bubble is a checkbox – click on it if you wish to avoid hearing advice on that topic again in future. You can reset all the advice being blocked in the Game Settings, by hitting the ESC key during the campaign.
The controls that surround the advisor’s portrait are:
The magnifying glass button will show you the location that is relevant to the advice being offered.
Click on this button to have the advisor demonstrate how to carry out an action in the game. They’ll take you through a step-by-step process so you can see how a part of the game works.
This Advisor Speech & Text button toggles between offering advice as speech & text, text only, or speech only.
The X button dismisses an advisor, closing the Advisor Panel. The panel will return when new advice is being brought to your attention.
Advice Preferences
You can adjust the amount of advice you receive before starting a Grand Campaign or during a campaign in the Game Options. You will find these settings when starting a Grand Campaign.
•Turn Advice Off - Stop the advisors from appearing on screen at all. The only exception is when you actually request help or advice.
•Only Vital Info – Your advisors will only give you warnings and vital status updates.
•Get Me Started - Your advisors will give you enough help to play the game, but give you room for your own experimentation.
•Tell Me Everything – Your advisors will provide detailed instructions and explanations of most aspects of the game as you play.
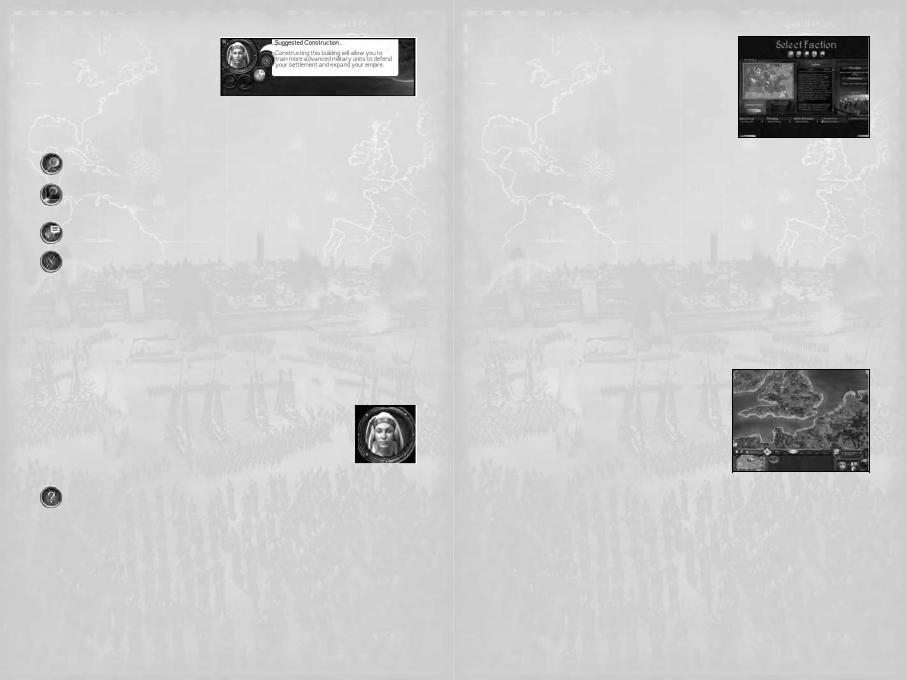
Asking for Advice
The Settlement Scroll has an icon of the advisor that you can click to receive a construction or recruitment suggestion. If you are unsure of what to recruit or build next in a settlement, you can click on this button for help. The advice given will be determined by whether the player has selected the Construction Panel or the Recruitment Panel.
Using Help
Throughout Medieval II: Total War you’ll see a “?” button on scrolls and information panels, typically in the top-right corner. Click on this to bring up help information
about the relevant part of the game – This help will arrive via your advisor.
CAMPAIGNS
The Grand Campaign
The Grand Campaign is the “main game” of Medieval II: Total War, where you not only lead your armies into battle, but also manage an entire empire. These two things are handled quite separately – You take your time planning where to send armies and managing the affairs in your realm. However on the field of battle, you need to react swiftly and decisively to any threats or opportunities.
Your overall goal in the Grand Campaign is to lead your people to become the most dominant empire in the world, seeking to control a huge area of land, and either have control of a certain region or outlive a particular opposing faction. Victory in the Grand
Campaign is a truly epic achievement – they generally take days, or even weeks, to complete.
Starting a Grand Campaign
From the Main Menu, select Single Player, then select Grand Campaign. Before you start playing, you must select a faction. This is also where you decide on any special settings you’d like for this particular campaign. Once you’ve adjusted the settings for the campaign you are about to play, click on the “Next” button in the bottom-right corner of the screen to begin!
The campaign settings & options include:
•Campaign Rules: Choose between short and long victory conditions. Conditions vary from faction to faction.
•Advice Level: Determines amount of advice given in the campaign.
•Difficulty: The higher the difficulty the more effective AI-controlled factions are, and the more other factions will take offence to diplomatic transgressions.
•Battle Difficulty: The higher the difficulty, the more effective AI controlled opponents are in battle.
•Manage All Cities: Selecting this will allow you to manage cities without having a governor in residence.
•No Battle Time Limit: Selecting this will remove the time limit from campaign battles.
•Show CPU Moves: Selecting this will track the movement of armies and characters visible to the player during the CPU factions’ turns.
PLAYING THE GRAND CAMPAIGN
How to Win a Campaign
Your main goal in the Grand Campaign is to expand your empire by conquering regions of land, either near or far. Your secondary goal will be to either take control of a certain settlement or wipe out an opposing faction. That secondary goal will depend upon whether or not you selected to play a long (standard) or short campaign.
Let’s look at understanding what’s in front of you at the start of the campaign to get you on the road to conquering the world!
The Campaign Map View
The first time you play the Grand Campaign, your campaign advisor Lady Gwendolyn will give you a tour of your lands, and show you some ideal targets to strike at first. After her tour, you will have control of the campaign map view yourself, and this is your basic window to the world in Medieval II: Total War.
You will see that the campaign map has all sorts of climates and terrain types over it and that the lands are divided into different regions, marked out by borders. The colors of the borders show you which faction controls the land.
Firstly, these are the following things you will see around the campaign map as you play
Medieval II: Total War:
•Settlements. These appear as either cities or castles on the map, with a name plate. The amount of filled color on the banner above the settlement indicates the power of the force garrisoned within it.
•Armies. These appear as a military figure with a banner above them. The amount of filled color of the banner above the army indicates its overall power. Command stars beside an army represent the experience of the General leading it.
•Agents. These include all the non-military character types such as Spies, Assassins, Priests, Merchants, Diplomats and Princesses. Some types of agent are always controlled by the CPU, such as Heretics, Witches and Inquisitors.
•Resources. Around the map you will see various trade resources out in the countryside. These show what goods can be exported from the region they are in and also where
8 |
9 |
Merchants can stand to earn trade bonuses.
•Sea-Crossing Points. At various points around the map there are green arrows that represent points land-based armies can cross without a fleet.
•Dark Areas. These represents areas of the map that your faction cannot see, due to not having a character close enough to show who or what is there. The completely black areas are totally uncharted.
Moving the View
You can move your view of the campaign map in the following ways:
•Move the mouse cursor to the edge of the screen to move the view in that direction.
•Use either the arrow keys or the 1, 2, 3 & 5 keys on your numeric keypad to move the view in the appropriate “compass point” direction.
•Use your mouse wheel (or + & - keys if no mouse wheel present) to zoom the view in and out.
•Click on the mini-map (bottom left of screen) to instantly move the view to that location in the world.
You can also get more information about what you see in the area you’re viewing by:
•Mousing-over a character or object to receive more information in a pop-up tooltip.
•Right-click-and-hold over the map without a unit or settlement selected to get confirmation of what sort of terrain is at the cursor’s position.
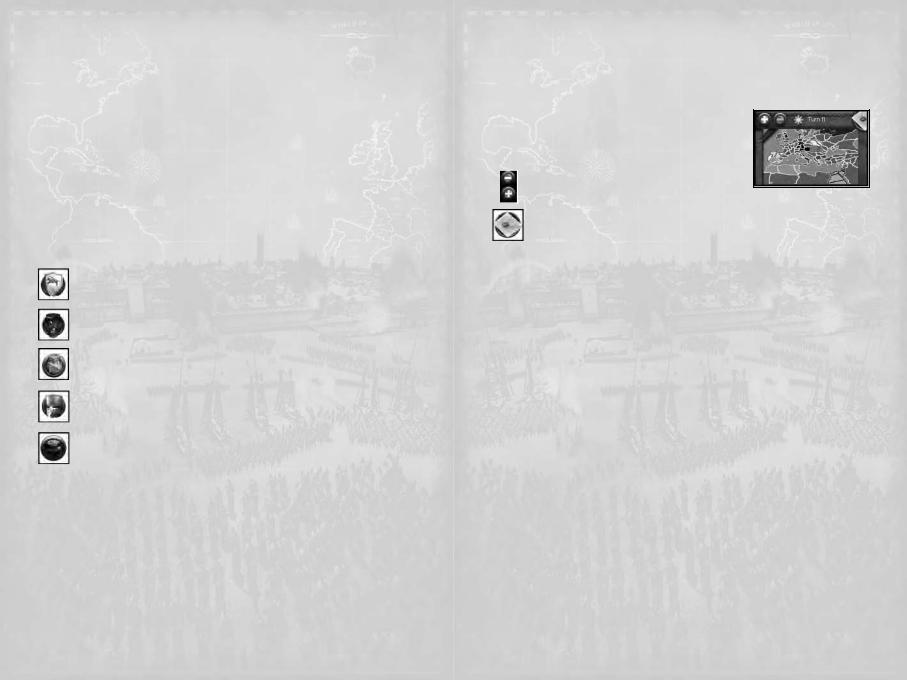
The Control Panel
In the bottom right of the screen you will find the Control Panel – This is where the basic controls and information for the campaign can be accessed.
•Faction Shield button. Click on this to open a panel that has information on your faction, your relations with other factions, and if you’re playing as a Catholic faction, information on the Pope.
•Selection Information & buttons. The currently selected army, settlement or character will have its name displayed here. Click on the buttons on either side of the information to cycle through selectable settlements and characters.
•End Turn button. Click on this button to end your turn, while the number beneath it shows the current turn number.
•Construction button. Click on this when a settlement is selected to open up a scroll with its construction options. Click on this with a General selected outside of a settlement to build a fort or a watchtower.
•Recruit button. Click on this when a settlement is selected to open a scroll with its recruitment options. Click on this with a General selected outside of a settlement to hire mercenaries.
•Finances button. Click on this to bring up your faction’s Financial Details Scroll. The number beneath it shows your current treasury amount.
The Review Panel
In the middle of the bottom of the screen you will find the Review Panel – This is where you can see what units, buildings, agents and fleets are in a given location. This is where you will transfer units in and out of your armies.
At the top of the panel you will see the Review Panel Tabs:
•Army/Navy Tab. Click to see what units are in the currently selected army/navy or settlement. Right-click to open up the Military Forces Roster to list all of your faction’s armies.
•City Tab. Click to see what buildings are in the currently selected settlement. Rightclick to open up the Settlements Roster to list all of your faction’s cities and castles.
•Agents Tab. Click to see what non-military characters are in the currently selected army or settlement. Right-click to open up the Agents Roster to list all of your faction’s agents.
•Fleets Tab. Click to see what ships are in the currently selected fleet or settlement.
The Review Panel Display Area is the large area below the tabs. This display area changes based upon which of the tabs you have selected. For example, if you have the “Army” Tab selected, you will see military units. If you have the “City” tab selected, you will see the buildings within a settlement.
The main way to use the review panel area is to right-click on any card in the panel area to get an Information Scroll on that unit, building or character.
The Mini-map Panel
In the bottom left of the screen you will find the Mini-map Panel – This is where you can quickly look to see what faction owns each region that your own faction can presently see. It is
also where you will find the Missions button.
•+ and - buttons. Click on these two buttons to zoom the mini-map display in or out accordingly.
•Missions button. Click on this button to open up the Missions Scroll. There you will find a record of all current missions your faction is undertaking (see below).
•The Mini-map. Click on the panel to center the campaign map view on
that location.
Starting Play - Your First Turn
The part of Medieval II: Total War that is played on the campaign map is turn-based – simply meaning that each faction in the game takes turns moving its armies and managing its settlements and affairs before the next one does. This means you can take as long as you like to plan out your moves on the campaign map; there is no time limit at all.
Each turn you will usually do the following things (all detailed in later sections of the manual):
•Check your event messages
•Move armies and fleets, attack with them
•Move agents, use their skills where appropriate
•Recruit units in settlements
•Select buildings to construct in settlements
•Check that your settlements are free of problems
•Work towards completing a mission
You will also sometimes have the need to do other things like:
•Engage in diplomacy with other factions
•Hire mercenaries outside of a settlement
•Upgrade the armor or weapons of your units
•Repair buildings and retrain units
•Combat Heresy
Before Ending Your First Turn
There are lots of things you can do, even in the first turn of the game. Details on all of your options are covered in the following sections of the manual, but here is a quick overview of wise things to do before considering hitting the End Turn button:
•Look for idle armies and agents that you may wish to use this turn. You can do this quickly by using the selection buttons on your Control Panel.
•Check for settlements that have an empty construction queue or recruitment queue. You can do this quickly on the Settlement Roster Scroll.
•Look for foreign armies and agents that could threaten your settlements or armies, and ensure that you are prepared for what they might do.
10 |
11 |
EVENTS & MISSIONS
What are Events?
In Medieval II: Total War, events are reports relating to things happening within your faction, or news from around the world. These events arrive as square icons that drop down the left side of the main display area, which you then click on to get the full message – Which could be anything from information about a declaration of war, news on a natural disaster or announcements of royal weddings. There are literally hundreds of events in Medieval II: Total War to face as a ruler in the medieval era.
To use event icons:
•Click to open an event icon to see the full description of whatever has happened.
•Right-click on an event icon to dismiss it.
Your First Event and Mission
The first event icon that appears when you start a campaign is a mission –
That mission will be given to you by your Council of Nobles to take control of a nearby Rebel settlement within a certain number of turns. All missions have a time limit.
Important Tip: Completing missions is always optional.
However ignoring them means failing them, and sometimes there is some sort of penalty for failure. You can always check on your current missions by clicking on the Missions button in the corner of the Mini-map Panel to view the Missions Scroll.
Who Gives Missions?
Missions can come to you from several sources, and they may vary in importance to how you’re managing your faction.
The sources of missions are:
•Council of Nobles. These missions are essentially advice from the nobility of your realm as to what they believe would be in the best interests of your people.
•Guilds. Guilds are essentially trade powers and knightly orders that will interact with your faction throughout the game, depending on what you build and promote in your realm. Their missions will typically involve their “trade.”
•The Pope. Catholic factions will receive orders from the Pope. As you would expect, he takes your success or failure in the missions he gives personally.
•Faction Heirs. You may be approached by the successor to another faction’s throne, asking that you help speed up his ascension to power by killing his current Faction Leader!
Mission Rewards & Penalties
When you complete a mission, there is always a reward that comes with it. Not all missions have a penalty for failure, but any mission that does will have the penalties detailed in the
Missions Scroll.
It is always wise for you to assess what the rewards or penalties will mean for your current plans for your faction, and what effort will be required to complete the mission. If something happens that would prevent you from being able to complete the mission, it will be cancelled – this does not count as failure.
Rewards may include things such as:
•A financial reward
•A bonus unit
•Improved relations with another faction
Penalties may include things such as:
•Excommunication from the Catholic Church
•Having an Inquisitor sent to your lands
•A deterioration of relations with another faction
Faction & World Events
Most messages are going to be reports about things that have happened in your faction, such as what units were recruited, what buildings were completed, family members that died or a mission to undertake.
You will also receive news of diplomatic happenings, such as declarations of war, or an announcement that some foreign power has become the richest kingdom in the world. Reading these messages will help ensure that you are aware of things going on both within your borders, and far beyond them as well.
Historical Events
Sometimes a message will be about a discovery in the world, or an event that heralds new possibilities or problems. An example would be the discovery of gunpowder, which is arguably the most important advance in the history of military technology.
Some historical events will just prove to be amusing, interesting or terrifying, but ensure that you read these messages to be informed of new opportunities that arise as the game progresses.
CHARACTERS
Every figure seen on the campaign map is a “character,” and they fall into two basic classes: military characters and agents. Using these characters will be explained in the Using Armies and Using Agents sections of this manual, but here you will learn their role and how to read information on a specific character.
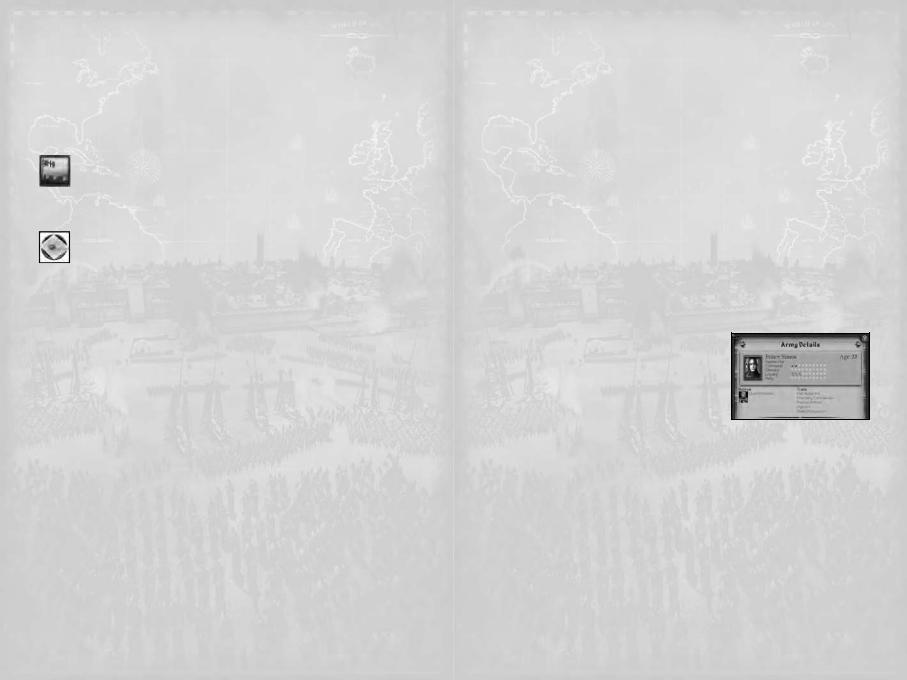
Viewing Character Information
When you double-click on any character on the campaign map, or right-click on their card in the
Review Panel, you call up a scroll that has information on the selected character. Here you can access all the key information about this individual.
The Character Information Panel details include:
•Name: The character’s name, which may alter
depending on their title, or an epithet they are known by.
•Age: The character’s age in years. Nobody lives forever.
•Character Class: This shows what type of character it is.
•Attributes: The names of the attributes are listed on the left, with the meters to the right filling with images as the attribute is higher. More on attributes below.
•Retinue: The personal followers and items that go wherever the character does. These affect the character’s attributes.
•Traits: Traits can be everything from physical characteristics, to a representation of experiences and natural abilities. These can be positive or negative, and they affect the character’s attributes.
Military Class Characters
These are the characters that appear as soldiers or ships on the campaign map. Their use is covered in Using Armies.
Generals
Available to: All factions
Role: Commands armies and governs settlements
Generals are the most important characters in your faction, as they are the only ones who can recruit mercenaries, build field structures and govern settlements. They also have a positive effect on troops being led into battle. The way you use them will greatly
12 |
13 |
determine what sort of leaders they will become and what their strengths and weaknesses will become.
Generals that weren’t bribed to join your faction are considered to be a part of your “Family Tree” and can become successors to the throne of your empire.
Captains
Available to: All factions Role: Temporary commander
When an army has no General a Captain from within one of its units will step forward to lead the army. Captains do not earn traits from accomplishments in battle unless they are promoted to a General – something that may be offered to you during play. Armies led by a Captain are more prone to bribery from foreign Diplomats.
Admirals
Available to: All factions Role: Naval commander
Admirals command a fleet of ships in battle, and can develop their combat ability in the same way that a General can – by winning battles. They cannot govern a settlement like a General; they are a purely naval commander.
Agent Class Characters
These characters are specialists that perform tasks away from the battlefield. Mastering their use can help to ensure that aspects of your faction’s workings such as religion, trade and diplomacy all run smoothly.
Priests / Imams
Available to: All factions
Role: Preaching and Denouncing
Priests and Imams are religious men who ensure that their people’s faith is spread throughout their lands. They are also the only characters aside from assassins that are capable of dealing with Heretics, except they perform a heresy trial, rather than a physical attack.
Diplomats
Available to: All factions Role: Diplomacy
Diplomats are refined men who are sent to negotiate with foreign dignitaries. Although Princesses can also enter diplomacy, only a Diplomat can attempt to bribe a
foreign army, settlement or character, and are thus extremely useful for wealthy factions.
Princesses
Available to: Catholic and Orthodox factions Role: Marriage and Diplomacy
A Princess is a member of the ruling family of her faction, whose main ability is to marry a General. This can be as part of a marriage alliance to a Faction Heir, an attempt to “steal” a foreign General or to marry someone within her own faction. She can represent her people as a Diplomat.
Spies
Available to: All factions
Role: Espionage and Propaganda
Spies are intelligence operatives that are capable of moving undetected by foreign forces. Their main task is to infiltrate foreign settlements, where they will report on the buildings and garrison behind the walls. When within an enemy settlement, Spies inspire unrest in the population, and may also help disable wall defenses. Finally, Spies are also the most effective character at spotting other hidden agents.
Assassins
Available to: All factions
Role: Elimination and Sabotage
Assassins are similar to Spies in that they have a good chance of moving and operating undetected, except that their job is to directly target a person or building for elimination. Assassination attempts are considered an act of war.
Merchants
Available to: All factions
Merchants are men who serve your people by traveling to far off lands to find resources and establish a lucrative trade route back to your capital. Merchants can attempt to put a foreign Merchant out of business – however this does not count as an act of war, nor does entering foreign lands.
Character Attributes
The attributes shown on the Character Information Panel are your most direct means to assess your characters’ weaknesses.
Command
Used by: Generals and Admirals
This is a measure of a General’s ability to lead troops in battle and the higher his Command rating, the better the morale of his troops and the greater his ability to rally his troops who are routing (see Routing).
Piety
Used by: Priests/Imams and Generals
This shows how devout a character is seen to be. For Generals this affects the happiness of settlements he governs and his chances of surviving an inquisition. For Priests, it affects how effectively they convert the populace to their religion, as well
as their chances of denouncing a Heretic or Witch.
Chivalry / Dread
Used by: Generals
This shows how honorable or dishonorable this man’s actions in both rule and war may be. Letting prisoners go free, showing bravery in battle and abstaining from taxing the people harshly are examples of chivalrous behavior. Executing prisoners, exterminating large numbers of people and ruling oppressively are examples of dreadful behavior.
Dread generals can cause fear to inspire a morale penalty in their enemies, while chivalrous generals can inspire a morale boost in their own troops. Chivalry and dread also have an effect upon the population of a settlement governed by a General with either attribute.
Loyalty
Used by: Generals
This shows how seriously this character honors their role of servitude. During the course of Medieval II: Total War there will be numerous situations that will test the loyalty of your Generals, and the higher this attribute, the more likely they shall honor their pledge to you.
Authority
Used by: Faction Leader
This shows the amount of respect commanded by a Faction Leader. A Faction Leader with high Authority is more likely to retain the loyalty of his Generals, while a leader with low authority is more likely to face rebellion.
Charm
Used by: Princesses
This shows how effective this woman is at swaying those she deals with. The higher a
14 |
15 |

princess’s Charm, the more effective she is in diplomacy, and the more likely she will be to successfully convince a General to marry into her family.
Influence
Used by: Diplomats
This shows how effective this man is at convincing others to accept diplomatic proposals during negotiations. The higher a Diplomat’s Influence rating, the more effective is his diplomacy.
Subterfuge
Used by: Spies and Assassins
This shows how effective this man is at performing acts of stealth and espionage. For Spies it affects their ability to infiltrate an enemy army or foreign settlement undetected. It also determines how much unrest they cause via propaganda once behind the walls, as well as their chances of opening the gates in a siege.
For Assassins it effects their ability to successfully eliminate a target marked for assassination or sabotage. Both Spies and Assassins use Subterfuge to remain unseen from other characters, as well as spot hidden foreign agents.
Finance
Used by: Merchants
This shows how efficient this man is with money and trade. It affects a Merchant’s ability to acquire a foreign Merchant’s assets, and also the amount of income generated from standing on a trade resource.
Improving Your Characters
As your characters do things in the campaign, they will begin to develop traits and gain followers as they either succeed or fail. Sometimes they will develop traits just as a result of sitting around or being in a certain environment.
With both logic and observation, you should be able to see a connection between what you do with your characters, and what sort of traits they develop. Leave a General in a town with a big tavern forever and he’ll eventually turn to drink. However, pro-active behavior is the way to develop positive traits and gain more useful followers.
There are literally hundreds of things that can lead to receiving traits, followers and items. Here are some examples of them:
•Hereditary traits, both through bloodline and the parents’ beliefs.
•The outcome of a battle
•Personal involvement in battle
•Getting married
•Succeeding or failing at agent missions
•How you have Governors manage their settlements
•Completing certain missions
•Building certain buildings
•The environment the character lives in
Traits
Traits can come in several different forms. It is important not to think of these as abilities earned but side effects of the character’s life up until this point. Your involvement with your characters’ traits comes in making decisions as to where they will be and what
they will do.
If your characters develop negative traits, the best way to deal with them is to either acknowledge it as a weakness of the character or attempt to redeem themselves with positive actions.
Examples of types of Traits:
•Physical characteristics
•Personal beliefs
•Leadership styles
•Experience in an activity
•Insanities
•Fears and hates
Retinue
A character’s retinue is their entourage of followers, as well as their personal belongings that they keep with them on their journeys. Some of your followers and items can be transferred from one character to another by clicking on the item or individual and dragging them onto the portrait of another character. Of course, there are some items that characters will not part with, and there are followers who simply will not be told who they will accompany.
USING ARMIES
Total War Armies
Your armies are your primary weapon in the Medieval II: Total War campaign. Each army contains 1-20 military units that move and fight together. When you select an army on the campaign map, you will immediately see what units it contains in the Review Panel.
Things to know about armies on the campaign map:
•Click on an army on the campaign map to select the entire army.
•Any gold stars to the left of the army show the Command rating of the general in charge (0-10); the more stars, the better the General is at leading in battle.
•The banner color and symbol shows the owning faction.
•The darker color that “fills” the banner from the bottom shows the strength of the army. The stronger the army: the more of the banner will be filled from the bottom.
•There are certain things that armies led by a Captain cannot do. Only armies led by a General can hire mercenaries and build fortifications.
Who Commands in Battle?
The commander of an army is determined by the following rules:
•The General with the highest Command rating is the Commander.
•The only exception is when the Faction Leader is present, he is always the Commander, regardless of his Command rating.
•The commanding General’s unit card will be marked with a gold star.
We will cover commanding armies in battle in Medieval II: Total War Battles – this section covers forming armies, and using them in the campaign map.
Unit Types
There are several different classes of unit on the battlefield, and it is vital to understand the basic role that they play. Some types of unit are very effective against other types. It is best to know this before you begin recruiting units.
The basic types are:
•Light Infantry. These are troops who are lightly armed and armored, and are best used in support roles to attack or defend in unison, rather than be used in an important position in a front line.
•Heavy Infantry. These are troops who are heavily armed and/or armoured and are generally good at engaging other infantry.
•Spears. These troops are specialized infantry armed with lengthy pole-mounted weapons that are ideally suited to forming a defensive line, especially against cavalry. Their role makes them vulnerable to missiles.
•Missile. These are troops who are armed with ranged weapons that can strike enemy targets at a distance. They are usually very vulnerable in hand-to-hand combat.
•Light Cavalry. These are mounted troops who are somewhat lightly armed and armored, but extremely swift and mobile. They are excellent at chasing down routing enemies, but poor against spears.
16 |
17 |
•Heavy Cavalry. These are mounted troops who are well armed and armore and used as a strong, fast attacking force. They are poor against spears.
•Missile Cavalry. These are mounted troops who are armed with ranged weapons such as bows. They are generally poor at melee combat but can hit and run, making difficult targets.
•Artillery. These are mobile war machines or cannons that can be used as powerful ranged weapons on both enemy troops and settlement walls and defenses. They are poor at defending themselves and typically require defending infantry to protect them.
Forming Armies
To form an army, you need to either recruit new troops in a settlement or hire mercenaries with a general outside of a settlement. Troops can be pulled together from multiple places and merged together to form a larger, more capable army.
Tips on how to have a balanced army:
•Always try to have a mix of infantry, spears, missiles and cavalry. This will ensure you have a unit to counter whatever the enemy sends at you.
•When first building an army, start with infantry. Most missile, cavalry and artillery units are poor at standing their ground without help.
Tips on how to produce an army for a special purpose:
•If you’re creating a siege army, include artillery units capable of destroying walls. This is more reliable than building siege equipment during siege.
•If you’re creating a defensive garrison, missile units are extremely effective from walls and can be defended with little infantry.
•If you’re looking to capture prisoners, ensure you have multiple cavalry units to make chasing down routers easier.
Moving Armies
Select an army by clicking on it. Once selected, there are numerous ways to move the army, some involving attacking or merging with other armies:
•The highlighted area shows every place in the game world that the army can move during the current turn. All actions (moves and attacks) cost movement points, and as these are used the distance an army can move for the remainder of the turn will reduce.
•Right-click on the spot where you want an army to go. A large arrow will show the proposed route for the army.
•Right-click-and-drag to show the route changing for an army as its destination changes.
•Right-click on an enemy or neutral army or settlement to attack it. The cursor will change into a sword to show that an attack is possible. Attacking a neutral army or settlement is a declaration of war on that faction. See Battles in Medieval II: Total War to learn about how to command in battles.
•Right-click on another of your faction’s armies (not an ally!) to merge the selected army into the stationary one. There are further details about merging armies that are covered below.
•Right-click on a friendly settlement (not an allied settlement) to merge the army with the settlement garrison (if any). The army will move into the settlement, and if the army has a General and the settlement doesn’t have a Governor, then the General will be automatically appointed as the new Governor. See the Running Settlements section for more information.
•Red highlighted areas are in enemy zones of control, which means that they are adjacent to an enemy army. Movement in red highlighted zones is restricted. Armies cannot move directly between red spaces on the map. They must move away from their enemies (or neutral armies) before marching back into contact.
•Right-click beyond the green highlighted area to set a multi-turn movement order. The route will be shown as normal, except with a multi-colored line, with
each color representing one turn’s movement. The army will move as ordered unless its path is blocked or is given new orders.
•Armies that can move no further will have no highlighted zone around them when selected. They will kneel to show their resting state.
•Armies are also shown as kneeling figures when they are hidden in woodland terrain and ready to ambush any passing enemies.
Merging Armies
Move an army onto another friendly (same faction) army or settlement to merge the two forces. It may be useful to merge units before attempting to merge two armies. You can’t merge units at the same time as merging armies.
•The general with the highest Command rating is always in charge of a merged army. When an
army led by a Captain is merged with a General’s army, the Captain is reduced to the ranks
and disappears.
•If fewer than 20 units in total (in both armies)
are involved, then the merging process is completely automatic.
If there are more than 20 units (total, in both armies) involved in the merging, then the
Merge Armies Scroll will appear.
•Select the units in either army that you wish to move to the other army. You can make multiple selections holding down the CTRL key as you click.
•Some units may be greyed out. These have already moved as far as they are able this turn, and therefore cannot move (merge) to another army.
•Click on the transfer arrow button in the middle of the scroll once you’re happy with the army compositions. You can also drag-and-drop units between the two armies on this scroll.
•Once you are happy with the merged armies, click on the “tick” button in the lower right hand corner of the scroll.
Splitting Armies
There will be times when you need to take some units out of a large army or garrison and send them elsewhere – This is splitting armies.
•Select the units you wish to move using their unit cards in the Review Panel in the center of the Control Panel at the bottom of the screen.
•You can use the SHIFT and CTRL keys while selecting to make multiple selections. Hold down the CTRL key and double-click on a unit card in the review panel to select all the units of that type.
•Move the cursor to the spot you want the selected units to go, then Right-click to order them to move there.
•You can also drag-and-drop the selected units from the review panel to an appropriate location in the game world.
•In both cases, the new army that is breaking away from the original one will appear next to the force it is leaving and march to the new location.
Merging Units
After battles, there is a strong chance that you will have taken some casualties, and
not all of your units will have their full compliment of men in them. Even if a unit has only a few men remaining, it will still take up one of your 20 unit slots, and may be too small to engage effectively anymore. To deal with this, you can merge two units of the same type together.
•Click-and-drag one unit onto another in the Review Panel, and the two will merge. The men in the unit being dropped are added to the target unit.
18 |
19 |
 Loading...