


Longbow2
1997, 1998

L O N G B O W 2
Written by Tuesday Frase and Chris McCubbin
Additional writing by Jennifer Spohrer
Edited by David Ladyman
Design and Layout by ORIGIN Creative Services
© 1997, 1998 ORIGIN Systems, Inc. Origin is a trademark or registered trademark of ORIGIN Systems, Inc. Electronic Arts and We Make Sims by the Book are trademarks or registered trademarks of Electronic Arts in the U.S. and/or other countries. All rights reserved. ORIGIN is an Electronic Arts company.
Jane’s Combat Simulations is an Electronic Arts brand. Jane’s is a registered trademark of Jane’s Information Group Ltd. Reference work from Jane’s Library © 1997 Jane’s Information Group Ltd. Made in the USA. All rights reserved, including the right of reproduction in whole or in part in any form. This product is not licensed or endorsed by McDonnell Douglas Corporation.
ORIGIN Systems, Inc.
5918 West Courtyard Drive
Austin, Texas 78730

0 : I N T R O D U C T I O N
HOW TO USE
This manual is subdivided into eight chapters. Some (0, 1 and 2) describe how to play the game, others (3, 6, 7 and Appendices) contain reference information, and others (4 and 5) contain both.
At the beginning of each chapter, you’ll find a detailed table of contents. Page references include the chapter and page number — p. 3.12, for example, refers to Chapter 3, page 12. The appendices at the end of the book give glossary and acronym information, a bibliography and useful flight charts.
SHADED TEXT Text in a light-gray box denotes additional information. Although useful, this info is not required to play the game.
QUICK START |
For a quick game overview and fundamental |
|
keystokes, see the back inside cover of this manual. |
0. INTRODUCTION |
How to Use (this section) tells you how to find the |
|
information you need in this book. A detailed table of |
|
contents follows. |
|
Table of Contents (p. 0.6 - 0.11) gives a chapter by |
|
chapter listing of contents for this manual. More |
|
detailed listings appear at the beginning of each chap- |
|
ter. |
|
In a Hurry? (p. 0.12 - 0.16) describes how to start an |
|
Instant Action mission and explains basic keystrokes to |
|
get you up in the air and firing your weapons. |
1. ON THE BASE |
On the Base describes the functionality of all buildings |
|
on the base, as well as how to use the training mis- |
|
sions, Jane’s object viewer, and mission planner. |
2. COCKPIT/SYSTEMS |
Aircraft Overview (p. 2.3) introduces the three flyable |
|
helicopters and briefly describes the helicopters’ main |
|
display systems and Master Modes (p. 2.9). |
|
Integrated Helmet and Display Sighting System (p. |
|
2.12) and IHADSS Flight Symbology (p. 2.14) cover |
|
the four IHADSS modes and define each item you see |
|
in the Longbow’s cockpit display. |
|
Multi-Function Displays (p. 2.24) takes you through |
|
all MFD pages for all helicopter types and explains the |
|
items that appear in them. |
|
In-Flight Navigation System (p. 2.44) discusses the |
|
game’s dynamic, in-flight mission planning map, and |
|
Kiowa Digital Moving Map (p. 2.45) covers the Kiowa |
|
Warrior’s scrolling map display. |
0.3

L O N G B O W 2
|
AH-64D Targeting and Sight Systems (p. 2.46) talks |
|
about the Longbow’s main systems — the Fire-Control |
|
Radar (FCR), Target Acquisition and Designation Sight |
|
(TADS), and Pilot’s Night Vision System (PNVS). |
|
Co-Pilot/Gunner Cockpit (p. 2.51) describes the front- |
|
seat cockpit and the Optical Relay Tube (ORT) Unit. |
|
Black Hawk Analog Cockpit (p. 2.54) contains infor- |
|
mation and diagrams of instruments on the Black Hawk |
|
dashboard. |
|
View Controls (p. 2.56) lists all of the in-flight camera |
|
views. |
3. GROUND SCHOOL |
Lift Force (p. 3.1) discusses physical theories of flight. |
|
Rotational Motion (p. 3.5) and Horizontal Motion (p. |
|
3.9) examine the inherent physical characteristics of |
|
rotary flight. |
4. FLIGHT TRAINING |
Helicopter Controls (p. 4.1) describes the helicopter’s |
|
control inputs and autopilot functions. It also gives |
|
information on adjusting realism and difficulty options. |
|
Practice Flight (p. 4.8) goes through the basic tech- |
|
niques of taking off, flying to a waypoint and landing. |
|
You’ll also find advanced information on autorotational |
|
and combat landings. |
5. COMBAT |
Staying Alive (p. 5.2) details your Aircraft Survivability |
|
Equipment (ASE) and tells you how to use it to survive |
|
in combat. |
|
Weapons Systems (p. 5.9) explains everything you |
|
need to know about finding, targeting and destroying |
|
an enemy with your helicopter’s weapons. |
|
Laser Operation (p. 5.22) describes how to use the |
|
helicopter’s laser sensor in conjunction with weapon |
|
systems. |
|
Wingmen and Backup (p. 5.24) defines wingman |
|
commands and tells you how to call in artillery and air |
|
strikes, and how to trade targets with your wingman. |
|
Combat Tactics (p. 5.27) illustrates effective helicopter |
|
tactics against ground targets and air opposition. |
6. CAMPAIGNS |
Campaigns (p. 6.1) gives background information on |
|
the game’s Iranian and National Training Center |
|
campaigns, and includes relevant articles from Jane’s |
|
Information Group magazines. |
0.4

|
0 |
: |
I |
N |
T |
R |
O |
D |
U |
C |
T |
I |
O |
N |
|
|
|
|
|
|
|
|
|
|
|
|
|
|
|
7. JANE’S |
Jane’s Specifications (p. 7.1) lists actual specifica- |
|||||||||||||
|
tions and photographs from Jane’s Information Group |
|||||||||||||
|
for all three flyable helicopters, their weapons and |
|||||||||||||
|
major avionic systems. |
|||||||||||||
APPENDICES |
Appendices provide useful lists and glossary information: |
|||||||||||||
Appendix A |
Longbow vs. Longbow 2 (p. A.1) gives veteran |
|||||||||||||
|
players an idea of what new, major features to expect |
|||||||||||||
|
in Longbow 2, and describes where to find specifics on |
|||||||||||||
|
each element. |
|||||||||||||
Appendix B |
Acronyms (p. B.1) explains commonly used |
|||||||||||||
|
acronyms. |
|||||||||||||
Appendix C |
Glossary (p. C.1) defines commonly used aircraft, |
|||||||||||||
|
ground vehicles and military terms. |
|||||||||||||
Appendix D |
Flight Charts (p. D.1) lists cruise velocity and autoro- |
|||||||||||||
|
tational landing charts for the Longbow Apache, Black |
|||||||||||||
|
Hawk and Kiowa Warrior. |
|||||||||||||
Appendix E |
Bibliography (p. E.1) lists the references used in |
|||||||||||||
|
preparing the game and the manual. |
|||||||||||||
0.5

L O N G B O W 2
0. INTRODUCTION / IN A HURRY?
IN A HURRY? ...................................... |
0.12 |
Flight Basics ..................................................... |
0.13 |
Starting the Game ............................................ |
0.12 |
Basic Flight Controls ................................... |
0.13 |
Instant Action Mission Parameters..................... |
0.12 |
Takeoff Keys.............................................. |
0.13 |
|
|
Navigation Keys......................................... |
0.14 |
|
|
Targeting Keys........................................... |
0.14 |
|
|
Weapon Keys............................................. |
0.14 |
|
|
View Keys.................................................. |
0.15 |
|
|
Ending the Mission ..................................... |
0.15 |
|
|
Useful Hints............................................... |
0.16 |
For a three-page Quick Start, please see the back cover and inside back cover on this manual.
1. ON THE BASE
READ JANE’S ........................................ |
1.1 |
BUNKHOUSE ......................................... |
1.2 |
Creating a New Pilot ................................... |
1.3 |
Pilot Careers ............................................... |
1.4 |
Deleting a Pilot ........................................... |
1.4 |
Switching the Active Pilot............................. |
1.4 |
TRAINING BUILDING ............................. |
1.5 |
INSTANT MISSION HELICOPTER ............. |
1.6 |
MULTI-PLAYER MISSION BUILDING ........ |
1.6 |
SINGLE MISSION BUILDING ................... |
1.6 |
CAMPAIGN MISSION BUILDING ............. |
1.8 |
Campaign Options....................................... |
1.8 |
Resuming a Campaign................................. |
1.9 |
MOBILE MISSION |
|
PLANNING CELL (MMPC) ..................... |
1.10 |
Mission Planner ............................................... |
1.11 |
Function Buttons.............................................. |
1.13 |
Mission Summary Bar...................................... |
1.15 |
The Map.......................................................... |
1.15 |
Fly Mission ...................................................... |
1.19 |
Trash Mission................................................... |
1.19 |
ENDING A MISSION ............................ |
1.20 |
Landing at a FARP ........................................... |
1.20 |
Debriefing Area............................................... |
1.20 |
Saving Your Progress ....................................... |
1.20 |
Crashing, Surviving and Dying ......................... |
1.22 |
GUARD SHACK.................................... |
1.22 |
0.6

0 : I N T R O D U C T I O N
2. COCKPIT/SYSTEMS
Game vs. Reality ............................................... |
2.1 |
How to Use This Chapter .................................... |
2.2 |
AIRCRAFT OVERVIEW ........................... |
2.3 |
Longbow Apache......................................... |
2.3 |
Kiowa Warrior ............................................ |
2.3 |
Black Hawk ................................................ |
2.3 |
In-Flight System Keys ........................................ |
2.3 |
Game Options ............................................. |
2.3 |
Pausing/Ending the Mission......................... |
2.4 |
Speeding up Travel...................................... |
2.4 |
Radio.......................................................... |
2.4 |
Overview: IHADSS ............................................. |
2.4 |
Overview: Multi-Function Displays (MFDs) .......... |
2.6 |
MFD Types .................................................. |
2.6 |
Overview: Targeting Systems.............................. |
2.7 |
MASTER MODES ................................... |
2.9 |
Master Mode Settings ........................................ |
2.9 |
Upfront Display ............................................... |
2.10 |
Black Hawk Indicator Lights ............................. |
2.10 |
Longbow Fire Warning Lights ........................... |
2.11 |
Physical Backup Gauges................................... |
2.11 |
IHADSS............................................... |
2.12 |
IHADSS Helmet System .................................... |
2.13 |
IHADSS FLIGHT SYMBOLOGY............... |
2.14 |
Hover IHADSS Mode ........................................ |
2.14 |
Bob-Up IHADSS Mode ...................................... |
2.19 |
Transition IHADSS Mode................................... |
2.20 |
Cruise IHADSS Mode ........................................ |
2.21 |
Weapon-Specific Items ..................................... |
2.22 |
MULTI-FUNCTION DISPLAYS ................ |
2.24 |
Tactical Situation Display (TSD) MFD................. |
2.24 |
How It Works ............................................ |
2.25 |
Adjusting TSD Items .................................. |
2.27 |
TSD with Realistic FCR ............................... |
2.27 |
Priority Fire Zones (PFZs).......................... |
2.28 |
PFZs and Hellfire Missiles .......................... |
2.28 |
Radar MFD...................................................... |
2.29 |
Air/Ground Radar Modes .......................... |
2.29 |
Realistic FCR Options and Symbols ............. |
2.30 |
Realistic FCR Operation Commands ............ |
2.31 |
Downloading Targets to Radar MFD ........... |
2.31 |
TADS MFD ....................................................... |
2.32 |
Panning/Zooming..................................... |
2.33 |
TADS and Realistic FCR .............................. |
2.33 |
Realistic TADS Operation............................ |
2.33 |
Weapons MFD ................................................. |
2.33 |
Aircraft Survivability Equipment (ASE) MFD ...... |
2.35 |
Realistic Jammers ..................................... |
2.36 |
ASE Autopage ........................................... |
2.37 |
System MFD .................................................... |
2.38 |
Engine MFD..................................................... |
2.38 |
Interpreting the Symbols ........................... |
2.39 |
Flight MFD....................................................... |
2.40 |
Communications MFD....................................... |
2.40 |
Vertical System Display MFD ............................ |
2.41 |
Mast-Mounted Sight (MMS) MFD ...................... |
2.43 |
IN-FLIGHT NAVIGATION SYSTEM ......... |
2.44 |
KIOWA DIGITAL MOVING MAP............ |
2.45 |
TARGETING AND SIGHT SYSTEMS ........ |
2.46 |
Mast-Mounted Longbow FCR ............................ |
2.46 |
TADS ............................................................... |
2.47 |
TADS and MMS Cameras .................................. |
2.47 |
Pilot’s Night Vision System (PNVS/ANVIS)......... |
2.48 |
Kiowa Pilot Display Unit................................... |
2.48 |
CO-PILOT/GUNNER COCKPIT............... |
2.51 |
Kiowa’s Left Seat (CP/G) ................................. |
2.51 |
Longbow’s Front Seat (CP/G) ........................... |
2.51 |
IHADSS/MFDS/UPFRONT Display ..................... |
2.52 |
Optical Relay Tube (ORT) Unit .......................... |
2.53 |
Head-Out/Head-Down Displays ................. |
2.53 |
BLACK HAWK ANALOG COCKPIT.......... |
2.54 |
Cockpit Gauges................................................ |
2.54 |
VIEW CONTROLS ................................ |
2.56 |
View Panning .................................................. |
2.56 |
Inside Cockpit Views......................................... |
2.57 |
Target Views .................................................... |
2.58 |
0.7

L O N G B O W 2
3. GROUND SCHOOL
LIFT FORCE ........................................... |
3.1 |
HORIZONTAL MOTION |
..........................3.9 |
Generating Lift .................................................. |
3.2 |
Translational Lift................................................ |
3.9 |
Bernoulli’s Principle..................................... |
3.2 |
Drag......................................................... |
3.10 |
Angle of Attack ........................................... |
3.3 |
Asymmetry of Lift............................................ |
3.10 |
Angle of Incidence....................................... |
3.4 |
Retreating Blade Stall ...................................... |
3.12 |
ROTATIONAL MOTION ........................... |
3.5 |
Autorotational landing ..................................... |
3.12 |
Dissymmetry of Lift ........................................... |
3.5 |
|
|
Compressibility of Air .................................. |
3.6 |
|
|
Coning ........................................................ |
3.6 |
|
|
Downwash......................................................... |
3.6 |
|
|
Ground Effect in a Hover............................. |
3.7 |
|
|
Settling with Power ..................................... |
3.7 |
|
|
Torque............................................................... |
3.8 |
|
|
Tail Rotor .................................................... |
3.8 |
|
|
Hovering and Translating Tendency.............. |
3.8 |
|
|
4. FLIGHT TRAINING
HELICOPTER CONTROLS......................... |
4.1 |
PRACTICE FLIGHT (NON-COMBAT) |
.........4.8 |
Rotor................................................................. |
4.1 |
Startup.............................................................. |
4.9 |
Collective Stick................................................... |
4.2 |
Takeoff ........................................................... |
4.10 |
Advanced Collective Controls........................ |
4.2 |
In-Flight .......................................................... |
4.11 |
How Collective Works .................................. |
4.2 |
Landing........................................................... |
4.12 |
Cyclic Stick ........................................................ |
4.3 |
Advanced Combat Landing ........................ |
4.13 |
How Cyclic Works ........................................ |
4.3 |
Autorotational Landing.............................. |
4.14 |
Directional Control Pedals .................................. |
4.4 |
|
|
How Directional Control Pedals Work ........... |
4.4 |
|
|
In-Game Flight Tutorials..................................... |
4.4 |
|
|
Adjusting Realism and Difficulty......................... |
4.5 |
|
|
Autopilot Functions ............................................ |
4.5 |
|
|
Autopilot..................................................... |
4.5 |
|
|
Advanced Autopilot Keys ............................. |
4.6 |
|
|
Hover Hold ................................................. |
4.7 |
|
|
Force Trim................................................... |
4.7 |
|
|
0.8

0 : I N T R O D U C T I O N
5. COMBAT
STAYING ALIVE ..................................... |
5.2 |
Aircraft Survivability Equipment ......................... |
5.2 |
Evading Missiles................................................. |
5.3 |
DAMAGE............................................... |
5.4 |
TACTICAL MISSIONS .............................. |
5.6 |
AH-64D Longbow Apache ............................ |
5.6 |
OH-58D Kiowa Warrior ............................... |
5.7 |
UH-60L Black Hawk .................................... |
5.8 |
WEAPONS SYSTEMS.............................. |
5.9 |
Finding the Enemy............................................. |
5.9 |
Visual Tracking............................................ |
5.9 |
Sensor Systems ........................................... |
5.9 |
Target Acquisition Modes.................................. |
5.10 |
TADS/MMS Target Acquisition Mode........... |
5.11 |
FCR Target Acquisition Mode...................... |
5.11 |
Priority Fire Zones .................................... |
5.11 |
Selecting Targets from Your Target List ............. |
5.12 |
Getting Best Cannon Targets ...................... |
5.12 |
Getting Best Missile Targets ....................... |
5.12 |
Selecting Targets with the Mouse ............... |
5.12 |
Engaging Targets with Cannon, |
|
FFAR and Stingers ........................................ |
5.13 |
M230 Chain Gun Cannon .......................... |
5.14 |
Stinger Infrared-Guided Missile.................. |
5.16 |
Folding Fin Aerial Rocket (FFAR)................ |
5.17 |
Engaging Targets with Hellfires ........................ |
5.18 |
LOBL Missile Launch Mode......................... |
5.18 |
LOAL Missile Launch Mode......................... |
5.19 |
Launching Hellfires with PFZs........................... |
5.19 |
Troubleshooting — Getting a Valid Lock .......... |
5.20 |
Weapon Inhibit Field ................................. |
5.20 |
Identifying the Target................................ |
5.21 |
Laser Operation............................................... |
5.22 |
Realistic TADS and the Laser ...................... |
5.23 |
Using the Laser with Laser Hellfires ........... |
5.23 |
WINGMEN AND BACKUP ..................... |
5.24 |
Wingman Commands ....................................... |
5.24 |
Giving Your Wingman Targets.................... |
5.24 |
Getting Your Wingman’s Targets ................ |
5.25 |
Other Wingman Commands ....................... |
5.25 |
Calling on Backup............................................ |
5.26 |
Calling an Air Strike .................................. |
5.26 |
Calling an Artillery Strike .......................... |
5.26 |
COMBAT TACTICS ................................ |
5.27 |
Air-to-Ground Tactics ........................................ |
5.27 |
Escorting Transports................................... |
5.28 |
Terrain Masking ........................................ |
5.28 |
Contour Chasing – Speed vs. Safety .......... |
5.28 |
Bob-Up ..................................................... |
5.29 |
Pop Sideways............................................ |
5.30 |
Air-To-Air Tactics............................................... |
5.30 |
Against Fighters ........................................ |
5.31 |
Against Helicopters.................................... |
5.31 |
0.9

L O N G B O W 2
6. CAMPAIGNS
CAMPAIGNS ......................................... |
6.1 |
IRAN, AZERBAIJAN AND THE US............... |
6.2 |
Fear Drives Caucasian Policy .............................. |
6.2 |
Iran Warns USA To “Think Twice” |
|
About An Attack ................................................ |
6.3 |
Iran Strives To Regain Military Might; |
|
Rearmament Drive Aims to Restore |
|
Gulf Balance...................................................... |
6.4 |
Baku and Tehran, Renewed Tensions .................. |
6.6 |
Azeris Want New Look at Tashkent Accord .......... |
6.8 |
The Jane’s Interview: |
|
National Training Center .................................... |
6.9 |
JANE’S SENTINEL – |
|
THE GULF STATES – IRAN.......................... |
6.10 |
Defence Production.......................................... |
6.10 |
Historical Overview.......................................... |
6.11 |
Territorial Disputes – Iraq, UAE........................ |
6.11 |
International Affairs ........................................ |
6.12 |
JANE’S SENTINEL – RUSSIA |
|
AND THE CIS – AZERBAIJAN.................... |
6.14 |
Risk Pointers ................................................... |
6.14 |
Azerbaijan’s Oil to Flow ................................... |
6.15 |
GAME CAMPAIGN BACKGROUND ........... |
6.16 |
National Training Center .................................. |
6.16 |
Iran: Operation Fallen Crescent ........................ |
6.17 |
DYNAMIC MISSION GENERATOR............. |
6.19 |
Overview......................................................... |
6.19 |
Campaign Goals .............................................. |
6.19 |
Criteria for an Offensive Advance..................... |
6.21 |
Resource Management..................................... |
6.22 |
Mission Outcomes ............................................ |
6.22 |
0.10
0 : I N T R O D U C T I O N
7. SPECIFICATIONS
DEFINITIONS.................................................. |
7.2 |
AVIONICS |
|
|
MILITARY AIRCRAFT, ROTARY WING |
|
AN/ALQ-144 Infrared |
7.22 |
|
AH-64D Longbow Apache |
7.4 |
Countermeasures Set ....................................... |
||
AN/APR-39A Threat Warning System |
7.23 |
|||
UH-60A/L Blackhawk (Sikorsky S-70A) |
7.7 |
|||
AN/AVR-2 Laser Detecting Set |
7.24 |
|||
OH-58D Kiowa Warrior |
7.10 |
|||
ANVIS/HUD System |
7.25 |
|||
WEAPONRY |
|
|||
|
Longbow Radar |
7.26 |
||
AIM-92 Stinger |
7.13 |
|||
MMS Mast Mounted Sight |
7.27 |
|||
Folding Fin Aerial Rocket |
7.14 |
|||
Target Acquisition Designation Sight/ |
|
|||
Hellfire Missile |
7.16 |
|
||
Pilot Night Vision Sensor |
7.28 |
|||
FN 0.50 Browning M2 Heavy |
|
|||
|
|
|
||
Barrel Machine Gun......................................... |
7.18 |
|
|
|
M134 7.62mm Minigun Machine Gun .............. |
7.19 |
|
|
|
M230 Chain Gun Cannon ................................. |
7.20 |
|
|
|
M60D 7.62mm Machine Gun ........................... |
7.21 |
|
|
APPENDICES
GAME COMPARISONS ........................... |
A.1 |
FLIGHT CHARTS .................................... |
D.1 |
|
Longbow vs. Longbow 2..................................... |
A.1 |
Cruise Charts ..................................................... |
D.1 |
|
ACRONYMS |
B.1 |
Longbow Apache......................................... |
D.1 |
|
Kiowa Warrior |
D.2 |
|||
GLOSSARY |
C.1 |
|||
Black Hawk |
D.3 |
|||
|
|
|||
|
|
Autorotational Descent Charts ............................ |
D.4 |
|
|
|
Longbow Apache......................................... |
D.4 |
|
|
|
Kiowa Warrior ............................................ |
D.5 |
|
|
|
Black Hawk ................................................ |
D.6 |
|
|
|
BIBLIOGRAPHY ..................................... |
E.1 |
0.11

L O N G B O W 2
IN A HURRY?
This section assumes that you selected a CASUAL installation. If you selected EXPERT, you can change the game’s settings in the OPTION menu.
1.Press aO
2.Select CONTROLS, then CASUAL. Press ACCEPT.
3.Select GAMEPLAY, then ARCADE. Press ACCEPT twice to close the options screen.
This section is for new pilots who want a basic introduction to the game, as well as for seasoned pilots who only want enough information to get the game started.
Instant Action encounters don’t affect your pilot’s record, but they’re a great way to ease into the game before starting an actual campaign.
Check out the Quick Start Reference Card on the back cover/inside back cover of this manual for basic keystrokes.
Page numbers in parentheses indicate where to go in the manual for more details.
Starting the Game
1.Ensure that your input devices are calibrated in Windows 95. If you have any questions or problems, please refer to the Install Guide.
2.Double-left click on the Longbow 2 icon, or left-click the Start button and select
Programs/Jane’s Combat Simulations/AH64D Longbow 2/Longbow 2
:Once the game starts, you’ll see an overhead view of the base. Right-click the mouse anywhere to display all the hotspots.
LLeft-click on the grounded helicopter (in front of the Campaign hangar) to start
an INSTANT ACTION mission.
Instant Action Mission Parameters
Instant Action mission mode places you in the pilot’s seat of an AH-64D Longbow Apache. (A second cockpit, the co-pilot/gunner’s seat, is available as well. This front seat is usually used for targeting and weapon functions. See p. 2.51 for details.)
♦Terrain. You’ll fly in whichever map was last decompressed (NTC or Iran).
♦Helicopter/Weapon. You’ll fly an invulnerable AH-64D Longbow Apache, with unlimited weaponry (M230 chain gun rounds, RF Hellfire missiles, FFAR rockets and Stinger ATA missiles).
♦Flight Model. SIMPLE flight mode is active. You can increase difficulty by activating the OPTIONS menu (press aO), then selecting a different flight model from the GAMEPLAY menu. You can also adjust REALISM options that change the characteristics of your chopper and/or weapons.
0.12

0 : I N T R O D U C T I O N
♦Forces. You’ll face a slew of random air and ground enemies — SAMs, helicopters, anti-aircraft guns, tanks, trucks, etc. Some will be friendly, so you may want to spend some time watching the ground battles below.
Keeping your targets straight won’t be a problem — you aren’t allowed to target friendlies with this control type. To track target positions, use the in-flight mission planner map (aN).
Flight Basics (pp. 4.1-7)
This section covers basic keystrokes you need for survival, as does the Quick Start Reference Card on the back cover of this manual. See the rest of the manual or the Reference Card for a complete listing of keys and game functions.
Basic Flight Controls
All helicopters have three basic controls:
♦The collective adjusts vertical velocity (altitude), and can be set from 0-100%.
♦The cyclic controls forward, sideways and backward movement.
♦The directional control pedals change heading by swinging the tail rotor left or right (most useful at slow speeds).
COLLECTIVE |
=/ - |
Increase/decrease vertical velocity (altitude). |
|
or throttle wheel |
|
CYCLIC |
W/ Z |
Pitch helicopter down (to move forward)/up (to move backward) |
|
A/ S |
Bank helicopter left/right |
|
or joystick |
|
PEDALS |
[ / ] |
Rotate tail rotor left/right |
|
or pedals |
|
Takeoff Keys
Takeoff is automatic in Instant Action missions. For specific details on how to take off in other mission types, see Flight Training: Practice Flight, p. 4.8.
0.13
L O N G B O W 2
Navigation Keys (p. 2.44, p. 4.5)
AActivate autopilot (key cycles through MAINTAIN HEADING (AP1), FOLLOW WAYPOINTS (AP2) and OFF
(NONE).
HActivate hover hold (must be flying slower than 15 knots, or be in autopilot mode)
tCycle through time compression (2x, 4x, 8x)
st Restore normal time
aN Open mission planner
Targeting Keys (pp. 5.10-12)
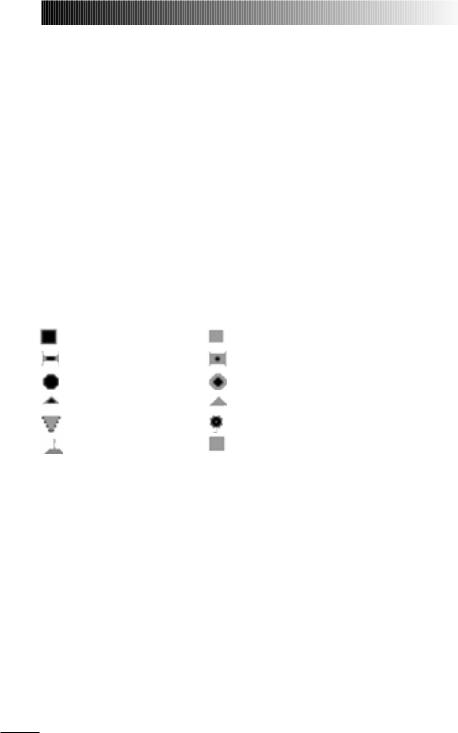
In the Longbow Apache, the square multi-function display (MFD) on the right side of the dashboard is your Tactical Situation Display (TSD). Small icons are potential targets, and an icon with a diamond represents the current target. Other MFDs exist — the types and locations vary by helicopter type. (See Cockpit/Systems, p. 2.1, for details.)
TTarget next enemy object
Targets have the following TSD icons: |
|
||
Light Structure |
Heavy Structure |
||
Light Armor |
Heavy Armor |
||
Light Wheeled Vehicle |
Heavy Wheeled Vehicle |
||
Light Artillery |
Heavy Artillery |
||
Airplane |
Helicopter |
||
Ground Threat (ASE) |
|
|
Out-of-Range |
|
|||
Note: The icons change if REALISTIC FCR SYMBOLS is active. See the Options Menu in the Install Guide for details.
0.14

0 : I N T R O D U C T I O N
Weapon Keys (pp. 5.13-19)
Target Reticle |
Rocket I-Beam Constraint |
ATA Constraint |
Hellfire Constraint |
The weapon constraint indicator is a square, circle or I-beam, depending on the active weapon and helicopter type. Line it up with the target reticle (small, dashed cross hairs that appear over a target in view). When the constraint border turns from dashed to solid, you have a VALID LOCK and can fire. (If you can’t fire, messages will appear on your screen — see Weapon Inhibit Field, p. 5.20.)
bSwitch active weapon to Hellfires/FFARs/Stingers
(On the Longbow Apache, the M230 Chain Gun is always active.)
eFire cannon (M230 Chain Gun)
z Fire rocket/missile
View Controls (p. 2.56)
1Front cockpit view
s1 Front view, no cockpit
4Virtual cockpit view (pannable; use a+ joystick to slew view)
6Next object view (pannable)
7Next target view (pannable)
View Panning and Zooming
You can pan/zoom the 4, 6and 7views. a+ joystick also pans these views.
5 (numpad) |
Reset view to center position |
8 (numpad) |
Pan view up |
2 (numpad) |
Pan view down |
6 (numpad) |
Pan view right |
4 (numpad) |
Pan view left |
+ (numpad) |
Zoom in |
- (numpad) |
Zoom out |
Ending the Mission
Pause or exit the mission/game with these keys:
aP Pause the game
aQ Quit the mission
aX Exit to Operating System
0.15

L O N G B O W 2
Useful Hints
♦In all three helicopter types, stay low to avoid detection. Follow the terrain, flying at a low altitude and speed (below 70 knots). Most importantly, try to mask your position as long as possible by hiding behind hills or structures, or in valleys. Only pop up when you absolutely need to.
♦When SAMs approach your aircraft, reduce altitude as quickly as you can without hitting the ground. This will help decrease your chances of being hit.
♦Try sticking with the Longbow Apache and radar Hellfire missiles until you’ve got the hang of the game. They’ll let you stay far enough away from your targets to take advantage of LOAL missile launch mode and reduce your exposure to enemy fire.
♦Kill the AAA threats that have the longest ranges first when entering enemy territory. This makes it easier to maneuver around other threats with shorter ranges. Keep an eye on your ASE MFD and weave around the arced firing ranges of the remaining SAMs and AAA.
♦Focus on mission objectives before you worry about other enemies. You'll almost always need to hit a few threats along the way — just make sure you reserve enough weapons to destroy your primary objectives. You can use any remaining ammo to hit stray targets on the way back.
♦You aren’t required to fly missions along pre-set waypoints. If you can identify a path with less resistance, try moving your waypoints. Keep in mind, however, that you’ll need to have ample fuel to return through an alternate route.
♦Listen to your CPG. He’ll tell you what’s out there, and where.
♦To identify nearby targets, press U. This toggles on target identification, which shows identifying names in the UPFRONT display as you switch targets.
♦If you suspect that you’ll face enemy helicopters in an area, clear out a section of SAMs near the anticipated area of engagement. This way, you’ll have room to climb and evade the helos without being tagged by a SAM.
♦If you become disoriented when dodging fire and think you may crash, quickly press A so that the game’s autopilot function will restore level flight. As soon as your altitude and bearing become stable, continue the fight.
♦Memorize the key commands for your wingman/air support/artillery strikes. Try to use your limited number of artillery strikes on concentrated SAM areas, and use the air support strikes only on AAA positions. (If you use air strikes on SAM sites, you risk having your A-10/F-16 shot down. This will subtract promotion points from your mission score.)
0.16

1 On the Base

L O N G B O W 2
1. ON THE BASE
READ JANE’S ........................................ |
1.1 |
BUNKHOUSE ......................................... |
1.2 |
Creating a New Pilot .......................................... |
1.3 |
Pilot Careers...................................................... |
1.4 |
Deleting a Pilot.................................................. |
1.4 |
Switching the Active Pilot ................................... |
1.4 |
TRAINING BUILDING ............................. |
1.5 |
INSTANT MISSION HELICOPTER ............. |
1.6 |
MULTI-PLAYER MISSION BUILDING ........ |
1.6 |
SINGLE MISSION BUILDING ................... |
1.6 |
CAMPAIGN MISSION BUILDING ............. |
1.8 |
Campaign Options ............................................. |
1.8 |
Resuming a Campaign ....................................... |
1.9 |
MOBILE MISSION |
|
PLANNING CELL (MMPC) ..................... |
1.10 |
Mission Planner ............................................... |
1.11 |
Menu Bars....................................................... |
1.11 |
Function Buttons.............................................. |
1.13 |
Mission Summary Bar...................................... |
1.15 |
The Map.......................................................... |
1.15 |
Waypoint Symbology ....................................... |
1.16 |
Moving, Adding and Deleting Waypoints ...... |
1.16 |
Waypoint Information Window......................... |
1.17 |
Fly Mission ...................................................... |
1.19 |
Trash Mission................................................... |
1.19 |
ENDING A MISSION ............................ |
1.20 |
Landing at a FARP ........................................... |
1.20 |
Debriefing Area............................................... |
1.20 |
Saving Your Progress ....................................... |
1.20 |
Crashing, Surviving and Dying ......................... |
1.22 |
GUARD SHACK.................................... |
1.22 |
1.2

1 : O N T H E B A S E
The first thing you see when you start the game is an overhead view of the complex. Each building performs one or more different functions. To see what action spots are available, right-click anywhere on the screen. To access a particular building, move the cursor over it and left-click. Once you’ve finished exploring the Base, proceed to Training Building, p. 1.5, or Flight Training, Chapter 4.
|
|
|
|
Campaign |
|
|
Single |
Instant |
|
|
Missions |
|
|
|
|
Action |
|
|
Select |
Commo Building |
|
|
Pilot |
|
|
|
|
(Multi-Player) |
|
|
Exit to |
|
|
|
Operating |
Tutorial/ |
|
|
System |
Training |
|
|
|
|
|
|
|
|
|
|
|
Read Jane’s
The Jane’s Military Aircraft, Vehicles and Logistics book lists a variety of information about most objects in the game and about the Jane’s organization. The information and photos that appear here come directly from Jane’s Information Group, and are identical to the published versions (although some have partial entries).
Jane’s reference books can be accessed from the Bunkhouse, Training Building, Commo Building, MMPC and Debriefing room.
1.1

L O N G B O W 2
Each tabbed section contains information about items in that category.
♦ To activate, highlight the red Jane’s book, then left-click.
Aircraft |
Displays information on helicopters and airplanes in the game. |
Armour |
Displays information on armored vehicles in the game. |
Vehicles |
Displays information on unarmored ground vehicles in the game. |
Air Defense |
Displays information on AA guns and SAM sites in the game. |
About Jane’s |
Displays the title page of the Jane’s book and gives information |
|
on the Jane’s organization. |
Close |
Returns to the Base. |
By using these pages, you can learn about the objects in the game.
♦Left-click on the book tabs to change chapters.
♦Left-click on pictures on the left page to enlarge them to full-screen view. Left-click again to return to the normal page view.
♦Left-click inside either white text box to enlarge the text page. Left-click the vertical scroll bars to scroll through statistics or descriptive text. (Or, use W and Zto scroll.) Left-click to return to the normal page.
♦Left-click on the gray arrows at the bottom of either page to turn the page.
♦Left-click-and-hold on the 3-D object box on the right-hand page to rotate the object. Dragging the mouse cursor rotates the object in any direction. Pressing the left and right mouse buttons simultaneously lets you control zoom. Push the mouse forward to zoom in, backward to pull back.
BUNKHOUSE
Select Pilot appears when this building is highlighted.
The Bunkhouse is where all existing pilot records are stored. Each time you start the game, the pilot that you last used will be the active pilot.
Left-click on the building to see a row of lockers. Here, you can create and store six pilots (one per locker). Once a pilot is MIA (Missing In Action) or KIA (Killed In Action), he/she is no longer available, and a folded flag appears in the locker.
Note: You must create a pilot before flying Single or Campaign Missions. Once you create/select a pilot, he/she will remain active until you create/select a different one.
To select a different active pilot, click on his/her flight helmet.
To create a new pilot, click on a locker and it will open. Click on the notebook to select a unit and give the pilot a name and callsign. The currently selected pilot has a flight bag in place of the helmet.
Left-click on the door to exit this room and return to overhead Base view.
1.2
1 : O N T H E B A S E
Creating a New Pilot
A locker with a flight bag or helmet indicates an active pilot. A locker with a folded flag means that the pilot is inactive (either missing or killed in action).
To replace a dead pilot with a new one, select the dead pilot and change the name. This will replace the pilot with a newly created one.
CHANGE UNIT
Highlight the space at the top of the spiral notebook and leftclick to change your unit affiliation. You can left-click on the unit insignias to view available units and select the one you wish to join, and you can enter a nickname for your squad.
CREATE NEW PILOT Left-click on the name of the default pilot to change the pilot’s name and callsign.
You will be given a window with the current pilot’s name and callsign. Left-click on the end of the name and backspace over it, then enter the name you prefer in the space. Then, press e. If you wish to change your callsign, t down to the callsign field and do the same. Repeat for your squad nickname.
When you have the name, callsign and squad name you wish, left-click on ACCEPT. Or left-click CANCEL to exit with no changes.
VIEW SQUAD DATA Left-click on this folder to open it and view a variety of information about the performance of that pilot and the rest of his squad.
Left-click on the bottom of the folder to toggle between pages, and on the top to exit back to the locker.
The first page of Squad Data is your personal record. At the top are your name, callsign, unit and squad. The left column consists of your current rank, total number of missions flown and number successfully completed, flight hours in each of the four aircraft types, your current score (your combat activity and successes, expressed in points) and your rating vs. other pilots in your unit, expressed as a percentile. Finally, all campaigns and training missions completed by the pilot are listed. The second column shows the number of times you’ve fired and hit with each weapon, and rates your efficiency with it, and also shows your confirmed kills sorted by unit type.
The second page of the folder displays information about your squad. Each squad consists of 16 helicopter crews. The page displays the name of each pilot and CP/G, the type of helicopter flown by that team (your entry will dis-
1.3
L O N G B O W 2
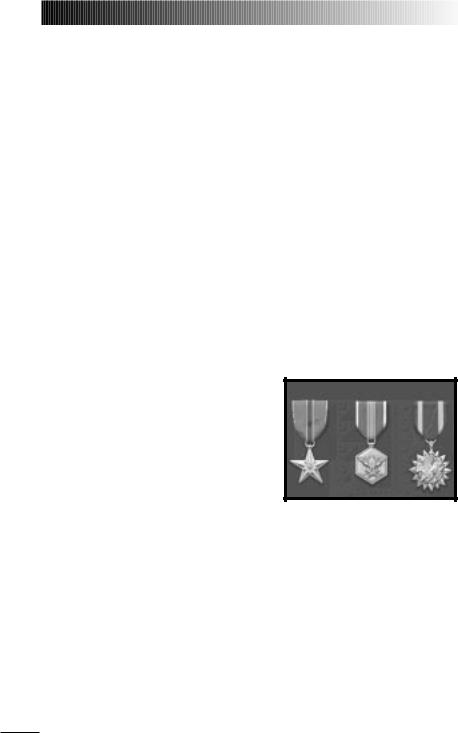
VIEW MEDALS
play the type of helicopter flown on your most recent mission), an efficiency rating for the team, total number of kills for the team, and total flight time logged.
Each pilot created is assigned a squadron of computergenerated characters upon creation. This page keeps track only of information about that computer-generated squad. It will not reflect any information about any live players you may fly with during multi-player missions.
Left-click on the box to the left to view medals you’ve earned. As you progress in the campaign, you’ll receive medals and campaign ribbons. Right-click in the medals screen to see the names of all of the medals.
EXIT |
Close the locker. |
Once you create a pilot and save your progress, this pilot remains active. (Only one pilot can be active at once.) Whoever was flying the last sortie is the default pilot when you resume the game.
♦Left-click on the locker door (at the left-hand side of the screen) to close the locker.
♦Left-click on the door or on the active pilot’s flight bag to exit the Bunkhouse. You can now fly this pilot in any mission.
Pilot Careers
Every mission you fly logs hours for the active pilot and adds points to his/her cumulative score. Single or Campaign missions all get recorded on the pilot’s stat sheet. (Instant Action missions, however, do not.) If you die in any mission, the active pilot will not be available for future missions, unless you re-fly the mission and survive.
Once you’ve accumulated enough points, flown enough missions, or met some other condition, you’ll find new ribbons and medals in your pilot’s locker.
Deleting a Pilot
Once you create a pilot, that locker is occupied until the pilot is dead, captured or deleted. If you die or are captured during a mission and choose to save your progress at that point, a yellow ribbon and flag appear in the locker. The ribbon and flag remain there until you create a new pilot in that locker.
Switching the Active Pilot
To resume another pilot’s career, left-click on the flight helmet of the pilot you want to use. A flight bag will appear in the top portion of the locker — left-click on it to return to the overhead Base view. Now, missions you fly will be saved to that pilot’s record.
1.4

1 : O N T H E B A S E
TRAINING BUILDING
Tutorial/Training appears when this building is highlighted.
Before you head for the flight area, you may want to hone your piloting skills. The Training Building offers a complete, interactive tutorial that introduces you to the Longbow Apache, Kiowa Warrior, Black Hawk and helicopter flight in general.
Basic Black Hawk |
|
|
|
Exit |
|
|
|
||
Training |
|
|
|
Basic Kiowa |
|
|
|
|
|
Basic Longbow |
|
|
|
Training |
Training |
|
|
|
Read Jane’s |
Free-Flight |
|
|
|
|
|
|
|
|
|
Gunnery Practice |
|
|
|
Multi-media Room |
Advanced Longbow |
|
|
|
Basic Flight |
Training |
|
|
|
Training |
|
|
|
|
|
You can access six different training modules. Three are accessed by clicking on the books on the shelf, the other three by clicking on the helicopter models suspended from the ceiling.
The Basic Flight Training mission introduces you to the fundamentals of combat helicopter operation. There are also specific missions for training in each of the three helicopter types (two missions — basic and advanced — for the Longbow, and one each for the Kiowa and Black Hawk). There’s also a Free Flight Gunnery Range mission where you can sharpen your flight and weapons skills at your own pace.
VIEW FILMS
Brings you to an area where you can view promotional films about the helicopters and their systems. This area also allows you to view any game cinematics you’ve seen.
♦Left-click on the stack of films to display a list of promotional films.
♦Left-click on a film name in the dialog box to load it.
♦To stop a movie, left click the mouse or press q.
The News Scrapbook records cinematics as you progress through the campaign. Jane’s displays background information on Jane’s Information Group.
♦ Left-click on the light switch to return to the base view.
1.5
L O N G B O W 2
INSTANT MISSION HELICOPTER
Instant Action appears when this helicopter is highlighted.
Instant Action missions are for players who want to get up in the air quickly and destroy targets. Left click on the grounded helicopter to start an Instant Action Mission (single-player) or Death Match (multi-player). For details, see In a Hurry? on p. 0.12.
MULTI-PLAYER MISSION BUILDING
Commo Building appears when this building is highlighted.
From this building you can connect to, join or organize a multi-player Longbow 2 session. For complete instructions see the: Multi-Player Guide.
SINGLE MISSION BUILDING
Single Missions appears when this building is highlighted.
When you enter this building you are taken to the MMPC (see p. 1.10), from which you can elect to fly any one of ten pre-generated missions, or a random mission.
When you left-click on the notebook you are given a menu of pre-generated missions from which to select.
Mission |
Planning |
Computer |
Fly |
Mission |
Random |
Mission |
Clipbaard |
Single |
Mission |
Notebook |
When you left-click on the
clipboard you are given a list of parameters with which to customize a random mission. You can either play a completely random situation, or pre-set the nature and difficulty of your task by adjusting the skill level of the enemy pilots (and of allied forces), the weather, the time of day, the mission type and more.
♦To customize a mission, move your cursor over an option (most options default to RANDOM) and left-click to cycle through available parameters.
THEATER OF OPERATION |
Available options are RANDOM, WESTERN AZERBAIJAN, CENTRAL |
|
AZERBAIJAN, EASTERN AZERBAIJAN or FORT IRWIN NTC (National |
|
Training Center). |
TIME OF DAY |
Set the mission time to RANDOM, DAY, DAWN/DUSK or NIGHT. |
WEATHER |
Adjust the weather to RANDOM, GOOD (clear skies), FAIR |
|
(partly cloudy) or POOR (cloudy, drizzly). |
WEAPONS AVAILABILITY |
You can limit your weapon selection by selecting RANDOM, |
|
ALLOW ALL, NO HELLFIRES, NO STINGERS and ROCKETS ONLY. |
1.6

1 : O N T H E B A S E
You can give one side or the other a situational advantage.
Select FRIENDLY ADVANTAGE, ENEMY ADVANTAGE, NEUTRAL or
RANDOM.
The remaining parameters can be set independently for both both teams.
MISSION TYPES |
Set the mission objective. |
|
STRIKE (attack enemy positions behind enemy lines) |
|
ESCORT (escort friendlies into dangerous territory) |
|
RECON (scout enemy forces behind enemy lines) |
|
CAP (Combat Air Patrol — engage airborne enemies) |
|
CAS (Combat Air Support — provide air support for a friendly |
|
ground offensive) |
|
RANDOM |
SKILL LEVEL |
Change the skill level for computer-controlled helicopter |
|
units on both sides of the battle. |
|
CAT III (Crack Enemies possess excellent flying skills and |
|
are difficult to kill) |
|
CAT II (Veteran Enemies possess average flying skills and |
|
are moderately hard to kill) |
|
CAT I (Green Enemies possess poor flying skills and are |
|
easy to kill) |
|
RANDOM |
GROUND FORCES |
Select LIGHT, MEDIUM, HEAVY or RANDOM for each side. |
AIR DEFENSES |
Select LIGHT, MEDIUM, HEAVY or RANDOM for each side. |
HELICOPTERS |
Select LIGHT, MEDIUM, HEAVY or RANDOM for each side. |
AIR SUPPORT |
Select LIGHT, MEDIUM, HEAVY or RANDOM for each side. |
ARTILLERY SUPPORT Select LIGHT, MEDIUM, HEAVY or RANDOM for each side.
♦When you’re finished configuring the mission, left-click ACCEPT PARAMETERS to lock in your choices, or left-click on the pencil to exit to the Clipboard. Once your parameters are set, the program then generates a random mission according to your specifications. Left-click on the Mission Planning Computer to view your mission map, briefing and to set the mission parameters. Then exit back to the MMPC and fly the mission by left-clicking on the helmet.
Details for the MMPC options appear on pp. 1.10-19.
1.7
L O N G B O W 2
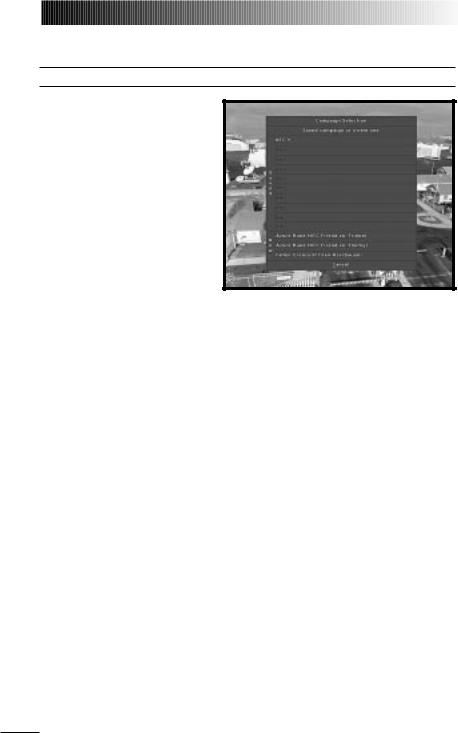
CAMPAIGN MISSION BUILDING
Campaign Missions appears when this building is highlighted.
When you left-click on this building, a plaque displays with both FALLEN CRESCENT and AZURE RUNE options. The Azure Rune training campaign has two variants. In the Friend vs. Enemy campaign, the opposing force uses authentic international arms, while in the Friend vs. Friend campaign both sides have American armaments (thereby providing a realistic context for a multiplayer, head-to-head campaign).
Select one of the options to start
that campaign. (See Chapter 6: Campaigns for background information on both campaigns.)
To begin a new campaign:
1.Left-click on the Campaign Mission Building.
2.Select the campaign you wish to fly.
You can have a maximum of ten saved campaign games.
If you attempt to create a new campaign game, but already have ten campaigns in progress, a plaque will prompt you to replace one of them. Select the campaign slot you wish to replace.
3.Enter a name for your save game file.
4.Set campaign options (see below).
You will be taken to the MMPC for your first mission briefing.
Campaign Options
Note: For info on options specific to Multi-Player play, see the Multi-Player Guide.
You will have to select among the following options before starting a new campaign.
CHALLENGE LEVEL |
Select Easy, Average or Hard. |
FORCE ADVANTAGE |
Which side in the conflict has the numerical advantage. |
|
Select NEUTRAL, FRIENDLY ADVANTAGE or ENEMY ADVANTAGE. |
CAMPAIGN LIMIT |
Controls the amount of game-time you are given to suc- |
|
cessfully complete the campaign. Select TWO, THREE, FOUR |
|
WEEKS or UNLIMITED. |
1.8

1 : O N T H E B A S E
LIMIT RADAR LONGBOWS If this toggle is set to ON, destroyed Longbows will not be
|
replaced immediately. |
LIMIT OTHER |
If this toggle is set to ON, destroyed Kiowas, Longbows |
HELICOPTERS |
without radars and Black Hawks will not be replaced |
|
immediately |
LIMIT MISSILES |
If this toggle is set to ON, expended Hellfires and Stingers |
|
will not be replaced immediately. |
LIMIT ROCKETS |
If this toggle is set to ON, expended rockets will not be |
|
replaced immediately. |
ORDINANCE |
Controls the speed at which missiles and rockets will be |
REPLACEMENT |
resupplied, if either is limited. Select SLOW, AVERAGE or FAST. |
HELICOPTER |
The rate at which destroyed helicopters will be replaced, |
REPLACEMENT |
if any of the helicopter types are limited. Select SLOW, |
|
AVERAGE or FAST. |
LIMITED INTELLIGENCE |
If this toggle is set to ON, the “fog of war” may prevent you |
|
from receiving accurate information about the enemy |
|
forces in your briefings. |
TIME OF DAY |
Select RANDOM, ALWAYS DAY or ALWAYS NIGHT. |
VISIBILITY |
Select RANDOM, ALWAYS GOOD or ALWAYS POOR. |
Resuming a Campaign
When you restart the game and want to resume a campaign, left-click on the Campaign building. Then, left-click on the save game name that you used when you saved that campaign game.
The Campaign Mission Building will sometimes play newscasts that update you on the situation. Following that, you’ll find yourself in the MMPC, where you prepare for your next mission.
See pp. 1.10-19 for details on what you can do in this area.
1.9
L O N G B O W 2
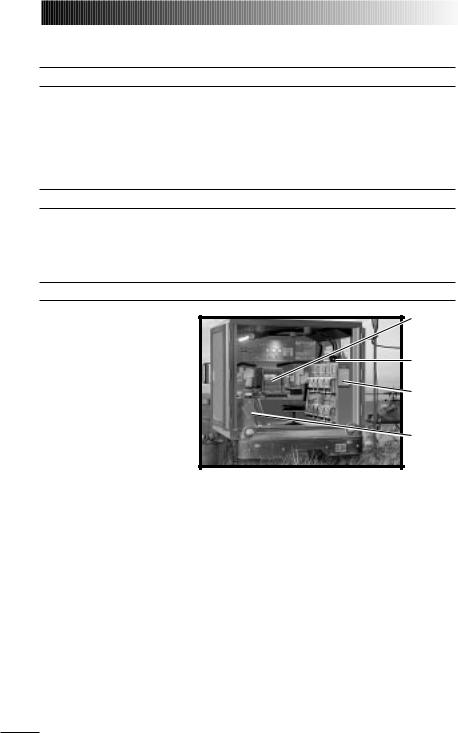
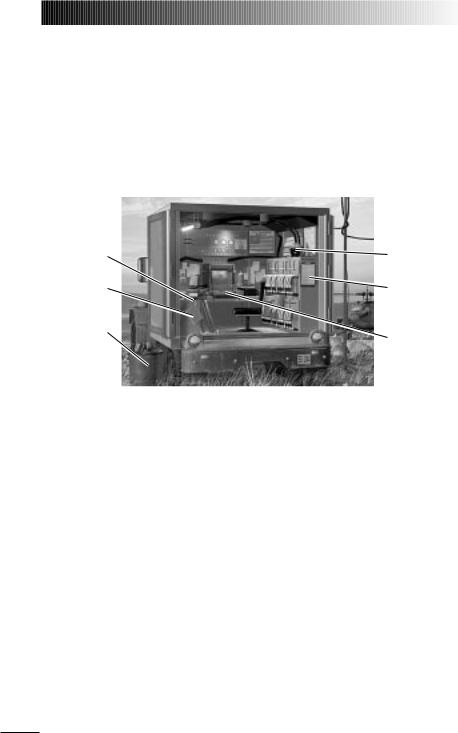
MOBILE MISSION PLANNING CELL (MMPC)
The MMPC is a tent or truck-mounted system used for tactical mission planning in the field. Left-clicking on either the Campaign or Single Mission Building will take you to the MMPC.
When you left-click on the notebook (after entering from the Single Mission Building) you are given a menu of pre-generated missions from which to select.
When you left-click on the clipboard (after entering from the Single Mission Building) you are given a list of parameters from which to customize a random mission.
Read Jane’s |
|
Fly Mission |
Single |
|
Random |
Mission |
|
Mission |
List* |
|
Planner* |
Trash Mission |
|
Mission Planner |
|
|
|
|
|
|
* If in Single Mission Mode
Right-click to display text for the hotspots. You have five options in this area. When you pass the cursor over an option area, the option will highlight.
The following options are available in both Single and Campaign missions.
MISSION PLANNER
Left-click on the computer to access the Mission Planner (available only after selecting a mission).
READ JANE’S |
Left-click on the Jane’s book on top of the table to view |
|
statistics, pictures and text descriptions of objects in the |
|
game, just as they appear in the Jane’s books. |
FLY MISSION
TRASH MISSION
Left-click on the green flight helmet to begin the mission (available only after selecting a mission).
Left-click on the trash can to cancel the mission and return to the main screen for the current mission type.
1.10

1 : O N T H E B A S E
Mission Planner
♦Left-click on the mission planning computer on the desk to view the Mission Planner display. You can use this interface to add/delete waypoints (planned navigation points), view intelligence reports on what to expect during the mission, arm and assign your squad’s helicopters, view in detail the map of the mission area, and more. You also
get your briefing here (in text form).
In addition to planning your own mission, the mission planner allows you to direct the computer-controlled flights for the rest of the helicopters in your squad.
♦Each mission has a full suite of default options with which you can fly, so you never have to change anything in the mission planner.
♦Left-click the red power button to close the tactical planning display and return to the Mission Planning Center. From the Mission Planning Center, left-click on the Flight Helmet to fly the mission with your current changes to the Mission Planner, or left-click on the waste basket or press qto trash the mission and restore defaults.
♦Another name for a mission is an Air Tasking Order (ATO).
Using the mission planner gives you control over the mission, not just for your own helicopter but for an entire squadron. You can assign and arm helicopters, move or delete waypoints, and even disregard certain objectives entirely to concentrate your forces on the goals you consider most important.
Even if you have absolutely no interest in tinkering with the default mission parameters assigned by the computer, you are encouraged to at least check the briefing for any special instructions.
Menu Bars
There are four menu bars across the top of the Mission Planner Screen: System, Overlays, Map View, Waypoints. You can use them to turn certain map features on/off. Whatever options you select load the next time you use the Mission Planner.
1.11

L O N G B O W 2
System. This bar contains only three options, one of which is found only in multiplayer games.
Exit. Closes the Mission Planner and returns you to the Mission Planning center. This option is identical in function to the red power button.
Restore All Defaults. Erases all changes to the Mission Planner and restores the computer’s original defaults.
Transmit FARP Data. (multi-player only, see Multi-Player Guide) Transmits
Overlays. Toggles the various layers of the map on and off, to make it easier to notice significant details.
FARPS. Toggles FARPS on and off. FARPS (Forward-Arming And Refueling Points) are the starting points for each mission. There will usually be four FARPs per mission, each of which can launch one two-helicopter flight (Lead and Wingman). If you want to mass your forces so more than two helicopters engage any given objective, you’ll have to assign a flight(s) from another FARP to rendezvous at the objective.
Friendly Units. Toggles the friendly units (blue counters) on and off.
Enemy Units. Toggles the opposing forces’ units (red counters) on and off.
Air Threats. Toggles known air threats on and off. The rings around the air threat counters indicate the maximum engagement range of the threat.
Phase Lines. Toggles the Phase Line on and off. These are the imaginary lines indicating the interface between friendly-controlled and enemy-controlled territory — the battle front, if you will.
Battle Areas. The map indicates the general operation area for each mission (ATO). This option toggles those indicators off, as well as the arrow that indicates an escorted friendly’s direction of advance.
5 km Grid Lines. Toggles the grid lines on the map on or off.
Map View. Controls the overall scale and appearance of the map display.
Zoom In. Zooms in on the map, until maximum magnification is reached.
Zoom Out. Zooms out until the broadest possible scale is reached.
Satellite. When this option is selected, the map appears as a satellite photo of the terrain.
Contour. When this option is selected, the map appears as a geographic contour map.
NATO Icons. When this option is selected, units on the map are displayed using standard military symbols.
Picture Icons. When this option is selected, units on the map are displayed using pictographic icons depicting their function.
1.12
 Loading...