


TM
SPECIAL
OPERATIONS
MANUAL
© 2001 Red Storm Entertainment, Inc. Red Storm and Red Storm
Entertainment are trademarks of Red Storm Entertainment, Inc. Red StormEntertainment, Inc. is a Ubi Soft Entertainment company. All Rights Reserved. Tom Clancy's Ghost Recon is a trademark of Rubicon, Inc. under license to Ubi Soft Entertainment.

CONTENTS
Introduction. . . . . . . . . . . . . . . . . . . . . . . . . . . . 4
Overview . . . . . . . . . . . . . . . . . . . . . . . . . . . . . . 4
Quick Start. . . . . . . . . . . . . . . . . . . . . . . . . . . . . 5
Quickstart - Starting a New Campaign . . . . . 5
Quickstart - Joining a Multiplayer Game . . . . 5
Quickstart - Starting a Multiplayer Game . . . 5
Minimum Specifications . . . . . . . . . . . . . . . . . . . 6
Installation . . . . . . . . . . . . . . . . . . . . . . . . . . . . 7
Uninstalling Ghost Recon . . . . . . . . . . . . . . . . . . 7
Main Menu . . . . . . . . . . . . . . . . . . . . . . . . . . . . 8
Training Menu . . . . . . . . . . . . . . . . . . . . . . . . . . 9
Playing the Training Missions . . . . . . . . . . 9 Do-Over . . . . . . . . . . . . . . . . . . . . . . . . 9 The Training Missions are:. . . . . . . . . . . 10 T01Obstacle Course . . . . . . . . . . . . . . . 10 T02Small Arms. . . . . . . . . . . . . . . . . . . 10 T03Grenades . . . . . . . . . . . . . . . . . . . . 10 T04Heavy Weapons. . . . . . . . . . . . . . . . 10 T05Machine Guns . . . . . . . . . . . . . . . . . 10 T06Demolitions. . . . . . . . . . . . . . . . . . . 10 T07Command . . . . . . . . . . . . . . . . . . . . 10 Don’t Go There . . . . . . . . . . . . . . . . . . 10 Training Status . . . . . . . . . . . . . . . . . . 10 Ending Training . . . . . . . . . . . . . . . . . . 10
Campaign . . . . . . . . . . . . . . . . . . . . . . . . . . . . . 11
New Campaign . . . . . . . . . . . . . . . . . . . . 11
Deleting a Campaign . . . . . . . . . . . . . . . . 11
Resuming a Campaign . . . . . . . . . . . . . . . 12
Campaign Mission . . . . . . . . . . . . . . . . 12
Select Saved Games. . . . . . . . . . . . . . . 12
Options . . . . . . . . . . . . . . . . . . . . . . . . . . . . . . 13
Cancel . . . . . . . . . . . . . . . . . . . . . . . . 13 Reset to Defaults . . . . . . . . . . . . . . . . 13 Accept . . . . . . . . . . . . . . . . . . . . . . . . 13 Where You’re Coming From. . . . . . . . . . 13 Changing Options . . . . . . . . . . . . . . . . . . 13 Gameplay . . . . . . . . . . . . . . . . . . . . . . . . 14 Input . . . . . . . . . . . . . . . . . . . . . . . . . . . 14 Already Taken . . . . . . . . . . . . . . . . . . . 14 Saving a Key Configuration . . . . . . . . . . 14 Loading a Key Configuration. . . . . . . . . . 15 Mouse Look Reverse Y . . . . . . . . . . . . . 15 Multiplayer . . . . . . . . . . . . . . . . . . . . . . . 15 Chat Messages . . . . . . . . . . . . . . . . . . 15 Server Name. . . . . . . . . . . . . . . . . . . . 16
Allow Remote Access . . . . . . . . . . . . . . 16
Remote Access Password. . . . . . . . . . . 16
MotD. . . . . . . . . . . . . . . . . . . . . . . . . 16
Player Name . . . . . . . . . . . . . . . . . . . . 16
Multiplayer - Main Menu Only . . . . . . . . . . 16
Behind Firewall . . . . . . . . . . . . . . . . . . 16
Choose Network Interface Card . . . . . . . 16
Join Port . . . . . . . . . . . . . . . . . . . . . . 16
If It Ain’t Broke... . . . . . . . . . . . . . . . . . 16
Graphics . . . . . . . . . . . . . . . . . . . . . . . . . . . . . 17
Resolution . . . . . . . . . . . . . . . . . . . . . 17
Texture Detail . . . . . . . . . . . . . . . . . . . 17
Shadows . . . . . . . . . . . . . . . . . . . . . . 17
Why Change Shadows?. . . . . . . . . . . . . 17
Show Dead Bodies . . . . . . . . . . . . . . . . 17
Compress Textures . . . . . . . . . . . . . . . 17
Character Vertex Weighting . . . . . . . . . 17
Maximum Bullet Holes . . . . . . . . . . . . . 18
Gamma Setting . . . . . . . . . . . . . . . . . . 18
Fast Changes . . . . . . . . . . . . . . . . . . . 18
Particle Detail . . . . . . . . . . . . . . . . . . . 18
Z-Buffer Depth . . . . . . . . . . . . . . . . . . 18
Mods . . . . . . . . . . . . . . . . . . . . . . . . . . 18
Sound . . . . . . . . . . . . . . . . . . . . . . . . . . 19
Master Switch. . . . . . . . . . . . . . . . . . . 19
Volume. . . . . . . . . . . . . . . . . . . . . . . . 19
Quick Mission . . . . . . . . . . . . . . . . . . . . . . . . . 20
Difficulty and Game Type . . . . . . . . . . . . 20
Load Saved Game . . . . . . . . . . . . . . . . 20
Main Menu . . . . . . . . . . . . . . . . . . . . . 20
Start . . . . . . . . . . . . . . . . . . . . . . . . . 20
Replays . . . . . . . . . . . . . . . . . . . . . . . . . . . . . . 20
Starting a Game . . . . . . . . . . . . . . . . . . . . . . . . 21
Briefing . . . . . . . . . . . . . . . . . . . . . . . . . 21
Objective List . . . . . . . . . . . . . . . . . . . 21
Default Objectives . . . . . . . . . . . . . . . . 21
Briefing Text . . . . . . . . . . . . . . . . . . . . 21
Mission Information . . . . . . . . . . . . . . . 22
Screen Buttons . . . . . . . . . . . . . . . . . . 22
Platoon Setup . . . . . . . . . . . . . . . . . . . . . 22
Fireteam Designation . . . . . . . . . . . . . . 22
Soldiers . . . . . . . . . . . . . . . . . . . . . . . 23
Specialists . . . . . . . . . . . . . . . . . . . . . 23
Statistics . . . . . . . . . . . . . . . . . . . . . . 24
Unassigning Combat Points . . . . . . . . . . 24
1
CONTENTS
Kit. . . . . . . . . . . . . . . . . . . . . . . . . . . 24 The Right Tools for the Right Job . . . . . . 24 Screen Buttons . . . . . . . . . . . . . . . . . . 25
Action Screen . . . . . . . . . . . . . . . . . . . . . . . . . 26
Movement . . . . . . . . . . . . . . . . . . . . . . . 26
Looking . . . . . . . . . . . . . . . . . . . . . . . 26
Walking . . . . . . . . . . . . . . . . . . . . . . . 26
Stance . . . . . . . . . . . . . . . . . . . . . . . . 26
Fireteam Stance . . . . . . . . . . . . . . . . . 27
Running . . . . . . . . . . . . . . . . . . . . . . . 27
Shuffling . . . . . . . . . . . . . . . . . . . . . . . 27
Peeking . . . . . . . . . . . . . . . . . . . . . . . 27
Switching Fireteams. . . . . . . . . . . . . . . 28
Actions . . . . . . . . . . . . . . . . . . . . . . . . . 28
.50 Caliber Machine Guns . . . . . . . . . . . 28
Doors . . . . . . . . . . . . . . . . . . . . . . . . 28
Out of My Way . . . . . . . . . . . . . . . . . . 28
Combat . . . . . . . . . . . . . . . . . . . . . . . . . 28
Firing . . . . . . . . . . . . . . . . . . . . . . . . . 29
Rate of Fire . . . . . . . . . . . . . . . . . . . . 29
Switching Weapons . . . . . . . . . . . . . . . 29
Changing Magazines. . . . . . . . . . . . . . . 29
Zoom In and Zoom Out . . . . . . . . . . . . . 29
Binoculars . . . . . . . . . . . . . . . . . . . . . 30
Demolitions Charges . . . . . . . . . . . . . . 30
Claymores . . . . . . . . . . . . . . . . . . . . . 30
Sensors . . . . . . . . . . . . . . . . . . . . . . . 30
The On-Screen Interface . . . . . . . . . . . . . . . . . . 31
In-Game Screen Elements. . . . . . . . . . . . . 31
Friendly Troops . . . . . . . . . . . . . . . . . . 31
Hostiles . . . . . . . . . . . . . . . . . . . . . . . 31
Vehicles . . . . . . . . . . . . . . . . . . . . . . . 31
Terrain . . . . . . . . . . . . . . . . . . . . . . . . 31
Refugees . . . . . . . . . . . . . . . . . . . . . . 31
Rescuing Hostages . . . . . . . . . . . . . . . 31
Interface Elements . . . . . . . . . . . . . . . . . 32
Soldier Panel. . . . . . . . . . . . . . . . . . . . 32
Threat Indicator. . . . . . . . . . . . . . . . . . 32
Weapon Panel . . . . . . . . . . . . . . . . . . . 33
No Clip Number? . . . . . . . . . . . . . . . . . 33
Reticle . . . . . . . . . . . . . . . . . . . . . . . . 33
Night Vision . . . . . . . . . . . . . . . . . . . . 34
Messages . . . . . . . . . . . . . . . . . . . . . 34
The Command Interface . . . . . . . . . . . . . . . . . . 35
The Command Map . . . . . . . . . . . . . . . . . 35
Rules of Engagement . . . . . . . . . . . . . . 35
RoE, Cover and Formations . . . . . . . . . . 36
Waypoints . . . . . . . . . . . . . . . . . . . . . 37
Firing Arcs . . . . . . . . . . . . . . . . . . . . . 37
Soldier Cards . . . . . . . . . . . . . . . . . . . . . 38
Nothing to See Here. . . . . . . . . . . . . . . 38
Quick Save and Quick Load . . . . . . . . . . . . 38
Quick Load . . . . . . . . . . . . . . . . . . . . . 38
Quick Save . . . . . . . . . . . . . . . . . . . . . 38
Mission Status . . . . . . . . . . . . . . . . . . . . 39
Continue. . . . . . . . . . . . . . . . . . . . . . . 39
Save Game . . . . . . . . . . . . . . . . . . . . . 39
Options . . . . . . . . . . . . . . . . . . . . . . . 39
Restart . . . . . . . . . . . . . . . . . . . . . . . 39
Abort. . . . . . . . . . . . . . . . . . . . . . . . . 39
End Mission . . . . . . . . . . . . . . . . . . . . 39
Quit . . . . . . . . . . . . . . . . . . . . . . . . . . 39
Finishing a Mission. . . . . . . . . . . . . . . . . . . . . . 40
After Action Review (AAR) Screen . . . . . . . 40
Mission Info . . . . . . . . . . . . . . . . . . . . 40
Objective Status . . . . . . . . . . . . . . . . . 40
Platoon Status . . . . . . . . . . . . . . . . . . 40
View Replay . . . . . . . . . . . . . . . . . . . . 40
Save Replay . . . . . . . . . . . . . . . . . . . . 40
Menu Button. . . . . . . . . . . . . . . . . . . . 40
Forward Button . . . . . . . . . . . . . . . . . . 40
Back Button . . . . . . . . . . . . . . . . . . . . 40
Saving a Replay . . . . . . . . . . . . . . . . . . 41
Multiplayer . . . . . . . . . . . . . . . . . . . . . . . . . . . 42
Multiplayer Setup . . . . . . . . . . . . . . . . . . 42
Create Game . . . . . . . . . . . . . . . . . . . 42
Game List. . . . . . . . . . . . . . . . . . . . . . 42
LAN Game List . . . . . . . . . . . . . . . . . . 42
Joining a Game . . . . . . . . . . . . . . . . . . 42
Internet Game List. . . . . . . . . . . . . . . . 43
Join Port . . . . . . . . . . . . . . . . . . . . . . 43
Player Setup. . . . . . . . . . . . . . . . . . . . . . 43
Persistent Settings . . . . . . . . . . . . . . . 43
Soldier/Roster . . . . . . . . . . . . . . . . . . . 44
Roster . . . . . . . . . . . . . . . . . . . . . . . . 44
Observer Mode . . . . . . . . . . . . . . . . . . 44
Soldier . . . . . . . . . . . . . . . . . . . . . . . . 44
Game Information . . . . . . . . . . . . . . . . 45
Warning . . . . . . . . . . . . . . . . . . . . . . . 45
Message Window . . . . . . . . . . . . . . . . 45
2
CONTENTS
Edit Server . . . . . . . . . . . . . . . . . . . . . 45
Request Eject . . . . . . . . . . . . . . . . . . . 45
Server Info . . . . . . . . . . . . . . . . . . . . . 46
Exiting the Screen . . . . . . . . . . . . . . . . 46
Server Setup . . . . . . . . . . . . . . . . . . . . . 46
Map Selection . . . . . . . . . . . . . . . . . . . 46
Team Selector . . . . . . . . . . . . . . . . . . . 46
Game Details . . . . . . . . . . . . . . . . . . . 47
Game Types . . . . . . . . . . . . . . . . . . . . . . 47
Solo. . . . . . . . . . . . . . . . . . . . . . . . . . 47
Co-Op . . . . . . . . . . . . . . . . . . . . . . . . 47
Team . . . . . . . . . . . . . . . . . . . . . . . . . 47
Mission List . . . . . . . . . . . . . . . . . . . . 48
Respawn . . . . . . . . . . . . . . . . . . . . . . 48
Kit Restrictions . . . . . . . . . . . . . . . . . . 48
Pregame Session Timeout . . . . . . . . . . . 49
Loading and Saving Game Settings . . . . . 49
OK . . . . . . . . . . . . . . . . . . . . . . . . . . 49
Cancel . . . . . . . . . . . . . . . . . . . . . . . . 49
Escape. . . . . . . . . . . . . . . . . . . . . . . . 49
Message Window . . . . . . . . . . . . . . . . 49
Remote Access. . . . . . . . . . . . . . . . . . . . 49
Multiplayer Gameplay . . . . . . . . . . . . . . . . 50
After Action Review (AAR) Screen . . . . . 50
Replays (AAR Screen) . . . . . . . . . . . . . 50
Moving On . . . . . . . . . . . . . . . . . . . . . 50
Soldier Classes . . . . . . . . . . . . . . . . . . . . . . . . 51
Rifleman . . . . . . . . . . . . . . . . . . . . . . . . 51
Support . . . . . . . . . . . . . . . . . . . . . . . . . 51
Demolitions . . . . . . . . . . . . . . . . . . . . . . 51
Sniper . . . . . . . . . . . . . . . . . . . . . . . . . . 51
Specialist . . . . . . . . . . . . . . . . . . . . . . . . 51
Weapons . . . . . . . . . . . . . . . . . . . . . . . . . . . . . 52
Hand-Held . . . . . . . . . . . . . . . . . . . . . . . 52
M18 Claymore . . . . . . . . . . . . . . . . . . 52
M2 Demolitions Charge . . . . . . . . . . . . 52
AN/GVS-5 Binoculars . . . . . . . . . . . . . . 52
AN/GSQ-187 Sensor . . . . . . . . . . . . . . 52
M67 Hand Grenade . . . . . . . . . . . . . . . 52
Assault Rifles . . . . . . . . . . . . . . . . . . . . . 52 M24 . . . . . . . . . . . . . . . . . . . . . . . . . 52 L96A1 . . . . . . . . . . . . . . . . . . . . . . . . 52 SVD. . . . . . . . . . . . . . . . . . . . . . . . . . 52 M82A1 . . . . . . . . . . . . . . . . . . . . . . . 53 M16A2 . . . . . . . . . . . . . . . . . . . . . . . 53
M16/M203 . . . . . . . . . . . . . . . . . . . . 53 OICW . . . . . . . . . . . . . . . . . . . . . . . . 53 Carbines . . . . . . . . . . . . . . . . . . . . . . . . 53 M4 . . . . . . . . . . . . . . . . . . . . . . . . . . 53 SA-80 . . . . . . . . . . . . . . . . . . . . . . . . 53 Sub-machineguns . . . . . . . . . . . . . . . . . . 53 MP5 . . . . . . . . . . . . . . . . . . . . . . . . . 53 MP5SD . . . . . . . . . . . . . . . . . . . . . . . 53 Light Machineguns. . . . . . . . . . . . . . . . . . 54 M249 SAW . . . . . . . . . . . . . . . . . . . . 54 MG3 . . . . . . . . . . . . . . . . . . . . . . . . . 54 RPK74 . . . . . . . . . . . . . . . . . . . . . . . . 54 Pistols. . . . . . . . . . . . . . . . . . . . . . . . . . 54 M9 . . . . . . . . . . . . . . . . . . . . . . . . . . 54 M9SD . . . . . . . . . . . . . . . . . . . . . . . . 54 Anti-Tank . . . . . . . . . . . . . . . . . . . . . . . . 54 M136 . . . . . . . . . . . . . . . . . . . . . . . . 54 Careful Where You Point That Thing . . . . 54
Credits. . . . . . . . . . . . . . . . . . . . . . . . . . . . . . . 58
Ghost Recon Team. . . . . . . . . . . . . . . . . . 58
Ubisoft Europe . . . . . . . . . . . . . . . . . . . . 59
International Content Management . . . . . 59
Marketing. . . . . . . . . . . . . . . . . . . . . . 59
Ubisoft U.S. . . . . . . . . . . . . . . . . . . . . . . 60
Ubi.com Engineering Team . . . . . . . . . . . . 60
Soundelux Credits . . . . . . . . . . . . . . . . . . 60
Motion Capture Provided By . . . . . . . . . . . 61
Notice . . . . . . . . . . . . . . . . . . . . . . . . . . . . . . . 61
3
INTRODUCTION
The year is 2008, and the world teeters on the brink of war. Radical ultranationalists have seized power in Moscow - their goal, the reestablishment of the old Soviet empire. Ukraine, Belarus, Kazakhstan - one by one the nearby independent republics slip back into the Russian orbit. Russian tanks sit in the Caucasus Mountains and the Baltic forests, poised to strike to the south and east. The world holds its breath, and waits. For one small group of elite soldiers, the war has already begun: U.S. Special Forces
Group 5, First Battalion, D Company. Deployed on peacekeeping duty to the Republic of Georgia in the Caucasus, this handful of Green Berets represents the very tip of the spear - the first line of defense. Equipped with the latest battlefield technology, and trained in the latest techniques of covert warfare, they strike - swiftly, silently, invisibly.
They call themselves “The Ghosts.”
OVERVIEW
In Ghost Recon, you lead the Ghosts, an elite American infantry unit using the most advanced technology the United States has to offer, onto the front lines and into battle. The Ghosts are the spearhead of the United States Army’s quick response. They are the first unit deployed into dangerous situations and the last ones to leave when things get rough. As the leader of a platoon of Ghosts in the field, it is your responsibility to select your fireteam members, train them, kit them out, and command them once the shooting starts. You control them as they seek to execute your orders, which you give during the heat of battle, and complete their missions. Particularly spectacular performance and the completion of special objectives will unlock Specialist characters, who bring new weapons and new levels of expertise to your platoon.
The game consists of a series of fifteen missions along a single storyline, which forms a campaign. While many of the gameplay elements of Ghost Recon may seem familiar if you have played Rainbow Six or Rogue Spear, it is an entirely new game in an entirely new setting. If you’ve played Rogue Spear or Rainbow Six, prepare yourself for the next step in squad-based tactical games. If you are new to this style of game, get ready for edge-of-your-seat action and challenging tactical gameplay.
And in either case, be ready to test your wits, your eye and your nerves against a terrifying new threat to world peace and security. The fate of the world just might depend on you.
No pressure.
4
QUICKSTART
Quickstart - Starting a New Campaign
1.Insert the Ghost Recon CD into your computer and start the game.
2.When the Main Menu appears, click on Campaign.
3.At the Campaign Screen, click on New Campaign.
4.Type in a name for your new campaign.
5.Click on Start.
6.When you’re finished with the briefing, click on the right arrow button at the lower right of the screen.
7.Click Auto-Assign.
Click on the right arrow button at the lower right of the screen.
Quickstart - Joining a Multiplayer Game
1.Insert the Ghost Recon CD-ROM and start the game.
2.From the Main Menu, click on Options.
3.Click on the Multiplayer Tab.
4.Select the Player Name field.
5.Type in the name you want to be known as in the game.
6.Click Accept. This will take you back to the Main Menu.
7.Click on Multiplayer.
8.Select LAN or Internet.
9.Click on the name of the game you want to join.
10.Type in the password and/or port if necessary.
11.Select Join Game.
12.Add yourself to a platoon by clicking on a platoon tab, then clicking on a spot within that platoon.
13.Click on the Soldier tab.
14.Scroll through the available soldier types with the left and right arrows at the top of the screen. Stop when you find the soldier you want to play.
15.Scroll through the available kit types
for your soldier with the left and right arrows that bracket the kit names. Stop when you find the kit you want to use.
16.Click on the Ready box, and wait for the game to start.
Quickstart - Starting a Multiplayer Game
1.Insert the Ghost Recon CD-ROM into your computer and start the game.
2.Click on the Multiplayer Tab.
3.Select the Player Name field.
4.Type in the name you want to be known as in the game.
5.Click Accept. This will take you back to the Main Menu.
6.Click on Multiplayer.
7.Click on Create Game.
8.Add yourself to a platoon by clicking on a platoon tab, then clicking on a spot within that platoon.
9.Click on the Soldier tab.
10.Scroll through the available soldier types with the left and right arrows at the top of the screen. Stop when you find the soldier you want to play.
11.Scroll through the available kit types for your soldier with the left and right arrows that bracket the kit names. Stop when you find the kit you want to use.
12.Click on Edit Server.
13.Choose the game settings you want.
14.Click on OK.
15.Click on Ready, which will automatically start the game when all players indicate that they are ready. If you want to start the game regardless, click on the right arrow at the bottom right of the screen. This will start the game automatically. If you set an autostart in the Edit Server Screen, the game will also start automatically.
5

MINIMUM SPECIFICATIONS
In order to play Ghost Recon on your computer, your system must meet the following criteria:
•Computer: Pentium 2 with 450 MHz processor or the equivalent
•Memory: 128 MB of RAM
•Operating System: Windows 9X/ME/2000/XP
•DirectX: DirectX 8.0 or higher (included on CD)
•Video Card: 16MB DirectX 8 compatible 3D card
•Drive Space: 1GB minimum hard drive space
•CD-ROM: 4X or better
•Sound Card: DirectX 8.0 compatible sound card
•Internet/Network Play: Properly configured TCP/IP connection at 28.8 KBPS or faster
INSTALLATION
To Install Ghost Recon, follow these simple steps:
1.Start your computer’s operating system,
2.Insert the Ghost Recon CD into your CDROM drive. The Autorun Menu should appear.
Note: If the Autorun Menu does not automatically appear, double click on the My Computer Icon located on your desktop, then double-click the icon that corresponds to your computer’s CD-ROM drive. The Autorun Menu should now appear.
Once you have created a directory for Ghost Recon, the game will automatically be installed on your hard drive. The game will automatically ask you if you want to install DirectX v. 8.0. You will not be able to play Ghost Recon without version 8.0 or higher on your computer. If you already have a version of DirectX that is v.8.0 or higher, simply click the no button, and it will not install DirectX.If you are not sure, click
yes, and the DirectX installer will do its own verification.
3.Click the Install Ghost Recon button. The installation routine will now walk you through each step of the setup and installation process for the game.
4.After you have finished installing the game, you can select Ghost Recon from your computer’s Start menu or double-click on the Ghost Recon.EXE file in the installed directory. Doing either will start the game.
UNINSTALLING GHOST RECON
To uninstall Ghost Recon:
1.Start the operating system on your computer.
2.Insert the Ghost Recon CD into your CD-ROM drive.
3.When it appears, click the Uninstall Ghost Recon button. You will be asked if you really want to uninstall the game. If you are sure you want to remove Ghost Recon from your hard drive, click Yes. If you do not want to uninstall the game, click No, which will cancel the process.
If you uninstall Ghost Recon, any previously saved Campaigns and games will remain on your hard drive if you choose to save them during the uninstall process. Simply follow the uninstaller dialogs.
Note: You can also uninstall Ghost Recon by using the Add/Remove Programs control panel in Windows.
6 |
7 |
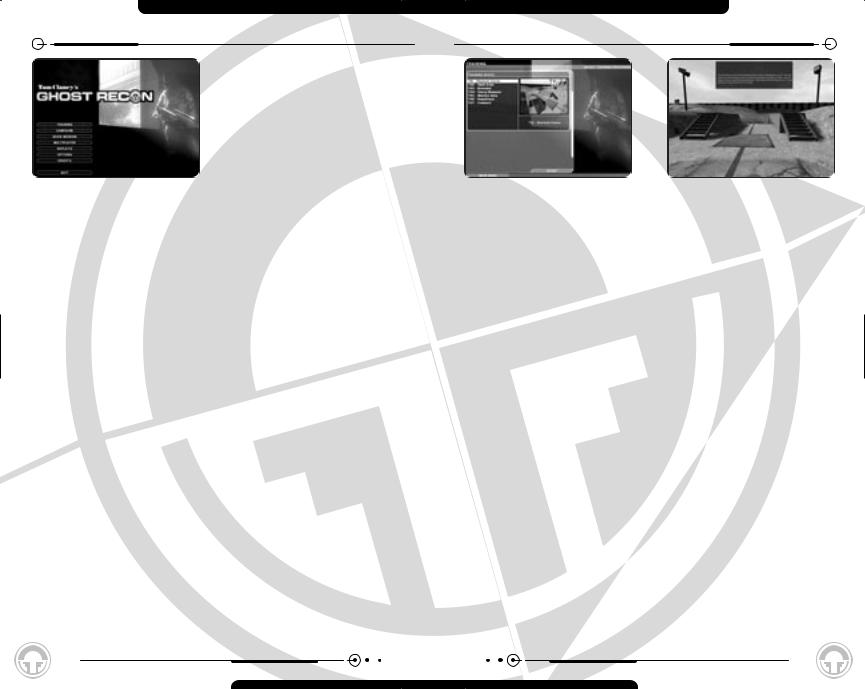
MAIN MENU
When you first start Ghost Recon, you are presented with the Main Menu, which gives you the following 8 options:
•Training - This button takes you to the Training Menu, which allows you to practice the skills you’ll need to play Ghost Recon.
•Campaign - This button takes you to the single-player game and starts a campaign.
•Quick Mission - This button takes you to the Quick Mission Menu, which allows you to play a single mission on any difficulty level without starting a new campaign. You must unlock the missions in a campaign first, but once unlocked they are available thereafter.
•Multiplayer - This button takes you to the Multiplayer Menu.
•Replays - This button takes you to the Replays Menu, which allows you to view saved video replays of games.
•Options - This button takes you to the Options menu, where you can set gameplay, input, multiplayer, graphics and sound options.
•Credits - This button shows you the credits of everyone who worked on the game.
•Quit - This button allows you to quit the game.
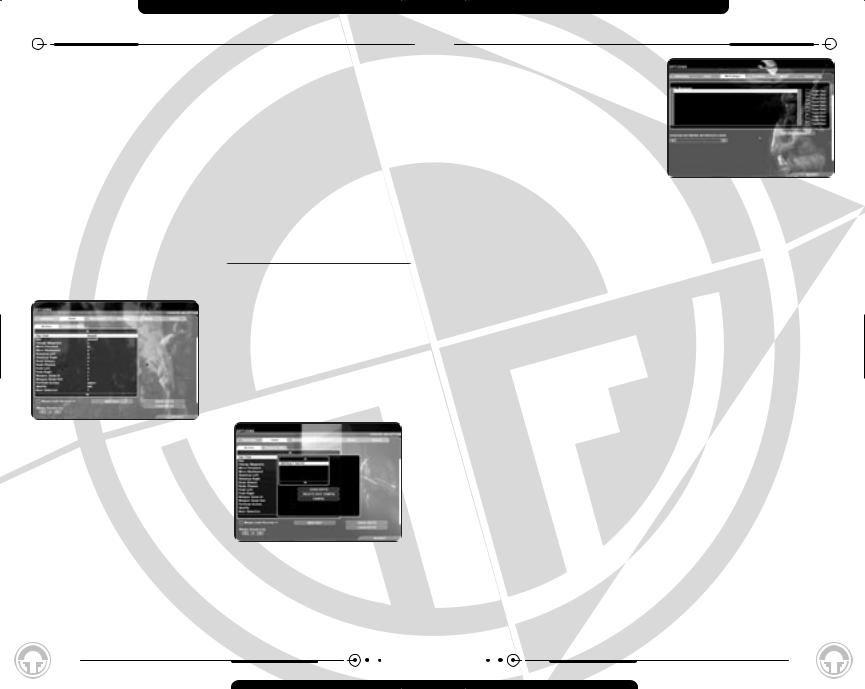
TRAINING MENU
The Training Menu provides you with a list of |
|
in the training |
missions, |
missions where you can hone your skills |
|
outlined in red on the |
|
before starting a campaign. At the left of the |
|
spots, you’ll see yellow-and- |
|
screen is a list of training missions, |
|
. These are places |
|
numbered 1 through 7. Each also indicates |
|
to stop and partake in |
|
which particular skill set it tests. The |
|
exercises. |
|
individual mission in the list can be selected |
|
|
|
by clicking on it with the mouse. |
|
you will have |
unlimited |
|
|
magazines |
will run |
To the right is a window showing the selected |
|
weapons will need to be |
|
mission. You can switch missions as much as |
|
have an infinite number of |
|
you like while you are in the Training Menu. |
|
to practice. |
|
At the bottom of the screen are two buttons: |
|
|
|
Start and Main Menu. Selecting Main Menu |
|
|
|
|
|
|
|
takes you back to the Main Menu without |
|
|
|
starting a training mission. Selecting Start |
If |
like to repeat a training |
|
begins the currently selected training |
|
back out of the training |
|
mission and sends you to the action screen |
|
-enter it. This will reload |
|
for the actual training. |
|
restock your kit, and reset |
|
Playing the Training Missions |
|
. |
|
|
|
|
|
|
|
|
|
When you enter a training mission, you will |
|
|
|
see red lines on the ground of the training |
|
training courses takes place |
|
area. These are your paths, laying out what |
in |
space. What this means |
|
you’re supposed to do and where you’re |
is |
finish one training mission, |
|
supposed to go during each mission. In |
|
to the next one without |
|
addition, you’ll hear voice cues as you move |
|
screen. You can also follow |
|
through training. These will tell you what |
|
to a previous training |
|
you’re supposed to be learning at each site, |
|
that one as well. And as |
|
and how you’re supposed to perform |
|
ammunition in the training |
|
important tasks in the game. |
|
repeat the scenarios as |
|
|
|
for as long as you’d like. |
|
9
TRAINING MENU
Each mission starts you at a different insertion zone within the training complex. As you move from training mission to training mission, your soldier will be re-kitted so that he has the appropriate equipment at all times.
Through most of the training missions, you will have just one soldier. However, in some of the later missions you will command a fireteam or even the entire platoon.
The Training
Missions are:
T01Obstacle Course
This mission trains you in the various movement modes in Ghost Recon, including crawling, running, and peeking.
T02Small Arms
The Small Arms training mission demonstrates the use of handguns and other small arms.
T03Grenades
This mission teaches you how to use grenades, including the M203 grenade launcher.
T04Heavy Weapons
The Heavy Weapons training mission teaches you how to use heavier guns effectively in combat, including anti-tank weapons.
T05Machine Guns
This mission teaches the appropriate use of machine guns in combat.
T06Demolitions
Demolitions shows you how to set demo charges and use a claymore.
T07Command
The Command training teaches use the Command Interface effectively.
Don’t Go There
There are some areas of the that don’t correspond to any
and don’t have a red line running through them. While you can certainly explore these areas by shooting the doors open, they’re not attached to any formal part of the training cycle, so don’t be surprised if nothing happens on this map - at least in single player mode.
Training Status
Pressing ESCAPE during a training mission brings up the Mission Status dialog. This differs from the regular Mission Status dialog only in that during a training mission, you have no objectives.
Ending Training
To exit Training, press ESCAPE, then choose Quit from the Mission Status Dialog. This will take you back to the Main Menu.
10
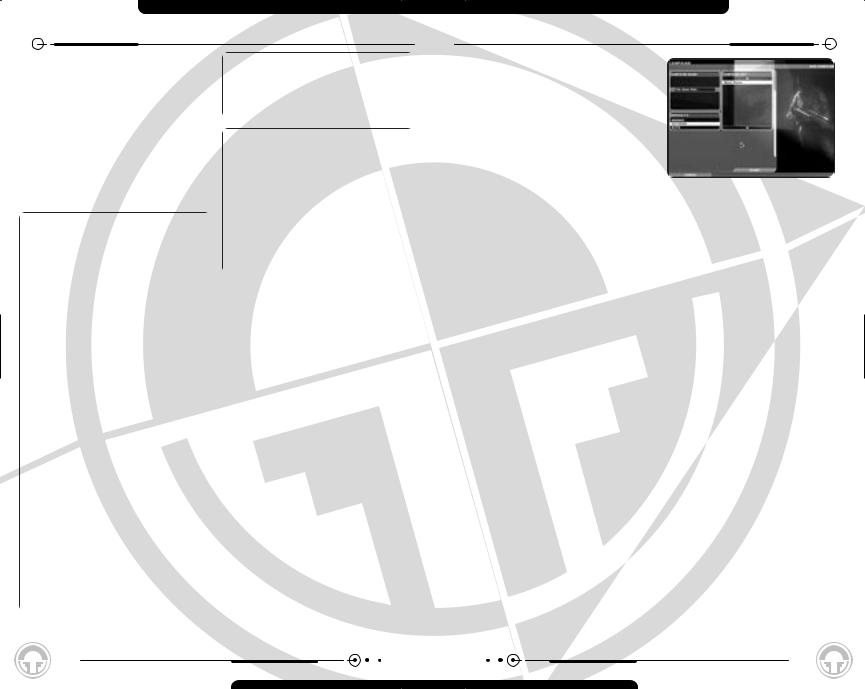
CAMPAIGN
Beneath it are three buttons. The first, New Campaign, allows you to start a new campaign from the beginning of the game. The second, Delete Campaign, allows you to remove a saved campaign from your current list. The third, Resume Campaign, lets you pick up a saved campaign and either advance it or replay missions you’ve already completed.
To the right is a box that shows scenes and maps from the next mission of the currently selected campaign. If you have no campaign selected, or are starting a new one, images from mission M01Iron Dragon, appear instead. Underneath the images you will see the mission number and name, along with the currently selected difficulty level.
At the bottom of the screen is a button labeled Main Menu. Selecting this closes the Campaign Screen and takes you back to the game’s Main Menu.
click on the New
. This takes you to the New
.
you will see a text box. Type new campaign here. It’s a it distinctive, to avoid between saved campaigns.
are your difficulty ratings: and Elite. Select one of difficulty for your campaign. ammunition for some as less skilled opponents. gameplay, and Elite sets
extremely skilled, lethal that you cannot change difficulty levels within a campaign. If you
begin a campaign at Recruit, you will have to start a new one if you decide that you’re ready to tackle Veteran missions.
At the bottom left of the screen is a button labeled Cancel. This deletes your choices and takes you back to the previous (Campaign) screen.
At the lower right is a button marked Start. Clicking on this begins your campaign.
Deleting a Campaign
To delete a campaign, select it by clicking on it with your mouse, then click the Delete
11

CAMPAIGN
Campaign button. A dialog box asking if you wish to continue will appear. If you decide that you’d rather save the campaign after all, click No. If you do in fact want to delete the campaign, click on Yes. This will delete the campaign from your saved campaign list, and remove it from the list at the upper left of the screen. If you delete a campaign, any individual games you’ve saved as part of that campaign are deleted as well.
Saving a Game vs. Saving a Campaign
You can save up to five separate campaigns in Ghost Recon and as many games as you’d like within that particular campaign. In other words, if you’re in the middle of mission 6 and decide you want to take another crack at it later, you can save that game and move on within the campaign itself, returning to that particular version of mission 6 at your leisure. You can delete individually saved games without deleting the campaign as a whole, but you cannot delete the campaign without losing all of the saved games that go with it.
If
.
(If
a
to
.
to experiment with tactics or attempt to complete them with fewer casualties.
Clicking on a game from the list selects it. Clicking on Start begins that game. Clicking on the Back button at the bottom of the screen takes you to the Campaign Mission Screen.
OPTIONS
The Options Screen is where you can change a wide variety of options on Ghost Recon to optimize your play experience.
You’ll find three buttons at the bottom of the Options Screen, as well as a row of tabs along the top. The buttons are labeled Cancel, Reset to Defaults and Accept, while the tabs let you access submenus where you can change specific types of Options.
Cancel
Clicking this button cancels any and all changes you’ve made on the Options Screen, and takes you back to the previous screen. If you accessed the Options Screen from the Main Menu, then you’ll be returned there. If you accessed it from the in-game menu, then you’ll be returned to wherever you brought up that menu.
Reset to Defaults
Selecting Reset to Defaults does not close the Options Screen. Instead, it simply returns all Options settings to their default state. This lets you start over if you feel you’ve made a mistake and aren’t sure how to correct it.
starts. It’s best to set all |
|||||
|
- |
control |
scheme, |
||
- |
before |
you |
start |
a |
|
|
to |
tweak the |
smaller |
||
game performance to your |
|||||
actually playing. |
|
|
|||
Options
the row of tabs across the various types of available for you to change. and selecting one with a list of options on it.
of options are:
related to overall
controls both in the action the command map
related to
number of places within the game, ranging from the Main Menu to in the middle of a firefight. Depending on where you access it, certain Options may be locked against being changed. For example, you cannot turn the journal on to save a replay of your current mission halfway through - you need to do that
resolution, level of options related to what’s
and de-activating mods
various sound effects on volume levels.
13
OPTIONS– GAMEPLAY/INPUT
Input
Input Options control how your input reaches the game. In practical terms, that’s your key configuration and how your mouse interprets the Y axis (up and down).
The center of the Input screen is a window listing all of your key inputs and their current assignments (which key you hit to get that effect). There are two tabs at the top of this window, labeled Action and Command Map. These are clickable, and selecting them brings up the list of assigned keys for, respectively, the Action Phase and the Command Map.
To change a key assignment, select the function you want to remap. You can do this by clicking the function with your mouse. Then, click on the Map key button. This will bring up a window that tells you which key the function is currently mapped to, and which tells you to hit a key to re-assign that function. If you want to re-map the function, hit the key you want to use for that function. That key will now be attached to that function, and the window closes. If you decide you like the key assignment the way it is after all, you can click on the Cancel button instead. This will close the window without changing any key assignments.
Already Taken
If you remap a function to a key that’s already assigned, the new assignment will override the old one. As soon as you remap the key, the function that key was previously attached to will be unattached, and will have a blank space next to it in the list. You’ll want to remap a key for that function as well, if you intend to use it in the game.
If
14
OPTIONS– MULTIPLAYER
Config and enter a name for that configuration so you’ll be able to identify it later. If you decide you don’t want to save the key config, just hit Cancel. Otherwise, type in the name and hit Accept.
If you’ve modified a key config that’s already in place, you have a choice of clicking on New Key Config and saving it under a new name, or clicking on Save Key Config, which will overwrite the current one. If you decide to overwrite the current one, you’ll get a window asking you if you really want to do this. As always, you can click No and avoid overwriting your key config. If you click Yes, then your changes will be saved. You can also delete a key configuration if you’d like by selecting it and then clicking the Delete Key Config button. Again, you’ll be asked if you really want to do this. If so, click Yes. If not, click No.
Loading a Key Configuration
Clicking on this takes you to a similar window as Save Key Config. You’ll have the option of loading a key config, deleting one, or canceling the operation, and a list of saved key configurations to choose from. You can also Cancel out of this screen.
Mouselook Reverse Y
Clicking on this box changes the orientation of your mouselook. If you turn on this option, moving the mouse forward now moves your viewpoint down, and moving it backward sends your viewpoint up. Clicking this off restores the normal mouse look.
Multiplayer
Here you can set various options for your multiplayer game not related to the format and rules of the game itself. (Those are set under the Multiplayer Menu.)
Chat Messages
Chat messages are pre-scripted messages that you send out either to your team or to everyone in the game during a multiplayer game.
To set a message, click on a slot in the Chat Messages window and then click on the Edit Chat Message Button. This will bring up a window where you can type in or edit your chat message. Clicking on Accept saves the message and any changes you’ve made to it, and takes you back to the Multiplayer Options Screen. Clicking on Cancel aborts any changes and also closes the window.
Once you’ve entered the text of a message, it will display in the Chat Messages window. To the right of the window is a checkbox for Team Chat. Clicking on this means that the message only goes out to your team when you send it. Otherwise, everyone in the game sees it. (In other words, it’s a good idea to make sure that only your teammates see “Go left while I draw the fire from that bunker,” and a better one to make sure that someone besides your teammates sees “I own you.”)
15
OPTIONS– MULTIPLAYER
Each chat message in multiplayer is assigned a key (1 through 9 on the Numpad is the default setting). To send your message out, simply press that key. You can send the same message as many times as you like, though it’s considered impolite to flood other players with chatter while they’re trying to shoot you.
To edit the text of the message, select a message and then click on the Edit Chat Message button. This will bring up the text of the message, which you can change. Click on Accept to keep the changed text, or Cancel to go back to the old version.
Server Name
This lets you create a name for your server if you’re going to host a game. This name will appear in the Server Name list on the Multiplayer Screen.
Allow Remote Access
You can click this on and off to allow people outside your server - if they have the correct password - to access your server settings and alter them.
Remote Access Password
This allows you to set a password for Remote Access.
MotD
MotD, or Message of the Day, is a string of informational text that people will read when they click on the Info button for your server. Clicking on the MotD text field lets you type in a new message or edit the current one.
Player Name
This allows you to set the name you’ll be known by in multiplayer games.
Multiplayer -
Main Menu Only
The following settings appear Multiplayer Options, but can only be changed when you access the Options Screen
the Main Menu. Once gameplay starts, cannot alter these options.
Behind Firewall
Clicking this lets the game know that you are playing (or hosting) from behind a firewall. The firewall may interfere with the operation of the game by blocking the default ports, and clicking on this lets Ghost Recon know to look for available ones.
Choose Network Interface Card
This lets you select the network card you’ll be using to access the network with the game on it. You can scroll through your options - generally NIC and modem choices - by clicking the left and right arrows around the card’s name.
Join Port
This selects the port through which you join games, and through which players can join a server which you set up on your current computer.
If It Ain’t Broke...
Most likely, you’ll never want to touch the Port settings in Ghost Recon. The default settings will provide you with the most popular port numbers for the game, meaning that you’ll see and be seen by the maximum number of servers and players out there. About the only time you might want to change your port settings manually (unless you really want to keep your server private) would be if you were playing behind a firewall, and only certain port numbers were open.
16
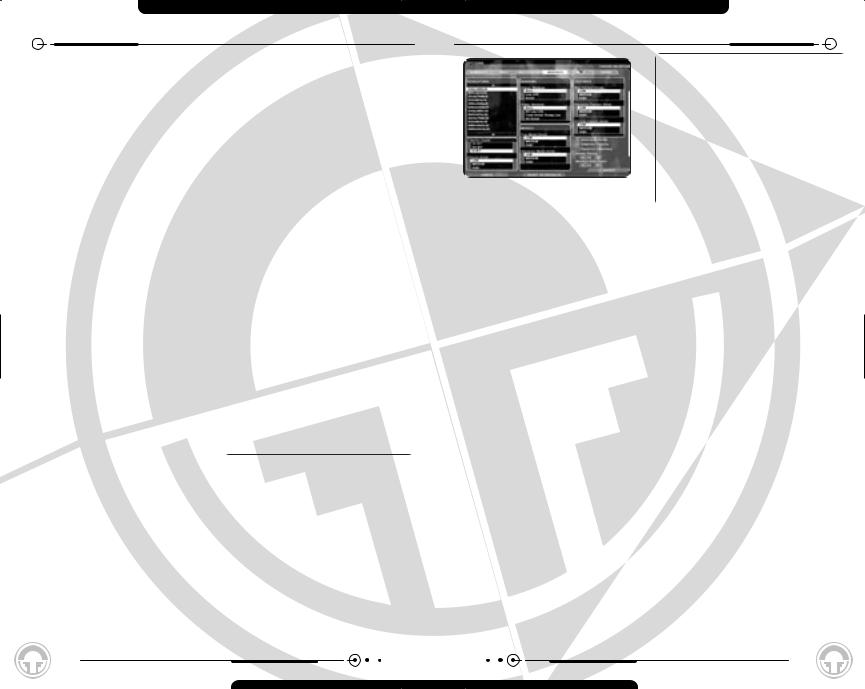
OPTIONS– GRAPHICS
Why Change Shadows?
The higher the detail you choose, the more processor power it takes to draw them accurately. This can contribute to the speed of your game diminishing. If you feel the game’s moving unnecessarily slowly, try turning down the level of detail on the shadows. On the other hand, if your system has the power to handle them, you should turn them up as high as you like to add to the realism of gameplay.
|
Show Dead Bodies |
|
|
Clicking this on and off determines whether |
|
|
cadavers stay on the field of battle after |
|
- |
they’ve been killed. Note that even if you |
|
switch this feature off, the location of corpses |
||
|
||
|
will still be noted on the Command Map. |
Compress Textures
Compress Textures depends on your video card. If your card supports it, having Compress Textures on reduces the size of all textures in the game so that everything looks more crisp. If this is not available through your video card, the option is grayed out. Reducing textures also gives a slight performance increase. It is recommended that you turn it on if possible.
T |
Character Smoothing |
|
Turning on Character Vertex Weighting |
|
allows characters to move more smoothly in |
|
the game. Weighted vertices can make the |
|
game run more slowly than normal. |
your mouse.
17
 Loading...