


“There are fighters and there are
targets. There is nothing else.”
- John A. Fergione, Experimental Test Pilot Lockheed Martin Tactical Aircraft Systems
Internet Address: www.LMTAS.com
F-16
Multirole Fighter™
User Manual
02
Contents
Table of Contents
Credits |
03 |
Introduction |
06 |
Chapter 1 Installing F-16 |
07 |
Game Installation |
07 |
Calibrating the Joystick |
09 |
Starting the Game |
09 |
Chapter 2 Quick Start |
10 |
10 easy steps to getting up in the air |
10 |
10 easy steps to getting back on the ground |
11 |
Chapter 3 Menus |
13 |
Quick Mission |
13 |
Campaign |
18 |
Multiplayer (Refer to Chapter 9) |
21 |
Options |
21 |
Overview |
25 |
Credits |
25 |
Exit |
25 |
Chapter 4 Controls |
26 |
The Joystick |
26 |
Rudder Controls |
27 |
Throttle Controls |
28 |
Keyboard Controls |
28 |
Mouse Controls |
36 |
Chapter 5 Displays |
37 |
Cockpit |
37 |
Threat Warning Display |
39 |
Multifunction Displays |
42 |
Head-Up Display |
|
Chapter 6 Flying F-16 |
48 |
Tutorials |
48 |
Basic Flight Maneuvers |
50 |
Landing the Aircraft |
58 |
01

Contents
Chapter 7 Air Combat |
62 |
Radar |
62 |
Air-to-Air Weapons |
63 |
Air-to-Surface Weapons |
65 |
Chapter 8 Strategies and Tactics |
68 |
Altitude |
68 |
Speed |
69 |
Emissions Control |
70 |
Wingman Tactics |
70 |
Missile Avoidance |
71 |
Chapter 9 Multiplayer |
73 |
Connection Types |
73 |
Multiplayer Game Types |
75 |
Hosting a game |
76 |
Integrated Battle Space™ |
78 |
Glossary |
79 |
Legals |
90 |
Tech Support |
91 |
Index |
92 |
F16 Multirole Fighter now features the holographic Wide Angle HUD specially designed to support the LANTIRN pod. Although the screenshots in this manual show the former Head-Up Display, all text annotations and delineating symbology remain true.
02

Credits
Credits
Programmed by
Eric Milota
Pat Griffith
Menu Programming
David King
Tools Programming
Scott Ray
Multi-player System
Randy Casey
Graphics
Programming
Mark Davis
Additional
Programming
Kyle Freeman
Jim Ratcliff
NovaWorld ™
Programming
John Bojorquez
System Designed by
Randy Casey
Eric Milota
Executive Producer
John Garcia
Producer
Wes Eckhart
Project Management
David Seeholzer
Technical
Management
John Butrovich
Randy Casey
Associate Producer
Ken Hullet
Mission Design
Manager
Alicia Taylor
Senior Mission
Designer
Mat Jennings
Mission Design
Fred Beers
Dan Chang
Dave Merrick
Todd Owens
Kevin White
Art Director
Keith Rust
Art
Troy Adams
Jhoneil Centeno
Lou Garcia
Tim Higgins
Craig Marschke
Rod Parong
Chris Tamburrino
Jon Tando
Darren Thorne
Jason Tull
Additional Art
Lawrence Kevin
Sean Kinnear
Animation
Dean Fowler
Digital Video
Processing
Daryl Kimoto
Audio Director
Tom Hays
Sound Effects
Richard Adrian
Tom Hays
03
Dialog Editing
Rich Adrian
Joe Shands/Industrial City
Productions
Jamie Kahn/Function 8
Monte Vallier
David Freel
Music Composed by
Scott Gilman
Dialog Recorded at
N.S.I
Burbank, CA
Voices
Valerie Michelle Arem
Capt. Craig “Slick“ Barden
Keith Bauer
Sgt. Jim Blekherman
Lt. Pete “El Gato“ Catalano
John A. Fergione
Sgt. Oscar L. Galvan, USMC
Edward A. Mackay
Lt. Sean “Rax“ Rackley
Lt. Thad “Fingers” Shelton
Jamie Tardif
Manual
Kevin R. O’Hara
Manual Layout
and Design
BlueSpark Studios
Packaging Layout
Ulises Gerardo
Technical Consulting
Ed Burnett
John A. Fergione
Lead QA
Tony “Tiger“ Kotelenets
Credits
Quality Assurance
Ron “Iron“ Amaral
Brian “Infrared“ Bekian
Jason “Blackthorne“
Bender
Seth “Nero“ Christian
Daniel “Lobo“ Constant
Ron “Checkmate“ De Los
Santos
John “Firefox“ Graham
Chris “Icepick“ Lauw
Jeremiah “Apocalypse“
Maza
Douglass “Graveyard“
Rothman
Computer
Maintenance
Glenn Kronick
Special Thanks
Dave Ferguson
Lt. General Robert
Springer, USAF-ret
Lee Milligan
David Pollack
Karly Young
James Lamorticelli
Jacqueline Lay
Tara Stivers
Kris Kraves
Dorothy Peters
Lisa Nielsen
Rozita Tolouey
Lockheed Martin Tactical
Aircraft Systems
Lt. Col. Bruce Gillman
Matt Ruhl
Paul Walkden
Lockheed Martin
Communications Dept.
04


Intro
Introduction
Thank you for purchasing F-16 Multirole Fighter, the latest fixed wing simulation from NovaLogic. To make the best possible game, our design team went straight to the experts at Lockheed Martin Tactical Aircraft Systems. With the invaluable aid of their professional consultation, we are able to bring you the most exciting and easy to use F-16 PC flight simulation without sacrificing authentic characteristics such as the unique flight model.
The F-16 Multirole Fighter is the best the world has to offer when it comes to true multi-mission fighter planes. Capable of housing a larger variety of ordnance and fuel pods than any other fighter aircraft, the F-16 adeptly handles a wide range of tasks. Air-to-Air missiles such as the AMRAAM and the AIM-9M Sidewinder along with a unique, high maneuverability body blend make the F-16 a formidable opponent in air combat and interception. Laser and Infrared guided bombs and missiles such as the GBU-10 and the AGM-84 Harpoon allow the F-16 to be used in precision ground strikes and maritime interdiction. Advanced detection instruments such as the LANTIRN and FLIR permit the aircraft to operate fully at night in all weather conditions. The current F-16 can do it all.
Originally intended to be a lightweight air-to-air fighter, the F-16 first flew in January of 1974. Over its long lifetime, it would see continual upgrades and refits to its body/tail design, engines and detection systems. This helped transcend the F-16 into a superbly effective multi-mission aircraft.
The current service record speaks for itself. With an impressive 69-0 kill ratio and an average peacetime mission success rate of 88%, the F-16 is a proven asset. Due to the nine highly configurable hard points, the USAF continues to use the F-16 to test new forms of advanced weaponry. To this day, F-16s have been successfully utilized in enforcing U.N. no-fly zones over Iraq. With a price tag of under $20 million (and considerably less for NovaLogic’s version of the F-16), it is no wonder why 20 air forces around the world choose the F-16.
We hope that you enjoy the thrill of piloting the versatile and powerful F-16 Multirole Fighter as much as we enjoyed creating the game.
06

Installing
Chapter 1
Installing F-16
Multirole Fighter
Welcome to F-16 Multirole Fighter. This chapter of the manual will help you get the program installed on your computer, and will walk you through the configuration of your system. The next chapter is a Quick Start section, for those of you with significant flight sim experience, or for those who want to jump right in and learn by doing.
In order to play F-16 Multirole Fighter, you must first install the game files onto your computer’s hard drive. You should also calibrate your joystick before beginning play.
Game Installation
Your gateway to installing and running F-16 Multirole Fighter is the AutoRun program. AutoRun will automatically load itself and run each time you insert the F-16 Multirole Fighter CD into your CD-ROM drive. F-16 Multirole Fighter uses the Install Wizard to place the necessary files on your hard drive.
The AutoRun Program
Before you begin installing the game, close all programs that your computer may be currently running. The installation program requires all of your computer’s resources. Then:
1)Place the game CD into your CD-ROM drive and close the drive door. The AutoRun program will now take over. If you have turned off the AutoRun feature or if the Autorun fails to launch automatically, double-click on the “My Computer“ icon on your desktop and then double-click on your computer’s CD-ROM drive letter. This should launch the
F-16 Multirole Fighter AutoRun.
2)Click the mouse on one of the menu choices, or type the letter corresponding to the underlined hot key. The AutoRun menu gives you the following choices:
Start F-16 Multirole Fighter—Select this option to play the simulation. You will first have to install the program on your hard drive.
07
Installing
Install F-16 Multirole Fighter—Select this option to install the simulation onto your hard drive. You must install the game before you can play. This will also automatically install the Mission Editor at the same time.
View Readme—The Readme file contains the latest technical and game-related information about the program.
Start Mission Editor—Select this option to create new missions for your F-16. To learn how to use the Mission Editor, please refer to the Adobe Acrobat file included on the CD.
Explore CD—This CD also contains informational files and demos of other NovaLogic games. Use this option to see the contents of the CD.
Install DirectX—Make this selection to install DirectX™ onto your hard drive. You must have DirectX 5.0 or greater installed on your machine to play F-16 Multirole Fighter. Multiplayer games require DirectX 5.0 or greater. Windows NT requires Service Pack 3 (obtained at the Microsoft Website) to play single player and Internet multiplayer.
Exit—Exits the AutoRun program.
When you are ready, select Install F-16 Multirole Fighter.
Installing F-16 Game Files
Use your mouse to make the appropriate selection, or press the letter of the underlined hot key.
1)At the beginning of the installation program you are given the opportunity to select a destination folder for the game. A default is typed in the window for you. Press the enter key to select the default destination. Otherwise, select your own folder name. If the folder you specify does not already exist on your hard drive, the Install program will create it for you. Further installation instructions will appear onscreen.
2)If there is enough free hard drive space at the destination site, the program will copy the files from your F-16 Multirole Fighter CD-ROM. An on-screen progress meter displays the completion percentage as the program transfers the files.
3)The install procedure automatically adds a NovaLogic folder to your Windows® 95/98 Start Menu under the
Programs heading. The F-16 sub-folder within the NovaLogic folder contains an application short-cut icon for the game. The install also places an F-16 shortcut icon on your desktop.
08
Installing
4) If your system does not already have DirectX installed, you will need to install it now. Select Install DirectX from the AutoRun program, then follow the on-screen instructions. You will need to restart your computer to activate DirectX before you can play F-16 Multirole Fighter.
3Dfx™ Users
If the game appears too bright or washed out in 3Dfx™ mode, we recommend that you check the Gamma control of your 3D fx™ card. You can do this by going to the Displays in your computer’s Control Panel Settings under the Start Menu.
Calibrating the Joystick
If you haven’t done so already, you will need to calibrate your joystick in Windows 95/98 for it to work properly in F-16 Multirole Fighter. Follow these steps:
1.Click on the Start button at the far left of the Taskbar at the bottom of the screen.
2.Highlight Settings, then select Control Panel from the menu.
3.Double-click on the Game Controllers icon.
4.Select your joystick from the list of game controllers you have installed, then follow the on-screen instructions to calibrate your joystick.
Starting the Game
If your computer is already turned on and the F-16 Multirole Fighter CD is in the CD-ROM drive, double-click on the F-16 Multirole Fighter shortcut, or go to the directory containing the simulation or Start Menu and double-click on the F-16 Multirole Fighter program icon.
If your computer is on, but the program CD is not in the drive, insert the F-16 Multirole Fighter CD into the drive and select Start from the AutoRun screen. If no screen appears when you insert the CD, double-click on the “My Computer“ icon on your desktop, then double-click on the icon for your computer’s CD-ROM drive. You can then choose Start from the AutoRun screen. You may also use your computer’s Find feature to locate and launch the program.
Enjoy!
09
Quick Start
Chapter 2
Quick Start
For those of you who want to jump right into the simulation, select
Quick Mission from the Main Menu. Click Accept to get to the
Mission Briefing and Accept again to start the mission. Your F-16 will have an appropriate weapons load. To abort the mission, press the esc key. In order to utilize the number pad on your keyboard, you will want to make certain that the numlock  is on.
Press the pause  key if you need to pause the simulation between the steps listed below or at anytime.
10 Easy Steps to Getting Up In The Air
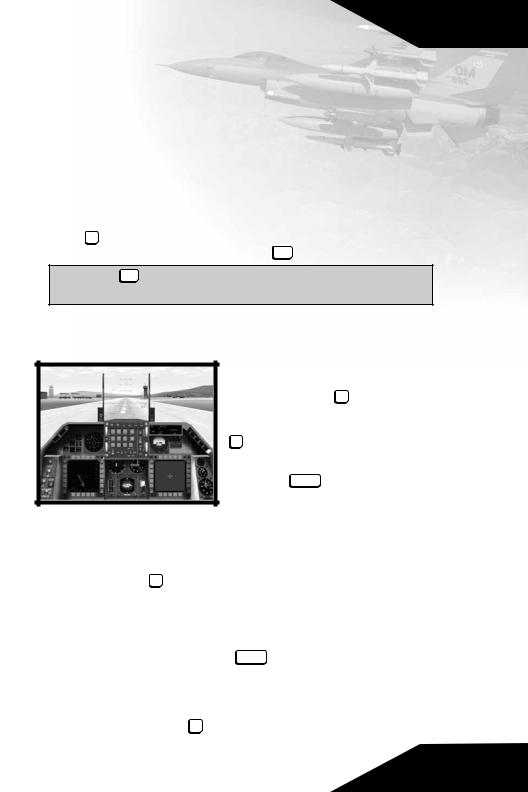
1)The mission will begin with the camera positioned on the exterior of your F-16. Press F1 to enter the virtual cockpit. Press it again for an
alternate view of the cockpit. Press
xxxF2  if you prefer to use the F-16’s HUD (Head-Up Display) view.
2)Hit the backspace to engage your afterburner. You will begin to accelerate down the runway. At
around 160 knots (located in the box at the left side of the HUD), pull up into the air. This could take longer depending on your aircraft’s total weight.
3) Press the G  key to raise your landing gear only if you have changed your Landing Gear to Manual in the Options screen. Climb to a comfortable altitude (generally around 20,000 ft). The Altitude Above Sea Level (ASL) is in the right hand box of your HUD. Adjust the engine power with


 keys or pour on the speed with the xxxxbackspacex key (afterburners). Cut your afterburner to conserve fuel.
4) Now is the time to practice flying. Try making turns and rolls with your arrow key or joystick. If you are having trouble stabilizing, use the L to auto level the plane. With all aircraft maneuvers, you should try to be deliberate and precise.
10
Quick Start
5) Level out and take the time to look around your aircraft. This would be a good time to hit pause . The entire number pad (and hatswitch on some joysticks) allows you look about the cockpit. “Check your Six“ (look behind you) by pressing the CC+ on the number pad. Press F3 to see the exterior of your aircraft. While
holding the | Ct key down, you can move the camera angle |
|||
ctrl |
|
|
|
with your arrow keys. Pressing the |
S and |
X |
keys will zoom |
the view in and out respectively. |
|
|
|
6) Hit F2 to check your HUD for |
your |
next |
Steerpoint (a |
preprogrammed navigational reference point), then proceed there. The tadpole in the middle of your HUD points to your next navigational Steerpoint. If you desire, you may press the
A key and the autopilot will direct the F-16 there for you.
7) Hitting the R key will toggle your radar on and off. Radar is used to select a target.
8)Cycle through your weapons with the ~ key (or joystick button 3).
9)When you have your target acquired and are in range, press
the spacebar (or joystick button 2) to launch or fire your weapon. At any time you can fire your 20 mm cannon by pressing the
Z button (or joystick trigger).
10) Press the O key to view your mission objectives. After completing all of them, you will be prompted to end your mission. Do so by pressing the E key. You are not required to land your airplane to complete most missions, but will get a higher score if you do.
10 Easy Steps to Getting Back on the Ground
1)Press the H key to have the navigational computer guide you directly toward the Initial Approach Steerpoint (about 15 miles from the runway).
2)When you are facing the correct direction toward this Steerpoint, reduce the throt-
tle to 60% by pressing 8 . Get
to an altitude of 5000 feet AGL, with a speed of 400 knots. Use your air brakes ( B ), if you are going too fast.
11
Quick Start
3) When you get to the Initial Approach Steerpoint, begin reducing speed and altitude. When you hit the Final Approach Steerpoint (about 5 miles from the runway), you should be around 1500 feet AGL and flying no more than 250 knots.
4) Press G to lower your landing gear.
5) Align yourself with the center of the runway. Avoid sharp banks and sudden turns. Level your wings, use the L key as needed.
6)You should be flying at about 160 knots. Use your air brakes ( B ), if you are going more than 175 knots.
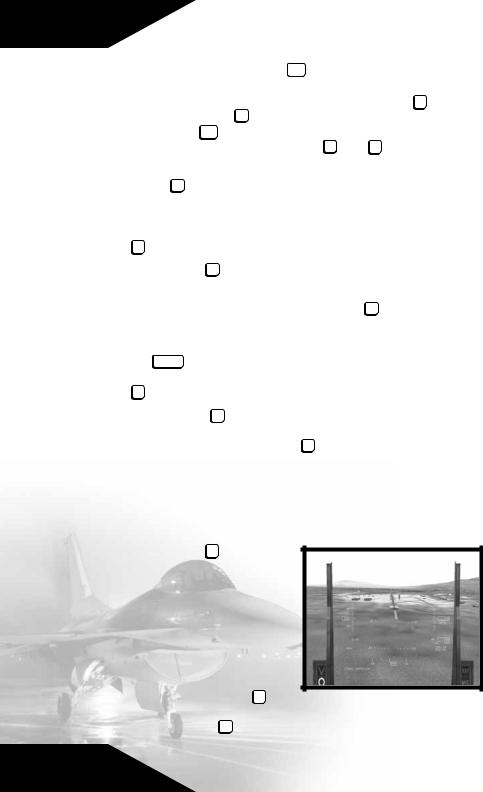
7)Check the HUD Pitch Scale. Adjust your pitch to be about 10 degrees.
8)Keep your aircraft aligned with the runway centerline. Use the Instrument Landing System, located on the center of the Head-Up Display. Align the vertical and horizontal lines.
9)Just before touchdown, “flare“ (pitch) your aircraft’s nose up.
10)Press the B key to apply brakes until the plane stops. Congratulations, you may now end the mission.
12
Menus
Chapter 3
The Menus
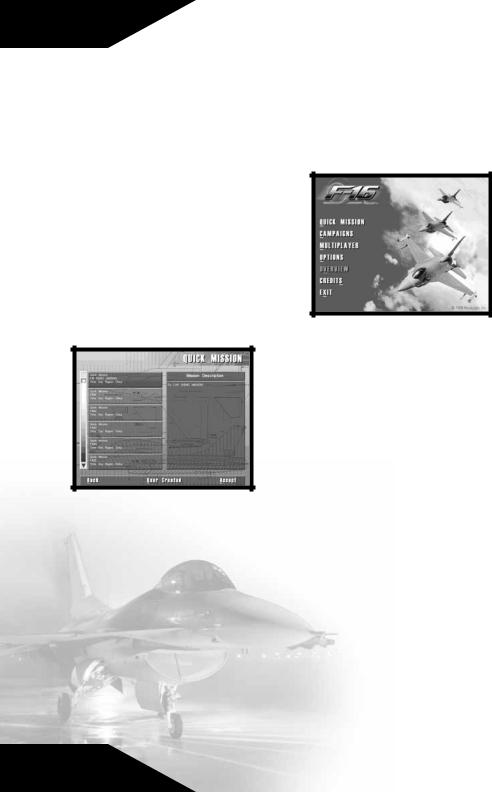
The F-16 Menu System gives you access to all game features, including campaigns, missions, multiplayer options, and information about the simulation itself. Each session of F-16 Multirole Fighter begins at the Main Menu, from which you can make the following selections by pressing the underlined key or using your mouse:
Quick Mission
Select Quick Mission when you simply want to fly, without the long term considerations of a campaign.
F-16 Multirole Fighter provides you with a set of missions designed especially for this feature. In addition, whenever you complete a mission in a campaign, that mission is added to
the Quick Mission list, so you will be able to select it for replay whenever you want.
To select a Training Mission or a Quick Mission, click on the Quick Mission option on the Main Menu then examine the list of missions provided. You can scroll through all the available missions with the scroll bars to the left of the mission title. Highlight a mission to get a description of the situation and goals. Click on the Accept box when you have highlighted the mission you wish to fly, or click on Back to return to the Main Menu. Press User Created to load in a custom mission created by the Mission Editor.
Mission Briefing
When you are given a mission, either because you selected it from the Quick Mission list or because you have been assigned a task
13

Menus
as part of a continuing Campaign, the first element is always a
Mission Briefing. The briefing details the tasks you must complete before the mission can be considered over. You are required to achieve all the mission’s primary objectives before you are allowed to end the mission.
The Mission Briefing screen lets you determine some of the conditions under which you will fly the mission, including the ammunition loadout you will take into the air, the amount of fuel you will carry, and the Map route you will follow to accomplish your goals. Click on Loadout to view or change the mission default munitions and fuel aboard, and click on Map to check out the battle zone and set your flight route for this mission. Click on the Accept box to begin the simulation, or click on Back to return to the Quick
Mission screen.
Loadout
Click on Loadout to select what armaments your F-16 will carry for this mission. This brings up the Loadout Options screen. Here you will see your plane sitting in the hangar awaiting ordnance. As you load the
F-16, the armament will be placed on the appropriate stations. You can use the center buttons or keyboard arrow keys to walk around or zoom toward the aircraft.
You select your ordnance on the lower left side of the screen. Each station is marked by a number that corresponds with the diagram of the plane. Use the arrow buttons to scroll through the possible armament for each station. The text box on the lower right will display important information about the ordnance selected.
The lower center column contains two options. The first one allows you to choose between Normal Mode and Double Mode. Normal Mode will limit your aircraft to an authentic Loadout maximum. The Double Mode will double your existing weaponry without adding the extra weight. Pressing the Default Load button will automatically load your F-16 with a balanced inventory recommended for this specific mission by the mission designers. If you are undertaking a Campaign mission, the number of weapons
14
Menus
available is the total number you can have for the entire campaign, unless friendly transport aircraft or convoys bring in more. If the transports in a particular campaign get shot down, you may face ammunition shortages in that Campaign.
The lower right side displays important Loadout information, including the weight of your fuel and ordnance. In Normal Mode, you will not be able to exceed the maximum weight allowance of the F-16 (37,203 pounds).
The heavier your aircraft is, the longer it will take to achieve liftoff. Also with increased drag, your in-air maneuverability will be diminished. However, remember that as you expend fuel by flying, your aircraft will start to become lighter.
When you have finished, click on Accept to give yourself the weapons load you have selected and return to the Mission Briefing. Click on Back to return to the Mission Briefing screen without choosing a Loadout.
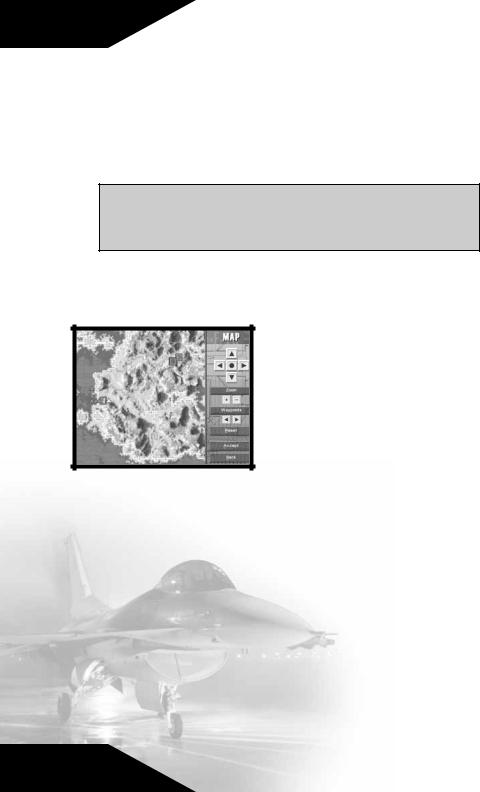
Map
Every mission begins with a series of Steerpoints already entered on the map. Steerpoints are locations that your on-board navigational computer can use to give directions to your Autopilot. They are also handy for manual navigation. Your HUD (Head-Up Display) in the front
of the cockpit will direct you toward any selected Steerpoint. This simplifies navigation enormously, particularly under conditions where you find it difficult to locate landmarks below, such as at night.
You can move most of the Steerpoints on the map, changing the designated mission route. Simply click on a Steerpoint and hold the mouse button down while you drag the icon to a new location. Release the mouse button to place the Steerpoint in its new location. You will not be able to move the last two Steerpoints. These are your Initial and Final Approach Steerpoints, which help you land your airplane. Click on the Steerpoint buttons to select the next or previous Steerpoint. Use the arrow buttons at the right to scroll the map, and click on the Zoom buttons to zoom the map in and out. You can instantly return to the mission default Steerpoints settings by pressing the Default button.
15
Menus
When you have thoroughly examined the terrain over which you will be flying, and have arranged the mission Steerpoints to your satisfaction, click on Accept to save your choices and return to the Mission Briefing screen. Clicking on Back will return to the Mission Briefing screen without saving your changes.
Ending a Mission
If you run low of ammunition or fuel on a mission, you may return to your base to pick up more. You will have to land at your base and bring the aircraft to a complete stop before you can be rearmed and refueled. Damage to the aircraft, however, will not be repaired while you are still on this mission.
You must complete all your assigned primary mission objectives before your mission can be considered a success. If, for example, your Mission Briefing orders you to shoot down a transport, eliminate its escorting fighters, and bomb its base, and you shoot down the transport and a few fighters, you will still have to accomplish the rest of your mission goals to have a successful mission. During a mission, press the M key to view the list of mission objectives. To get credit for a completed mission you will have to achieve all your primary mission goals. Secondary and bonus goals are only recommended, not required to succeed.
When you complete all the assigned primary goals in a mission, you will receive a text message across the top of your screen, giving you clearance to end the mission by pressing the E key. This will bring up the Mission Statistics Screen, which analyzes your mission performance. In all missions you will receive a score, so you will know how well you did on the flight. To get the most points possible for a mission, do not press the E key as soon as you have accomplished the mission goals. Wait until you have taken your aircraft back to base and landed it before pressing
E . That way you will receive the Landing Bonus, a large addition to your score, awarded once each mission for successfully landing the aircraft back at base.
You may abort any mission at any time by pressing the esc key. When you abort a mission you will be taken directly to the
Mission Statistics screen.
16
Menus
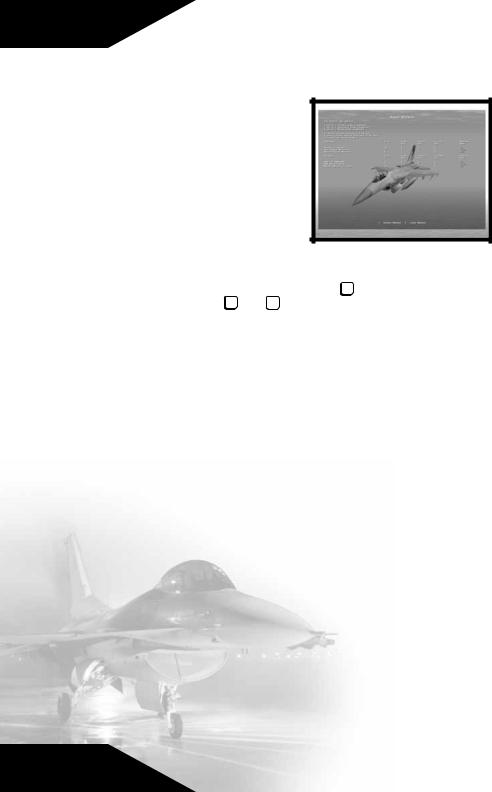
The Mission
Statistics Screen
At the conclusion of each mission you get a summary of your performance, including how many enemy aircraft and ground targets you destroyed and how many missiles, bombs, or cannon rounds it took you to do so. You will be rated for accuracy as well. There will also be a Mission Score assigned. If you are playing a Quick Mission this
score is for your own information, but in Campaign missions this score constitutes your Promotion Points for the mission, which are essential to achieve higher rank. Press xxx1  if you wish to replay the scenario. Press esc or 2 to exit to the Mission Briefing screen for your next assignment.
Scoring
You receive points during a mission based on whether or not you accomplish certain tasks. Here are the tasks for which you can receive points:
•Complete a Mission—1,000 points, once per mission
•Bonus for Wingman Surviving—1000, once per mission
•Achieve Mission Bonus Goal—500 points per goal
•Successful Landing—500 points, once per mission
•Cannon Success Rate—10 points per 1% efficiency
•Short Range Missile Success Rate—5 points per 1% efficiency
•Medium Range Missile Success Rate—5 points per 1% efficiency
•Bomb Success Rate—8 points per 1 % efficiency
•Airframe Integrity—5 points per 1% undamaged structure at missions end
•Killed Enemy Skill Level Bonus—0-250 points depending on enemy pilot’s skill level
17
Menus
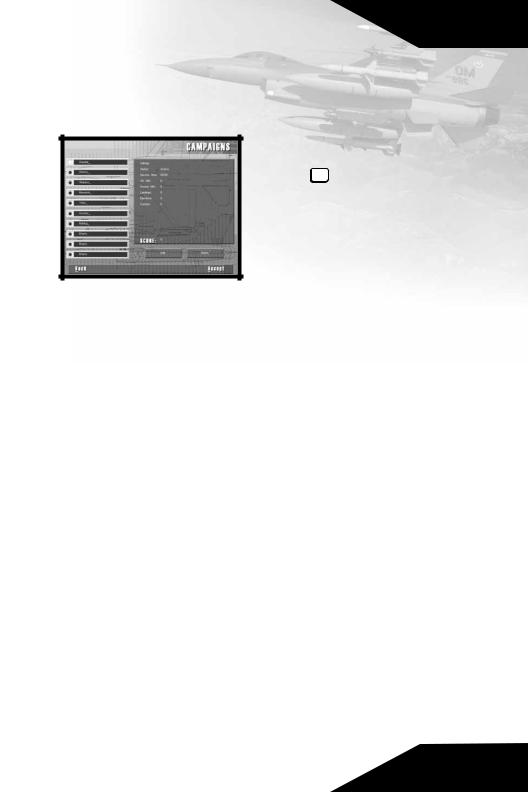
Campaigns
Choose Campaigns to start a new campaign game with a new pilot or continue a campaign in progress with an established pilot. You can have up to ten pilots/campaigns at one time. Use the mouse to select the slot with the callsign of the pilot who will be flying your campaign
and press enter .
If you wish to edit a pilot’s callsign, highlight it, then click on Edit Name. You will be able to enter a new callsign for your pilot. To remove a pilot from the list and free up a campaign slot, highlight your pilot’s call-
sign and then click on Delete Slot. This will permanently remove that pilot’s career from your system. A warning screen will appear to ensure that you wish to complete this action.
On the right side of the screen is the Pilot Stats, where you can view your overall performance ratings and score. Press the arrows to see the Pilot Awards you have accumulated. The game rewards successful completion of all the missions in a single campaign with a Medal. The Air Force recognizes your hard work and accomplishments; wear your medals with pride. Pressing the arrows again will bring you to the Campaign Stats, where you can select which campaign to play. Feel free to switch to a new campaign at any time.
When you have selected a pilot for your campaign, click on the Accept box to continue, or click on Back to return to the Main Menu. When you accept a campaign you will go directly to the Mission Briefing screen for the first mission in your campaign. See the Mission Briefing section under Quick Mission at the beginning of this chapter for a complete description.
The Campaigns
F-16 Multirole Fighter consists of five separate Campaigns which you can play in any order. Campaigns are made up of a series of missions linked to a common story line. Actions taken in one mission affect some of the conditions for the next. The goals for subsequent missions can be changed by your success (or lack thereof) in an earlier one. If, for example, you bomb a factory in one mission, it will still be destroyed when you fly over it on your next
18
Menus
mission. Similarly, if you allow enemy fighters to destroy your AWACS plane, it will not be available for the remainder of that campaign unless another one is sent in. When you are conducting a campaign, you do not select your own missions. F-16 will assign missions based on what you have achieved so far in the campaign, and on what the overall campaign requires.
You may also have restricted Loadout choices. Each campaign allows your unit only a certain number of bombs and guided missiles, though supplies may be replenished by friendly transports. You must therefore pay attention to some of the logistical factors in a campaign. If you shoot a lot of AMRAAM radar-guided missiles, for example, you may run out of them, leaving you only Sidewinders and your 20mm cannon to combat enemy aircraft until new missiles can be flown in.
Serbia
An extremist Serb faction within the Yugoslav military has seized control of the Yugoslavian government. Blaming the continued economic hardships of the country on international interference and loss of territories that are rightfully Serbian, this faction has begun making territorial and economic demands on its neighbors. Concerned that this will upset the fragile balance of the region, the United Nations and NATO have authorized a limited operation to defeat the extremists and restore the legitimate Yugoslavian government.
Liberia / Sierra Leone
After the death of their president, the military government of Nigeria appointed a hard-line general to lead the country. Once in power this general initiated a large scale modernization of his armed forces, including procurement of new weapon systems from China. Unable to raise money because of an international embargo on Nigerian oil, the general ordered his forces to seize control of the extensive diamond fields in Sierra Leone. Buoyed by their quick success in Sierra Leone, Nigerian forces have been ordered to continue their blitzkrieg and attack Liberia. Alarmed at the quick capitulation of the government in neighboring Sierra Leone, Liberia has appealed to their long time friend the United States for assistance. The UN Security Council has authorized a US led mission to protect Liberia from this aggression and to restore the rightful government of Sierra Leone.
Democratic Republic of the Congo
After months of fighting in the Democratic Republic of the Congo (DRC), government forces were on the brink of defeating rebel forces. The DRC had long claimed that Rwandan military units
19

Menus
were fighting alongside the rebels, but could not obtain proof that the war was being orchestrated by its neighbor. As DRC government forces closed in on the last positions of the rebels, the Rwandan military poured across the border. The surprise attack stunned the DRC military and forced them to retreat significantly. With Rwandan forces openly attacking DRC positions, the President of the DRC has requested assistance in ending the long conflict and driving back the invaders within its territory. With the leadership of the United States, the UN Security Council has authorized the creation of a force sufficient to push back the Rwandans and secure the territorial integrity of the DRC.
Burma (Myanmar)
The most powerful drug lord of the Golden Triangle has been steadily increasing the strength of his personal army. Through careful diplomacy and big promises he managed to unite most of the armies opposing the national government. In a series of wellexecuted battles, the unified armies defeated the State Law and Order Restoration Council (SLORC) and gained control of the entire country. By holding the majority of his own troops in reserve, the drug lord maintained his own strength while weakening the strength of his “allies“. Once in power, he commanded his army to destroy all of his former allies and grabbed control over all of Burma. His goal is to use this vast military to take over all Opium production in the region. This includes seizing areas of Thailand, Laos, and even China.
Fearful of the instability being wrought by these actions, the Association of South-East Asian Nations (ASEAN) and the UN have sanctioned a multi-lateral force to defeat this threat. US forces and leadership will be the key to coordinating this force and defeating this large and highly motivated drug lord’s army.
Somalia/Ethiopia
After years of internecine fighting between the various warlords and their clans in Somalia, the Somaliland National Front (SNF) managed to defeat its rivals and unify the country. While the international community was happy to see the long years of bloody struggle end, many voiced suspicions about the number and types of weapons used by the SNF. Upon the full pacification of northern Somalia, the SNF began exploitation of the natural gas and oil deposits discovered by the UN during operations there in the early 1990s. When the deposits were discovered to be very limited, the SNF started to make claims on the known oil reserves in Ethiopia.
Following a swift build-up in its military capability, the SNF has
20
Menus
crossed into Ethiopian territory. The international community was quick to condemn this brutal invasion. In cooperation with the member states of the Organization of African Unity, the United States has dispatched its forces to roll back this invasion.
Multiplayer
F-16 Multirole Fighter allows for the exciting possibility of fighting against up to 128 opponents on NovaWorld and the challenge of facing the MiG-29 Fulcrum™ and F-22 Raptor™ in Integrated Battle Space. See Chapter 9: Multiplayer for more details.
Options
The Options selection lets you to choose a variety of game-related parameters, allowing you to set up the game for best performance on your system. It also gives you options concerning some of the features you can include in an F-16 game. Access the configuration features via the Options choice on the Main Menu. Press Accept to accept changes and return to the
Main Menu screen.
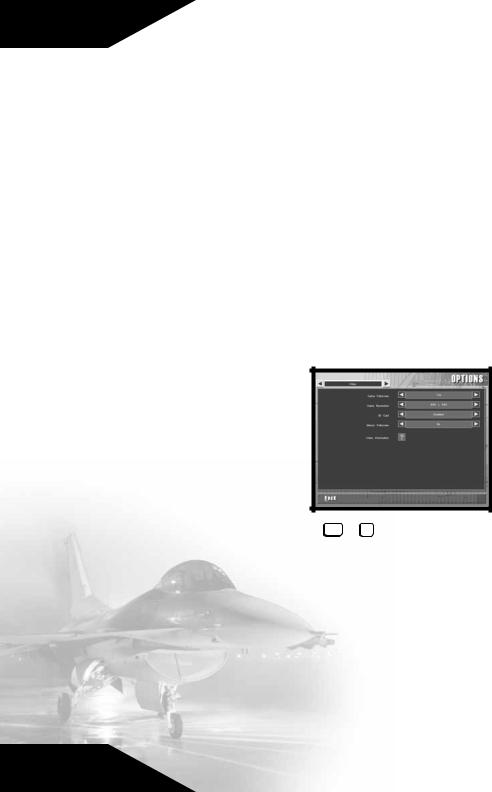
Video Options
Game Fullscreen
Select No from the Game Fullscreen option to run the game inside a Windows window. Selecting Yes gives you a full-screen view of the simulation. When you are playing the simulation you may also toggle
between the choices by pressing both ctrl + V .
Game Resolution
Choose the screen resolution that is most suitable for your computer. The options are 640 x 480, 800 x 600, and 1024 x 768. The higher the resolution, the finer the graphical detail will be, however the game will play slower.
3D Card
Select Enabled if you wish to use your 3D card to enhance the graphical representation of the simulator. If your system does not have a suitable 3D card or lacks the appropriate drivers, then only the Disabled option will be available. Select the Video Information button below to see the specific set up of your system.
21
Menus
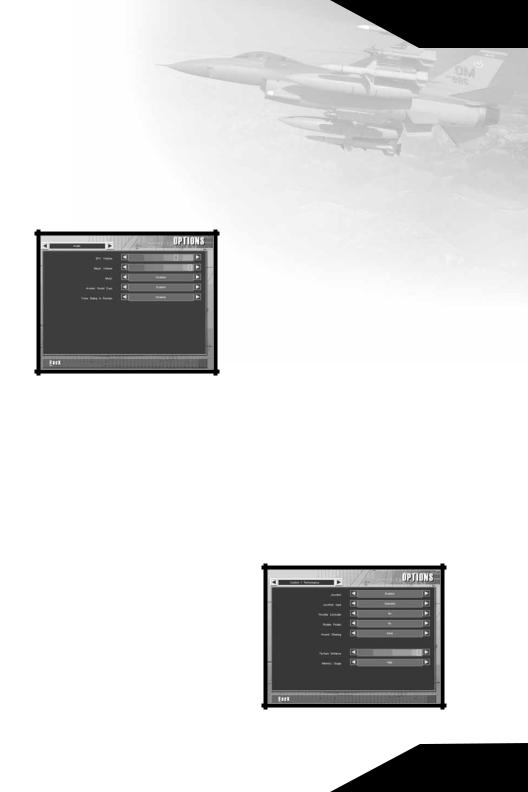
Menus Fullscreen
Select No to display the pre-game menus inside a Windows window. Selecting Yes gives you a full-screen view of the menus. Depending on your system, you may need to have this option enabled to connect to NovaWorld.
Video Information
Pressing the question mark will have F-16 Multirole Fighter auto-detect your systems configuration.
Audio Options
Sound FX Volume
Use the mouse to slide the bar to an appropriate volume level for game sounds.
Music Volume
Use the mouse to slide the bar to an appropriate volume level for the menu music.
Menu Music
Disabling this option will override the Music Volume control and turn the menu music off.
Avionic Sound Cues
Select Enable to hear indicator tones and beeps given off by your F-16’s computer.
Voice Dialog Volume
Use the mouse to slide the bar to an appropriate volume level for game dialog.
Control/
Performance
Options
Joystick
When you select Enabled, your joystick will be the primary flight control device for the simulation. If you select Disabled, the keyboard’s
arrow keys are the only way to fly the F-16.
22
Menus
Joystick Type
This option provides you with a list of joystick types to choose from. Select the one that matches your joystick. If your joystick brand is not listed, use the Standard option.
Throttle Controller
Allows you to select an external throttle device. Your choices are Yes, No, and Reverse. Selecting Reverse means that your external throttle will accelerate the airplane when you pull back on the throttle yoke rather than when you push it forward. Note that you cannot use an external throttle to start the engines. You will have to press one of the Engine Control keys to start them.
Rudder Pedals
Your choices are Yes and No. Select Yes if you have a set of external Rudder Pedals or twisting joystick connected.
Ground Steering
This selection lets you determine what method of steering control you use when on the ground. Your selections are Stick or Rudder Pedals. Selecting Stick means that the joystick (or the arrow keys if you have no joystick installed) steers the aircraft while it is on the runway. Select Rudder Pedals if you want to steer the aircraft with rudder pedals or the rudder keys delete and  downpage . In this mode, the arrow keys will not affect ground steering.
Texture Distance
This slide controller allows you to set the distance at which the F-16 simulation will apply textures to the terrain. Players with slower machines should move the slider to the left to speed up the graphical presentation.
Memory Usage
Your choices are High, Medium, and Low. Select High if your system is well equipped with RAM. Select Low if you have a small amount of RAM.
Flight Model
Options
Blackouts /
Redouts
Sharp turns and rapid acceleration can cause severe G-force consequences to an aircraft’s pilot. High-G turns, for example, cause
23

Menus
blood to drain from the pilot’s head, leading to blackouts. Similarly, maneuvers that bring about negative-G situations can cause the body’s blood supply to rush to the head, filling the eyes with blood and causing a redout. If you do not want this degree of realism in an F-16 mission, turn this selection to Off before you fly.
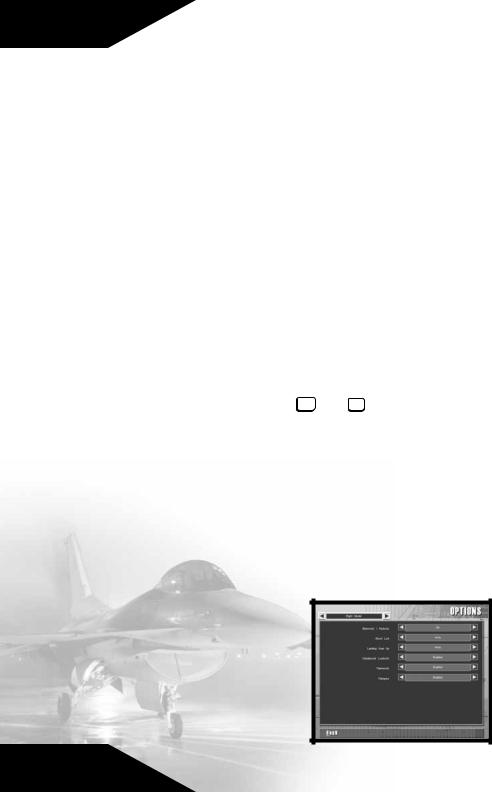
Shoot List
Auto creates a shootlist whenever you have targets available. If you select Manual, you will have to press the enter key to have your aircraft create a shootlist.
Joystick Mapping
Your joystick’s Cannon Priority configuration is described in
Chapter 4:Joystick Buttons. Select Weapons Priority to shift all of the buttons down one so that the Trigger will now fire yor currently selected weapon. In this configuration, hold down button 4 to move the camera angle around. The Weapon Priority configuration is generally preferred for 2-button joysticks.
Landing Gear Up
Select Auto to have your F-16 automatically raise its landing gear after takeoff and lower them when you slow to fewer than 250 knots while landing. Manual means you perform this task yourself.
Unbalanced Loadouts
If you select Enabled, your plane will list/roll when your loadouts are unbalanced by firing ordnance from only one wing. With this feature set to Disabled, your plane’s balance is not affected by unbalanced loadouts.
Flameouts
In certain circumstances, the engine of the F-16 can lose all power in a flameout. The engine will try to re-ignite itself, but may not be successful. Select Enabled if you want this level of authenticity. Choosing Disabled will not allow the F-16 to experience flameouts.
Flatspins
In rare cases, a wrong maneuver can throw the aircraft into the dangerous flatspin. Recovering from this predicament is nearly impossible. Select Enabled if you want this level of authenticity. Choosing Disabled will not allow the F-16 to experience flatspins.
24

Menus
Map Keyboard
and Joystick
You have the ability to alter any of the Keyboard commands and Joystick buttons to suit your tastes. Using the mouse, click on the command that you would like to change. Type the key or push the button that you would like to be
used for that command, when the Status bar indicates that input is on for that command. If the message in the Status bar indicates that “Input is off“, then nothing will be changed if you hit a key or button. The Status bar will also indicate if there is a conflict with another command sharing the same key.
Use the left-hand scroll bar to see all possible Keyboard and Joystick commands. Select the Revert All button to change all keys or buttons back to your last saved configuration. Pressing the Default All button will change all of the keys or buttons back to the original configuration set by NovaLogic. Under this is a Default button to reset only the selected command back to the original configuration and a Delete button to remove all keys or buttons associated with the corresponding command. This is useful in avoiding conflicts.
Overview
This section highlights key points of the F-16 Multirole Fighter.
Credits
Make this selection to learn more about the people who created the
F-16 Multirole Fighter simulation.
Exit
Choosing Exit takes you directly back to the Windows operating system desktop.
25

Controls
Chapter 4
Controls
The Joystick
All game controls can be found on the keyboard, however the preferred flight control device for the F-16 Multirole Fighter simulator is the joystick. With a little practice, using the joystick will help immerse you into the aircraft’s cockpit. When flying, try to make your stick movements definite and purposeful. A good pilot is always in positive control of the aircraft.
The Stick
The stick controls the elevators, at the rear of the aircraft, and the flaperons, on the trailing edges of the wings. The elevators pitch the nose of the aircraft up or down, while the flaperons roll the airplane around its longitudinal axis. Combining these two elements allows you to turn.
When you move the joystick to the left or right, it causes the wings of your aircraft to bank in the direction of the stick movement. If you move the stick to the right, for example, the flaperons cause the right wing of the aircraft to drop and the left wing to rise. The airplane is now “banked“ to the right. Now when you pull back on the joystick the elevators will pitch the nose of the plane up perpendicular to the wings, and cause the aircraft to turn in the direction of the bank. The further you push the stick to the right or left, and the harder you pull it back, the faster your turn will be.
Sharp turns increase the G forces exerted on the aircraft, which may cause it to lose both airspeed and altitude or begin to shake as its airframe becomes compromised. High G stresses can also cause the pilot to become unconscious. Save your extreme maneuvers for times you really need them, like when you are trying to dodge a missile or get behind an enemy aircraft.
Joystick Buttons
F-16 supports joysticks with up to sixteen buttons, and includes a number of custom joystick configuration files. You can reconfigure the joystick buttons in the Options screen.
26

Controls
The Cannon Priority Default configuration for the joystick buttons is as follows:
• Button 1—The Trigger button fires several rounds from your 20mm cannon.
•Button 2— Fires or launches your selected weapon.
• Button 3— Cycles through all the targets on your Shootlist.
•Button 4— Cycles through your available weapons.
•Hat Switch—The four hat switch positions perform the following functions:
2
3
1
4

Up—The Up position toggles between the Virtual Cockpit view and the HUD.
Down—Push the hat switch button to the Down position to look to your rear (“check your six“).
Left—Look out the cockpit to the left.
Right—Look out the cockpit to the right.
Use the Options screen to select your specific joystick type or reconfigure the joystick buttons.
Rudder Controls
The rudders cause the airplane’s nose to swing to the left or right (this motion is called “yaw“). Modern aircraft integrate the rudder into the operation of the joystick, automatically applying the proper amount of rudder to enhance the operations of the flaperons.
You can use rudder inputs to make your flight maneuvers more extreme, which can be useful in combat. Use the rudder to exaggerate your other control motions. Step on the right rudder, for example, when you are making a right-hand turn with the joystick. The actions of the rudders will bring the nose of the aircraft around more quickly than the effect of the flaperons and elevators alone. You can also use the rudders to make flight inputs in the opposite direction from your other controls. If you can control the instability of the flight path, it will make it difficult for an enemy to stay with you.
27
 Loading...