


ASU9RQ
ASU9RQ
ASU12RQ
AOU9RQ
AOU12RQ
En-2
Fig. 1 Indoor Unit
1 Operating Control Panel (Fig. 2)
2 AIR CLEANER RESET / MANUAL AUTO
button
●
Intake grill opening mechanism.
When the remote control is not available
for use, this button can be used as a
Quick-start button. However when the
Air Cleaning check function (see page 13)
is in operation, this button is used as a
reset button.
3 Indicator Lamps (Fig. 3)
4 Remote Control Signal Receiver
5 OPERATION Indicator Lamp (red)
6 TIMER Indicator Lamp (green)
●
If the TIMER indicator lamp flashes when
the timer is operating, it indicates that a
fault has occurred with the timer setting
(See Page
G Auto Restart).
7 AIR CLEAN Indicator Lamp (green)
8 SWING Indicator Lamp (orange)
9 Intake Grille (Fig. 4)
0 Air Filter
A Air Flow Direction Louver
B Right-Left Louver
(behind Air Flow Direction Louver)
C Drain Hose
D Electrical Air Cleaning Filter
Fig. 5 Outdoor Unit
E Intake Port
F Outlet Port
G Pipe Unit
Fig. 6 Remote Control Unit
H MASTER CONTROL button
I SET TEMP. / SET TIME buttons (+/-)
J Signal Transmitter
K TIMER button
L FAN CONTROL button
M START/STOP button
N AIR CLEAN button
O SET button
P SWING button
Q ACL button
R TIME ADJUST button
Rear side (Fig. 7)
S TEST RUN
● Touch the two metal contacts with a
metallic object to send the signal to
perform a test run.
● Perform a test run only when installing the
air conditioner. If the signal to perform a
test run is received during normal
operation, the air conditioner’s thermostat
will malfunction.
● If the signal to perform a test run is re-
ceived during normal operation, the unit
will switch to the test operation mode and
the indoor unit’s OPERATION and TIMER
indicator lamps will flash simultaneously.
● To stop the test operation mode, press the
START/STOP button to stop the air
conditioner.
T Remote Control Unit Display (Fig. 8)
U Transmit Indicator
V Clock Display
W Operating Mode Display
X T imer Mode Display
Y Fan Speed Display
Z Temperature Set Display
[ T imer Set Indicator
\ Temperature Set Indicator
● Refer to the folded out page on the cover.

FEATURES AND FUNCTIONS
AUTO CHANGEOVER
The operation mode (cooling, heating) is switched
automatically to maintain the set temperature, and the
temperature is kept constant at all times.
SLEEP TIMER
When SLEEP is selected be pressing TIMER button during
Heating mode, the air conditioner’s thermostat setting is
gradually lowered during the period of operation; during
Cooling or Dry mode, the thermostat setting is gradually
raised during the period of operation. When the set time is
reached, the unit automatically turns off.
SWING OPERATION
The Air Flow Direction Louvers swings automatically up and
down so that the air speeds to every nook and corner of
your room.
WIRELESS REMOTE CONTROL UNIT
The Wireless Remote Control Unit allows convenient con-
trol of air conditioner operation.
MILDEW-RESISTANT FILTER
The AIR FILTER has been treated to resist mildew growth,
thus allowing cleaner use and easier care.
SUPER QUIET OPERATION
When the FAN CONTROL button is used to select QUIET,
the unit begins super-quiet operation; the indoor unit’s air-
flow is reduced to produce quieter operation.
AIR CLEANING MODE
Relies on the air conditioner’s power to quickly purify the
air in the room.
ELECTRONIC AIR CLEAN FILTER
Install for use inside of the dust collection unit. For details
on how to install the filter, please refer to page 15.
Electrical power is used to charge the filter to remove con-
taminants from the air and to effectively collect dust and
remove odors. It also helps to reduce the bacterial activity.
WIRED REMOTE CONTROL UNIT (OPTION)
The optional wired remote control unit (model No.: AR-3TA ) can be used.
When you use remote control unit, there are following different points as compared with
using wireless remote control unit.
[The additional functions for wired ones]
• Weekly timer
• Temperature set back timer
[The restricted functions for wired ones]
• Air-cleaning function can't be turned ON/OFF. (During operation, it is always ON)
• QUIET can't be selected in FAN MODE.
• Sleep-timer can't be used.
And you can't use both wired remote control unit and wireless simultaneously.
(Only one kind can be selected)
En-4
PREPARATION
CAUTION!
● Take care to prevent infants from
accidentally swallowing batteries.
● When not using the remote control unit
for an extended period, remove the
batteries to avoid possible leakage and
damage to the unit.
● If leaking battery fluid comes in contact
with your skin, eyes, or mouth, immedi-
ately wash with copious amounts of
water, and consult your physician.
● Dead batteries should be removed
immediately and disposed of properly,
either in a battery collection receptacle
or to the appropriate authority.
● Do not attempt to recharge dry batteries.
Never mix new and used batteries, or
batteries of different types.
Batteries should last about one year
under normal use. If the remote control
unit’s operating range becomes appre-
ciably reduced, replace the batteries and
press the ACL button with the tip of a
ballpoint pen or other small object.
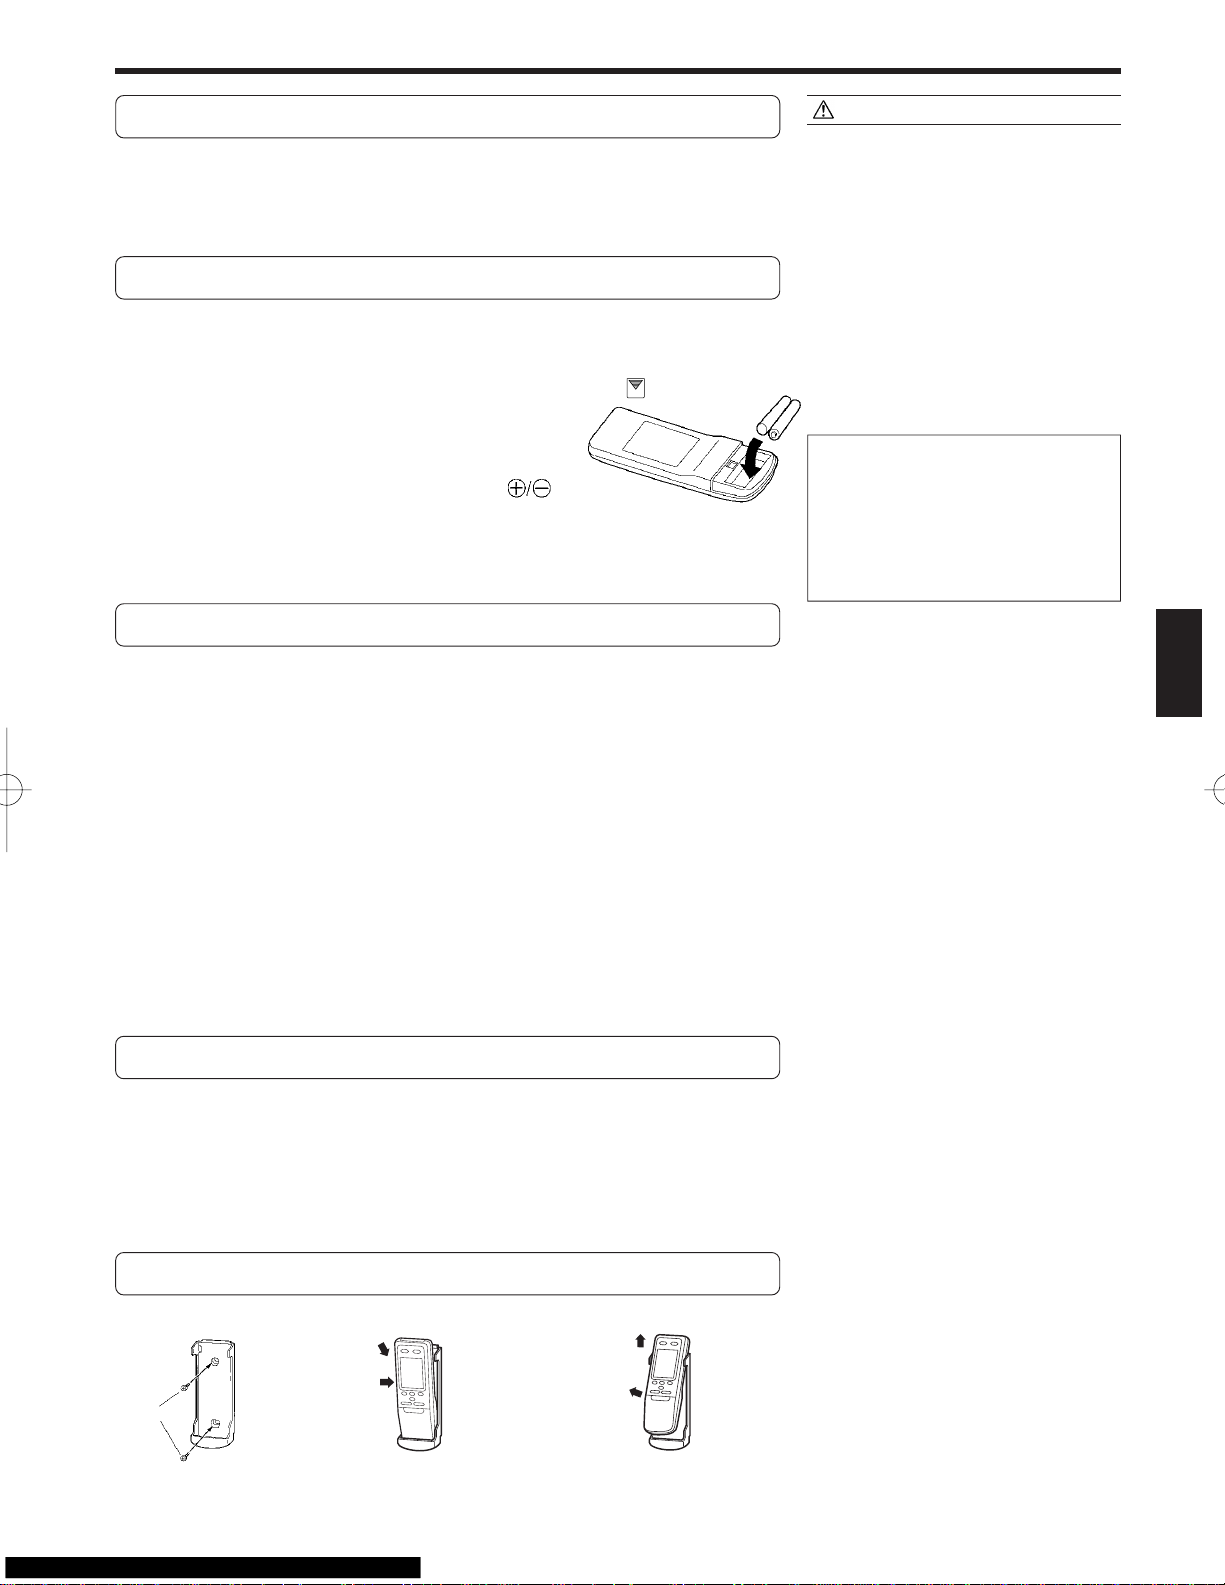
Turn on the Power
In the case of a direct line connection, turn on the circuit
breaker.
Load Batteries (R03 / LR03
××
××
× 2)
1
Press and slide the battery compartment lid on the re-
verse side to open it.
Slide in the direction of the arrow while pressing the mark.
2
Insert batteries.
Be sure to align the battery polarities ( ) correctly.
3
Close the battery compartment lid.
Set the Current time
1
Press the TIME ADJUST button (Fig. 6 R).
Use the tip of a ball-point pen or other small object to press the button.
2
Use the , / - SET TEMP. / SET TIME buttons (Fig. 6
I) to adjust the clock to the current time.
, button: Press to advance the time.
- button: Press to reverse the time.
(Each time the buttons are pressed, the time will be advanced/reversed in
one-minute increments; hold the buttons depressed to change the time
quickly in ten-minute increments.)
3
Press the TIME ADJUST button again.
This completes the time setting and starts the clock.
To Use the Remote Control Unit
● The Remote Control Unit must be pointed at signal receiver (Fig. 1 4) to operate
correctly.
● Operating Range: About 7 meters.
● When a signal is properly received by the air conditioner, a beeping sound will
be heard.
● If no beep is heard, press the Remote Control Unit button again.
Remote Control Unit Holder
Screws
Insert
Press in
Slide up
Pull out
3 To remove the Remote
Control Unit (when use at
hand).
1 Mount the Holder. 2 Set the Remote Control
Unit.
To Select Mode Operation
1
Press the START / STOP button (Fig.6 M).
The indoor unit’s OPERATION indicator lamp (red) (Fig. 3 5) will light.
The air conditioner will start operating.
2
Press the MASTER CONTROL button (Fig.6 H) to se-
lect the desired mode.
Each time the button is pressed, the mode will change in the following
order.
AUTO COOL DRY
HEAT FAN
About three seconds later, the entire display will reappear.
To Set the Thermostat
Press the SET TEMP. / SET TIME buttons (Fig. 6 I).
, button: Press to raise the thermostat setting.
- button: Press to lower the thermostat setting.
●Thermostat setting range:
AUTO .................................. 64 to 88 °F
Heating ............................... 60 to 88 °F
Cooling/Dry ........................ 64 to 88 °F
The thermostat cannot be used to set room temperature during the
FAN mode (the temperature will not appear on the remote control
unit’s display).
About three seconds later, the entire display will reappear.
The thermostat setting should be considered a standard value, and may differ
somewhat from the actual room temperature.
To Set the Fan Speed
Press the FAN CONTROL button (Fig. 6 L).
Each time the button is pressed, the fan speed changes in the following order:
AUTO HIGH MED LOW QUIET
About three seconds later, the entire display will reappear.
When set to AUTO:
Heating : Fan operates so as to optimally circulate warmed air.
However, the fan will operate at very low speed when the tempera-
ture of the air issued from the indoor unit is low.
Cooling : As the room temperature approaches that of the thermostat setting,
the fan speed becomes slower.
Fan : The fan runs at the low fan speed.
The fan will operate at a very low setting during Monitor operation
and at the start of the Heating mode.
When set to QUIET:
SUPER QUIET operation begins. The indoor unit’s airflow will be reduced for qui-
eter operation.
● SUPER QUIET operation cannot be used during Dry mode. (The same is true
when dry mode is selected during AUTO mode operation.)
● Heating and Cooling performance will be reduced somewhat during SUPER QUIET
operation.
OPERATION
ssss
s
Example: When set to COOL.
Example: When set to 86 °F.
Example: When set to AUTO.
To Stop Operation
Press the START/STOP button (Fig.6 M).
The OPERATION indicator lamp (red) (Fig. 3 5) will go out.
t
s
s
s
t
En-6
OPERATION
About AUTO CHANGEOVER Operation
AUTO: ● When AUTO CHANGEOVER operation first selected, the fan will oper-
ate at very low speed for about one minute, during which time the unit
detects the room conditions and selects the proper operating mode.
If the differance between thermostat setting and actual room tempera-
ture is more than +4 °F → Cooling
If the difference between thermostat setting and actual room tempera-
ture is within ±4 °F → Monitor operation
If the difference between thermostat setting and actual room tempera-
ture is more than –4 °F → Heating operation
● When the air conditioner has adjusted your room’s temperature to near
the thermostat setting, it will begin monitor operation. In the monitor
operation mode, the fan will operate at low speed. If the room tem-
perature subsequently changes, the air conditioner will once again
select the appropriate operation (Heating, Cooling) to adjust the tem-
perature to the value set in the thermostat.
(The monitor operation range is ±4 °F relative to the thermostat setting.)
● If the mode automatically selected by the unit is not what you wish,
select one of the mode operation (HEAT, COOL, DRY, FAN).
About Mode Operation
Heating: ● Use to warm your room.
● When Heating mode is selected, the air conditioner will operate at very
low fan speed for about 3 to 5 minutes, after which it will switch to the
selected fan setting. This period of time is provided to allow the indoor
unit to warm up before begin full operation.
● When the room temperature is very low, frost may form on the outside
unit, and its performance may be reduced. In order to remove such
frost, the unit will automatically enter the defrost cycle from time to
time. During Automatic Defrosting operation, the OPERATION indica-
tor lamp (red) will flash, and the heat operation will be interrupted.
Cooling: ● Use to cool your room.
Dry: ● Use for gently cooling while dehumidifying your room.
● You cannot heat the room during Dry mode.
● During Dry mode, the unit will operate at low speed; in order to adjust
room humidity, the indoor unit’s fan may stop from time to time. Also,
the fan may operate at very low speed when adjusting room humidity.
● The fan speed cannot be changed manually when Dry mode has been
selected.
Fan: ● Use to circulate the air throughout your room.
During Heating mode:
Set the thermostat to a temperature set-
ting that is higher than the current room
temperature. The Heating mode will not
operate if the thermostat is set lower than
the actual room temperature.
During Cooling/Dry mode:
Set the thermostat to a temperature set-
ting that is lower than the current room
temperature. The Cooling and Dry modes
will not operate if the thermostat is set
higher than the actual room temperature
(in Cooling mode, the fan alone will oper-
ate).
During Fan mode:
You can not use the unit to heat and cool
your room.
 Loading...