


Installation and Operation Manual
www.sylvane.com 1-800-934-9194
Dehumidifier
D25D, D50D, D70D
Models
D25D |
Volts: 115/60Hz |
Capacity: 25 Pints |
Moisture Removal: 25 Pint/Day |
D50D |
Volts: 115/60Hz |
Capacity: 50 Pints |
Moisture Removal: 50 Pint/Day |
D70D |
Volts: 115/60Hz |
Capacity: 70 Pints |
Moisture Removal: 70 Pint/Day |
920-198-10 (3-10)

www.sylvane.com 1-800-934-9194
920-198-10
Congratulations!
Thank you for your decision to purchase the Friedrich Dehumidifier. Please read thoroughly of this Installation and Operation Manual.
THANK YOU, on behalf of our entire company, for making such a wise purchase.
|
Table of Contents |
DESCRIPTION OF COMPONENTS |
........................................................................................................................................................................................3 |
FUNCTION EXPLANATION..................................................................................................................................................................................................... |
3 |
INSTALLATION INSTRUCTIONS............................................................................................................................................................................................ |
4 |
OPERATION INSTRUCTIONS................................................................................................................................................................................................ |
4 |
OPERATING DO'S AND DON'TS............................................................................................................................................................................................ |
6 |
CONTINUOUS DRAINAGE..................................................................................................................................................................................................... |
8 |
MAINTENANCE..................................................................................................................................................................................................................... |
10 |
IN CASE OF EMERGENCY................................................................................................................................................................................................... |
11 |
2

www.sylvane.com 1-800-934-9194
920-198-10
DESCRIPTION OF COMPONENTS
Figure 1 |
|
CONTROL PANEL |
DEHUMIDIFIED |
|
AIR FILTER |
DRY AIR VENT |
|||
|
|
|||
|
|
HANDLE |
||
|
|
|
MOIST AIR
INTAKE
|
DRAIN BUCKET |
|
DRAIN PUMP OUTLET |
CONTINUOUS |
|
|
ROLL CASTERS |
(ONLY ON 50 AND 70 PINT MODELS) |
DRAINAGE OUTLET |
|
|
|
FRD001 |
|
FUNCTION EXPLANATION |
|
|
||
|
|
|
|
|
|
Figure 2 |
|
|
|
|
BUCKET FULL LAMP |
DEFROST LAMP |
CURRENT TEMP / TIMER SET DISPLAY |
|
|
LAMP LIGHTS WHEN |
LAMP LIGHTS WHEN UNIT IS |
WHEN THE UNIT IS RUNNING THE CURRENT TEMP IS DISPLAYED. |
|
|
DRAIN BUCKET IS |
DEFROSTING (SEE PAGE 5). |
WHEN THE TIMER BUTTON IS PRESSED THIS WINDOW DISPLAYS |
|
|
FULL AND NEEDS TO |
|
THE TIMER SETTING THEN REVERTS BACK TO THE TEMPERATURE |
|
|
BE EMPTIED. |
|
AFTER 10 SECONDS. |
|
FAN SPEED
HIGH/LOW
POWER
ON/OFF
TIMERS
WHEN THE UNIT IS ON PRESS THE TIMER BUTTON TO DISPLAY THE POWER OFF TIMER.
SELECT FROM 1-24 HOURS OF RUNNING TIME UNTIL THE UNIT SHUTS OFF AUTOMATICALLY.
WHEN THE UNIT IS OFF PRESS THE TIMER BUTTON TO DISPLAY THE POWER ON TIMER. SELECT FROM 1-24 HOURS UNTIL THE UNIT WILL TURN ON AUTOMATICALLY.
CURRENT HUMIDITY DISPLAY |
°C/°F SELECTOR |
DISPLAYS THE CURRENT |
PRESS THE °C/°F |
RELATIVE HUMIDITY (RH) IN |
SWITCH BUTTONS |
THE ROOM. WHEN THE OR |
IT WILL SWITCH |
IS PRESSED THE HUMIDITY |
BETWEEN °C AND °F. |
SETTING IS DISPLAYED. |
|
SET HUMIDITY
ADJUST THE HUMIDITY % FROM 30% TO 90% RH BY PRESSING THE
 OR
OR  BUTTONS. HUMIDITY IS ADJUSTED IN 5% INCREMENTS.
FRD002
3
www.sylvane.com 1-800-934-9194
920-198-10
INSTALLATION INSTRUCTIONS
Follow the steps below for unpacking and set up your unit. STEP 1. Remove unit from carton and inspect.
STEP 2. Remove accessories from drain bucket.
STEP 3. Install Roll Casters (D25D models only) per installation instructions below.
STEP 4. Setupunitinpositionwithadequateclearance. Installation of unit is complete.
Roll Caster Installation (D25D Models only)
STEP 1. Locate Roll Casters removed during STEP 2 above. STEP 2. Lay unit on its side for ease of installation.
STEP 3. Insert Roll Casters in slots as shown (See Figure 3) until they click into place.
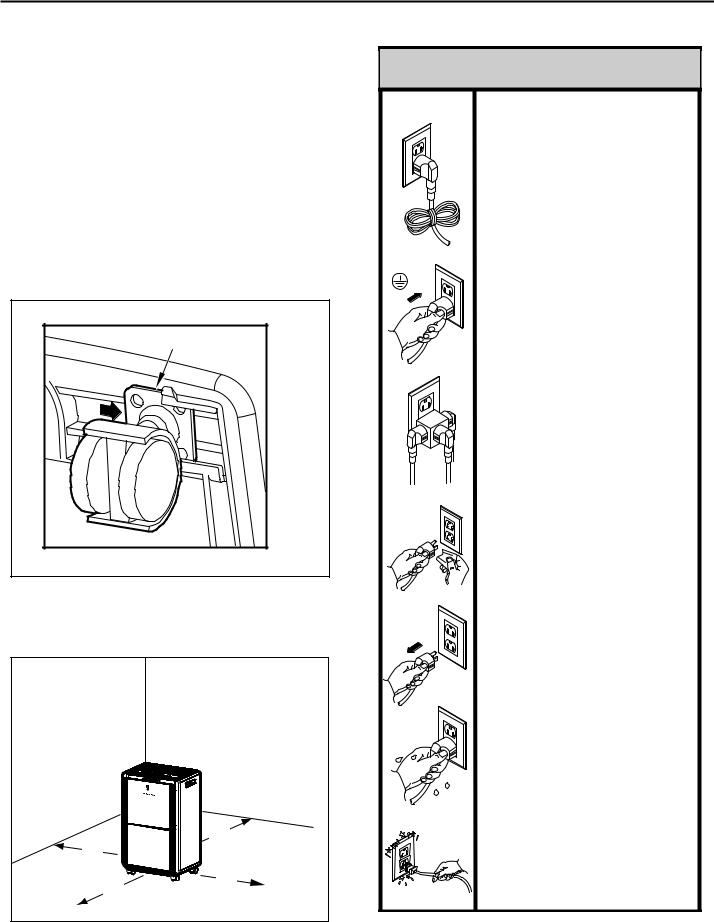
Figure 3
ROLL CASTER |
FRD031
STEP 4. Set the unit upright. Roll Caster installation is complete. STEP 5. Allow unit to sit upright 1 hour before operating.
Allow 8 inches of space on all sides of the unit.
Figure 4 |
|
|
8’’ |
8’’ |
|
8’’ |
8’’ |
|
|
|
FRD032 |
4 |
|
OPERATION INSTRUCTIONS
 WARNING
Electrical Hazards
Do not fold power cord as shown at left.
Make sure the plug is placed fully and firmly into the receptacle.
Do not use multiple sockets as shown at left.
Make sure the plug is clean.
After turning the unit off please take plug out of the receptacle.
Do not have wet hands when connecting the power plug.
Do not pull the power cord to avoid a broken cord, which can lead to danger.
 Loading...