


SHARK CLIP
S4
S3 
 S2
S2
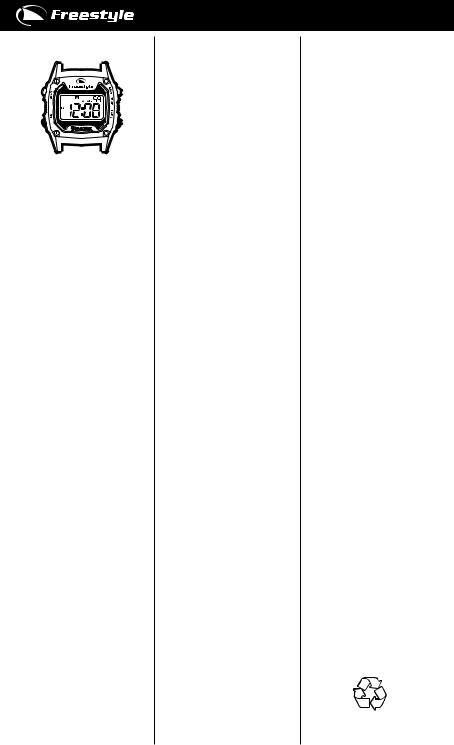
S1. Start/stop Button
S2. Lap/reset Button
S3. Mode Button
S4. Light Button
DISPLAY MODES
The watch has four display modes:
HOME TIME (TIME) / FOREIGN TIME (TM-2), HOME TIME ALARM (ALM1) / FOREIGN TIME ALARM (ALM2), STOPWATCH (STW) and COUNTDOWN TIMER (TMR).
To change from one display mode to another, press the S3 button once. The mode description will appear for 2 seconds before the selected mode is activated.
HOME AND FOREIGN DISPLAY
To display FOREIGN TIME, press S2 button when HOME TIME is displayed. The mode description (TM-2) will appear shortly before FOREIGN TIME is displayed. To change back to HOME TIME, press S2 button.
To display FOREIGN TIME ALARM, press S2 button when HOME TIME ALARM is displayed. The mode description (ALM 2) will appear shortly before the FOREIGN TIME ALARM is displayed. To change back to HOME TIME ALARM, press S2 button.
TO SET THE TIME AND CALENDAR
1.Press S3 button to select time mode.
2.Press S2 button to toggle between HOME TIME and FOREIGN TIME mode to set.
3.Press and hold S2 button for 2 seconds until the “SET” message appears and the second digits will blink.
4.Press S1 button to reset the second digits to 00.
5.Press S3 button, the minute digits will blink.
6.Press S1 button to set the minute digits. Holding down the button speed up the process.
7.Press S3 button, the hour digits will blink.
8.Press S1 button to set the hour digits.
9.Follow the same pattern to set date,
month, day (of the week), hour format and calendar format.
10.To set the hour format, press S1 button to toggle between 12-hour and 24-hour format. The P.M. indicator may be displayed to indicate the time period 12:00 A.M. – 11:59 P.M. in 12-hour format.
11.To set the calendar format, press S1 button to toggle between M-D (monthdate) and D-M (date-month) format.
12.After finished making all the settings, press S2 button to confirm.
NOTE: The chosen hour and calendar formats will apply to both HOME TIME mode and FOREIGN TIME mode.
NOTE: In FOREIGN TIME settings, only minutes, hours, date, month and day are open to setting.
TO DISPLAY THE CALENDAR
1.Press S3 button to select time mode.
2.Press S1 button to toggle between time display and calendar display.
Note: Calendar will be displayed for around 6 seconds before the watch switches back to time display.
TO SET THE ALARM TIME
1.Press S3 button to select alarm mode.
2.Press S2 button to toggle between HOME TIME ALARM and FOREIGN TIME ALARM mode to set.
3.Press and hold S2 button for 2 seconds until the “SET” message appears and the minute digits will blink.
4.Press S1 button to set the minute digits. Holding down the button will speed up the process.
5.Press S3 button, the hour digits will blink.
6.Press S1 button to set the hour digits.
7.After finished making all the settings, press S2 button to confirm.
TO TURN ON/OFF THE ALARM AND HOURLY CHIME
In alarm mode,
1.Press S2 button to toggle between HOME TIME ALARM and FOREIGN TIME ALARM mode to set.
2.Press S1 button once to activate the alarm. Alarm indicator 


 will appear.
3.Press again to activate the hourly chime. Chime indicator  will appear.
4.Press the third time to activate both functions. Both of the indicators will appear.
5.Press the fourth time to deactivate both functions. Both of the indicators will disappear.
WHEN AN ALARM OR HOURLY CHIME GOES OFF
A tune will go off by the hour if the hourly chime function is activated.
An alarm tune will be emitted for around 20 seconds at the designated time when the alarm is activated. To stop the tune, press any button.
TO USE THE STOPWATCH
1.Press S3 button to select STOPWATCH mode.
2.The stopwatch will then be displayed in its current state – reset, running, or stopped.
3.To resume a counting, press S1 button to resume from where it left off.
4.To start a new counting, reset the stop watch to zero first.
Press S1 button to stop counting, then press S2 button to reset counter to zero.
For the measurement of elapsed time: In STOPWATCH mode,
1.Press S1 button to start counting.
2.To stop counting, press S1 button once. Press S1 button again to resume from where it left off.
3.To reset to zero, press S1 button to stop counting, then press S2 button to reset the counter to zero.
For the measurement of split time: In STOPWATCH mode,
1.Press S1 button to start counting.
2.While the stopwatch is running, press S2 button once to register a lap. The stop watch is still running in the background. To display the currently accumulated time, press S2 button again.
3.Repeat the last step until all the laps have been registered.
4.To stop counting, press S1 button once. Press S1 button again to resume from where it left off.
5.To reset to zero, press S1 button to stop counting, then press S2 button to reset the counter to zero.
NOTE: You can leave the stopwatch running while switching over to other operating modes.
TO SET THE TIMER
1.Press S3 button to select TIMER mode.
2.Press S2 button to alter the timer setting among 1, 3, 5, 10, 15, 20, 25, 30, 45 and 60 minutes.
ENGLISH
TO USE THE TIMER
In TIMER mode,
1.Press S1 button to start counting.
2.To stop counting, press S1 button once. Press S1 button again to resume from where it left off.
3.To reload the TIMER, press S1 button to stop counting and then press S2 button.
4.After reaching zero in a countdown, a tune will be emitted. To stop the tune, press any button, the TIMER will reload automatically.
NOTE: You can leave the timer running while switching over to other operating modes.
TO USE THE BACKLIGHT
Press S4 button to turn on the backlight for around 3 seconds.
|
CLIP-1084-MR04 |
soy inks on recycled paper. |
FS8129-SHARK |
To reduce carbon foot print, these |
|
Freestyle instructions are printed with |
|

SHARKCLIP
S4
S3 
 S2
S2
S1. Botón para iniciar/parar
S2. Botón de vuelta/puesta a cero
S3. Botón de modo
S4. Botón de luz
MODOSDEVISUALIZACIÓN
El reloj tiene cuatro vistas: HORA EN CASA (TIME) / HORA EN EL EXTRANJERO (TM-2), ALARMA PARA LA HORA EN CASA (ALM1) / ALARMA PARA LA HORA EN EL EXTRANJERO (ALM2), PARAR RELOJ (STW) y CUENTA ATRÁS (TMR).
Para cambiar de una vista a otra, pulse el botón S3 una vez. La descripción del modo aparecerá durante 2 segundos antes de activar el modo seleccionado.
PANTALLAPARACASAYELEXTRANJERO
Para ver la HORA EN EL EXTRANJERO, pulse el botón S2 cuando vea en la pantalla HOME TIME (hora en casa). La descripción del modo (TM-2) aparecerá brevemente en la pantalla antes de ver la HORA EN EL EXTRANJERO. Para volver a HORA EN CASA, pulse el botón S2.
Para ver la ALARMA EN EL EXTRANJERO, pulse el botón S2 cuando vea en la pantalla HOME TIME ALARM (alarma en el extranjero). La descripción del modo (ALM2) aparecerá brevemente en la pantalla antes de ver la ALARMA EN EL EXTRANJERO. Para volver a HORA EN CASA, pulse el botón S2.
CÓMOAJUSTARLAHORAYEL
CALENDARIO
1.Pulse el botón S3 para seleccionar el modo de hora.
2.Pulse el botón S2 para cambiar entre los modos de HORA EN CASA y HORA EN EL EXTRANJERO.
3.Mantenga pulsado el botón S2 durante 2 segundos. Verá la palabra “SET”, y parpadearan los dígitos de los segundos.
4.Pulse el botón S1 para volver a poner los dígitos de los segundos en 00.
5.Pulse el botón S3. Los dígitos de los minutos parpadearán.
6.Pulse el botón S1 una vez. Los dígitos de los minutos aumentarán en una unidad. Mantenga pulsado el botón para acelerar el proceso.
7.Pulse el botón S3. Los dígitos de las horas parpadearán.
8.Pulse el botón S1 para ajustar los dígitos de la hora.
9.Haga lo mismo para configurar el formato de la fecha, el mes, el día de la semana, el formato de la hora y el calendario.
10.Para ajustar el formato de la hora,
pulse el botón S1 para cambiar entre los formatos de 12 horas y de 24 horas.
Se mostrará el indicador de pm para señalar la hora en formato de 12 horas.
11.Para ajustar el formato del calendario, pulse el botón S1 para cambiar entre los formatos M-D (mes-día) y D-M (día-mes).
12.Después de hacer todos los ajustes necesarios, pulse el botón S2 para confirmarlo.
NOTA: El formato elegido para la hora y el calendario se usará tanto para el modo de hora en casa y en el extranjero.
NOTA: En la configuración de la HORA EXTRANJERA, sólo podrá ajustar los minutos, las horas, la fecha, el mes y el día.
PARAVERELCALENDARIO
1.Pulse el botón S3 para seleccionar el modo de hora.
2.Pulse el botón S1 para cambiar entre las pantallas de visualización de hora y calendario.
NOTA: El calendario se verá durante 6 segundos antes de que el reloj vuelva a mostrar la hora.
CÓMOCONFIGURARLAHORADELA ALARMA
1.Pulse el botón S3 para seleccionar el modo de ALARMA.
2.Pulse el botón S2 para cambiar entre los modos de ALARMA EN CASA y ALARMA EN EL EXTRANJERO.
3.Mantenga pulsado el botón S2 durante 2 segundos. Verá la palabra “SET”, y parpadearan los dígitos de los minutos.
4.Pulse el botón S1 una vez. Los dígitos de los minutos aumentarán en una unidad. Mantenga pulsado el botón para acelerar el proceso.
5.Pulse el botón S3. Los dígitos de las horas parpadearán.
6.Pulse el botón S1 para ajustar los dígitos de la hora.
7.Después de hacer todos los ajustes necesarios, pulse el botón S2 para confirmarlo.
CÓMOAPAGARYENCENDERLAALARMAY ELREPIQUEDELAHORA
En el modo de ALARMA,
1.Pulse el botón S2 para cambiar entre los modos de ALARMA EN CASA y ALARMA EN EL EXTRANJERO.
2.Pulse el botón S1 para activar la alarma diaria. Aparecerá el indicador de alarma 


 .
.
3.Pulse el botón otra vez para activar el repique de la hora. Aparecerá el indicador del repique de la hora  .
.
4.Pulse una tercera vez para activar ambas funciones. Aparecerán ambos indicadores.
5.Pulse una cuarta vez para desactivar ambas funciones. Desaparecerán ambos indicadores.
ALSALTARUNAALARMAYELREPIQUE DELAHORA
Cuando se active la función de repique en cada hora, saltará una melodía.
Con la alarma activada, el sonido de alarma saltará a la hora fijada durante 20 segundos. Para parar el tono, pulse cualquier botón.
CÓMOUSARLACUENTAATRÁS
1.Pulse el botón S3 para seleccionar el modo de CUENTA ATRÁS.
2.Aparecerá el cronómetro en el estado en que esté: en marcha, a cero o parado.
3.Pulse el botón S1 para retomar la cuenta ahí donde se quedó.
4.Para iniciar una cuenta nueva, primero hay que poner el cronómetro a cero. Pulse el botón S1 para interrumpir la cuenta y después pulse el botón S2 para volver a cero.
Para medir el tiempo transcurrido, En modo CUENTA ATRÁS
1.Pulse el botón S1 para empezar a contar.
2.Pulse el botón S1 una vez para interrumpir la cuenta. Pulse el botón S1 otra vez para retomar la cuenta ahí donde se quedó.
3.Pulse el botón S1 para interrumpir la cuenta y después pulse el botón S2 para volver a cero.
Para medir el tiempo dividido, En modo CUENTA ATRÁS
1. Pulse el botón S1 para empezar a contar.
ESPAÑOL
2.Mientras la CUENTA ATRÁS está en marcha, pulse el botón S2 una vez para guardar la cuenta. El cronómetro seguirá contando por detrás.
Para mostrar el tiempo acumulado hasta el momento, pulse S2 otra vez.
3.Repita el último paso hasta que se hayan guardado todas las vueltas.
4.Pulse el botón S1 una vez para interrumpir la cuenta. Pulse el botón S1 otra vez para retomar la cuenta ahí donde se quedó.
5.Pulse el botón S1 para interrumpir la cuenta y después pulse el botón S2 para volver a cero.
NOTA: Puede dejar la CUENTA ATRÁS en marcha y cambiar a otros modos operativos.
CÓMOCONFIGURARELTEMPORIZADOR
1.Pulse el botón S3 para seleccionar el modo TEMPORIZADOR.
2.Pulse el botón S2 para configurar el temporizador entre 1, 3, 5, 10, 15, 20, 25, 30, 45 y 60 minutos.
CÓMOUSARELTEMPORIZADOR
En el modo de TEMPORIZADOR,
1.Pulse el botón S1 para empezar a contar.
2.Pulse el botón S1 una vez para interrumpir la cuenta. Pulse el botón S1 otra vez para retomar la cuenta ahí donde se quedó.
3.Para resetear el TEMPORIZADOR, pulse el botón S1 una vez para interrumpir la cuenta. Ahora pulse el botón S2 para volver a cero.
4.Después de llegar a cero en una cuenta atrás, sonará un pitido durante veinte segundos. Para interrumpir el pitido, pulse cualquier botón. El TEMPORIZADOR se cargará de nuevo automáticamente.
NOTA: Puede dejar el TEMPORIZADOR en marcha y cambiar a otros modos operativos.
CÓMOUSARLALUZDEFONDO
Pulse el botón S4 para encender la luz de fondo durante unos 3 segundos.
|
CLIP-1084-MR04 |
Para reducir la huella del carbono, |
SHARK-FS8129 |
las instrucciones de Freestyle se han |
|
imprimido con tinta de soja en papel |
|
reciclado. |
|
SHARK CLIP
S4
S3 
 S2
S2
S1. Taste „Start/Stopp”
S2. Taste „Runde/Zurücksetzen”
S3. Taste „Modus”
S4. Taste „Licht”
ANZEIGEMODI
Die Uhr hat vier Anzeigenmodi: ORTSZEIT (TIME) / FREMDZEIT(TM-2), WECKFUNKTION ORTSZEIT (ALM1) / WECKFUNKTION FREMDZEIT
(ALM2), STOPPUHR (STW) und ZEITKONTROLLE/TIMER (TMR).
Drücken Sie die Taste S3 einmal um von einer Anzeige zur nächsten zu wechseln. Die Beschreibung des Modus wird 2 Sekunden lang angezeigt bevor der entsprechende Modus aktiviert wird.
ANZEIGEORTSZEITUNDFREMDZEIT
Um die FREMDZEIT anzuzeigen drücken Sie Taste S2 wenn die ORTSZEIT angezeigt wird. Die Beschreibung des Modus (TM-2) wird kurz erscheinen; anschließend wird die FREMDZEIT angezeigt. Drücken Sie die Taste S2 um wieder zur ORTSZEIT zu wechseln.
Um die WECKFUNTION FREMDZEIT anzuzeigen drücken Sie Taste S2 wenn die WECKFUNKTION ORTSZEIT angezeigt wird. Die Beschreibung des Modus (ALM2) wird kurz erscheinen; anschließend wird die WECKFUNKTION FREMDZEIT angezeigt. Drücken Sie die Taste S2 um wieder zur ORTSZEIT zu wechseln.
ZEITUNDKALENDEREINSTELLEN
1.Drücken Sie Taste S3 um den Zeitmodus zu wählen
2.Drücken Sie Taste S2 um zwischen ORTSZEIT und FREMDZEIT zu wechseln.
3.Drücken Sie Taste S2 2 Sekunden lang bis der Hinweis „SET“ (Einstellen) angezeigt wird. Die Sekundenanzeige wird blinken.
4.Drücken Sie Taste S1 um die Sekundenanzeige auf „00” zurückzusetzen.
5.Drücken Sie Taste S3 einmal. Die Minutenanzeige wird blinken.
6.Drücken Sie Taste S1 um die Ziffern um jeweils eine Einheit zu erhöhen. Halten Sie die Taste gedrückt um die Anzeige schneller vorzubewegen.
7.Drücken Sie Taste S3 einmal. Die Stundenanzeige wird blinken.
8.Drücken Sie Taste S1 um die Stunden einzustellen.
9.Folgen Sie den gleichen Schritten um den Tag, Monat, Wochentag, sowie das Stunden- und Datumsformat einzustellen.
10.Um das Stundenformat zu wählen, drücken Sie Taste S1 um zwischen 12-Stunden und 24-Stundenformat zu wählen.
Die „PM”-Anzeige erscheint um die Zeit im 12-Stunden-Format anzuzeigen.
11.Um das Datumsformat einzustellen, drücken Sie Taste S1 um zwischen M-D (Monat-Datum) und D-M (Datum-Monat) zu wechseln.
12.Wenn Sie alle Einstellungen abgeschlossen haben, drücken Sie Taste S2 zur Bestätigung.
HINWEIS: Das gewählte Format für die Stundenund Datumsanzeige wird in beiden Modi für Ortszeit und Fremdzeit angezeigt.
HINWEIS: Bei der Einstellung der FREMDZEIT können nur Minuten, Stunden, Tag, Monat, und Datum eingestellt werden.
KALENDERANZEIGEN:
1.Drücken Sie Taste S3 um den Zeitmodus zu wählen
2.Drücken Sie Taste S1 um zwischen Zeitanzeige und Kalenderanzeige zu wechseln.
Hinweis: Der Kalender wird etwa sechs Sekunden lang angezeigt, danach wechselt die Uhr wieder in den normalen Zeitanzeigemodus zurück.
WECKZEITEINSTELLEN
1.Drücken Sie Taste S3 um den Weckmodus zu wählen.
2.Drücken Sie Taste S2 um zwischen WECKFUNKTION ORTSZEIT und WECKFUNKTION FREMDZEIT zu wechseln.
3.Drücken Sie Taste S2 2 Sekunden lang bis der Hinweis „SET“ (Einstellen) angezeigt wird. Die Minutenanzeige wird blinken.
4.Drücken Sie Taste S1 um die Ziffern um jeweils eine Einheit zu erhöhen. Halten Sie die Taste gedrückt um die Anzeige schneller vorzubewegen.
5.Drücken Sie Taste S3 einmal. Die Stundenanzeige wird blinken.
6.Drücken Sie Taste S1 um die Stunden einzustellen.
7.Wenn Sie alle Einstellungen abgeschlossen haben, drücken Sie Taste S2 zur Bestätigung.
WECKFUNKTIONUNDSTUNDENSIGNAL AN-/AUSSTELLEN:
Im Weckmodus:
1.Drücken Sie Taste S2 um zwischen WECKFUNKTION ORTSZEIT und WECKFUNKTION FREMDZEIT zu wechseln.
2.Drücken Sie Taste S1 einmal um die tägliche Weckfunktion zu aktivieren. Symbol Weckfunktion 


 wird erscheinen.
3.Die Taste S1 nochmal drücken um das Stundensignal zu aktivieren. Symbol Stundensignal  wird erscheinen.
4.Die Taste S1 zum dritten Mal drücken um beide Funktionen zu aktivieren. Beide Symbole werden erscheinen.
5.Taste S1 zum vierten Mal drücken um beide Funktionen zu deaktivieren. Beide Symbole werden erlöschen.
WENNDASALARMSIGNALODER STUNDESIGNALERTÖNT
Ein Signal wird stündlich ertönen wenn die Stundensignal-Funktion aktiviert ist.
Wenn die Weckfunktion aktiviert ist, wird ein Signalton zur vorbestimmten Zeit 20 Sekunden lang ertönen. Drücken Sie irgendeine Taste um den Signalton abzustellen.
ZEITMESSUNGMITDERSTOPPUHR
1.Drücken Sie Taste S3 um den Modus STOPPUHR zu wählen.
2.Die Stoppuhr wird dann im aktuellen Status – Rücksetzen, zählend, gestoppt
– angezeigt.
3.Drücken Sie Taste S1 um die Zeitmessung wieder aufzunehmen.
4.Um eine neue Zeitmessung zu starten, setzen Sie die Stoppuhr zuerst wieder auf „Null“.
Drücken Sie Taste S1 um die Zeitmessung zu stoppen und dann Taste S2 um den Zähler wieder auf „Null“ zurückzusetzen.
Um die abgelaufene Zeit zu messen: Im Modus STOPPUHR,
1.Drücken Sie Taste S1 um die Zeitmessung zu starten.
2.Drücken Sie S1 nochmals um die Zeitmessung zu stoppen. Drücken Sie S1 noch einmal um ab der letzten Messung weiter zu messen.
3.Um die Stoppuhr zurückzusetzen, drücken Sie Taste S1 um die Zeitmessung zu stoppen und anschließend S2.
DEUTSCH
Messung der Zwischenzeit (Split Time): Im Modus STOPPUHR,
1.Drücken Sie Taste S1 um die Zeitmessung zu starten.
2.Während die Stoppuhr zählt, drücken Sie Taste S2 einmal um die Rundenzeit abzulesen. Die STOPPUHR läuft im Hintergrund weiter.
Drücken Sie nochmals Taste S2 um die aktuelle, kumulative Rundenzeit anzuzeigen.
3.Wiederholen Sie den letzten Schritt bis alle Runden angezeigt wurden.
4.Drücken Sie S1 nochmals um die Zeitmessung zu stoppen. Drücken Sie S1 noch einmal um ab der letzten Messung weiter zu messen.
5.Um die Stoppuhr zurückzusetzen, drücken Sie Taste S1 um die Zeitmessung zu stoppen und anschließend S2.
HINWEIS : Sie können die STOPPUHR weiter laufen lassen wenn Sie in andere Modi wechseln.
TIMEREINSTELLEN
1.Drücken Sie Taste S3 um den TIMERModus zu wählen
2.Drücken Sie Taste S2 um den Timer auf 1, 3, 5, 10, 15, 20, 25, 30, 45 oder 60 Minuten zu stellen.
TIMERBENUTZEN
Im TIMER Modus:
1.Drücken Sie Taste S1 um die Zeitmessung zu starten.
2.Drücken Sie S1 nochmals um die Zeitmessung zu stoppen. Drücken Sie S1 noch einmal um ab der letzten Messung weiter zu messen.
3.Um den TIMER zurückzusetzen, drücken Sie Taste S1 um die Zeitmessung zu stoppen und anschließend Taste S2.
4.Wenn nach der Zählung Null erreicht wird, ertönt für zwanzig Sekunden ein Signalton. Drücken Sie jede beliebige Taste um den Signalton abzustellen. Der TIMER wird sich automatisch zurücksetzen.
HINWEIS : Sie können den TIMER weiter laufen lassen wenn Sie in andere Modi wechseln.
HINTERGRUNDBELEUCHTUNGBENUTZEN
Drücken Sie Taste S4 um die Hintergrundbeleuchtung für etwa 3 Sekunden anzuschalten.
|
CLIP-1084-MR04 |
Diese Freestyle-Gebrauchsanweisung |
SHARK-FS8129 |
wurde mit Tinte auf Sojabasis auf |
|
Recycling-Papier gedruckt um den |
|
Kohleausstoß zu reduzieren. |
|
 Loading...